This month's
Daring Bakers challenge was chosen by Elle of
Feeding my Enthusiasms and Deborah of
Taste and Tell: cheesecake pops! These totally reminded me of the frozen cheesecake slices dipped in chocolate that I used to get at the boardwalk (or at the
Rocky Mountain Chocolate Factory now that we live nowhere near the beach).
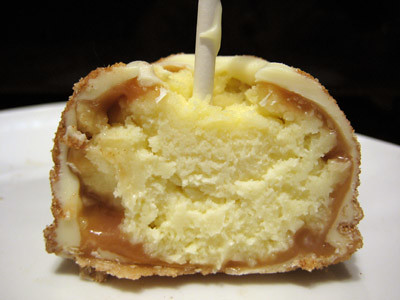
After reading comments about how several bakers were having problems with their cheesecakes not setting after the recommended 45 minute baking time, I baked mine for approximately 60 minutes until it was mostly set around the edges and just slightly jiggly in the center. I've never really had problems with my cheesecake setting before, so I was fairly confident that I had baked mine long enough. Turns out it was cooked all the way through and was sufficient for consumption, but it wasn't firm enough in the center to roll into balls for dipping (I've since read that several had to bake theirs well over 1 hour). I made do, however, and got them into the roundest shape I could using my ice cream scoop, popped them in the freezer for a few hours, and then dipped them. They turned out really well, but had to stay in the freezer until just before serving. I left a few in the refrigerator and they were still fine, but the lollipop sticks would fall out if you tried to eat one that had been in the refrigerator and not the freezer.
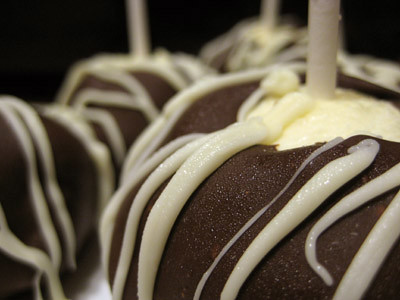
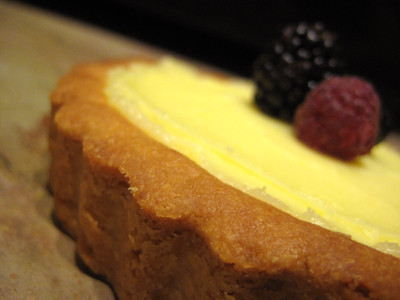
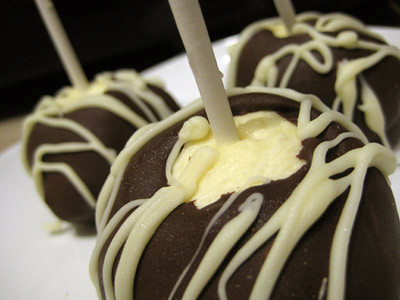
When I first found out that this was the April challenge, so many different dipping ideas went through my head... the possibilities were endless. Alas, I only had 2 weeks to complete this challenge, as I was on vacation at the beginning of the month and then left on a business trip yesterday. Then of course I had to get sick, injure my hand, etc. after my vacation so I really ended up with only 1 week to do this... and it was the week that my in-laws were visiting so my time was truly limited. So, I ended up going very simple with this recipe: I made one batch dipped in semi-sweet chocolate and then drizzled them with white chocolate; the second batch I dipped in
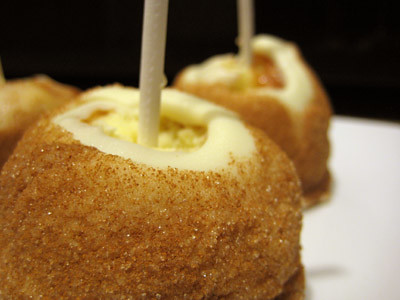
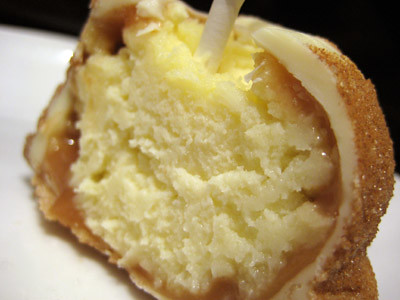
caramel sauce, popped them back in the freezer for a bit, then dipped them in white chocolate and rolled them in a cinnamon/sugar mixture. (My favorite caramel apple at the
Rocky Mountain Chocolate Factory is the "Apple Pie" Apple, so that's where I got the idea.)
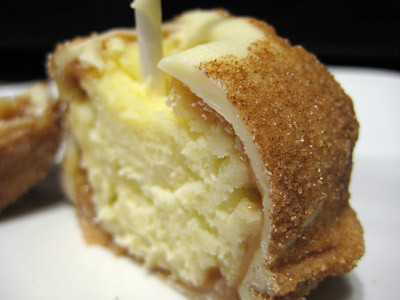
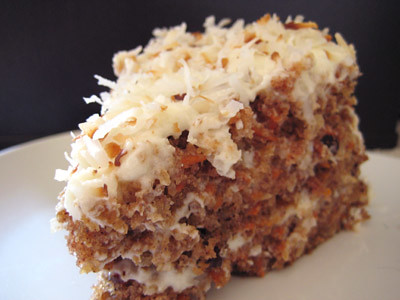
The flavor of the cheesecake itself was really good. So rich and creamy. I preferred the ones dipped in caramel/white chocolate/cinnamon/sugar over the ones that were simply dipped in chocolate, and so did my husband.
Aside from extending the baking time for the cheesecake, I would also recommend going a bit smaller than 2 ounces for each cheesecake pop. When I rolled out the cheesecake balls, I took out my kitchen scale to make sure they were 2 ounces each, as it states in the recipe. They looked quite large to me. Elle and Deborah said they shouldn't be much larger than a golf ball, but at 2 ounces, they definitely were. Even at that size, the 8-inch lollipop sticks seemed to be too long. Luckily, I had also purchased 6-inch lollipop sticks, so I ended up using those instead.
Thanks again to Elle and Deborah for hosting this month's challenge. These were a lot of fun to make and I would definitely like to make them again in the future. I wish I could have done something more impressive with the dipping and decorations, but time was not on my side. You'll have to visit the other
Daring Bakers' blogs to see how creative everyone else got with their cheesecake pops--I've already seen several that are just amazing!
Aside from the
blogroll, the
Daring Bakers now has its own
new website (still a work in progress). What's exciting about the new site is that there is a forum for discussion/questions that is available to both members and non-members, so go
check it out! (The members' forum is not visible to the public.)
I'm also submitting this to Joelen's
Tasty Tools event. The idea is to feature a particular kitchen tool so that we'll all have a collection of recipes to inspire us to use our kitchen tools more often. It's funny how Joelen is not a Daring Baker, and yet for two months in a row now, she has chosen a kitchen tool that I have had to use for the Daring Baker's challenge! This month's tasty tool was ice cream scoops and portion scoops. I think most everyone who made these cheesecake pops found that it was much easier to make the cheesecake balls using a scoop. Be sure to head on over to
Joelen's blog on May 5th to see the round up, and get great ideas on how you can get more use of out your scoops!
Cheesecake Popsfrom Sticky, Chewy, Messy, Gooey: Desserts for the Serious Sweet Tooth by Jill O'Connor
5 8-oz. packages cream cheese at room temperature
(I used 1/3 less fat Neufchatel cheese)2 cups sugar
¼ cup all-purpose flour
¼ teaspoon salt
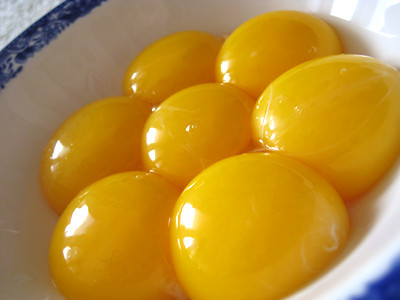
5 large eggs
2 egg yolks
2 teaspoons pure vanilla extract
¼ cup heavy cream
Boiling water as needed
Thirty to forty 8-inch lollipop sticks
(I used 6-inch sticks purchased from Michael's)1 pound chocolate, finely chopped – you can use all one kind or half and half of dark, milk, or white (Alternately, you can use 1 pound of flavored coatings, also known as summer coating, confectionary coating or wafer chocolate – candy supply stores carry colors, as well as the three kinds of chocolate.)
2 tablespoons vegetable shortening
(Note: White chocolate is harder to use this way, but not impossible)
Assorted decorations such as chopped nuts, colored jimmies, crushed peppermints, mini chocolate chips, sanding sugars, dragees) - Optional
Position oven rack in the middle of the oven and preheat to 325 degrees F. Set some water to boil.
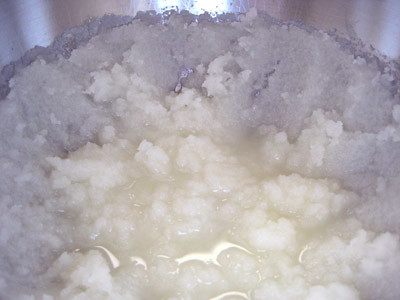
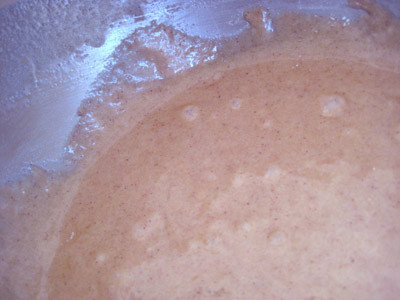
In a large bowl, beat together the cream cheese, sugar, flour, and salt until smooth. If using a mixer, mix on low speed. Add the whole eggs and the egg yolks, one at a time, beating well (but still at low speed) after each addition. Beat in the vanilla and cream.
Grease a 10-inch cake pan (not a springform pan), and pour the batter into the cake pan. Place the pan in a larger roasting pan. Fill the roasting pan with the boiling water until it reaches halfway up the sides of the cake pan. Bake until the cheesecake is firm and slightly golden on top, 35 to 45 minutes.
Remove the cheesecake from the water bath and cool to room temperature. Cover the cheesecake with plastic wrap and refrigerate until very cold, at least 3 hours or up to overnight.
When the cheesecake is cold and very firm, scoop the cheesecake into 2-ounce balls and place on a parchment paper-lined baking sheet. Carefully insert a lollipop stick into each cheesecake ball. Freeze the cheesecake pops, uncovered, until very hard, at least 1 – 2 hours.
When the cheesecake pops are frozen and ready for dipping, prepare the chocolate. In the top of a double boiler, set over simmering water, or in a heatproof bowl set over a pot of simmering water, heat half the chocolate and half the shortening, stirring often, until chocolate is melted and chocolate and shortening are combined. Stir until completely smooth. Do not heat the chocolate too much or your chocolate will lose it’s shine after it has dried. Save the rest of the chocolate and shortening for later dipping, or use another type of chocolate for variety.
Alternately, you can microwave the same amount of chocolate coating pieces on high at 30 second intervals, stirring until smooth.
Quickly dip a frozen cheesecake pop in the melted chocolate, swirling quickly to coat it completely. Shake off any excess into the melted chocolate. If you like, you can now roll the pops quickly in optional decorations. You can also drizzle them with a contrasting color of melted chocolate (dark chocolate drizzled over milk chocolate or white chocolate over dark chocolate, etc.) Place the pop on a clean parchment paper-lined baking sheet to set. Repeat with remaining pops, melting more chocolate and shortening (or confectionary chocolate pieces) as needed.
Refrigerate the pops for up to 24 hours, until ready to serve.
Makes 30 – 40 Pops