Tuesday, August 25, 2009

Creamiest Lime Cream Meringue Pie (TWD)


This week's Tuesdays with Dorie (TWD) recipe was chosen by Linda of Tender Crumb: Creamiest Lime Cream Meringue Pie. I'm not a big lemon meringue pie person, but I really liked Dorie's Florida Pie so I thought this recipe would also be worth a try.


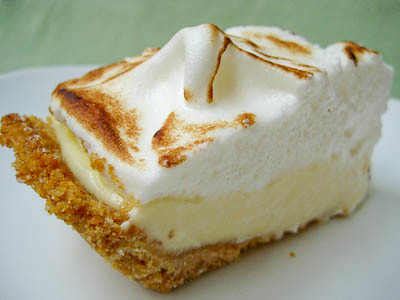
It's like your traditional lemon meringue pie, except with lime cream instead. But this isn't just any lime cream - it's a super tart, absolutely creamy, spiked with ginger - lime cream. I almost ate it all by the spoonful instead of putting it into my pie crust! It is definitely rich, but so good. I actually only added 2 sticks of butter (yes, 2 sticks!!!) into this cream instead of the 2 1/2 you are supposed to use. I know others omitted a whole stick and still ended up with great results.


The only problem I had with this recipe was getting the cream up to 180F. This did not take 10 minutes, but rather 30-35 minutes. I had to increase the heat on the double boiler to bring the water to a boil instead of just a simmer, because it seemed that it would never reach 180F at just a simmer. Despite whisking constantly, I did end up with bits of scrambled egg in my cream. No worries, though, because though were removed when I passed the cream through the strainer to remove the lime zest. Otherwise, this recipe was really easy. It requires a lot of planning, as the cream requires 4 hours of refrigeration and the assembled pie needs to be refrigerated for at least 3 hours, but otherwise it doesn't take much time at all.


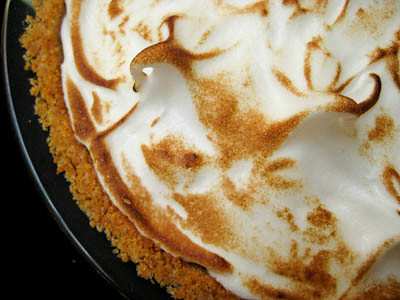
I used a graham cracker crust, so this really tasted like a key lime pie with a meringue top. I loved it! My husband and I actually ate half of it all by ourselves! Thanks Linda, for picking this recipe - I will definitely be making it again. If you would like the recipe, you can find it here. Make sure you check out the TWD Blogroll, to see how everyone else enjoyed this wonderful, tart treat.

* Recipes notes:
- You can cut back on the butter by 1/2 - 1 stick, but to get the full creamy effect, use all 2 1/2 sticks! :)
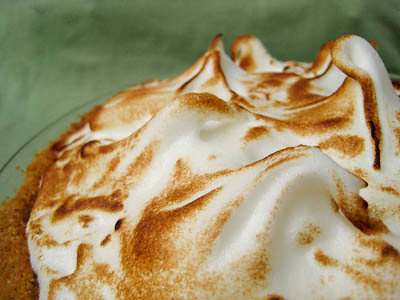
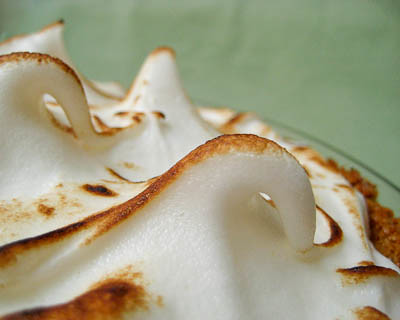
- Watch your pie very very carefully once you stick it under the broiler - it will go from beautifully browned to completely burnt in no time!
- For tips, click here.

Monday, August 24, 2009

Mom's Banana Apple Bread (SMS)


I'm a day late, but this is the kind of recipe that is better the next day anyway ;)

This week's Sweet Melissa Sundays (SMS) recipe was chosen by Joy of Hot Oven, Warm Heart: Mom's Apple Banana Bread. It's a great twist on a very classic recipe - one that was quite delicious.

It's your basic banana bread recipe, with some caramelized apples thrown into the mix. I had small apples, so I added three instead of two - and that probably ended up being more apples than you're supposed to include, but I loved having some apple in every bite. The only complication I ran into was that I had too much batter for my loaf pan, due to the extra space that the apples took up.


I added one whole teaspoon of cinnamon to the apples as I was cooking them in the brown sugar and butter, just because a half a teaspoon just didn't seem like enough. This ended up being just perfect, as the spices in the loaf came out just perfect - not too strong, but prominent enough to enhance the flavor of the bread.


This is probably one of my favorite banana breads, along with the super moist Classic Banana Bundt Cake I made recently. Thanks Joy, for a great pick. If you would like the recipe, you can find it here. Make sure you visit the SMS Blogroll to see how everyone else enjoyed this wonderful treat!

* Recipe Notes:
- Double the cinnamon to 1 tsp when cooking the apples.
- I had to bake my loaf for about 1 hour and 15 minutes, a bit longer than the recipe indicated. The top will start to brown quite a bit towards the end, so be sure to put a foil tent over it if yours takes longer to bake like mine did.

Tuesday, August 18, 2009

Applesauce Spice Bars (TWD)


This week's Tuesdays with Dorie (TWD) recipe was chosen by Karen of Something Sweet: Applesauce Spice Bars. I actually made these last year because I got anxious waiting for someone to pick them! I'm glad I didn't wait, though, because no one chose them last fall and I know I couldn't have possibly waited until now :)

I paired these with some Burnt Caramel Ice Cream and they were amazing!!! You really need to try both recipes. Make sure you check out the TWD Blogroll, to see how everyone else enjoyed this wonderful, fall treat.

Tuesday, August 11, 2009

Brownie Buttons (TWD)


This week's Tuesdays with Dorie (TWD) recipe was chosen by Jayma of Two Scientists Experimenting in the Kitchen: Brownie Buttons. They are these adorable little brownies made in mini muffin pans. Only problem was that I don't have mini muffin pans and did not want to go out and buy them just for this recipe.


So I made these in a regular sized muffin pan instead, and ended up with four regular sized brownies. I have to say that making brownies this way so easy and convenient - no need to slice them when you're done, and there is a great ratio of crispy edge to soft fudgey middle. No need for a special edge pan! The prep time was literally 5 minutes, and then they were in the oven - easiest brownie recipe ever!


Since my brownie "buttons" were so large, I "frosted" them instead of dipping them. I put melted white chocolate on half of them, and melted peanut butter chips on the other half. These had a nice crisp edge around them but they were soft and fudgey in the middle. My husband and I both loved these - our only complaint was that the recipe only yielded four! I would definitely recommend making a double batch if you try this.


Thanks Jayma, for picking this recipe, I will definitely be making it again - it may be my go-to brownie recipe from now on simply because it is so simple and easy! If you would like the recipe, you can find it here. Make sure you check out the TWD Blogroll, to see how everyone else enjoyed this chocolatey treat.

* Recipes notes:
- I baked my brownies in a regular muffin pan and they were done after 21 minutes.
- Wrapped airtight, these will keep in the freezer for 2 months.
- For tips, click here.

Tuesday, August 4, 2009

Classic Banana Bundt Cake (TWD)


This week's Tuesdays with Dorie (TWD) recipe was chosen by Mary of The Food Librarian: Classic Banana Bundt Cake. It's really just a banana bread in bundt pan, though Dorie also gives you a recipe for a nice lemon glaze if you want to spruce it up a bit. (I think a caramel glaze would be awesome.)


The recipe is as straightforward as any other banana bread recipe. This one calls for sour cream or yogurt (I used both) that makes it an extremely moist cake. I haven't really ever had a banana bread I didn't like, but I did enjoy the fact that this one was particularly moist.


I did check on my bundt cake 30 minutes into baking as Dorie recommends, but my cake looked just fine at that point. I did have to finally cover it with a foil tent around the 50 minute mark, though, so keep a close eye on your cake to make sure it doesn't over brown.


Thanks Mary, for picking this recipe, it was fantastic and I will definitely be making it again. If you would like the recipe, you can find it here. If you're looking for something a bit sweeter to make with your ripe bananas, then try this Upside-Down Bananas Foster Cake. Make sure you check out the TWD Blogroll, to see how everyone else enjoyed this classic treat.

* Recipes notes:
- I baked my bundt cake for exactly 65 minutes, as indicated in the recipe. I did not have to place a foil tent over it until 50 minutes (as opposed to 30 minutes).
- For tips, click here.


Sunday, August 2, 2009

Chewy Peanut Butter Cookies (SMS)


This week's Sweet Melissa Sundays (SMS) recipe was chosen by Stephanie of Ice Cream Before Dinner: Chewy Peanut Butter Cookies. I love anything peanut butter, so I was more than happy to try this peanut butter cookie recipe.


These were super easy to throw together. Melissa warns you not to over bake these, or else they become crunchy instead of chewy, so I kept a really close eye on mine while they were in the oven. I baked mine for 12 minutes, slightly longer than what the recipe indicated (10 minutes), and then allowed them to rest on the baking sheet for an additional 5-10 minutes before transferring them to a cooling rack. I found that they were so soft and fragile that moving them any sooner was near impossible without having the cookies fall apart on me en route. Once they were completely cooled, they weren't so frail.


I sprinkled the tops of my cookies with some sugar before putting them in the oven. They would look even prettier with some raw/turbinado sugar sprinkled on top.


These cookies were super soft, but chewy around the edges. I really enjoyed them and have to admit that I ate the whole batch almost all by myself in just 3 days!! These would be really good to use for ice cream sandwiches. I will definitely be making them again. If you prefer crunchy peanut butter cookies, then I would recommend you try these Peanut Butter Crisscrosses. If you've got a little extra time in the kitchen, then you have to try these soft peanut butter cookies that have a candy surprise in the middle!

Thanks Stephanie, for a great pick. If you would like the recipe, you can find it here. Make sure you visit the SMS Blogroll to see how everyone else enjoyed these peanut buttery treats!


* Recipe Notes:
- Dip your fork into some flour to make the criss cross pattern. The first cookie you press will stick a bit to your fork. Dip it in flour again and the flour will more easily stick to fork with the little bit of cookie dough that is stuck to it. You'll have to dip the fork into the flour again after each cookie.
- Bake for 10-12 minutes, then remove from the oven and allow to cool on the baking sheet 5-10 minutes before transferring them to a cooling rack.