Saturday, January 12, 2008

DMBLGiT

I have been terribly busy lately. We visited my family in California over the holidays and I went straight back to work after we returned. I was only home for about a week and half before I had to leave for a work conference. I returned on Wednesday night and had to work Thursday, Friday, and today. Needless to say, I have (sadly) not been spending very much time in the kitchen and I am weeks behind with my Google Reader subscriptions. It was only a few weeks, but I feel like I missed so much. If you have not seen any comments on your blog from me in a while, be patient as I find the time to catch up and read about all the great things you have been making :)

So, after coming home from work today, I was finally able to sit down and catch up a bit with my food blogging. I was pleasantly surprised to find out that I have received a Host Award in the December DMBLGiT (Does My Blog Look Good in This?) Contest. DMBLGiT is a monthly blogging event in which food bloggers share their best food photos from the previous months' posts. Photos are judged based on aesthetics, edibility, and originality. The Host Awards highlight pictures that did not necessarily get the most points, but were photos that the host personally loved.


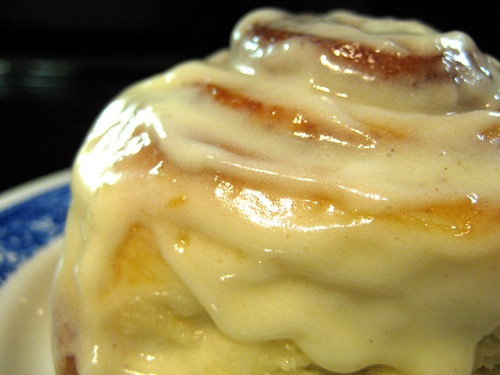
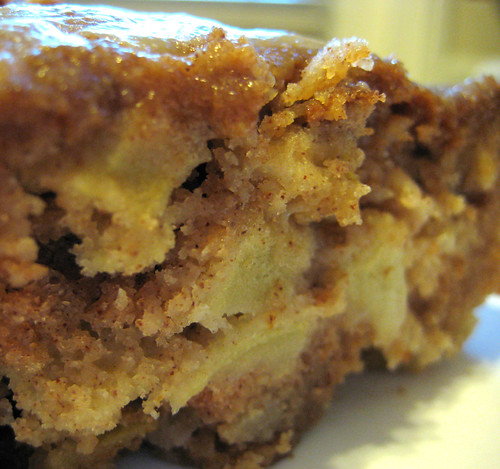
I am fairly new to the food blogging community and I am still very much working on developing my photography skills... so I did not think I would really win anything when I submitted my photo last month. So thank you to Dayna of food+photography for hosting December's contest and for choosing my photo among all the entries to receive one of the Host Awards! I am honored! Here is the photo I submitted:

Tuesday, January 1, 2008

Best of 2007

Happy New Year! As we look back on 2007 and look forward to 2008, I wanted to take a moment to highlight my favorite recipes from 2007. Although my blog is only 3 months old and I don't have twelve months' worth of recipes to choose from, I had a really hard time picking just one favorite... so I've highlighted favorites from various categories to share here :) I hope that if you try these, you will enjoy them as much as I do!

Favorite Soup:
Favorite Side:

Favorite Pasta Dish:
Favorite Chicken Dish:
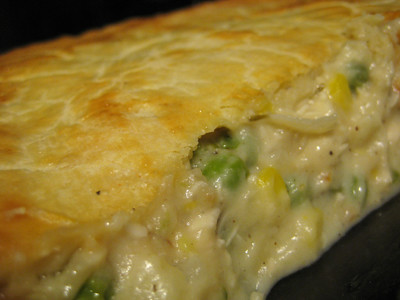
Chicken Pot Pie

The reason the pot pie is my favorite is because of the pastry crust, not the chicken per se, so here is my favorite chicken dish were the chicken is really delicious:

Chicken Breasts Stuffed with Goat Cheese and Sun Dried Tomatoes

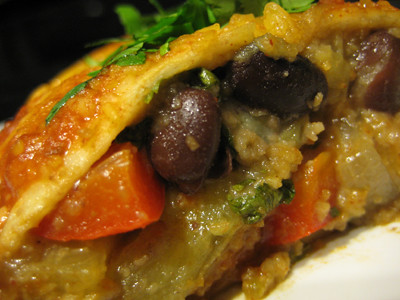
Favorite Vegetarian Dish:

Favorite Breakfast Item:
Favorite Bread:
Favorite Cookie:
Favorite Pastry:
Favorite Chocolate Sweet:

Favorite Cake:
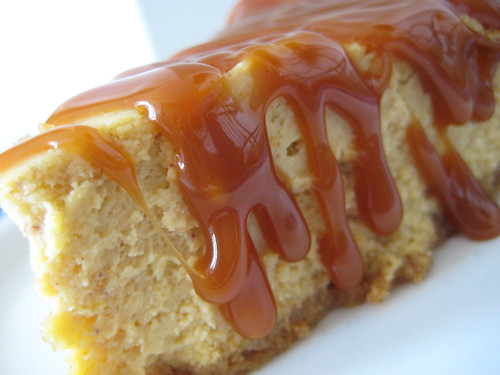
Apple Cake with Caramel Sauce

I hope everyone had a great 2007! I was the proud recipient of several cookbooks for Christmas, and cannot wait to start trying some of the new recipes for my blog this upcoming year! So stay tuned for even better good eats and sweet treats in 2008! :)

Tuesday, December 25, 2007

Merry Christmas!


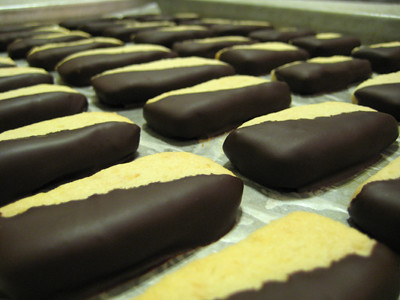
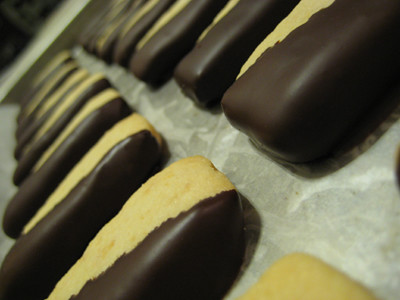
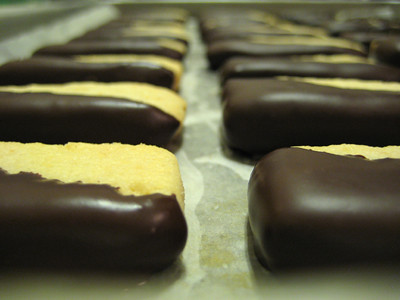
I mentioned in a previous post about how great chocolate dipped macadamia nut shortbread cookies are. My dad loves them (we gave him a box last year for Christmas). There are several companies that make them, but the best are from Big Island Candies. Unfortunately, shipping them from Hawaii to the mainland can cost you a pretty penny so this year I decided I would try to replicate these cookies for my dad. They didn't turn out exactly the same, but I actually think they taste better :)

When I made these almond crescent cookies recently, I thought to myself that it would be great to experiment with the recipe and substitute different types of nuts. When I saw that the ones from Big Island Candies were actually macadamia nut shortbread and not just regular shortbread, I knew I could probably get pretty close to copying the cookie by using macadamia nuts instead of almonds in that recipe. Next time, I may try making a true shortbread cookie, which is one part sugar, two parts butter, and three parts flour. For now, though, I am content to munch on these!


I'm sure that at this point, everyone has stuffed themselves full of prime rib, ham, turkey, mashed potatoes, casseroles, and all sorts of holiday goodies. However, my Christmas gift to all of my blog readers are these delectable chocolate dipped cookies. So here's to wishing everyone a very Merry Christmas! Hope that everyone has a great time with family and friends!

Chocolate Dipped Macadamia Nut Shortbread
adapted from Simply Recipes


1 cup of butter, room temperature
2/3 cup of sugar
1 teaspoon of vanilla extract
2 1/2 cups of flour
1 cup of ground macadamia nuts (I got about 1-1/4 cup from 6 oz of whole nuts)
2 cups semi-sweet chocolate chips
2 tsp shortening (i.e. Crisco)

Preheat oven to 350°F.

In a food processor, pulse the macadamia nuts until they are finely ground. Be careful not to over grind them. Set aside.

Cream the butter and the sugar together until light and fluffy. Add the vanilla extract and mix.

Add the flour and ground macadamia nuts. Mix thoroughly.

Roll the dough onto a lightly floured surface until it is about 1/4" thickness. Using a dull instrument like a butter knife, make horizontal and vertical cuts into the dough, creating rectangles that are approximately 1/2" wide by 2" tall. Carefully transfer onto parchment paper and bake at 350°F for 15-20 minutes or until a light golden brown. Freeze the cookies for approximately 1 hour (or longer) to prepare them for dipping. This will prevent them from crumbling/breaking during the dipping process.

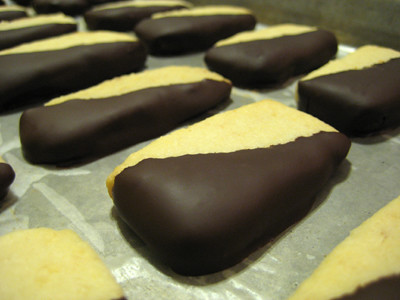
After the cookies have been frozen, melt the chocolate chips in a double boiler. If you do not have one, melt them in your microwave on high heat for 1 minute, at 30 seconds intervals, stirring well between each interval. If the chocolate is not completely melted, continue heating it in your microwave in 10 second intervals, stirring well between each interval, and being careful not to burn the chocolate. Hold the cookies at one corner and dip them into the melted chocolate at a diagonal, then let the chocolate harden.

Friday, December 21, 2007

Holiday Recipe Exchange


This holiday season I decided to participate in a Recipe Exchange on the What's Cooking? Board. The rules are simple. Each of us submitted a recipe and in turn we were given another recipe to make. We were allowed to make any necessary changes to the recipe (as to dietary restrictions, etc) but the original recipe needed to be included with notations as to those items changed. The deadline to post is December 22nd.

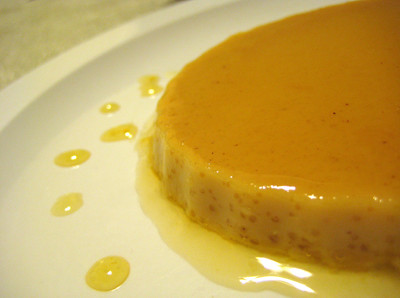
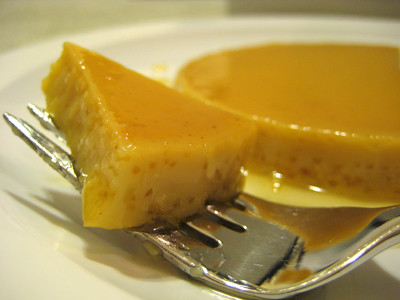
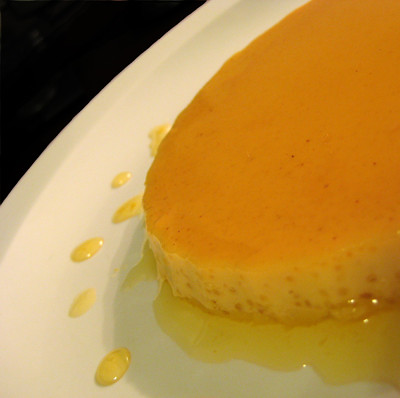
I was given a flan recipe to create. Flan is basically a custard topped with a caramel sauce. Sugar syrup is cooked until it reaches the caramel stage, then it is poured into a dish before adding the custard. After it is cooked, the flan is inverted onto a serving plate. The caramelized sugar leaves behind a nice layer of caramel sauce.

I was a little unsure about making this, as I have pretty high standards for flan. My mom makes the best flan, and is always getting requests for this dessert. So I grew up seeing her make this time and time again... and while I was often in the kitchen helping her out when I was growing up, I actually never made this with her. I think I was fairly successful in baking this; I did not get any cracks in my flan and was able to invert it onto a plate in one piece. However, the texture was not what I was used to. My mom's flan is very light; it almost melts in your mouth. This flan is very dense. I'm not sure if the texture came out a little differently because I used ramekins instead of one large square pan, if I over-baked it, or if it's the recipe itself. It's probably just personal preference, but after having my mom's flan for years, it's hard to find another flan that is better :)


There were a few things missing from the recipe, including the original source. I've put question marks below in those places where there is missing information. The most important thing missing from the recipe was the amount of vanilla extract. I emailed Katie who is coordinating the recipe exchange to get the missing details... she emailed the person who submitted the recipe and still has not received a reply. So, I will update this recipe when I find out, but when I made it, I just eye-balled the amount of vanilla I put in it :) After December 22nd, be sure to visit Katie's blog, Good Things Catered, to see the round up with all the goodies that were baked up.

Flan
from ?


6 eggs
1 can of evaporated milk
1 can of condensed milk
pinch of salt
dash of cinnamon
? tablespoons of vanilla

Ingredients for caramel sauce:
2 cups of sugar
1 cup of water

Preheat oven to 350F. Place a large baking pan (large enough to fit a 9" square pan in) in the oven and fill 1/3 of it with water. This is called a water bath.

Next is the sauce. The sauce has to be prepared first since it takes much more time to make than the actual flan batter.

Combine the two cups of sugar and one cup of water in small non-stick sauce pan; add sugar first then pour water over the sugar. Do not stir. Cook on high heat until the sauce reaches a dark caramel color. Be careful not to over cook it or it will be ruined.

While the sauce is cooking combine ingredients for flan and mix well and set aside.

When sauce is done pour into 9" square pan and spread evenly on bottom and sides. Let it set for a moment or your batter will get all mixed in it.

Once it sets for about ? minutes, pour in the flan batter. Place in the large baking pan filled with water.

The water should reach the halfway mark of the smaller pan. If it doesn't, add more water, if it's too much take some out.

Bake for about 40 minutes or until inserted knife is clean when removed.

Place on a large dish and turn upside down. The flan should be brown on the bottom and the sauce should be dripping along the edges.

Chill for 2 hours, and enjoy.

*Note if when you turn the flan over it seems stuck to the pan just separate the edges of the flan from the pan and it should plop right out. Also you'll see some caramel sauce is still stuck to the pan - this is normal. As long as some of it is melted and dripping on the flan you are good.

Tuesday, December 18, 2007

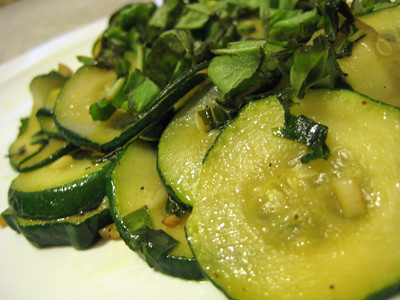
Basil Zucchini


I was looking for a way to use up some zucchini and basil, when I came across this simple recipe for Basil Zucchini. This was a great way for us to incorporate more veggies into our diets. I love anything with fresh basil, and this dish is no exception. If I was a more creative cook, I might have come up with this on my own; but I'm more of a baker and still very much a beginner cook who needs recipes. So, for those who are still in the same boat as me, I hope you enjoy this 'recipe' too :)

Basil Zucchini
from Bon Appétit

1 teaspoon olive oil
3 small zucchini, thinly sliced
2 tablespoons chopped fresh basil
1 garlic clove, minced

Heat oil in heavy medium nonstick skillet. Add zucchini, 1 tablespoon basil and garlic and stir-fry until zucchini is just tender, about 5 minutes. Season to taste with salt and pepper. Remove from heat. Sprinkle with remaining basil.

Yield: 2 servings.

Friday, December 14, 2007

'Tis the Season...

...for holiday baking! This year I decided to bake up a host of holiday delights for my friends and co-workers. I spent all last weekend baking, and put together holiday gift packages chock full of goodies for everyone. My husband got to take an assortment of leftovers to school with him, and this is just some of what they got to sample:


Talk about a baking marathon! I don't think I have ever spent that much time in the kitchen before, but I enjoyed it because it was a true labor of love :) So, if you are looking for ideas this holiday season, check out my next 15 posts! With German, Jewish, and Middle Eastern treats in addition to some traditional holiday classics like peppermint bark and molasses cookies, you're guaranteed to find something you can enjoy with your friends and family this holiday season!

Note: This post prefaces the next (or last) 15 posts; since these are all being updated to my blog on the same day, instead of placing this post at the bottom (or beginning) of the 15 posts, I am placing it at the end so that it will be the first thing you read when you visit my blog.

All the Reindeer Loved Him


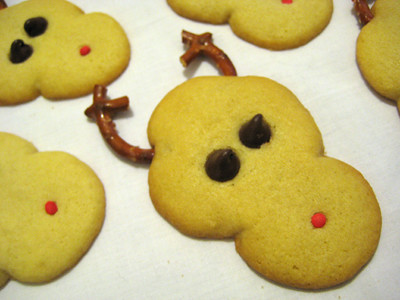
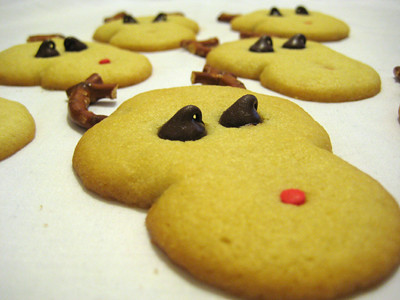
I was inspired to make these cookies by one of the recent issues of Southern Living. I thought they were so cute I had to make them. They are obviously more fragile than most cookies due to the pretzel 'antlers,' so these aren't really cookies that can be shipped. They're perfect if you want something cute for a holiday party, though.

Instead of using store bought sugar cookie dough, I made sugar cookies from scratch. It seems like everyone has "the best" sugar cookie recipe in their blog, so I wasn't sure which one I should use. I used this recipe from Allrecipes last year and enjoyed it, but this year I wanted to try another recipe. I considered using this recipe from Blonde Ambition in the Kitchen (actually a recipe from Joelen's Culinary Adventures), but ended up using a recipe from Peabody's blog instead. Her recipe yielded a nice and soft, melt-in-your-mouth, sugar cookie. I wish I could compare it to the recipe from Allrecipes, but it has been so long since I made those that I have no basis for comparison. I halved her recipe and believe it would be more than enough for any occasion; I didn't keep track, but I think I got approximately 4 dozen 2-1/2" cookies out of it. You could definitely make the full recipe and freeze any leftover dough for later use (for great tips on freezing your dough, visit Our Sweet Life). (By halving the recipe, I needed half an egg - I did so by lightly beating an egg in a small bowl, transferring it to a small measuring cup and then adding half the volume to the bowl.)
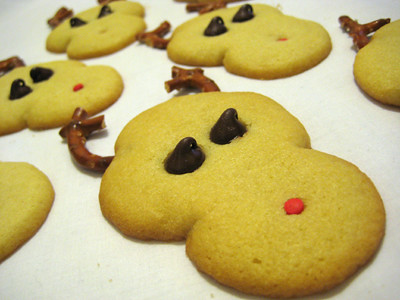

I have to admit that I became extremely frustrated when making these cookies. Not because the sugar cookies were hard to work with, but because I had the hardest time making the antlers! My pretzels kept breaking in the wrong places and I would end up with pieces that looked nothing like antlers. I found that the best way to do this was to first score the pretzels with a knife at the desired points before breaking apart the pretzel. It didn't always work, but I had much better success using that method.

Don't be too shy about pinching the sugar cookie dough to form the muzzle, as it will spread out while baking. I also couldn't find cinnamon candies at my local grocery store, so I had to use smaller red cake decors instead. I didn't think of it at the time, but I might substitute red M&M's next time, as I don't care much for cinnamon candies.

I decided to submit these cookies for the "Eat Christmas Cookies" blog event, hosted by Susan of Food Blogga. Click on the logo below to visit her blog and see all the other wonderful cookies being submitted!


Rudolph's Christmas Sugar Cookies
from Southern Living


1 (16.5-oz.) package refrigerated sugar cookie dough (I used the sugar cookie recipe below, instead)
36 pretzel twists
36 semisweet chocolate mini morsels (I used regular-sized chocolate chips)
18 red cinnamon candies (I used red cake decors instead)

Freeze dough 15 minutes.

Roll dough to a 1/4-inch thickness on a floured surface. Cut dough with a 3-inch round cutter, and place 2 inches apart on ungreased baking sheets. Using thumb and forefinger, pinch opposite sides of each slice about two-thirds of the way down to shape face.

Break curved sides away from center of each pretzel twist to form antlers. Press bottom of 1 set of antlers on each side at top of each reindeer face.

Bake at 350° according to package directions or until lightly browned. Remove from oven; press in 2 chocolate mini morsels for eyes and 1 red cinnamon candy for nose. Let cool 1 minute on baking sheets. Remove to wire racks; cool 20 minutes or until completely cool.

Yield: Makes 1 1/2 dozen

Sugar Cookies
from Culinary Concoctions by Peabody


4-1/2 cups powdered sugar
1 lb plus 8 oz unsalted butter, softened
3 eggs
1 tbsp vanilla extract
7-1/2 cups all purpose flour
1 tbsp baking soda
1 tbsp cream of tartar

Preheat oven to 375F.

Cream the powdered sugar and butter for at least 3 minutes. Add the eggs one at a time and scrape down the bowl after each egg. Add vanilla and mix for 2 more minutes.

Mix in the flour, baking soda and cream of tartar while mixer is on slow speed. Mix till you have a smooth dough. Chill for at least 4 hours before rolling out.

Roll out dough and cut using whatever shapes you would like. (I used a glass with a diameter of ~2-1/2")

Yield: Approximately 8 Dozen Cookies?