Showing posts with label cookies. Show all posts

Saturday, December 22, 2012

Crunchers

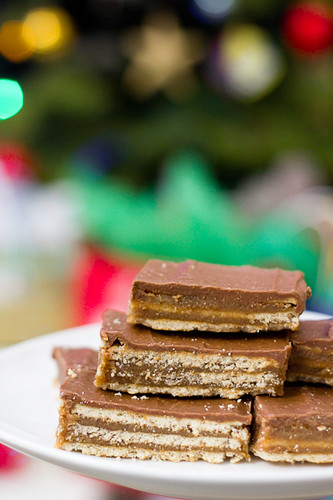
Have you tried these crunchers yet? I've seen variations of this recipe, or similar recipes, made with saltine crackers as well.  I've been seeing them on various blogs and on pinterest for a few years now.  Every time I see them, I've said I want to try them but I've never gotten around to it because I never have butterscotch chips on hand in my pantry.  I love the salty and sweet combination (chocolate covered pretzels are among my favorite!) and when you're baking several different things for the holidays, it's nice to have a few recipes that are simple and quick to prepare.

This recipe is basically club crackers with layers of caramel-type filling in between, topped with a chocolate peanut butter layer.  The best part - they can be made in under 15 minutes.

The best way to describe these "crunchers" would be to compare them to peanut butter Twix.  I actually used multi-grain club crackers because I sent my mom out to get them for me and she didn't know what I'd be using them for so she got the multi-grain variety.  They tasted just fine and I suppose the "multi-grain" aspect might make you feel a little less guilty about eating these ;)

My only issue with them is that they are best when kept refrigerated.  After they are taken out of the refrigerator, the chocolate layer on top starts to get very soft and easily smudged.  So, these wouldn't be the best goodies to ship out if you're looking to mail some holiday goodies.  Don't let that stop you from trying these though because for such minimal effort, these are really good!

Crunchers
from Gonna Want Seconds

    80 - Club Crackers
    1 Cup - Butter
    2 Cups - Graham Cracker Crumbs
    1 Cup - Light Brown Sugar, Firmly Packed
    1/2 Cup - Whole Milk (I used 2%)
    1/3 Cup - Sugar
    2/3 Cup - Creamy Peanut Butter
    1/2 Cup - Semi Sweet Chocolate Chips
    1/2 Cup - Butterscotch Chips

Line a 9x13-inch baking pan with foil, leaving an extension of foil on either end.  Line the foil with 1 layer of club crackers, cutting to fit if necessary.

In a heavy bottom large saucepan, melt butter over medium heat. Add graham cracker crumbs, brown sugar, milk and sugar. Bring to a boil and boil for 5 minutes, stirring constantly. Moderate heat and reduce as needed so mixture doesn't stick to the bottom and mixture doesn't boil too hard (this can cause butter to separate). Remove from heat and spread half of butter mixture evenly over crackers. Place another single layer of crackers evenly over butter mixture, cutting to fit if necessary. Spread remaining butter mixture evenly over crackers. Top evenly with remaining crackers.

In a small saucepan, combine peanut butter, chocolate chips, and butterscotch chips. Melt over medium-low heat, stirring constantly. Spread evenly over top of crackers. Cover, and chill for at least 1 hour. Lift foil overhang and remove bars from pan. Cut into bars. Store in the refrigerator.

Pumpkin Gingerdoodle Cookies

One of the first food blogs I ever started following was Peabody's blog, Culinary Concoctions by Peabody.  Everything she makes looks amazing - I truly wish I was one of her friends so I could have the pleasure of eating all of it ;) So, when I went in search of recipes to try this holiday season, I knew that I could surely find something wonderful to make from there.

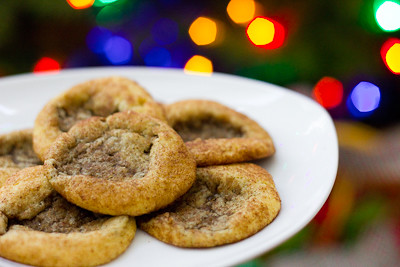
And I was right.  After scrolling through a few posts, I stumbled upon these pumpkin gingerdoodle cookies.  Part pumpkin snickerdoodle and part gingersnap cookie, these cookies combine some of everyone's favorite holiday flavors.  My husband walked into the kitchen and saw me pulling these out of the oven and asked, "Can I have a snickerdoodle?" I informed him they weren't snickerdoodles but pumpkin gingerdoodles and he was happy to try them.  He quickly proclaimed, "These are way better than regular snickerdoodles."

I only had two issues with these cookies.  The first issue was really a non-issue: I had way more pumpkin snickerdoodle dough than gingersnap dough.  So in the end, I made some plain pumpkin snickerdoodle cookies as well (all were eagerly consumed regardless). 

The second issue was in the consistency of the cookies.  The pumpkin snickerdoodle dough puffed up into a wonderful moist, slightly cakey cookie.  The gingersnap dough, on the other hand, puffed up but deflated after I pulled it out of the oven.  So, my cookies looked lopsided when I placed the cookie doughs side by side.  Next I tried a batch with the pumpkin snickerdoodle dough on the bottom and the gingersnap dough on top.  Those turned out okay, but they weren't very aesthetically pleasing.  So finally I made a batch with the gingersnap dough on the bottom and the pumpkin snickerdoodle dough on top and those cookies turned out to the look the best.  I'm not sure how Peabody got her cookies to look the way that she did, but the cookies you see in the photo at the top of this blog post were the best that I could do. 

Regardless of how these cookies look, they are amazing.  We couldn't stop eating them in our household and almost didn't have enough to give out to family and friends because we wanted them all to ourselves! So, if you're going to only try one new recipe out this holiday season, I encourage you to make it this one - I promise you won't regret it!

Pumpkin Gingerdoodles
from Culinary Concoctions by Peabody


Pumpkin Snickerdoodle Dough

1 1/2 cups granulated sugar
1 cup unsalted butter
2 eggs
¾ cup pumpkin puree
3 cups all-purpose flour
2 tsp. cream of tartar
1 tsp. baking soda
1/4 tsp. salt

for rolling the cookies in: (I had to double this)
1/4 cup granulated sugar
2 tsp. ground cinnamon

Mix 1 1/2 cups sugar, the butter, pumpkin, and eggs in a stand mixer with paddle attachment.  (It will appear curdled, but don't worry it will all come together in the next step.)

Add in flour, cream of tartar, baking soda and salt and mix on low until fully combined. Set aside.

Gingersnap Dough

3/4 cup butter
1 cup granulated sugar
1/4 cup molasses
1 egg
2 cups all-purpose flour
2 teaspoons baking soda
1/4 teaspoon salt
1 teaspoon cinnamon
1 teaspoon cloves
1 teaspoon ginger

Combine cinnamon and sugar in a small bowl and set aside for rolling dough in.

Cream together butter and sugar. Add molasses and egg and continue beating. Add flour, baking soda, salt, cinnamon, cloves, and ginger and mix until combined, scraping down the sides of the bowl as needed.

Preheat oven to 350°F. Lightly grease baking sheets with no-stick cooking spray and set aside.

(I found that it's best to refrigerate both cookie doughs for at least one hour before assembly and baking.)

Roll a small amount of gingersnap dough into a ball and a small amount of snickerdoodle dough and place them together and gently roll or squeeze together.

Roll in cinnamon sugar.

Place on baking sheets and bake for 9-11 minutes. Remove from oven and allow to cool on baking sheets for 2 minutes before moving to cooling racks.

Magic Middle Peanut Butter Cookies

Wow, has it been a crazy few months. I can't believe that it's been over three months since my last blog post?! I thought that with my daughter starting school in September, I'd have all this extra time to bake and blog again.  However, as many moms out there know - your time without the kids is rare - so I found myself running a million different errands every time she was in school and I was never home to do any baking. I kept thinking to myself that I'd get around to another post "soon" and then before I knew it, I was busy getting ready for my daughter's third birthday party and then a few days later I had my baby girl! Life's been crazy with a newborn and a three year old, to say the least.  For those who have been following my blog for some time and would like to see some pictures of the new little one, you can visit our photographer's blog here. I'm so blessed to be celebrating this holiday with two beautiful little girls that are the light of my life.

And without further ado, I'm hoping to post a flurry of blog posts today to make up for my lack of blogging over the past few months (hopefully the kids will nap long enough for me to get these all up today!).  For those who are still looking for some last minute inspiration for their holiday baking, look no further :) I've got some great recipes that I've tried out this year, and of course there are the tried and true recipes from years past as well.

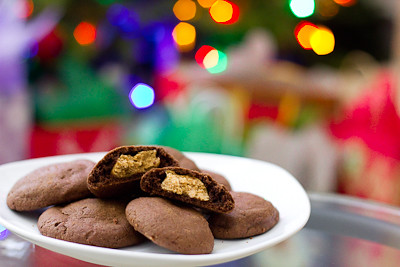
Let's start off this series of posts with one of my favorite combinations - peanut butter and chocolate.  You really can't go wrong with anything made with these two ingredients! These cookies are impressive yet simple to make.  With chocolate cookies it can be difficult to tell sometimes when the cookies are done baking because they do not turn golden brown like other cookies do.  You'll want to watch these cookies closely - when they just start to barely crack you should take them out of the oven.  They'll continue to bake just a little bit more while they're cooling on your cookie sheet.  If you over bake them, they'll still be good, but a bit on the dry side. 

Magic Middle Peanut Butter Cookies
from Gonna Want Seconds

Cookie:
    1 1/2 Cups - All Purpose Flour
    1/2 Cup - Unsweetened Cocoa Powder
    1/2 Teaspoon - Baking Soda
    1/2 Cup - Sugar
    1/2 Cup - Brown Sugar, Packed
    1/2 Cup - Unsalted Butter, at Room Temperature
    1/4 Cup - Peanut Butter
    1 Teaspoon - Vanilla Extract
    1 - Large Egg

Filling:
    3/4 Cup - Powdered Sugar
    3/4 Cup - Peanut Butter

Preheat oven to 375 degrees.

Make Cookies: In a small  bowl, blend flour, cocoa, and baking soda.

In a large bowl beat white sugar, brown sugar, butter and 1/4 cup peanut butter, until light and fluffy.  Add vanilla and egg, beat until blended.  Stir in flour mixture until blended.  Set aside.

Make the filling: Combine the confectioners sugar and 3/4 cup peanut butter.  Beat well with electric mixer until mixture comes together.

Roll filling into 30 1 inch balls. Form exterior part of cookie by sectioning dough into approximately 1 tablespoon pieces and then shaping the exterior part of cookie around filling balls.  Cover the filling completely.  Place 2 inches apart on an ungreased cookie sheet.  Flatten with a glass dipped in sugar.

Bake at 375 degrees for 7-9 minutes. Allow to cool on cookie sheet for 10 minutes then remove to a cooling rack and cool completely.

Monday, January 30, 2012

Kids' Thumbprints (TWD)


I'm a horrible blogger :( I haven't posted in weeks... and I made these cookies back in December and I am just now getting around to blogging about it! *sigh* My life is now consumed with play dates, story time, craft time, little gym, etc. so I haven't had nearly as much time as I used to for baking, blogging, and visiting other blogs :( Thank you to those who are still around, reading each blog post that I'm able to put up! I did want to put a question out there to my readers... do you enjoy the posts about food-related coupons and deals? I started with them on my Facebook page, then posted a few here on the blog... but wasn't sure if that was something that people were interested in? Should I stick with just the recipe posts, or would you like to see deals posted too? Please leave me a comment and let me know! :)

So anyway, without further ado... the very last Tuesdays with Dorie (TWD) recipe was chosen by none other than Dorie Greenspan herself, author of Baking: From My Home to Yours.  She chose Kids' Thumbprints.  These were kind of like grown up peanut butter and jelly cookies.  You take a peanut butter cookie dough and rough it into a ball, then dip it in egg whites and roll it in some chopped up peanuts.  Then proceed like you would with any other thumbprint cookie recipe and press your thumb gently into the center and fill with jam after the cookies have baked.

I only needed one egg white for my cookies, otherwise I followed the recipe exactly as written.  These were incredibly addicting cookies! I found that if you let the jam cool just a little bit after warming it up, the cookies are a little bit easier to fill because then the jam isn't quite so runny.  I shared these with my neighbor and she loved them, too.

If you would like the recipe, you can find here.  This is the last blog post for Tuesdays with Dorie - Baking: From My Home to Yours. I can't believe that after 4 years, we've finally baked through the entire book! It's been so much fun... not only baking everything, but meeting so many other wonderful bloggers out there.  I've had a blast and I have learned so much with the group baking week by week through the book.  I'm still not the best cake decorator out there, but I can make some pretty good pastries and brioche now! I'm so proud of what I have done with the group.  While we are putting Baking back up on the shelf, our group is getting ready to embark on another adventure... as we bake our way through Baking with Julia.  So, if you are interested in baking along with us, please join us as Tuesdays with Dorie: Baking with Julia starts on February 7th!

Tuesday, September 20, 2011

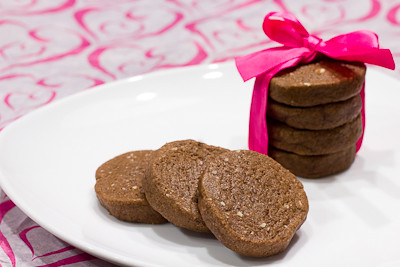
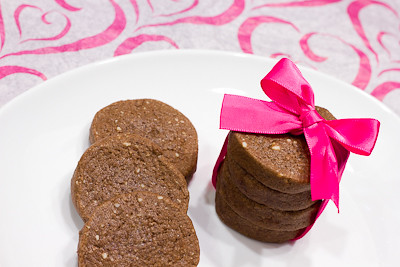
Salt and Pepper Cocoa Shortbreads (TWD)


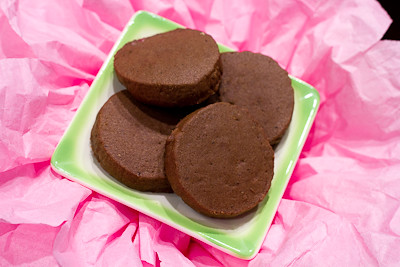
This week's Tuesdays with Dorie (TWD) recipe was chosen by Tia of Buttercream Barbie: Salt and Pepper Cocoa Shortbread. This was our second time this month baking up chocolate slice and bake cookies. This time, our cookies were spiced up with salt and pepper. Yes, salt and pepper!

I would never think to put salt and pepper in a cookie, but it worked surprisingly well. You don't really taste the salt and pepper right away when you bite into the cookies, but as you start to enjoy them, the salt and pepper flavors start to really come to the forefront. I think you definitely need to use fleur de sel or sea salt and a coarsely ground black pepper, as regular salt or finely ground black pepper won't stand out as much on your palate next to the buttery chocolate shortbread flavor.

Thanks Tia, for hosting this week.  This was definitely something different, and I'm glad I got to try these cookies! If you would like the recipe, you can find it here. Make sure you check out the TWD Blogroll, to see how everyone else enjoyed these chocolately treats!

Tuesday, September 6, 2011

Chocolate Spice Quickies (TWD)


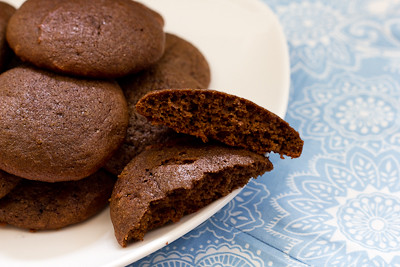
This week's Tuesdays with Dorie (TWD) recipe was chosen by Jessica of My Baking Heart: Chocolate Spice Quickies.  Dorie calls these "sophisticated little rounds" that are "mildly spiced, slightly chewy, almond-flecked chocolate cookies."

After reading in the P&Q that these Chocolate Spice Quickies were a little lacking in the spice department, I decided to double the spices.  I added 1/4 teaspoon of cinnamon, as well as a few pinches of cloves and nutmeg.  I also used unblanched almonds (instead of blanched almonds), simply because I was in a rush.

These cookies were easy to put together.  They were in the oven for exactly 7 minutes before they were done baking.  They were delicate, sweet, nutty, and chocolately with just a hint of spice.  I can see how others would have trouble tasting the spice if there was only 1/8 teaspoon of spice in the dough.  I don't think it really mattered that I didn't blanch the almonds, so feel free to skip that step too, if you make these cookies.


I like Dorie's suggestion of making ice cream sandwiches with these cookies, and definitely need to get my hands on some ice cream for the cookies that are remaining! As far as chocolate cookies go, these were good, but I'm not a big chocolate cookie kind of gal and my favorite chocolate cookies are still the World Peace Cookies and Chocolate Malted Whopper Drops :)

Thanks Jessica, for hosting this week.  If you would like the recipe, you can find it here. Make sure you check out the TWD Blogroll, to see how everyone else enjoyed these chocolately treats!

Tuesday, August 2, 2011

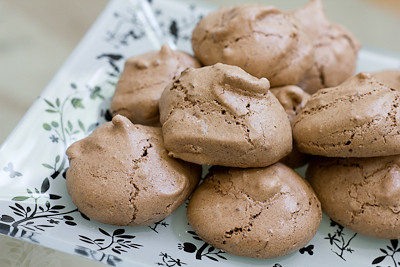
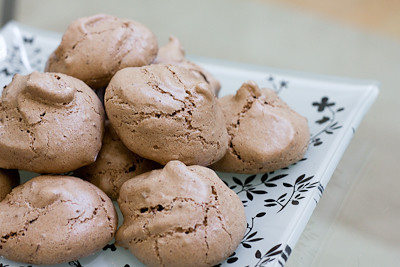
Cocoa Almond Meringues (TWD)


This week's Tuesdays with Dorie (TWD) was chosen by Mike of Ugly Food for an Ugly Dude: Cocoa Almond Meringues.  Dorie describes them as small cookies that "have the rough, craggy surface of stone nuggets.  Their interiors are wonderfully chewy and their flavor a bit caramelish, slightly nutty and quite chocolaty."

I loved how quick and easy these cookies were to make.  I think "slightly nutty" is a good description because despite being called Cocoa Almond Meringues, I'm not sure you'd know there were (ground) almonds in them unless you saw the recipe.  Regardless, these are especially great if you're craving something chocolate but want something light.


Thanks Mike, for hosting this week. If you would like the recipe, you can find it here. Make sure you check out the TWD Blogroll, to see how everyone else enjoyed these crunchy, chewy, chocolately treats!

Tuesday, June 28, 2011

Sour Cream Chocolate Cake Cookies (TWD)


This week's Tuesdays with Dorie (TWD) recipe was chosen by Spike of Spike Bakes: Sour Cream Chocolate Cake Cookies.  I almost didn't make this one because there were some lukewarm reviews of these cookies on the P&Q.  However, the recipe looked pretty simple, so I decided to forge ahead.

I included both raisins and dried cherries in my cookies, and like Dorie, found that biting into the little bits of dried fruit was wonderful.  I thought the dried cherries were better than the raisins in this cookie, just because they were tart and stood out more than the raisins did.  I can definitely see how those who omitted the dried fruit found the cookies to be a little plain.  (However, if you do make these cookies without the dried fruit, because they have a very cake-like crumb, they do make for the base of some fantastic chocolate whoopie pies.)

Thanks Spike, for hosting this week.  If you would like the recipe, you can find it here. Make sure you check out the TWD Blogroll, to see how everyone else enjoyed this chocolately treat! Also don't forget to enter my giveaway here before it ends on June 24th.

Tuesday, April 26, 2011

Cornmeal Shortbread Cookies (TWD)


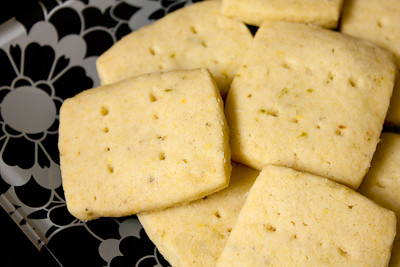
This week's Tuesdays with Dorie (TWD) recipe was chosen by Valerie of Une Gamine dans la Cuisine: Cornmeal Shortbread Cookies. I have to admit that I almost skipped out on this recipe.  When you compare it to a lot of the other recipes in the book, this one just doesn't sound that exciting! They're traditional shortbread cookies with a twist - aside from substituting some of the flour for cornmeal, the zest of a lemon (or lime, in my case) is rubbed in with the sugar to give it a little extra something.


Boy am I glad that I didn't skip this one! The cookies are buttery sweet and crumbly like you'd expect shortbread cookies to be, but the citrus zest gives it the most wonderful flavor.  The cornmeal gives it an interesting crunch (they have just the slightest gritty texture), though I wouldn't really know that there was cornmeal in these cookies unless you told me there was.

Thanks Valerie, for hosting this week.  I'm so glad you got me to try a recipe I'd probably otherwise skip in this book! If you would like the recipe, you can find it here. Make sure you check out the TWD Blogroll, to see how everyone else enjoyed this buttery, crumbly treat!

Tuesday, April 5, 2011

Almond Powder Puffs (TWD)


I'm supposed to be posting about a coffee ice cream tart today (chosen by Jessica of Domestic Deep Thought of the Day) but seeing as the recipe calls for store bought ice cream, that pretty much just leaves the tart to be made from scratch.  I read in the P & Q (problems & questions) that the tart gets frozen so hard that by the time the tart thaws out enough to be eaten, the ice cream is melted :(  So, I considered using Dorie's sweet tart dough instead, but in the end just ran out of time and motivation.  My apologies to Jessica for not baking along this week.  Instead, I have for you today last week's recipe, which I neglected to post seven days ago!

Last week's Tuesdays with Dorie (TWD) recipe was chosen by Tianne of Buttercream Barbie: Pecan Powder Puffs. I made these well before the posting date, but then I totally forgot about them until now! I'll blame it on "mommy brain" ;)

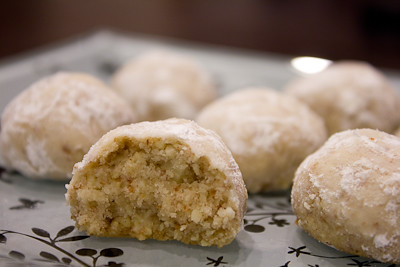
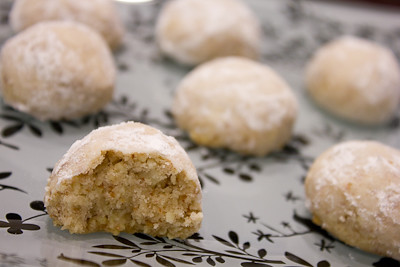
Looking at the name, I thought these were some type of cream puff, until I looked at the recipe and realized that they're actually cookies! They are Mexican wedding cookies, which are made from ground nuts, flour, sugar, and butter and then rolled in confectioner's sugar.  I didn't have any pecans on hand, so I made almond powder puffs instead.  I don't usually like whole nuts in my desserts, but I do enjoy things made with ground nuts (like this awesome chocolate dipped macadamia nut shortbread).


These cookies were super easy to make, the only hard part was waiting for the dough to chill in the refrigerator for two hours before baking! They aren't too buttery and the salty nutty flavor balances out quite well with the sweet sugary coating.  My husband had one and I fully expected these to be 'not his thing,' but instead he immediately exclaimed, "What are these?! They are good!"  So, I guess these will be making another appearance in our household in the near future :) I haven't had too many Mexican wedding cookies before, but I think the general opinion among other TWD bakers was that these are far better than any other Mexican wedding cookie encountered!

Thanks Tianne, for a great pick.  If you would like the recipe, you can find it here. Make sure you check out the TWD Blogroll, to see how everyone else enjoyed these nutty, crumbly treats!  And, if you haven't already, head on over here to enter my current giveaway. 

Sunday, February 27, 2011

Panna Cotta and Florentine Cookies (DB)


I don't know about other parts of the country, but we've been enjoying beautiful 70 degree weather here in Texas lately.  It's a welcome change to the all the ice and snow we've been having! (Makes me wish we had a yard with a wooden swing set for my little girl to play on, though.)  While some desserts lend themselves to the winter season (i.e. Yule log), here are two sweets that can be enjoyed year round whether it's warm or cold outside - panna cotta and florentine cookies.

The February 2011 Daring Bakers’ challenge was hosted by Mallory from A Sofa in the Kitchen. She chose to challenge everyone to make Panna Cotta from a Giada De Laurentiis recipe and Nestle Florentine Cookies. 

I love panna cotta and have always wanted to try making it.  Every time I see it on a blog, I think I should try it, yet I never seem to get around to doing so.  I was glad, then, to see that it was chosen for this month's challenge.  Panna cotta is an Italian dessert made by simmering together milk, cream, and sugar, mixed with gelatin.  When set, it has a texture/consistency somewhat thicker than flan and but more delicate than jello.


Giada's recipe uses honey in addition to sugar to sweeten the cream. I found that this was a great way to flavor the panna cotta.  It was subtle, but added some depth to the panna cotta's flavor profile.  It only took a year, but I took this opportunity to use some Bee Raw wild raspberry honey that I won from Blake Makes.  Because honey always takes on the flavors of the flowers used by the bees during the pollination process, this is “a light and floral honey, with a unique raspberry finish intertwined with the aroma of warm cocoa butter." It was wonderful in this panna cotta.

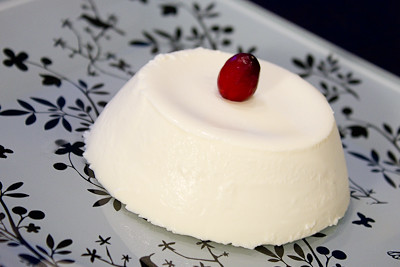
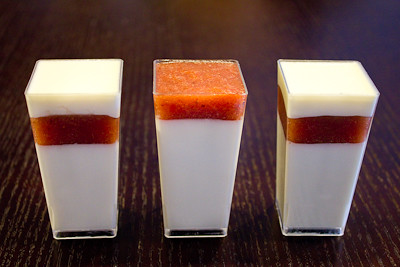
I ended up serving my panna cotta in several different ways.  I layered it with some strawberry gelée in a small drinking glass, put it in some mini dessert glasses, and unmolded one from a small ramekin.  While the small drinking glass size is great for any panna cotta lover, I think it's way too much cream for most folks.  The small ramekin size was good and would probably be the size I would go with for entertaining.  The mini dessert size was my favorite, though.  Just enough to get a taste when you're craving something sweet after dinner, but not too much to where you end up too full and wishing you hadn't had dessert.  If you've never made panna cotta before, I encourage you to try it.  It is really easy and doesn't require a lot of ingredients.  You can dress it up for a holiday or special occasion, or enjoy it with a weeknight dinner.


The florentine cookies were my favorite part of this challenge! They reminded me quite a bit of the maple tuiles I made not long ago, with a more grainy texture due to the addition of oats.  These did not last long in our household, as I kept telling myself they were healthier for me than regular cookies because of the oats ;)  I drizzled some with chocolate, sandwiched some cookies with nutella, and then ate the rest just plain.  They were good and I will definitely be making them again!

Thanks Mallory, for hosting this month's challenge.  I'm glad I finally got to make my own panna cotta, and I'm thrilled to have discovered florentine cookies! Make sure you check out the Daring Bakers' Blogroll to see how everyone else enjoyed these sweet, creamy, and crunchy treats!

Vanilla Panna Cotta
from Giadia de Laurentiis

Ingredients
1 cup (240 ml) whole milk
1 tablespoon (one packet) (15 ml) (7 gm) (¼ oz) unflavored powdered gelatin
3 cups (720 ml) whipping cream (30+% butterfat)
1/3 cup (80 ml) honey
1 tablespoon (15 ml) (15 gm) (½ oz) granulated sugar
pinch of salt

Directions:

1. Pour the milk into a bowl or pot and sprinkle gelatin evenly and thinly over the milk (make sure the bowl/pot is cold by placing the bowl/pot in the refrigerator for a few minutes before you start making the Panna Cotta). Let stand for 5 minutes to soften the gelatin.
2. Pour the milk into the saucepan/pot and place over medium heat on the stove. Heat this mixture until it is hot, but not boiling, about five minutes. (I whisk it a few times at this stage).
3. Next, add the cream, honey, sugar, and pinch of salt. Making sure the mixture doesn't boil, continue to heat and stir occasionally until the sugar and honey have dissolved 5-7 minutes.
4. Remove from heat, allow it to sit for a few minutes to cool slightly. Then pour into the glass or ramekin.
5. Refrigerate at least 6 hours or overnight. Add garnishes and serve.

* Recipe tips:
- When you sprinkle your gelatin over your milk, be sure that it's a thin even layer of gelatin, no clumps. When you heat it up after it's soaked a bit, you'll be less likely to get any lumps of gelatin in the finished product.
- The type of honey you use will lend a subtle flavor the panna cotta so if you have a particular non-clover honey that you enjoy, you should use it in this recipe.
- If you would like to unmold your Panna Cotta from a ramekin simply run a knife along the edge, dip the ramekin in a bit of hot water, then invert onto your serving platter. Viola! Unmolded Panna Cotta. (Be aware though, Panna Cotta is not Jell-o, it's got a much softer texture so it does not keep its shape in the same way as Jell-o)
- If you cannot find powdered gelatin/only have access to sheet gelatin this can be used. Simply follow the directions on the package for conversions.
- Milk substitutes, such as skim, almond, or even coconut milk can be used in the vanilla Panna Cotta in place of the whole milk, but cream is important. In order to get the right texture there needs be a certain percentage of cream fat.


Fruit Gelée
from A Sofa in the Kitchen

Ingredients:
1 cup (240 ml) (230 gm) (8 oz) fruit (strawberries, raspberries, mango, blackberry, etc.) *Note: Certain fruits interact with gelatin and stop it gelling like pineapple and kiwi etc.
3 tablespoons (45 ml) water
1/4 cup (60 ml) (60 gm) (2 oz) granulated sugar
1½ teaspoons (7½ ml) (3½ gm) (1/8 oz) unflavored powdered gelatin

Directions:

1. Sprinkle gelatin over water.
2. Place fruit and sugar in a small saucepan and simmer until sugar has dissolved. Now mix the gelatin into the strawberry mixture and stir until gelatin has dissolved.
3. Remove from heat and allow to cool (close to room temp, again, if you're planning on layering on pouring on top of your Panna Cotta, a hot mixture will also heat up your chilled Panna Cotta).


Florentine Cookies
from Nestle

Ingredients:
2/3 cup (160 ml) (150 gm) (5.3 oz) unsalted butter
2 cups (480 ml) (160 gm) (5 2/3 oz) quick oats
1 cup (240 ml) (230 gm) (8 oz) granulated sugar
2/3 cup (160 ml) (95 gm) (3⅓ oz) plain (all purpose) flour
1/4 cup (60 ml) dark corn syrup
1/4 cup (60 ml) whole milk
1 tsp (5 ml) vanilla extract
pinch of salt
1½ cups (360 ml) (250 gm) (9 oz) dark or milk chocolate

Directions:
Preheat oven to moderately hot 375°F (190°C) (gas mark 5). Prepare your baking sheet with silpat or parchment paper.

Melt butter in a medium saucepan, then remove from the heat.

To the melted butter add oats, sugar, flour, corn syrup, milk, vanilla, and salt. Mix well. Drop a tablespoon full, three inches (75 mm) apart, onto your prepared baking sheet. Flatten slightly with the back of your tablespoon, or use a spatula.

Bake in preheated oven for 6-8 minutes, until cookies are golden brown. Cool completely on the baking sheets.

While the cookies are cooling melt your chocolate until smooth either in the microwave (1 1/2 minutes), or stovetop (in a double boiler, or a bowl that fits atop a saucepan filled with a bit of water, being sure the water doesn't touch the bottom of the bowl).

Peel the cookies from the silpat or parchment and place face down on a wire rack set over a sheet of wax/parchment paper (to keep counters clean).

Spread a tablespoon of chocolate on the bottom/flat side of your cookie, sandwiching another (flat end) cookie atop the chocolate.

This recipe will make about 2 1/2 - 3 dozen sandwiched Florentine cookies. You can also choose not to sandwich yours, in which case, drizzle the tops with chocolate (over your wax paper).

* Recipe tips:
- If you only have old fashioned oats on hand, simply give them a quick whir in your food processor to give them a similar texture to the quick oats.  If you don't have a food processor on hand, you can still use the old fashioned oats in this recipe, you'll just end up with a chewier cookie.
- Nutella also tastes great sandwiched between these cookies!

Tuesday, February 15, 2011

Chocolate Oatmeal Drops (TWD)


This week's Tuesdays with Dorie (TWD) recipe was chosen by Caroline and Claire of Bake with Us: Chocolate Oatmeal Drops. I'm on vacation right now so I'm short on time but I did want to put up a quick post about these!

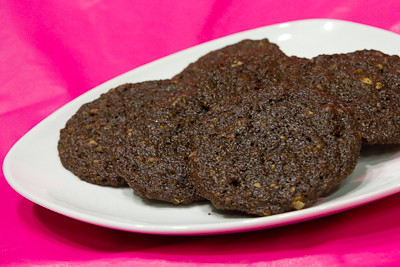
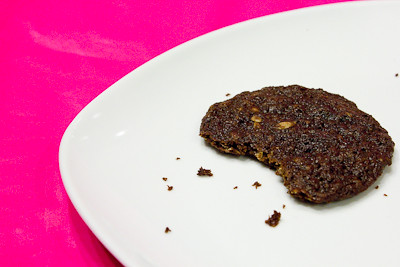
I made these cookies the day before we left for our trip and they were great to munch on during the flight! :) A half batch was more than enough, I'm not sure what you'd do with a full recipe! My cookies did spread quite a bit and ended up rather pathetic looking, but if you follow the advice of Carol from The Bake More and chill your dough for about 20 minutes before scooping it out and baking these, you'll end up with beautiful cookies that are crunchy on the outside with a soft, chewy middle.  Looks aside, I did enjoy these cookies, even though I'm generally not a fan of chocolate cookies.


Thanks Caroline and Claire, for hosting this week.  If you would like the recipe, you can find it here. Also make sure you check out the TWD Blogroll, to see how everyone else enjoyed these chocolatey treats!

* Recipe notes:
- Be sure to chill your dough until it is firm before scooping it out to bake.
- It's hard to tell when these are done because they are so dark, but mine were done closer to 10 minutes (maybe it would have been closer to the recommended 12 minute baking time with the chilled dough?). I'd recommend making a small batch in your oven first to determine the ideal baking time before making a large batch.
- For more recipe tips, click here

Tuesday, January 11, 2011

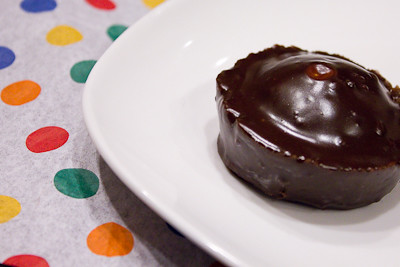
Fluff-Filled Chocolate Madeleines (TWD)

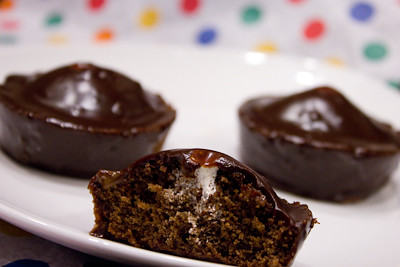
This week's Tuesdays with Dorie (TWD) recipe was chosen by Margo of Effort to Deliciousness: Fluff-Filled Chocolate Madeleines.  I don't have a madeleine pan, but instead of skipping this week's recipe I went ahead and made them in a muffin pan.  I halved the recipe and got six of the cutest looking "madeleines" that didn't quite look like cookies and didn't quite look like muffins either! I did, however, get the characteristic madeleine "humps" and was very excited about that :)

I'm not sure if I overbaked mine - I took them out right at 13 minutes but found them to be just slightly dry.  I was worried about over filling them with fluff and having the tops crack, so I wasn't too aggressive with my filling and ended up with under filled madeleines :(


These were good, but I think I enjoy classic madeleines better than the chocolate version.  (Although these were pretty fantastic drenched in a chocolate ganache glaze!)

Thanks Margo, for hosting this week.  If you would like the recipe, you can find it on Margo's blog. (You should go see how cute her madeleines turned out!) Also make sure you check out the TWD Blogroll, to see how everyone else enjoyed these fluff-filled chocolatey treats!

Oh, and if you haven't already, head on over here to enter my current giveaway!

* Recipe notes:
- I used semisweet chocolate instead of bittersweet chocolate for the glaze.
- I used salted butter in this recipe without any problems.
- My cookies were done in 13 minutes but were a little dry.  Judging from the comment below, they may have been ready as early as 8-9 minutes!
- Wrapped airtight, these glazedookies will keep in the freezer for up to 2 months.
- For more recipe tips, click here

Tuesday, January 4, 2011

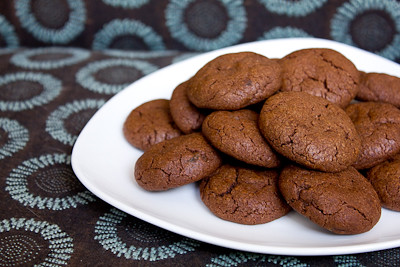
Choco-Ginger Crackles (TWD)

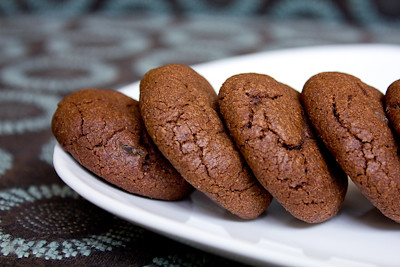
This week's Tuesdays with Dorie (TWD) recipe was chosen by the group's founder, Laurie of Slush, and Jules of Someone's In The Kitchen: Midnight Crackles. These are chocolate cookies spiced with cinnamon and cloves, named for their dark color and the crackles that form along the top when they are done. I decided to go with one of Dorie's variations and made the Choco-ginger Crackles. I replaced the cinnamon and cloves with ground ginger and added candied/crystallized ginger pieces.

These cookies were very easy to make, and I definitely liked biting into the bits of ginger. My husband thought the ginger flavor in these was too strong, but he's not a big ginger person to begin with. I didn't find the ginger flavor overwhelming at all. However, I'm just not a chocolate cookie person in general. So while I enjoyed these cookies I probably won't be making them again.


Thanks Laurie and Jules, for hosting this week.  I can't believe I've been baking along with the group for three years now!!! Looking forward to baking along in 2011 :)

If you would like the recipe, you can find it here. Make sure you check out the TWD Blogroll, to see how everyone else enjoyed these chocolatey treats!

* Recipe notes:
- I used semisweet chocolate instead of bittersweet chocolate.
- I used 1/4 teaspoon of ground ginger in place of the cinnamon and cloves.
- I used 2 tablespoons of diced candied/crystallized ginger in place of the chopped stem ginger that Dorie recommends. 
- I refrigerated my dough for one hour, and still had to let is sit on the counter for a little bit before I was able to roll it into balls.
- My cookies were done in 9-10 minutes.
- Wrapped airtight, these cookies will keep in the freezer for up to 2 months.
- For more recipe tips, click here

Tuesday, December 7, 2010

Translucent Maple Tuiles (TWD)

This week's Tuesdays with Dorie (TWD) recipe was chosen by Hindy of Bubie’s Little Baker: Translucent Maple Tuiles. I was honestly a bit intimidated about these because they look so beautiful and delicate and in the book. When I read the recipe and realized how quick and easy they are, I decided to give them a try.

The dough is simply butter, brown sugar, and maple syrup with just a little bit of flour. It can be made in a matter of minutes but requires a bit of refrigeration so you'll need to plan ahead when making these. Luckily, the dough will also keep in the refrigerator for up to a week, so you can make it ahead of time.


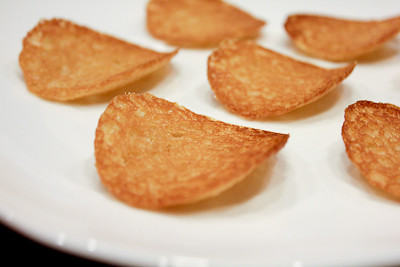
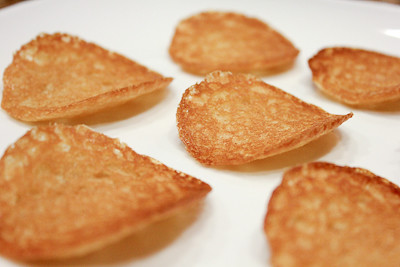
My tuiles did not turn out at all! They look more like pringles than translucent tuiles! I think my idea of a small cherry is a little different from Dorie's so my dough balls were a bit too big. So I ended up with cookies that did not spread as much as they should have but luckily only the appearance was affected because the taste was amazing! These tuiles are like part cookie, part candy.

Thanks Hindy, for hosting this week.  I will definitely be making this again - next time I will be sure to roll out smaller balls of dough so they'll actually get their characteristic honeycomb appearance. If you would like the recipe, you can find it here.

Make sure you check out the TWD Blogroll, to see how these are really supposed to look :)

* Recipe notes:
- Keep a close eye on these to make sure you don't burn them! Mine were done after a short 4-5 minutes in the oven!
- Make sure you make your balls of dough really small, as they spread quite a bit in the oven and a little bit goes a long way.
- For more recipe tips, click here

Monday, September 27, 2010

Decorated Sugar Cookies (DB)


The September 2010 Daring Bakers’ challenge was hosted by Mandy of “What the Fruitcake?!” Mandy challenged everyone to make Decorated Sugar Cookies based on recipes from Peggy Porschen and The Joy of Baking.  The theme for this challenge was "September" - we were to decorate these cookies based on whatever happens in our lives during September.

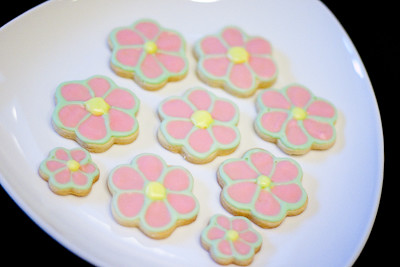
For me, September conjures up fond memories of Hawaii... because it is the month in which we celebrate our wedding anniversary! My husband and I just celebrated our 5 year anniversary this month! Hard to believe that 5 years ago we were in Hawaii, saying our vows.  Now here we are today, getting ready to plan our baby girl's first birthday party! So, in honor of the September theme, I decided to make sugar cookies in the shape of flowers, decorated using our wedding colors of pink and green.
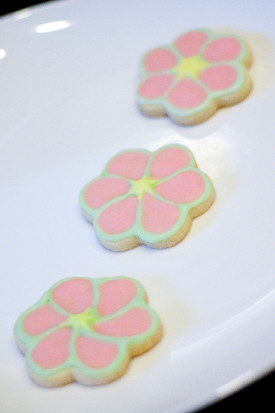

To make these cookies, I first created the outline of the petals in green.  After the green outline was dry, I flooded the petals with pink, allowed the pink icing to dry, and then topped it all with a yellow dot for the center (some of the cookies were decorated with a yellow star in the center instead).  I have also seen similar cookies made where the entire cookie is decorated one color first, and after the icing has dried, the outline of the petals is made with a second color.  That just seems like more work to me, though, because you end up having to outline the petals twice (once before flooding the cookie and then a second time with the contrasting color).

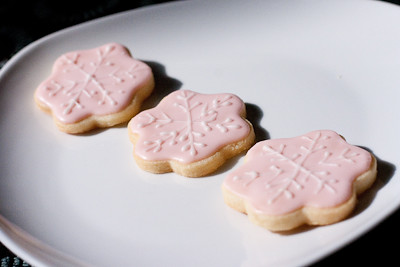
I also made a batch of pink snowflake cookies to send to my friend, Laura, who recently gave birth to her second daughter.  While she was still in her mommy's belly, they called the baby "snowflake."  So I thought it would only be fitting to send her pink snowflake cookies to celebrate her daughter's arrival :)


To make these cookies, I used the same flower cookie cutter I used for the cookies above, but this time I outlined and flooded the entire cookie with pink.  After allowing the icing to dry, I then went back in with white royal icing and created the snowflake pattern on them.

I've been asked a few times for my favorite sugar cookie recipe.  If you like the soft, melt-in-your mouth type of cookie, you should try these (though they are not good for decorating with royal icing you can still do some fun things with them).  These sugar cookies were great for decorating, too, but it's been so long that it's hard for me to compare that recipe to this one.  I may have to make them again, just so I can figure out which one I like better.  Regardless, I found that this sugar cookie dough was very easy to work with.  Even better, it took almost no time to come together (not counting refrigeration time) and was so good that these cookies did not last more than 2 days in our house! (Almost a shame, considering how long it took me to decorate them all!)

Thanks Mandy, for hosting this month's challenge.  I had fun decorating the cookies for our anniversary and you gave me the nudge I needed to finally make the decorated sugar cookies I had already been planning (since June) to send to my friend! I have found that making decorated sugar cookies, while at first may seem intimidating, is actually quite easy (just very time consuming!)

Make sure you check out the Daring Bakers' Blogroll to see how everyone else enjoyed these lovely treats.

Decorated Sugar Cookies

Basic Sugar Cookies:
Makes Approximately 36x 10cm / 4" Cookies
200g / 7oz / ½ cup + 6 Tbsp Unsalted Butter, at room temperature
400g / 14oz / 3 cups + 3 Tbsp All Purpose / Plain Flour
200g / 7oz / 1 cup Caster Sugar / Superfine Sugar
1 Large Egg, lightly beaten
5ml / 1 tsp Vanilla Extract / Or seeds from 1 vanilla bean

Directions
• Cream together the butter, sugar and any flavourings you’re using. Beat until just becoming
creamy in texture.
Tip: Don’t over mix otherwise you’ll incorporate too much air and the cookies will spread during
baking, losing their shape.

• Beat in the egg until well combined, make sure to scrape down the sides of the bowl.
Add the sifted flour and mix on low until a non sticky dough forms.
Tip: I don’t have a stand mixer so I find it easier to switch to dough hooks at this stage to avoid
flour flying everywhere.

• Knead into a ball and divide into 2 or 3 pieces.
• Roll out each portion between parchment paper to a thickness of about 5mm/1/5 inch (0.2 inch)
• Refrigerate for a minimum of 30mins.
Tip: Recipes commonly just wrap the whole ball of dough in clingwrap and then refrigerate it for an
hour or overnight, but by rolling the dough between parchment, this shortens the chilling time and
then it’s also been rolled out while still soft making it easier and quicker.

• Once chilled, peel off parchment and place dough on a lightly floured surface.
• Cut out shapes with cookie cutters or a sharp knife.
• Arrange shapes on parchment lined baking sheets and refrigerate for another 30mins to an hour.
Tip: It’s very important you chill them again otherwise they’ll spread while baking.
• Re-roll scraps and follow the above process until all scraps are used up.
• Preheat oven to 180°C (160°C Fan Assisted) / 350°F / Gas Mark 4.
• Bake until golden around the edges, about 8-15mins depending on the size of the cookies.
Tip: Bake same sized cookies together otherwise mixing smaller with larger cookies could result in
some cookies being baked before others are done.

Tip: Rotate baking sheets half way through baking if your oven bakes unevenly.
• Leave to cool on cooling racks.
• Once completely cooled, decorate as desired.
Tip: If wrapped in tinfoil/cling wrap or kept in airtight containers in a cool place, un-decorated
cookies can last up to a month.


Royal Icing:
315g – 375g / 11oz – 13oz / 2½ - 3 cups Icing / Confectioner’s / Powdered Sugar, unsifted
2 Large Egg Whites
10ml / 2 tsp Lemon Juice
5ml / 1 tsp Almond Extract, optional

Directions
• Beat egg whites with lemon juice until combined.
Tip: It’s important that the bowls/spoons/spatulas and beaters you use are thoroughly cleaned and
grease free.

• Sift the icing sugar to remove lumps and add it to the egg whites.
Tip: I’ve listed 2 amounts of icing sugar, the lesser amount is good for a flooding consistency, and the larger amount is for outlining, but you can add even more for a much thicker consistency good for writing. If you add too much icing sugar or would like to make a thinner consistency, add very small amounts of water, a few drops at a time, until you reach the consistency you need.
• Beat on low until combined and smooth.
• Use immediately or keep in an airtight container.
Tip: Royal Icing starts to harden as soon as it’s in contact with air so make sure to cover containers with plastic wrap while not in use.

Decorating Your Cookies: Flooding
“Flooding” a cookie is a technique used when covering a cookie with Royal Icing.
1. You outline the area you want to flood which helps create a dam
2. Then fill or flood inside the area you’ve outlined

Decorating Your Cookies: What You'll Need
- Piping bags / Parchment Cones / Ziplock Bags
- Elastic bands
- Piping tips (between sizes 1 & 5)
- Couplers
- Glasses (handy for standing your piping bags in)
- Clean clothes, dry & damp
- Toothpicks
- Gel or paste food colouring


Decorating Your Cookies: Royal Icing
The most important thing when it comes to decorating with Royal Icing is the consistency.
There are two ways of flooding your cookies. Some like to do the outline with a thicker icing and then flood with a thinner icing. Some like to use the same icing to do both which saves time and you don’t have to have two different piping bags for each colour you’re using.

The Same Consistency Method
Consistency:
• Mix your royal icing according to the recipe/instructions
• Drag a knife through the surface of the Royal Icing and count to 10
• If the surface becomes smooth between 5 & 10 seconds, the icing is at the correct consistency
Tip: If your icing is too thick, thin it by adding a few drops of water. Mix, do the 10 second test, then if it’s still too thick, add a few more drops of water, repeat, etc.
Tip: To thicken your icing, add small amounts of icing sugar until thick enough for the 10 second test

Two Different Consistencies Method
Consistency:
• Mix your royal icing according to the recipe/instructions.
• Separate into 2 different bowls, one lot of icing for outlining, the other for flooding.
• For the outlining icing, drag a knife through the surface of the Royal Icing.
• If the surface becomes smooth at around 10 seconds, the icing is at the correct consistency.
Tip: If your icing is too thick, thin it by adding a few drops of water. Mix, count to 10 seconds, then if it’s still too thick, add a few more drops of water, repeat, etc.
Tip: To thicken your icing, add small amounts of icing sugar until thick enough for the 10 second test.
• For the flooding/filling icing, drag a knife through the surface of the Royal Icing.
• If the surface becomes smooth at around 3-4 seconds, the icing is at the correct consistency.
Tip: If your icing is too thick, thin it by adding a few drops of water. Mix, count to 3-4 seconds, then if it’s still too thick, add a few more drops of water, repeat, etc.
Tip: To thicken your icing, add small amounts of icing sugar until thick enough for the 3-4 second test.

Colouring
• Separate Royal Icing into separate bowls for each colour you plan on using.
Tip: Make sure to cover the bowls with cling film or a damp cloth to prevent the top from setting and then making lumps
• Using a toothpick, add gel or paste colouring to each bowl and mix thoroughly until desired colour is reached
Tip: You can use liquid food colouring but you might not be able to get the desired strength of colour, liquid colouring will also thin out the icing so you’ll need to add more icing sugar to thicken it again.

Prepping and Filling Your Bag
• Attach your icing tips to the piping bags using couplers
Tip: You don’t need to use a coupler but it makes it easier if you want to change tip sizes
Tip: A size 1 tip is best for doing intricate details. A size 2 tip is good for some details and outlining. Fill or flood with sizes 2 – 5.
Tip: You don’t need a piping bag, you can use a parchment cone or ziplock bag with a tiny bit snipped off the corner. I would however recommend getting a piping set if you don’t have one as it will be much easier and more precise.
• Stand the piping bags in glasses with the tops of the bags folded over the top of the glass.
• Fill your icing bags with each coloured icing.
• Tie the ends of the piping bags with elastic bands.

Decorating: Outlining
• Fit the piping bag with a size 2 or 3 tip.
Tip: Or snip a very small bit of the corner off of a parchment cone or Ziploc bag
• Hold the piping bag at a 45 degree angle above the cookie where you want to start the outline.
• Gently squeeze the piping bag and start moving in the direction you want to outline the cookie.
• Start lifting the piping bag away from the cookie so that the flow of icing falls onto the cookie, making it an even and neater outline.
• As you start to reach the beginning of the outline, bring the piping tip closer to the surface of the cookie to meet the start of the icing outline.
Tip: If you’re doing an intricate cookie, like a snow flake, you won’t be able to lift the tip as far away from the cookie.
• If you’re doing a different colour border, eg a black border, let the outline dry before flooding. If using the same colour for the outline as you’re flooding with, begin flooding after doing the outline.

Decorating: Flooding
• Fit the piping bag with a size 2-5 tip, the bigger the area being filled, the bigger the tip.
Tip: Or cut slightly more off the corner of a Ziploc bag to create a slightly larger opening.
• Quickly zigzag back and forth over the area you want to fill.
Tip: You need to be quick when flooding the cookie so don’t worry too much if it’s not filled in neatly.
• Using a toothpick or clean paintbrush, push the icing around into the gaps that are still remaining.
• Either pick up the cookie and tip it from side to side to even out the filling, or lightly bang the cookie down on your kitchen counter.

Decorating: Melding Colours
• If you would like to add lines or dots to the base colour that you flooded the cookie with so that they meld and dry as a smooth surface, you need to add the lines/dots/patterns as quickly as possible after flooding and smoothing the surface of the cookie.
Tip: Make sure to have all the colours you’re planning on using ready and close by so that you can switch between colours quickly
• Simply pipe other colours onto the flooded surface in patterns or lines which you can either leave as that or then drag a toothpick through to make marbling patterns.

Decorating: On top of flooding
• If you’d like to do other patterns/outlines or writing on top of the flooded surface so that they are raised above the flooded background, simply allow the icing to dry, preferably over night.
• Fit the piping bag with tip sizes 1-3.
• Pipe patterns or write on top of the dry icing
Tip: For writing, the consistency of your icing should be thicker rather than thinner, drag a knife through your icing and when the surface smoothes around 12-15 seconds, the consistency is correct.
 
Packaging and Storing
• Once fully decorated, allow cookies to dry for 24 hours in a cool and dry area.
• Stack cookies in an airtight container, from largest cookies at the bottom, to smallest and more intricate at the top, with parchment or wax free paper in between the layers.
• Store in a cool and dry area with the container’s lid firmly sealed.
• Will last for about a month if stored this way.

General Baking Tips
• When measuring by volume (cup) always shift/aerate your flour/icing sugar in the container/bag before measuring because it settles as it sits and so you end up with more flour/icing sugar in your cup. I do this by moving the ingredient around with a spoon, whisk or fork.
• When measuring flour or icing sugar by volume (cup) never scoop the flour/icing sugar up with the cup otherwise you compress the contents and this can make a big difference in the amount you’re using. Rather, spoon the ingredient into the cup until level with the top.
• When measuring baking powder or baking soda, always level off the top of the measuring spoon with something flat (like the back of a knife) as these ingredients need to be accurately measured.
• When mixing your ingredients, always follow the recipe instructions, especially when it comes to beating in eggs and flour, so if it specifies to mix until just combined or to beat for 4 minutes, follow the instructions to get best results.
• Unless otherwise specified, always have your ingredients at room temperature.
• It’s always best to invest in an oven thermometer so that you know exactly the temperature you’re baking at then you can also find out if you have cold or hot spots in your oven.
• If you need to rotate your trays midst baking, always allow at least half the baking time to lapse before opening your oven to move baking trays around, this allows time for your baked goods to form a good structure so that they won’t flop.

General Royal Icing Tips
• Keep a damp cloth handy while decorating your cookies so that if you’re switching between different icing bags, you can keep the tips covered with the damp cloth so that the icing doesn’t dry and clog them.
• If your icing tips do clog, use a toothpick or pin to unclog them.
• Always pipe a little bit of royal icing onto a board/paper towel before you begin to make sure there are no air bubbles.
• Remember to always cover bowls containing royal icing wither cling wrap, a damp cloth or sealable lid so that the surface doesn’t dry.
• Don’t store anything decorated with royal icing in the fridge otherwise the royal icing will
become tacky.

Recipe Source
Basic Sugar Cookie recipe adapted from Peggy Porschen
Royal Icing recipe adapted from The Joy of Baking

Tuesday, September 7, 2010

Peanut Butter Crisscrosses (TWD)

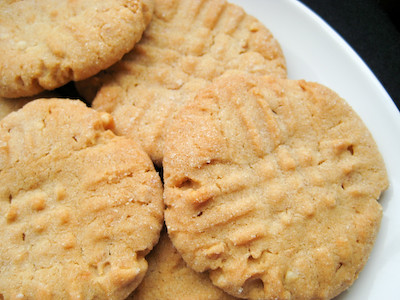
This week's Tuesdays with Dorie (TWD) recipe was chosen by Jasmine of Jasmine Cuisine: Peanut Butter Crisscrosses.  I actually made these almost two years ago, during the holiday season of 2008.  Hard to believe that it's really been that long - seems like yesterday that I made them.  If you'd like to know what I thought of these cookies, you can read about them here.

Be sure to come back later this week, as I'll be sharing another ice cream recipe as we say goodbye to summer! And in the meantime, be sure to check out the delicious (and super easy) crepes I just posted about.

Tuesday, August 3, 2010

Gingered Carrot Cookies (TWD)


This week's Tuesdays with Dorie (TWD) recipe was chosen by Natalia of gatti fili e farina : Gingered Carrot Cookies.  I actually almost skipped this week because Dorie describes these cookies as tasting almost like scones and I'm not a big scone fan.  I'm so glad I decided to give it a go, though, because these cookies are fabulous!

When Dorie first created these, she set out to make a cookie that tasted like carrot cake.  They definitely don't taste like carrot cake at all, but that doesn't mean that they aren't good.  They are delicious little morsels! I'm not quite sure if I would consider these scone-like, but they are definitely cakey cookies.  All the add-ins - the carrots, coconut, and raisins (I omitted the nuts) - gave these cookies a nice chewy texture.  The ginger gave these cookies the perfect little boost too!

Thanks Natalia, for hosting this week. If you would like the recipe, you can find it here. Make sure you check out the TWD Blogroll, to see how everyone else enjoyed these sweet treats!

Sunday, June 13, 2010

Chocolate Orange Macaroons (SMS)


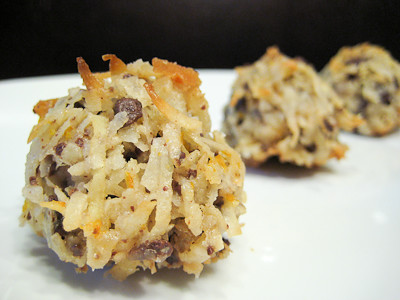
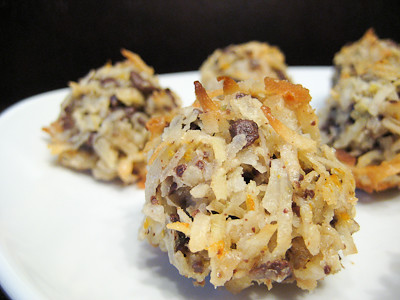
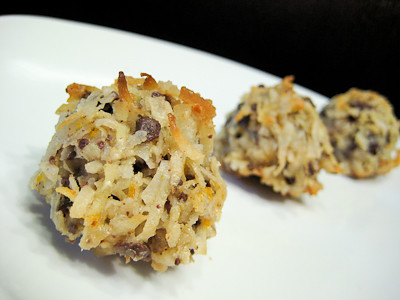
This week's Sweet Melissa Sundays (SMS) recipe was chosen by Ellen of Blue Tree Green Heart: Chocolate Orange Macaroons. I love coconut, and so does my husband, so making this recipe was a no brainer. I also love chocolate infused with orange. Plus, it doesn't hurt that this recipe only takes a few minutes to come together - a bonus these days for this busy mommy!


The recipe is short and sweet. Rub the zest of an orange with some shredded coconut, then add some sugar and chopped chocolate, and mix with egg whites. Scoop and then bake! That's it! The only thing I did differently was that I chose to rub the sugar in with the zest as well, instead of just mixing it with the chocolate. I figured that would give the macaroons an even stronger orange flavor.


These came out perfect! Crisp on the outside, chewy in the middle, with bits of chocolate and plenty of orange flavor.  Some found these to be a bit too sweet, and while you could probably decrease the amount of sugar in them to cut back on some calories, I didn't find them too sweet at all.  I'll definitely be making these again and again! They're a great way to use up egg whites after all the ice cream I've been making this summer and much more fun than angel food cake.

Thanks Ellen, for hosting this week.  If you would like the recipe, you can find it here. Make sure you check out the Sweet Melissa Sundays Blog Roll to see how everyone else enjoyed these delicious treats.

* Recipe notes:
- I used semisweet chocolate chips in this recipe instead of bar chocolate.
- If you tend to prefer cookies that aren't super sweet, use unsweetened coconut or decrease the amount of sugar in the recipe to one half cup.

- I used a medium cookie scoop and got about 36 cookies, not 24 from the recipe.
- Keep a close eye on these to prevent them from burning - mine were done a few minutes early, around 22 minutes.
- For more tips, click here.

Sunday, May 23, 2010

Flourless Peanut Butter Cookies


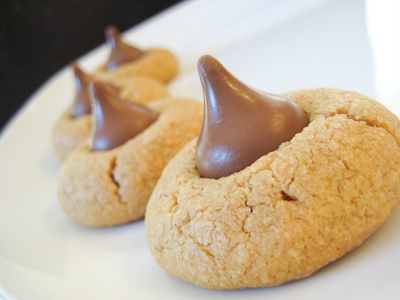
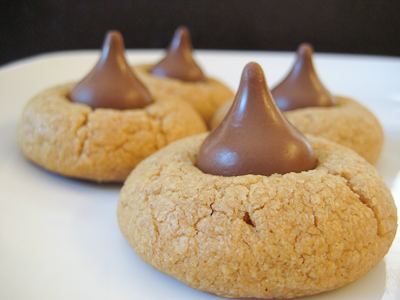
I love peanut butter cookies. Some people like the soft and chewy ones, others like the crunchy and crumbly ones. I love them all! When I came across this particular peanut butter cookie, I fell in love and immediately asked for the recipe. Turns out it was from some newspaper clipping and while I would love to give credit to whomever developed these little morsels of heaven, I have no idea where it came from.


What’s unique about these cookies is that they contain no flour! Just peanut butter, eggs, and sugar. Yep, that’s it. Easy peasy. They are very delicate cookies and will crumble if you’re not careful transferring from the cookie sheet to the cooling rack, but when you put one in your mouth and it almost melts in your mouth, you will know why I love these cookies so much. So, give them a try the next time you get a peanut butter craving, I promise you won’t be disappointed! (I've also made them without the kisses and they are still good so if you don't like chocolate (gasp) don't let that stop you from trying these.)

Also, don't forget to enter my giveaway while you're here :)


Flourless Peanut Butter Cookies
recipe source unknown

1 Jar (18 oz) creamy peanut butter
1-1/4 cups granulated sugar
2 large eggs
48 milk chocolate kisses (a 9 ounce package contains 53)

Heat oven to 350 F. Have cookie sheets ready. With a wooden spoon stir peanut butter, sugar, eggs in a medium size bowl until thoroughly blended. (Dough will be slightly sticky but don't worry, you'll still be able to roll it out.)

With floured hands, roll level measuring tablespoonfuls into 1-1/4 inch balls. Place 1-1/2 inches apart on ungreased cookie sheets. Bake 12 to 14 minutes until cookies look dry with tops crackled. Remove from oven and immediately press a chocolate kiss in center of each. Cool on cookie sheet 1 to 2 minutes, then
remove to wire racks to cool completely.

Yield: 48 cookies

Per cookie: 111
cal, 3 g protein, 10 g carb, 7 g fat, 12 mg cholesterol, 71 mg sodium.