Showing posts with label sweet treats. Show all posts
Sunday, December 23, 2012

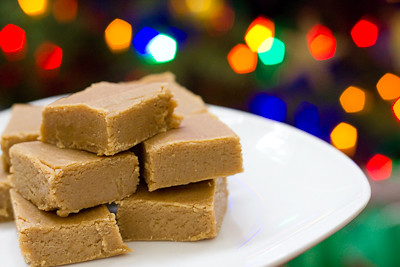
Maple Pumpkin Fudge

I love maple fudge and originally went in search of a maple fudge recipe when I stumbled upon this maple pumpkin fudge.  It's the perfect fall/holiday recipe and seems fairly fool proof - I actually let it get a bit too hot (up to 239 degrees) and it still turned out just fine. 

Just imagine pumpkin pie filling with maple syrup in it, in convenient bite size servings... that is what this fudge tastes like! The maple flavor is certainly there; I'd say it's a good blend of maple of pumpkin... but if you want a predominantly maple fudge with pumpkin undertones, then I would suggest adding maple extract for a stronger maple flavor.

So if you're doing some last minute baking in the days leading up to Christmas, try this unique fudge recipe and let me know what you think.  I'd still like to find a good plain old maple fudge recipe, too, so if you've got one, please leave me a link in the comments section below!
 
Maple Pumpkin Fudge
from Sugar Crafter
    1 1/2 cups granulated sugar
    1 1/2 cups packed light brown sugar
    1 1/2 sticks unsalted butter, cut into small pieces
    2/3 cup evaporated milk
    2/3 cup pureed pumpkin
    1 tsp cinnamon
    1/4 tsp nutmeg
    1/8 tsp cloves
    2 cups white chocolate chips (one 12 ounce bag)
    1/2 lb marshmallows or marshmallow crème
    3 Tbsp maple syrup

Line a 12×8″ baking dish with foil, letting it hang over the edges. In a large sauce pan, whisk together the sugars, butter, evaporated milk, pumpkin, and spices.

Bring to a foil over medium heat, stirring constantly. Continue boiling for 10-12 minutes or until the candy thermometer registers 235 degrees Fahrenheit – soft ball stage (soft ball stage occurs when you drop some of the mixture into a bowl of cold water, and it forms a “soft ball” when it cools and is removed from the water).

Stir in the white chocolate chips first, and then the marshmallows or marshmallow crème and maple syrup.

Stir until melted, and then immediately pour into the prepared pan.

Let cool on a wire rack for 2 hours or until completely cooled. To cut, lift the foil from the ends of the dish. Cut the fudge into 1″ squares. Store in the refrigerator or freezer.

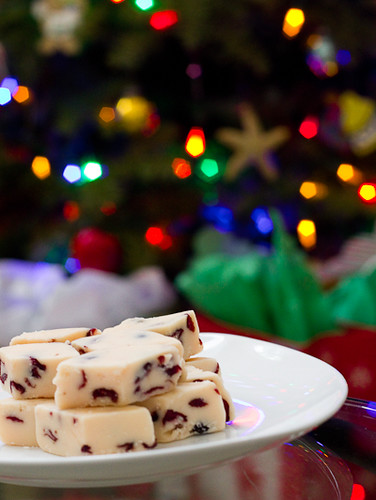
In The Pink White Chocolate Cranberry Fudge

Ok, so I wasn't able to finish posting all of my holiday posts yesterday before the kids started needing my attention.  Today I'll finish off the series with some fudge recipes.  What holiday baking list would be complete without fudge? I love fudge.  Every variety of it - chocolate, peanut butter, chocolate with peanut butter, and maple.  This year I tried two new flavors of fudge: White chocolate cranberry and maple pumpkin (the latter will be my next post).  This white chocolate fudge recipe is nice because it doesn't require the use of a candy thermometer.

I actually made this pink white chocolate cranberry fudge the first time in November for my daughter's birthday party.  I needed both pink and purple desserts and stumbled upon this fudge recipe while browsing the web.  I love white chocolate (even though my husband gets on me for it not being "real" chocolate), so I knew I'd love this fudge.  I omitted the nuts because I never put nuts in my baked goods, but the cranberries were a welcome addition.  The original recipe calls for cherries, but I did not have those on hand.  The dried cranberries work well as a substitute, as they are both tart and sweet.  Everyone who tried this at the party loved it, so if you're looking for something a little bit different this holiday season, I'd encourage you to try this fudge.

In The Pink White Chocolate Cranberry (Almond) Fudge
adapted from Imperial Sugar

2 cups Imperial Sugar® Extra Fine Granulated Sugar
2/3 cup heavy cream
1/2 cup butter
3 cups mini marshmallows
2 cups (one 12 ounce bag) white chocolate chips
1 cup dried cranberries, chopped
3-4 drops red food coloring
1/2 cup chopped slivered almonds, toasted (I omitted these)

Line an 8x8x2-inch baking pan with foil (I used a 9x9 inch pan). Butter foil and set aside.

Combine sugar, cream and butter in a heavy 2-quart saucepan. Cook and stir over low heat until blended. Increase heat to medium. Bring to a boil.  Boil for 5 minutes, stirring constantly.

Remove from heat and stir in marshmallows and white chocolate chips. Stir until chocolate is melted. Stir in cranberries, enough food coloring to turn fudge pink (3-4 drops) and nuts, mixing until well blended.

Spoon into prepared pan. Refrigerate until firm. Cut into squares.  Store tightly covered in refrigerator for up to a month.

Saturday, December 22, 2012

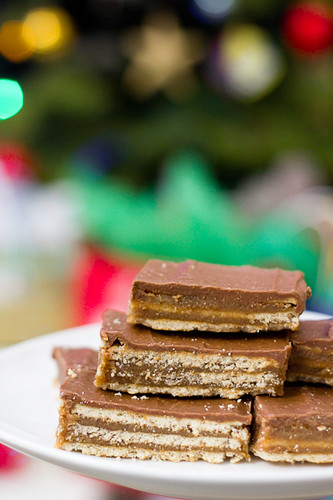
Crunchers

Have you tried these crunchers yet? I've seen variations of this recipe, or similar recipes, made with saltine crackers as well.  I've been seeing them on various blogs and on pinterest for a few years now.  Every time I see them, I've said I want to try them but I've never gotten around to it because I never have butterscotch chips on hand in my pantry.  I love the salty and sweet combination (chocolate covered pretzels are among my favorite!) and when you're baking several different things for the holidays, it's nice to have a few recipes that are simple and quick to prepare.

This recipe is basically club crackers with layers of caramel-type filling in between, topped with a chocolate peanut butter layer.  The best part - they can be made in under 15 minutes.

The best way to describe these "crunchers" would be to compare them to peanut butter Twix.  I actually used multi-grain club crackers because I sent my mom out to get them for me and she didn't know what I'd be using them for so she got the multi-grain variety.  They tasted just fine and I suppose the "multi-grain" aspect might make you feel a little less guilty about eating these ;)

My only issue with them is that they are best when kept refrigerated.  After they are taken out of the refrigerator, the chocolate layer on top starts to get very soft and easily smudged.  So, these wouldn't be the best goodies to ship out if you're looking to mail some holiday goodies.  Don't let that stop you from trying these though because for such minimal effort, these are really good!

Crunchers
from Gonna Want Seconds

    80 - Club Crackers
    1 Cup - Butter
    2 Cups - Graham Cracker Crumbs
    1 Cup - Light Brown Sugar, Firmly Packed
    1/2 Cup - Whole Milk (I used 2%)
    1/3 Cup - Sugar
    2/3 Cup - Creamy Peanut Butter
    1/2 Cup - Semi Sweet Chocolate Chips
    1/2 Cup - Butterscotch Chips

Line a 9x13-inch baking pan with foil, leaving an extension of foil on either end.  Line the foil with 1 layer of club crackers, cutting to fit if necessary.

In a heavy bottom large saucepan, melt butter over medium heat. Add graham cracker crumbs, brown sugar, milk and sugar. Bring to a boil and boil for 5 minutes, stirring constantly. Moderate heat and reduce as needed so mixture doesn't stick to the bottom and mixture doesn't boil too hard (this can cause butter to separate). Remove from heat and spread half of butter mixture evenly over crackers. Place another single layer of crackers evenly over butter mixture, cutting to fit if necessary. Spread remaining butter mixture evenly over crackers. Top evenly with remaining crackers.

In a small saucepan, combine peanut butter, chocolate chips, and butterscotch chips. Melt over medium-low heat, stirring constantly. Spread evenly over top of crackers. Cover, and chill for at least 1 hour. Lift foil overhang and remove bars from pan. Cut into bars. Store in the refrigerator.

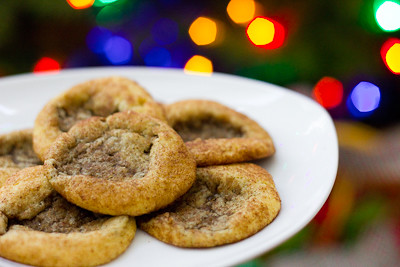
Pumpkin Gingerdoodle Cookies

One of the first food blogs I ever started following was Peabody's blog, Culinary Concoctions by Peabody.  Everything she makes looks amazing - I truly wish I was one of her friends so I could have the pleasure of eating all of it ;) So, when I went in search of recipes to try this holiday season, I knew that I could surely find something wonderful to make from there.

And I was right.  After scrolling through a few posts, I stumbled upon these pumpkin gingerdoodle cookies.  Part pumpkin snickerdoodle and part gingersnap cookie, these cookies combine some of everyone's favorite holiday flavors.  My husband walked into the kitchen and saw me pulling these out of the oven and asked, "Can I have a snickerdoodle?" I informed him they weren't snickerdoodles but pumpkin gingerdoodles and he was happy to try them.  He quickly proclaimed, "These are way better than regular snickerdoodles."

I only had two issues with these cookies.  The first issue was really a non-issue: I had way more pumpkin snickerdoodle dough than gingersnap dough.  So in the end, I made some plain pumpkin snickerdoodle cookies as well (all were eagerly consumed regardless). 

The second issue was in the consistency of the cookies.  The pumpkin snickerdoodle dough puffed up into a wonderful moist, slightly cakey cookie.  The gingersnap dough, on the other hand, puffed up but deflated after I pulled it out of the oven.  So, my cookies looked lopsided when I placed the cookie doughs side by side.  Next I tried a batch with the pumpkin snickerdoodle dough on the bottom and the gingersnap dough on top.  Those turned out okay, but they weren't very aesthetically pleasing.  So finally I made a batch with the gingersnap dough on the bottom and the pumpkin snickerdoodle dough on top and those cookies turned out to the look the best.  I'm not sure how Peabody got her cookies to look the way that she did, but the cookies you see in the photo at the top of this blog post were the best that I could do. 

Regardless of how these cookies look, they are amazing.  We couldn't stop eating them in our household and almost didn't have enough to give out to family and friends because we wanted them all to ourselves! So, if you're going to only try one new recipe out this holiday season, I encourage you to make it this one - I promise you won't regret it!

Pumpkin Gingerdoodles
from Culinary Concoctions by Peabody


Pumpkin Snickerdoodle Dough

1 1/2 cups granulated sugar
1 cup unsalted butter
2 eggs
¾ cup pumpkin puree
3 cups all-purpose flour
2 tsp. cream of tartar
1 tsp. baking soda
1/4 tsp. salt

for rolling the cookies in: (I had to double this)
1/4 cup granulated sugar
2 tsp. ground cinnamon

Mix 1 1/2 cups sugar, the butter, pumpkin, and eggs in a stand mixer with paddle attachment.  (It will appear curdled, but don't worry it will all come together in the next step.)

Add in flour, cream of tartar, baking soda and salt and mix on low until fully combined. Set aside.

Gingersnap Dough

3/4 cup butter
1 cup granulated sugar
1/4 cup molasses
1 egg
2 cups all-purpose flour
2 teaspoons baking soda
1/4 teaspoon salt
1 teaspoon cinnamon
1 teaspoon cloves
1 teaspoon ginger

Combine cinnamon and sugar in a small bowl and set aside for rolling dough in.

Cream together butter and sugar. Add molasses and egg and continue beating. Add flour, baking soda, salt, cinnamon, cloves, and ginger and mix until combined, scraping down the sides of the bowl as needed.

Preheat oven to 350°F. Lightly grease baking sheets with no-stick cooking spray and set aside.

(I found that it's best to refrigerate both cookie doughs for at least one hour before assembly and baking.)

Roll a small amount of gingersnap dough into a ball and a small amount of snickerdoodle dough and place them together and gently roll or squeeze together.

Roll in cinnamon sugar.

Place on baking sheets and bake for 9-11 minutes. Remove from oven and allow to cool on baking sheets for 2 minutes before moving to cooling racks.

Magic Middle Peanut Butter Cookies

Wow, has it been a crazy few months. I can't believe that it's been over three months since my last blog post?! I thought that with my daughter starting school in September, I'd have all this extra time to bake and blog again.  However, as many moms out there know - your time without the kids is rare - so I found myself running a million different errands every time she was in school and I was never home to do any baking. I kept thinking to myself that I'd get around to another post "soon" and then before I knew it, I was busy getting ready for my daughter's third birthday party and then a few days later I had my baby girl! Life's been crazy with a newborn and a three year old, to say the least.  For those who have been following my blog for some time and would like to see some pictures of the new little one, you can visit our photographer's blog here. I'm so blessed to be celebrating this holiday with two beautiful little girls that are the light of my life.

And without further ado, I'm hoping to post a flurry of blog posts today to make up for my lack of blogging over the past few months (hopefully the kids will nap long enough for me to get these all up today!).  For those who are still looking for some last minute inspiration for their holiday baking, look no further :) I've got some great recipes that I've tried out this year, and of course there are the tried and true recipes from years past as well.

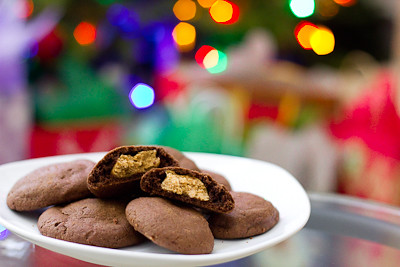
Let's start off this series of posts with one of my favorite combinations - peanut butter and chocolate.  You really can't go wrong with anything made with these two ingredients! These cookies are impressive yet simple to make.  With chocolate cookies it can be difficult to tell sometimes when the cookies are done baking because they do not turn golden brown like other cookies do.  You'll want to watch these cookies closely - when they just start to barely crack you should take them out of the oven.  They'll continue to bake just a little bit more while they're cooling on your cookie sheet.  If you over bake them, they'll still be good, but a bit on the dry side. 

Magic Middle Peanut Butter Cookies
from Gonna Want Seconds

Cookie:
    1 1/2 Cups - All Purpose Flour
    1/2 Cup - Unsweetened Cocoa Powder
    1/2 Teaspoon - Baking Soda
    1/2 Cup - Sugar
    1/2 Cup - Brown Sugar, Packed
    1/2 Cup - Unsalted Butter, at Room Temperature
    1/4 Cup - Peanut Butter
    1 Teaspoon - Vanilla Extract
    1 - Large Egg

Filling:
    3/4 Cup - Powdered Sugar
    3/4 Cup - Peanut Butter

Preheat oven to 375 degrees.

Make Cookies: In a small  bowl, blend flour, cocoa, and baking soda.

In a large bowl beat white sugar, brown sugar, butter and 1/4 cup peanut butter, until light and fluffy.  Add vanilla and egg, beat until blended.  Stir in flour mixture until blended.  Set aside.

Make the filling: Combine the confectioners sugar and 3/4 cup peanut butter.  Beat well with electric mixer until mixture comes together.

Roll filling into 30 1 inch balls. Form exterior part of cookie by sectioning dough into approximately 1 tablespoon pieces and then shaping the exterior part of cookie around filling balls.  Cover the filling completely.  Place 2 inches apart on an ungreased cookie sheet.  Flatten with a glass dipped in sugar.

Bake at 375 degrees for 7-9 minutes. Allow to cool on cookie sheet for 10 minutes then remove to a cooling rack and cool completely.

Tuesday, September 4, 2012

Nectarine Upside-Down Chiffon Cake (TWD)


This week's Tuesdays with Dorie: Baking with Julia recipe was hosted by Marlise of The Double Trouble Kitchen and Susan of The Little French Bakery: Nectarine Upside-Down Chiffon Cake.  It's been a long, long, time since I've posted for this group - I'm sorry :( I have just been so busy, and on top of that I'm six months pregnant and turning on the oven when it is 100+ degrees outside just hasn't been very appealing.  The good news, however, is that my baby girl (who is not so much a baby anymore) just started school this week so that means this mama is going to have a lot more time to bake each week! So, you should start to see blog posts pick up a little more at least.

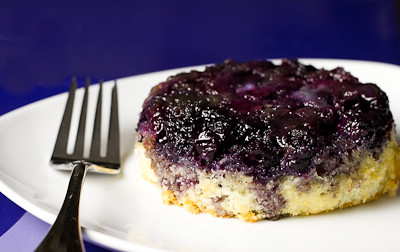
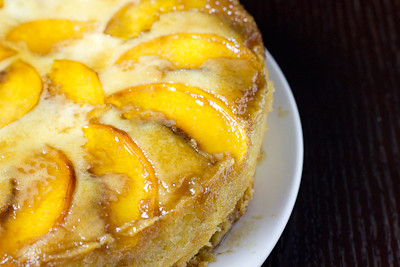
I didn't have a pan large enough for this cake, so I made one large nectarine and peach upside-down chiffon cake and one mini blueberry upside-down chiffon cake.  After reading some of the comments on the weekly P&Q, I decided to skip the streusel and made sure to bake my cake for a few extra minutes.  I really think the longer baking time has to do with whether or not the cake is baked on a jelly roll pan.  I did not bake mine on one and I think it only took an extra 3-5 minutes to bake.  I did, however, cover the bottom of my pans with foil to catch the butter drippings, which was good because there was quite a bit.
The blueberry cake was delicious.  The chiffon was light and airy, as it should be.  It's a nice contrast to the denser, more traditional pineapple upside down cake.  I'm not sure how the nectarine and peach cake turned out because that one will be going with my husband to work tomorrow, but I imagine it's just as good as the blueberry cake.
Thanks to Marlise and Susan for hosting; you can find the recipe on their blogs here and here.  Make sure you check here, too, to see what everyone else thought of this sweet, end of summer treat.

* Recipe notes:
- If you bake your cake on a jelly roll pan, be sure to add at least another 10 minutes of baking time to your cake.  Definitely don't forget to wrap the bottom of your pan in foil, or you'll end up with a big mess on the bottom of your oven.
- Frozen blueberries work great with this recipe.  Do not thaw before baking.
- For more recipe notes, check here.

Tuesday, August 28, 2012

Filled Pate a Choux Swans and Turtles (DB)

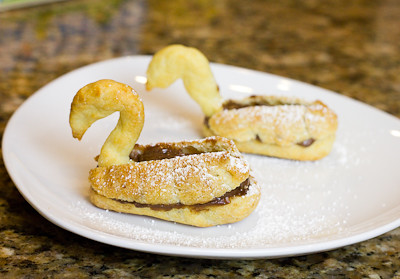
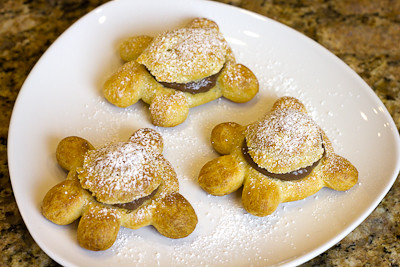
Kat of The Bobwhites was our August 2012 Daring Baker hostess who inspired us to have fun in creating pate a choux shapes, filled with crème patisserie or Chantilly cream. We were encouraged to create swans or any shape we wanted and to go crazy with filling flavors allowing our creativity to go wild!

I've made pate a choux several times in the past before, but it had been quite some time.  As such, I didn't catch that a key piece of information was missing from the recipe until my dough turned out like soup! :(  The recipe states that you are to melt the butter in water, milk, and salt.  Then remove the saucepan from the heat and add the flour.  Well, it doesn't say if you're to melt the butter over low, medium, or high heat so I did it over medium heat.  Unfortunately, if your liquid isn't boiling when you add the flour, it won't cook the flour and you end up with a soupy mess instead of a beautiful pate a choux dough! So, I've added those notes to the recipe so you can avoid that fatal mistake if you make this recipe.
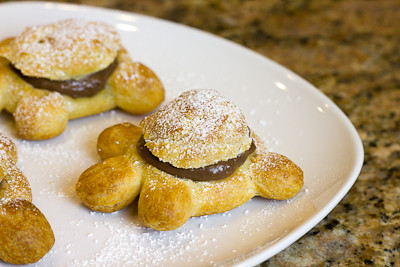
Otherwise, everything went off without a hitch.  I made a few swans and then loved the idea of making some turtles as another Daring Baker had posted in our private forum.  I filled my pastries with chocolate pastry cream and they were delicious. 
Thanks Kat, for hosting this month's challenge.  You'll find the recipes below.  Also be sure to check out the Daring Bakers' Blogroll to see all the other wonderful creations that were made!

Pate a choux 

(cannot be doubled)

Recipe source: Good Housekeeping Illustrated Guide to Cooking, 1980 edition


Ingredients
½ cup (120 ml) (115 gm) (4 oz) butter
1 cup (240 ml) water
¼ teaspoon (1½ gm) salt
1 cup (240 ml) (140 gm) (5 oz) all-purpose flour
4 large eggs

Directions:
  1. Line at least two baking sheets with silicone mats or parchment paper, or grease pans well.
  2. Preheat oven to moderately hot 375°F/190°C/gas mark 5 .
  3. In a small saucepot, combine butter, water, and salt. Heat over until butter melts (and liquid has come to a full rolling boil), then remove from stove.
  4. Add flour all at once and beat, beat, beat the mixture until the dough pulls away from the sides of the pot.
  5. Add one egg, and beat until well combined. Add remaining eggs individually, beating vigorously after each addition. Resulting mixture should be somewhat glossy, very smooth, and somewhat thick.
  6. Using a ¼” (6 mm) tip on a pastry bag, pipe out about 36 swan heads. You’re aiming for something between a numeral 2 and a question mark, with a little beak if you’re skilled and/or lucky.
  7. Remove the tip from the bag and pipe out 36 swan bodies. These will be about 1.5” (40 mm) long, and about 1” (25 mm) wide. One end should be a bit narrower than the other.
  8. Bake the heads and bodies until golden and puffy. The heads will be done a few minutes before the bodies, so keep a close eye on the baking process.
  9. Remove the pastries to a cooling rack, and let cool completely before filling.
Assembly
  1. Take a swan body and use a very sharp knife to cut off the top 1/3rd to ½.
  2. Cut the removed top down the center to make two wings.
  3. Dollop a bit of filling into the body, insert head, and then add wings.
  4. Your first attempt will probably not look like much, but the more you make, the more your bevy of swans will become a beautiful work of swan art.

Vanilla Crème Patissiere

(Half Batch)
Ingredients:
1 cup (225 ml.) whole milk
2 Tbsp. cornstarch
6 Tbsp. (100 g.) sugar
1 large egg
2 large egg yolks
2 Tbsp. (30 g.) unsalted butter
1 Tsp. Vanilla
Directions:
  1. Dissolve cornstarch in ¼ cup of milk. Combine the remaining milk with the sugar in a saucepan; bring to boil; remove from heat.
  2. Beat the whole egg, then the yolks into the cornstarch mixture. Pour 1/3 of boiling milk into the egg mixture, whisking constantly so that the eggs do not begin to cook.
  3. Return the remaining milk to boil. Pour in the hot egg mixture in a stream, continuing whisking.
  4. Continue whisking (this is important – you do not want the eggs to solidify/cook) until the cream thickens and comes to a boil. Remove from heat and beat in the butter and vanilla.
  5. Pour cream into a stainless steel/ceramic bowl. Press plastic wrap firmly against the surface. Chill immediately and until ready to use.

Chocolate Pastry Cream

(Half Batch Recipe):
Bring ¼ cup (about 50 cl.) milk to a boil in a small pan; remove from heat and add in 3 ounces (about 80 g.) semisweet chocolate, finely chopped, and mix until smooth. Whisk into pastry cream when you add the butter and vanilla.

Coffee Pastry Cream

(Half Batch recipe)
Dissolve 1 ½ teaspoons instant espresso powder in 1 ½ teaspoons boiling water. Whisk into pastry cream with butter and vanilla.

Chantilly Cream

1 cup (225 ml.) cold heavy cream
2 tablespoons confectioners' (powdered) sugar
Chill medium mixing bowl and whisk in freezer for 10 minutes before beginning. In chilled bowl, whisk cream until it begins to foam and thicken. Add sugar and continue to whisk just until soft peaks form. Do not over-whip.

Freezing/Storage Instructions/Tips: While the crème filling stores well when covered tightly and kept in a refrigerator, the baked choux does not store well at all, especially after being filled. Therefore, you must eat these the day they are made. This won’t be a problem, though, I assure you.

Tuesday, July 31, 2012

Blueberry Nectarine Pie (TWD)


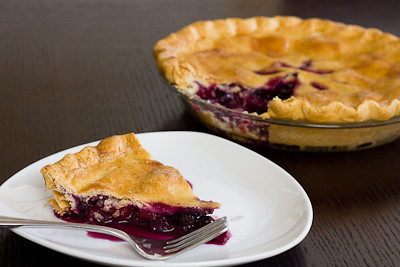
This week's Tuesdays with Dorie: Baking with Julia recipe was hosted by Hilary of Manchego's Kitchen and Liz of That Skinny Chick Can Bake: Blueberry Nectarine Pie.  This pie is about as summer as you can get.  I love taking advantage of fresh fruits that are in season. 

In this recipe, the blueberries and nectarines get cooked down in a little bit of lime zest and brown sugar and then they're tossed in some fresh lime juice with more fresh blueberries and nectarines.  The lime is what really brings out the flavors in the fruit.  This pie was delicious, and the only thing I'd probably change is to double the fruit next time, as my pie came out a bit thin.
Thanks to Hilary and Liz for hosting; you can find the recipe on their blogs here and here.  Make sure you check here, too, to see what everyone else thought of this fruit-filled summer treat.

* Recipe notes:
- You'll definitely want to use a pie crust shield or cover the edges of your pie with some foil about half way through the baking process to prevent the edges from getting burned.
- I had to bake my pie about an extra 10-15 minutes before the crust was golden and the fruit juices were bubbling.
- I did not bake my pie on a baking sheet; in my experience that only causes the bottom crust to be undercooked.  Instead, I simply laid a piece of foil at the bottom of the oven to catch any juices that might bubble over.

Tuesday, June 19, 2012

French Strawberry Cake (TWD)


This week's Tuesdays with Dorie: Baking with Julia recipe was hosted by Sophia of Sophia's Sweets and Allison of Sleep Love Think Dine: French Strawberry Cake.  It's a genoise, or Italian sponge cake, made without any chemical leavening agents.  Instead, the sponge is made by whipping air into the batter and the dry ingredients are folded in.  The batter is extremely delicate, and over mixing will cause it to deflate.  The cake is then split into three layers, and then strawberries and cream are layered into between each cake layer.


I had a few small issues with this cake.  First, I was traveling and did not have an 8-inch cake pan.  I had to use a larger pan, and the resulting cake was too thin to cut into three layers.  So, I ended up baking a second cake and splitting both cakes into two layers instead - resulting a 4-layer cake instead of a 3-layer cake.  Even though I whipped up a full 2 cups of heavy cream (instead of the indicated 1-1/4), I did not have enough cream to pipe around the cake.  Instead, I decided to just decorate my cake with more fresh strawberries.


Thanks to Sophia and Allison for hosting; you can find the recipe on their blogs here and here.  Make sure you check here, too, to see what everyone else thought of wonderful summer treat.

* Recipe notes:
- Be very very careful folding your ingredients together, especially the butter.  If you're not careful all is lost and you shouldn't even bother baking up the deflated batter.
- I'd recommend using at least 2 cups of heavy whipping cream to frost the cake.

Wednesday, May 2, 2012

Hungarian Shortbread (TWD)


I'm a day late posting, but this week's Tuesdays with Dorie: Baking with Julia recipe was hosted by Lynette of 1smallkitchen and Cher of The not so exciting adventures of a dabbler…: Hungarian Shortbread.  This shortbread recipe is very similar to most traditional shortbreads - made with flour, sugar, and a lot of butter.  However, instead of rolling out the dough, half of it is grated into the pan and then topped with fruit preserves, and then topped with more grated dough.

The dough recipe was simple, and the results quite delicious.  However, I think I spent a good 30 minutes grating all of the dough! It kept getting too soft to grate so I'd have to put it back in the fridge to chill while I grated the other ball of dough. So, while these were buttery, crumbly, and delicious, I'm afraid I won't be making them again simply because I cannot put myself through another 30 minutes straight of grating again!

Thanks to Lynette and Cher for hosting; you can find the recipe on their blogs here and here.  Make sure you check here, too, to see what everyone else thought of these sweet, buttery treats.

* Recipe notes:
- I used a 13 x 9 inch pyrex pan to bake my shortbread.
- Instead of 8 oz of fruit preserves, I used 16 oz.  This seemed to be a good amount.  I think 8 oz would result in a layer of fruit preserves that was too thin.  I would recommend using at least 12 oz.
- I had to bake my shortbread for an extra 15 minutes before it was golden brown on top.  Some bakers noted that the bottom layer seemed undercooked but I did not have this problem since I baked mine longer.

Thursday, April 19, 2012

Orange Loaf Cake (TWD)


Ack! I'm not sure how I missed it, but I totally lost track of the days and realized on Wednesday night that I had forgotten to do this week's Tuesdays with Dorie: Baking with Julia recipe! This week's recipe hosted by Truc of Treats and Michelle of The Beauty of Life: Lemon Loaf Cake.

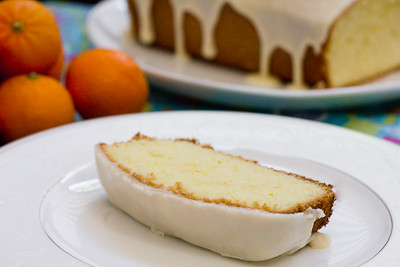
This was a quick and easy one bowl recipe that came together in just minutes (no mixer required!).  I didn't have any lemons on hand so I made an orange loaf cake instead.  I also glazed my loaf with an orange glaze.

The crumb was nice and fluffy, not too heavy at all.  However, I did find the cake a tad dry - not sure if I over baked it?  The orange flavor was quite subtle and I'm not sure you would really taste much of it without the glaze.  One of my favorite treats to get at Starbucks is their iced lemon pound cake.  I'm afraid this one pales in comparison.  It was good, but probably not something that I'll make again.

Thanks to Truc and Michelle for hosting; you can find the recipe on their blogs here and here.  Make sure you check here, too, to see what everyone else thought of citrus infused treat.

Tuesday, March 20, 2012

Irish Soda Bread (TWD) and Vitacost Deal on Coconut Oil


This week's Tuesdays with Dorie: Baking with Julia was hosted by Carla of Chocolate Moosey and Cathleen of my culinary mission.  The chosen recipe was Irish Soda Bread.  So named because instead of yeast, baking soda is used as the leavening agent in this bread.

It's pretty similar to most quick bread recipes (or biscuits), in that you mix all the dry ingredients together in one bowl, then pour the liquid ingredients in and mix it all together.  This recipe does call for a quick kneading, however, and I found the dough to be way too wet to knead.  I had to add quite a bit of extra flour before I could handle it.  Otherwise, this was a super easy recipe and it came together in just a matter of minutes!  I added dried cranberries and chopped dried apricots to mine, which gave it a slightly sweet but not overwhelmingly sweet flavor.  I saw that a few other bakers added cheese to theirs and I think that will be my next rendition of this recipe :)

Thanks to Carla and Cathleen for hosting; you can find the recipe on their blogs here and here.  Make sure you check here, too, to see all the other variations on this classic Irish bread.

Also, if you missed the last Vitacost deal I posted about, their free shipping promotion has been extended through 3/26 at 9am EST.
Right now, Vitacost.com is offering FREE shipping on orders that contain over $20 in Vitacost brand products.  (Normally their shipping fee is $4.95 for orders under $49 and free shipping for orders $49+)  Pair this free shipping offer with their $10 off $10 promo (for new customers) and you can get $20 worth of products for just $10.

You can get the 54oz Vitacost Coconut Oil for just $11.95 after the discount.  It's normally $18.89 on Amazon, so this is quite a savings.

Here's how:
1) Use this link to sign up and get a $10 promo code sent to your email.  After you register for an account with Vitacost.com (it must be through the link provided) you will receive an email with the subject line "Here's your $10 coupon for Vitacost.com" (this may take an hour)

2) Then add the Vitacost Coconut Oil to your cart for $19.95 (used to be $20.99 so it would qualify for free shipping alone).  Add the apple cider vinegar ($2) as a filler to bring your total to $20+.  Then use the $10 off code sent to your email, bringing your order total to $11.95 for both the coconut oil and the apple cider vinegar!

Of course, feel free to look around their website for other items.  You can view all Vitacost brand items that qualify for this free shipping offer here

Also, don't forget to add 2 free samples to your cart before checking out (they've got a few different teas and other samples available).  Happy shopping!

Tuesday, March 6, 2012

Rugelach (TWD)


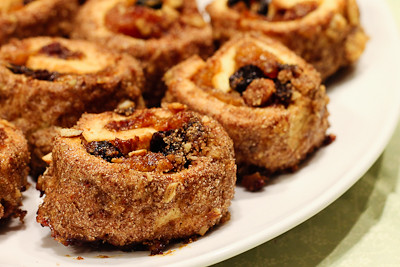
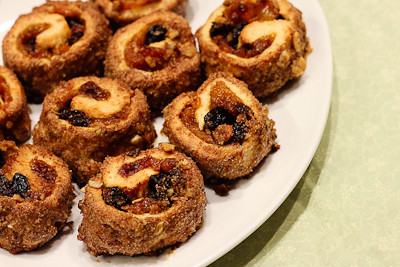
This week's Tuesdays with Dorie: Baking with Julia was co-hosted by Jessica of My Baking Heart and Margaret of The Urban Hiker.   The chosen recipe was rugelach.  Rugelach are actually Jewish pastries made with sour cream pastry dough.  They are made in the form of a crescent by rolling a triangle of dough around a filling of fruit, nuts, or fruit preserves.  The rugelach made in this recipe is slightly different in that it is made with a cream cheese pastry dough, and the rolled dough and filling is cut into slices before baking.

I've actually made rugelach a few times prior to this - love the stuff!  I love this Barefood Contessa recipe and we actually also made rugelach back in 2008 for TWD.  I'm not a nut person so I didn't put nuts in my filling, but I did put some nuts in the streusel that the pastries were rolled in.  I made apricot lekvar (homemade fruit butter) and filled my rugelach with dried cherries, raisins, and dried apricots.  I did not have any problems with this recipe, except that I did not look at it ahead of time and did not realize how much refrigeration time was required, so I did not finish baking them until very late today!

I have to say that I love this version of rugelach.  The sugar and cinnamon mixture that the pastries get rolled in caramelizes in the oven and gives it a wonderful, crisp texture.  Then you bite into the cream cheese pastry that is so light and flaky, and then you taste the apricot butter and dried fruit bits.  I think I just ate about ten of them in one sitting and my husband asked me to hide them from him because he can't stop eating them!

This recipe is definitely a keeper, and I can't wait to make it again.  Thanks to Jessica and Margaret for hosting; you can find the recipe on their blogs here and here.  Make sure you check here, too, to see how everyone else in our baking group enjoyed these pastries!

Also be sure to leave a comment below... I was visited recently by the Fairy Hobmother and received an unexpected gift... if you leave a comment here you might get a visit from the Fairy Hobmother too ;)

Monday, January 30, 2012

Kids' Thumbprints (TWD)


I'm a horrible blogger :( I haven't posted in weeks... and I made these cookies back in December and I am just now getting around to blogging about it! *sigh* My life is now consumed with play dates, story time, craft time, little gym, etc. so I haven't had nearly as much time as I used to for baking, blogging, and visiting other blogs :( Thank you to those who are still around, reading each blog post that I'm able to put up! I did want to put a question out there to my readers... do you enjoy the posts about food-related coupons and deals? I started with them on my Facebook page, then posted a few here on the blog... but wasn't sure if that was something that people were interested in? Should I stick with just the recipe posts, or would you like to see deals posted too? Please leave me a comment and let me know! :)

So anyway, without further ado... the very last Tuesdays with Dorie (TWD) recipe was chosen by none other than Dorie Greenspan herself, author of Baking: From My Home to Yours.  She chose Kids' Thumbprints.  These were kind of like grown up peanut butter and jelly cookies.  You take a peanut butter cookie dough and rough it into a ball, then dip it in egg whites and roll it in some chopped up peanuts.  Then proceed like you would with any other thumbprint cookie recipe and press your thumb gently into the center and fill with jam after the cookies have baked.

I only needed one egg white for my cookies, otherwise I followed the recipe exactly as written.  These were incredibly addicting cookies! I found that if you let the jam cool just a little bit after warming it up, the cookies are a little bit easier to fill because then the jam isn't quite so runny.  I shared these with my neighbor and she loved them, too.

If you would like the recipe, you can find here.  This is the last blog post for Tuesdays with Dorie - Baking: From My Home to Yours. I can't believe that after 4 years, we've finally baked through the entire book! It's been so much fun... not only baking everything, but meeting so many other wonderful bloggers out there.  I've had a blast and I have learned so much with the group baking week by week through the book.  I'm still not the best cake decorator out there, but I can make some pretty good pastries and brioche now! I'm so proud of what I have done with the group.  While we are putting Baking back up on the shelf, our group is getting ready to embark on another adventure... as we bake our way through Baking with Julia.  So, if you are interested in baking along with us, please join us as Tuesdays with Dorie: Baking with Julia starts on February 7th!

Tuesday, December 13, 2011

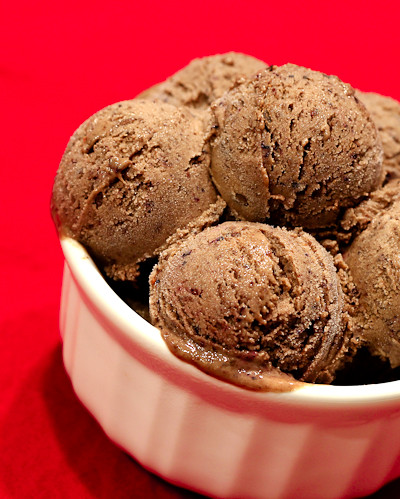
Unbelievably Good Chocolate Blueberry Pomegranate Ice Cream (TWD)


This week's Tuesdays with Dorie (TWD) recipe was chosen by Laurie (founder of TWD!) of Slush: Unbelievably Good Chocolate Blueberry Ice Cream.

I would never to think to make chocolate blueberry ice cream, but I've totally had chocolate covered strawberries, and chocolate covered dried cherries, blueberries, etc. so of course it would make sense that chocolate blueberry ice cream would be good :)

I thought I had everything I needed for this recipe because we usually keep frozen blueberries on hand for my daughter, but when I went to the make the recipe I realized that the recipe calls for blueberry preserves, not fresh/frozen blueberries! Well, I just so happened to receive some Pomegranate Jelly for my birthday in November, so I decided to puree some frozen blueberries (about 1 tbsp) and mixed it together with the Pomegranate Jelly.... resulting in the most delicious chocolate blueberry pomegranate ice cream!

If you would like the recipe, you can find here.  Make sure you also check out this page, too, so you can see what everyone else thought of this unusual chocolate ice cream!

And if you haven't already, don't forget to enter my Peeled Snacks Giveaway!

Sunday, December 4, 2011

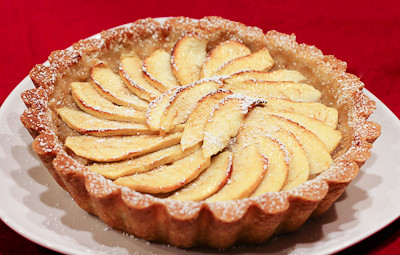
Sour Cream Pumpkin Tart and Normandy Apple Tart (TWD)


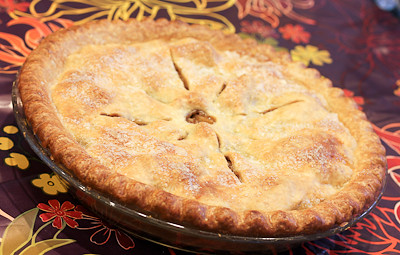
This week for Tuesdays with Dorie (TWD) we had two recipes! (I actually had this post ready to go on Tuesday night and just realized I never posted it! oops!) The recipes were chosen by Tracey of Tracey’s Culinary Adventures and Judy of Judy’s Gross Eats. Tracey chose the Normandy Apple Tart and Judy chose the Sour Cream Pumpkin Pie/Tart.  I was ambitious this week and made both :)

The Normandy Apple Tart is a very rustic and homey dessert.  It's basically a tart shell filled with delicious homemade (or store bought) applesauce, then layered with apples on top.  It's amazing how something so simple can be so delicious.  I think using your own homemade applesauce really makes a difference in this dessert.  I am also a huge fan of Dorie's tart shell recipe and use it all the time.... I even used it for the Sour Cream Pumpkin Pie recipe because Dorie mentions that as an alternative to your traditional pie crust.


The sour cream pumpkin pie was one of my husband's favorite desserts this Thanksgiving.  He said he liked it better than traditional pumpkin pie because it wasn't so heavy.  I thought that was interesting, given the amount of heavy cream in it ;) It has a nice blend of spices to it and I think the addition of some rum to the filling really makes it stand out.


While the pumpkin pie can be served cold or at room temperature, I thought the flavors were a bit muted when it was chilled, so I would definitely recommend serving it at room temperature.

Thanks, Tracey and Judy, for hosting this week! I really enjoyed both recipes.  I don't normally eat pumpkin pie except around Thanksgiving, but I could definitely see myself making the Normandy Apple Tart a few times each fall :) If you'd like the recipes, please click here for the Normandy Apple Tart and here for the Sour Cream Pumpkin Pie.

* Recipe notes:
- Make sure to put a pie crust shield (or some foil) around the edge of your tart about 20-30 minutes into baking to avoid burning the edges.

Sunday, November 27, 2011

Sans Rival (DB)


Catherine of Munchie Musings was our November Daring Baker’s host and she challenged us to make a traditional Filipino dessert – the delicious Sans Rival cake! And for those of us who wanted to try an additional Filipino dessert, Catherine also gave us a bonus recipe for Bibingka which comes from her friend Jun of Jun-blog.

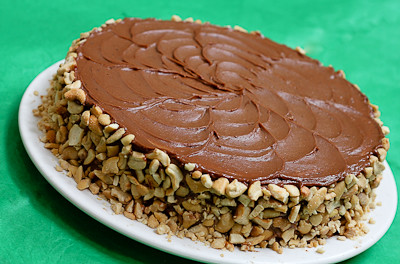
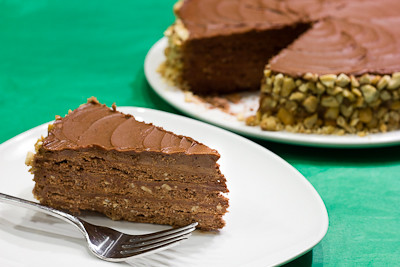
With all the cooking and backing involved with the Thanksgiving holiday, I only had time to make the Sans Rival cake. “Sans rival” means “without rival” and any Filipino will argue with you that this is true. Although it’s one of the most popular desserts in the Philippines, its origins are certainly French. In the 1920’s to 30’s there were many Filipinos who went abroad to study. A good number went to France and learned many French cooking techniques which they then brought home. A Sans Rival is made with layers of dacquoise, typically using crushed cashews, with very rich French buttercream frosting. The dacquoise is allowed to bake and dry to a crispy layer so that there is the crunch of pastry and nuts with the buttery, silky frosting. I went the traditional route with cashews, but the non-traditional route by making mine chocolate based.


The recipe really isn't more difficult than any other layered cake.  In fact, it's a little easier because each layer is baked as is so you don't even need to halve the layers and worry about slicing them perfectly!  It's basically meringue with crushed nuts folded in, then layered with buttercream.

It was fun to make, but I have to be honest and say that it didn't really "wow" me.  I like cashews but wasn't a big fan of a cashew flavored cake.  Perhaps almonds or peanuts would have been a better choice for me? Both my parents thought the cake was good, while my husband didn't really care for it.  So I guess it just depends on who you ask!


Thanks Catherine, for hosting this month's challenge.  Make sure you check out the Daring Bakers' Blogroll to see how everyone else enjoyed this Filipino cake!

Sans Rival
from Catherine of Munchie Musings 

Ingredients
10 large egg whites, room temp
1 cup (240 ml) (225 gm) (8 oz) white granulated sugar
1 teaspoon (5 ml) (3 gm) cream of tartar
¼ cup (60 ml) (20 gm) (2/3 oz) Dutch processed cocoa (optional and not traditional)
2 cups (480 ml) (240 gm) (8½ oz) chopped, toasted cashews

Directions:

Note: You will need four layers which will mean that you might have to bake in two batches. Be sure to use fresh parchment paper and cooled pans for each batch.

1. Preheat oven to moderate 325°F/160°C/gas mark 3.
2. Line cake pan bottoms with parchment paper and butter and flour the sides really well.
3. In a large clean, dry glass or metal mixing bowl, beat egg whites on medium until foamy (2 mins.). Sprinkle with cream of tartar. Gradually add sugar, a couple of tablespoons at a time, continuing to beat now at high speed until stiff shiny peaks form. (about 7-10 mins.)
4. Fold in nuts, reserving enough to use for decoration.
(Note the more finely ground for folding into meringue. The coarsely ground for is decoration of finished cake.)
5. Divide meringue into four equal parts. Spread in pans, evenly to edges. If doing batches, use fresh parchment paper and cooled pans for each batch.
6. Bake in preheated oven for 30 minutes, or until golden brown. Remove the meringue from the baking pans while still hot; allow to cool slightly. Peel off the parchment paper while it is still warm, it is difficult to remove sometimes when they have completely cooled.
7. When cool, trim edges so that all 4 meringue layers are uniformly shaped. Set aside.

French Buttercream:

Ingredients
5 large egg yolks, room temperature
1 cup (240 ml) (225 gm) (8 oz) white granulated sugar
1/4 cup (60 ml) water
1¼ cup (300 ml) (2½ sticks) (285 gm) (10 oz) unsalted butter, room temperature
Optional Flavorings: 2 oz (55 gm) unsweetened chocolate, melted, or 1½ teaspoon (7 ½ ml) almond extract, or 1½ teaspoon (7 ½ ml) vanilla extract, or any flavor you like

Directions:
1. Put the egg yolks in a mixing bowl. Beat at high speed until the yolks have doubled in volume and are a lemon yellow.
2. Put the sugar and water in a heavy pan and cook over medium heat, stirring the sides down only until all the sugar is dissolved and the syrup reaches 235°F/112°C (or thread stage).
3. With the mixer on high, very slowly pour the syrup down the sides of the bowl, until all has been added. Be careful as the very hot syrup could burn you if it splashes from the beaters. Continue beating on high until the mixture is ROOM TEMPERATURE (about 15 mins). Still on high, beat in the soft, room temperature butter a tablespoon at a time. Add flavoring after you beat in the butter. Refrigerate the buttercream for at least an hour, and whip it smooth just before you use it.

Assembly:

Set bottom meringue on cake board with a dab of butter cream to hold it in place. Spread a
thin layer of buttercream and then place another meringue on top. Repeat with a thin layer of
buttercream, meringue, thin layer of buttercream, meringue, and finally buttercream the top and
sides. Decorate with reserved nuts.
Refrigerate until ready to serve. It is easier to cut cold. May freeze.

Yield: 12 Servings

Notes:
• Brushing the parchment paper with some oil will help you to peel it off after the dacquoise is baked.
• Do not grind the nuts down to a fine flour/powder. This recipe is better with the nuts in a grainy/sandy grind.
• It is important to peel off the parchment within a couple of minutes of it coming out of the oven. Certainly while it is still warm.
• After you’ve removed the paper, return it into the warm oven to dry out more as the oven is cooling down. You want crunchy layers.

Friday, November 25, 2011

Ginger Jazzed Brownies and Fall Butternut Squash Pie (TWD)

I hope everyone had a wonderful Thanksgiving filled with lots of good eats and sweet treats! We had a pretty impressive spread at our house, and of course we're still enjoying leftovers today.

This week we're posting for Tuesdays with Dorie (TWD) on Friday.  This was to allow everyone the time to get ready for Thanksgiving.  There was no specific recipe chosen for this week, we were simply given the liberty to do a "rewind," meaning we could go back and bake a recipe from the past that we may have missed.  I'll be posting about the Ginger Jazzed Brownies and the Depths-of-Fall Butternut Squash Pie.

The ginger jazzed brownies were actually chosen by Hindy of Bubie’s Little Baker as the recipe of the week for October 18 and I made them a few weeks ago.  I just never got around to posting about them! I didn't have any fresh ginger on hand, so I added extra ground ginger to the brownies, as Dorie suggested.  My brownies came out with very little ginger flavor to them, which was a big disappointment because I love ginger.  I had contemplated adding in chopped candied/crystallized ginger to the brownies, and should have... because I munched on some while eating these brownies and found that the ginger and chocolate flavors together were great.  So, next time I make these, I will definitely add in chopped crystallized ginger instead of fresh ginger.  Otherwise, these brownies were super moist and dense like you would expect brownies to be.


The Fall Butternut Squash Pie was chosen by Valerie of Une Gamine dans la Cuisine. I am not a big butternut squash fan, but I still wanted to try this pie because that's what TWD is all about - trying recipes you wouldn't otherwise try. So, I made this one for Thanksgiving. Aside from the butternut squash, this pie is filled with pears, brown sugar, spices, walnuts, and raisins (or dried cranberries or diced apples).


This pie was met with mixed reviews. I really didn't care for it much. I think I would have liked it better if there had been more sugar in it because I think it was lacking in sweetness. My mom thought it was good, but attributed that to the fact that there was a lot of other filling ingredients besides squash. I think if it had a little bit less squash and lots of pears and apples, it would be very good. Just enough to have a hint of squash in it, but not overwhelmingly squashy ;)


If you're interested, head on over here for the Ginger Jazzed Brownies recipe and here for the Fall Butternut Squash Pie recipe.

Tuesday, November 15, 2011

Alsatian Apple Tart (TWD)


I am back with Tuesdays with Dorie (TWD) and will be back to posting weekly with the group from now until the end of the year.  Even though we're down to the last few recipes in the book, we've got a lot of great recipes lined up. Believe it or not, we'll be done baking through the entire book by the end of the year! Isn't that crazy?!

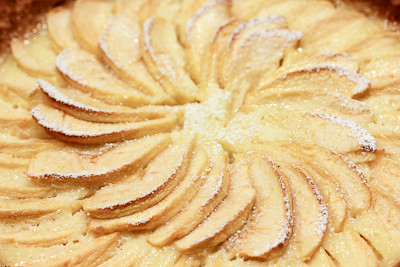
This week's TWD recipe was chosen by Jessica of Cookbook Habit: Alsatian Apple Tart.  It is a tart lined with "thick slices of sweet apples and a vanilla-flavored mix of eggs, cream and sugar that is poured over the apples and, under heat, transformed into a soft custard."

When I think of custard filled tarts, I think of fruit tarts that are topped with fruits like strawberries, blackberries, kiwi, blueberries, etc.  I have never had a custard fruit tart with apples! Interestingly enough, the rich and creamy custard that envelopes the apples is absolutely delicious.  I think the tart would be great with pears, too, which Dorie suggests in the "Playing Around" section.

I only added one egg and omitted the extra egg yolk in the custard, just because I didn't want to have another egg white in my freezer.  The custard was still rich despite this omission thanks to the heavy cream.  Only thing I would do differently next time would be to remember to put my pie crust shield on the tart sooner! I forgot and didn't realize the edges were burning until I started to smell it! (That's why you don't see a picture of the entire tart!)

Thanks, Jessica, for hosting this week! I love baked apple desserts and this one was no exception.

* Recipe notes:
- Make sure to put a pie crust shield (or some foil) around the edge of your tart about 20 minutes into baking to avoid burning the edges.

Sunday, November 6, 2011

Povitica (DB)

 
The Daring Baker’s October 2011 challenge was Povitica, hosted by Jenni of The Gingered Whisk. Povitica is a traditional Eastern European Dessert Bread that is as lovely to look at as it is to eat! It is a specialty bread that normally costs $25 a loaf! Yes, $25!

Yes, I know it's November and October is long gone, but I am so terribly behind in my blogging.  I actually finished this dessert bread before the posting deadline and have several other things I have made that I just haven't gotten around to blogging about! Please bear with me as I get back into my blogging groove.... being sick for most of September and part of October just threw me for a loop and then the last week I was very very busy making a super special birthday cake for my daughter (post to come)!

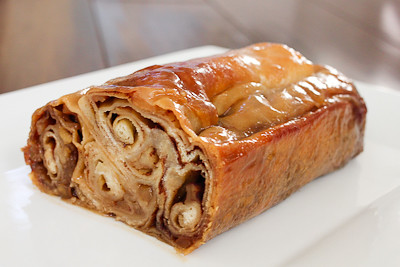
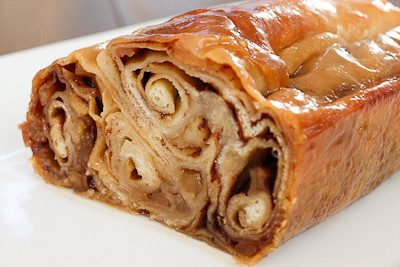
So on to the challenge... this dessert bread was different from anything I've tried before, but certainly delicious.  You basically make your regular yeast dough, then roll it out super thin (kind of like making phyllo dough) and then add in whatever filling you like.  Then you roll it up like you would a cinnamon roll and coil it up onto itself into a loaf pan.  The result is a beautiful spiral filled dessert bread.
 
We were given the liberty to either fill our bread with an English walnut filling, or the filling of our choice... and since I don't really like nuts I went with a cinnamon apple filling.  I browned some butter and brown sugar in a pan, sauteed the apples, and then layered them into the bread with cinnamon and sugar.  I didn't have enough apples at home (only 3) so my filling was a little scarce, and I would definitely add more next time. 

When I first removed my pan from the oven, there were lots of juices from the baked apples bubbling in the pan.  I found, however, that after leaving the pan out overnight that most of it had been soaked up by the bread, making it oh so gooey and delicious. It almost tasted like cinnamon apple cinnamon rolls but with thin layered dough.

Thanks Jenni, for hosting this month's challenge.  Make sure you check out the Daring Bakers' Blogroll to see how everyone else this specialty bread!

Povitica
(makes 4 loaves)

Ingredients

To activate the Yeast:
2 Teaspoons (10 ml/9 gm) Sugar
1 Teaspoon (5 ml/3 gm) All-Purpose (Plain) Flour
½ Cup (120ml) Warm Water
2 Tablespoons (30ml/14 gm/½ oz/2 sachets) Dry Yeast

Dough:
2 Cups (480ml) Whole Milk
¾ Cup (180 ml/170gm/6 oz) Sugar
3 Teaspoons (15 ml/18 gm/2/3 oz) Table Salt
4 Large Eggs
½ Cup (120ml/115 gm/one stick/4 oz) Unsalted Butter, melted
8 cups (1.92 l/1.12 kg/39½ oz/2½ lb) All-Purpose Flour, measure first then sift, divided

Walnut Filling:
7 Cups (1.68 l/1.12 kg/2.5 lbs) Ground English Walnuts
1 Cup (240ml) Whole Milk
1 Cup (240ml/225 gm/2 sticks/8 oz) Unsalted Butter
2 Whole Eggs, Beaten
1 Teaspoon (5ml) Pure Vanilla Extract
2 Cups (480ml/450 gm/16 oz) Sugar
1 Teaspoon (5 ml/4 gm) Unsweetened Cocoa Powder
1 Teaspoon (5 ml/3 gm) Cinnamon

Topping:
½ Cup (120 ml) Cold STRONG Coffee
2 Tablespoons (30 ml/28 gm/1 oz) Granulated Sugar
Melted Butter

To Activate Yeast:
1. In a small bowl, stir 2 teaspoons sugar, 1 teaspoon flour, and the yeast into ½ cup warm water and cover with plastic wrap.
2. Allow to stand for 5 minutes

To Make the Dough:
3. In a medium saucepan, heat the milk up to just below boiling (about 180°F/82°C), stirring constantly so that a film does not form on the top of the milk. You want it hot enough to scald you, but not boiling. Allow to cool slightly, until it is about 110°F/43°C.
4. In a large bowl, mix the scalded milk, ¾ cup (180 gm/170 gm/6 oz) sugar, and the salt until combined.
5. Add the beaten eggs, yeast mixture, melted butter, and 2 cups (480 ml/280 gm/10 oz) of flour.

6. Blend thoroughly and slowly add remaining flour, mixing well until the dough starts to clean the bowl.

7. Turn dough out onto floured surface and knead, gradually adding flour a little at a time, until smooth and does not stick. Note: I did not use all 8 cups of flour

8. Divide the dough into 4 equal pieces (they will each weight about 1.25 pounds/565 grams)
9. Place dough in 4 lightly oiled bowls, cover loosely with a layer of plastic wrap and then a kitchen towel and let rise an hour and a half in a warm place, until doubled in size.


To Make the Filling
10. In a large bowl mix together the ground walnuts, sugar, cinnamon and cocoa.
11. Heat the milk and butter to boiling.
12. Pour the liquid over the nut/sugar mixture.
13. Add the eggs and vanilla and mix thoroughly.
14. Allow to stand at room temperature until ready to be spread on the dough.
15. If the mixture thickens, add a small amount of warm milk.

To Roll and Assemble the Dough:
16. Spread a clean sheet or cloth over your entire table so that it is covered.
17. Sprinkle with a couple of tablespoons to a handful of flour (use flour sparingly)
18. Place the dough on the sheet and roll the dough out with a rolling pin, starting in the middle and working your way out, until it measures roughly 10-12 inches (25½ cm by 30½ cm) in diameter.

19. Spoon 1 to 1.5 teaspoons (5ml to 7 ½ ml/4 gm to 7 gm) of melted butter on top.
20. Using the tops of your hands, stretch dough out from the center until the dough is thin and uniformly opaque. You can also use your rolling pin, if you prefer.
21. As you work, continually pick up the dough from the table, not only to help in stretching it out, but also to make sure that it isn’t sticking.
22. When you think it the dough is thin enough, try to get it a little thinner. It should be so thin that you can see the color and perhaps the pattern of the sheet underneath.

23. Spoon filling (see below for recipe) evenly over dough until covered.

24. Lift the edge of the cloth and gently roll the dough like a jelly roll.

25. Once the dough is rolled up into a rope, gently lift it up and place it into a greased loaf pan in the shape of a “U”, with the ends meeting in the middle. You want to coil the dough around itself, as this will give the dough its characteristic look when sliced.
26. Repeat with remaining three loaves, coiling each rope of dough in its own loaf pan.
27. Brush the top of each loaf with a mixture of ½ cup (120 ml) of cold STRONG coffee and 2 tablespoons (30ml/28 gm/1 oz) of sugar. If you prefer, you can also use egg whites in place of this.
28. Cover pans lightly will plastic wrap and allow to rest for approximately 15 minutes.
29. Preheat oven to moderate 350°F/180°C/gas mark 4.
30. Remove plastic wrap from dough and place into the preheated oven and bake for approximately 15 minutes.
31. Turn down the oven temperature to slow 300°F/150°C/gas mark 2 and bake for an additional 45 minutes, or until done.
32. Remove bread from oven and brush with melted butter.
33. Check the bread at 30 minutes to ensure that the bread is not getting too brown. You may cover the loaves with a sheet of aluminum foil if you need to.
34. Remove from the oven and allow to cool on a wire rack for 20-30 minutes, still in the bread pan. Remember, the bread weighs about 2.5 and it needs to be able to hold its own weight, which is difficult when still warm and fresh out of the oven. Allowing it to cool in the pan helps the loaf to hold its shape.
35. It is recommended that the best way to cut Povitica loaves into slices is by turning the loaf upside down and slicing with a serrated knife.


Smaller batch measurements courtesy of Audax
Half Batch Dough Ingredients (Makes two loaves each 1.25 lbs/565 grams)
To activate the Yeast:
1 Teaspoon (5 ml/4 ½ gm) Sugar
½ Teaspoon (2½ ml/1½ gm) All-Purpose (Plain) Flour
¼ Cup (60 ml) Warm Water
1 Tablespoon (15 ml/7 gm/¼ oz/1 sachet) Dry Yeast

Dough:
1 Cup (240 ml) Whole Milk
6 Tablespoons (90 ml/85 gm/3 oz) Sugar
1½ Teaspoons (7½ ml/9 gm/1/3 oz) Table Salt
2 Large Eggs
¼ Cup (60 ml/60 gm/½ stick/2 oz) Unsalted Butter, melted
4 cups (960 ml/560 gm/19¾ oz/1¼ lb) All-Purpose Flour, measure first then sift, divided

Topping:
¼ Cup (60 ml) Cold STRONG Coffee
1 Tablespoon (15 ml/14 gm/½ oz) Granulated Sugar
Melted Butter

Half Batch Filling Ingredients (enough filling for the two loaves(
3½ Cups (840 ml/560 gm/1¼ lb/20 oz) Ground English Walnuts
½ Cup (120 ml) Whole Milk
½ Cup (120 ml/115 gm/1 stick/4 oz) Unsalted Butter
1 Whole Egg, Beaten
½ Teaspoon (2½ ml) Pure Vanilla Extract
1 Cup (240 ml/225 gm/8 oz) Sugar
½ Teaspoon (2½ ml/2 gm) Unsweetened Cocoa Powder
½ Teaspoon (2½ ml/1½ gm) Cinnamon

Quarter Batch Dough Ingredients (Makes one loaf 1.25 lbs/565 grams)
To activate the Yeast:
½ Teaspoon (2½ ml/2¼ gm) Sugar
¼ Teaspoon (1¼ ml/¾ gm) All-Purpose (Plain) Flour
2 Tablespoons (30 ml) Warm Water
1½ Teaspoons (7½ ml/3½ gm/0.125 oz/½ sachet) Dry Yeast

Dough:
½ Cup (120 ml) Whole Milk
3 Tablespoons (45 ml/43 gm/1½ oz) Sugar
¾ Teaspoon (3¾ ml/9 gm/0.17 oz) Table Salt
1 Large Egg
1 tablespoon (30 ml/30 gm/¼ stick/1 oz) Unsalted Butter, melted
2 cups (480 ml/280 gm/10 oz/0.62 lb) All-Purpose Flour, measure first then sift, divided

Topping:
2 Tablespoons (30 ml) Cold STRONG Coffee
1½ Teaspoons (7½ ml/7 gm/¼ oz) Granulated Sugar
Melted Butter