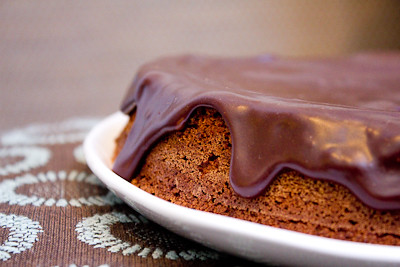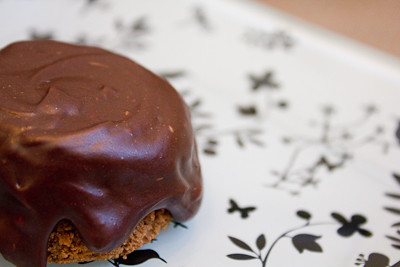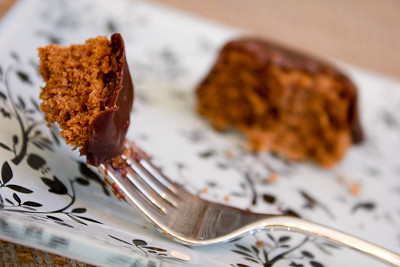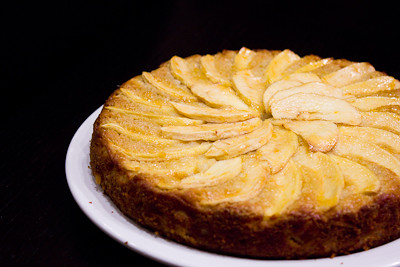
Showing posts with label cake. Show all posts

Tuesday, September 4, 2012

Nectarine Upside-Down Chiffon Cake (TWD)


This week's Tuesdays with Dorie: Baking with Julia recipe was hosted by Marlise of The Double Trouble Kitchen and Susan of The Little French Bakery: Nectarine Upside-Down Chiffon Cake.  It's been a long, long, time since I've posted for this group - I'm sorry :( I have just been so busy, and on top of that I'm six months pregnant and turning on the oven when it is 100+ degrees outside just hasn't been very appealing.  The good news, however, is that my baby girl (who is not so much a baby anymore) just started school this week so that means this mama is going to have a lot more time to bake each week! So, you should start to see blog posts pick up a little more at least.

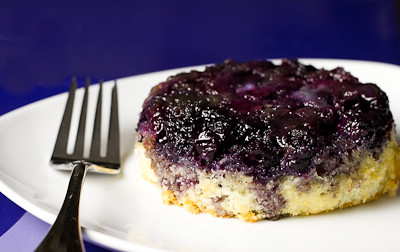
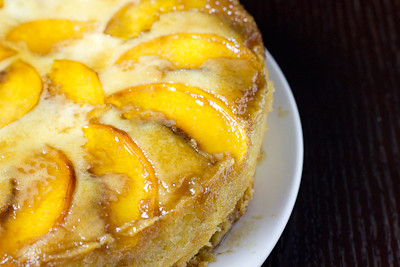
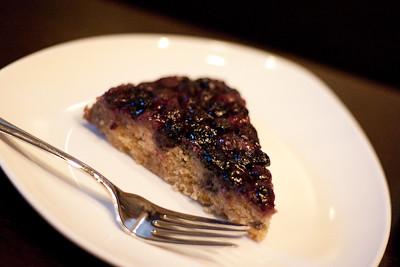
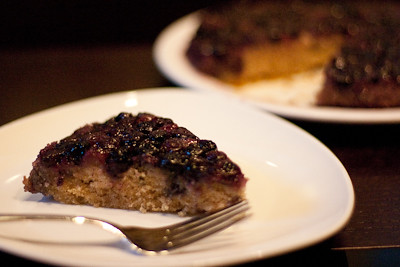
I didn't have a pan large enough for this cake, so I made one large nectarine and peach upside-down chiffon cake and one mini blueberry upside-down chiffon cake.  After reading some of the comments on the weekly P&Q, I decided to skip the streusel and made sure to bake my cake for a few extra minutes.  I really think the longer baking time has to do with whether or not the cake is baked on a jelly roll pan.  I did not bake mine on one and I think it only took an extra 3-5 minutes to bake.  I did, however, cover the bottom of my pans with foil to catch the butter drippings, which was good because there was quite a bit.
The blueberry cake was delicious.  The chiffon was light and airy, as it should be.  It's a nice contrast to the denser, more traditional pineapple upside down cake.  I'm not sure how the nectarine and peach cake turned out because that one will be going with my husband to work tomorrow, but I imagine it's just as good as the blueberry cake.
Thanks to Marlise and Susan for hosting; you can find the recipe on their blogs here and here.  Make sure you check here, too, to see what everyone else thought of this sweet, end of summer treat.

* Recipe notes:
- If you bake your cake on a jelly roll pan, be sure to add at least another 10 minutes of baking time to your cake.  Definitely don't forget to wrap the bottom of your pan in foil, or you'll end up with a big mess on the bottom of your oven.
- Frozen blueberries work great with this recipe.  Do not thaw before baking.
- For more recipe notes, check here.

Tuesday, June 19, 2012

French Strawberry Cake (TWD)


This week's Tuesdays with Dorie: Baking with Julia recipe was hosted by Sophia of Sophia's Sweets and Allison of Sleep Love Think Dine: French Strawberry Cake.  It's a genoise, or Italian sponge cake, made without any chemical leavening agents.  Instead, the sponge is made by whipping air into the batter and the dry ingredients are folded in.  The batter is extremely delicate, and over mixing will cause it to deflate.  The cake is then split into three layers, and then strawberries and cream are layered into between each cake layer.


I had a few small issues with this cake.  First, I was traveling and did not have an 8-inch cake pan.  I had to use a larger pan, and the resulting cake was too thin to cut into three layers.  So, I ended up baking a second cake and splitting both cakes into two layers instead - resulting a 4-layer cake instead of a 3-layer cake.  Even though I whipped up a full 2 cups of heavy cream (instead of the indicated 1-1/4), I did not have enough cream to pipe around the cake.  Instead, I decided to just decorate my cake with more fresh strawberries.


Thanks to Sophia and Allison for hosting; you can find the recipe on their blogs here and here.  Make sure you check here, too, to see what everyone else thought of wonderful summer treat.

* Recipe notes:
- Be very very careful folding your ingredients together, especially the butter.  If you're not careful all is lost and you shouldn't even bother baking up the deflated batter.
- I'd recommend using at least 2 cups of heavy whipping cream to frost the cake.

Thursday, April 19, 2012

Orange Loaf Cake (TWD)


Ack! I'm not sure how I missed it, but I totally lost track of the days and realized on Wednesday night that I had forgotten to do this week's Tuesdays with Dorie: Baking with Julia recipe! This week's recipe hosted by Truc of Treats and Michelle of The Beauty of Life: Lemon Loaf Cake.

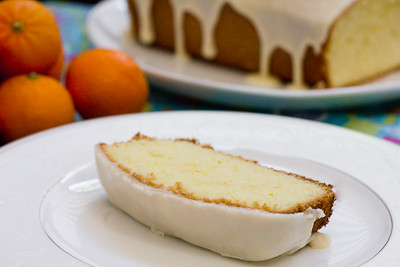
This was a quick and easy one bowl recipe that came together in just minutes (no mixer required!).  I didn't have any lemons on hand so I made an orange loaf cake instead.  I also glazed my loaf with an orange glaze.

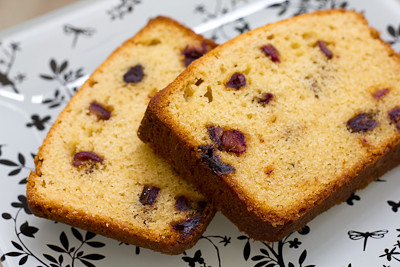
The crumb was nice and fluffy, not too heavy at all.  However, I did find the cake a tad dry - not sure if I over baked it?  The orange flavor was quite subtle and I'm not sure you would really taste much of it without the glaze.  One of my favorite treats to get at Starbucks is their iced lemon pound cake.  I'm afraid this one pales in comparison.  It was good, but probably not something that I'll make again.

Thanks to Truc and Michelle for hosting; you can find the recipe on their blogs here and here.  Make sure you check here, too, to see what everyone else thought of citrus infused treat.

Sunday, November 27, 2011

Sans Rival (DB)


Catherine of Munchie Musings was our November Daring Baker’s host and she challenged us to make a traditional Filipino dessert – the delicious Sans Rival cake! And for those of us who wanted to try an additional Filipino dessert, Catherine also gave us a bonus recipe for Bibingka which comes from her friend Jun of Jun-blog.

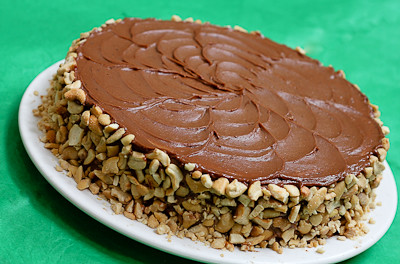
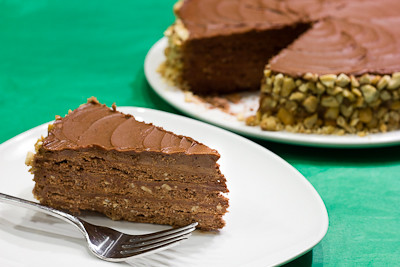
With all the cooking and backing involved with the Thanksgiving holiday, I only had time to make the Sans Rival cake. “Sans rival” means “without rival” and any Filipino will argue with you that this is true. Although it’s one of the most popular desserts in the Philippines, its origins are certainly French. In the 1920’s to 30’s there were many Filipinos who went abroad to study. A good number went to France and learned many French cooking techniques which they then brought home. A Sans Rival is made with layers of dacquoise, typically using crushed cashews, with very rich French buttercream frosting. The dacquoise is allowed to bake and dry to a crispy layer so that there is the crunch of pastry and nuts with the buttery, silky frosting. I went the traditional route with cashews, but the non-traditional route by making mine chocolate based.


The recipe really isn't more difficult than any other layered cake.  In fact, it's a little easier because each layer is baked as is so you don't even need to halve the layers and worry about slicing them perfectly!  It's basically meringue with crushed nuts folded in, then layered with buttercream.

It was fun to make, but I have to be honest and say that it didn't really "wow" me.  I like cashews but wasn't a big fan of a cashew flavored cake.  Perhaps almonds or peanuts would have been a better choice for me? Both my parents thought the cake was good, while my husband didn't really care for it.  So I guess it just depends on who you ask!


Thanks Catherine, for hosting this month's challenge.  Make sure you check out the Daring Bakers' Blogroll to see how everyone else enjoyed this Filipino cake!

Sans Rival
from Catherine of Munchie Musings 

Ingredients
10 large egg whites, room temp
1 cup (240 ml) (225 gm) (8 oz) white granulated sugar
1 teaspoon (5 ml) (3 gm) cream of tartar
¼ cup (60 ml) (20 gm) (2/3 oz) Dutch processed cocoa (optional and not traditional)
2 cups (480 ml) (240 gm) (8½ oz) chopped, toasted cashews

Directions:

Note: You will need four layers which will mean that you might have to bake in two batches. Be sure to use fresh parchment paper and cooled pans for each batch.

1. Preheat oven to moderate 325°F/160°C/gas mark 3.
2. Line cake pan bottoms with parchment paper and butter and flour the sides really well.
3. In a large clean, dry glass or metal mixing bowl, beat egg whites on medium until foamy (2 mins.). Sprinkle with cream of tartar. Gradually add sugar, a couple of tablespoons at a time, continuing to beat now at high speed until stiff shiny peaks form. (about 7-10 mins.)
4. Fold in nuts, reserving enough to use for decoration.
(Note the more finely ground for folding into meringue. The coarsely ground for is decoration of finished cake.)
5. Divide meringue into four equal parts. Spread in pans, evenly to edges. If doing batches, use fresh parchment paper and cooled pans for each batch.
6. Bake in preheated oven for 30 minutes, or until golden brown. Remove the meringue from the baking pans while still hot; allow to cool slightly. Peel off the parchment paper while it is still warm, it is difficult to remove sometimes when they have completely cooled.
7. When cool, trim edges so that all 4 meringue layers are uniformly shaped. Set aside.

French Buttercream:

Ingredients
5 large egg yolks, room temperature
1 cup (240 ml) (225 gm) (8 oz) white granulated sugar
1/4 cup (60 ml) water
1¼ cup (300 ml) (2½ sticks) (285 gm) (10 oz) unsalted butter, room temperature
Optional Flavorings: 2 oz (55 gm) unsweetened chocolate, melted, or 1½ teaspoon (7 ½ ml) almond extract, or 1½ teaspoon (7 ½ ml) vanilla extract, or any flavor you like

Directions:
1. Put the egg yolks in a mixing bowl. Beat at high speed until the yolks have doubled in volume and are a lemon yellow.
2. Put the sugar and water in a heavy pan and cook over medium heat, stirring the sides down only until all the sugar is dissolved and the syrup reaches 235°F/112°C (or thread stage).
3. With the mixer on high, very slowly pour the syrup down the sides of the bowl, until all has been added. Be careful as the very hot syrup could burn you if it splashes from the beaters. Continue beating on high until the mixture is ROOM TEMPERATURE (about 15 mins). Still on high, beat in the soft, room temperature butter a tablespoon at a time. Add flavoring after you beat in the butter. Refrigerate the buttercream for at least an hour, and whip it smooth just before you use it.

Assembly:

Set bottom meringue on cake board with a dab of butter cream to hold it in place. Spread a
thin layer of buttercream and then place another meringue on top. Repeat with a thin layer of
buttercream, meringue, thin layer of buttercream, meringue, and finally buttercream the top and
sides. Decorate with reserved nuts.
Refrigerate until ready to serve. It is easier to cut cold. May freeze.

Yield: 12 Servings

Notes:
• Brushing the parchment paper with some oil will help you to peel it off after the dacquoise is baked.
• Do not grind the nuts down to a fine flour/powder. This recipe is better with the nuts in a grainy/sandy grind.
• It is important to peel off the parchment within a couple of minutes of it coming out of the oven. Certainly while it is still warm.
• After you’ve removed the paper, return it into the warm oven to dry out more as the oven is cooling down. You want crunchy layers.

Wednesday, October 19, 2011

Apple Muffin Cake (TWD)

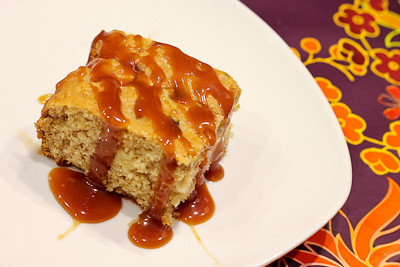
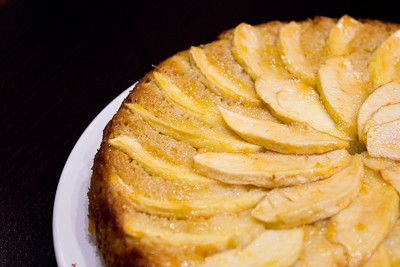
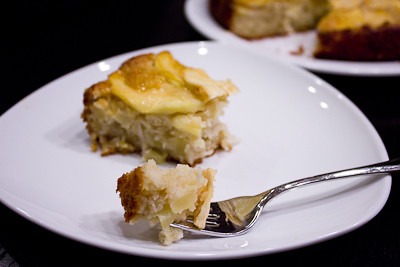
It's been weeks since my last blog post... I've been horribly sick for the last five (yes, five!) weeks and the last few were particularly terrible. I got a cold that turned into walking pneumonia and I didn't have the energy to do anything. I'm still playing catch up with my life but I finally managed to get some baking done. Too bad I'm still behind. I made Katrina's Tuesdays with Dorie (TWD) pick from October 4th finally - Apple Muffin Cake.  It was very moist but kind of plain, I thought... but it was pretty great with some caramel sauce drizzled on top :)


....and then I wanted to make the ginger jazzed brownies that were yesterday's TWD pick, but I ran out of butter! I never run out of butter! I usually try to keep the house well stocked with butter, sugar, eggs, and flour but what with being sick and all I haven't been keeping track of things so well. I hope to make those tomorrow and post them soon, so stay tuned. 

I also have a few more giveaways lined up, just have to get some time to sit down and write those posts! So if you haven't already, become a fan of my blog on Facebook so you don't miss those giveaway announcements!

* Recipe notes:
- I baked my cake in a 9 inch pan instead of an 8 inch pan and it was done at 20 minutes.

Tuesday, September 27, 2011

Flip-Over Plum Cake (TWD)


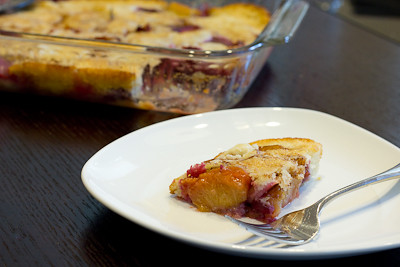
This week's Tuesdays with Dorie (TWD) recipe was chosen by Becky of Project Domestication: Flip-Over Plum Cake.  Dorie describes this cake as having "down-home, not-in-the-least-fussy good looks, an unquestionably appealing flavor and a texture that can't decide whether it wants to be a cake or your favorite nursery pudding."  I'll have to admit that when I read that description, it sounded great, up until the "nursery pudding" part! I love bread pudding (and I have no idea what nursery pudding is), but for some reason, thinking of a cake as pudding just didn't sound appetizing.  But please don't let that deter you from trying this cake - it was fantastic!

What's neat about this recipe is you pour the batter into the bottom of the pan, then top if with the fruit and pop it in the oven... and when you pull it out, the fruit has sunken to the bottom and the batter has risen to the top!

This cake has a really interesting flavor because Dorie pairs cinnamon with the plums.  Typically when you think of cinnamon being used with fruits, it's with apples, but Dorie was on to something when she paired it with plums! I'm not sure if I would describe this as a pudding, but more like a rustic cobbler of sorts.  Whatever you might want to call it, this cake was delicious.  Probably one of my favorites from this book so far if you factor in both taste and prep time (basically it has a high yield yummy factor with a low prep time factor!).  Only change I'll make when I try this again will be to decrease the sugar in the fruit by 50%, as it was just a little bit too sweet for my taste.

Thanks Becky, for hosting this week.  I loved this cake and will be making it again and again.  I think it would also be good with different types of fruits, too.  If you would like the recipe, you can find it here. Make sure you check out the TWD Blogroll, to see how everyone else enjoyed these chocolately treats!

* Recipe notes:
- I baked my cake in a 9 x 13 inch pan so my cake was a little bit thinner and was therefore done baking at about 40-45 minutes.
- I'll try reducing the sugar in the fruit by 50% next time, or perhaps cut the sugar in the batter by 50% to cut back on the sweetness just a little.

Wednesday, July 27, 2011

Fresh Frasiers (DB)

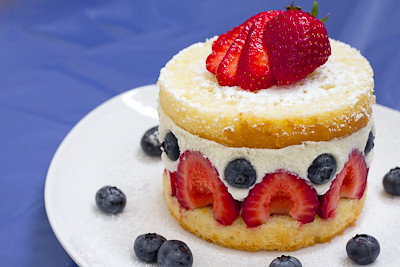
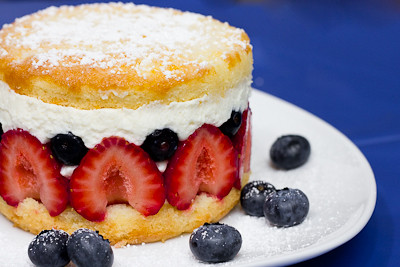
Jana of Cherry Tea Cakes was our July Daring Bakers’ host and she challenges us to make Fresh Frasiers inspired by recipes written by Elisabeth M. Prueitt and Chad Robertson in the beautiful cookbook Tartine.  The Frasier is a light, moist layered chiffon cake, split and filled with sliced fresh fruit and pastry cream, then topped with a thin sheet of almond paste.

I love fresh fruit and this challenge was the perfect way to showcase some of summer's fresh fruits! I omitted the optional layer of almond paste on top, mostly just because I didn't have any on hand, but followed the rest of the recipe exactly. I made an orange chiffon cake and filled it with strawberries and blueberries. I made the simple syrup with 2 tablespoons of orange juice and 2 tablespoons of triple sec. I was concerned the flavor of the alcohol would be too strong if I added the full 4 tablespoons of alcohol, but in retrospect I think it would have been much better that way.
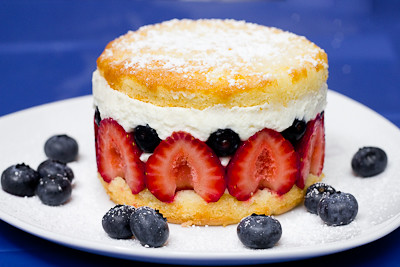
Regardless, this cake was amazing. The chiffon had an incredibly light but moist crumb.  (It is also special to me because this was the first time that my 20 month old helped me make a cake! She helped mix the cake batter (before the egg whites were added!) and it was so great to see how much fun she was having helping her mommy out.)  The pastry cream was delicious, though I think calling it a "pastry cream" makes it sound heavier than it actually is. Most pastry creams are made with multiple egg yolks (thus lending them their richness); this one is made with just one whole egg. So it's more like whipped cream with a little pastry cream added in. This keeps the dessert from being too heavy, and adds just a touch of richness to it. I basically loved everything about this dessert. Just look at all those fresh berries swimming in pastry cream! Yum!
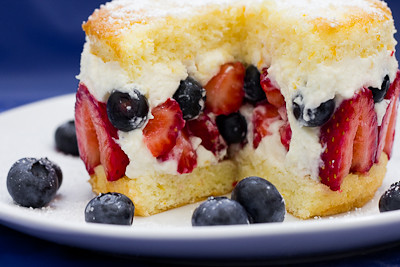
While this dessert is compromised of several components, each part on its own is very simple and you can make each individual component ahead of time and then assemble it all when needed.  Plus, if you are short on time, you can just make a trifle with the cake, fruit, and pastry cream!  It's every bit as good without any of the fuss.

Thanks Jana, for hosting this month's challenge.  I've never had or made a Fresh Frasier before, but I fell in love with them and definitely plan to make them again in the future! Make sure you check out the Daring Bakers' Blogroll to see how everyone else enjoyed this sweet, summery treat.

* Recipe notes - 
- When cutting parchment rounds for your pan(s), don't forget to check out my helpful tip here!
- I made my chiffon cakes in mini springform pans.  One chiffon cake recipe (below) will fit in four to five mini springform pans (depending on how thick you want them to be).  Depending on how thick or thin you want your cake layers to be, you can cut them into either three or four layers once they are cooled.  (I made four mini cakes and found that cutting them into two layers yielded layers that were too thick for this dessert.)
- Please note that the cake, like all chiffon cakes, will rise quite a bit, so do not overfill your pan(s)! You only want to fill them about half way, or two-thirds at most.
- Baking time was approximately 30 minutes for the mini cakes.

Fresh Frasiers
Basic Chiffon Cake:

Ingredients:
1 cup + 2 tablespoons (270 ml) (5½ oz/155 gm) all-purpose flour
1 teaspoon (5 ml) (4 gm) baking powder
3/4 cups (180 ml) (6 oz /170 gm) sugar
1/2 teaspoon (2½ ml) (1½ gm) salt, preferably kosher
1/4 cup (2 fl oz/60 ml) vegetable oil
3 large egg yolks
⅓ cup + 1 tablespoon (3.17 fl oz/95 ml) water
1 teaspoon (5 ml) pure vanilla extract
3/4 teaspoon (3¾ ml) (3 gm) lemon zest, grated
5 large egg whites
¼ teaspoon (1¼ ml) (1 gm) cream of tartar

Directions:

Preheat the oven to moderate 325°F (160°C/gas mark 3).

Line the bottom of an 8-inch (20 cm) spring form pan with parchment paper. Do not grease the sides of the pan.

In a large mixing bowl, stir together the flour and baking powder. Add in all but 3 tablespoons (45 ml.) of sugar, and all of the salt. Stir to combine.

In a small bowl combine the oil, egg yolks, water, vanilla and lemon zest. Whisk thoroughly.

Combine with the dry ingredients and mix thoroughly for about one minute, or until very smooth.

Put the egg whites into a stand mixer, and beat on medium speed using a whisk attachment on a medium speed, until frothy. Add cream of tartar and beat on a medium speed until the whites hold soft peaks. Slowly add the remaining sugar and beat on a medium-high speed until the whites hold firm and form shiny peaks.

Using a grease free rubber spatula, scoop about ⅓ of the whites into the yolk mixture and fold in gently. Gently fold in the remaining whites just until combined.

Pour the batter into the prepared pan. Bake for 45 to 55 minutes or until toothpick inserted into the center comes out clean.

Removed the cake from the oven and allow to cool in the pan on a wire rack.

To unmold, run a knife around the sides to loosen the cake from the pan and remove the spring form sides. Invert the cake and peel off the parchment paper. Refrigerate for up to four days.

Variations to the Basic Chiffon Cake:

Lemon Chiffon Cake

Ingredient Alterations:
Reduce water to 1/4 cup (60 ml)
Add 1/8 cup (30 ml) lemon juice
Increase lemon zest to 1½ teaspoon (7½ ml) (5 gm)
Remove the vanilla from the recipe

Direction Alterations:
Follow the directions, same as above, adding the lemon juice and zest to the oil, egg yolks and water in step 4.

Orange Chiffon Cake

Ingredient Alterations:
Replace the full amount of water with orange juice
Replace lemon zest with the zest of one orange
Remove the vanilla from the recipe

Direction Alterations:
Follow the directions, same as above, adding the orange juice and zest to the oil, and egg yolks in step 4.

Coconut Chiffon Cake

Ingredient Alterations:
Add ¼ teaspoon (1¼ ml) (1 gm) freshly ground nutmeg
Reduce oil to 1/8 cup (1 fl oz/30ml)
Reduce water to 1/8 cup (1 fl oz/30ml)
Add 1/3 cup (2 ⅔fl oz/80 ml) unsweetened coconut milk
Remove the vanilla from the recipe

Direction Alterations:
Follow the directions, same as above, adding the nutmeg to the flour mixture in step 3, and the coconut milk to the oil, water and egg yolks in step 4.

Chocolate Chiffon Cake

Ingredient Alterations:
Reduce all-purpose flour to ¾ cup + 1 tablespoon (195 ml) (4 oz/110 g)
Add 1/4 cup (60 ml) (3/4 oz/20 g) cocoa powder

Direction Alterations:
Follow the directions, same as above, adding the cocoa to the flour mixture in step 3.

Pastry Cream Filling:

Ingredients:
1 cup (8 fl oz/250 ml) whole milk
1/2 teaspoon (2½ ml) pure vanilla extract
1/8 teaspoon (1/2 ml) (¼ gm) salt, preferably kosher
2 tablespoons (30 ml) (10 gm)cornstarch
1/4 cup (60 ml) (2 oz/55 gm) sugar
1 large egg
2 tablespoons (30 ml) (1 oz/30 gm) unsalted butter
3/4 teaspoon (3¾ ml) (4 gm) gelatin
1/2 tablespoon (7½ ml) water
1 cup (8 fl oz/250 ml) heavy cream

Directions:

Pour the milk, vanilla, and salt into a heavy sauce pan. Place over medium-high heat and scald, bringing it to a near boiling point. Stir occasionally.

Meanwhile, in a stand mixer add the cornstarch and sugar. Whisk to combine

Add the eggs to the sugar and cornstarch and whisk until smooth.

When the milk is ready, gently and slowly while the stand mixer is whisking, pour the heated milk down the side of the bowl into the egg mixture.

Pour the mixture back into the warm pot and continue to cook over a medium heat until the custard is thick, just about to boil and coats the back of a spoon.

Remove from heat and pass through a fine mesh sieve into a large mixing bowl. Allow to cool for ten minutes stirring occasionally.

Cut the butter into four pieces and whisk into the pastry cream a piece at a time until smooth.

Cover the cream with plastic wrap, pressing the plastic wrap onto the top of the cream to prevent a skin from forming. Chill in the refrigerator for up to five days.

In a small dish, sprinkle the gelatin over the water and let stand for a few minutes to soften.

Put two inches (55 mm) of water into a small sauce pan and bring to a simmer over a medium heat.

Measure 1/4 cup (2 oz/60 ml) of the chilled pastry cream into a small stainless steel bowl that will sit across the sauce pan with the simmering water, without touching the water.

Heat the cream until it is 120 F (48.8 C). Add the gelatin and whisk until smooth. Remove from the water bath, and whisk the remaining cold pastry cream in to incorporate in two batches.

In a stand mixer, fitted with the whisk attachment, whip the cream until it holds medium-stiff peaks.

Immediately fold the whipped cream into the pastry cream with a rubber spatula.

Simple Syrup:

You may choose to flavor the syrup. One way is to use flavored sugar (for example: apple cider sugar, orange sugar, or vanilla sugar) or to stir in 1-2 teaspoons of flavored extract. You may also infuse with herbs or spices, if desired or add four tablespoons (60 ml) of fruit juice or liqueur while the syrup is cooling.
Ingredients:
1/3 cup (2⅔ fl oz/80 ml) (2⅔ oz/75 gm) of sugar, flavored or white
1/3 cup (2⅔ fl oz/80 ml) of water

Directions:

Combine the water and sugar in a medium saucepan.

Bring the mixture to a boil and let the sugar dissolve. Stirring is not necessary, but will not harm the syrup.

Remove the syrup from the heat and cool slightly.

Transfer syrup to a lidded container or jar that can be stored in the refrigerator. Simple syrup can be stored for up to one month.


Fraisier Assembly:

Components:
1 baked 8 inch (20 cm) chiffon cake
1 recipe pastry cream filling
⅓ cup (80 ml) simple syrup or flavored syrup
2 lbs (900 g) strawberries
confectioners’ sugar for dusting
½ cup (120 ml) (5 oz/140 gm) almond paste

Directions:

Line the sides of a 8-inch (20 cm) spring form pan with plastic wrap. Do not line the bottom of the pan.

Cut the cake in half horizontally to form two layers.

Fit the bottom layer into the prepared spring form pan. Moisten the layer evenly with the simple syrup.

When the cake has absorbed enough syrup to resemble a squishy sponge, you have enough.

Hull and slice in half enough strawberries to arrange around the sides of the cake pan. Place the cut side of the strawberry against the sides of the pan, point side up forming a ring.

Pipe cream in-between strawberries and a thin layer across the top of the cake.

Hull and quarter your remaining strawberries and place them in the middle of the cake. Cover the strawberries and entirely with the all but 1 tbsp. (15 ml) of the pastry cream.

Place the second cake layer on top and moisten with the simple syrup.

Lightly dust a work surface with confectioners' sugar and roll out the almond paste to a 10-inch (25 cm) round 1/16 inch (1.5 mm) thick. Spread the remaining 1 tablespoon (15 ml) of pastry cream on the top of the cake and cover with the round of almond paste.

Cover with plastic wrap and refrigerate for at least 4 hours.

To serve release the sides of the spring form pan and peel away the plastic wrap.

Serve immediately or store in the refrigerator for up to 3 days.

Tuesday, June 21, 2011

Date (Nut) Loaf (TWD)


I can't believe it's been two weeks since I last posted! Where does the time go? I really need to get better about posting, especially since I have some great good eats to post about!
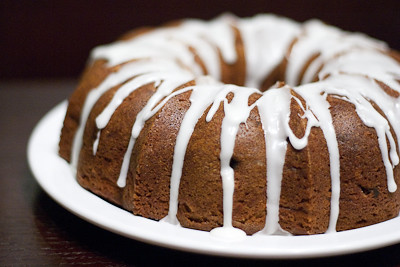
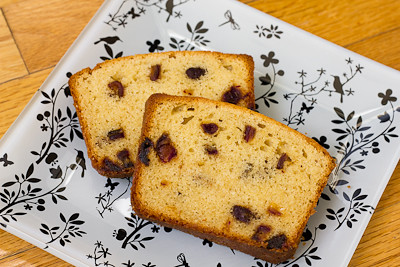
This week's Tuesdays with Dorie (TWD) recipe was chosen by Mary of Popsicles and Sandy Feet: Date-Nut Loaf. I love dates, but I'm not so keen on nuts so my cake was a Date Loaf sans nuts.  The recipe was straightforward and easy.  While I was creaming the butter, cream cheese, and sugar together, I chopped the dates up.  After that, it was just a few more minutes to add in the eggs, extracts, and dry ingredients.  My loaf was done baking about 10 minutes early, so I was glad I checked on it, because it was just a tad on the dry side as it is.
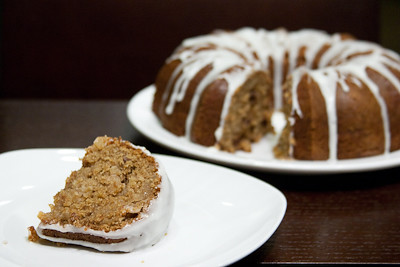

Thanks Mary, for hosting this week.  I just finished baking the loaf today and I've only had a few bites so far, because I wanted to wrap the loaf and lets the flavors "ripen" overnight, as Dorie suggests.  The dates were delicious in this loaf, and I imagine dried apricots would be quite nice, too.  I'll have to report back later on the final verdict after I try it again tomorrow!

If you would like the recipe, you can find it here. Make sure you check out the TWD Blogroll, to see how everyone else enjoyed this sweet treat! Also don't forget to enter my giveaway here before it ends on June 24th.

* Recipe notes - 
- I checked my loaf and it was done 10 minutes early, though next time I'll probably start checking it 20 minutes out to make sure the loaf doesn't dry out.

Tuesday, June 7, 2011

Blueberry-Brown Sugar Plain Cake (TWD)


This week's Tuesdays with Dorie (TWD) recipe was chosen by Cindy of Everyday Insanity: Blueberry-Brown Sugar Plain Cake. Dorie says this cake, with "no crumbs, streusel, nuts, icing or filling--is just plain appealing. It's got soft crumbs, a strong streak of caramel brown sugar flavor and the here-and-there surprise of sweet tart berries."

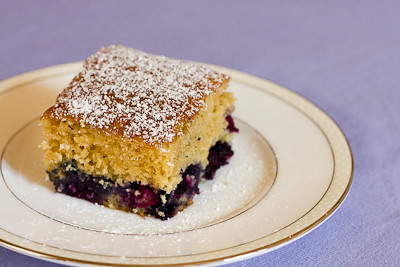
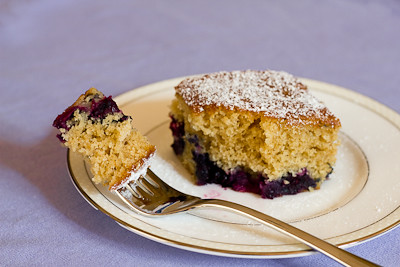
I have to say that this is probably the best "plain cake" I've had in a while! It's tempting to want to put a glaze or streusel topping on it, but give it a try as is and I promise you won't be disappointed!  The sweet, caramel undertone from the brown sugar is well complimented by the layer of blueberries.  Yes, like many other bakers noted, all of my blueberries sank to the bottom of the cake while it was in the oven (and I even rolled them in flour first!).  So, I ended up with a nice blue layer on the bottom of my cake. Thankfully this did not affect the taste at all ;)


Thanks Cindy, for hosting this week. I'll definitely be making this again! It was such a simple recipe but the flavor combination was spectacular. If you would like the recipe, you can find it here. Make sure you check out the TWD Blogroll, to see how everyone else enjoyed this sweet, blueberry treat! Also don't forget to enter my giveaway here before it ends on June 24th.

* Recipe notes - 
- I baked my cake in a 9 inch square pan and that did not seem to affect the baking time.
- I did have to cover the cake loosely with a foil tent to prevent the top from over browning.

Tuesday, May 10, 2011

Brown Sugar Bundt Cake (TWD)


This week's Tuesdays with Dorie (TWD) recipe was chosen by Peggy of Pantry Revisited: Brown Sugar Bundt Cake.  It doesn't sound like anything special, but there is something to be said about brown sugar - I love anything flavored with brown sugar or caramel.

The addition of prunes is quite unusual, and when my husband saw me making the cake he asked me, "You're making a cake... with prunes?!" I told him that I had made muffins not too long ago with prunes that he liked, but he had no recollection of prunes in anything I had made!  I swapped out the fresh pears in the recipe for some apples, and the combination of apples and prunes was quite good.  I know some may find the idea of prunes in a cake to be odd, but Dorie was really on to something when she came up with this cake.  If you are absolutely against having prunes in your cake, you can also substitute other dried fruit such as raisins, dried apricots, or dried cranberries.

This cake is extremely moist and the caramel undertone that the brown sugar gives it is delightful.  The flavors definitely ripen if you're able to wait a day before cutting into it. 

Thanks Peggy for hosting this week. I'll definitely be making this one again! If you would like the recipe, you can find it here. Make sure you check out the TWD Blogroll, to see how everyone else enjoyed this incredibly moist treat!

Tuesday, May 3, 2011

Chocolate Orange Marbled Loaf Cake (TWD)


This week's Tuesdays with Dorie (TWD) recipe was chosen by Carol of The Bake More: Basic Marbled Loaf Cake. Dorie gives several "playing around" options, with the peppermint version being her favorite.  I would have loved to have tried it but did not have any peppermint extract on hand.  Instead, I decided to make the chocolate orange marbled loaf cake. 

My loaf cake only had a hint of orange to it because I did not have any orange extract, either.  However, to bring out as much orange flavor as possible, I rubbed the orange zest with the sugar before mixing it in with the creamed butter.  I took the loaf out right at 1 hour and 20 minutes, and it was nice and moist, although I wonder if I may have over baked it by just a few minutes because I had envisioned the cake being more moist than it was.  Still, it was good and enjoyed by all. 

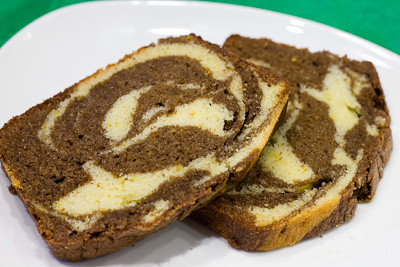
I was especially pleased with how the marbling turned out with this one, as it was only my third attempt at marbling a cake (and I failed the first and second attempts miserably!).  Overall, I enjoyed this cake but probably won't be making it again.  There's nothing wrong with it per se, I just feel like there are so many other recipes that I enjoy more than this one.

Thanks Carol, for hosting this week. If you would like the recipe, you can find it here. Make sure you check out the TWD Blogroll, to see how everyone else enjoyed this swirly treat!

Sunday, March 27, 2011

Yeasted Meringue Coffee Cake (DB)


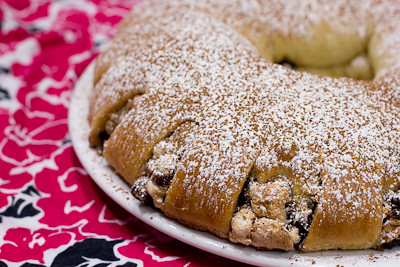
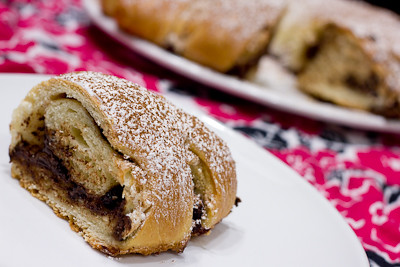
The March 2011 Daring Bakers’ challenge was hosted by Ria of Ria’s Collection and Jamie of Life’s a Feast. Ria and Jamie challenged The Daring Bakers to bake a yeasted Meringue Coffee Cake. Jamie found this recipe on a piece of yellowed paper in her dad’s collection of clipped out and hand-written recipes from the 1970’s, no source, no date, and she tried the recipe and loved it! It's a gorgeous brioche-like dough rolled jellyroll style around a layer of whipped meringue, cinnamon, sugar, and chocolate chips, then shaped into a wreath and baked.

I halved this recipe because I didn't really see the need to have two coffee cakes around the house tempting me! The recipe was easy to follow, and instead of kneading the dough by hand I let my KitchenAid dough hook do the work for me.  I did have to add a little extra flour until the dough was ready and was no longer sticking to the sides of the bowl, but otherwise the recipe was really straightforward.  I used the filling recommended by Jamie, sans nuts, and simply doubled the amount of cinnamon in the mixture.  It came out just right!

I wasn't sure what to expect from the meringue layer that is rolled into this cake, but as Ria and Jamie describe, the meringue "miraculously melts into the dough as it bakes leaving behind just a hint of sweetness and adding to the perfect moistness of the cake."  Some of it does ooze out between the slits cut into the cake, and that part of the meringue bakes up into slightly crisp, ooey gooey goodness!


Thanks Ria and Jamie, for hosting this month's challenge.  It was delicious and I'll definitely be making it again. Make sure you check out the Daring Bakers' Blogroll to see how everyone else enjoyed this wonderful breakfast treat.

And don't forget - I'm giving you two chances right now to enter to win a $100 Visa gift card.  There are just a few days left to enter the giveaway that ends on March 31st.  You have until April 11th to enter my second giveaway here.

FILLED MERINGUE COFFEE CAKE
Makes 2 round coffee cakes, each approximately 10 inches in diameter
The recipe can easily be halved to make one round coffee cake

Ingredients
For the yeast coffee cake dough:
4 cups (600 g / 1.5 lbs.) flour
¼ cup (55 g / 2 oz.) sugar
¾ teaspoon (5 g / ¼ oz.) salt
1 package (2 ¼ teaspoons / 7 g / less than an ounce) active dried yeast
¾ cup (180 ml / 6 fl. oz.) whole milk
¼ cup (60 ml / 2 fl. oz. water (doesn’t matter what temperature)
½ cup (135 g / 4.75 oz.) unsalted butter at room temperature
2 large eggs at room temperature
10 strands saffron for Ria’s version (Saffron might be hard to find and it’s expensive, so you can substitute with ½ - 1 teaspoon of ground cardamom or ground nutmeg. Or simply leave it plain like Jamie’s version)

For the meringue:
3 large egg whites at room temperature
¼ teaspoon salt
½ teaspoon vanilla
½ cup (110 g / 4 oz.) sugar

For the filling:
Jamie’s version: (this recipe is for 1 coffee cake)
1 cup (110 g / 4 oz.) chopped pecans or walnuts
2 Tablespoons (30 g / 1 oz.) granulated sugar
¼ teaspoon ground cinnamon
1 cup (170 g / 6 oz.) semisweet chocolate chips or coarsely chopped chocolate

Ria’s version:
1 cup (130 g / 5 oz.) chopped cashew nuts
2 Tablespoons (30 g / 1 oz.) granulated sugar
½ teaspoon garam masala (You can make it at home – recipe below - or buy from any Asian/Indian grocery store)
1 cup (170g / 6 oz.) semisweet chocolate chips ( I used Ghirardelli)
Egg wash: 1 beaten egg
Cocoa powder (optional) and confectioner’s sugar (powdered/icing sugar) for dusting cakes

**Garam (means “hot”) masala (means “mixture”) is a blend of ground spices and is used in most Indian savory dishes. It is used in limited quantities while cooking vegetables, meats & eggs. There is no “one” recipe for it as every household has a recipe of their own. Below, I am going to share the recipe which I follow.
4 or 5 sticks (25 g) Cinnamon Sticks (break a stick and open the scroll)
3 ½ tablespoons (25 g / less than an ounce) Cloves, whole
100 g. (3.5 oz.) Fennel seeds
4 tablespoons (25 g / less than an ounce) Cumin seeds
1 ½ tablespoons (10 g / less than half an ounce) Peppercorns
25 g (less than half an ounce) Green Cardamom pods

In a small pan on medium heat, roast each spice individually (it hardly takes a minute) until you get a nice aroma. Make sure you stir it throughout so that it doesn’t burn. As soon as each spice is roasted, transfer it to a bowl to cool slightly. Once they are all roasted, grind into a fine powder by using a coffee grinder, or pestle & mortar. Store in an airtight container and use as needed.

Directions:
Prepare the dough:
In a large mixing bowl, combine 1 ½ cups (230 g) of the flour, the sugar, salt and yeast.
In a saucepan, combine the milk, water and butter and heat over medium heat until warm and the butter is just melted. Ria’s version: add the 10 saffron threads to the warmed liquid and allow to steep off of the heat for 10 minutes. This will give the mixture a distinct aroma and flavor and a yellowish-orange hue.

With an electric mixer on low speed, gradually add the warm liquid to the flour/yeast mixture, beating until well blended. Increase mixer speed to medium and beat 2 minutes. Add the eggs and 1 cup (150 g) flour and beat for 2 more minutes.

Using a wooden spoon, stir in enough of the remaining flour to make a dough that holds together. Turn out onto a floured surface (use any of the 1 ½ cups of flour remaining) and knead the dough for 8 to 10 minutes until the dough is soft, smooth, sexy and elastic, keeping the work surface floured and adding extra flour as needed.
Place the dough in a lightly greased (I use vegetable oil) bowl, turning to coat all sides. Cover the bowl with plastic wrap and a kitchen towel and let rise until double in bulk, 45 – 60 minutes. The rising time will depend on the type of yeast you use.

Prepare your filling:In a small bowl, combine the cinnamon and sugar for the filling if using. You can add the chopped nuts to this if you like, but I find it easier to sprinkle on both the nuts and the chocolate separately.

Once the dough has doubled, make the meringue:
In a clean mixing bowl – ideally a plastic or metal bowl so the egg whites adhere to the side (they slip on glass) and you don’t end up with liquid remaining in the bottom – beat the egg whites with the salt, first on low speed for 30 seconds, then increase to high and continue beating until foamy and opaque. Add the vanilla then start adding the ½ cup sugar, a tablespoon at a time as you beat, until very stiff, glossy peaks form.

Assemble the Coffee Cakes:
Line 2 baking/cookie sheets with parchment paper.

Punch down the dough and divide in half. On a lightly floured surface, working one piece of the dough at a time (keep the other half of the dough wrapped in plastic), roll out the dough into a 20 x 10-inch (about 51 x 25 ½ cm) rectangle. Spread half of the meringue evenly over the rectangle up to about 1/2-inch (3/4 cm) from the edges. Sprinkle half of your filling of choice evenly over the meringue (ex: half of the cinnamon-sugar followed by half the chopped nuts and half of the chocolate chips/chopped chocolate).

Now, roll up the dough jellyroll style, from the long side. Pinch the seam closed to seal. Very carefully transfer the filled log to one of the lined cookie sheets, seam side down. Bring the ends of the log around and seal the ends together, forming a ring, tucking one end into the other and pinching to seal.
Using kitchen scissors or a sharp knife (although scissors are easier), make cuts along the outside edge at 1-inch (2 ½ cm) intervals. Make them as shallow or as deep as desired but don’t be afraid to cut deep into the ring.

Repeat with the remaining dough, meringue and fillings.

Cover the 2 coffee cakes with plastic wrap and allow them to rise again for 45 to 60 minutes.

Preheat the oven to 350°F (180°C).

Brush the tops of the coffee cakes with the egg wash. Bake in the preheated oven for 25 to 30 minutes until risen and golden brown. The dough should sound hollow when tapped.
 
Remove from the oven and slide the parchment paper off the cookie sheets onto the table. Very gently loosen the coffee cakes from the paper with a large spatula and carefully slide the cakes off onto cooling racks. Allow to cool.

Just before serving, dust the tops of the coffee cakes with confectioner’s sugar as well as cocoa powder if using chocolate in the filling. These are best eaten fresh, the same day or the next day.

Tuesday, January 25, 2011

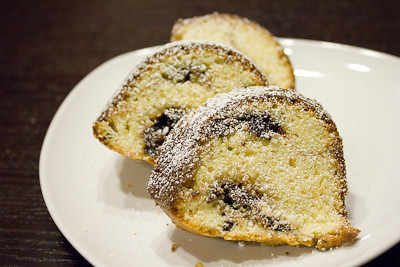
Chocolatey Swirly Sour Cream Bundt Cake (TWD)


This week's Tuesdays with Dorie (TWD) recipe was chosen by Jennifer of Cooking for Comfort: Nutty, Chocolately, Swirly Sour Cream Bundt Cake.  Cinnamon and sugar, nuts, chocolate chips, and raisins all mixed into a sour cream bundt cake.  Wait a minute. Raisins?! Yes you heard me right - raisins! I know there are many raisin haters out there, but I can tell you that we loved this cake, raisins and all!

This cake was deliciously moist thanks to the addition of sour cream.  I didn't quite get the "swirls" I was expecting, but luckily that didn't affect the taste ;) You're supposed to spoon half the batter into the pan, sprinkle half the swirl in, then top it with the rest of the batter.  You then create a "channel" for the rest of the swirl using a spoon and then you're supposed to cover the swirl with the batter that's on each side of the "channel."  It's a fairly sticky batter, so this was a bit difficult for me.  Plus there wasn't much batter to work with because my "channel" was fairly shallow (but that's what the recipe says to do!).  Luckily I had a bit of batter left in the bowl that I was able to scrape together and use to patch over the top.  Next time I'll probably just reserve a little bit for the end.

This cake was so good.  Let's just say that I made this yesterday evening, there were three of us munching on this cake, and as I write this there is half of a piece left! If you don't like raisins then leave them out (I left the nuts out of the recipe), but do substitute something like dried cranberries or apricots.  I think the dried fruit really adds a nice flavor to this cake.

Thanks Jennifer, for hosting this week.  I'll definitely be making this again.  If you would like the recipe, you can find it here. Also make sure you check out the TWD Blogroll, to see how everyone else enjoyed swirly chocolate treat!

* Recipe notes:
- I omitted the nuts so I increased the mini chocolate chips to 1/2 cup.
- Some bakers had problems unmolding their bundt cake so be sure to butter and flour your pan well. 
- Careful when you are putting the swirl in that you don't get too much near the edges of the pan or else it will burn.
- When preparing the cake, instead of using half the dough and then the other half on top, I would use a little less than half the dough for the first layer so you have some leftover to put on the very top to cover your "channel" or swirl/filling.
- For more recipe tips, click here

Sunday, January 23, 2011

Speakeasy (SMS)

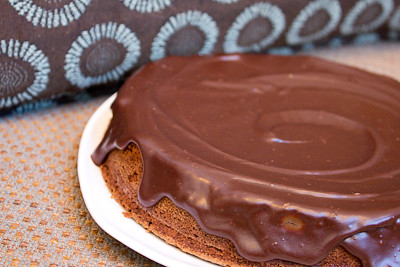
As I was sitting on our kitchen bar stool looking over this week's Sweet Melissa Sundays (SMS) recipe, I realized that I didn't have any 8x2-inch round cake pans for the cake.  Jeannette of The Whimsical Cupcake had chosen the Speakeasy - I'd never heard of a Speakeasy cake before. Apparently a speakeasy is an establishment that illegally sells alcoholic beverages (these establishments came into prominence during the Prohibition).  So this speakeasy is a chocolate cake with brandy mixed into the batter.  Most of it is baked off in the oven, but you can still get a hint of it in the finished product.  I suppose I could have just used my 9-inch springform pan but instead I used my 8x1-1/4" cake pan and then made 6 mini cakes in a muffin pan.


The cake came together easily enough but I seemed to have the same problem that Jeannette did with hers - it formed a thick crust on the top (kind of like a brownie does but thicker).  So, I guess I may have over whipped my egg whites? My cake didn't form a crater underneath the crust like Jeannette's did, so I simply scraped it off and proceeded as planned.  Plus, Melissa says you should flip the cake over to glaze it anyway.


The only change I made to this cake was to use semisweet chocolate instead of bittersweet, as I don't like bittersweet or dark chocolate.  How did it turn out? I loved this cake. It had a nice, dense crumb with just a hint of brandy. The cake was rich but not over the top rich like a flourless chocolate cake. You can taste the brandy in it, but really only if you know to look for that flavor.  I'll definitely be making it again; maybe next time I'll try it with some rum!


Thank you, Jeannette, for hosting this week. If you'd like the recipe, you can find it here. Make sure you check out the Sweet Melissa Sundays Blog Roll to see how everyone else enjoyed this boozey, chocolatey treat!

* Recipe notes:
- I used semisweet chocolate chips instead of bittersweet chocolate.
- The mini cakes I made in the muffin pan were done around 15 minutes.  My full size cake was done closer to around 60 minutes because it wasn't quite as thick as the one in the recipe.

- The cake will keep in a cake saver at room temperature for 2 days.  For longer storage, you can keep it in the refrigerator for up to 1 week.  I was able to wrap mine in plastic wrap (after the glaze had set) without really messing up the glaze.

Tuesday, December 14, 2010

Apple-Coconut Family Cake (TWD)

 This week's Tuesdays with Dorie (TWD) recipe was chosen by Amber of Cobbler du Monde: Apple-Coconut Family Cake. I had seen this recipe in the book before, and thought it looked interesting. I honestly thought it was more of a fancy cake, so I passed it up, waiting to make it another day. Had I spent a little more time to read the recipe instructions (and not just the recipe list), I would have quickly realized that this is not a fussy cake, and it doesn't take long to make at all. The most time consuming aspect of it is slicing and dicing the apples. Otherwise, it's pretty much like any other muffin or quick bread recipe that doesn't even require an electric mixer. 


I found that my cake took considerably longer to bake through completely - a full 20-25 minutes extra! I was worried that the edges would burn because they started to brown much sooner than the center, but in the end it was okay.  The edges of my cake were a little drier than the center, but they weren't burnt at least.  Otherwise, this recipe came together quickly and easily for me. The slightly chewy texture that the coconut gives this cake did not bother me, but I did read that a few did not like that. I love apples and I love coconut, but I never would have thought to put the two together like this.  It was a nice combination of flavors.


Thanks Amber, for hosting this week.  I will definitely be making this again. If you would like the recipe, you can find it here.  Make sure you check out the TWD Blogroll, to see how everyone else enjoyed this cake.

* Recipe notes:
- Make sure you test your cake before removing it from the oven - mine took a full 20-25 minutes longer to bake!
- For more recipe tips, click here

Tuesday, November 9, 2010

Not-Just-For Thanksgiving Cranberry Shortbread Cake (TWD)

This week's Tuesdays with Dorie (TWD) recipe was chosen by Jessica of Singleton in the Kitchen: Not-Just-For Thanksgiving Cranberry Shortbread Cake.  Dorie calls this "part cake, part torte and even part bar cookie."  It's a delicious layer of homemade cranberry orange jam sandwiched between two layers of shortbread.

The jam is so simple to make (takes about 10 minutes), but if you are short on time (or don't have the ingredients on hand) you can substitute 2 cups of your favorite chunky fruit preserve or citrus marmalade.  If you've never segmented an orange before, you'll find this video to be helpful.

There were several bakers that had problems with their cakes ending up too tart.  Dorie does recommend that you taste the jam at the end and add more sugar if it's too tart.  I was worried about ending up with a cake that was too tart for consumption, so I added quite a bit of sugar to my jam.  Even then, my cake ended up with a nice zing to it.  Definitely not too tart, but more tart than I anticipated it being.  My only guess is that the jam tastes more sweet when warm than when cooled to room temperature.  So, my advice would be to add the sugar until the jam has reached your desired level of tartness, then add a little bit more sugar for good measure.


This cake was delicious.  The crumb was so soft and tender, and the cranberry orange jam keeps this dessert light.  It would be the perfect addition to any Thanksgiving table, especially since you can make the jam up to two weeks ahead.  Dorie says you can make the dough ahead of time and refrigerate it overnight, but I had mine in the refrigerator for 2-3 nights without any problems.  So you could easily make each component in advance and then put it all together come Thanksgiving Day.

Thanks Jessica, for hosting this week.  I will definitely be making this again - maybe next time using Dorie's suggestion of layering caramelized apples in between!  If you would like the recipe, you can find it here.

Make sure you check out the TWD Blogroll, to see how everyone else enjoyed this wonderful cake!  If you love cranberries, these sugared cranberries were a hit when I made them last year!

* Recipe notes:
- It seems that the cranberry orange jam tastes more sweet while it is warm than after it cools. So, keep adding sugar until it's no longer too tart for your preference, then continue to add a bit more! 
- I did not do the knife test on my cake to see if it was done - I simply went by the color of the crust on top and that seemed to work well. 
- I did not place my springform pan on a baking sheet as directed; I simply placed my pan directly into the oven.  It was done baking after about 38 minutes.
- For more recipe tips, click here

Sunday, October 17, 2010

Fluffy Coconut Cake with Guava Filling (SMS)

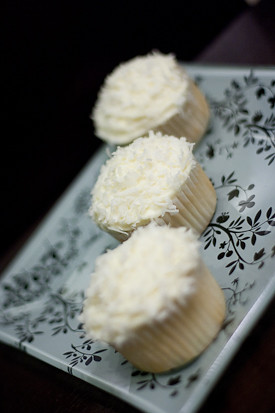
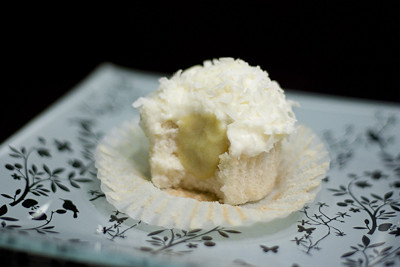
This week's Sweet Melissa Sundays (SMS) recipe was chosen by Karen of Karen’s Cookies Cakes & More: Fluffy Coconut Cake with Passion Fruit Filling. I didn't feel like trying to make a fancy layer cake, so I opted for the cupcake version instead. And, because I couldn't get my hands on any passion fruit juice, I made a guava filling for my cupcakes. I think the other option for a lemon filling would be great with these cupcakes, too.

I kind of feel like the name "Fluffy Coconut Cake" is a misnomer because there is not one bit of coconut in this cake! It is just a basic cake that is topped with coconut cream cheese frosting. Nevertheless, these cupcakes were delicious... and I think the real star of this recipe is the coconut cream cheese frosting. The guava filling was interesting and paired well with the coconut, but I think the cupcakes were good without any filling at all, too. If you're looking for a recipe to use up all those extra egg whites you have in your freezer (like I always do after making ice cream!), this is a great one to make.


Thank you, Karen, for hosting this week. If you'd like the recipe, you can find it here. Make sure you check out the Sweet Melissa Sundays Blog Roll to see how everyone else enjoyed this coconut-y treat!

* Recipe notes:
- I made a full recipe and was able to make 34 cupcakes from it.
- I baked my cupcakes for about 18-19 minutes before they were done.

Tuesday, October 5, 2010

Double Apple Bundt Cake (TWD)

This week's Tuesdays with Dorie (TWD) recipe was chosen by Lynne of Honey Muffin: Double Apple Bundt Cake. I already said last week that I love baked apples.... so I was pleased to see yet another apple recipe picked for this week! With the weather finally cooling down here (into the 80's - ha!) and all these apple recipes, it is finally beginning to feel like fall!
This is another quick and easy recipe, with the exception of the time it takes to grate the apples. Truthfully, that still only took me about 15 minutes, so it really wasn't bad at all (and I did not have a grater so I sliced them into slivers). 

I made a few slight changes to the recipe. I doubled the cinnamon because 1/2 teaspoon seemed like so little.  I omitted the nuts, but did add the raisins.  I think dried cranberries would be wonderful in this cake, too. Instead of 1-1/2 cups of white sugar, I used 1 cup white sugar and 1/2 cup brown sugar.   I'd like to use all brown sugar next time to see how it tastes, and top the cake with a caramel sauce instead, because I love this apple cake with caramel sauce and Dorie's recipe seems much "healthier" (relatively speaking).

Wow was this cake good! So moist and full of apple flavor. I think the apple butter gave it that extra little something that just made it special and set it apart from other apple cakes.  The lemon icing on top is a nice, tart contrast to the sweetness of the cake.  I just finished baking this cake this evening and I'm not sure if it will even last 24 hours!


Thanks Lynne, for hosting this week.  I will definitely be making this one again and again! If you would like the recipe, you can find it here. Make sure you check out the TWD Blogroll, to see how everyone else enjoyed this fall treat! As a reminder, if you'd like to meet Dorie during her current book tour, see if she will be visiting your city here.  If you'd like to join us at her cooking class here in Dallas on October 24th, sign up here.

* Recipe notes:
- I used 1 teaspoon of cinnamon instead of 1/2.
- I used 1 cup of white sugar and 1/2 cup of brown sugar.
- I used Gala apples which were perfect in this recipe.
- I baked my cake for a total of 60 minutes, 5 minutes longer than indicated.
- Wrapped well, this cake will keep for 4 days at room temperature or 2 months in the freezer.
- For more recipe tips, click here

Tuesday, September 14, 2010

Blueberry Upside-Downer (TWD)


This week's Tuesdays with Dorie (TWD) recipe was chosen by Sabrina of Superfluous: Cranberry Upside-Downer.  I've actually wanted to make this cake from the moment I got this cookbook! The photograph in the book is just so scrumptious looking.  Somehow year after year, I always end up making some other type of cranberry goodie instead because surprisingly, no one has picked this cake... until now! :)

This cake took almost no time to make, allowing me to throw it together in a matter of minutes, before my little girl lost interest in the miscellaneous items I handed to her as I set her down in the kitchen to play while I baked ;) (Unfortunately, it was getting dark by the time I got to photograph it and with my hubby rushing me to finish so he could eat some, I neglected to change the settings on my camera so my pictures aren't the best.)

The only problem I had with this cake was flipping it right side up.  Be careful, as it's a very juicy cake and I had scorching hot, juicy butter splatter onto my arm as I flipped it onto the plate!!! Thankfully aloe vera is amazing and I went from having a splatter shaped first degree burn on my arm to virtually no trace of any burns whatsoever there now!


This cake was delicious.  It's nice and moist and not overly sweet.  Perfect for dessert, or breakfast.  I couldn't find any cranberries at my grocery store (fresh or frozen), so I used frozen blueberries instead. I definitely plan to make this again once it gets closer to Thanksgiving and cranberries are more readily available. 

I also like to think of this cake as "healthy." I remember hearing somewhere that one teaspoon of cinnamon has as many antioxidants as one half cup of blueberries.  Well, this cake has one teaspoon of cinnamon and two cups of blueberries in it so it has to be good for you, right? ;)


Thanks Sabrina, for hosting this week.  I loved this cake. I can't wait to make it again, with cranberries! If you would like the recipe, you can find it here. Make sure you check out the TWD Blogroll, to see how everyone else enjoyed this wonderful, fall treat!

* Recipe notes:
- I did not place my cake pan on a baking sheet; I put it directly into the oven.
- I found that my cake was done five minutes earlier, at 35 minutes, so keep a close eye on your cake.
- Be very, very careful flipping your cake over, and do it over the sink, as some of the juices may spill over.
- For more recipe tips, click here.

Sunday, August 29, 2010

Ice Cream Petit Fours (DB)


The August 2010 Daring Bakers’ challenge was hosted by Elissa of 17 and Baking. For the first time, The Daring Bakers partnered with Sugar High Fridays for a co-event and Elissa was the gracious hostess of both. Using the theme of beurre noisette, or browned butter, Elissa chose to challenge Daring Bakers to make a pound cake to be used in either a Baked Alaska or in Ice Cream Petit Fours. The sources for Elissa’s challenge were Gourmet magazine and David Lebovitz’s “The Perfect Scoop”.

I decided to make the petit fours since I've never made them before.  I'm a few days late posting, but I had some technical difficulties with my ice cream machine! For some reason, I couldn't get the container to freeze, and I didn't realize this until the last minute. So, I had to stick the second container in the freezer and wait for it to freeze before I could make my ice cream.  Otherwise, this recipe went off without a hitch.

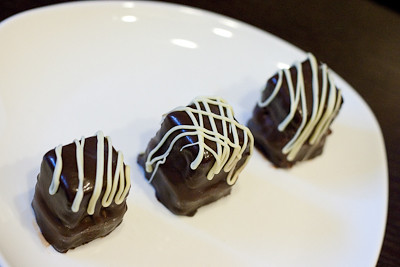
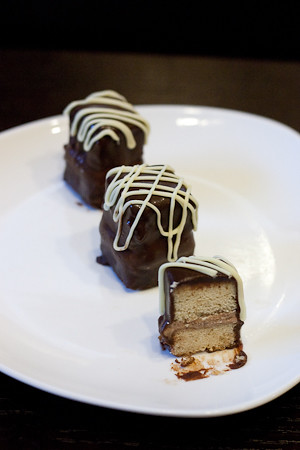
I made Dorie Greenspan's chocolate ganache ice cream for my petit fours, instead of David Lebovitz' vanilla ice cream.  The chocolate ice cream sandwiched between the brown butter cake pound cake, drenched in the chocolate glaze was any chocolate lover's dream come true!


My favorite part of this recipe was actually the brown butter pound cake.  One of my favorite pastas is the one from Spaghetti Factory that is served with browned butter and mizithra cheese.  So I am very familiar with the wonderful nutty aroma of browned butter.  This pound cake was moist and delicious and much better than any traditional pound cake I've had.  I'll definitely be making it again.

Thanks Elissa, for hosting this month's challenge.  I had fun making petit fours for the very first time! Make sure you check out the Daring Bakers' Blogroll to see how everyone else enjoyed this cool and creamy summer treat.

Ice Cream Petit Fours

Preparation time:
Ice cream – 45 min active time, ice cream rests/chills for 1 hour then overnight. Without an ice cream maker, the ice cream chills 2-3 hours and must be stirred every 30 minutes.

Brown Butter Pound Cake – 2 hours (includes cooling time)

Chocolate Glaze – 15 minutes

Assembly of Ice Cream Petit Fours – Ice cream must be frozen ahead of time several hours, then the cake and ice cream freeze overnight. After dipping, the petit fours freeze for one hours.

Equipment required:
• Small and medium saucepans
• Paring knife
• 2 quart (2 litres) bowl
• Electric mixer
• Whisk
• Spatula
• Sieve
• 9”x9” (23cmx23cm) square baking pan
• 10” (25 cm) skillet
• Cake leveler/serrated knife
• Cooling racks
• Rimmed half sheets
• Teacups
• Plastic wrap
• Piping bags (optional)
• Ice cream maker (optional)
• Cooking blow torch (optional)

Directions:

Vanilla Ice Cream

1 cup (250ml) whole milk
A pinch of salt
3/4 cup (165g) sugar
1 vanilla bean, split lengthwise OR 2 teaspoons (10ml) pure vanilla extract
2 cups (500ml) heavy (approx 35% butterfat) cream
5 large egg yolks
1 teaspoon (5ml) pure vanilla extract

1. Heat the milk, salt, and sugar in a medium saucepan until the liquid steams. Scrape out the seeds of the vanilla bean with a paring knife and add to the milk, along with the bean pod. Cover, remove from heat, and let infuse for an hour. (If you do not have a vanilla bean, simply heat the milk, salt, and sugar in a medium saucepan until the liquid steams, then let cool to room temperature.)

2. Set up an ice bath by placing a 2-quart (2 litre) bowl inside a large bowl partially filled with water and ice. Put a strainer on top of the smaller bowl and pour in the cream.

3. In another bowl, lightly beat the egg yolks together. Reheat the milk in the medium saucepan until warmed, and then gradually pour ¼ cup warmed milk into the yolks, constantly whisking to keep the eggs from scrambling. Once the yolks are warmed, scrape the yolk and milk mixture back into the saucepan of warmed milk and cook over low heat. Stir constantly and scrape the bottom with a spatula until the mixture thickens into a custard which thinly coats the back of the spatula.

4. Strain the custard into the heavy cream and stir the mixture until cooled. Add the vanilla extract (1 teaspoon [5ml] if you are using a vanilla bean; 3 teaspoons [15ml] if you are not using a vanilla bean) and refrigerate until thoroughly chilled, preferably overnight.

5. Remove the vanilla bean and freeze in an ice cream maker. If you don’t have an ice cream maker, you can make it without a machine. See instructions from David Lebovitz: http://www.davidlebovitz.com/archives/2007/07/making_ice_crea_1.html

Brown Butter Pound Cake

19 tablespoons (9.5 oz) (275g) unsalted (sweet) butter
2 cups (200g) sifted cake flour (not self-rising; sift before measuring) (See “Note” section for cake flour substitution)
1 teaspoon (5g) baking powder
1/2 teaspoon (3g) salt
1/2 cup (110g) packed light brown sugar
1/3 (75g) cup granulated sugar
4 large eggs
1/2 teaspoon pure vanilla extract

1. Preheat the oven to 325°F/160°C and put a rack in the center. Butter and flour a 9”x9” (23cmx23cm) square pan.

2. Place the butter in a 10” (25cm) skillet over medium heat. Brown the butter until the milk solids are a dark chocolate brown and the butter smells nutty. (Don’t take your eyes off the butter in case it burns.) Pour into a shallow bowl and chill in the freezer until just congealed, 15-30 minutes.

3. Whisk together cake flour, baking powder, and salt.

4. Beat the brown butter, light brown sugar, and granulated sugar in an electric mixer until light and fluffy, about 2 minutes. Beat in the eggs one at a time, mixing well, and then the vanilla extract.

5. Stir in the flour mixture at low speed until just combined.

6. Scrape the batter into the greased and floured 9”x9” (23cmx23cm) square pan. Smooth the top with a rubber spatula and rap the pan on the counter. Bake until golden brown on top and when a toothpick inserted into the center comes out clean, about 25 minutes.

7. Cool in the pan 10 minutes. Run a knife along the edge and invert right-side-up onto a cooling rack to cool completely.

Chocolate Glaze (For the Ice Cream Petit Fours)

9 ounces (250g) dark chocolate, finely chopped
1 cup (250 ml) heavy (approx 35% butterfat) cream
1 1/2 tablespoons (32g) light corn syrup, Golden syrup, or agave nectar
2 teaspoons (10ml) vanilla extract

Stir the heavy cream and light corn syrup in a small saucepan over medium heat until it comes to a boil. Remove from heat and add the dark chocolate. Let sit 30 seconds, then stir to completely melt the chocolate. Stir in the vanilla and let cool until tepid before glazing the petit fours.

Assembly Instructions 
1. Line a 9”x9” (23cmx23cm) pan with plastic wrap, so that no sides of the pan are exposed and so there is some extra plastic wrap hanging off the sides. Spread 1 ¾ to 2 cups (450ml to 500ml) ice cream into the pan. Cover with more plastic wrap and freeze several hours.

2. Once the brown butter pound cake has completely cooled, level the top with a cake leveler or a serrated knife. Then split the cake in half horizontally to form two thin layers.

3. Unwrap the frozen ice cream. Flip out onto one of the layers of cake and top with the second layer of cake. Wrap well in plastic wrap and return to the freezer overnight.

4. Make the chocolate glaze (see above.)

5. While the glaze cools, trim ¾” (2cm) off each side of the ice cream cake to leave a perfectly square 7.5” (19cm) ice cream cake. Cut the cake into twenty five petit fours, each 1.5”x1.5” (4cmx4cm).

6. Glaze the petit fours one at a time: place a petit four on a fork and spoon chocolate glaze over it.

7. Place the petit fours on a parchment-lined baking sheet and return to the freezer for one hour.