Showing posts with label chicken. Show all posts

Thursday, January 20, 2011

Chicken, Garlic, and Sundried Tomato Pasta... and a Winner!


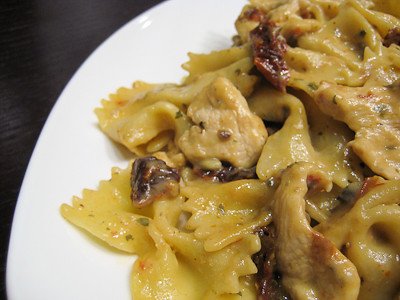
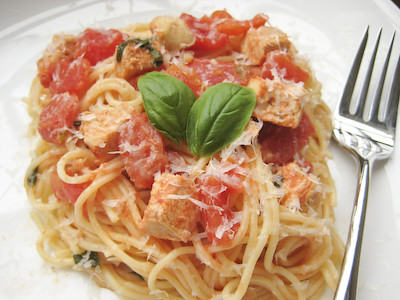
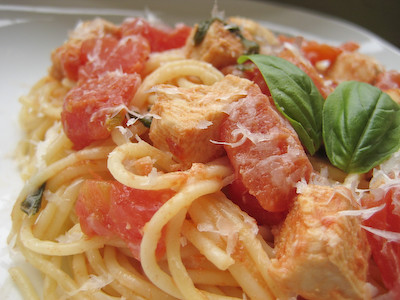
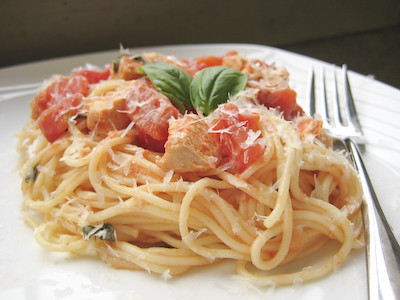
This is one of my favorite go-to dinners when I'm craving pasta but want something other than a regular red sauce or meat sauce.  It is creamy and delicious but not overly heavy like an alfredo sauce can be sometimes.  I've made it so many times now that I've adjusted it to suit our tastes... namely, I've cut back on the butter, added more garlic, milk, and sun dried tomatoes, and some crushed red pepper to give it a kick! I've also found that if I slice the chicken very thin, I don't have to precook it and I can simply add the chicken in raw, bring the sauce to a quick boil, and then lower the temp and let it simmer for those last 6-8 minutes.

Brownish colored food is never easy to photograph, but you'll have to trust me when I say that even though the photo doesn't look that appetizing, this is a really tasty dish! :)

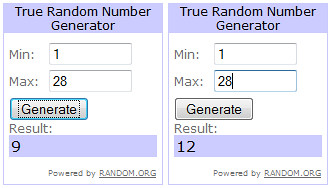
And, without further ado, the winners of the Kettle Confections giveaway are lucky #9 and #12.  Congrats to Marcy of minus tomato and "ikkinlala."  I'll be contacting you shortly and you have until midnight (CST) January 22nd to email me your mailing address; if I do not hear from you by then, I will select alternate winners.  Enjoy!


Chicken, Garlic, and Sundried Tomato Pasta
from Good Eats 'n Sweet Treats (adapted from Allrecipes)

1 (12 ounce) package farfalle pasta
6 tbsp butter
4-6 cloves garlic, minced
1 (10.75 ounce) can condensed cream of chicken soup
1 (10.75 ounce) can condensed cream of mushroom soup
1 cup skim milk
1 tablespoon dried parsley
1/2 teaspoon salt
1/2 teaspoon freshly ground black pepper
1 tsp crushed red pepper, optional
2 cooked skinless, boneless chicken breast halves, cut into bite-size pieces
2/3 cup sun-dried tomatoes, rehydrated in water
2 tablespoons grated Romano cheese

In a large pot with boiling salted water cook farfalle pasta until al dente. Drain.

Meanwhile, melt butter in a large saucepan. Add garlic cloves and cook until garlic browns. Add the cream of chicken and cream of mushroom soup and milk, stirring until smooth. Stir in the dried parsley, salt, and ground fresh pepper (as well as the crushed red pepper if you are using it). Let simmer for 2 to 3 minutes. Add bite size chicken pieces and hydrated sun dried tomatoes. Simmer for 6 to 8 minutes. Mix in grated Romano cheese.

Toss cooked and drained pasta with chicken sauce. Serve warm.

Friday, October 8, 2010

Mojito Chicken Revisited


A while back, I was sent a sample of black garlic from Marx Foods.  Since I knew nothing about black garlic previously, the information I found on their website about it was helpful:

Black garlic is a unique ingredient that has been used in Korean, Thai, and Japanese food for some time... it is essentially conventional garlic that has been carefully high-heat fermented for a month, until the cloves soften and turn dark black... it is sweet (but not cloying) with a more mild garlic aftertaste, but there are nuances that people describe as molasses, balsamic, licorice or tamarind-like flavors. It is considered to be a high umami ingredient. Black garlic is considered healthier than plain garlic because it contains twice as many antioxidants.

I wracked my brain for weeks, trying to figure out what dish to try this black garlic in.  I finally settled upon this Mojito Chicken that I made a while back.  I'll be honest with you... I was a little hesitant to taste this dish after I made it! You see, I'm not always the most adventurous eater and when I hear about something like black garlic that is fermented, I have no idea what it's going to taste like and that's a little scary!

You know what? I had no reason to be scared... the black garlic was an excellent addition to this dish.  I do not think that anyone eating this would ask what was in it (as if they tasted something funny).  Rather, it enhanced all the existing flavors.  It really is a difficult flavor profile to describe - slightly sweet but also a bit savory at the same time.  I think it's one of those foods that you just have to taste for yourself.

A big thanks to Marx Foods for the black garlic! You should check out their store - they used to market to professional chefs, but now they are selling the same quality ingredients that were previously only available to professional chefs to home cooks like you and me!

Saturday, January 17, 2009

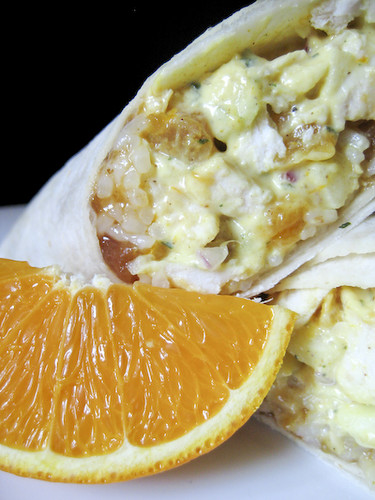
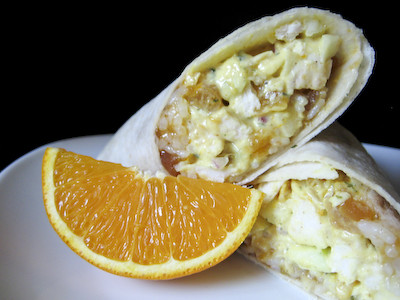
Curried Chicken Salad Wraps


When I was in college, my roommate and I quickly learned that the food at the graduate school cafeterias was much better than our dorm food. So we'd go to the medical school sometimes, but most of the time we chose to eat at the School of Management because of its proximity to us.


Every day for lunch, they'd offer a different kind of wrap, made to order. One of my favorites was an Indian inspired wrap - it had curried chicken in it, rice, and some type of chutney.


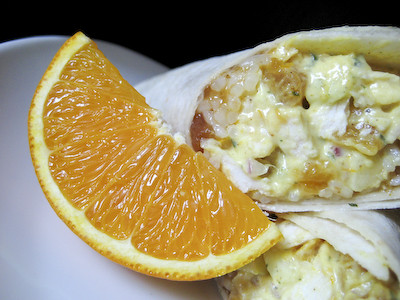
When I saw this recipe from Cooking Light, I was reminded of the wraps that I had grown to love in college, and thought I could adapt this recipe to replicate them. I really can't remember if there were grapes or apples in them, but I just used apples because that's what I had on hand. I have to say that I was pleasantly surprised with how well these turned out. They weren't exactly like what I remember, but they're pretty close.


So, if you're looking for a quick dinner idea, or something different to pack for lunch during the week, give these wraps a try.

Curried Chicken Salad Wraps
adapted from Cooking Light

click here for printable recipe

6 tablespoons reduced-fat mayonnaise
1/2 teaspoon grated orange rind
1 1/2 teaspoons orange juice
1 teaspoon curry powder
1/2 teaspoon grated peeled fresh ginger
2 1/2 cups diced roasted skinless, boneless chicken breasts (about 3/4 pound) (I used 1 pound and it yield 2 cups)
3/4 cup seedless green grapes, halved (I used diced apples)
1/4 cup diced dried apricots (I used 5 pieces)
1/4 cup thinly sliced green onions (I used finely diced red onions)
2 tablespoons chopped unsalted cashews (I don't like nuts so I omitted these)
1 tablespoon chopped fresh parsley (I used 1 tsp dried parsley)
4 (6-inch) naan breads (I used flour tortillas but if you want a good naan recipe, click here)
3 cups trimmed watercress (I omitted this but would like to use it next time)
4 tbsp chutney (I used Hot Peach & Apple Chutney)
1 cup cooked rice (basmati would be best but you can use white rice too)

Combine first 5 ingredients in a large bowl; stir with a whisk. Add chicken and next 5 ingredients (through parsley) to mayonnaise mixture, tossing to coat.

Heat naan according to the package directions, if desired.

Spread 1 tablespoon of chutney across one side of your naan/tortilla. Layer on about 1/4 cup cooked rice. Spoon about 3/4 cup chicken mixture onto each naan (or tortilla). Top with 3/4 cup watercress; fold over (or roll up wrap tightly if using tortillas. Cut diagonally in half.)

Yield: 4 servings (serving size: 1 sandwich/wrap)

Wednesday, October 29, 2008

Barbeque Chicken Pizza


This month's Daring Bakers Challenge was chosen by Rosa of Rosa's Yummy Yums: Pizza! This challenge is dedicated to Sher of What Did You Eat? Sher was set to co-host this month with Rosa, but tragically passed away in July from a heart attack. It was originally Sher's idea for homemade pizza to be what the Daring Bakers made this month.


I was excited to try this recipe because while I've made pizza at home several times (with my own sauces and toppings), I've never made pizza dough from scratch.

If you decide to try this recipe, make sure you plan ahead. The flour needs to be chilled and the dough requires an overnight rest in the refrigerator before baking. (The dough can be frozen for later use to save some time.)
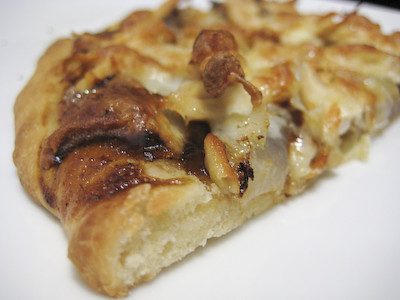

I don't know what happened to this month, but before I knew it, the posting date for this challenge had snuck up on me. I just got back from my vacation on the 25th, so I barely had enough time to complete this. I almost decided to sit this one out, but ended up throwing together a Barbeque Chicken Pizza.
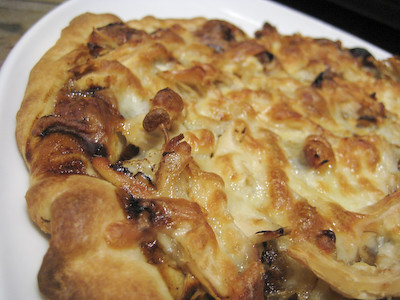

The real challenge this month (at least for me) was to actually toss the dough instead of rolling it out. I had every intention of doing this - at least trying - but in the end it just wasn't in the cards for me. After allowing the dough to rest on the counter for two hours, it was way too soft to toss. I think my mistake was that I overlooked the part of the recipe that indicates that the flour needs to be chilled first. Consequently, my dough was too warm by the time I had finished kneading it. Regardless of my mistake, the pizza still tasted great (the dough was just really hard to work with).

Thanks Rosa, for choosing pizza for this month's challenge and honoring Sher. I hope that next time, I can follow the instructions a little better and actually get it right! The recipe for the pizza dough can be found below; if you'd like the recipe for the Barbeque Chicken Pizza you can find it here. Make sure you visit the Daring Bakers Blogroll to see how hundreds of others fared with this challenge!


Basic Pizza Dough
from The Bread Baker's Apprentice: Mastering The Art of Extraordinary Bread, by Peter Reinhart

Makes 6 pizza crusts (about 9-12 inches/23-30 cm in diameter).

Ingredients:
4 1/2 Cups (20 1/4 ounces/607.5 g) Unbleached high-gluten (%14) bread flour or all purpose flour, chilled - For Gluten Free (GF): 4 ½ cups GF Flour Blend with xanthan gum or 1 cup brown rice flour, 1 cup corn flour, 1 cup oat flour, 1 ½ cup arrowroot, potato or tapioca starch + 2 tsp xanthan or guar gum
1 3/4 Tsp Salt
1 Tsp Instant yeast - FOR GF use 2 tsp
1/4 Cup (2 ounces/60g) Olive oil or vegetable oil (both optional, but it’s better with)
1 3/4 Cups (14 ounces/420g or 420ml) Water, ice cold (40° F/4.5° C)
1 Tb sugar - FOR GF use agave syrup
Semolina/durum flour or cornmeal for dusting

DAY ONE

Method:
1. Mix together the flour, salt and instant yeast in a big bowl (or in the bowl of your stand mixer).

2. Add the oil, sugar and cold water and mix well (with the help of a large wooden spoon or with the paddle attachment, on low speed) in order to form a sticky ball of dough. On a clean surface, knead for about 5-7 minutes, until the dough is smooth and the ingredients are homogeneously distributed. If it is too wet, add a little flour (not too much, though) and if it is too dry add 1 or 2 teaspoons extra water.

NOTE: If you are using an electric mixer, switch to the dough hook and mix on medium speed for the same amount of time.The dough should clear the sides of the bowl but stick to the bottom of the bowl. If the dough is too wet, sprinkle in a little more flour, so that it clears the sides. If, on the contrary, it clears the bottom of the bowl, dribble in a teaspoon or two of cold water.
The finished dough should be springy, elastic, and sticky, not just tacky, and register 50°-55° F/10°-13° C.

Or

2. FOR GF: Add the oil, sugar or agave syrup and cold water, then mix well (with the help of a large wooden spoon or with the paddle attachment, on low speed) in order to form a sticky ball of dough.

3. Flour a work surface or counter. Line a jelly pan with baking paper/parchment. Lightly oil the paper.

4. With the help of a metal or plastic dough scraper, cut the dough into 6 equal pieces (or larger if you want to make larger pizzas).

NOTE: To avoid the dough from sticking to the scraper, dip the scraper into water between cuts.

5. Sprinkle some flour over the dough. Make sure your hands are dry and then flour them. Gently round each piece into a ball.

NOTE: If the dough sticks to your hands, then dip your hands into the flour again.

6. Transfer the dough balls to the lined jelly pan and mist them generously with spray oil. Slip the pan into plastic bag or enclose in plastic food wrap.

7. Put the pan into the refrigerator and let the dough rest overnight or for up to thee days.

NOTE: You can store the dough balls in a zippered freezer bag if you want to save some of the dough for any future baking. In that case, pour some oil (a few tablespoons only) in a medium bowl and dip each dough ball into the oil, so that it is completely covered in oil. Then put each ball into a separate bag. Store the bags in the freezer for no longer than 3 months. The day before you plan to make pizza, remember to transfer the dough balls from the freezer to the refrigerator.

DAY TWO

8. On the day you plan to eat pizza, exactly 2 hours before you make it, remove the desired number of dough balls from the refrigerator. Dust the counter with flour and spray lightly with oil. Place the dough balls on a floured surface and sprinkle them with flour. Dust your hands with flour and delicately press the dough into disks about 1/2 inch/1.3 cm thick and 5 inches/12.7 cm in diameter. Sprinkle with flour and mist with oil. Loosely cover the dough rounds with plastic wrap and then allow to rest for 2 hours.

Or

8. FOR GF: On the day you plan to eat pizza, exactly 2 hours before you make it, remove the number of desired dough balls from the refrigerator. Place on a sheet of parchment paper and sprinkle with a gluten free flour. Delicately press the dough into disks about ½ inch/1.3 cm thick and 5 inches/12.7 cm in diameter. Sprinkle the dough with flour, mist it again with spray oil. Lightly cover the dough round with a sheet of parchment paper and allow to rest for 2 hours.

9. At least 45 minutes before making the pizza, place a baking stone on the lower third of the oven. Preheat the oven as hot as possible (500° F/260° C).

NOTE: If you do not have a baking stone, then use the back of a jelly pan. Do not preheat the pan.

10. Generously sprinkle the back of a jelly pan with semolina/durum flour or cornmeal. Flour your hands (palms, backs and knuckles). Take 1 piece of dough by lifting it with a pastry scraper. Lay the dough across your fists in a very delicate way and carefully stretch it by bouncing it in a circular motion on your hands, and by giving it a little stretch with each bounce. Once the dough has expanded outward, move to a full toss.

Or

10. FOR GF: Press the dough into the shape you want (about 9-12 inches/23-30 cm in diameter - for a 6 ounces/180g piece of dough).

NOTE: Make only one pizza at a time.
During the tossing process, if the dough tends to stick to your hands, lay it down on the floured counter and reflour your hands, then continue the tossing and shaping.
In case you would be having trouble tossing the dough or if the dough never wants to expand and always springs back, let it rest for approximately 5-20 minutes in order for the gluten to relax fully,then try again.
You can also resort to using a rolling pin, although it isn’t as effective as the toss method.

11. When the dough has the shape you want (about 9-12 inches/23-30 cm in diameter - for a 6 ounces/180g piece of dough), place it on the back of the jelly pan, making sure there is enough semolina/durum flour or cornmeal to allow it to slide and not stick to the pan.

Or

11. FOR GF: Lightly top it with sweet or savory toppings of your choice.

12. Lightly top it with sweet or savory toppings of your choice.

Or

12. FOR GF: Place the garnished pizza on the parchment paper onto the stone in the oven or bake directly on the jelly pan. Close the door and bake for about 5-8 minutes.

NOTE: Remember that the best pizzas are topped not too generously. No more than 3 or 4 toppings (including sauce and cheese) are sufficient.

13. Slide the garnished pizza onto the stone in the oven or bake directly on the jelly pan. Close the door and bake for about 5-8 minutes (I baked mine for 10 minutes).

Or

13. FOR GF: Follow the notes for this step.

NOTE: After 2 minutes baking, take a peek. For an even baking, rotate 180°.

If the top gets done before the bottom, you will need to move the stone or jelly pane to a lower shelf before the next round. On the contrary, if the bottom crisps before the cheese caramelizes, then you will need to raise the stone or jelly.

14. Take the pizza out of the oven and transfer it to a cutting board or your plate. In order to allow the cheese to set a little, wait 3-5 minutes before slicing or serving.

Helpful Tossing Links:
http://www.wikihow.com/Toss-Pizza-Dough, http://www.vids.myspace.com/index.cfm?f … D=35480534, http://www.ehow.com/how_2066953_toss-pizza-dough.html, http://www.classic-hand-tossed-pizza.bl … hands.html, http://www.youtube.com/watch?v=mhcTKeslAmk, http://www.ask.yahoo.com/20050222.html

Friday, October 24, 2008

Basil Chicken over Angel Hair Pasta


This is a very basic pasta dish that is great for weeknights. The flavors in it are classic - garlic, onion, tomato and basil. I adapted the recipe slightly to suit my tastes. I love basil, so I added three times as much basil to this :) I also love spicy food, so I added extra pepper (of course if you don't care for the additional heat, just omit the hot pepper sauce). While I did add some heavy cream to this to balance out some of the acidity from the tomatoes, it is still a very light meal.


You can use dried basil (4 teaspoons) if you don't have any fresh basil on hand, but it really won't taste as good. If you hate paying an arm and a leg for fresh basil at the grocery store, there are two lower cost alternatives. The first is to find your local Asian grocery store. If you live in a decently sized city, chances are you have some local Asian grocery stores around. There, you can get a huge bundle of basil (30+ leaves) for $1 versus the $2-3 you pay at your neighborhood grocery store for 8-10 leaves of basil. The other way to get cheap basil is to plant your own. I bought a tiny little starter basil plant a few months ago (for $3), and it has grown so much now that I have enough basil to cook something with it once a week. Don't worry if you don't have a green thumb - I don't either and mine hasn't died yet ;) For tips on how to grow an herb garden, click here.


Save time and money by using canned, diced tomatoes in this instead of fresh. You can also save time by cooking the chicken ahead of time. That way, all you have to do is throw the sauce together while the pasta is cooking.

This is my submission to the weekly Presto Pasta Nights, hosted by Ruth over at Once Upon a Feast.

Basil Chicken over Angel Hair Pasta from Allrecipes

1 (8 ounce) package angel hair pasta
2 teaspoons olive oil
1/2 cup finely chopped onion
1 clove garlic, chopped
2 1/2 cups chopped tomatoes (I used a 28 oz can of diced tomatoes, undrained) 2 cups boneless chicken breast halves, cooked and cubed (I poached my chicken*)
1/4 cup chopped fresh basil (I used 3/4 cup)
1/2 teaspoon salt
1/8 teaspoon hot pepper sauce (I used about 1/2 tsp crushed red pepper flakes) 1/4 cup heavy cream
1/4 cup grated Parmesan cheese

* To poach your chicken, put the chicken breast halves in a large saucepan and add lightly salted water to cover. Bring to a boil over high heat, reduce the heat to low and simmer for 30 minutes. You can do this with frozen chicken breasts, too.

In a large pot of salted boiling water, cook angel hair pasta until it is al dente, about 8 to 10 minutes. Drain, and set aside.

In a large skillet, heat oil over medium-high heat. Saute the onions and garlic. Stir in the tomatoes, chicken, basil, salt and hot pepper sauce. Reduce heat to medium, and cover skillet. Simmer for about 5 minutes, stirring frequently, until mixture is hot and tomatoes are soft.

Toss sauce with hot cooked angel hair pasta to coat. Serve with Parmesan cheese.

Yield: 4 Servings

Thursday, October 16, 2008

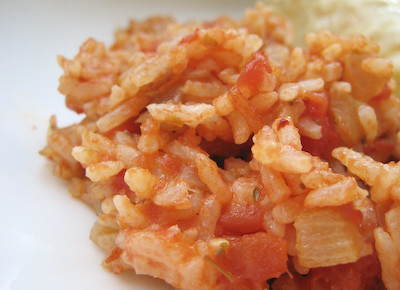
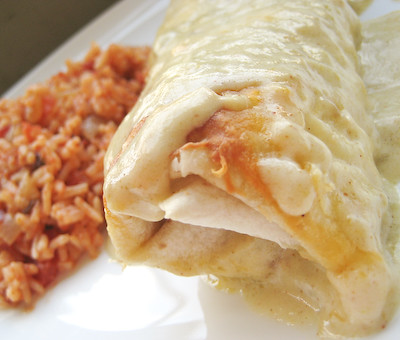
Honey Lime Chicken Enchiladas with Chipotle Tomato Rice


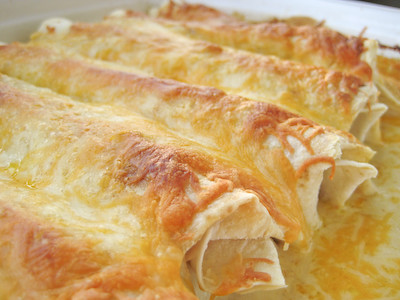
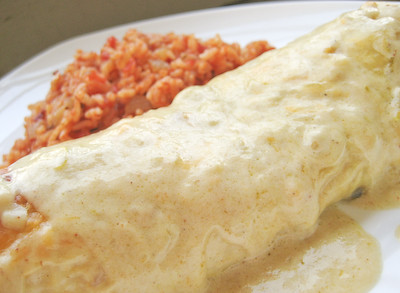
When I saw these enchiladas on Holly's blog, Phe/MOM/enon, I knew I had to try them. The flavor combination of honey and lime just sounded so good. Plus Holly assured me that these would rock.my.world. How could I not try them? :) A word of warning, though - if you don't like sweet flavors in your savory dishes, I would pass on this... sometimes when a recipe has the word "honey" in its title, it has a subtle hint of sweetness to it. Not these enchiladas! The honey flavor is quite prominent. I enjoy all things sweet, however, and loved these! They're a nice change from your typical enchiladas.


I especially love that they are easy and quick to make. The enchilada sauce is actually a rich, creamy sauce. I used the original quantity of heavy cream recommended in the recipe (one cup) but found it a little too rich. Next time, I will do what Holly did and only add one half cup.


I served these with Brianna's chipotle tomato rice. You can serve these with Spanish rice instead, but I found the smoky, spicy flavors of the chipotle rice to complement the sweet and creamy flavors of the enchiladas quite well.

This is the perfect meal to throw together on a weeknight, especially if you use a precooked, store bought rotisserie chicken. I will definitely be making both of these recipes again. You need to try them - you won't be disappointed!

Honey Lime Chicken Enchiladas
adapted from Phe/MOM/menon (who got it from Brittany at The Sisters' Cafe via Melanie at My Kitchen Cafe)

6 tablespoons honey
5 tablespoons lime juice (approx. 1 large lime) (I have used 1/2 cup and have found the flavor even better)
1 tablespoon chili powder (use a little less for a milder version)
1/2 teaspoon garlic powder
1 pound chicken, cooked and shredded (approx. 2 large chicken breasts) (I poached* my chicken. Save time by using a store bought rotisserie chicken. If you like a lot of filling in your enchiladas, I would recommend doubling this.)
8-10 flour tortillas (I made 6 enchiladas with 10" tortillas)
1 pound monterey jack cheese, shredded (I used a Fiesta blend of Cheddar, Monterey Jack, and Queso Quesadilla and Asadero Cheese)
16 ounces green enchilada sauce (also good with red enchilada sauce)
1 cup heavy cream (I would recommend going with 1/2 cup, as it was a bit too heavy/rich)

* To poach your chicken, put the chicken breast halves in a large saucepan and add lightly salted water to cover. Bring to a boil over high heat, reduce the heat to low and simmer for 30 minutes. The longer you do this, the more tender the chicken will be.  You can do this with frozen chicken breasts, too.

Mix the honey (tip: spray your measuring spoon with cooking spray before measuring out the honey), lime juice, chili powder and garlic together and toss with the shredded chicken. Let it marinate for at least 1/2 hour (or toss together in a ziploc bag and let it sit in the fridge for a few hours).

Pour about 1/2 cup enchilada sauce on the bottom of a 9X13 baking pan. Fill flour tortillas with chicken (approx. 1/4 cup) and shredded cheese, saving about 1 cup of cheese to sprinkle on top of enchiladas. Mix the remaining enchilada sauce with the cream and leftover marinade. Pour sauce on top of the enchiladas and sprinkle with cheese. Bake at 350 degrees for 30 minutes until brown and crispy on top.

Serve with sour cream, rice and black beans.


Chipotle Tomato Rice
from Oishii

2 cups cooked rice (2/3 cup uncooked rice)
2 Tbsp canola oil
1 white onion, chopped
2 cloves of garlic, chopped
2 chipotle peppers in adobo sauce (or 1 tsp. chipotle powder) (halve this if you don't have a high heat tolerance)
1 tsp dried oregano
14 ounce can of diced tomatoes, with liquid
salt & pepper to taste
chopped cilantro, for garnish (optional)

Prepare the rice by combining 2/3 cup uncooked rice with 2 cups of water in a rice cooker or in a sauce pan. When done, set aside.

In a frying pan, heat the canola oil over medium high heat. Cook the onion until translucent, about 4 minutes. Add the garlic and cook 1 minute more.

Stir in the chipotle and oregano.

Add the canned tomatoes with liquid, reduce heat, and simmer until some of the liquid has evaporated, about 8 minutes.

Add the cooked rice, and stir until combined and heated through. Season to taste with salt & pepper and serve. Garnish with some fresh chopped cilantro if you have some.

Yield: 4 Servings


Friday, September 5, 2008

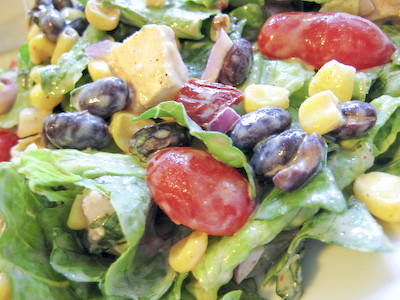
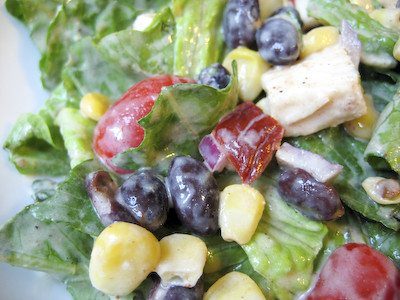
Chipotle Chicken Taco Salad


Chipotles are actually smoke-dried jalapeño peppers. Not sure why they need a different name instead of just "dried jalapeños." Guess it's kind of like how we call dried plums prunes :) Chipotles come in many forms (dried, powder, etc.) but the most common form I've seen used in recipes are the canned chipotles in adobo sauce. If you use just the chipotle chiles in this salad, it's only mildly spicy. If you particularly enjoy a lot of heat (like I do) you can add extra chipotle chiles and a teaspoon or two of the adobo sauce.


I'm always looking for quick and easy weeknight dinner ideas and this definitely fit the bill. Plus it's pretty healthy, so even better. I love tex mex dishes with black beans and corn. Top it off with some avocado and I'm sold :) This salad really comes together in just minutes. You can prepare the dressing and cook the chicken the night before. Or, save even more time buy using a store bought/precooked rotisserie chicken. For a little extra crunch in your salad, add some deep fried tortilla strips or crushed tortilla chips.

Chipotle Chicken Taco Salad
from Cooking Light

Dressing:
1/3 cup chopped fresh cilantro
2/3 cup light sour cream
1 tablespoon minced chipotle chile, canned in adobo sauce (I used about 1.5 tbsp mince chipotles + 2 tsp adobo sauce)
1 teaspoon ground cumin
1 teaspoon chili powder
4 teaspoons fresh lime juice
1/4 teaspoon salt

Salad:
4 cups shredded romaine lettuce
2 cups chopped roasted skinless, boneless chicken breasts (about 2 breasts) (I seasoned some chicken with salt and pepper, then grilled it on the George Foreman Grill)
1 cup cherry tomatoes, halved
1/2 cup diced peeled avocado
1/3 cup thinly vertically sliced red onion
1 (15-ounce) can black beans, rinsed and drained
1 (8 3/4-ounce) can no-salt-added whole-kernel corn, rinsed and drained

To prepare dressing, combine first 7 ingredients, stirring well.

To prepare salad, combine lettuce and remaining ingredients in a large bowl. Drizzle dressing over salad; toss gently to coat. Serve immediately.
Tip: Add a spoonful of adobo sauce for a spicier salad. Kidney or pinto beans also taste great in this dish.

Yield: 4 servings (serving size: 2 1/2 cups)


Saturday, July 26, 2008

Pineapple Chicken Salad Pitas


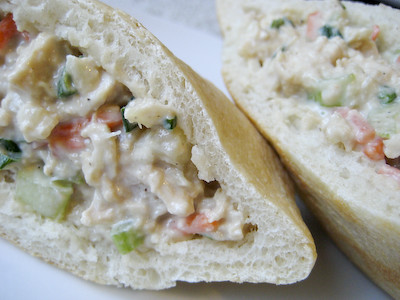
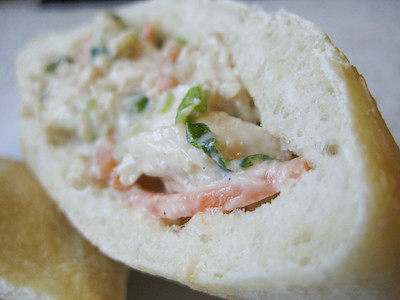
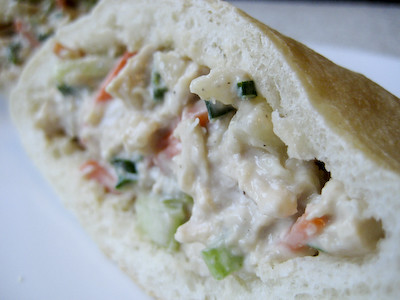
Mayonnaise is like an avocado. People have very strong feelings about it. They either love it or they hate it. My husband won't eat anything with mayo on or in it, but I think that when used properly, mayo can be good in a dish. I recently posted about my homemade pita bread and promised to share with you what I chose to stuff them with. Instead of a traditional Greek filling, I decided to fill mine with chicken salad. I have always been a fan of chicken salad containing pineapple, so when I saw this recipe from Cooking Light, I knew I wanted to try it.


The Worcestershire sauce gave this chicken salad a bit more depth. I added some celery because I like my chicken salad to have a little crunch (and I don't like nuts). The only other thing I would probably change next time is to use canned pineapple tidbits instead of crushed pineapple - I prefer a chunkier chicken salad.


If you don't have any pita bread on hand, this would be great sandwiched between some toasted bread, or simply by itself with a fresh fruit plate.

Pineapple Chicken Salad Pitas
from Cooking Light

2 1/2 cups chopped poached or cooked chicken breast* (about 1 pound) (My 1 lb of chicken yielded about 2 1/4 cups, so you might want to use more chicken; save time by using store bought, precooked Rotisserie chicken)
1/2 cup matchstick-cut carrots
1/3 cup sliced almonds, toasted (I omitted these)
1/3 cup light mayonnaise
1/4 cup finely chopped green onions
1/4 cup finely chopped celery
1/4 cup plain fat-free yogurt
1 tablespoon Worcestershire sauce
1/2 teaspoon garlic powder
1/4 teaspoon salt
1/4 teaspoon black pepper
1 (8-ounce) can crushed pineapple in juice, drained
4 (6-inch) whole wheat pitas, each cut in half (I used my homemade pitas)
8 Romaine lettuce leaves (I forgot these)

* To poach your chicken, put the chicken breast halves in a large saucepan and add lightly salted water to cover. Bring to a boil over high heat, reduce the heat to low and simmer for 30 minutes. You can do this with frozen chicken breasts, too.


Combine first 11 ingredients in a large bowl, stirring well. Line each pita half with 1 lettuce leaf; fill each half with 1/3 cup chicken mixture.

Yield: 4 servings (serving size: 2 stuffed pita halves)

Thursday, April 3, 2008

Mojito Chicken


I miss living in California. Being able to drive just 30 minutes to the beach. All the beautiful sunshine and mild winters. And Trader Joe's. Yep, one of the things I really miss about living in CA is having access to Trader Joe's. They have such a great selection of food there, and at such reasonable prices. And after seeing on Peabody's blog that they have chocolate covered sunflower seeds, I am even more sad that I do not live near one. I know that they've expanded and you can now find them in several other states. In fact, after living in North Carolina for 6 years, they finally opened up a store close to where I lived... right before I moved! I was so upset that I only got to shop there once before we had to relocate, and now I am stuck again living nowhere near a Trader's Joes.


So, needless to say, whenever I am near one, I like to stock up :) I had heard some good things about their Mojito Simmer Sauce, and being that the mojito is one of my favorite drinks (a Cuban cocktail consisting of rum, sugar cane juice, lime, club soda, and mint), I knew I had to try it. I only bought two jars on my last trip, though, because I didn't want to stock up on something that I had never tried before.

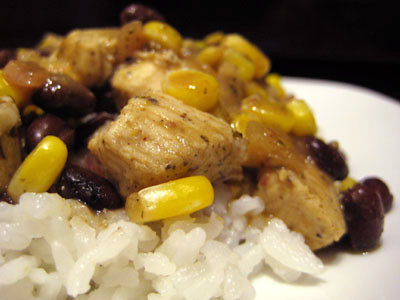
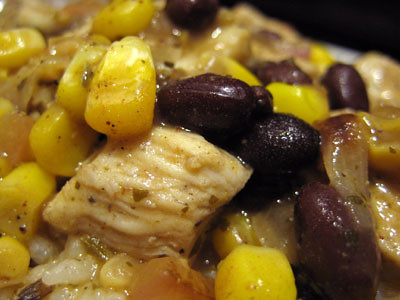
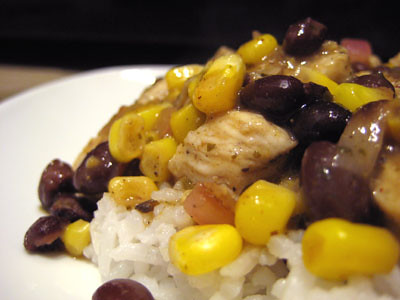
Well, the sauce sat in my pantry for a short while before I figured out what I wanted to do with it. I was presented with the opportunity to use it when I came home from work late one night, with very little time on my hands and very little food in my fridge with which to cook. I had stumbled across and bookmarked this recipe from Envious Edibles, and it looked easy enough to throw together. I had some frozen corn in my freezer, some canned black beans in my pantry, and I always have onions and garlic laying around. I was pleasantly surprised at how quickly this dinner came together, and how flavorful it was!


I'm wasn't sure what Caribbean seasoning was, but my mom had given me some Walkerswood Jamaican Jerk Seasoning that she picked up while in Jamaica and it seemed like it would be a good fit for this dish. I simply added a tablespoon of the seasoning to my chicken, tossed it, and then cooked it. Since the jerk seasoning is already spicy, I omitted the crushed red pepper from the recipe. In writing this blog post, I decided to do a little research to find out where you could get this jerk seasoning without buying an airline ticket to Jamaica :) Looks like you can get it not only from Walkerswood, but you can also get it on Amazon.com!


This was really good. I love that the ingredient list is simple, and that it all comes together in under 30 minutes. I will definitely be making this again (and plan to really stock up on some more Mojito Simmer Sauce the next time I'm at Trader Joe's). I went simple this time and served it with plain rice, but I think it would be great to serve this next time with some cilantro lime rice, rolled up in a burrito.

So tell me, what are your favorite items from Trader Joe's? I'd like to get a list together for the next time I'm there :)

Mojito Chicken
from Envious Edibles

1/2 onion, diced
2 cloves of garlic, diced
2 chicken breasts, cut into bite sized pieces
1 jar of Trader Joe's Mojito Simmer Sauce
1 can of corn, drained (I used 8 oz frozen corn)
1 can of black beans, drained
1 tablespoon of Caribbean seasoning (I used 1 tbsp of Jamaican Jerk Seasoning)
1/3 cup of Bacardi 151 Rum (or any rum of your choice) (I used Jamaican Appleton Estate)
1 pinch of crush red red pepper (I omitted this)

Salt and pepper chicken, sprinkle with Caribbean seasoning, crush red red pepper and cook until brown in small amount of olive oil. Add Rum and cook until alcohol burns off, remove from pan and set aside.

Saute onions and garlic, add corn and black beans. Simmer for just a few minutes, then add simmer sauce and add chicken back into the sauce.

Serve over rice.

Yield: 3-4 Servings.

Thursday, February 21, 2008

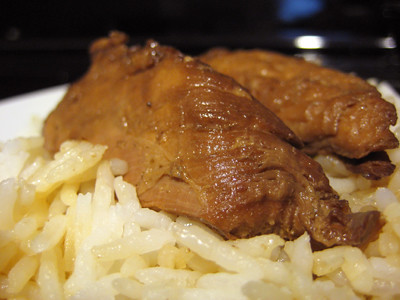
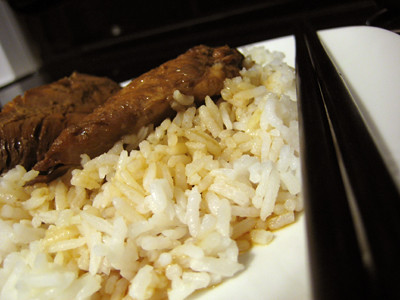
Chicken Adobo


I've been posting a lot of sweet treats lately, and realized it was about time for some good eats! Work can often be fairly stressful, so I rarely feel like cooking when I get home from work. I do most of my cooking on the weekends, or on my days off (I get a weekday off every other week). I do, on occasion, cook on a weeknight when I'm working; but I'm much more inclined to do so if it's a quick and simple, but tasty, meal.


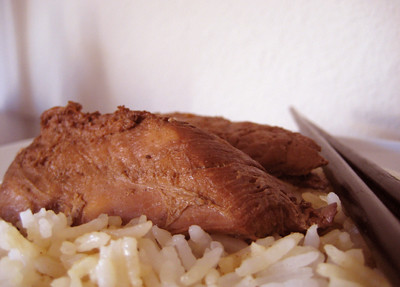
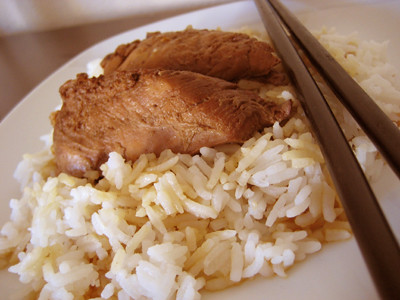
I got this recipe for Adobo from my friend Daphne. It is a Filipino dish that is usually cooked with either chicken or pork. I have to admit that I have never had chicken adobo anywhere else, so I have no idea how this compares to other recipes. All I know is that I love the simplicity of this, and the flavor is wonderful (though it's not the most photogenic dish). The recipe calls for cooking a whole chicken, but I don't eat dark meat (I know, my family says I'm crazy!) so I just use boneless skinless chicken breasts. I'm sure that the flavor would be even more amazing if you cooked this using a whole, skin on, chicken.


This is another great weeknight meal. You can prepare/marinate the chicken the day before, and then when you get home from work, all you have to do is pop it on the stove and simmer it. You need to cook it on the stove top for quite some time (approximately 1 hour), but it's something that doesn't require a lot of babysitting - you can get it started and then walk away from it. Sometimes you need that time to relax and unwind after a long day... I imagine that you could adapt this to become a slow cooker recipe, but I haven't gotten around to trying that yet.

Chicken Adobo
from Daphne's mom


1 cup white vinegar
1 cup soy sauce
2 tbsp black peppercorn (whole)
2-3 cloves garlic, crushed
2-3 bay leaves
1 whole chicken, cut up

Mix all the ingredients together and marinate at least one hour; overnight is best.

Add the chicken and marinade to a large pot. Bring to a boil, then reduce heat to low and simmer, covered, for half an hour. Uncover and simmer an additional 20-30 minutes.

Serve with rice.

Thursday, January 24, 2008

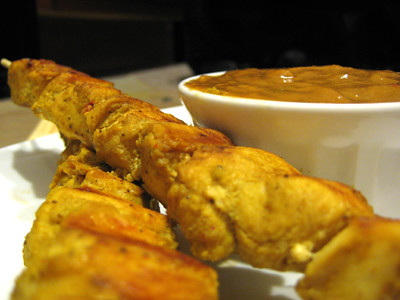
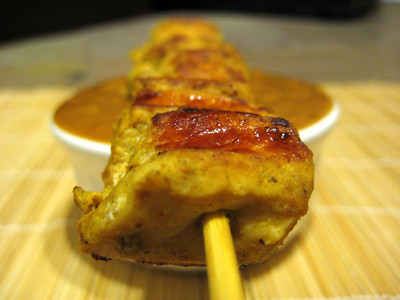
Chicken Satay


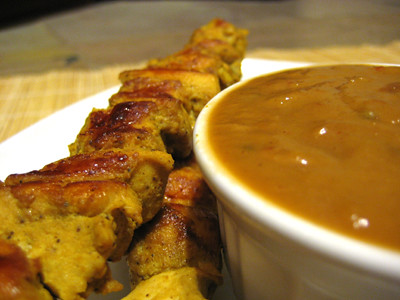
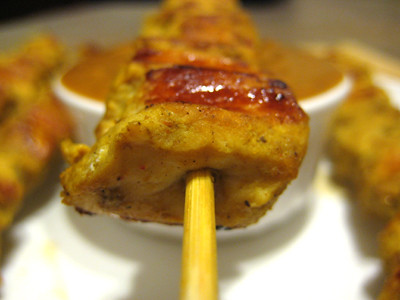
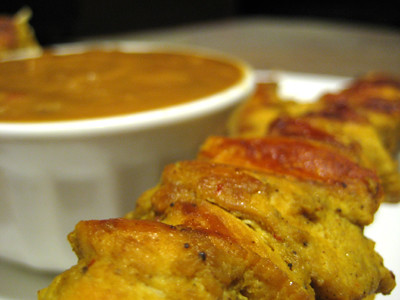
With the upcoming Super Bowl, I have been featuring various appetizer recipes in my blog. One of my favorite Thai appetizers is Chicken Satay with Peanut Sauce. Satay is popular in Indonesia, Malaysia, Singapore, the Philippines, Thailand, and the Netherlands. You'll find that the recipes for satay vary in each country, but it invariably consists of chunks of meat skewered and grilled over a wood or charcoal fire. While I would love to be able to do that to impart a genuine grilled/smoky taste to my chicken, we don't have a grill... so I use my George Foreman grill instead and it seems to turn out pretty well.

This was the very first recipe I tried for Chicken Satay. I loved it so much, I haven't tried any others. Whenever I make the peanut sauce for the Cold Sesame Noodles, I always make a little extra because I love to use it as a dipping sauce for this dish. Some Thai restaurants will also serve this with a cucumber relish. The cucumber is refreshing and helps cleanse the palate before you take your next bite of the chicken. I don't have photos of it, but I have included a recipe for the cucumber relish below.


Chicken Satay
from Allrecipes.com

2 tablespoons creamy peanut butter
1/2 cup soy sauce
1/2 cup lemon or lime juice
1 tablespoon brown sugar
2 tablespoons curry powder
2 cloves garlic, chopped
1 teaspoon hot pepper sauce (I used Sambal Oelek Chili Paste)
6 skinless, boneless chicken breast halves - cubed

In a mixing bowl, combine peanut butter, soy sauce, lime juice, brown sugar, curry powder, garlic and hot pepper sauce. Place the chicken breasts in the marinade and refrigerate. Let the chicken marinate at least 2 hours, overnight is best.

Preheat a grill to high heat. (I used my George Foreman grill.)

Weave the chicken onto skewers, then grill for 5 minutes per side. (With the George Foreman grill, I find it takes only about 3-5 minutes total, depending on how big your pieces of chicken are.)

Yield: 12 Servings.


Peanut Sauce
from Tyler Florence

1 tablespoon peanut oil
1 green onion, thinly sliced on the diagonal
1/2-inch piece fresh ginger, minced
1-2 garlic cloves, minced
1/2 teaspoon red chili paste, such as Sambal Oelek (omit this if you don't tolerate spicy foods well)
1 tablespoon brown sugar
1/4 cup creamy peanut butter
1-1/2 tablespoons rice vinegar
1-1/2 tablespoons soy sauce
3 tablespoons hot water

In a small saucepan, heat the peanut oil over medium-low flame. Add the green onions, ginger, garlic, and chili paste. Cook and stir for a minute until soft and fragrant. Mix in the brown sugar, peanut butter, vinegar, soy sauce, and hot water. Stir until the sugar is dissolved and the peanut butter has smoothed out.


Cucumber Relish
from Mom :)

1 cucumber, diced
1/2 cup sugar
1/2 cup white vinegar
dash of salt and pepper

In a small bowl, combine the sugar, vinegar, salt, and pepper and mix well. Add the cucumbers and toss to coat. Refrigerate at least 1 hour before serving.

Tuesday, December 4, 2007

Happy Housewarming, Peabody!


You've seen me mention it several times before, but one of my very favorite food blogs is Culinary Concoctions by Peabody. Well, she recently moved into a beautiful new home and will be hosting a virtual housewarming party on Saturday. The details about the event are here; it's not too late to whip something up if you're interested, the deadline is not until Thursday night so you have two more evenings!

So I thought long and hard about what I should bring to this housewarming. If you browse through Peabody's blog, you will see a plethora of amazing baked goods. I know from experience now that I will not be disappointed with anything I make from her blog! :) So that made it even more difficult for me to decide on an appropriate dish because I wanted to bring something that had at least a little bit of complexity to it. I thought long and hard about baking some type of impressive dessert, but in the end I decided to bring a main dish instead.

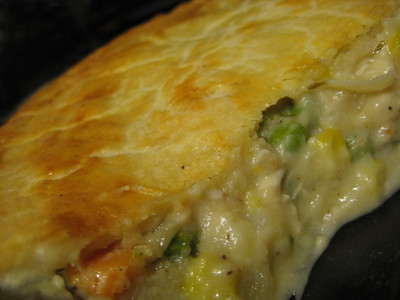
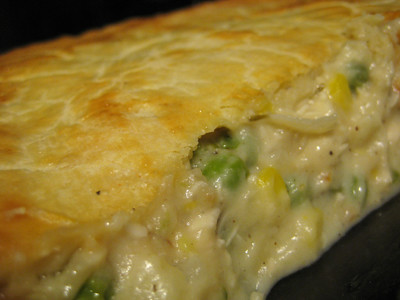
I decided to bring a chicken pot pie. I came across this recipe on the reading 'riting and recipes blog a few weeks ago; when I started to peruse through my "must try" list of recipes, I thought it would be perfect for Peabody's housewarming. The first reason I chose this recipe was because I wanted to make something that was a personal challenge. I have never made my own pastry crust before, and have been meaning to try my hand at one for a while now. This chicken pot pie recipe entails making everything from scratch, including the pastry crust. The second reason I chose this recipe was because it is from one of Peabody's favorite cooks, Rebecca Rather (The Pastry Queen).


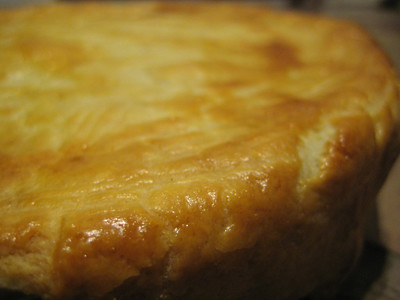
I was so happy with the outcome of this recipe! While it was a bit more time consuming than most of the recipes I make, it was well worth the effort. The cream cheese in the pastry crust makes this one of the best crusts I have ever had! :) Not bad for my first pastry crust, if I do say so myself ;) I adapted the recipe, based on the ingredients that I had on hand. Part of what I love about this recipe is that you can easily adapt it to suit your tastes based on the types of veggies you like. I've never put bell peppers in my pot pie before, but thought they were a nice addition to the filling. I particularly enjoyed the addition of crushed red pepper flakes, which gave the pot pie a subtle kick. So, I want to thank Peabody for inviting me to her housewarming party and allowing me to challenge myself to another 'first.' I cannot wait to see what everyone else brings to this event :)

Chicken Pot Pie
adapted from The Pastry Queen, by Rebecca Rather

Filling
3 tablespoons unsalted butter
1 large russet potato, peeled and diced
1 medium-size yellow onion, chopped
3 cloves garlic, minced
1 red bell pepper, diced
8 ounces button mushrooms, sliced (instead of mushrooms and the next 2 ingredients, I used a 16 oz bag of frozen mixed veggies which included corn, peas, and green beans)
8 ounces fresh green beans, cut into 1-inch pieces
8 ounce package frozen peas
8 oz frozen carrots
1 cup chopped celery
1/2 teaspoon crushed red pepper flakes
Salt and freshly ground black pepper
1 purchased cooked rotisserie chicken or 1 whole stewed chicken, cooled (I use 4 chicken breasts, poached* and shredded with 2 forks)

* To poach your chicken, put the chicken breast halves in a large saucepan and add lightly salted water to cover. Bring to a boil over high heat, reduce the heat to low and simmer for 30 minutes. You can do this with frozen chicken breasts, too.

Cream Sauce
1/2 cup (1 stick) unsalted butter
1 cup all purpose flour
2 1/2 cups chicken stock
1/2 cup heavy cream
Dash of hot pepper sauce, such as Tabasco
Salt and freshly ground white pepper (I used black pepper)

Pie Crust
1 cup (2 sticks) chilled unsalted butter, cut into 16 pieces
3 cups all purpose flour
10 ounces chilled cream cheese, cut into large pieces
1 teaspoon salt
1/4 teaspoon freshly ground white pepper (I used black pepper)
1 large egg

To make the filling:
If you will be cooking the chicken instead of using store bought rotisserie, start the chicken first so it will be ready to shred while the vegetables are sautéing.

Melt the butter in a large sauté pan set over medium heat. Add the onions, carrots, celery, and potatoes and sauté for 5 minutes. Add the garlic, bell pepper, and mushrooms and sauté about 15 minutes, until the vegetables are tender. Stir in the crushed red pepper and add salt and pepper to taste.

While the vegetables are sautéing, skin the chicken, pull the meat off the bones and shred the meat or cut into bite-size pieces. Stir the peas and chicken into the vegetable mixture. Set the filling aside.

To make the cream sauce:
Melt the butter over medium heat in a large saucepan. Add the flour and whisk until smooth. Whisk in the chicken stock and cook the sauce over medium heat until it thickens to the consistency of a cream soup. Add the cream, hot pepper sauce, and salt and white pepper to taste. Pour the cream sauce over the chicken filling and stir to combine. Fill individual 1/4-cup capacity oven-safe bowls three-quarters of the way to the top with the creamed chicken filling.

To make the crust:
Preheat the oven to 375 degrees F. In the bowl of a food processor fitted with a metal blade, pulse the butter and flour until crumbly. Add the cream cheese, salt, and white pepper. Continue pulsing just until the dough forms a ball.

Set the dough on a flat surface dusted with flour. Use a floured rolling pin to roll the dough out to 1/4-inch thickness. Measure the diameter of the pot pie bowls and cut out dough rounds that are 1 1/2 inches larger in diameter. Whisk the egg in a small bowl. Lay the dough rounds on top of the pot pies, making sure the dough hangs evenly over each bowl. Brush the dough lightly with the beaten egg. Bake the pies for 20 to 25 minutes, until golden brown. Serve immediately.

Alternatively, you can bake this in two 9" dishes or a 13x9" inch dish, rolling out the dough to just slightly larger than the dish and topping it with the pastry, and tucking in the sides of the pastry.


Tip: You can double wrap the pot pies in plastic wrap and freeze them. When you're ready to eat them, bake them (frozen) at 350F for about 30 minutes. They will keep in the freezer for 2-3 weeks.

Monday, November 19, 2007

No Takeout Tonight


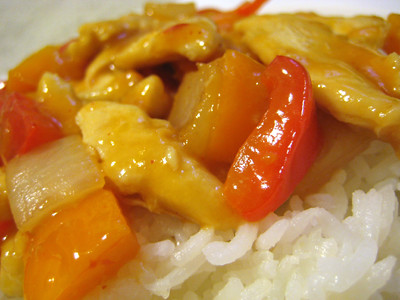
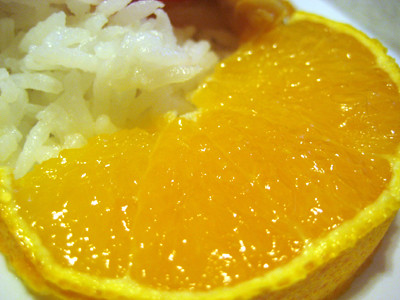
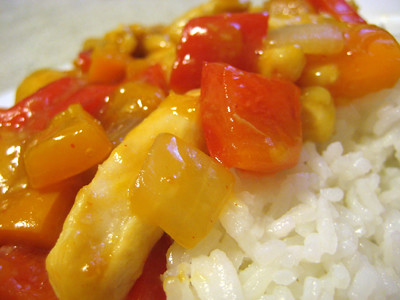
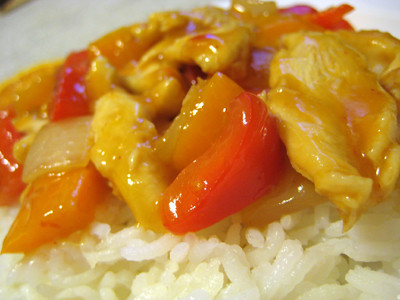
This is a recipe I got from my friend Laura. It's from one of the Weight Watcher's cookbooks; unfortunately I'm not sure which one so I'm not able to site the exact source. The original recipe is for Spicy Orange Beef, however I usually substitute chicken instead. It's a great, healthier alternative to ordering takeout when you have a craving for Chinese food.


I make this dish all the time. It makes a great weeknight meal, as it does not require too much prepping. It's also very easy to adapt, depending on your tastes. This time, I used red and orange bell peppers with some onions, but that's just what I had on hand.

Spicy Orange Beef (Chicken)
from Weight Watcher's


3/4 lb beef top round, trimmed of all visible fat, cut into thin strips (I used 2 chicken breasts)
2 tbsp cornstarch
2 tsp grated orange rind
1/2 cup low sodium beef broth (I used chicken broth)
1/4 cup orange juice
2 tbsp reduced sodium soy sauce
1 tbsp sugar
1 1/2 tsp chili garlic sauce or 1/4 tsp crushed red pepper
4 tsp canola oil
1 tbsp minced peeled fresh ginger
1/4 lb green beans, halved crosswise (I omitted these)
1 red bell pepper, seeded and cut into thin strips (I used 1 red and 1 orange bell pepper)
1 carrot, cut into thin match stick thin strips (I used 1/2 small onion, chopped)

Combine beef, 1 tbsp cornstarch, and orange rind in medium bowl; toss well to coat and set aside. Combine remaining 1 tbsp cornstarch, broth, orange juice, soy sauce, sugar, and chili garlic sauce in small bowl; set aside.

Heat nonstick wok or large, deep skilled over medium-high heat until a drop of water sizzles. Swirl in 2 tsp of oil, then add beef. Stir fry until cooked through, 2-3min; transfer to plate. Swirl remaining 2 tsp oil, then add ginger. Stir fry til fragrant, about 10 seconds. Add green beans, bell pepper, and carrot. Stir fry until crisp tender, 2-3 minutes. Add broth mixture and cook, stirring occasionally, until mixture boils and thickens, about 1 minute. Add beef and cook until heated through, about 1 minute.

Makes 4 servings
1 serving = 1 cup = 227 cal, 8 g fat, 2 g saturated fat, 16 g carb, 2g fiber, 22g protein


Sunday, November 11, 2007

(Chicken) Meat and Potatoes...


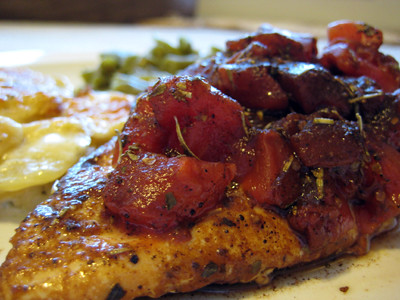
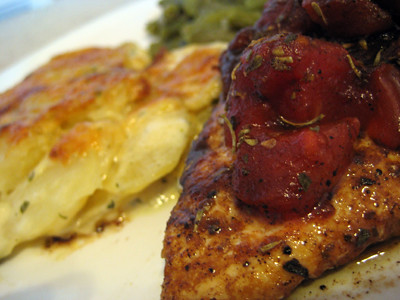
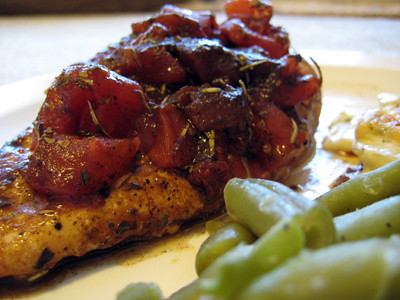
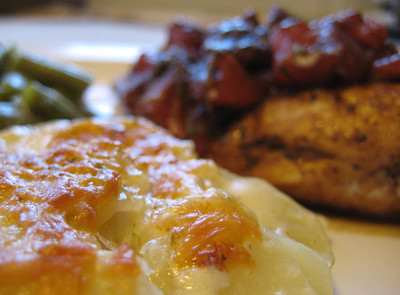
This is a dinner I like to throw together in a pinch, as I usually have all the ingredients on hand. I usually like a lot of sauce/tomatoes with the chicken, so I make the recipe as is, but reduce the number of chicken breasts to just four. I also add a little brown sugar to the sauce to tone down the tang from the balsamic vinegar just a little bit. I'm not sure if you are supposed to drain the can of diced tomatoes or not, but I usually don't so at the end I make the sauce into a balsamic reduction.

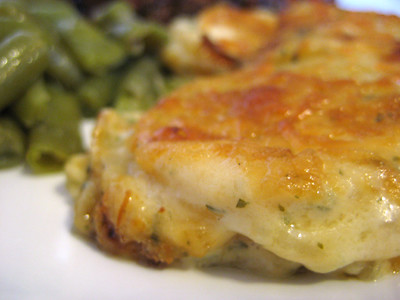
I usually like to serve this with mashed potatoes, but tonight I decided to try a scalloped potatoes recipe I found in the November issue of Southern Living. These scalloped potatoes were so good! I only made a few changes, indicated below. The only other change I think I will make next time is I will probably substitute all of the cream with evaporated milk to make it a bit healthier.

Braised Balsamic Chicken
from Allrecipes.com


6 skinless, boneless chicken breast halves (I only use 4)
ground black pepper to taste
1 teaspoon garlic salt
2 tablespoons olive oil
1 onion, thinly sliced (I omit this)
1/2 cup balsamic vinegar
1 (14.5 ounce) can diced tomatoes
1 teaspoon dried basil
1 teaspoon dried oregano
1 teaspoon dried rosemary
1/2 teaspoon dried thyme
1 tbsp brown sugar
1 tbsp cornstarch

Season chicken breasts with ground black pepper and garlic salt. Heat olive oil in a medium skillet, and brown the onion and seasoned chicken breasts.

Pour tomatoes and balsamic vinegar over chicken, and season with basil, oregano, rosemary and thyme. Simmer until chicken is no longer pink and the juices run clear, about 15 minutes. I usually remove the chicken and tomatoes and then add the brown sugar and cornstarch to the balsamic liquid and simmer until reduced.


Classic Parmesan Scalloped Potatoes

from Southern Living


1/4 cup butter
2 pounds Yukon gold potatoes, peeled and thinly sliced
3 cups whipping cream (I used 1-1/2 cups whipping cream, 1-1/2 cups evaporated milk)
2 garlic cloves, chopped
1 1/2 teaspoons salt
1/4 teaspoon freshly ground pepper
1/4 cup fresh flat-leaf parsley, chopped (I used 4 tsp dried parsley)
1/2 cup (2 oz.) grated Parmesan cheese (I used 3/4 cup)


Preheat oven to 400°F.

Melt butter in a large Dutch oven over medium-high heat. Stir in potatoes and next 5 ingredients, and bring to a boil. Reduce heat to medium-low, and cook, stirring gently, 15 minutes or until potatoes are tender.

Spoon mixture into a lightly greased 13- x 9-inch baking dish; sprinkle with cheese.

Bake at 400°F for 25 to 30 minutes or until bubbly and golden brown. Remove to a wire rack, and let stand 10 minutes before serving.

Makes 6 to 8 servings