Showing posts with label coconut. Show all posts

Tuesday, August 9, 2011

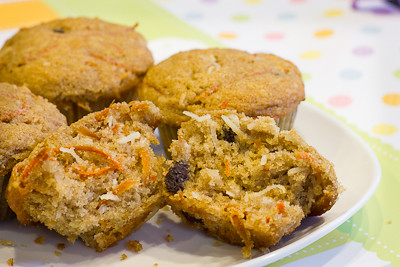
Carrot Spice Muffins (TWD)


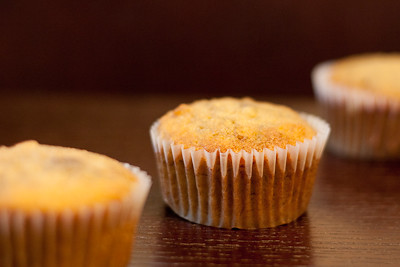
This week's Tuesdays with Dorie (TWD) recipe was chosen by Nancy of The Dogs Eat the Crumbs: Carrot Spice Muffins.  I personally thought these muffins could use a little more sugar (or maybe some cream cheese frosting!) but then I guess they would be more like cupcakes and not really muffins :)  The addition of some crushed pineapple might be nice, too.  Regardless, these muffins were perfect for breakfast, or as a snack, and were a big hit with all of my husband's coworkers. 

Thanks Nancy, for hosting this week.  I'm sorry my post is so short this week but I've been so busy and barely had enough time to get this post up today! If you would like the recipe, you can find it here. Make sure you check out the TWD Blogroll, to see how everyone else enjoyed this delightful breakfast treat!

Tuesday, December 14, 2010

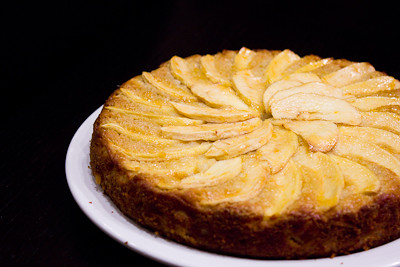
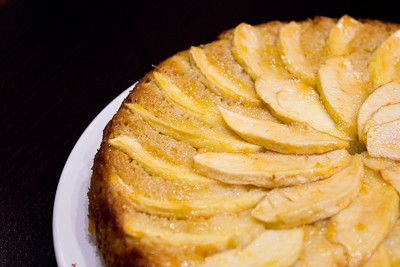
Apple-Coconut Family Cake (TWD)

 This week's Tuesdays with Dorie (TWD) recipe was chosen by Amber of Cobbler du Monde: Apple-Coconut Family Cake. I had seen this recipe in the book before, and thought it looked interesting. I honestly thought it was more of a fancy cake, so I passed it up, waiting to make it another day. Had I spent a little more time to read the recipe instructions (and not just the recipe list), I would have quickly realized that this is not a fussy cake, and it doesn't take long to make at all. The most time consuming aspect of it is slicing and dicing the apples. Otherwise, it's pretty much like any other muffin or quick bread recipe that doesn't even require an electric mixer. 


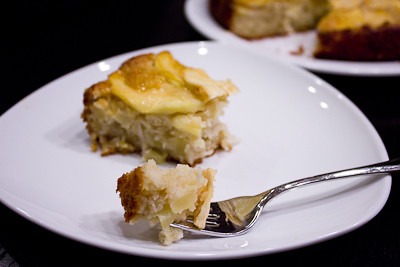
I found that my cake took considerably longer to bake through completely - a full 20-25 minutes extra! I was worried that the edges would burn because they started to brown much sooner than the center, but in the end it was okay.  The edges of my cake were a little drier than the center, but they weren't burnt at least.  Otherwise, this recipe came together quickly and easily for me. The slightly chewy texture that the coconut gives this cake did not bother me, but I did read that a few did not like that. I love apples and I love coconut, but I never would have thought to put the two together like this.  It was a nice combination of flavors.


Thanks Amber, for hosting this week.  I will definitely be making this again. If you would like the recipe, you can find it here.  Make sure you check out the TWD Blogroll, to see how everyone else enjoyed this cake.

* Recipe notes:
- Make sure you test your cake before removing it from the oven - mine took a full 20-25 minutes longer to bake!
- For more recipe tips, click here

Sunday, October 17, 2010

Fluffy Coconut Cake with Guava Filling (SMS)

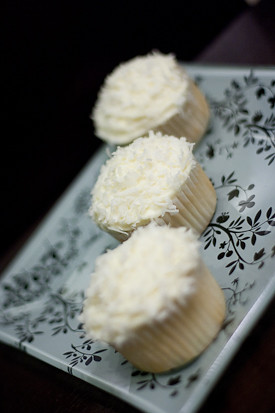
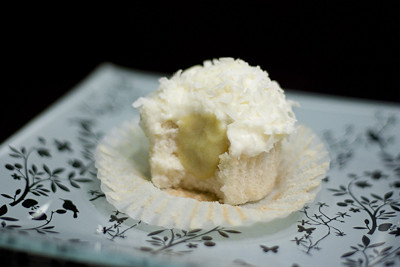
This week's Sweet Melissa Sundays (SMS) recipe was chosen by Karen of Karen’s Cookies Cakes & More: Fluffy Coconut Cake with Passion Fruit Filling. I didn't feel like trying to make a fancy layer cake, so I opted for the cupcake version instead. And, because I couldn't get my hands on any passion fruit juice, I made a guava filling for my cupcakes. I think the other option for a lemon filling would be great with these cupcakes, too.

I kind of feel like the name "Fluffy Coconut Cake" is a misnomer because there is not one bit of coconut in this cake! It is just a basic cake that is topped with coconut cream cheese frosting. Nevertheless, these cupcakes were delicious... and I think the real star of this recipe is the coconut cream cheese frosting. The guava filling was interesting and paired well with the coconut, but I think the cupcakes were good without any filling at all, too. If you're looking for a recipe to use up all those extra egg whites you have in your freezer (like I always do after making ice cream!), this is a great one to make.


Thank you, Karen, for hosting this week. If you'd like the recipe, you can find it here. Make sure you check out the Sweet Melissa Sundays Blog Roll to see how everyone else enjoyed this coconut-y treat!

* Recipe notes:
- I made a full recipe and was able to make 34 cupcakes from it.
- I baked my cupcakes for about 18-19 minutes before they were done.

Tuesday, August 3, 2010

Gingered Carrot Cookies (TWD)


This week's Tuesdays with Dorie (TWD) recipe was chosen by Natalia of gatti fili e farina : Gingered Carrot Cookies.  I actually almost skipped this week because Dorie describes these cookies as tasting almost like scones and I'm not a big scone fan.  I'm so glad I decided to give it a go, though, because these cookies are fabulous!

When Dorie first created these, she set out to make a cookie that tasted like carrot cake.  They definitely don't taste like carrot cake at all, but that doesn't mean that they aren't good.  They are delicious little morsels! I'm not quite sure if I would consider these scone-like, but they are definitely cakey cookies.  All the add-ins - the carrots, coconut, and raisins (I omitted the nuts) - gave these cookies a nice chewy texture.  The ginger gave these cookies the perfect little boost too!

Thanks Natalia, for hosting this week. If you would like the recipe, you can find it here. Make sure you check out the TWD Blogroll, to see how everyone else enjoyed these sweet treats!

Tuesday, July 20, 2010

Lots of Ways of Banana Cake (TWD)


This week's Tuesdays with Dorie (TWD) recipe was chosen by Kimberly of Only Creative Opportunities: Lots of Ways of Banana Cake.  It's a moist banana cake made with bananas, coconut milk and toasted coconut.  Dorie calls it "lots of ways" because you can adapt it however you'd like.  If you don't have brown sugar you can use white sugar.  If you don't have coconut milk on hand, you can use buttermilk, sour cream, etc. What a wonderful way to use up some over ripe bananas (instead of the old standby banana bread!).

I had big plans for this recipe... I wanted to make cupcakes and then top them with some chocolate whipped cream.  Unfortunately, I didn't read the recipe ahead of time and did not realize that the chocolate whipped cream requires 4 hours of chilling time in the refrigerator (preferably overnight).  So, I ended up with rum drenched lots of ways banana cupcakes instead!  I simply used the rum syrup recipe from the Rum Drenched Vanilla Cakes we recently made.  These cupcakes were super moist, and had just the right amount of banana and coconut flavor to them. I used half of the cake batter for cupcakes and then other half for a single layer cake - I'll make the chocolate whipped cream for the cake tomorrow when I get the chance!

Thanks Kimberly, for hosting this week. If you would like the recipe, you can find it here. Make sure you check out the TWD Blogroll, to see how everyone else enjoyed this minty, chocolate treat!

* Recipes notes:
- The cupcakes took 18-20 minutes to bake.  I was able to get about 15 cupcakes from half of the recipe.
- I baked the rest in a 9-inch round cake pan.  This cake took about 30 minutes to bake.
- For tips from other TWD bakers, click here.

Sunday, June 13, 2010

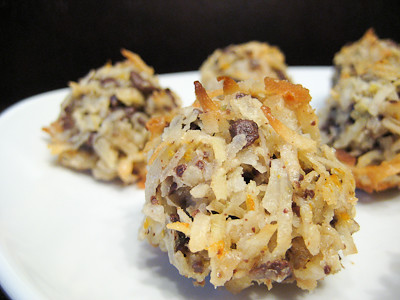
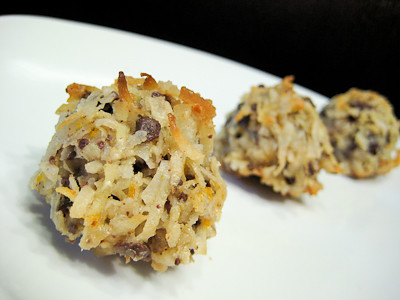
Chocolate Orange Macaroons (SMS)


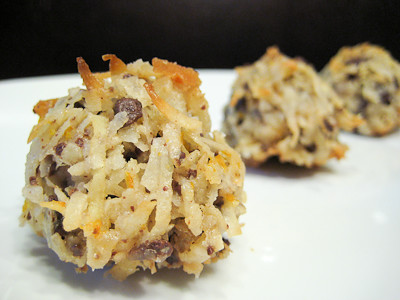
This week's Sweet Melissa Sundays (SMS) recipe was chosen by Ellen of Blue Tree Green Heart: Chocolate Orange Macaroons. I love coconut, and so does my husband, so making this recipe was a no brainer. I also love chocolate infused with orange. Plus, it doesn't hurt that this recipe only takes a few minutes to come together - a bonus these days for this busy mommy!


The recipe is short and sweet. Rub the zest of an orange with some shredded coconut, then add some sugar and chopped chocolate, and mix with egg whites. Scoop and then bake! That's it! The only thing I did differently was that I chose to rub the sugar in with the zest as well, instead of just mixing it with the chocolate. I figured that would give the macaroons an even stronger orange flavor.


These came out perfect! Crisp on the outside, chewy in the middle, with bits of chocolate and plenty of orange flavor.  Some found these to be a bit too sweet, and while you could probably decrease the amount of sugar in them to cut back on some calories, I didn't find them too sweet at all.  I'll definitely be making these again and again! They're a great way to use up egg whites after all the ice cream I've been making this summer and much more fun than angel food cake.

Thanks Ellen, for hosting this week.  If you would like the recipe, you can find it here. Make sure you check out the Sweet Melissa Sundays Blog Roll to see how everyone else enjoyed these delicious treats.

* Recipe notes:
- I used semisweet chocolate chips in this recipe instead of bar chocolate.
- If you tend to prefer cookies that aren't super sweet, use unsweetened coconut or decrease the amount of sugar in the recipe to one half cup.

- I used a medium cookie scoop and got about 36 cookies, not 24 from the recipe.
- Keep a close eye on these to prevent them from burning - mine were done a few minutes early, around 22 minutes.
- For more tips, click here.

Tuesday, May 25, 2010

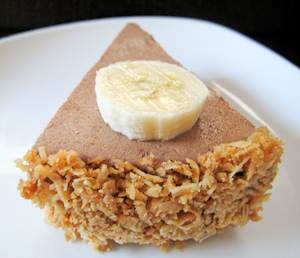
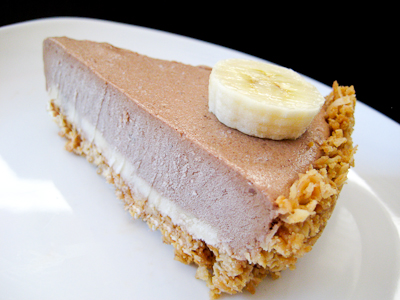
Banana Coconut Ice Cream Pie (TWD)


This week's Tuesdays with Dorie (TWD) recipe was chosen by Spike of Spike Bakes: Banana Coconut Ice Cream Pie.

When I was a kid, I loved going to Disneyland. We only lived 30 minutes from "the happiest place on earth," so I was lucky enough to get to go there at least once a year. Sure, I loved meeting the Disney characters, seeing the castle, and going on all the rides... but what did I really look forward to the most? The food :) I'm sure that if you're regular visitor to my blog, that can't really surprise you.

I'd love grabbing a churro and eating it while waiting in line for Splash Mountain. Or drinking one of those slushy lemonade drinks while waiting to board Star Tours. But my absolute favorite thing to get at Disneyland? Their frozen bananas! A banana dipped in chocolate, then rolled in peanuts and frozen to perfection! Yum!


Imagine my delight, then, when Rocky Mountain Chocolate Factory came about and started offering frozen bananas in their stores! I was thrilled that I no longer had to be at an amusement park to enjoy one of my favorite frozen treats.  I've even gone and made my own frozen bananas at home a few times, but I always feel so wasteful dipping anything in chocolate because you always end up with some excess in the bowl.

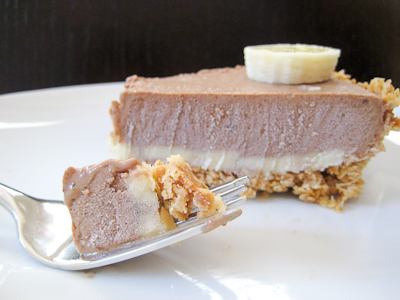
So, when Spike chose the Banana Coconut Ice Cream Pie, I was eager to make it. Just reading the recipe immediately took me back to my childhood memories of frozen bananas! It's a layer of chocolate banana ice cream atop a coconut crust, sandwiched between two layers of sliced bananas (although I layered lots of banana slices on top of my pie, for the blog photos I only added a single banana to the slice I photographed).

While I adore the flavors of chocolate and bananas together, I have to agree with my husband in saying that the crust is the star of this recipe! Unfortunately, I couldn't find the LU shortbread cookies that Dorie recommends so I used graham cracker crumbs instead. Still, butter + browned coconut + cookie crumbs = one amazing crust! I didn't have a deep dish pie plate, so I used a springform pan instead and didn't have any problems.


For the ice cream, instead of using store bought chocolate ice cream I decided to make Dorie's Chocolate Ganache ice cream. After I added in the bananas and rum to the ice cream, it almost didn't make it into the pie! I may have to make a batch of Chocolate Banana ice cream in the near future (a much better use of over ripe bananas than banana bread!)

I loved this pie and since making it this weekend I have eaten half of it all by myself! :) It totally reminds me of my childhood frozen banana favorite, only it's kicked up a notch with an amazing buttery coconut crust.

Thanks Spike, for hosting this week. The recipe for the Chocolate Ganache Ice Cream is below; if you would like the recipe for the pie, you can find it here. Make sure you check out the TWD Blogroll, to see how everyone else enjoyed this cool, summery treat! Also, you've got one more day to enter my $100 gift card giveaway while you're here :)

* Recipes notes:
- If you do not have shortbread cookies, you can substitute graham cracker crumbs.
- For tips from other TWD bakers, click here.


Chocolate Ganache Ice Cream
from Baking: From My Home to Yours by Dorie Greenspan

6 ounces bittersweet chocolate, finely chopped
1-1/2 cups heavy cream
1 cup whole milk
4 large egg yolks
1/3 cup sugar

Put the chocolate in a 2-quart liquid measuring cup or a large heatproof bowl. Bring ¾ cup of the cream to a boil. Pour the cream over the chocolate and let it sit for a minute, then, using a rubber spatula and starting in the center of the mixture, slowly stir the cream in to the chocolate in ever-widening concentric circles. When the ganache is smooth, set it aside.

Bring the milk and the remaining ¾ cup cream to a boil in a medium heavy-bottomed saucepan.

Meanwhile, in a medium bowl, whisk the yolks and sugar together until well blended and just slightly thickened. Still whisking, drizzle in about one third of the hot liquid- this will temper, or warm, the yolks so they won’t curdle. Whisking all the while, slowly pour in the remaining liquid. Pour the custard back into the pan and cook over medium heat, stirring without stopping, until the custard thickens slightly and coats the back of a spoon; of you run your finger down the bowl of the spoon, the custard should not run into the track. The custard should reach at least 170 degrees F, but no more than 180 degrees F, on an instant-read thermometer. Immediately remove the pan from the heat and slowly and gently stir the custard into the ganache.

Refrigerate the custard until chilled before churning it into ice cream.

Scrape the chilled custard into the bowl of an ice cream maker and churn according to the manufacturer’s instructions. Pack the ice cream into a container and freeze it for at least 2 hours, until it is firm enough to scoop.

Tuesday, April 6, 2010

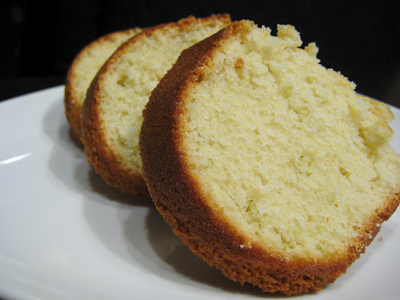
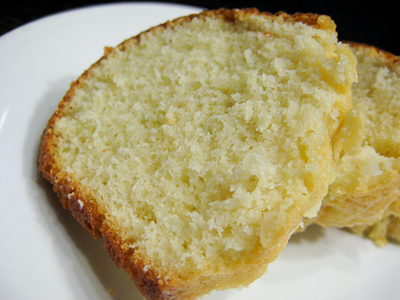
Coconut Tea Cake (TWD)


This week's Tuesdays with Dorie (TWD) recipe was actually the Mocha-Walnut Marbled Bundt Cake, but in the spirit of Easter, our leader Laurie let us swap weeks and we were allowed to make the Coconut Tea Cake from last week, chosen by Carmen of Carmen Cooks.

Time was short, and this recipe was a breeze to whip up. I made the coconut lime version, with the use of lime sugar and rum in the batter. The lime flavor was subtle, though I could definitely see pretty little flecks of lime zest in the finished product. As for the coconut, I could recognize the bits of shredded coconut in each bite, but I was hoping that the addition of coconut milk would lend a stronger coconut flavor.


Still, the cake came out pretty moist and we all enjoyed it on Easter. I had intentions of making a nice glaze or a coconut cream cheese frosting for this cake, but time got away from me and I had more fun taking pictures of my dear daughter (she'll be 5 months next week already!!!) and her first Easter instead :)


Thanks, Carmen, for hosting this (last) week. If you would like the recipe, you can find it here. Make sure you check out the TWD Blogroll, to see how everyone else enjoyed this coconut-y treat!

* Recipes notes:
- Take the cake out just as it begins to turn a nice golden color. Leave it in too long and it will dry out. Mine was done right around 60 minutes.
- For tips from other TWD bakers, click here.

Saturday, March 6, 2010

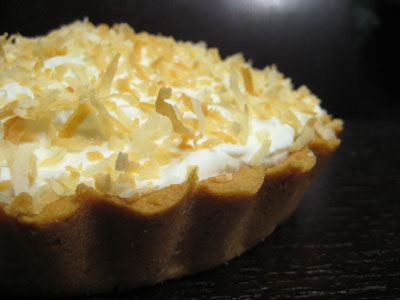
Toasted-Coconut Custard Tart (TWD)


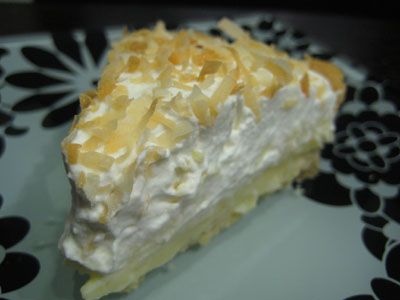
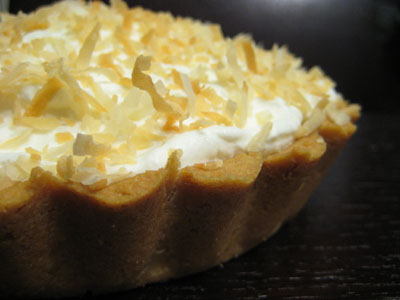
This week's Tuesdays with Dorie (TWD) recipe was chosen by Beryl of Cinemon Girl: Toasted-Coconut Custard Tart. I actually made this last weekend, but I'm a bit late posting this because unfortunately the power cord to my laptop died and I had to order a new one, but better late than never right? So back to this past week's pick... I love all things coconut, so I was eager to try this recipe.


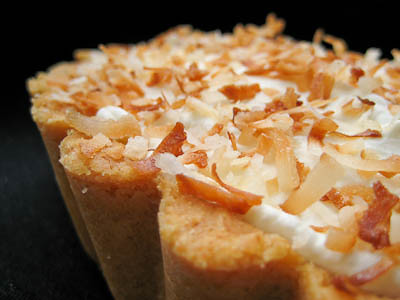
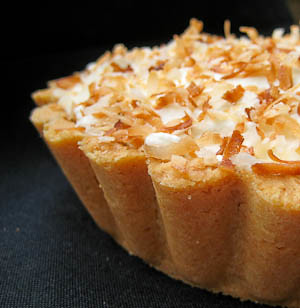
It's basically a rum infused vanilla pastry cream chock full of toasted coconut atop Dorie's wonderful sweet tart crust, topped with a rum flavored whipped cream. With six egg yolks in the pastry cream, I was worried that this tart was going to be overly rich and creamy. Surprisingly, this tart was very light and airy and not heavy at all. The coconut flavor was well complemented with the rum, and you can't ever go wrong with Dorie's sweet tart dough.

While I thoroughly enjoyed this tart, if you love coconut, I would highly recommend that you try Dorie's Florida Pie, which is like a coconut filled key lime pie :)


Thanks, Beryl, for hosting this week. I loved it. If you would like the recipe, you can find it here. Make sure you check out the TWD Blogroll, to see how everyone else enjoyed this light, coconut-y treat!

* Recipes notes:
- For tips from other TWD bakers, click here.

Tuesday, February 16, 2010

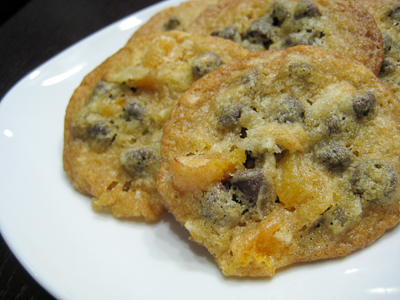
Dorie's Best (Coconut Apricot) Chocolate Chip Cookies (TWD)


This week's Tuesdays with Dorie (TWD) recipe was chosen by Kait of Kait's Plate: My Best Chocolate Chip Cookies. Of course every baker I know is always on the look out for "the best" chocolate chip cookies. So, I was anxious to try Dorie's favorite recipe. She says they are slightly crisp around the edges and chewy in the middle.

I wish I had read the P&Q before making these, because I ran into the same problem as everyone else... my cookies spread out and flattened like crazy in the oven! It seems the problem may be in the amount of flour in these cookies. Apparently most of us don't put as much flour as Dorie does in our measuring cups when spooning the flour in. Dorie recommends weighing out 4.75 ounces of flour for each cup, and the consensus seems that the additional flour prevents these cookies from spreading too much.


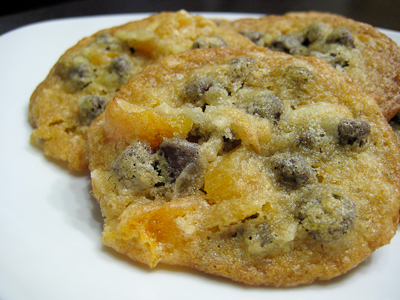
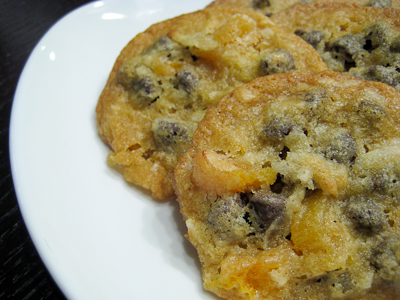
Luckily, I split my dough in half. The first batch I used to make regular chocolate chip cookies (without any nuts). These were the ones that flattened out and were just okay. With the second batch I used Dorie's "playing around" suggestion and added shredded coconut and dried apricot pieces. I absolutely loved these! The coconut and apricots made these cookies nice and chewy, plus I think they helped prevent them from spreading as much as the regular batch. I've always liked dried apricots dipped in chocolate, so I knew that I would enjoy this combination.


Thanks, Kait, for hosting this week. While I haven't found a new favorite basic chocolate chip cookie recipe, I will definitely make these coconut apricot chocolate chip cookies again! If you would like the recipe, you can find it here. Make sure you check out the TWD Blogroll, to see how everyone else enjoyed these classic cookies! (And if you're interested in trying my favorite chocolate chip cookie recipe, click here.)

* Recipes notes:
- It's best to weigh your flour instead of measuring it out. Dorie's "cup" is 4 3/4 oz per cup.
- I added 3/4 cup sweetened shredded coconut and 1/2 cup chopped dried apricot pieces into my half batch of cookie dough. I'll probably add 3/4 cup apricots next time.
- For tips from other TWD bakers, click here.

Wednesday, January 27, 2010

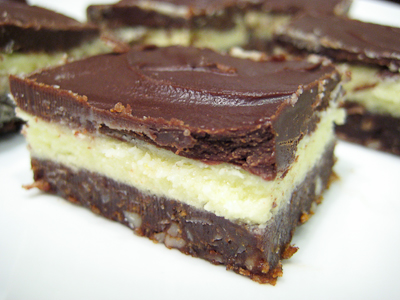
Homemade Graham Crackers and Nanaimo Bars (DB)


The January 2010 Daring Bakers’ challenge was hosted by Lauren of Celiac Teen. Lauren chose Gluten-Free Graham Wafers and Nanaimo Bars as the challenge for the month. The sources she based her recipe on are 101 Cookbooks and www.nanaimo.ca.

The first part of the challenge entailed making homemade graham crackers. Ideally, these were to be gluten free, but I didn't get a chance to go to the store to pick up the necessary sweet rice flour, tapioca starch, and sorghum flour. Instead, I made whole wheat graham crackers. I made a half recipe and it was more than enough for the Nanaimo bars - a quarter recipe would have been just fine. The only problem I ran into was how sticky the dough was - even after being chilled. Definitely flour both the dough and your work surface generously while you are rolling it out or else you'll end up with a big sticky mess. I didn't end up with the most attractive looking graham crackers for this reason, but next time I know to use more flour.


The second part of this challenge was to use our homemade graham crackers in Nanaimo Bars (pronounced Nah-nye-Moh), in honor of the upcoming 2010 Winter Olympics in Vancouver. Nanaimo Bars are a classic Canadian dessert created in none other than Nanaimo, British Colombia. These bars have 3 layers: a base containing graham crackers, cocoa, coconut and almonds, a middle custard layer, and a topping of chocolate. They are extremely rich and available almost everywhere across the country.

The bars are actually a no bake dessert, something that I didn't notice initially until I started making them. I don't have an 8-inch square pan, so I used my 9-inch pan. I made everything according to the recipe, except I doubled the top chocolate layer in order to have enough to spread across the entire pan. It was probably a bit thicker than it was supposed to be, but it didn't really seem to throw off the flavors (proportionately) at all.
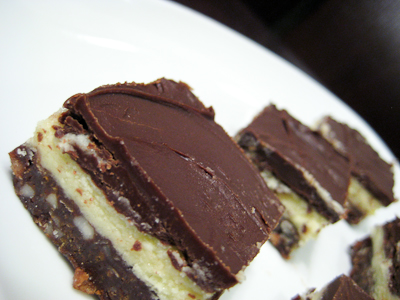

Aside from cracks in the top layer when I went to cut these bars, they turned out great. From the comments I had read, I was expecting something super rich and almost too sweet. However, I did not find that to be the case at all. They are sweet and rich but not overly so. I thought they tasted a lot like a Mounds candy bar, but my husband didn't really think so. Either way, the crunch from the almonds and the chew from the coconut both gave these bars a nice texture.

Thanks Lauren, for hosting this month's challenge. I loved these and will definitely be making them again! Make sure you check out the Daring Bakers' Blogroll to see how everyone else enjoyed these Canadian treats!


Gluten-Free Graham Wafers

1 cup (138 g) (4.9 ounces) Sweet rice flour (also known as glutinous rice flour)
3/4 cup (100 g) (3.5 ounces) Tapioca Starch/Flour
1/2 cup (65 g) (2.3 ounces) Sorghum Flour
1 cup (200 g) (7.1 ounces) Dark Brown Sugar, Lightly packed
1 teaspoon (5 mL) Baking soda
3/4 teaspoon (4 mL ) Kosher Salt
7 tablespoons (100 g) (3 ½ ounces) Unsalted Butter (Cut into 1-inch cubes and frozen)
1/3 cup (80 mL) Honey, Mild-flavoured such as clover.
5 tablespoons (75 mL) Whole Milk
2 tablespoons (30 mL) Pure Vanilla Extract

Directions:
1. In the bowl of a food processor fitted with a steel blade, combine the flours, brown sugar, baking soda, and salt. Pulse on low to incorporate. Add the butter and pulse on and off, until the mixture is the consistency of a coarse meal. If making by hand, combine aforementioned dry ingredients with a whisk, then cut in butter until you have a coarse meal. No chunks of butter should be visible.
2. In a small bowl or liquid measuring cup, whisk together the honey, milk and vanilla. Add to the flour mixture until the dough barely comes together. It will be very soft and sticky.
3. Turn the dough onto a surface well-floured with sweet rice flour and pat the dough into a rectangle about 1 inch thick. Wrap in plastic and chill until firm, about 2 hours, or overnight.
4. Divide the dough in half and return one half to the refrigerator. Sift an even layer of sweet rice flour onto the work surface and roll the dough into a long rectangle, about 1/8 inch thick. The dough will be quite sticky, so flour as necessary. Cut into 4 by 4 inch squares. Gather the scraps together and set aside. Place wafers on one or two parchment-lined baking sheets. Chill until firm, about 30 to 45 minutes. Repeat with the second batch of dough.
5. Adjust the rack to the upper and lower positions and preheat oven to 350 degrees Fahrenheit (180 degrees Celsius).
6. Gather the scraps together into a ball, chill until firm, and reroll. Dust the surface with more sweet rice flour and roll out the dough to get a couple more wafers.
7. Prick the wafers with toothpick or fork, not all the way through, in two or more rows.
8. Bake for 25 minutes, until browned and slightly firm to the touch, rotating sheets halfway through to ensure even baking. Might take less, and the starting location of each sheet may determine its required time. The ones that started on the bottom browned faster.
9. When cooled completely, place enough wafers in food processor to make 1 ¼ cups (300 mL) of crumbs. Another way to do this is to place in a large ziplock bag, force all air out and smash with a rolling pin until wafers are crumbs.

*Note: The graham wafers may be kept in an airtight container for up to 2 weeks. If making the graham crackers with wheat, replace the gluten-free flours (tapioca starch, sweet rice flour, and sorghum flour) with 2 ½ cups plus 2 tbsp of all-purpose wheat flour, or wheat pastry flour. Watch the wheat-based graham wafers very closely in the oven, as they bake faster than the gluten-free ones, sometimes only 12 minutes. (I found that mine still baked up in about 25 minutes.)

Nanaimo Bars

Bottom Layer
1/2 cup (115 g) (4 ounces) Unsalted Butter
1/4 cup (50 g) (1.8 ounces) Granulated Sugar
5 tablespoons (75 mL) Unsweetened Cocoa
1 Large Egg, Beaten
1 1/4 cups (300 mL) (160 g) (5.6 ounces) Gluten Free Graham Wafer Crumbs (See previous recipe) - If making the graham wafers just for the Nanaimo bars, you can go with just 0.25x the original recipe
1/2 cup (55 g) (1.9 ounces) Almonds (Any type, Finely chopped)
1 cup (130 g) (4.5 ounces) Coconut (Shredded, sweetened or unsweetened) I used sweetened

Middle Layer
1/2 cup (115 g) (4 ounces) Unsalted Butter
2 tablespoons and 2 teaspoons (40 mL) Heavy Cream
2 tablespoons (30 mL) Vanilla Custard Powder (Such as Bird’s. Vanilla pudding mix may be substituted.)
2 cups (254 g) (8.9 ounces) Icing Sugar

Top Layer (I doubled this for my 9-inch pan)
4 ounces (115 g) Semi-sweet chocolate
2 tablespoons (28 g) (1 ounce) Unsalted Butter

Directions:
1. For bottom Layer: Melt unsalted butter, sugar and cocoa in top of a double boiler. Add egg and stir to cook and thicken. Remove from heat. Stir in crumbs, nuts and coconut. Press firmly into an ungreased 8 by 8 inch pan.
2. For Middle Layer: Cream butter, cream, custard powder, and icing sugar together well. Beat until light in colour. Spread over bottom layer.
3. For Top Layer: Melt chocolate and unsalted butter over low heat. Cool. Once cool, pour over middle layer and chill.

*Note: These bars freeze very well, so don’t be afraid to pop some into the freezer.

Tuesday, June 30, 2009

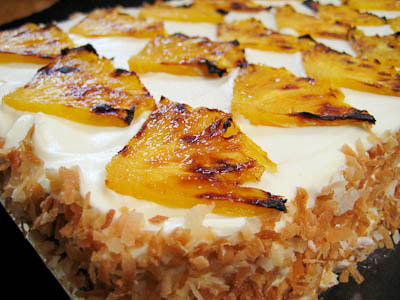
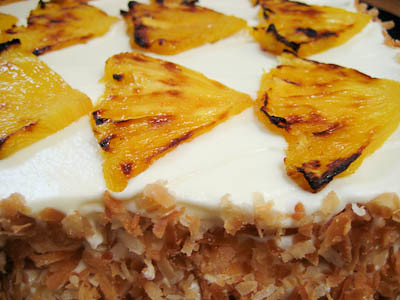
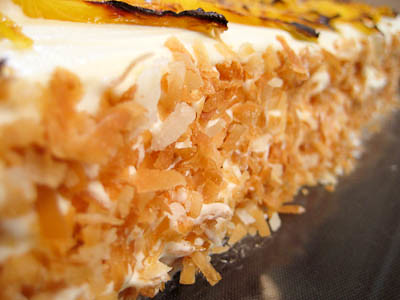
Perfect Party Cake and Coconut-Roasted Pineapple Dacquoise (TWD)


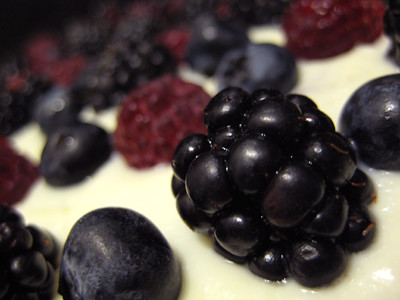
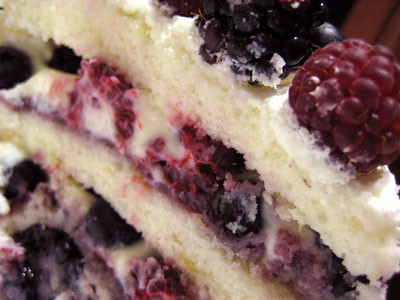
This week's Tuesdays with Dorie (TWD) recipe was chosen by Carol of mix, mix... stir, stir: Perfect Party Cake. I actually made this cake last year as part of one of The Daring Bakers' challenges. The first time I made it, I frosted it with white chocolate whipped cream because I don't particularly care for buttercream frosting. I made it again at the end of last year for my mother-in-law's birthday party and used Dorie's buttercream recipe and loved it. It was not until I tried this buttercream recipe that I realized not all buttercreams are created equal. So if you make this cake, I urge you to try it with the buttercream because it is delicious. You can read more about my experiences with this cake and see more photos of it here. This would be a perfect cake for a Fourth of July celebration, topped with blueberries and raspberries!


I'm sorry Carol, but I did not have time to make this cake again. I barely got the June Daring Bakers' challenge posted at the last minute this weekend, and then had some catching up to do as well. Last week, Andrea of Andrea in the Kitchen chose the Coconut-Roasted Pineapple Dacquoise (pronounced da-kwaz). I did not have a chance to make it due to the passing of my grandmother, but promised I would get to it soon.

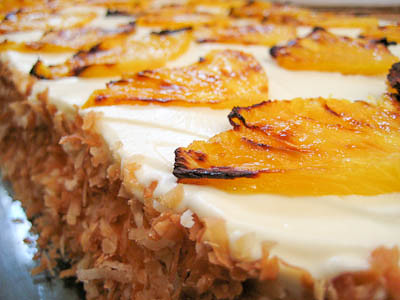
I have wanted to make Coconut-Roasted Pineapple Dacquoise from the moment I got the cookbook. There is a lovely picture of it in the book that just jumps out at you. I grew up in southern California, only thirty minutes from the beach. During the summer, we'd always stop at Thrifty's on the way home from the beach for some ice cream. One of my favorite ice cream flavors there was pineapple coconut. So I knew that with roasted pineapple, coconut, and white chocolate ganache, this was going to be one really great dessert.


The recipe was fairly straightforward, though extremely time consuming. First, there's the coconut almond meringue layer made with ground almonds, coconut and egg whites. Though it can be made one day in advance, it takes three hours to fully bake.


The white chocolate ganache is made with white chocolate and heavy cream. You boil the heavy cream, then pour it over the white chocolate, and mix until the chocolate is completely melted. Then the ganache needs to be refrigerated for three hours before it is whipped up for the final dessert.


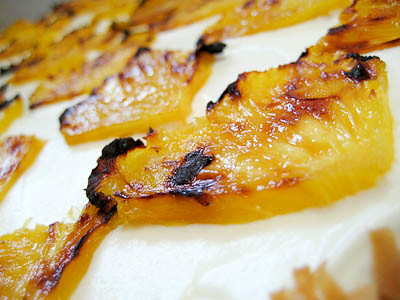
The roasted pineapple is probably the quickest part of this recipe, though cutting and slicing the pineapple does take some time. Simply quarter your pineapple, slice it into 1/8-inch thick pieces, sprinkle with some confectioners' sugar and place it under the broiler. After a quick 8 minutes in the oven, you've got some delicious, roasted pineapple.


Aside from the three hour bake time required for the meringue and the three hour refrigeration time for the ganache, after the dessert is assembled, it needs to chill in the refrigerator for at least four hours! So needless to say, if you're going to make this, plan ahead.


I had already read about how many people loved this dessert last week so I was excited to take my first bite. It absolutely lived up to all the hype I had heard about it. There is just something so great about pineapple and coconut together. It was a bit sweet, so if you don't like overly sweet desserts I would recommend using slightly sweetened whipped cream between each layer of meringue instead of the ganache.

Thanks Andrea, for a great pick. Though a bit late, I am so glad that I finally got to make this. If you would like the recipe, you can find it here. If you visit the TWD Blogroll, you'll see how much everyone else enjoyed this tropical treat!

* Recipes notes:
- While the recipe calls for a 4.25 pound pineapple, I bought a 2 pound pineapple and had just enough.
- I ended up with quite a bit of leftover white chocolate ganache (about 3 cups), so next time I make this I will make 1/2 of the ganache recipe.
- While some complained the ganache was too sweet and recommended using regular whipped cream in between each layer instead, I found the ganache to be just fine. I actually thought the pineapple was a bit too sweet and would probably omit the dusting of confectioners' sugar next time - I'm sure the natural sugars in the pineapple would be sufficient.
- Don't want such a big dessert? Or prefer something easier to serve at a get together? Consider making cute little individual servings like Vibi did here.
- For more tips, click here.

Tuesday, April 28, 2009

Chocolate Coconut Cream Tart (TWD)


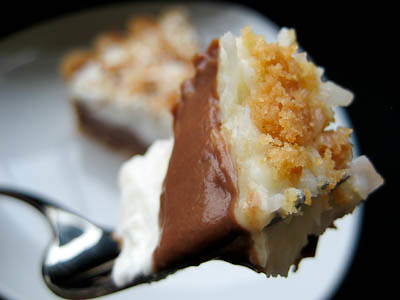
This week's Tuesdays with Dorie (TWD) recipe was chosen by Kim of Scrumptious Photography: Chocolate Cream Tart. The recipe includes a chocolate pastry cream in a dark chocolate shortbread crust, topped with sweetened whipped cream.


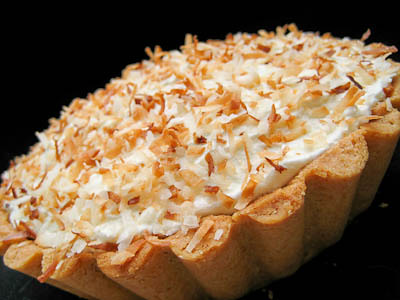
I lost track of time and almost didn't participate this week, but I am so glad that I did! I decided to go with Dorie's "playing around" idea to make a Chocolate Coconut Cream Pie instead. I've never had one before, but the idea of one sounded so good. I love Dorie's sweet tart dough, so I decided to keep with the tart idea instead of making a regular pie crust.


The coconut cream was very simple to make, though I almost ran out of patience waiting for the cream to come to a boil. I believe this step took at least 20 to 30 minutes, though I honestly lost track of time!

I've made Dorie's pastry cream many times before, so I had no issues with that component. I used semisweet chocolate because I'm not a fan of bittersweet chocolate.

I didn't have a 9-inch tart pan, so I used 4.5 or 5-inch tart pans instead. I made one recipe of sweet tart dough, but probably should have made 1.5x the recipe because my tarts were a bit on the thin side.


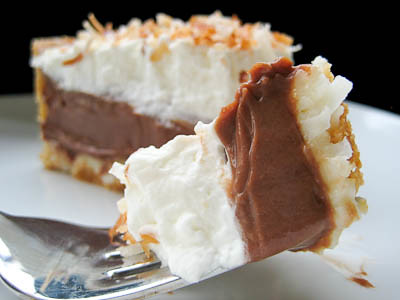
The Chocolate Coconut Cream Tarts were to die for! The chocolate pastry cream - oh, the pastry cream... it was amazing. Rich and creamy... chocolatey... but not too rich. The coconut cream gave the tart a nice flavor and texture. I'm glad that I went with the sweet tart dough instead of the chocolate shortbread crust because I think it would have been (gasp) too chocolately otherwise. Next time, I will drizzle some caramel sauce over the top and it will taste like a Samoa Girl Scout cookie! :)


Thanks Kim, for choosing this recipe - I loved it. If you would like the recipe for the chocolate cream tart, you can find it here. (I've included the recipe for the Chocolate Coconut Cream Tart below since I used a completely different tart dough recipe and the weekly host usually doesn't post the "playing around" options.) Make sure you visit the TWD Blogroll to see what everyone else thought about this chocolately treat!


Chocolate Coconut Cream Tart
from Baking: From My Home to Yours, by Dorie Greenspan
For the Coconut Cream
1-1/3 cups heavy cream
1 cup sweetened shredded coconut

For the Filling
2 cups whole milk
4 large egg yolks
6 tbsp sugar
3 tbsp cornstarch, sifted
1/4 tsp salt
7 ounces bittersweet chocolate, melted (I used semisweet)
2-1/2 tbsp unsalted butter, cut into pieces, at room temperature

For the Topping
1 cup heavy cream
3 tbsp confectioner's sugar
1 tbsp dark rum (optional)
1 tsp pure vanilla extract

1 9-inch Sweet Tart Dough, fully baked and cooled


To make the Coconut Cream:
Put the heavy cream and shredded coconut in a small saucepan and bring to a boil over medium-low heat, stirring almost constantly. Continue to cok and stir until cream is reduced by half and the mixture is slightly thickened. Scrape the coconut cream into a bowl and cool to room temperature.

To make the Filling:
Bring the milk to a boil in a small saucepan.

Meanwhile, in a medium heavy-bottomed saucepan, whisk the egg yolks together with the sugar and cornstarch until thick and well blended. Still whisking, drizzle in about 1/4 cup of the hot milk-- this will temper, or warm, the yolks so they won't curdle. Whisking all the while, slowly pour in the remainder of the milk. Put the pan over medium heat and, whisking vigorously, constantly and thoroughly (making sure to get the edges of the pot), bring the mixture to a boil. Keep at a boil, still whisking, for 1 to 2 minutes, then remove the pan from the heat.

Whisk in the melted chocolate. Let sit for 5 minutes, then whisk in the bits of butter, stirring until they are full incorporated and the pastry cream is smooth and silky. Scrape the cream into a bowl. You can press a piece of plastic wrap against the surface of the cream to create an airtight seal and refrigerate the pastry cream until cold or, if you want to cool it quickly--as I always do--put the bowl into a larger bowl filled with ice cubes and cold water, and stir the pastry cream occasionally until it is thoroughly chilled, about 20 minutes.

To make the topping:
Whip the heavy cream with the confectioner's sugar, dark rum, and pure vanilla extract.

To assemble the tart:
When you are ready to assemble the tart, whisk the chocolate pastry cream vigorously to loosen it and to bring back its velvety texture. Spread the coconut cream over the bottom of the tart crust, cover it with the chocolate cream, and then top it with the whipped cream. Cover the whipped cream with toasted coconut or with chocolate shavings, or a combination of the two.


* Recipes notes:
- If you've never made pastry cream before, it won't really come to a boil. It will just start to thicken. After it starts to thicken, just continue to cook for another 1-2 minutes.
- I used semisweet chocolate instead of bittersweet.
- If you don't have whole milk, learn how to make your own with skim/1%/2% and cream or half & half here.
- For more tips, click here.

Tuesday, March 31, 2009

Coconut Butter Thins (TWD)


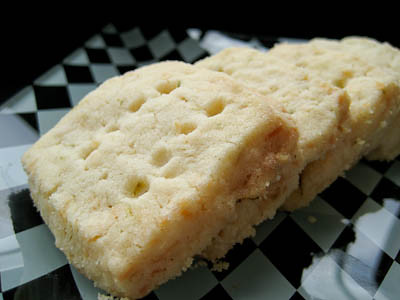
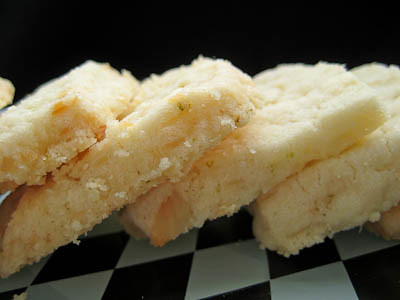
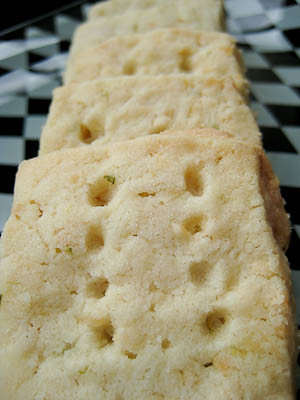
This week's Tuesdays with Dorie (TWD) recipe was chosen by Jayne of The Barefoot Kitchen Witch: Coconut Butter Thins. They're basically shortbread cookies with chopped macadamia nuts, shredded coconut, and a hint of lime.

The recipe is as simple as any other shortbread cookie recipe. Dorie warns that you should place these two inches apart on the baking sheet, but I surprisingly found that mine only spread a little bit. It seems that others had their cookies spread quite a bit, so I'm not sure what the difference was.


These cookies were very delicate. The coconut made them slightly chewy, but otherwise the coconut flavor wasn't too pronounced. There were many reports this week that coconut haters could not even taste the coconut in this recipe. The macadamia nuts gave them a nice crunch, too. Dorie's idea to rub the sugar with some lime zest was marvelous - coconut and lime are flavors that pair very well. These cookies were simple and delicious. I will definitely make them again.


Thanks Jayne, for choosing these cookies. If you would like the recipe, you can find it here. Make sure you visit the TWD Blogroll to see what everyone else thought about this buttery treat!

* Recipes notes:
- I didn't have a gallon size ziploc bag so I simply rolled my dough out between two pieces of plastic wrap until it was a 1/4-inch thickness.
- I baked my cookies for the full 20 minutes.
- Let the cookies rest of the baking sheet for about 1 minute before transferring them to a rack to cool - they are very delicate and may not make it in one piece if you transfer them too early.
- Wrapped well, these cookies will keep for a few days at room temperature. They will keep in the freezer for 2 months.
- For more tips, click here.

Tuesday, August 19, 2008

Granola Grabbers (TWD)


This week's Tuesdays with Dorie (TWD) recipe was chosen by Michelle of Bad Girl Baking: Granola Grabbers. I originally planned on sitting this one out. First, I didn't have any wheat germ and the smallest container I could find at the store was 16 ounces, more than I could ever use. I didn't even know what wheat germ was until now! According to Wikipedia, wheat germ is the "heart," or embryo, of the cereal kernel seed. Then there was the matter of nuts. I don't like nuts (except for peanuts - and I usually prefer peanut butter over whole peanuts). This recipe calls for peanuts and almonds. I wasn't sure how it would turn out if I omitted the almonds (and I didn't want to add double the amount of peanuts to make up for the volume).


Then I saw on the TWD P&Q (Problems & Questions) that Hannah of DeL Sisters Kitchen had made them without the wheat germ, just substituting wheat flour for all purpose flour. It was then that I decided to forge ahead with the recipe and give it a try.


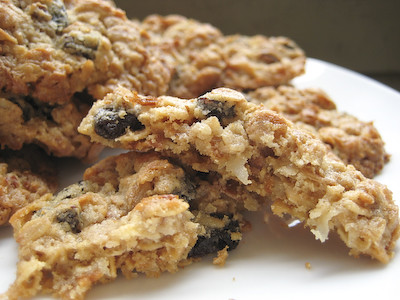
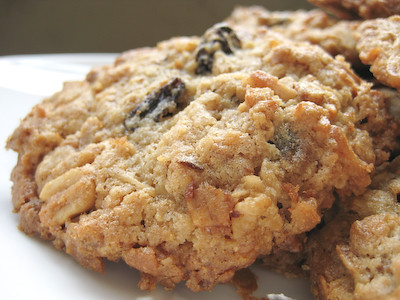
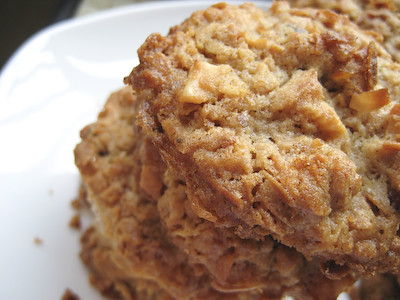
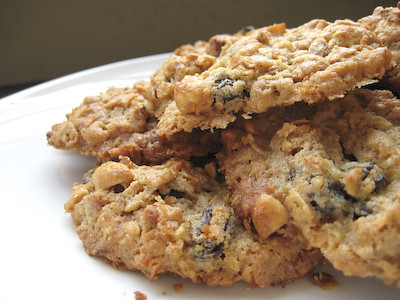
Several others commented that the cookies were too sweet, but I guess that's pretty subjective because neither my husband nor myself thought that. They were nice and crunchy around the edges, chewy in the middle, with a little bit of a sweet and a little bit of salty. We honestly couldn't stop going back for more! I wasn't a huge fan of the peanuts in these cookies, but that still didn't stop me from going back for more ;) They're like a cross between oatmeal cookies and granola bars.


Aside from omitting the wheat germ and using whole wheat flour in place of the all purpose flour, I omitted the almonds. Dorie recommends using granuloa without fruit in it, so I picked up some Orange Pecan Zest Granola made by Jake's Natural Fine Foods. I figured the small bits of pecans in the granola would make up for the almonds I was omitting.


Thanks again to Michelle for choosing the Granola Grabbers. I'm glad I didn't sit this one out. This was a really simple recipe that will certainly satisfy any craving for granola or trail mix. It's probably not something I will make often, but I'm much more likely to make these than I am homemade granola. If you would like the recipe for these cookies, you can find it here (with recipe tips here). Make sure you visit the TWD Blog Roll to see how everyone else enjoyed these wholesome cookies.