Showing posts with label cheese. Show all posts

Friday, July 27, 2012

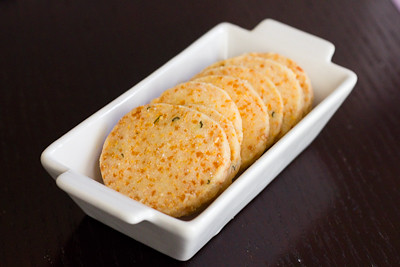
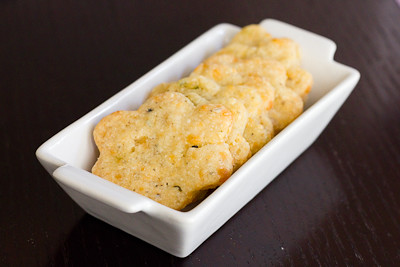
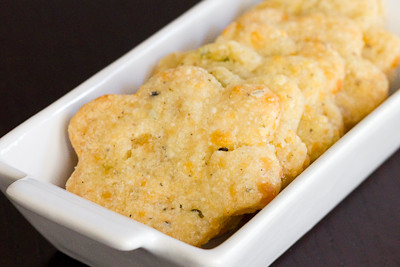
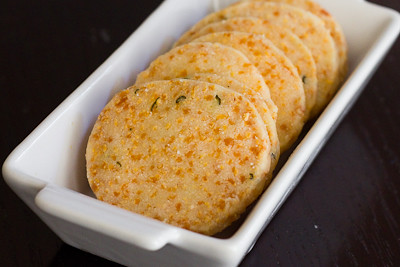
Homemade Crackers: Pepper Jack and Oregano Crackers and Cheddar Rosemary Icebox Crackers (DB)

Our July Daring Bakers' Host was Dana McFarland and she challenged us to make homemade crackers! Dana showed us some techniques for making crackers and encouraged to use our creativity to make each cracker our own by using ingredients we love.

It's been quite some time since I made homemade crackers, so it's hard for me to compare this experience with my previous one.  However, I found that both of these recipes were extremely quick and easy to execute.  The icebox crackers, in particular, were very simple.  Just mix everything together and form the dough into a log and refrigerate; then slice and bake when ready.


My schedule is a bit hectic these days, so I stuck with the recipes as written and didn't take any creative license with them.  The only thing I changed was to omit the walnuts from the cheddar rosemary crackers because I don't care for nuts.

Both types of crackers were very flavorful.  My only complaint would be that the cheddar rosemary crackers were way too salty; so I'll definitely cut back on the salt next time.  These crackers reminded me of a gourmet version of cheezits; the rosemary is such a wonderful addition.

I really enjoyed this challenge because it reminded me of how much I love making my own crackers.  With a toddler to feed, I love that I can make her a snack that doesn't have all the additives and preservatives that are found in store bought crackers.

Thanks Dana, for hosting this month's challenge.  You'll find the recipes below.  Also be sure to check out the Daring Bakers' Blogroll to see what everyone else thought of these savory homemade treats.

Pepper Jack and Oregano Crackers (Roll with pasta rollers or by hand):

Servings: Approximately 80 crackers

Ingredients

1⅔ cups (400 ml) (235 gm) (8¼ oz) all-purpose (plain) flour
2¼ cups (540 ml) (225 gm/8 oz) grated pepper jack cheese, firmly packed
2 teaspoons (10 ml) (1 gm) dried oregano
½ teaspoon (2½ ml) (3 gm) salt
½ teaspoon (2½ ml) (½ gm) black pepper
½ cup (120 ml) (4 fl oz) vegetable oil
½ cup (120 ml) (4 fl oz) water

Spice topping

¼ teaspoon (1¼ ml) (1/8 gm) cayenne
1 teaspoon (5 ml) (3 gm) kosher salt
1 teaspoon (5 ml) (5 gm) sugar

Directions:

1. Combine the spice topping and set aside.
2. Grate the cheese and put in the bowl of a food processor with flour, oregano, salt and pepper and pulse to combine. This can also be done by hand.

3. Add the oil and pulse until the consistency of wet sand is reached.
4. Add enough water for the dough to come together.
5. Form the dough into two disks, wrap with cling film and refrigerate for several hours or overnight.
6. Heat the oven to moderate 325°F/160°C/gas mark 3.
7. Working with a quarter of the dough at a time, either use a rolling pin or roll out in your pasta rollers to 1/8 of an inch (3 mm) thick. If you use pasta rollers, ensure the dough is well floured so as not to stick.
8. Cut the strips into cracker shapes or cut out using a cookie cutter.

9. Transfer to a parchment lined cookies sheet and sprinkle with the spice mixture.
10. Bake for 20-25 minutes until medium golden brown.
11. Store in an airtight container and eat within three days

Cheddar, Rosemary and Walnut Icebox Crackers (form into a log and slice):

Servings: Approximately 48 crackers

Ingredients

½ cup (120 ml) (1 stick) (115 gm/4 oz) butter, well softened
2¼ cups (540 ml) (225 gm/8 oz) grated aged cheddar cheese (the better the cheese, the better the cracker), firmly packed
1 cup plus 3 tablespoons (285 ml) (190 gm/6oz) all-purpose (plain) flour
1 teaspoon (5 ml) (6 gm) salt (I found this to be way too much! try 1/4-1/2 tsp)
1/2 cup (120 ml) (60 gm/2 oz) finely chopped walnuts
1 tablespoon (15 ml) (1¾ gm) finely chopped rosemary

Directions:

1. Combine butter, rosemary and cheese in a stand mixer and beat well (can also be done by hand)

2. Add the flour, salt and nuts and stir to combine
3. Form the dough into two tight logs and wrap with cling film

4. Chill for at least an hour and up to several days. The log can be frozen at this point for several months.
5. Heat the oven to moderate 325°F/160°C/gas mark 3.
6. Slice a log into 5mm (1/5 inch) coins and place on a parchment lined baking sheet
7. Bake about 10 minutes until golden brown
8. Store in an airtight container and eat within three days
9. Try this recipe with different cheeses, nuts (or no nuts), and spices. Get creative!

Storage and Freezing Instructions/Tips:

Generally crackers with less fat and cheese last for weeks in an airtight container and richer crackers only a few days. Dough can be made days ahead, stored in the fridge and baked when needed. The icebox cracker dough can be frozen for several months before thawed, sliced and baked.

Tuesday, April 3, 2012

Pizza Rustica (TWD)


This week's Tuesdays with Dorie: Baking with Julia was hosted by Emily of Capital Region Dining and Raelynn of The Place They Call Home: Pizza Rustica.  I'm not sure where this got its name.  Rustic it is, pizza it's not.  It's more like a quiche, but heavy on the cheese and light on the eggs.  The base of the filling is ricotta cheese.  Then you mix in some mozarella and romano cheeses, some parsley, and some prosciutto.

I didn't have any fresh parsley on hand, so I subbed in 2 teaspoons of dried parsley.  Also used cooked bacon instead of proscuitto, and asiago cheese instead of romano cheese.  Sometimes a quiche tastes to "eggy" for me, so this "pizza" was more appealing to me.

There were some mixed opinions among the group about the pie crust, which was very sweet.  I decreased the amount of sugar in it, just a bit, based on comments that it was too sweet.  In the end, I'm not sure if I liked this savory and sweet combination.  I think cutting the sugar in half with this recipe would be absolutely fine.

I thought this was a pretty good dish; my husband not so much.  He would not eat more than one bite :( He usually isn't very picky, either.  So, this is unfortunately probably the first and last time I'll make this one.... in its entirety at least.  I'll probably make the pie crust recipe again, as this is the first one I've ever made that I didn't have huge problems with and it was delicious :)

Thanks to Emily and Raelynn for hosting; you can find the recipe on their blogs here and here.  Make sure you check here, too, to see what everyone else thought of this non-traditional pizza.

Monday, February 27, 2012

Green Onion, Cheddar & Asiago Beer Batter Bread (DB)


The Daring Bakers' February 2012 host was – Lis! Lisa stepped in last minute and challenged us to create a quick bread we could call our own. She supplied us with a base recipe and shared some recipes she loves from various websites and encouraged us to build upon them and create new flavor profiles.

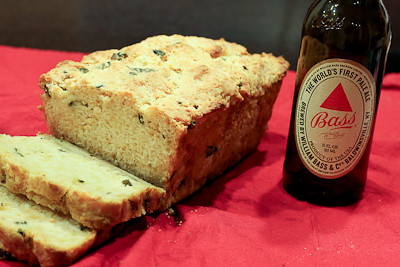
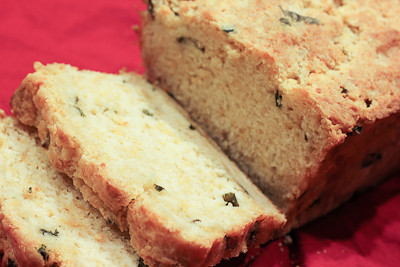
I was in the mood for something savory, not sweet (crazy, I know!) so I went with the green onion, cheddar & asiago beer batter bread!  Everything came together quickly and easily, and the smell of the bread baking in the oven was magnificent! I used a slightly smaller loaf pan (8.5" x 4.5") and that did not seem to affect the baking time much.

My bread was moist and fluffy and full of flavor! I love how the top of the loaf became crisp from brushing the butter on top! So good.  I think next time I'll also sprinkle some cheese on top as it's almost done baking to get a crisp, cheesy crust.  And maybe bake it in a muffin pan, to increase the ratio of buttery, cheesy crust to middle :) The best thing about this bread? It comes together so quickly! I'll definitely be making this one again.

Thanks Lis, for hosting this month's challenge.  You'll find the recipe below - be sure to read all the tips/notes below the recipe, as there is some useful information on quick breads there. Also be sure to check out the Daring Bakers' Blogroll to see how everyone else enjoyed the challenge.

Green Onion, Cheddar & Asiago Beer Batter Bread  
Makes one 9” x 5” (23 x 13 cm) loaf
Adapted from Recipe Girl’s Cheddar Chive Beer Batter Bread


Ingredients
1 tablespoon (15 ml) oil
1 cup (240 ml) (100 gm/3½ oz) sliced green (spring) onion
3 cups (720 ml) (420 gm/15 oz) all-purpose (plain) flour
3 tablespoons (45 ml) (45 gm/1½ oz) granulated sugar
2 teaspoons (10 ml) (10 gm) baking powder
1 teaspoon (5 ml) (6 gm) salt
1 cup (240 ml) (115 gm/4 oz) grated sharp cheddar cheese
½ cup (120 ml) (2 oz) grated Asiago cheese
One (12 fl oz/355 ml) (about 1½ cups) bottle beer (such as amber ale)
¼ cup (60 ml) (55 gm/2 oz) butter, melted and divided

Directions:
  1. Preheat oven to moderately hot 375°F/190°C/gas mark 5. Spray 9”×5″ (23 x 13 cm) loaf pan with cooking spray.
  2. Heat olive oil in a large nonstick skillet over medium heat. Add green onion and sauté 3-4 minutes or until tender. Cool to room temperature.
  3. Combine flour, sugar, baking powder and salt in a bowl; make a well in the center of the mixture. Add onion, cheeses, and beer. Stir just until moist.
  4. Spoon batter into prepared pan. Drizzle evenly with 2 tablespoons of butter. Bake for 35 minutes; brush with remaining 2 tablespoons butter. Bake an additional 23 minutes or until wooden pick inserted in the center comes out clean. Cool 5 minutes in pan on a wire rack; remove from pan. Cool completely on wire rack.
Quick bread primer
  • Quick breads can be sweet or savory, they are a modern innovation they became common after the introduction of baking powder and baking soda.
  • Baking powder is a combination of acid and alkaline that reacts together when moistened to form gases that raises the baked quick bread. Usage 1 to 2 teaspoons per cup of flour.
  • Baking soda (an alkaline salt, sodium bicarbonate) is used when the liquid is acidic, such as buttermilk, honey, molasses, tomato sauce etc. Usage ½ to 1 teaspoon per cup of acidic liquid.
  • Be sure your baking powder and baking soda are fresh.
  • Measure ingredients accurately, using the measuring tools and techniques suggested.
  • Preheat the oven to the correct baking temperature. Arrange racks so that the bread will bake in the center of the oven which has the best heat distribution in the oven.
  • To allow for good air circulation while baking, leave at least 1 inch of space between pans and between pans and sides of oven. Switch pan positions and rotate pans halfway through baking.
  • The two top secrets to moist, tender quick bread is 1)in the mixing always use a quick light technique so you don't over-mix the batter 2) don't over-bake since this cause dryness in the final baked product. .
  • Quick breads can be created by the following methods:
Muffin (or the two-bowl) method – The dry and wet ingredients are kept separate and then are combined quickly and gingerly by adding the wet to the dry, and folding the two together with only a few strokes. The idea is to not over-mix, basically moistening the ingredients and leaving the batter slightly lumpy, with wisps of flour showing (even small lumps are fine) so as not to overdevelop the gluten in the flour which will keep the bread tender. An over mixed batter creates tough and rubbery muffins/quick breads. Since over-mixing will cause "tunnels" – holes where the air bubbles can escape – which will make the quick bread tough.
Creaming method – The butter and sugar are beaten and creamed together until smooth and fluffy. Next, the egg and liquid flavoring are added to the butter and sugar mixture. The dry ingredients and other liquids are folded in last. This method is best when baking cakes since a lot of air pockets are added into the mixture. Folding in the ingredients creates even more air pockets to keep the cakes light and fluffy.
Cutting in method – The chilled fat is cut into the flour. The fat results in a flaky texture since the fat melts while in the oven. This method is best used when baking biscuits, scones or pie crusts.
  • Depending on the recipe and the type of quick bread, there are also three different types of batter:
Pour Batter: This type of batter has a dry:liquid ratio of 1:1. Because there is so much liquid in this type of batter, the result is very moist and dense.
Drop Batter: This batter has a dry:liquid ratio of 3:1. This batter will result in a moist but fluffy baked good.
Stiff Dough: This batter has a dry:liquid ratio of 7:1 This batter will result in a very light and fluffy baked good.
  • Lower gluten flours are best to make quick breads you can replace 4 tablespoons in each cup of all-purpose flour with cake flour in most recipes or replace 2 tablespoons in each cup of all-purpose flour with corn flour (cornstarch) if you wish to lower the gluten levels of your flour.
  • Flour should be sifted to aerate it which gives more rise therefore a lighter crumb to the final baked goods.
  • Add fruit, nuts, etc. after lightly combining the wet and dry ingredients. Then give the batter one more light-handed stir and you're done. Is the batter still thick and lumpy? That's exactly what you want
  • If you're adding dried fruit, try soaking it first. This will moisten the fruit, make it tender and juicy, and also preserve the bread's moisture. Don't sprinkle dried fruit on top of quick bread before baking, as it will burn before the loaf is done.
  • To lower the fat, for example, you can substitute some (or all) of the oil with an equal amount of almost any fruit puree (apple sauce, plum baby food, pumpkin puree, mashed bananas).
  • Glaze your baked quick breads for a nice finishing touch and burst of flavor. Make a simple mixture of confectioners' (icing) sugar and a little milk or fruit juice. Try orange and lemon juices, for their fragrant, tart zing; add curls of zest for extra color and flavor.
  • For most quick mix recipes as a general rule – less butter and sugar in a recipe makes it more bread-like, while more butter and sugar produces something closer to cake.
  • To prevent moist quick breads from spoiling, let them cool completely after baking. Then wrap them tightly in foil or plastic wrap and store at room temperature for up to 3 days. If your bread is made with cheese, cream cheese or other perishable foods, it should be refrigerated.
  • Quick breads such as banana, zucchini and cranberry slice and taste best when served a day after baking. Wrap the cooled bread in foil or plastic wrap; leave at room temperature overnight. Others like cornbread and coffee cakes are best served warm.
  • The quick bread is done if a toothpick inserted near the center comes out clean. If it is not done, test again in a few more minutes.
  • Cool in the pan for 10 minutes, unless recipe directs otherwise. Turn loaves out onto a wire rack to cool. Most quick bread should be cooled completely before slicing to prevent crumbling.
  • Using a sawing motion, cut loaves with a thin sharp knife. Use a serrated knife for quick breads that have fruits and/or nuts.
Common Problems and troubleshooting (ref http://allrecipes.com/howto/baking-quick-breads/)

Bread sticks to pan. Unless you're using high-quality non-stick metal or silicone baking pans, you should always grease the pans before you pour in the batter. The best thing to use for greasing the pan is shortening, because its melting point is higher than any other kind of fat, which helps maintain a "shield" between pan and batter while the bread is baking. A high-quality cooking spray--one that won't bake on to your pans and discolour them--is also a fast, easy fix. You can also prevent sticking by removing the bread from the pan sooner: let the bread cool for at least twenty minutes in order to set (Bundt loaves should cool twice as long) before inverting the pan.

There are big holes and "tunnels" in the bread, and/or the bread is tough. These problems are usually caused by over-mixing.

There's a big crack down the middle of the quick bread loaf. Don't worry--it's normal for quick breads. The crack on top happens when top of the loaf "sets" in the heat of the oven before the bread is finished rising. Drizzle the loaf with icing or dust with confectioners' (icing) sugar.

My blueberry muffins look green! By reacting with the alkaline baking soda, the blueberries' pigments can turn green. Toss the berries with the flour mixture before combining the ingredients; the coating should help. If you're using frozen berries, don't thaw them before using them.

The bread looks done on the outside but it's still raw in the middle. This is one of the most common quick bread problems, and it can be caused by a few different factors. The oven temperature could be too high. (Use an oven thermometer to check: they're cheap and available at most supermarkets.)

Try lowering the oven temperature and/or putting a loose tent of foil over the top of the bread so it won't burn before the middle has time to catch up.

Another cause of "raw center" syndrome could be using a different pan than the recipe calls for. One of the nice things about quick breads is that you can use the same batter to make muffins, mini loaves, jumbo loaves, or rounds. But each size requires different baking times--and some require different baking temperatures. The larger and thicker the loaf, the longer it's going to take to bake. If you're using a different size pan than your recipe calls for, adjust the baking time accordingly and check the bread often.

Tuesday, February 7, 2012

Basic White Loaves (TWD)

This is our inaugural post for the new group, Tuesdays with Dorie: Baking with Julia.  After four years, we are finally done baking our way through Baking: From My Home to Yours, and now we're diving head first into Baking with Julia. If you would like to join us, just grab a copy of the book Baking with Julia and sign up here.

Our hosts this week were Laurie and Jules.  They chose the basic white loaves.  Without actually looking at the recipe, I was a bit concerned that this would be a time consuming or difficult recipe because, of course, anything to do with Julia and yeast dough must be difficult, right?!

Well, I was pleasantly surprised to find that this recipe was pretty simple.  There are two 1-hour rest periods, but the actual prep time is about 15-20 minutes.  I started this recipe in the morning, and as Dorie notes, my loaves were done by lunch time.


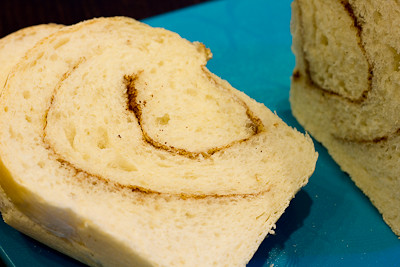
I actually didn't make the basic white loaves. I decided to kick them up a notch.  To my first loaf I added a generous smear of butter and then some Brady Street Cheese Sprinkle from Penzey's.  To my second loaf I added a generous smear of butter and then cinnamon and sugar.  I didn't really measure anything out, just eye balled it, and in retrospect, probably need to add a lot more cinnamon and sugar next time to get the flavors to really come out.  That said, my loaves turned out perfectly! They were golden on the outside and so soft and tender on the inside.  I will definitely be making this one again!

If you would like the recipe, you can find visit Laurie and Jules' blogs, Slush and Someone's in the Kitchen.  You can also go here, to see who else participated in this week's Tuesdays with Dorie.

* Recipe notes:
- I actually made this twice because the first time I used almost dead yeast.  So the second time around I was out of bread flour.  I made it with regular bleached all purpose flour and the bread still turned out fantastic! I am sure it is better with bread flour but if you don't have bread flour that's ok too.
- Another filling I would love to try the next time I make this: pesto or nutella!

Sunday, April 19, 2009

Caramel Apple Turnovers with Sweet Ricotta Filling (SMS)


As busy as I've been, the last thing I needed to do was join another baking group. But that's what I've done. When I discovered Sweet Melissa Sundays, I really had no intention of joining. Where would I find the time? I barely have enough time as it is keeping up with Tuesdays with Dorie and The Daring Bakers.


That all changed when I saw that Lorelei, founder of Sweet Melissa Sundays, was giving away a free copy of the book to anyone who wanted to join the group. I had wanted to get The Sweet Melissa Baking Book for quite some time, so I entered the giveaway, thinking I probably wouldn't win anyway. Well, lo and behold, it was my lucky day because I ended up winning the book! So, that's how I ended up as part of this group.

While I'm excited to be a part of this group, I'm afraid that I most likely won't be able to participate weekly in it like I do with Tuesdays with Dorie. My schedule is already super busy, then add to that the fact that we're supposed to post on Sundays. I do the majority of my baking on Sunday and Monday, so that makes it harder for me to post on schedule each week for this group. And because I joined Tuesdays with Dorie first, when things get busy, I'll always bake for Tuesdays with Dorie before I do for Sweet Melissa Sundays. I do hope to bake along with the group at least once or twice a month, though. Now on to the featured recipe...

This week's Sweet Melissa Sundays (SMS) recipe was chosen by Tracey of Tracey's Culinary Adventures: Caramel Apple Turnovers with Sweet Ricotta Filling. If you know me, you know that I love anything with fruit in it, especially apples. I could eat an apple crumb pie every day if I had to. So I was really looking forward to trying this recipe.


At first glance, the recipe looks really simple - and it is, but it definitely took longer than I had initially anticipated. There are three components to this recipe - the apple filling, ricotta filling, and the puff pastry.

For the apple filling, you caramelize some sugar and then toss in the apples and cook until they are tender and soft. I have caramelized sugar plenty of times before, but I swear this seemed to take forever. I'm guessing this was because the heat was set to low. I started to get impatient and actually turned my heat up to medium-low, and I think it took at least 15-25 minutes before it became amber. Otherwise, this step was really easy. I also sprinkled some cinnamon over my apples because it just didn't feel right to be cooking apples without cinnamon!

The ricotta filling is easy enough, too, though it does require some planning ahead. You need to strain the moisture out of the ricotta overnight in a cheesecloth, but once that is done the filling takes just a few minutes to prepare. I have to admit that I did not notice this step when I first looked at the recipe, and when I went to make it earlier this afternoon, I was mad at myself that I had not started this last night. I simply took the ricotta and squeezed it to the death in the cheesecloth and that seemed to work okay. I was able to get out quite a bit of moisture that way.

Thankfully this recipe uses store bought puff pastry, but make sure you set it out to thaw ahead of time, as it takes about 40 minutes to do so.


Assembly of the turnovers is simple, though I have a tendency to want to over stuff mine, so filling starts to ooze everywhere. I had a lot of filling leftover, probably enough to make an additional 3-4 turnovers.

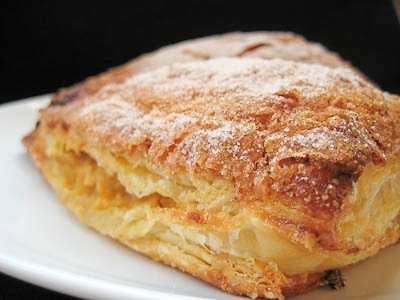
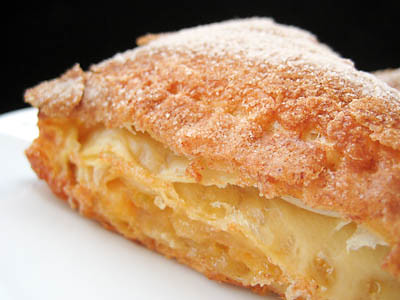
These were delicious! I was pleasantly surprised at how prominent the orange flavor was from the orange zest in the ricotta filling. It complemented the caramel apple filling well. My husband thought that these were too sweet, but I didn't think so at all. I love that you can make the apple and ricotta fillings ahead of time, and just assemble these the day of. Even better, you can make them from start to finish and just freeze them before baking so they're ready to bake whenever you have a craving :)


Thanks Tracey, for choosing this recipe - I love turnovers and will definitely be making this again! If you would like the recipe, you can find it here. Make sure you visit the SMS Blogroll to see what everyone else thought about this appley treat!

* Recipe tips:
- Save time by starting your water/sugar on the heat first before peeling/chopping your apples. I still had to wait for my sugar to caramelize even after I had finished with the apples.
- Make sure you DO NOT STIR your water/sugar mixture while you are waiting for it to caramelize - you will end up with big sugar crystals if you do.
- I dusted my turnovers with tons of cinnamon sugar, but still had some leftover. You can reduce the amount by 25% and waste less.
- Seal your turnovers shut with the tines of a fork - you'll get a better seal that way.
- I totally forgot to vent my turnovers (oops!) but apparently they still turned out okay.
- Keep a close eye on your turnovers - I checked mine at 39 minutes (6 minutes early) and they had already started to burn!
- For more tips, click here.

Thursday, April 9, 2009

Blog Makeover & Southwestern Potatoes


I've been dying to do a makeover for my blog for quite some time now. Sure, it was very simple and classic looking, but I wanted something a bit more colorful and fun.

Thanks to my amazing friend Lisa over at Surviving Oz, I was finally able to give my blog a face lift! I am beyond thrilled with how everything turned out and I cannot begin to thank her enough! I still have to work on finishing up some additional content for the blog, but for now at least it has a new look :)

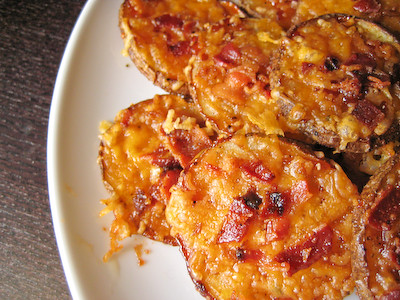
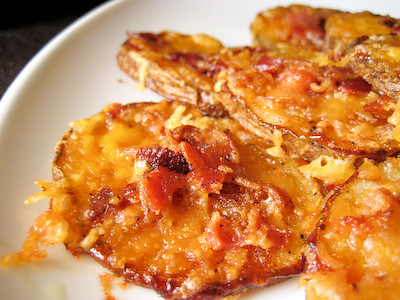
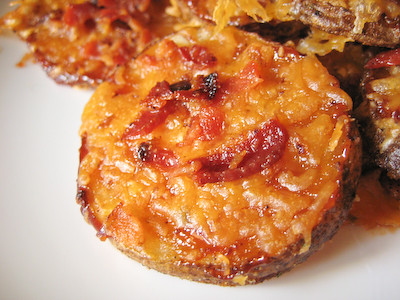
In honor of my blog makeover, I'm going to share with you one of the best recipes I have come across in a long time! I bookmarked this particular recipe several months ago. My only regret now is not making it sooner!! I promise that this is something you need to try! It's about as simple as simple gets. You simply slice some potatoes, toss them in olive oil, salt, and pepper, then bake them in the oven for about 15 minutes. Next, top them with some barbeque sauce, cheddar cheese, and bacon bits. After a few more minutes in the oven, you've got the tastiest potato side or appetizer you've ever eaten!


I made these two times in two days they were so good! My husband calls them crack :) I would bring these to a party any day over the alleged "crack dip."

Southwestern Potatoes
from cooking this and that

1 package bacon bits, or 4 slices of bacon, cooked and crumbled
2 unpeeled large potatoes, scrubbed
3 tablespoons olive oil
1 teaspoon garlic salt
1 teaspoon black pepper
1/4 cup barbecue sauce
1 cup shredded cheddar cheese
1/2 sour cream, optional (for dipping)


Line 2 large baking sheets with foil and preheat oven to 450 degrees. (I was able to fit it all on one baking sheet.)

Cut potatoes into 1/4 inch slices. Toss the potatoes, olive oil, garlic salt and pepper in a big ziploc bag to coat the potatoes.

Arrange potatoes in a single layer on the baking sheets. Bake until lightly browned, about 15-20 minutes.

Brush with barbecue sauce, then top with the shredded cheese and bacon bits. Bake until the cheese melts, about 3-5 minutes. Top with sour cream, if desired.

Yield: 4 servings (only 2 in our household!)


Sunday, March 29, 2009

Homemade Pasta


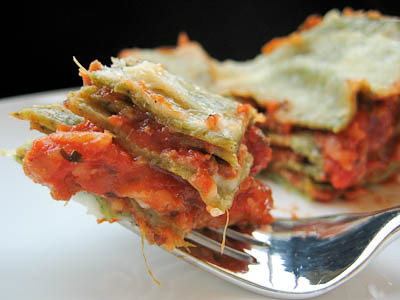
The Daring Bakers decided to go with a savory recipe this month. Our challenge was to make our own homemade spinach pasta!

The March 2009 challenge is hosted by Mary of Beans and Caviar, Melinda of Melbourne Larder and Enza of Io Da Grande. They have chosen Lasagne of Emilia-Romagna from The Splendid Table by Lynne Rossetto Kasper as the challenge.


I was really excited about this recipe because I've made lasagna from scratch in the past, but I've never tried making spinach pasta. I had some trouble incorporating the spinach into the pasta. I used frozen spinach, and while the package said it was 10 ounces, when I thawed it and drained it, it came out to only 6 ounces total, so I used the entire "10 ounce but only weighs 6 ounces" package. So I'm not sure if I used too much spinach or not. Luckily, I was able to fix the lumpy mess by adding one extra egg. I was worried the whole thing was ruined, but after I added the egg it all came together like magic.

I followed the recipe for the bechamel sauce without any problems. Instead of using the meat sauce recipe recommended below, I used my go to meat sauce recipe from the World's Best Lasagna.


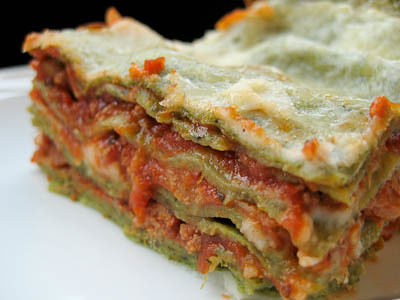
This lasagna was a big hit in our household. The only thing I would do differently next time is adding in more meat sauce. The recipe says to just add a thin layer, but in the end the dish seemed a bit lacking in sauce. That was easily fixed by spooning leftover meat sauce over the top of each slice!

Thank you to Mary, Melinda, and Enza for picking this month's challenge. I had a lot of fun making this pasta dish and I will definitely be using this recipe again.

The posting date for this month's challenge was originally today, but somewhere along the way they changed it to March 27th and I didn't notice this until today (oops). Better late than never, right? :) Please make sure you visit the Daring Bakers' Blogroll to see how everyone else stacked up with this challenge!

Lasagne of Emilia-Romagna (Lasagne Verdi al Forno)
from The Splendid Table: Recipes from Emilia-Romagna, the Heartland of Northern Italian Food by Lynne Rossetto Kasper

(Serves 8 to 10 as a first course, 6 to 8 as a main dish)

Preparation Time: 15 minutes to assemble and 40 minutes cooking time

10 quarts (9 litres) salted water
1 recipe Spinach Pasta cut for lasagna (recipe follows)#1
1 recipe Bechamel Sauce (recipe follows)#2
1 recipe Country Style Ragu (recipe follows)#3
1 cup (4 ounces/125g) freshly grated Parmigiano-Reggiano

Method
Working Ahead:
The ragu and the béchamel sauce can be made up to three days ahead. The ragu can also be frozen for up to one month. The pasta can be rolled out, cut and dried up to 24 hours before cooking. The assembled lasagne can wait at room temperature (20 degrees Celsius/68 degrees Fahrenheit) about 1 hour before baking. Do not refrigerate it before baking, as the topping of béchamel and cheese will overcook by the time the center is hot.

Assembling the Ingredients:
Have all the sauces, rewarmed gently over a medium heat, and the pasta at hand. Have a large perforated skimmer and a large bowl of cold water next to the stove. Spread a double thickness of paper towels over a large counter space. Preheat the oven to 350 degrees Fahrenheit (180 degrees Celsius). Oil or butter a 3 quart (approx 3 litre) shallow baking dish.

Cooking the Pasta:
Bring the salted water to a boil. Drop about four pieces of pasta in the water at a time. Cook about 2 minutes. If you are using dried pasta, cook about 4 minutes, taste, and cook longer if necessary. The pasta will continue cooking during baking, so make sure it is only barely tender. Lift the lasagne from the water with a skimmer, drain, and then slip into the bowl of cold water to stop cooking. When cool, lift out and dry on the paper towels. Repeat until all the pasta is cooked.

Assembling the Lasagne:
Spread a thin layer of béchamel over the bottom of the baking dish. Arrange a layer of about four overlapping sheets of pasta over the béchamel. Spread a thin layer of béchamel (about 3 or 4 spoonfuls) over the pasta, and then an equally thin layer of the ragu. Sprinkle with about 1&1/2 tablespoons of the béchamel and about 1/3 cup of the cheese. Repeat the layers until all ingredients are used, finishing with béchamel sauce and topping with a generous dusting of cheese.
Baking and Serving the Lasagne:
Cover the baking dish lightly with foil, taking care not to let it touch the top of the lasagne. Bake 40 minutes, or until almost heated through. Remove the foil and bake another 10 minutes, or until hot in the center (test by inserting a knife – if it comes out very warm, the dish is ready). Take care not to brown the cheese topping. It should be melted, creamy looking and barely tinged with a little gold. Turn off the oven, leave the door ajar and let the lasagne rest for about 10 minutes. Then serve. This is not a solid lasagne, but a moist one that slips a bit when it is cut and served.

#1 Spinach Egg Pasta (Pasta Verde)

Preparation: 45 minutes

Makes enough for 6 to 8 first course servings or 4 to 6 main course servings, equivalent to 1 pound (450g) dried boxed pasta.

2 jumbo eggs (2 ounces/60g or more) (I used 3 eggs)
10 ounces (300g) fresh spinach, rinsed dry, and finely chopped; or 6 ounces (170g) frozen chopped spinach, defrosted and squeezed dry (I used a 10 oz. package of frozen chopped spinach)
3&1/2 cups (14 ounces/400g) all purpose unbleached (plain) flour (organic stone ground preferred)

Working by Hand:

Equipment

A roomy work surface, 24 to 30 inches deep by 30 to 36 inches (60cm to 77cm deep by 60cm to 92cm). Any smooth surface will do, but marble cools dough slightly, making it less flexible than desired.

A pastry scraper and a small wooden spoon for blending the dough.

A wooden dowel-style rolling pin. In Italy, pasta makers use one about 35 inches long and 2 inches thick (89cm long and 5cm thick). The shorter American-style pin with handles at either end can be used, but the longer it is, the easier it is to roll the pasta.
Note: although it is not traditional, Enza has successfully made pasta with a marble rolling pin, and this can be substituted for the wooden pin, if you have one.

Plastic wrap to wrap the resting dough and to cover rolled-out pasta waiting to be filled. It protects the pasta from drying out too quickly.

A sharp chef’s knife for cutting pasta sheets.

Cloth-covered chair backs, broom handles, or specially designed pasta racks found in cookware shops for draping the pasta.

Mixing the dough:
Mound the flour in the center of your work surface and make a well in the middle. Add the eggs and spinach. Use a wooden spoon to beat together the eggs and spinach. Then gradually start incorporating shallow scrapings of flour from the sides of the well into the liquid. As you work more and more flour into the liquid, the well’s sides may collapse. Use a pastry scraper to keep the liquids from running off and to incorporate the last bits of flour into the dough. Don’t worry if it looks like a hopelessly rough and messy lump.

Kneading:
With the aid of the scraper to scoop up unruly pieces, start kneading the dough. Once it becomes a cohesive mass, use the scraper to remove any bits of hard flour on the work surface – these will make the dough lumpy. Knead the dough for about 3 minutes. Its consistency should be elastic and a little sticky. If it is too sticky to move easily, knead in a few more tablespoons of flour. Continue kneading about 10 minutes, or until the dough has become satiny, smooth, and very elastic. It will feel alive under your hands. Do not shortcut this step. Wrap the dough in plastic wrap, and let it relax at room temperature 30 minutes to 3 hours.

Stretching and Thinning:
If using an extra-long rolling pin work with half the dough at a time. With a regular-length rolling pin, roll out a quarter of the dough at a time and keep the rest of the dough wrapped. Lightly sprinkle a large work surface with flour. The idea is to stretch the dough rather than press down and push it. Shape it into a ball and begin rolling out to form a circle, frequently turning the disc of dough a quarter turn. As it thins outs, start rolling the disc back on the pin a quarter of the way toward the center and stretching it gently sideways by running the palms of your hands over the rolled-up dough from the center of the pin outward. Unroll, turn the disc a quarter turn, and repeat. Do twice more.

Stretch and even out the center of the disc by rolling the dough a quarter of the way back on the pin. Then gently push the rolling pin away from you with one hand while holding the sheet in place on the work surface with the other hand. Repeat three more times, turning the dough a quarter turn each time.

Repeat the two processes as the disc becomes larger and thinner. The goal is a sheet of even thickness. For lasagne, the sheet should be so thin that you can clearly see your hand through it and see colours. Cut into rectangles about 4 by 8 inches (10 x 20 cm). Note: Enza says that transparency is a crucial element of lasagne pasta and the dough should be rolled as thinly as possible. She says this is why her housekeeper has such strong arms!

Dry the pasta at room temperature and store in a sealed container or bag.

#2 Bechamel

Preparation Time: 15 minutes

4 tablespoons (2 ounces/60g) unsalted butter
4 tablespoons (2 ounces/60g) all purpose unbleached (plain) flour, organic stone ground preferred
2&2/3 cups (approx 570ml) milk
Salt and freshly ground pepper to taste
Freshly grated nutmeg to taste

Using a medium-sized saucepan, melt the butter over low to medium heat. Sift over the flour, whisk until smooth, and then stir (without stopping) for about 3 minutes. Whisk in the milk a little at a time and keep the mixture smooth. Bring to a slow simmer, and stir 3 to 4 minutes, or until the sauce thickens. Cook, stirring, for about 5 minutes, until the sauce thickens. Season with salt, pepper, and a hint of nutmeg.

#3 Country Style Ragu’ (Ragu alla Contadina)

Preparation Time: Ingredient Preparation Time 30 minutes and Cooking time 2 hours

Makes enough sauce for 1 recipe fresh pasta or 1 pound/450g dried pasta)

3 tablespoons extra virgin olive oil (45 mL)
2 ounces/60g pancetta, finely chopped
1 medium onion, minced
1 medium stalk celery with leaves, minced
1 small carrot, minced
4 ounces/125g boneless veal shoulder or round
4 ounces/125g pork loin, trimmed of fat, or 4 ounces/125g mild Italian sausage (made without fennel)
8 ounces/250g beef skirt steak, hanging tender, or boneless chuck blade or chuck center cut (in order of preference)
1 ounce/30g thinly sliced Prosciutto di Parma
2/3 cup (5 ounces/160ml) dry red wine
1 &1/2 cups (12 ounces/375ml) chicken or beef stock (homemade if possible)
2 cups (16 ounces/500ml) milk
3 canned plum tomatoes, drained
Salt and freshly ground black pepper to taste

Working Ahead:
The ragu can be made 3 days ahead. Cover and refrigerate. It also freezes well for up to 1 month. Skim the fat from the ragu’ before using it.

Browning the Ragu Base:
Heat the olive oil in a 12 inch (30cm) skillet (frying pan) over medium-high heat. Have a large saucepan handy to use once browning is complete. Add the pancetta and minced vegetables and sauté, stirring frequently with a wooden spoon, 10 minutes, or until the onions barely begin to color. Coarsely grind all the meats together, including the prosciutto, in a food processor or meat grinder. Stir into the pan and slowly brown over medium heat. First the meats will give off a liquid and turn dull grey but, as the liquid evaporates, browning will begin. Stir often, scooping under the meats with the wooden spatula. Protect the brown glaze forming on the bottom of the pan by turning the heat down. Cook 15 minutes, or until the meats are a deep brown. Turn the contents of the skillet into a strainer and shake out the fat. Turn them into the saucepan and set over medium heat.

Reducing and Simmering: Add the wine to the skillet, lowering the heat so the sauce bubbles quietly. Stir occasionally until the wine has reduced by half, about 3 minutes. Scrape up the brown glaze as the wine bubbles. Then pour the reduced wine into the saucepan and set the skillet aside.

Stir ½ cup stock into the saucepan and let it bubble slowly, 10 minutes, or until totally evaporated. Repeat with another ½ cup stock. Stir in the last 1/2 cup stock along with the milk. Adjust heat so the liquid bubbles very slowly. Partially cover the pot, and cook 1 hour. Stir frequently to check for sticking.

Add the tomatoes, crushing them as they go into the pot. Cook uncovered, at a very slow bubble for another 45 minutes, or until the sauce resembles a thick, meaty stew. Season with salt and pepper.

Friday, January 30, 2009

Super Bowl Appetizers

With the Super Bowl coming up this weekend, I know that many are on the lookout for great appetizers and finger foods that they can serve up for the big game. Last year, I was able to feature a variety of recipes leading up to the big weekend. Unfortunately, time was not on my side this year, and I was unable to try out any new recipes.

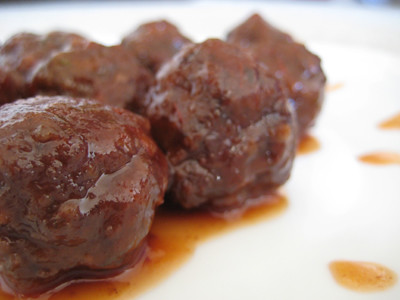
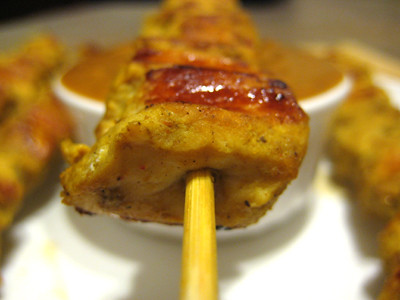
Regardless, I'd still like to feature some great appetizer recipes. I hope that you'll give some of them a try and enjoy them during the big game this weekend! Not sure which one to try? I have to say that the most popular recipe (out of all the recipes, not just appetizer recipes) on my blog to date is the Sweet and Sour Meatballs recipe; the second most popular recipe is the Chicken Satay with Peanut Dipping Sauce.

Buffalo Chicken Dip (aka Crack Dip)


Sun Dried Tomato Dip


Thursday, October 16, 2008

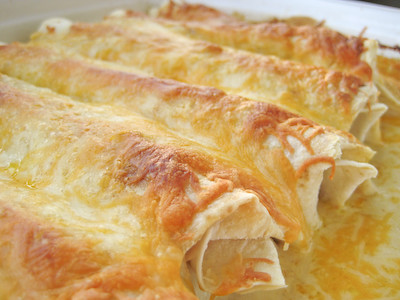
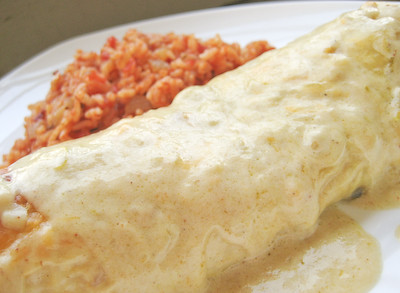
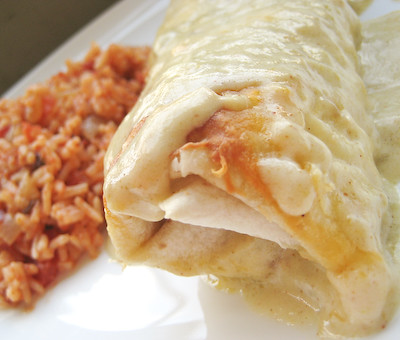
Honey Lime Chicken Enchiladas with Chipotle Tomato Rice


When I saw these enchiladas on Holly's blog, Phe/MOM/enon, I knew I had to try them. The flavor combination of honey and lime just sounded so good. Plus Holly assured me that these would rock.my.world. How could I not try them? :) A word of warning, though - if you don't like sweet flavors in your savory dishes, I would pass on this... sometimes when a recipe has the word "honey" in its title, it has a subtle hint of sweetness to it. Not these enchiladas! The honey flavor is quite prominent. I enjoy all things sweet, however, and loved these! They're a nice change from your typical enchiladas.
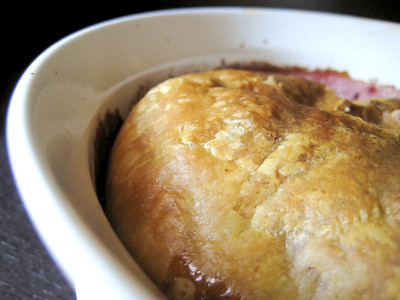

I especially love that they are easy and quick to make. The enchilada sauce is actually a rich, creamy sauce. I used the original quantity of heavy cream recommended in the recipe (one cup) but found it a little too rich. Next time, I will do what Holly did and only add one half cup.


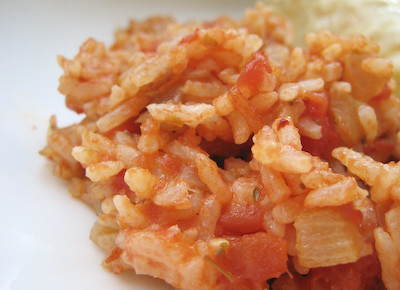
I served these with Brianna's chipotle tomato rice. You can serve these with Spanish rice instead, but I found the smoky, spicy flavors of the chipotle rice to complement the sweet and creamy flavors of the enchiladas quite well.

This is the perfect meal to throw together on a weeknight, especially if you use a precooked, store bought rotisserie chicken. I will definitely be making both of these recipes again. You need to try them - you won't be disappointed!

Honey Lime Chicken Enchiladas
adapted from Phe/MOM/menon (who got it from Brittany at The Sisters' Cafe via Melanie at My Kitchen Cafe)

6 tablespoons honey
5 tablespoons lime juice (approx. 1 large lime) (I have used 1/2 cup and have found the flavor even better)
1 tablespoon chili powder (use a little less for a milder version)
1/2 teaspoon garlic powder
1 pound chicken, cooked and shredded (approx. 2 large chicken breasts) (I poached* my chicken. Save time by using a store bought rotisserie chicken. If you like a lot of filling in your enchiladas, I would recommend doubling this.)
8-10 flour tortillas (I made 6 enchiladas with 10" tortillas)
1 pound monterey jack cheese, shredded (I used a Fiesta blend of Cheddar, Monterey Jack, and Queso Quesadilla and Asadero Cheese)
16 ounces green enchilada sauce (also good with red enchilada sauce)
1 cup heavy cream (I would recommend going with 1/2 cup, as it was a bit too heavy/rich)

* To poach your chicken, put the chicken breast halves in a large saucepan and add lightly salted water to cover. Bring to a boil over high heat, reduce the heat to low and simmer for 30 minutes. The longer you do this, the more tender the chicken will be.  You can do this with frozen chicken breasts, too.

Mix the honey (tip: spray your measuring spoon with cooking spray before measuring out the honey), lime juice, chili powder and garlic together and toss with the shredded chicken. Let it marinate for at least 1/2 hour (or toss together in a ziploc bag and let it sit in the fridge for a few hours).

Pour about 1/2 cup enchilada sauce on the bottom of a 9X13 baking pan. Fill flour tortillas with chicken (approx. 1/4 cup) and shredded cheese, saving about 1 cup of cheese to sprinkle on top of enchiladas. Mix the remaining enchilada sauce with the cream and leftover marinade. Pour sauce on top of the enchiladas and sprinkle with cheese. Bake at 350 degrees for 30 minutes until brown and crispy on top.

Serve with sour cream, rice and black beans.


Chipotle Tomato Rice
from Oishii

2 cups cooked rice (2/3 cup uncooked rice)
2 Tbsp canola oil
1 white onion, chopped
2 cloves of garlic, chopped
2 chipotle peppers in adobo sauce (or 1 tsp. chipotle powder) (halve this if you don't have a high heat tolerance)
1 tsp dried oregano
14 ounce can of diced tomatoes, with liquid
salt & pepper to taste
chopped cilantro, for garnish (optional)

Prepare the rice by combining 2/3 cup uncooked rice with 2 cups of water in a rice cooker or in a sauce pan. When done, set aside.

In a frying pan, heat the canola oil over medium high heat. Cook the onion until translucent, about 4 minutes. Add the garlic and cook 1 minute more.

Stir in the chipotle and oregano.

Add the canned tomatoes with liquid, reduce heat, and simmer until some of the liquid has evaporated, about 8 minutes.

Add the cooked rice, and stir until combined and heated through. Season to taste with salt & pepper and serve. Garnish with some fresh chopped cilantro if you have some.

Yield: 4 Servings


Thursday, October 2, 2008

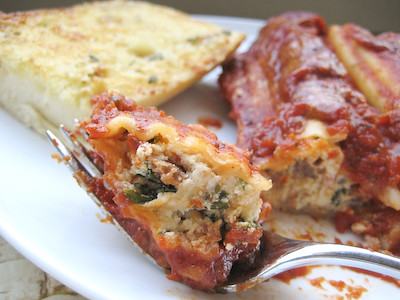
Make Ahead Manicotti


I love baked pasta dishes, but I'm not a big fan of baked ziti. It's a little too plain for me - just pasta, sauce, and cheese. I love this baked manicotti dish, though, because it has a nice blend of cheese and spinach. (I would bet that most picky kids wouldn't mind the spinach in this dish, either!) Sometimes I like to throw some hot Italian sausage and crushed red peppers into the mix to kick it up a notch too.

It can be time consuming stuffing the manicotti, but you can have it done in no time if you use a ziploc bag with the corner cut out or pastry bag. I've used a fork in the past to to fill them too. If you use freshly ground black pepper in this recipe, another tip I learned (from Alton Brown) is that twelve turns of your average pepper grinder will yield 1/8 teaspoon.

It's great because as the name states, you can make this ahead of time and then just pop it into the oven to bake when you get home from work and have dinner on the table in less than an hour. If you don't have the time to refrigerate this overnight, no worries... I have baked it immediately after assembly as well and it was still just as good. If you try this, you have to serve it with some homemade roasted garlic bread.


I'm also submitting this to the weekly Presto Pasta Nights, hosted by Ruth over at Once Upon a Feast.

Make Ahead Manicotti
from Allrecipes

1 pint ricotta cheese (I used part skim ricotta)
2 eggs
1 (10 ounce) package frozen chopped spinach, thawed and drained
1 cup shredded mozzarella cheese
1/2 cup grated Parmesan cheese
1 1/2 tablespoons white sugar (I omit this)
1/8 teaspoon salt
1/4 teaspoon ground black pepper (24 turns of the pepper grinder)
1/2 pound hot Italian sausage, crumbled and browned (optional)
1/4-1/2 tsp crushed red pepper flakes (optional - if you're using the sausage)
12 manicotti shells
1 (32 ounce) jar spaghetti sauce (I use 2 jars)

In a medium bowl, mix together ricotta cheese and eggs until blended. Stir in spinach, mozzarella cheese, 1/4 cup of the Parmesan cheese, sugar, salt and pepper (plus the sausage and crushed red pepper flakes if you are using them). Stuff mixture into uncooked pasta shells.

Spread 1/2 cup spaghetti sauce in the bottom of a medium baking dish (I use a 13 x 9-inch). Arrange stuffed pasta shells in a single layer over the sauce. Pour the remainder of the sauce over the shells (if you don't cover your pasta with enough sauce, it won't cook/soften properly in the oven), cover dish, and chill in the refrigerator for 8 hours, or overnight.

Preheat oven to 400 degrees F (200 degrees C). Bake covered for 40 minutes. Sprinkle with remaining Parmesan cheese, and bake for another 15 minutes.

Friday, September 19, 2008

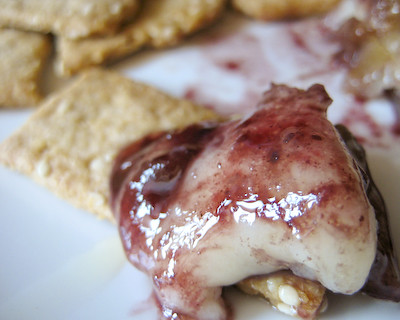
Baked Brie with Homemade Crackers


I was first introduced to Baked Brie several years ago by my friend Kari. She brought it for a potluck and I instantly fell in love with it. Even more so when I found out just how easy it is to make! It's the perfect appetizer to bring to a party when you don't have much time on your hands because it only takes about thirty minutes for both the prep and baking!


I recently found myself craving some baked brie. I had everything I needed, except the crackers to go with them. Usually I love to serve baked brie with wheat thins, as I like how their salty, grainy flavor complements the sweet and smooth flavor of the brie. I was too lazy to put on a change of clothes and run to the store, though, so I found myself flipping through The King Arthur Flour Baker's Companion for a cracker recipe.


I never thought I'd ever make my own crackers - or choose to make them from scratch instead of running to the store to get them. Once you realize how much better homemade stuff is, compared to the store bought prepackaged stuff you can get, you're much more motivated to making things yourself though. Making homemade pita bread was definitely a testament to that. So with that experience in mind, I forged ahead with this cracker recipe.


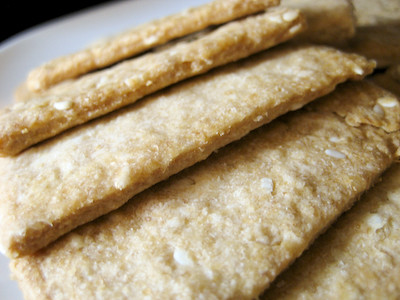
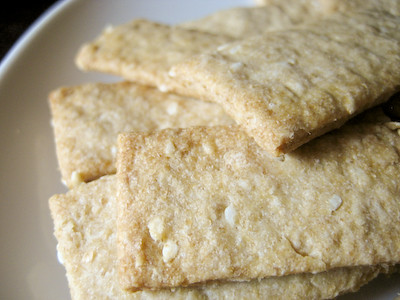
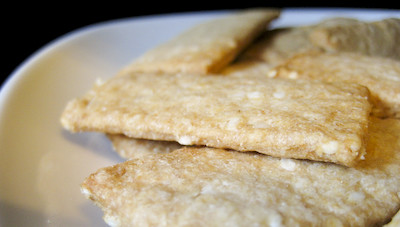
I was surprised at how easy it was to make these crackers - the method was very similar to making biscuits, except you roll the doll out into a super thin layer and then cut them into rectangles. These crackers are called "Thin Wheat Crackers" and I thought they might taste like Wheat Thins, but they didn't really taste like those at all. The sesame seeds were definitely a nice touch, and these crackers were really good... but I wouldn't call them Wheat Thins. They sort of remind me of the little sesame crackers you get in those Asian snack mixes. If you're not a big fan of sesame seeds, just omit them from the recipe.


When my husband saw me baking these, he asked me what I was making. I informed him that I was making crackers from scratch, at which point he laughed at me and then walked away. After these came out of the oven, he could not keep his hands off of them. I told him he should never doubt me again! ;)


Baked Brie

1 Puff Pastry Sheet, thawed
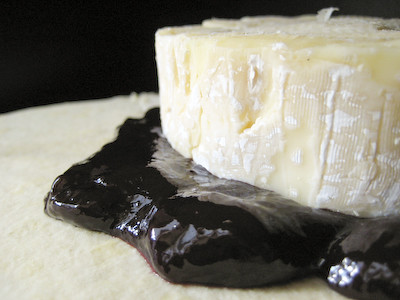
1 round of Brie (I like to remove the white "skin" from my brie using a vegetable peeler but that is optional)
12 ounces fruit preserves (my favorite is cherry)

Preheat oven to 350F

Unfold the puff pastry into a single layer on a baking sheet. Spread the fruit preserves over the center. Place the brie on top of the fruit preserves.


Fold the pastry dough over the top of the brie and press the edges together to seal tightly.

You can bake the brie as is on the baking sheet, but I prefer to invert it into an oven safe bowl so the seams are on the bottom, and any juices that leak will stay in the bowl.

Bake for 25 minutes. Let cool for 10 to 15 minutes before serving. Serve with your favorite crackers or some sliced apples.


Thin Wheat Crackers
from The King Arthur Flour Baker's Companion

1 cup (4.25 ounces) unbleached pastry flour or unbleached all purpose flour (I used bleached all purpose flour)
1 cup (5 ounces) whole wheat flour or white whole wheat flour
1/4 cup (1.25 ounces) sesame seeds
1/4 cup (1.75 ounces) granulated sugar
1/2 tsp salt
4 tbsp (1/2 stick, 2 ounces) butter
scant 1/2 cup (3.75 ounces) milk (I used skim)
Coarse salt (optional)

Preheat oven to 325F.

In a large bowl, combine the flours, sesame seeds, sugar and salt. Cut in the butter (use a pastry blender or two knives), then stir in the milk, adding just enough milk to form a workable dough.

Divide the dough into three pieces and roll it out ultra-thin, one piece at a time- 1/16 inch, if you can manage it (the thinner they are, the better; the thicker ones don't taste as good). Sprinkle with a bit of coarse salt, if desired, and use the rolling pin to press the salt into the dough.

Cut the dough into 1 x 2-inch rectangles. Transfer the crackers to baking sheets and bake for 20 to 25 minutes, until they begin to brown. Cool on a rack.

Yield: About 8 Dozen Crackers