Showing posts with label pastry. Show all posts

Tuesday, August 28, 2012

Filled Pate a Choux Swans and Turtles (DB)

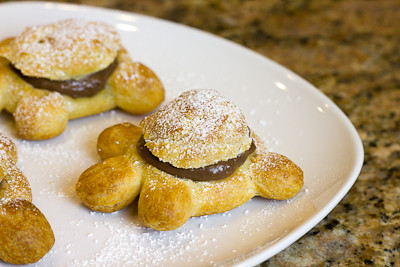
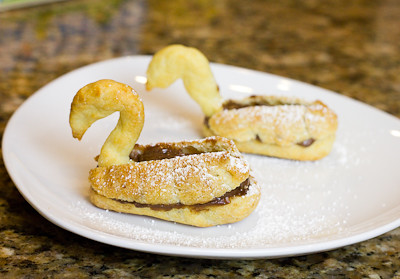
Kat of The Bobwhites was our August 2012 Daring Baker hostess who inspired us to have fun in creating pate a choux shapes, filled with crème patisserie or Chantilly cream. We were encouraged to create swans or any shape we wanted and to go crazy with filling flavors allowing our creativity to go wild!

I've made pate a choux several times in the past before, but it had been quite some time.  As such, I didn't catch that a key piece of information was missing from the recipe until my dough turned out like soup! :(  The recipe states that you are to melt the butter in water, milk, and salt.  Then remove the saucepan from the heat and add the flour.  Well, it doesn't say if you're to melt the butter over low, medium, or high heat so I did it over medium heat.  Unfortunately, if your liquid isn't boiling when you add the flour, it won't cook the flour and you end up with a soupy mess instead of a beautiful pate a choux dough! So, I've added those notes to the recipe so you can avoid that fatal mistake if you make this recipe.
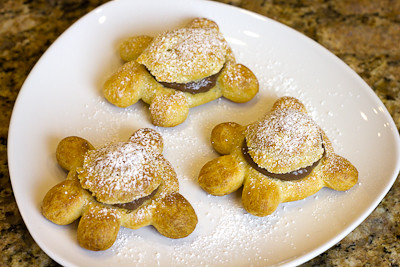
Otherwise, everything went off without a hitch.  I made a few swans and then loved the idea of making some turtles as another Daring Baker had posted in our private forum.  I filled my pastries with chocolate pastry cream and they were delicious. 
Thanks Kat, for hosting this month's challenge.  You'll find the recipes below.  Also be sure to check out the Daring Bakers' Blogroll to see all the other wonderful creations that were made!

Pate a choux 

(cannot be doubled)

Recipe source: Good Housekeeping Illustrated Guide to Cooking, 1980 edition


Ingredients
½ cup (120 ml) (115 gm) (4 oz) butter
1 cup (240 ml) water
¼ teaspoon (1½ gm) salt
1 cup (240 ml) (140 gm) (5 oz) all-purpose flour
4 large eggs

Directions:
  1. Line at least two baking sheets with silicone mats or parchment paper, or grease pans well.
  2. Preheat oven to moderately hot 375°F/190°C/gas mark 5 .
  3. In a small saucepot, combine butter, water, and salt. Heat over until butter melts (and liquid has come to a full rolling boil), then remove from stove.
  4. Add flour all at once and beat, beat, beat the mixture until the dough pulls away from the sides of the pot.
  5. Add one egg, and beat until well combined. Add remaining eggs individually, beating vigorously after each addition. Resulting mixture should be somewhat glossy, very smooth, and somewhat thick.
  6. Using a ¼” (6 mm) tip on a pastry bag, pipe out about 36 swan heads. You’re aiming for something between a numeral 2 and a question mark, with a little beak if you’re skilled and/or lucky.
  7. Remove the tip from the bag and pipe out 36 swan bodies. These will be about 1.5” (40 mm) long, and about 1” (25 mm) wide. One end should be a bit narrower than the other.
  8. Bake the heads and bodies until golden and puffy. The heads will be done a few minutes before the bodies, so keep a close eye on the baking process.
  9. Remove the pastries to a cooling rack, and let cool completely before filling.
Assembly
  1. Take a swan body and use a very sharp knife to cut off the top 1/3rd to ½.
  2. Cut the removed top down the center to make two wings.
  3. Dollop a bit of filling into the body, insert head, and then add wings.
  4. Your first attempt will probably not look like much, but the more you make, the more your bevy of swans will become a beautiful work of swan art.

Vanilla Crème Patissiere

(Half Batch)
Ingredients:
1 cup (225 ml.) whole milk
2 Tbsp. cornstarch
6 Tbsp. (100 g.) sugar
1 large egg
2 large egg yolks
2 Tbsp. (30 g.) unsalted butter
1 Tsp. Vanilla
Directions:
  1. Dissolve cornstarch in ¼ cup of milk. Combine the remaining milk with the sugar in a saucepan; bring to boil; remove from heat.
  2. Beat the whole egg, then the yolks into the cornstarch mixture. Pour 1/3 of boiling milk into the egg mixture, whisking constantly so that the eggs do not begin to cook.
  3. Return the remaining milk to boil. Pour in the hot egg mixture in a stream, continuing whisking.
  4. Continue whisking (this is important – you do not want the eggs to solidify/cook) until the cream thickens and comes to a boil. Remove from heat and beat in the butter and vanilla.
  5. Pour cream into a stainless steel/ceramic bowl. Press plastic wrap firmly against the surface. Chill immediately and until ready to use.

Chocolate Pastry Cream

(Half Batch Recipe):
Bring ¼ cup (about 50 cl.) milk to a boil in a small pan; remove from heat and add in 3 ounces (about 80 g.) semisweet chocolate, finely chopped, and mix until smooth. Whisk into pastry cream when you add the butter and vanilla.

Coffee Pastry Cream

(Half Batch recipe)
Dissolve 1 ½ teaspoons instant espresso powder in 1 ½ teaspoons boiling water. Whisk into pastry cream with butter and vanilla.

Chantilly Cream

1 cup (225 ml.) cold heavy cream
2 tablespoons confectioners' (powdered) sugar
Chill medium mixing bowl and whisk in freezer for 10 minutes before beginning. In chilled bowl, whisk cream until it begins to foam and thicken. Add sugar and continue to whisk just until soft peaks form. Do not over-whip.

Freezing/Storage Instructions/Tips: While the crème filling stores well when covered tightly and kept in a refrigerator, the baked choux does not store well at all, especially after being filled. Therefore, you must eat these the day they are made. This won’t be a problem, though, I assure you.

Tuesday, March 6, 2012

Rugelach (TWD)


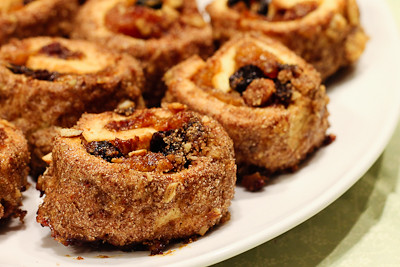
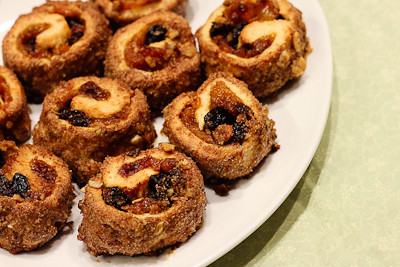
This week's Tuesdays with Dorie: Baking with Julia was co-hosted by Jessica of My Baking Heart and Margaret of The Urban Hiker.   The chosen recipe was rugelach.  Rugelach are actually Jewish pastries made with sour cream pastry dough.  They are made in the form of a crescent by rolling a triangle of dough around a filling of fruit, nuts, or fruit preserves.  The rugelach made in this recipe is slightly different in that it is made with a cream cheese pastry dough, and the rolled dough and filling is cut into slices before baking.

I've actually made rugelach a few times prior to this - love the stuff!  I love this Barefood Contessa recipe and we actually also made rugelach back in 2008 for TWD.  I'm not a nut person so I didn't put nuts in my filling, but I did put some nuts in the streusel that the pastries were rolled in.  I made apricot lekvar (homemade fruit butter) and filled my rugelach with dried cherries, raisins, and dried apricots.  I did not have any problems with this recipe, except that I did not look at it ahead of time and did not realize how much refrigeration time was required, so I did not finish baking them until very late today!

I have to say that I love this version of rugelach.  The sugar and cinnamon mixture that the pastries get rolled in caramelizes in the oven and gives it a wonderful, crisp texture.  Then you bite into the cream cheese pastry that is so light and flaky, and then you taste the apricot butter and dried fruit bits.  I think I just ate about ten of them in one sitting and my husband asked me to hide them from him because he can't stop eating them!

This recipe is definitely a keeper, and I can't wait to make it again.  Thanks to Jessica and Margaret for hosting; you can find the recipe on their blogs here and here.  Make sure you check here, too, to see how everyone else in our baking group enjoyed these pastries!

Also be sure to leave a comment below... I was visited recently by the Fairy Hobmother and received an unexpected gift... if you leave a comment here you might get a visit from the Fairy Hobmother too ;)

Tuesday, November 15, 2011

Alsatian Apple Tart (TWD)


I am back with Tuesdays with Dorie (TWD) and will be back to posting weekly with the group from now until the end of the year.  Even though we're down to the last few recipes in the book, we've got a lot of great recipes lined up. Believe it or not, we'll be done baking through the entire book by the end of the year! Isn't that crazy?!

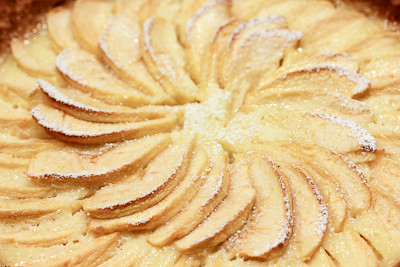
This week's TWD recipe was chosen by Jessica of Cookbook Habit: Alsatian Apple Tart.  It is a tart lined with "thick slices of sweet apples and a vanilla-flavored mix of eggs, cream and sugar that is poured over the apples and, under heat, transformed into a soft custard."

When I think of custard filled tarts, I think of fruit tarts that are topped with fruits like strawberries, blackberries, kiwi, blueberries, etc.  I have never had a custard fruit tart with apples! Interestingly enough, the rich and creamy custard that envelopes the apples is absolutely delicious.  I think the tart would be great with pears, too, which Dorie suggests in the "Playing Around" section.

I only added one egg and omitted the extra egg yolk in the custard, just because I didn't want to have another egg white in my freezer.  The custard was still rich despite this omission thanks to the heavy cream.  Only thing I would do differently next time would be to remember to put my pie crust shield on the tart sooner! I forgot and didn't realize the edges were burning until I started to smell it! (That's why you don't see a picture of the entire tart!)

Thanks, Jessica, for hosting this week! I love baked apple desserts and this one was no exception.

* Recipe notes:
- Make sure to put a pie crust shield (or some foil) around the edge of your tart about 20 minutes into baking to avoid burning the edges.

Sunday, October 2, 2011

Croissants (DB)

 
The Daring Bakers’ go retro this month! Thanks to one of our very talented non-blogging members, Sarah, the Daring Bakers were challenged to make Croissants using a recipe from the Queen of French Cooking, none other than Julia Child!

I don't typically complete the DB challenge until the last minute, but still get it posted in time.  Ironically, this month I actually completed it by mid-September, but couldn't get it posted in time.  I was supposed to get this post up on September 27th, but I've been sick, working, chasing around a toddler, and getting ready for a trip.  So you'll have to forgive me if this post is short and sweet.

Making croissants really isn't as hard as it might sound (time consuming, yes, but not very difficult).  It simply involves rolling out some dough, adding a layer of butter, and then folding it over several times until you've got layers of alternating dough and butter.  As it bakes up in the oven, it puffs up into wonderful, buttery, flaky layers. 

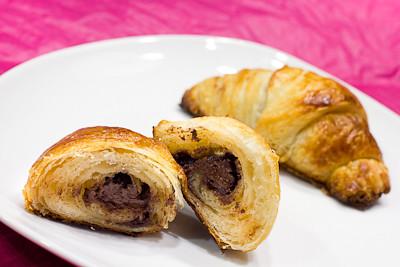
I filled my croissants with nutella and they were delicious.  I baked up a few and then put the rest in the freezer so that I can enjoy more at a later date.

Thanks Sarah, for hosting this month's challenge.  Nothing beats a fresh, homemade croissant and these were no exception! Make sure you check out the Daring Bakers' Blogroll to see how everyone else enjoyed these flaky, buttery, treats.

Croissants
Recipe Source: Mastering the Art of French Cooking, Volume Two. Julia Child and Simone Beck.
Download printable recipe here

Ingredients
¼ oz (7 gm) of fresh yeast, or 1¼ teaspoon (6¼ ml/4 gm) of dry-active yeast (about ½ sachet)
3 tablespoons (45 ml) warm water (less than 100°F/38°C)
1 teaspoon (5 ml/4½ gm) sugar
1 3/4 cups (225 gm/½ lb) of strong plain flour (I used Polish all-purpose flour, which is 13% protein)
2 teaspoons (10 ml/9 gm) sugar
1½ teaspoon (7½ ml/9 gm) salt
½ cup (120 ml/¼ pint) milk (I am not sure if the fat content matters. I used 2%)
2 tablespoons (30 ml) tasteless oil (I used generic vegetable oil)
½ cup (120 ml/1 stick/115 gm/¼ lb) chilled, unsalted butter
1 egg, for egg wash

Directions:

1. Mix the yeast, warm water, and first teaspoon of sugar in a small bowl. Leave aside for the yeast and sugar to dissolve and the yeast to foam up a little.
2. Measure out the other ingredients
3. Heat the milk until tepid (either in the microwave or a saucepan), and dissolve in the salt and remaining sugar
4. Place the flour in a large bowl.
5. Add the oil, yeast mixture, and milk mixture to the flour
6. Mix all the ingredients together using the rubber spatula, just until all the flour is incorporated
7. Turn the dough out onto a floured surface, and let it rest a minute while you wash out the bowl
8. Knead the dough eight to ten times only. The best way is as Julia Child does it in this video.  It’s a little difficult to explain, but essentially involves smacking the dough on the counter (lots of fun if you are mad at someone) and removing it from the counter using the pastry scraper.
9. Place the dough back in the bowl, and place the bowl in the plastic bag.
10. Leave the bowl at approximately 75°F/24°C for three hours, or until the dough has tripled in size.
11. After the dough has tripled in size, remove it gently from the bowl, pulling it away from the sides of the bowl with your fingertips.
12. Place the dough on a lightly floured board or countertop, and use your hands to press it out into a rectangle about 8 by 12 inches (20cm by 30cm).
13. Fold the dough rectangle in three, like a letter (fold the top third down, and then the bottom third up)
14. Place the dough letter back in the bowl, and the bowl back in the plastic bag.
15. Leave the dough to rise for another 1.5 hours, or until it has doubled in size. This second rise can be done overnight in the fridge
16. Place the double-risen dough onto a plate and cover tightly with plastic wrap. Place the plate in the fridge while you prepare the butter.
17. Once the dough has doubled, it’s time to incorporate the butter
18. Place the block of chilled butter on a chopping board.
19. Using the rolling pin, beat the butter down a little, till it is quite flat.
20. Use the heel of your hand to continue to spread the butter until it is smooth. You want the butter to stay cool, but spread easily.
21. Remove the dough from the fridge and place it on a lightly floured board or counter. Let it rest for a minute or two.
22. Spread the dough using your hands into a rectangle about 14 by 8 inches (35 cm by 20 cm).
23. Remove the butter from the board, and place it on the top half of the dough rectangle
24. Spread the butter all across the top two-thirds of the dough rectangle, but keep it ¼ inch (6 mm) across from all the edges.
25. Fold the top third of the dough down, and the bottom third of the dough up.
26. Turn the dough package 90 degrees, so that the top flap is to your right (like a book).
27. Roll out the dough package (gently, so you don’t push the butter out of the dough) until it is again about 14 by 8 inches (35 cm by 20 cm).
28. Again, fold the top third down and the bottom third up.
29. Wrap the dough package in plastic wrap, and place it in the fridge for 2 hours.
30. After two hours have passed, take the dough out of the fridge and place it again on the lightly floured board or counter.
31. Tap the dough with the rolling pin, to deflate it a little
32. Let the dough rest for 8 to 10 minutes
33. Roll the dough package out till it is 14 by 8 inches (35 cm by 20 cm).
34. Fold in three, as before
35. Turn 90 degrees, and roll out again to 14 by 8 inches (35 cm by 20 cm).
36. Fold in three for the last time, wrap in plastic, and return the dough package to the fridge for two more hours (or overnight, with something heavy on top to stop it from rising)
37. It’s now time to cut the dough and shape the croissants
38. First, lightly butter your baking sheet so that it is ready
39. Take the dough out of the fridge and let it rest for ten minutes on the lightly floured board or counter
40. Roll the dough out into a 20 by 5 inch rectangle (51 cm by 12½ cm). (Photo 24)
41. Cut the dough into two rectangles (each 10 by 5 inches (25½ cm by 12½ cm)) (Photo 24)
42. Place one of the rectangles in the fridge, to keep the butter cold
43. Roll the second rectangle out until it is 15 by 5 inches (38 cm by 12½ cm).
44. Cut the rectangle into three squares (each 5 by 5 inches (12½ cm by 12½ cm))
45. Place two of the squares in the fridge
46. The remaining square may have shrunk up a little bit in the meantime. Roll it out again till it is nearly square
47. Cut the square diagonally into two triangles.
48. Stretch the triangle out a little, so it is not a right-angle triangle, but more of an isosceles.
49. Starting at the wide end, roll the triangle up towards the point, and curve into a crescent shape.
50. Place the unbaked croissant on the baking sheet
51. Repeat the process with the remaining squares of dough, creating 12 croissants in total.
52. Leave the tray of croissants, covered lightly with plastic wrap, to rise for 1 hour
53. Preheat the oven to very hot 475°F/240°C/gas mark 9.
54. Mix the egg with a teaspoon of water
55. Spread the egg wash across the tops of the croissants
56. Put the croissants in the oven for 12 to 15 minutes, until the tops are browned nicely
57. Take the croissants out of the oven, and place them on a rack to cool for 10 minutes before serving.

Servings: 12 croissants

Monday, June 27, 2011

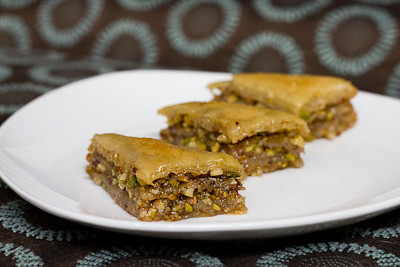
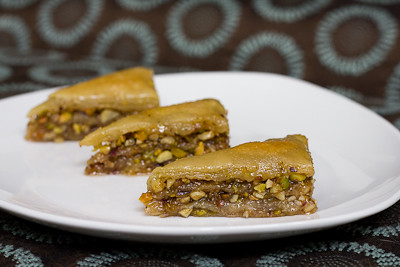
Baklava (DB)


Erica of Erica’s Edibles was our host for the Daring Bakers’ June challenge. Erica challenged us to be truly DARING by making homemade phyllo dough and then to use that homemade dough to make Baklava.  For those who are not familiar with baklava, it is a sweet rich pastry made with layers of phyllo dough and nuts sweetened with a simple syrup or honey syrup. Baklava is widely known as a Greek dessert, but its origin has really never been pinpointed as many Middle Eastern countries also name it as their own.

I was really excited to try this recipe.  I was pretty thrilled when I made puff pastry from scratch for the first time, so trying my hand at homemade phyllo dough sounded like a great challenge! It was actually not as hard as I had expected.  I think the hardest part for me was trying to get the sheets as thin as possible without tearing holes in them.  Thankfully the baklava is forgiving and you can put several partial sheets together to form one complete layer and no one will ever know the difference! :) It was a lot of fun stretching it out and seeing it get super thin!


Instead of an almond/walnut/pistachio nut mix, I simply used 1 cup of pistachios and 1/2 cup of almonds.  I don't generally like nuts in baked goods, but I'll eat them in something like this.

Unfortunately, I think I under baked my baklava a little bit.  I took it out about 20 minutes early because it was starting to become golden brown on the top and I was concerned about it burning.  As a result, I don't think my inner layers of phyllo got as crisp as they should have.  Still, the baklava turned out great and we all enjoyed it.  The recipe is definitely a keeper.

Thanks Erica, for hosting this month's challenge.  It was great to go beyond my comfort zone and try something completely new and challenging that I would never have thought to try on my own.  While I probably won't ever make my own phyllo dough again (store bought is just too convenient in this case), it's nice to have another skill under my belt.  Make sure you check out the Daring Bakers' Blogroll to see how everyone else enjoyed this sweet and flaky treat.


Homemade Baklava

Phyllo Dough:

*Note 1: To have enough to fill my 9” x 9” baking dish with 18 layers of phyllo I doubled this recipe.
*Note 2: Single recipe will fill a 8” x 5” baking dish.
*Note 3: Dough can be made a head of time and froze. Just remove from freezer and allow to thaw
and continue making your baklava

Ingredients:
1 1/3 cups (320 ml) (185 gm/6½ oz) unbleached all purpose (plain) flour
1/8 teaspoon (2/3 ml) (¾ gm) salt
1/2 cup less 1 tablespoon (105 ml) water, plus more if needed
2 tablespoons (30 ml) vegetable oil, plus additional for coating the dough
1/2 teaspoon (2½ ml) cider vinegar, (could substitute white wine vinegar or red wine vinegar, but could affect the taste)

Directions:

1. In the bowl of your stand mixer combine flour and salt

2. Mix with paddle attachment
3. Combine water, oil and vinegar in a small bowl.

4. Add water & oil mixture with mixer on low speed, mix until you get a soft dough, if it appears dry add a little more water (I had to add a tablespoon more)

5. Change to the dough hook and let knead approximately 10 minutes. You will end up with beautiful smooth dough. If you are kneading by hand, knead approx. 20 minutes.
6. Remove the dough from mixer and continue to knead for 2 more minutes. Pick up the dough and through it down hard on the counter a few times during the kneading process.

7. Shape the dough into a ball and lightly cover with oil

8. Wrap tightly in plastic wrap and let rest 30-90 minutes, longer is best ( I let mine rest 2 hours and it was perfect)


Rolling the dough:
1. Unwrap your dough and cut off a chunk slightly larger then a golf ball. While you are rolling be sure to keep the other dough covered so it doesn’t dry out.

2. Be sure to flour your hands, rolling pin and counter. As you roll you will need to keep adding, don’t worry, you can’t over-flour.

** Remove all rings and jewelry so it does not snag the dough**

Use whatever means you have to get the dough as thin as you can. Here is a fantastic video on how to roll out your phyllo dough, using a wooden dowel, which worked perfectly for me. You may also use a pasta machine if you have one, or a normal rolling pin whatever works for you.


3. Roll out the dough a bit to flatten it out.
4. Wrap the dough around your rolling pin/dowel

5. Roll back and forth quickly with the dough remaining on the dowel (see attached video for a visual, its much easier then it sounds)

6. Remove; notice how much bigger it is!

7. Rotate and repeat until it is as thin as you can it. Don’t worry if you get rips in the dough, as long as you have one perfect one for the top you will never notice.

8. When you get it as thin as you can with the rolling pin, carefully pick it up with well floured hands and stretch it on the backs of your hands as you would a pizza dough, just helps make it that much thinner. Roll out your dough until it is transparent. NOTE: you will not get it as thin as the frozen phyllo dough you purchase at the store, it is made by machine

9. Set aside on a well-floured surface. Repeat the process until your dough is used up. Between each sheet again flower well. You will not need to cover your dough with a wet cloth, as you do with boxed dough, it is moist enough that it will not try out.


Baklava Recipe

Adapted from Alton Brown, The Food Network
30 servings

Ingredients

For the syrup:
· 1 1/4 cups (300 ml) honey
· 1 1/4 cups (300ml) water
· 1 1/4 cups (300 ml) (280 gm/10 oz) sugar
· 1 cinnamon stick
· 1 (2-inch/50 mm) piece fresh citrus peel (lemon or orange work best)
· a few cloves or a pinch or ground clove

When you put your baklava in the oven start making your syrup. When you combine the two, one of them needs to be hot, I find it better when the baklava is hot and the syrup has cooled

Directions

1. Combine all ingredients in a medium pot over medium high heat. Stir occasionally until sugar has dissolved

2. Boil for 10 minutes, stir occasionally.

3. Once boiled for 10 minutes remove from heat and strain cinnamon stick and lemon, allow to cool as baklava cooks

Ingredients for the Filling:

1 (5-inch/125 mm piece) cinnamon stick, broken into 2 to 3 pieces or 2 teaspoons (10 ml) (8 gm) ground cinnamon
15 to 20 whole allspice berries ( I just used a few pinches)
3/4 cup (180 ml) (170 gm/6 oz) blanched almonds
3/4 cup (180 ml) (155 gm/5½ oz) raw or roasted walnuts
3/4 cup (180 ml) (140 gm/5 oz) raw or roasted pistachios
2/3 cup (160 ml) (150 gm/ 5 1/3 oz) sugar
phyllo dough (see recipe above)
1 cup (2 sticks) (240 ml) (225g/8 oz) melted butter ** I did not need this much, less then half**

Directions:

1. Preheat oven to moderate 350°F/180°C/gas mark 4.
2. Combine nuts, sugar and spices in a food processor and pulse on high until finely chopped. If you do not have a food processor chop with a sharp knife as fine as you can. Set aside

3. Trim your phyllo sheets to fit in your pan

4. Brush bottom of pan with butter and place first phyllo sheet

5. Brush the first phyllo sheet with butter and repeat approximately 5 times ending with butter. (Most recipes say more, but homemade phyllo is thicker so it's not needed)
6. Sprinkle 1/3 of the nut mixture on top

7. Continue layering phyllo and buttering repeating 4 times
8. Sprinkle 1/3 of the nut mixture on top
9. Continue layering phyllo and buttering repeating 4 times
10. Sprinkle 1/3 of the nut mixture on top
11. Continue layering and buttering phyllo 5 more times. On the top layer, make sure you have a piece of phyllo with no holes if possible, just looks better.
12. Once you have applied the top layer tuck in all the edges to give a nice appearance.

13. With a Sharp knife cut your baklava in desired shapes and number of pieces. If you can't cut all the ways through don’t worry you will cut again later. A 9x9 pan cuts nicely into 30 pieces. Then brush with a generous layer of butter making sure to cover every area and edge

14. Bake for approximately 30 minutes; remove from oven and cut again this time all the way through. Continue baking for another 30 minutes. (Oven temperatures will vary, you are looking for the top to be a golden brown, take close watch yours may need more or less time in the oven)

15. When baklava is cooked remove from oven and pour the cooled (will still be warmish) syrup evenly over the top, taking care to cover all surfaces when pouring. It looks like it is a lot but over night the syrup will soak into the baklava creating a beautifully sweet and wonderfully textured baklava!

16. Allow to cool to room temperature. Once cooled cover and store at room temperature. Allow the baklava to sit overnight to absorb the syrup.17. Serve at room temperature

Freezing/Storage Instructions/Tips: There are a few ways to store your Baklava. It is recommended that you store your baklava at room temperature in an airtight container. Stored at room temperature your baklava will last for up to 2 weeks. You will notice as the days pass it will get a little juicier and chewier. You may choose to store it in the fridge; this will make it a little harder and chewy, but does increase the shelf life. You can also freeze your baklava and then just set it out at room temperature to thaw.

Sunday, March 27, 2011

Yeasted Meringue Coffee Cake (DB)


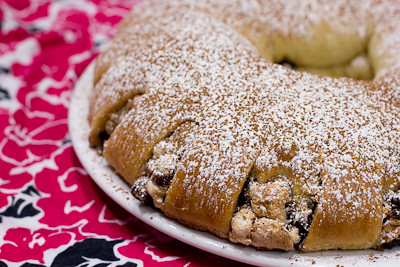
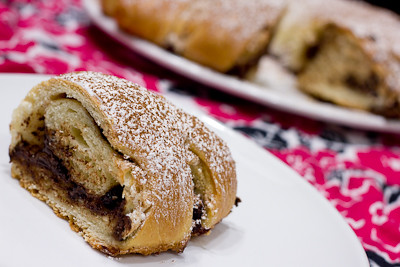
The March 2011 Daring Bakers’ challenge was hosted by Ria of Ria’s Collection and Jamie of Life’s a Feast. Ria and Jamie challenged The Daring Bakers to bake a yeasted Meringue Coffee Cake. Jamie found this recipe on a piece of yellowed paper in her dad’s collection of clipped out and hand-written recipes from the 1970’s, no source, no date, and she tried the recipe and loved it! It's a gorgeous brioche-like dough rolled jellyroll style around a layer of whipped meringue, cinnamon, sugar, and chocolate chips, then shaped into a wreath and baked.

I halved this recipe because I didn't really see the need to have two coffee cakes around the house tempting me! The recipe was easy to follow, and instead of kneading the dough by hand I let my KitchenAid dough hook do the work for me.  I did have to add a little extra flour until the dough was ready and was no longer sticking to the sides of the bowl, but otherwise the recipe was really straightforward.  I used the filling recommended by Jamie, sans nuts, and simply doubled the amount of cinnamon in the mixture.  It came out just right!

I wasn't sure what to expect from the meringue layer that is rolled into this cake, but as Ria and Jamie describe, the meringue "miraculously melts into the dough as it bakes leaving behind just a hint of sweetness and adding to the perfect moistness of the cake."  Some of it does ooze out between the slits cut into the cake, and that part of the meringue bakes up into slightly crisp, ooey gooey goodness!


Thanks Ria and Jamie, for hosting this month's challenge.  It was delicious and I'll definitely be making it again. Make sure you check out the Daring Bakers' Blogroll to see how everyone else enjoyed this wonderful breakfast treat.

And don't forget - I'm giving you two chances right now to enter to win a $100 Visa gift card.  There are just a few days left to enter the giveaway that ends on March 31st.  You have until April 11th to enter my second giveaway here.

FILLED MERINGUE COFFEE CAKE
Makes 2 round coffee cakes, each approximately 10 inches in diameter
The recipe can easily be halved to make one round coffee cake

Ingredients
For the yeast coffee cake dough:
4 cups (600 g / 1.5 lbs.) flour
¼ cup (55 g / 2 oz.) sugar
¾ teaspoon (5 g / ¼ oz.) salt
1 package (2 ¼ teaspoons / 7 g / less than an ounce) active dried yeast
¾ cup (180 ml / 6 fl. oz.) whole milk
¼ cup (60 ml / 2 fl. oz. water (doesn’t matter what temperature)
½ cup (135 g / 4.75 oz.) unsalted butter at room temperature
2 large eggs at room temperature
10 strands saffron for Ria’s version (Saffron might be hard to find and it’s expensive, so you can substitute with ½ - 1 teaspoon of ground cardamom or ground nutmeg. Or simply leave it plain like Jamie’s version)

For the meringue:
3 large egg whites at room temperature
¼ teaspoon salt
½ teaspoon vanilla
½ cup (110 g / 4 oz.) sugar

For the filling:
Jamie’s version: (this recipe is for 1 coffee cake)
1 cup (110 g / 4 oz.) chopped pecans or walnuts
2 Tablespoons (30 g / 1 oz.) granulated sugar
¼ teaspoon ground cinnamon
1 cup (170 g / 6 oz.) semisweet chocolate chips or coarsely chopped chocolate

Ria’s version:
1 cup (130 g / 5 oz.) chopped cashew nuts
2 Tablespoons (30 g / 1 oz.) granulated sugar
½ teaspoon garam masala (You can make it at home – recipe below - or buy from any Asian/Indian grocery store)
1 cup (170g / 6 oz.) semisweet chocolate chips ( I used Ghirardelli)
Egg wash: 1 beaten egg
Cocoa powder (optional) and confectioner’s sugar (powdered/icing sugar) for dusting cakes

**Garam (means “hot”) masala (means “mixture”) is a blend of ground spices and is used in most Indian savory dishes. It is used in limited quantities while cooking vegetables, meats & eggs. There is no “one” recipe for it as every household has a recipe of their own. Below, I am going to share the recipe which I follow.
4 or 5 sticks (25 g) Cinnamon Sticks (break a stick and open the scroll)
3 ½ tablespoons (25 g / less than an ounce) Cloves, whole
100 g. (3.5 oz.) Fennel seeds
4 tablespoons (25 g / less than an ounce) Cumin seeds
1 ½ tablespoons (10 g / less than half an ounce) Peppercorns
25 g (less than half an ounce) Green Cardamom pods

In a small pan on medium heat, roast each spice individually (it hardly takes a minute) until you get a nice aroma. Make sure you stir it throughout so that it doesn’t burn. As soon as each spice is roasted, transfer it to a bowl to cool slightly. Once they are all roasted, grind into a fine powder by using a coffee grinder, or pestle & mortar. Store in an airtight container and use as needed.

Directions:
Prepare the dough:
In a large mixing bowl, combine 1 ½ cups (230 g) of the flour, the sugar, salt and yeast.
In a saucepan, combine the milk, water and butter and heat over medium heat until warm and the butter is just melted. Ria’s version: add the 10 saffron threads to the warmed liquid and allow to steep off of the heat for 10 minutes. This will give the mixture a distinct aroma and flavor and a yellowish-orange hue.

With an electric mixer on low speed, gradually add the warm liquid to the flour/yeast mixture, beating until well blended. Increase mixer speed to medium and beat 2 minutes. Add the eggs and 1 cup (150 g) flour and beat for 2 more minutes.

Using a wooden spoon, stir in enough of the remaining flour to make a dough that holds together. Turn out onto a floured surface (use any of the 1 ½ cups of flour remaining) and knead the dough for 8 to 10 minutes until the dough is soft, smooth, sexy and elastic, keeping the work surface floured and adding extra flour as needed.
Place the dough in a lightly greased (I use vegetable oil) bowl, turning to coat all sides. Cover the bowl with plastic wrap and a kitchen towel and let rise until double in bulk, 45 – 60 minutes. The rising time will depend on the type of yeast you use.

Prepare your filling:In a small bowl, combine the cinnamon and sugar for the filling if using. You can add the chopped nuts to this if you like, but I find it easier to sprinkle on both the nuts and the chocolate separately.

Once the dough has doubled, make the meringue:
In a clean mixing bowl – ideally a plastic or metal bowl so the egg whites adhere to the side (they slip on glass) and you don’t end up with liquid remaining in the bottom – beat the egg whites with the salt, first on low speed for 30 seconds, then increase to high and continue beating until foamy and opaque. Add the vanilla then start adding the ½ cup sugar, a tablespoon at a time as you beat, until very stiff, glossy peaks form.

Assemble the Coffee Cakes:
Line 2 baking/cookie sheets with parchment paper.

Punch down the dough and divide in half. On a lightly floured surface, working one piece of the dough at a time (keep the other half of the dough wrapped in plastic), roll out the dough into a 20 x 10-inch (about 51 x 25 ½ cm) rectangle. Spread half of the meringue evenly over the rectangle up to about 1/2-inch (3/4 cm) from the edges. Sprinkle half of your filling of choice evenly over the meringue (ex: half of the cinnamon-sugar followed by half the chopped nuts and half of the chocolate chips/chopped chocolate).

Now, roll up the dough jellyroll style, from the long side. Pinch the seam closed to seal. Very carefully transfer the filled log to one of the lined cookie sheets, seam side down. Bring the ends of the log around and seal the ends together, forming a ring, tucking one end into the other and pinching to seal.
Using kitchen scissors or a sharp knife (although scissors are easier), make cuts along the outside edge at 1-inch (2 ½ cm) intervals. Make them as shallow or as deep as desired but don’t be afraid to cut deep into the ring.

Repeat with the remaining dough, meringue and fillings.

Cover the 2 coffee cakes with plastic wrap and allow them to rise again for 45 to 60 minutes.

Preheat the oven to 350°F (180°C).

Brush the tops of the coffee cakes with the egg wash. Bake in the preheated oven for 25 to 30 minutes until risen and golden brown. The dough should sound hollow when tapped.
 
Remove from the oven and slide the parchment paper off the cookie sheets onto the table. Very gently loosen the coffee cakes from the paper with a large spatula and carefully slide the cakes off onto cooling racks. Allow to cool.

Just before serving, dust the tops of the coffee cakes with confectioner’s sugar as well as cocoa powder if using chocolate in the filling. These are best eaten fresh, the same day or the next day.

Tuesday, September 28, 2010

Tarte Fine (TWD)

This week's Tuesdays with Dorie (TWD) recipe was chosen by Leslie of Lethally Delicious: Tarte Fine. I loved baked apples.... apple pie, apple crumble, apple tarts,... you name it, I love it! So I was thrilled when I saw that Leslie had chosen this recipe!

I love how quick and easy this one is! Seriously... just thaw some store bought puff pastry and then throw some sliced apples on top and you're done! Well, there are a few more steps in between, but really, you can make this in no time! I've already made it twice in one week, and the lengthiest step involved is peeling and slicing the apples.

The first time I made this tarte, I made the full fat, super sweet version that Dorie talks about in the "Playing Around" section :) I added bits of butter, cinnamon, and sugar to the puff pastry before layering the sliced apples on top.  Then, I brushed melted butter and sprinkled more cinnamon and sugar on top! It was delicious.  The extra cinnamon (not sure why Dorie doesn't use any? maybe because the French don't?) is perfect in this recipe.  I am sure if you sift your cinnamon onto the apples (or mix it in a bowl with the sugar first) it looks much better, but I was in a rush and just sprinkled it on straight from the container, resulting in a more "rustic" looking tarte :)


The second time I made this tarte, I decided to cut back on the sugar and butter a little bit, but I still didn't make the healthiest option Dorie gives (in the original recipe).  I did not put any pieces of butter on the bottom layer, and I added much less sugar and melted butter on top (exact quantities noted below).  Honestly, the tarte still tasted just as great and I could not tell the difference... so, when I make this again (and I definitely will!), I will go with the middle-of-the road option.

Thanks Leslie, for hosting this week.  If you would like the recipe, you can find it here. Make sure you check out the TWD Blogroll, to see how everyone else enjoyed this fall treat! As a reminder, if you'd like to meet Dorie during her current book tour, see if she will be visiting your city here.  If you'd like to join us at her cooking class here in Dallas on October 24th, sign up here.

* Recipe notes:
- If you are using Pepperidge Farm Puff Pastry, then no need to roll out the dough... it already comes premade in the perfect size for this tarte.  So just thaw it and then unfold it directly onto your baking sheet.
- Before arranging the apple layer on the puff pastry, I sprinkled 1 tablespoon of sugar as well as a generous sprinkling of cinnamon (sorry, I didn't measure it out, just eyeballed it) on top (I omitted the extra butter Dorie recommends in the Playing Around section the second time I made this and still loved it).
- Once the apples are layered on, brush the top with 2 tablespoons of melted butter (I found that 3-4 was way too much) and another 1.5-2 tablespoons of sugar.  Sprinkle with cinnamon again.  Alternatively, you could make a cinnamon and sugar mixture to sprinkle on top and your tart would look less "rustic" than mine did :)
- My tarte was done a few minutes early.  I definitely had to cover the edges with some foil to prevent it from burning, in order to get my apples lightly browned.
- For more recipe tips, click here

Thursday, May 27, 2010

Croquembouche (DB)


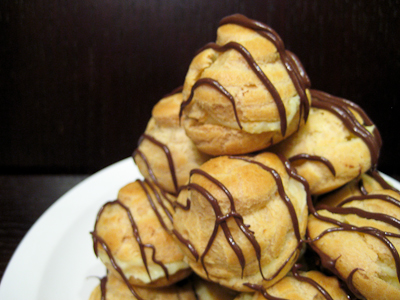
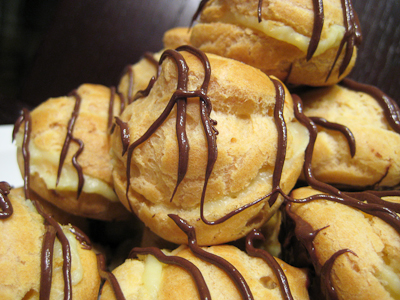
The May 2010 Daring Bakers’ challenge was hosted by Cat of Little Miss Cupcake. Cat challenged everyone to make a piece montée, or croquembouche, based on recipes from Peter Kump’s Baking School in Manhattan and Nick Malgieri. The classic piece montée is a high pyramid/cone made of profiteroles (cream-filled puff pastries) sometimes dipped in chocolate, bound with caramel, and usually decorated with threads of caramel, sugared almonds, chocolate, flowers, or ribbons.


This recipe has 3 main components: the pate a choux, the crème patissiere, and the glaze used to mount/decorate it.  I've made eclairs and cream puffs before, so I was familiar with the technique involved in making the pate a choux.  I had never made a croquembouche, however, and have to say that mine was pretty simple and unimpressive.  I didn't have much time so I made a half batch and put it together with a chocolate glaze.  I probably should have used toothpicks to assemble mine, but since I was short on time I simply brushed the bottoms of them with chocolate glaze to mount them together.  I've seen some put together with fancy spun sugar on a few other blogs and wish I could have done something like that... but my husband's coworkers didn't seem to complain about these chocolate glazed puffs.


Thanks Cat, for hosting this month's challenge. I'm afraid I wasn't extremely "daring" with the assembly of my croquembouche, but life these days with a baby limits my time in the kitchen! Make sure you check out the Daring Bakers' Blogroll to see how everyone else stacked up.

Croquembouche

For the Vanilla Crème Patissiere (Half Batch)
1 cup (225 ml.) whole milk
2 Tbsp. cornstarch
6 Tbsp. (100 g.) sugar
1 large egg
2 large egg yolks
2 Tbsp. (30 g.) unsalted butter
1 Tsp. Vanilla

Dissolve cornstarch in ¼ cup of milk. Combine the remaining milk with the sugar in a saucepan; bring to boil; remove from heat.

Beat the whole egg, then the yolks into the cornstarch mixture. Pour 1/3 of boiling milk into the egg mixture, whisking constantly so that the eggs do not begin to cook.

Return the remaining milk to boil. Pour in the hot egg mixture in a stream, continuing whisking.

Continue whisking (this is important – you do not want the eggs to solidify/cook) until the cream thickens and comes to a boil. Remove from heat and beat in the butter and vanilla.

Pour cream into a stainless steel/ceramic bowl. Press plastic wrap firmly against the surface. Chill immediately and until ready to use.

For Chocolate Pastry Cream (Half Batch Recipe):
Bring ¼ cup (about 50 cl.) milk to a boil in a small pan; remove from heat and add in 3 ounces (about 80 g.) semisweet chocolate, finely chopped, and mix until smooth. Whisk into pastry cream when you add the butter and vanilla.

For Coffee Pastry Cream (Half Batch recipe)
Dissolve 1 ½ teaspoons instant espresso powder in 1 ½ teaspoons boiling water. Whisk into pastry cream with butter and vanilla.

Pate a Choux (Yield: About 28)
¾ cup (175 ml.) water
6 Tbsp. (85 g.) unsalted butter
¼ Tsp. salt
1 Tbsp. sugar
1 cup (125 g.) all-purpose flour
4 large eggs

For Egg Wash: 1 egg and pinch of salt

Pre-heat oven to 425◦F/220◦C degrees. Line two baking sheets with parchment paper.

Preparing batter:
Combine water, butter, salt and sugar in a saucepan over medium heat. Bring to a boil and stir occasionally. At boil, remove from heat and sift in the flour, stirring to combine completely.

Return to heat and cook, stirring constantly until the batter dries slightly and begins to pull away from the sides of the pan.

Transfer to a bowl and stir with a wooden spoon 1 minute to cool slightly.

Add 1 egg. The batter will appear loose and shiny.

As you stir, the batter will become dry-looking like lightly buttered mashed potatoes.

It is at this point that you will add in the next egg. Repeat until you have incorporated all the eggs.

Piping:
Transfer batter to a pastry bag fitted with a large open tip (I piped directly from the bag opening without a tip). Pipe choux about 1 inch-part in the baking sheets. Choux should be about 1 inch high about 1 inch wide.

Using a clean finger dipped in hot water, gently press down on any tips that have formed on the top of choux when piping. You want them to retain their ball shape, but be smoothly curved on top.
Brush tops with egg wash (1 egg lightly beaten with pinch of salt).

Baking:
Bake the choux at 425◦F/220◦C degrees until well-puffed and turning lightly golden in color, about 10 minutes.

Lower the temperature to 350◦F/180◦C degrees and continue baking until well-colored and dry, about 20 minutes more. Remove to a rack and cool.

Can be stored in a airtight box overnight.

Filling:
When you are ready to assemble your piece montée, using a plain pastry tip, pierce the bottom of each choux. Fill the choux with pastry cream using either the same tip or a star tip, and place on a paper-lined sheet. Choux can be refrigerated briefly at this point while you make your glaze.

Use one of these to top your choux and assemble your piece montée.

Chocolate Glaze:
8 ounces/200 g. finely chopped chocolate (use the finest quality you can afford as the taste will be quite pronounced; I recommend semi-sweet)

Melt chocolate in microwave or double boiler. Stir at regular intervals to avoid burning. Use the best quality chocolate you can afford. Use immediately.

Hard Caramel Glaze:
1 cup (225 g.) sugar
½ teaspoon lemon juice

Combine sugar and lemon juice in a saucepan with a metal kitchen spoon stirring until the sugar resembles wet sand. Place on medium heat; heat without stirring until sugar starts to melt around the sides of the pan and the center begins to smoke. Begin to stir sugar. Continue heating, stirring occasionally until the sugar is a clear, amber color. Remove from heat immediately; place bottom of pan in ice water to stop the cooking. Use immediately.

Assembly of your Piece Montée:
You may want to lay out your unfilled, unglazed choux in a practice design to get a feel for how to assemble the final dessert. For example, if making a conical shape, trace a circle (no bigger than 8 inches) on a piece of parchment to use as a pattern. Then take some of the larger choux and assemble them in the circle for the bottom layer. Practice seeing which pieces fit together best.

Once you are ready to assemble your piece montée, dip the top of each choux in your glaze (careful it may be still hot!), and start assembling on your cake board/plate/sheet. Continue dipping and adding choux in levels using the glaze to hold them together as you build up. (You may want to use toothpicks to hold them in place – see video #4 below).

When you have finished the design of your piece montée, you may drizzle with remaining glaze or use ribbons, sugar cookie cut-outs, almonds, flowers, etc. to decorate. Have fun and enjoy! Bon appétit!

Thursday, May 13, 2010

Quick Classic Berry Tart (TWD)


This week's Tuesdays with Dorie (TWD) recipe was chosen by Cristine of Cooking with Cristine: Quick Classic Berry Tart. I'm a few days late posting this but I was traveling on Tuesday and forgot to do this before leaving.

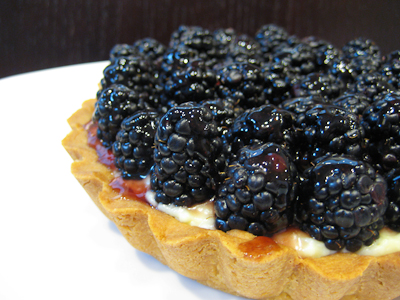
This week's post is going to be extremely short and sweet. Dorie's sweet tart dough. Vanilla pastry cream. Fresh blackberries topped with grandma's homemade blackberry jelly. Enough said :)


This tart was simple, classic, and delicious. Thanks Cristine, for hosting this week. If you would like the recipe, you can find it here. Make sure you check out the TWD Blogroll, to see how everyone else enjoyed this fresh, summery treat! Also, don't forget to enter my $100 gift card giveaway while you're here :)

* Recipes notes:
- For tips from other TWD bakers, click here.

Saturday, March 27, 2010

Orange Tian (DB)


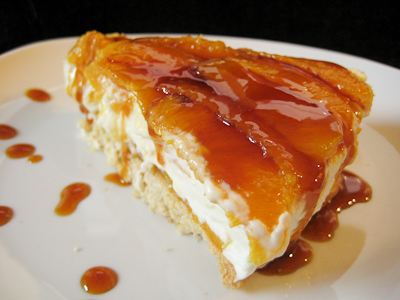
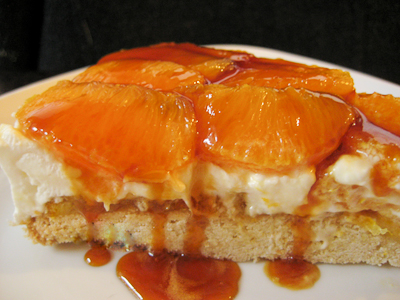
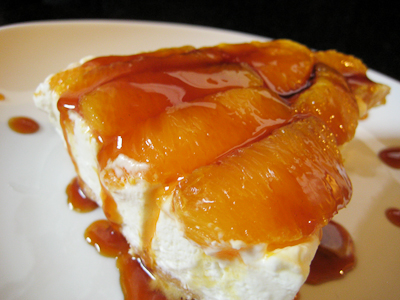
The 2010 March Daring Baker’s challenge was hosted by Jennifer of Chocolate Shavings. She chose Orange Tian as the challenge for this month, a dessert based on a recipe from Alain Ducasse’s Cooking School in Paris. What is a tian, you ask? Yeah, I had to ask that too. I had never heard of a tian before. Apparently it's as simple as any layered dish. So a 7-layer bean dip is considered a tian just as much as the orange pastry you see above is.


In this case, the orange tian is a layered dessert consisting of a sweet tart dough base, topped with orange marmalade, an orange flavored whipped cream, and then fresh orange segments, garnished with a luscious orange caramel sauce on top.

While this recipe was fairly straightforward, I did get to learn several new techniques through this challenge. To start off, I made my very first marmalade. I love orange marmalade and could eat it plain by the spoonful. In fact, that's what I did with a few spoonfuls of this homemade goodness! In making the marmalade, I also learned how to extract my own pectin from orange seeds! I somehow forgot to put pectin on my grocery list and by the time I started making this recipe, there was no way I was going back out to get it. So, I checked out the forum and found another baker had suggested extracting your own. You basically just stick the seeds in a piece of cheesecloth, let it soak in some warm water for a few hours, and then squeeze the living daylights out of the cheesecloth and seeds until you get some gloopy goodness that is pectin. So cool.

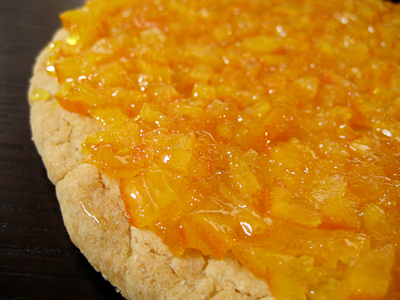
Beautiful layer of orange marmalade atop the pate sablee.

I also learned how to segment an orange during this process. As simple as it is, I had never done this before. The youtube video that was linked was a great tutorial and I had all eight oranges segmented in no time. This is definitely my preferred way to eat a grapefruit from now on (I used to always just slice it in half and then dig in with a spoon!).

Instead of making mini desserts with cookie cutters, I opted to make one large tart using my springform pan. I simply cut out a piece of parchment that would fit into my pan and then used that as a guide as I rolled out the dough.


This dessert is perfect for spring or summer. It would be great for entertaining, as you could get all of the components together ahead of time and then just assembled it right before the party. Even simpler if you used store bought marmalade or jam. I loved this dessert, especially with the orange caramel sauce on top! I've never had anything like it. My husband isn't a huge fan of citrus, but did think that this would be even better with raspberry jam on the bottom and fresh raspberries on top! I think the different flavor combinations are endless.

Thanks Jennifer, for hosting this month's challenge. Make sure you check out the Daring Bakers' Blogroll to see how everyone else enjoyed this citrus-y treat.


Orange Tian
Recipe slightly adapted from Alain Ducasse‘s Cooking School in Paris, France
Stabilized whipped cream (http://tamsin-cakes.com/2009/06/05/tamsincakes-on-flickr-adventures-in-s...)

For the Pate Sablee:

Ingredients U.S. Imperial Metric Instructions for Ingredients
2 medium-sized egg yolks at room temperature (you can use 2 large egg yolks without a problem)
granulated sugar 6 tablespoons + 1 teaspoon; 2.8 oz; 80 grams
vanilla extract ½ teaspoon
Unsalted butter ¼ cup + 3 tablespoons; 3.5 oz; 100 grams ice cold, cubed
Salt 1/3 teaspoon; 2 grams
All-purpose flour 1.5 cup + 2 tablespoons; 7 oz; 200 grams
baking powder 1 teaspoon ; 4 grams

Directions:
Put the flour, baking powder, ice cold cubed butter and salt in a food processor fitted with a steel blade.

In a separate bowl, add the eggs yolks, vanilla extract and sugar and beat with a whisk until the mixture is pale. Pour the egg mixture in the food processor.

Process until the dough just comes together. If you find that the dough is still a little too crumbly to come together, add a couple drops of water and process again to form a homogenous ball of dough. Form into a disc, cover with plastic wrap and leave to rest in the fridge for 30 minutes.
Preheat your oven to 350 degree Fahrenheit.

Roll out the dough onto a lightly floured surface until you obtain a ¼ inch thick circle. (I refrigerated my dough overnight so when it came time to roll it out, I had to let it sit on the counter for a bit to warm up and soften a little before I could roll it out.)

Using your cookie cutter, cut out circles of dough and place on a parchment (or silicone) lined baking sheet. Bake for 20 minutes or until the circles of dough are just golden. (I used a springform pan so I simply rolled out my dough into a circle that would fit into the pan.)

For the Marmalade:

Ingredients U.S. Imperial Metric Instructions for Ingredients
Freshly pressed orange juice ¼ cup + 3 tablespoons; 3.5 oz; 100 grams
1 large orange used to make orange slices
cold water to cook the orange slices
pectin 5 grams (If you do not have pectin, take all your orange seeds after segmenting the oranges and place them in a small piece of cheesecloth. Soak in warm water for a few hours, then squeeze out the pectin. It should be thick like corn syrup.)
granulated sugar: use the same weight as the weight of orange slices once they are cooked

Finely slice the orange. Place the orange slices in a medium-sized pot filled with cold water. Simmer for about 10 minutes, discard the water, re-fill with cold water and blanch the oranges for another 10 minutes.

Blanch the orange slices 3 times. This process removes the bitterness from the orange peel, so it is essential to use a new batch of cold water every time when you blanch the slices.

Once blanched 3 times, drain the slices and let them cool.

Once they are cool enough to handle, finely mince them (using a knife or a food processor).

Weigh the slices and use the same amount of granulated sugar . If you don’t have a scale, you can place the slices in a cup measurer and use the same amount of sugar.

In a pot over medium heat, add the minced orange slices, the sugar you just weighed, the orange juice and the pectin. Cook until the mixture reaches a jam consistency (10-15 minutes).

Transfer to a bowl, cover with plastic wrap and put in the fridge.

For the Orange Segments:

For this step you will need 8 oranges.

Cut the oranges into segments over a shallow bowl and make sure to keep the juice. Add the segments to the bowl with the juice.

[See YouTube video for additional information on segmenting oranges.]

For the Caramel:

Ingredients U.S. Metric Imperial Instructions for Ingredients
granulated sugar 1 cup; 7 oz; 200 grams
orange juice 1.5 cups + 2 tablespoons; 14 oz; 400 grams

Place the sugar in a pan on medium heat and begin heating it. (You can gently swirl the pan to prevent burning, but do not stir the sugar.)

Once the sugar starts to bubble and foam, slowly add the orange juice. (At this point, the caramel will harden... just keep heating and stirring and it will dissolve back into solution.) As soon as the mixture starts boiling, remove from the heat and pour half of the mixture over the orange segments.

Reserve the other half of the caramel mixture in a small bowl — you will use this later to spoon over the finished dessert. When the dessert is assembled and setting in the freezer, heat the kept caramel sauce in a small saucepan over low heat until it thickens and just coats the back of a spoon (about 10 minutes). You can then spoon it over the orange tians. (The caramel sauce will seem too thin after 10 minutes of additional heating. Refrain from continuing to heat it, because it will thicken nicely as it cools. I continued to heat it until it was thick and then once it cooled it was way too thick.)

[Tip: Be very careful when making the caramel — if you have never made caramel before, I would suggest making this step while you don’t have to worry about anything else. Bubbling sugar is extremely, extremely hot, so make sure you have a bowl of ice cold water in the kitchen in case anyone gets burnt!]

For the Whipped Cream:

Ingredients U.S. Metric Imperial Instructions for Ingredients
heavy whipping cream 1 cup; 7 oz; 200 grams
3 tablespoons of hot water
1 tsp Gelatine
1 tablespoon of confectioner's sugar
orange marmalade (see recipe above) 1 tablespoon

In a small bowl, add the gelatine and hot water, stirring well until the gelatine dissolves. Let the gelatine cool to room temperature while you make the whipped cream. Combine the cream in a chilled mixing bowl. Whip the cream using a hand mixer on low speed until the cream starts to thicken for about one minute. Add the confectioner sugar. Increase the speed to medium-high. Whip the cream until the beaters leave visible (but not lasting) trails in the cream, then add the cooled gelatine slowly while beating continuously. Continue whipping until the cream is light and fluffy and forms soft peaks. Transfer the whipped cream to a bowl and fold in the orange marmalade.
[Tip: Use an ice cold bowl to make the whipped cream in. You can do this by putting your mixing bowl, cream and beater in the fridge for 20 minutes prior to whipping the cream.]

Assembling the Dessert:

Make sure you have some room in your freezer. Ideally, you should be able to fit a small baking sheet or tray of desserts to set in the freezer.

Line a small tray or baking sheet with parchment paper or a silicone sheet. Lay out 6 cookie cutters onto the parchment paper/silicone.

Drain the orange segments on a kitchen towel.

Have the marmalade, whipped cream and baked circles of dough ready to use.

Arrange the orange segments at the bottom of each cookie cutter. Make sure the segments all touch either and that there are no gaps. Make sure they fit snuggly and look pretty as they will end up being the top of the dessert. Arrange them as you would sliced apples when making an apple tart.

Once you have neatly arranged one layer of orange segments at the bottom of each cookie cutter, add a couple spoonfuls of whipped cream and gently spread it so that it fills the cookie cutter in an even layer. Leave about 1/4 inch at the top so there is room for dough circle.

Using a butter knife or small spoon, spread a small even layer of orange marmalade on each circle of dough.

Carefully place a circle of dough over each ring (the side of dough covered in marmalade should be the side touching the whipping cream). Gently press on the circle of dough to make sure the dessert is compact.

Place the desserts to set in the freezer to set for 10 minutes.

Using a small knife, gently go around the edges of the cookie cutter to make sure the dessert will be easy to unmold. Gently place your serving plate on top of a dessert (on top of the circle of dough) and turn the plate over. Gently remove the cookie cutter, add a spoonful of caramel sauce and serve immediately.

Tuesday, January 5, 2010

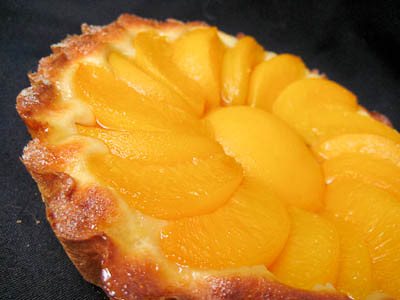
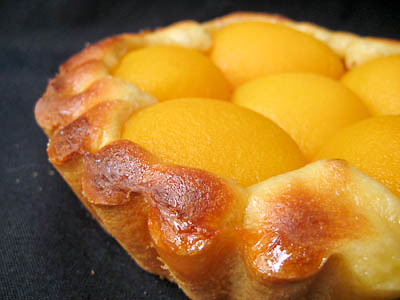
Apricot Tarte Tatin (TWD)


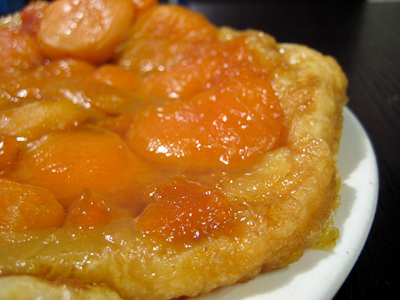
This week's Tuesdays with Dorie (TWD) recipe was chosen by Laurie of Slush: Tarte Tatin. It's a particularly special week because it's TWD's 2nd anniversary! I can't believe it's already been two years since I first joined! I have learned so much during my time with the group and up until the birth of my baby, I had hardly ever missed a week. I'm hoping that once things settle down some, I'll be back to baking weekly... but for now, I wanted to make sure I didn't miss this special anniversary week! Plus, I love tarte tatin and couldn't pass up the chance to make it myself.

I originally wanted to make Apple Tarte Tatin, but the baby seems to be going through a growth spurt right now so she isn't allowing me very much free time. I meant to make this yesterday but didn't get to it until this afternoon. So, instead of having to peel and slice a bunch of apples, I opted to use canned apricots instead. I also used frozen puff pastry instead of making my own pie or tart dough to save some time.


I burned my first batch of caramel, despite watching it religiously and being careful with the heat... it was getting pretty dark and I wasn't sure if it was burnt, so I scooped a small bit out with a knife, let it cool, and then tasted it - definitely bitter. So, I dumped it out and started over and heated the butter and sugar until it was just barely caramelized. I think I didn't cook my caramel mixture long enough, though, because when I flipped it out of the skillet, it was very soupy. Next time I make this, I will just heat the butter and sugar slowly over low heat instead of medium heat (I think I waited too long to turn down the heat the first time).

Well, despite the soupy mess, my tarte tatin was fantastic! The buttery, caramel-y taste combined with the fruit and puff pastry was divine. Thanks, Laurie, for picking this recipe. Moreover, thanks for all the hard work you do as the founder of TWD. If you would like the recipe, you can find it here. Make sure you check out the TWD Blogroll, to see how everyone else enjoyed this wonderful French pastry.

* Recipes notes:
- Caramelize your sugar over low heat, not medium heat, to ensure it becomes a deep caramel color without burning.
- I baked my tarte tatin in a cast iron skillet for about 50-55 minutes, until my puff pastry was golden brown.
- For tips from other TWD bakers, click here.

Sunday, October 11, 2009

Sticky Buns (SMS)

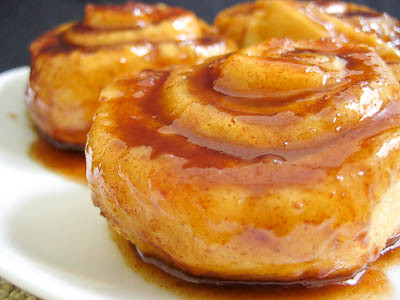
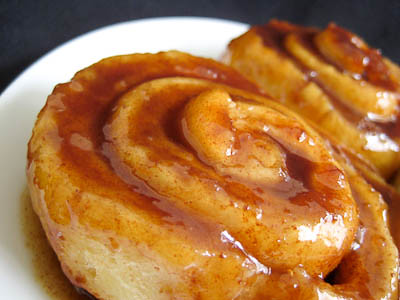
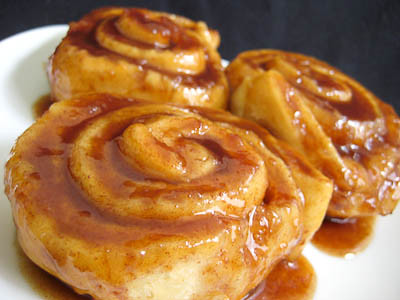
This week's Sweet Melissa Sundays (SMS) recipe was chosen by Jen of Not Microwave Safe: Sticky Buns with Toasted Almonds. I love cinnamon rolls and sticky buns and almost chose this recipe when it was my turn to pick, but in the end I chose the Bee Stings instead. So I was delighted to see that someone finally picked this recipe!

Working with yeast really isn't that bad. I remember when I used to be so intimidated by it. This recipe is a bit time consuming, but is not difficult at all. It is split into two days with an overnight refrigeration so you don't feel like you are baking all day. One thing I always do when baking with yeast is I use my oven as a proofing box. I'll preheat the oven for about a minute, just long enough for it to warm up but not to where it starts to get hot. Then I turn the oven off and stick my dough in and let it rise. This ensures that it is always warm enough for my dough to rise regardless of what time of year it is.


I omitted the orange zest from this recipe, just because I didn't have any on hand and didn't want to make a grocery store run just for orange zest... I am sure that the zest would probably add a great subtle flavor to the dough but it also tasted just fine without it.


I also omitted the toasted almonds because I don't like nuts, but you can also cover these with cream cheese frosting if you don't want to top them with sticky sauce. These smelled so good while they were baking in the oven... in fact, that was how I knew to check on them early. The smell of sugar and cinnamon was so strong that I though I'd better check on them - and it was a good thing I did because they were done in HALF the time indicated on the recipe! If I had waited for my timer to go off, these would have been burnt to a crisp!


I would love to try these with cream cheese frosting some time. The dough was really soft and sweet and it's probably just as good as my favorite Cinnabon recipe - though I'll have to try these with the cream cheese frosting before I declare them better than the other recipe :)

Thanks Jen, for choosing this recipe. I will definitely be making this one again. If you would like the recipe, you can find it here. Make sure you visit the SMS Blogroll to see how everyone else enjoyed this sweet, sticky treat!

* Recipe Notes:
- I added room temperature milk instead of cold milk to make sure that my dough would rise.
- I had to add a little over 1/2 cup of extra flour to get my dough to be not so sticky. So I used the full 2-3/4 cup, and then continued adding 1 tbsp of flour at a time until the dough no longer stuck to the edges of the mixing bowl.
- I did not have pure maple syrup so I used pancake syrup instead (Aunt Jemima's).
- I used salted butter in my sticky sauce and could taste a little bit of the salt in it - this was great because salty and sweet flavors go together very well.
- Use your oven as a proofing box. Preheat the oven for about a minute, just long enough for it to warm up but not to where it starts to get hot. Then turn the oven off and stick your dough in and let it rise. This ensures that it is always warm enough for your dough to rise regardless of what time of year it is.- Start checking on your buns around 20 minutes. They will probably be golden brown and done around 25 to 30 minutes, depending on your oven.
- You can easily freeze these. Prepare the recipe as directed up until the overnight refrigeration step. Then, instead of refrigerating it, wrap it tight and freeze it. When you are ready to bake, remove it from the freezer for the second rise until the dough has doubled in size and then bake.
- For more recipe tips, click here.

Sunday, September 27, 2009

Vols-au-Vent and Homemade Puff Pastry (DB)


The September 2009 Daring Bakers' challenge was hosted by Steph of A Whisk and a Spoon. She chose the French treat, Vols-au-Vent based on the Puff Pastry recipe by Michel Richard from the cookbook Baking With Julia by Dorie Greenspan.

Some background information from Steph:
Puff pastry is in the ‘laminated dough” family, along with Danish dough and croissant dough. A laminated dough consists of a large block of butter (called the “beurrage”) that is enclosed in dough (called the “détrempe”). This dough/butter packet is called a “paton,” and is rolled and folded repeatedly (a process known as “turning”) to create the crisp, flaky, parallel layers you see when baked. Unlike Danish or croissant however, puff pastry dough contains no yeast in the détrempe, and relies solely aeration to achieve its high rise. The turning process creates hundreds of layers of butter and dough, with air trapped between each one. In the hot oven, water in the dough and the melting butter creates steam, which expands in the trapped air pockets, forcing the pastry to rise.

Vols-au-vent are little puff pastry cases designed to hold a filling. They can be made large enough for a full meal, or made small for little one-bite canapés. Vols-au-vent are typically served hot and filled with a creamy savory filling (often poultry or seafood-based), but cold fillings, such as chicken or tuna salad, work, too. Whipped cream or pastry cream with fresh or stewed fruit often goes into sweet versions.


I was looking forward to this recipe because after making Cinnamon Apple Danish Braids in June 2008, I was familiar with the general concept of how to make a laminated dough and knew that this daunting challenge of making homemade puff pastry was within my grasp.

I didn't have any major problems with my dough, except that it is still pretty warm in Texas right now so I had to spend quite a bit more time chilling my dough in between turns. I was also only able to turn the dough once (instead of twice) before it required additional refrigeration time.


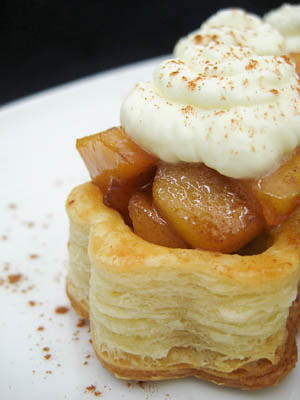
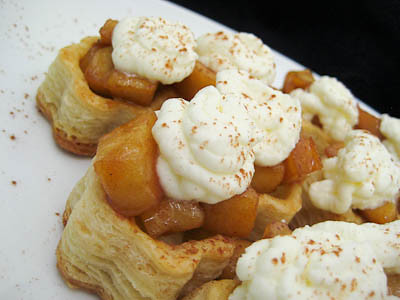
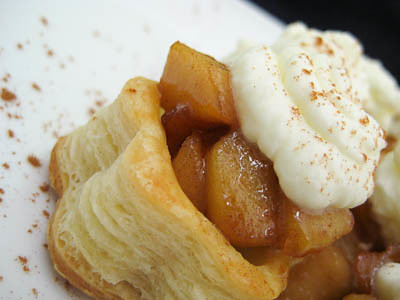
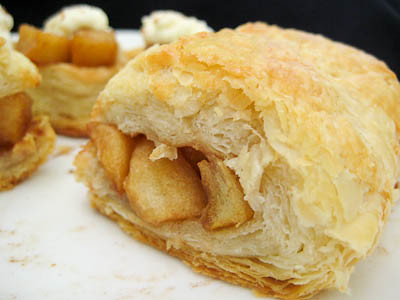
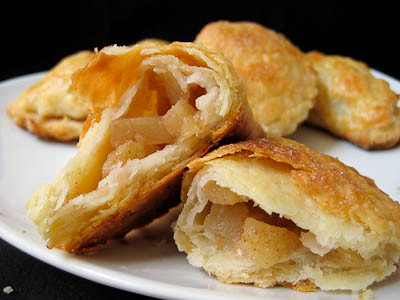
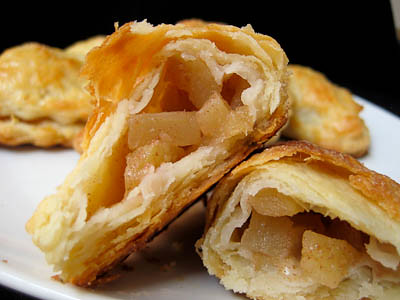
I filled my vols-au-vent with apples that were sauteed in brown sugar, butter, and cinnamon. Topped with some whipped cream and cinnamon sprinkled on top, these were delicious. With the extra puff pastry I had on hand, I made a few apple turnovers as well.


Thanks Steph, for hosting this month's challenge. While I will probably stick with store bought puff pastry (so much quicker!), I can now say that I've finally made homemade puff pastry! Make sure you check out the Daring Bakers' Blogroll to see how everyone else enjoyed these puffy treats.

Forming and Baking the Vols-au-Vent

Yield: 1/3 of the puff pastry recipe below will yield about 8-10 1.5” vols-au-vent or 4 4” vols-au-vent

You will need:
-well-chilled puff pastry dough (recipe below)
-egg wash (1 egg or yolk beaten with a small amount of water)
-your filling of choice

Line a baking sheet with parchment and set aside.

Using a knife or metal bench scraper, divided your chilled puff pastry dough into three equal pieces. Work with one piece of the dough, and leave the rest wrapped and chilled. (If you are looking to make more vols-au-vent than the yield stated above, you can roll and cut the remaining two pieces of dough as well…if not, then leave refrigerated for the time being or prepare it for longer-term freezer storage. See the “Tips” section below for more storage info.)

On a lightly floured surface, roll the piece of dough into a rectangle about 1/8 to 1/4-inch (3-6 mm) thick. Transfer it to the baking sheet and refrigerate for about 10 minutes before proceeding with the cutting.

(This assumes you will be using round cutters, but if you do not have them, it is possible to cut square vols-au-vents using a sharp chef’s knife.) For smaller, hors d'oeuvre sized vols-au-vent, use a 1.5” round cutter to cut out 8-10 circles. For larger sized vols-au-vent, fit for a main course or dessert, use a 4” cutter to cut out about 4 circles. Make clean, sharp cuts and try not to twist your cutters back and forth or drag your knife through the dough. Half of these rounds will be for the bases, and the other half will be for the sides. (Save any scrap by stacking—not wadding up—the pieces…they can be re-rolled and used if you need extra dough. If you do need to re-roll scrap to get enough disks, be sure to use any rounds cut from it for the bases, not the ring-shaped sides.)

Using a ¾-inch cutter for small vols-au-vent, or a 2- to 2.5-inch round cutter for large, cut centers from half of the rounds to make rings. These rings will become the sides of the vols-au-vent, while the solid disks will be the bottoms. You can either save the center cut-outs to bake off as little “caps” for you vols-au-vent, or put them in the scrap pile.

Dock the solid bottom rounds with a fork (prick them lightly, making sure not to go all the way through the pastry) and lightly brush them with egg wash. Place the rings directly on top of the bottom rounds and very lightly press them to adhere. Brush the top rings lightly with egg wash, trying not to drip any down the sides (which may inhibit rise). If you are using the little “caps,” dock and egg wash them as well.

Refrigerate the assembled vols-au-vent on the lined baking sheet while you pre-heat the oven to 400ºF (200ºC). (You could also cover and refrigerate them for a few hours at this point.)

Once the oven is heated, remove the sheet from the refrigerator and place a silicon baking mat (preferred because of its weight) or another sheet of parchment over top of the shells. This will help them rise evenly. Bake the shells until they have risen and begin to brown, about 10-15 minutes depending on their size. Reduce the oven temperature to 350ºF (180ºC), and remove the silicon mat or parchment sheet from the top of the vols-au-vent. If the centers have risen up inside the vols-au-vent, you can gently press them down. Continue baking (with no sheet on top) until the layers are golden, about 15-20 minutes more. (If you are baking the center “caps” they will likely be finished well ahead of the shells, so keep an eye on them and remove them from the oven when browned.)

Remove to a rack to cool. Cool to room temperature for cold fillings or to warm for hot fillings.

Fill and serve.

*For additional rise on the larger-sized vols-au-vents, you can stack one or two additional ring layers on top of each other (using egg wash to "glue"). This will give higher sides to larger vols-au-vents, but is not advisable for the smaller ones, whose bases may not be large enough to support the extra weight.

*Although they are at their best filled and eaten soon after baking, baked vols-au-vent shells can be stored airtight for a day.

*Shaped, unbaked vols-au-vent can be wrapped and frozen for up to a month (bake from frozen, egg-washing them first).

Michel Richard’s Puff Pastry Dough

From: Baking with Julia by Dorie Greenspan
Yield: 2-1/2 pounds dough

Steph’s note: This recipe makes more than you will need for the quantity of vols-au-vent stated above. While I encourage you to make the full recipe of puff pastry, as extra dough freezes well, you can halve it successfully if you’d rather not have much leftover.

There is a wonderful on-line video from the PBS show “Baking with Julia” that accompanies the book. In it, Michel Richard and Julia Child demonstrate making puff pastry dough (although they go on to use it in other applications). They do seem to give slightly different ingredient measurements verbally than the ones in the book…I listed the recipe as it appears printed in the book. http://video.pbs.org/video/1174110297/search/Pastry

Ingredients:
2-1/2 cups (12.2 oz/ 354 g) unbleached all-purpose flour
1-1/4 cups (5.0 oz/ 142 g) cake flour
1 tbsp. salt (you can cut this by half for a less salty dough or for sweet preparations)
1-1/4 cups (10 fl oz/ 300 ml) ice water
1 pound (16 oz/ 454 g) very cold unsalted butter

plus extra flour for dusting work surface

Mixing the Dough:

Check the capacity of your food processor before you start. If it cannot hold the full quantity of ingredients, make the dough into two batches and combine them.

Put the all-purpose flour, cake flour, and salt in the work bowl of a food processor fitted with a metal blade and pulse a couple of times just to mix. Add the water all at once, pulsing until the dough forms a ball on the blade. The dough will be very moist and pliable and will hold together when squeezed between your fingers. (Actually, it will feel like Play-Doh.)

Remove the dough from the machine, form it into a ball, with a small sharp knife, slash the top in a tic-tac-toe pattern. Wrap the dough in a damp towel and refrigerate for about 5 minutes.

Meanwhile, place the butter between 2 sheets of plastic wrap and beat it with a rolling pin until it flattens into a square that's about 1" thick. Take care that the butter remains cool and firm: if it has softened or become oily, chill it before continuing.

Incorporating the Butter:

Unwrap the dough and place it on a work surface dusted with all-purpose flour (A cool piece of marble is the ideal surface for puff pastry) with your rolling pin (preferably a French rolling pin without handles), press on the dough to flatten it and then roll it into a 10" square. Keep the top and bottom of the dough well floured to prevent sticking and lift the dough and move it around frequently. Starting from the center of the square, roll out over each corner to create a thick center pad with "ears," or flaps.

Place the cold butter in the middle of the dough and fold the ears over the butter, stretching them as needed so that they overlap slightly and encase the butter completely. (If you have to stretch the dough, stretch it from all over; don't just pull the ends) you should now have a package that is 8" square.

To make great puff pastry, it is important to keep the dough cold at all times. There are specified times for chilling the dough, but if your room is warm, or you work slowly, or you find that for no particular reason the butter starts to ooze out of the pastry, cover the dough with plastic wrap and refrigerate it . You can stop at any point in the process and continue at your convenience or when the dough is properly chilled.

Making the Turns:

Gently but firmly press the rolling pin against the top and bottom edges of the square (this will help keep it square). Then, keeping the work surface and the top of the dough well floured to prevent sticking, roll the dough into a rectangle that is three times as long as the square you started with, about 24" (don't worry about the width of the rectangle: if you get the 24", everything else will work itself out.) With this first roll, it is particularly important that the butter be rolled evenly along the length and width of the rectangle; check when you start rolling that the butter is moving along well, and roll a bit harder or more evenly, if necessary, to get a smooth, even dough-butter sandwich (use your arm-strength!).

With a pastry brush, brush off the excess flour from the top of the dough, and fold the rectangle up from the bottom and down from the top in thirds, like a business letter, brushing off the excess flour. You have completed one turn.

Rotate the dough so that the closed fold is to your left, like the spine of a book. Repeat the rolling and folding process, rolling the dough to a length of 24" and then folding it in thirds. This is the second turn.

Chilling the Dough:

If the dough is still cool and no butter is oozing out, you can give the dough another two turns now. If the condition of the dough is iffy, wrap it in plastic wrap and refrigerate it for at least 30 minutes. Each time you refrigerate the dough, mark the number of turns you've completed by indenting the dough with your fingertips. It is best to refrigerate the dough for 30 to 60 minutes between each set of two turns.

The total number of turns needed is six. If you prefer, you can give the dough just four turns now, chill it overnight, and do the last two turns the next day. Puff pastry is extremely flexible in this regard. However, no matter how you arrange your schedule, you should plan to chill the dough for at least an hour before cutting or shaping it.

Tuesday, September 22, 2009

Cottage Cheese Pufflets (TWD)


This week's Tuesdays with Dorie (TWD) recipe was chosen by Jacque of Daisy Lane Cakes : Cottage Cheese Pufflets. I don't normally eat cottage cheese - I've actually never even tried it. The texture just seems so weird to me that I don't want to try it. But seeing as the cottage cheese is blended into the dough in this recipe, I was willing to give it a try. So this was technically my first time trying cottage cheese :)


The dough is simple enough to make, as long as you have a food processor. Working with the dough, however, was extremely difficult for me. Despite refrigerating the dough overnight, I found that it would warm up and soften much too quickly for my liking. I had to roll it out, stick it in the freezer for a few minutes, and then that would only buy me a few minutes to make a few pufflets before I had to put it back in the freezer. This resulted in a very long and drawn out process... (I even cut my block of dough into 4 pieces instead of 2, working with less dough each time to avoid having to re-roll the dough out in several batches.)


The result? The dough was slightly flaky but a buttery soft, melt in your mouth kind of texture. It was quite delicious and well worth the struggle. I'm not sure how puffy these pufflets were supposed to get, but regardless they were delicious.

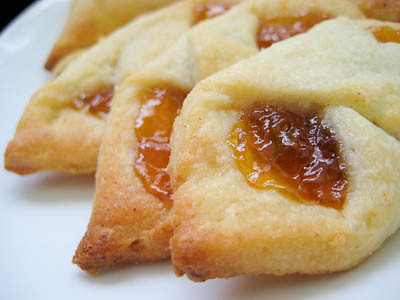
I ended up doing two different variations... with half the dough I made triangular pufflets just like Dorie instructs you to. With the other half of the dough I simple folded the edges in and left some preserves exposed. I found that using this method allowed me to get a higher preserves to pastry ratio which I prefer. (Dorie calls these cookies but I think they're more like pastries.)


I made some with orange marmalade and some with apricot preserves. After making several kinds of pastries, I've come to the conclusion that my favorite fruit filled pastry is one with apricot preserves. So if you made yours with another type of preserve, I encourage you to try this recipe with apricot preserves :)


Thanks Jacque, for picking this recipe. I loved the pufflets and they were all gone by the end of the day (I hate to admit it, but my husband only had a few and I ate the rest!) If you would like the recipe, you can find it here. Make sure you check out the TWD Blogroll, to see how everyone else enjoyed these pufflets.

* Recipes notes:
- I did not poke a hole in my pufflets to vent them and they turned out just fine.
- I would definitely recommend cutting your refrigerated dough into 4 pieces, working with just one piece and leaving the rest in the fridge while you assemble the first batch of pufflets. Make sure you put the dough back in the fridge or freezer if it gets too soft, otherwise it is impossible to work with (also results in very messy fingers!)
- I baked mine for 12-14 minutes, just slightly longer than indicated.

- For more tips, click here.

Tuesday, September 15, 2009

Flaky Apple Turnovers (TWD)


This week's Tuesdays with Dorie (TWD) recipe was chosen by Julie of Someone's in the Kitchen: Flaky Apple Turnovers. I love anything apple and this was the perfect way to celebrate the upcoming arrival of fall.

The pastry dough was pretty easy to make, but in my attempt to not over work the dough, I think I under mixed it. After the first refrigeration period, I found it way too crumbly and dry to roll out... in fact, I went to double check the recipe to see if I had messed it up somewhere along the way. Turns out I had followed the recipe to a "T" so my only conclusion was that I needed to mix it more thoroughly. So kneaded it together with my hands to more fully incorporate the flour, and then I was able to roll it out without any problems. Thankfully this did not ruin it and I still ended up with a nice, flaky pastry.


My main problem with most turnovers is wanting to overfill them. I really like a lot of fruit filling but then I have trouble sealing up the turnovers! I made some smaller turnovers about the same size as Dorie recommends, but then I made some much larger ones where I was able to get a higher fruit to pastry ratio :) (I only got pictures of the smaller ones with less filling.)

I have to admit that I ate the vast majority of these apple turnovers myself! (I like to use the excuse that I am eating for two.) The pastry was super flaky and buttery... and the apple filling was sweet and delicious. I did add four times the amount of cinnamon recommended, and thought it was just right... so I think it would be a bit bland if you didn't increase the amount of cinnamon. Otherwise this recipe is spot on.


Thanks Julie, for picking this recipe. The turnovers were great and I would definitely make these again. If you would like the recipe, you can find it here. Make sure you check out the TWD Blogroll, to see how everyone else enjoyed this wonderful fall treat.

* Recipes notes:
- I used 1 tsp of cinnamon in my apple filling (instead of just 1/4 tsp).
- These can be frozen after they have been assembled (but have not had had the egg wash applied yet). You can freeze them up to 2 months. Just bake them straight from the freezer without defrosting and add a few minutes to the total baking time.
- For more tips, click here.

Tuesday, July 14, 2009

Brioche Peach Tart (TWD)


This week's Tuesdays with Dorie (TWD) recipe was chosen by Denise of Chez Us: Brioche Plum Tart. I love anything with fruit in it, so I was looking forward to trying this recipe. It's not your traditional "tart" in that the shell is made of brioche.

The brioche was simple to make, though a bit sticky to work with. It was easier to work with after being refrigerated overnight, but it was still a bit sticky (though manageable) when I was molding it into my tart pans. I made two smaller tarts instead of one large one. If you don't have a tart pan, I think a regular pie pan or springform pan would work well (it just won't have the beautiful fluted edges).


There weren't a lot of plums available at my grocery store (and they were expensive), so I decided to go with peaches instead. I made one tart with the peaches sliced and fanned out, and the other one with peach halves placed cut side down. I sprinkled sugar on top, but omitted the nuts from the topping.


The brioche browned much quicker than I anticipated, so the edges of my tart are a bit darker than I would have liked. I had some juices from peaches drip over the sides of the tart, leading to some messy clean up in the oven, so I would recommend placing some foil under your tart to catch the drippings. Otherwise, everything went rather smoothly.


I wasn't quite sure what to expect with this tart. It was actually not very sweet at all. It was more like a slightly sweetened bread with fruit and jam. I thought it was just ok, but my husband liked it a lot. It would be great for breakfast or an afternoon tea, but I wouldn't serve it for dessert since it is not very sweet.


Thanks Denise, for picking this recipe. If you would like the recipe, you can find it here. If you visit the TWD Blogroll, you'll see how much everyone else enjoyed this great afternoon treat!

* Recipes notes:
- Cover your tart with a foil tent early, as this one tends to brown very quickly in the oven!
- If you don't have the same kind of jam as you do fruit for this recipe, don't worry about it. The jam flavor is subtle and any complementary jam would work.
- Don't forget to place some foil under your tarts to catch any juices that bubble over!
- For more tips, click here.