Showing posts with label candy. Show all posts

Sunday, December 23, 2012

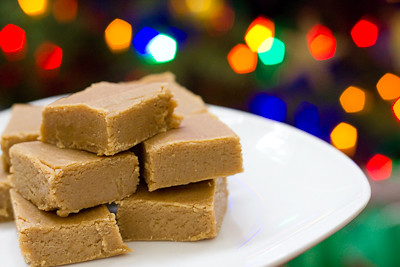
Maple Pumpkin Fudge

I love maple fudge and originally went in search of a maple fudge recipe when I stumbled upon this maple pumpkin fudge.  It's the perfect fall/holiday recipe and seems fairly fool proof - I actually let it get a bit too hot (up to 239 degrees) and it still turned out just fine. 

Just imagine pumpkin pie filling with maple syrup in it, in convenient bite size servings... that is what this fudge tastes like! The maple flavor is certainly there; I'd say it's a good blend of maple of pumpkin... but if you want a predominantly maple fudge with pumpkin undertones, then I would suggest adding maple extract for a stronger maple flavor.

So if you're doing some last minute baking in the days leading up to Christmas, try this unique fudge recipe and let me know what you think.  I'd still like to find a good plain old maple fudge recipe, too, so if you've got one, please leave me a link in the comments section below!
 
Maple Pumpkin Fudge
from Sugar Crafter
    1 1/2 cups granulated sugar
    1 1/2 cups packed light brown sugar
    1 1/2 sticks unsalted butter, cut into small pieces
    2/3 cup evaporated milk
    2/3 cup pureed pumpkin
    1 tsp cinnamon
    1/4 tsp nutmeg
    1/8 tsp cloves
    2 cups white chocolate chips (one 12 ounce bag)
    1/2 lb marshmallows or marshmallow crème
    3 Tbsp maple syrup

Line a 12×8″ baking dish with foil, letting it hang over the edges. In a large sauce pan, whisk together the sugars, butter, evaporated milk, pumpkin, and spices.

Bring to a foil over medium heat, stirring constantly. Continue boiling for 10-12 minutes or until the candy thermometer registers 235 degrees Fahrenheit – soft ball stage (soft ball stage occurs when you drop some of the mixture into a bowl of cold water, and it forms a “soft ball” when it cools and is removed from the water).

Stir in the white chocolate chips first, and then the marshmallows or marshmallow crème and maple syrup.

Stir until melted, and then immediately pour into the prepared pan.

Let cool on a wire rack for 2 hours or until completely cooled. To cut, lift the foil from the ends of the dish. Cut the fudge into 1″ squares. Store in the refrigerator or freezer.

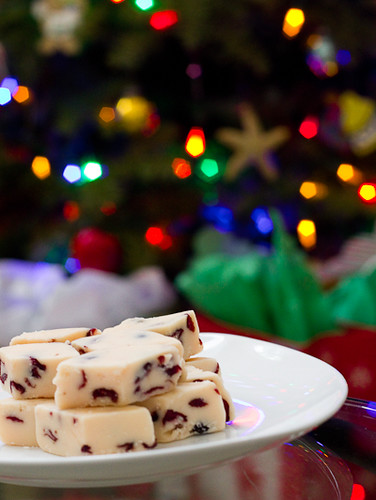
In The Pink White Chocolate Cranberry Fudge

Ok, so I wasn't able to finish posting all of my holiday posts yesterday before the kids started needing my attention.  Today I'll finish off the series with some fudge recipes.  What holiday baking list would be complete without fudge? I love fudge.  Every variety of it - chocolate, peanut butter, chocolate with peanut butter, and maple.  This year I tried two new flavors of fudge: White chocolate cranberry and maple pumpkin (the latter will be my next post).  This white chocolate fudge recipe is nice because it doesn't require the use of a candy thermometer.

I actually made this pink white chocolate cranberry fudge the first time in November for my daughter's birthday party.  I needed both pink and purple desserts and stumbled upon this fudge recipe while browsing the web.  I love white chocolate (even though my husband gets on me for it not being "real" chocolate), so I knew I'd love this fudge.  I omitted the nuts because I never put nuts in my baked goods, but the cranberries were a welcome addition.  The original recipe calls for cherries, but I did not have those on hand.  The dried cranberries work well as a substitute, as they are both tart and sweet.  Everyone who tried this at the party loved it, so if you're looking for something a little bit different this holiday season, I'd encourage you to try this fudge.

In The Pink White Chocolate Cranberry (Almond) Fudge
adapted from Imperial Sugar

2 cups Imperial Sugar® Extra Fine Granulated Sugar
2/3 cup heavy cream
1/2 cup butter
3 cups mini marshmallows
2 cups (one 12 ounce bag) white chocolate chips
1 cup dried cranberries, chopped
3-4 drops red food coloring
1/2 cup chopped slivered almonds, toasted (I omitted these)

Line an 8x8x2-inch baking pan with foil (I used a 9x9 inch pan). Butter foil and set aside.

Combine sugar, cream and butter in a heavy 2-quart saucepan. Cook and stir over low heat until blended. Increase heat to medium. Bring to a boil.  Boil for 5 minutes, stirring constantly.

Remove from heat and stir in marshmallows and white chocolate chips. Stir until chocolate is melted. Stir in cranberries, enough food coloring to turn fudge pink (3-4 drops) and nuts, mixing until well blended.

Spoon into prepared pan. Refrigerate until firm. Cut into squares.  Store tightly covered in refrigerator for up to a month.

Saturday, December 22, 2012

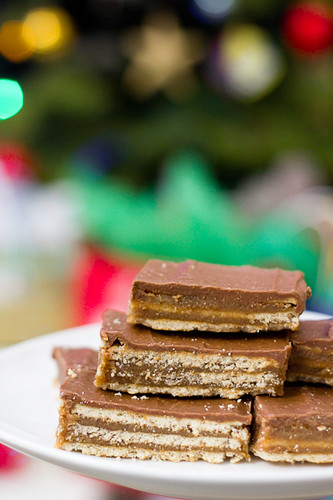
Crunchers

Have you tried these crunchers yet? I've seen variations of this recipe, or similar recipes, made with saltine crackers as well.  I've been seeing them on various blogs and on pinterest for a few years now.  Every time I see them, I've said I want to try them but I've never gotten around to it because I never have butterscotch chips on hand in my pantry.  I love the salty and sweet combination (chocolate covered pretzels are among my favorite!) and when you're baking several different things for the holidays, it's nice to have a few recipes that are simple and quick to prepare.

This recipe is basically club crackers with layers of caramel-type filling in between, topped with a chocolate peanut butter layer.  The best part - they can be made in under 15 minutes.

The best way to describe these "crunchers" would be to compare them to peanut butter Twix.  I actually used multi-grain club crackers because I sent my mom out to get them for me and she didn't know what I'd be using them for so she got the multi-grain variety.  They tasted just fine and I suppose the "multi-grain" aspect might make you feel a little less guilty about eating these ;)

My only issue with them is that they are best when kept refrigerated.  After they are taken out of the refrigerator, the chocolate layer on top starts to get very soft and easily smudged.  So, these wouldn't be the best goodies to ship out if you're looking to mail some holiday goodies.  Don't let that stop you from trying these though because for such minimal effort, these are really good!

Crunchers
from Gonna Want Seconds

    80 - Club Crackers
    1 Cup - Butter
    2 Cups - Graham Cracker Crumbs
    1 Cup - Light Brown Sugar, Firmly Packed
    1/2 Cup - Whole Milk (I used 2%)
    1/3 Cup - Sugar
    2/3 Cup - Creamy Peanut Butter
    1/2 Cup - Semi Sweet Chocolate Chips
    1/2 Cup - Butterscotch Chips

Line a 9x13-inch baking pan with foil, leaving an extension of foil on either end.  Line the foil with 1 layer of club crackers, cutting to fit if necessary.

In a heavy bottom large saucepan, melt butter over medium heat. Add graham cracker crumbs, brown sugar, milk and sugar. Bring to a boil and boil for 5 minutes, stirring constantly. Moderate heat and reduce as needed so mixture doesn't stick to the bottom and mixture doesn't boil too hard (this can cause butter to separate). Remove from heat and spread half of butter mixture evenly over crackers. Place another single layer of crackers evenly over butter mixture, cutting to fit if necessary. Spread remaining butter mixture evenly over crackers. Top evenly with remaining crackers.

In a small saucepan, combine peanut butter, chocolate chips, and butterscotch chips. Melt over medium-low heat, stirring constantly. Spread evenly over top of crackers. Cover, and chill for at least 1 hour. Lift foil overhang and remove bars from pan. Cut into bars. Store in the refrigerator.

Saturday, August 27, 2011

Homemade Chocolate Candies and How to Temper Chocolate (DB)


The August 2011 Daring Bakers’ Challenge was hosted by Lisa of Parsley, Sage, Desserts and Line Drive and Mandy of What the Fruitcake?! These two sugar mavens challenged us to make sinfully delicious candies! This was a special challenge for the Daring Bakers because the good folks at http://www.chocoley.com offered an amazing prize for the winner of the most creative and delicious candy!

This challenge involved learning how to temper chocolate.  For those who are unfamiliar with chocolate tempering, “tempering is a method of heating and cooling chocolate in order to use it for coating or dipping. Proper tempering gives chocolate a smooth and glossy finish. Tempered chocolate will have a crisp snap and won't melt on your fingers as easily as improperly tempered chocolate.  Properly tempered chocolate is also great for molding candies because the candies will release out of the molds more easily and still retain a glossy finish.” - Ghirardelli

If you simply melt chocolate and let it cool it will set with unattractive grey streaks or spots, called blooming. If eaten, the texture will be grainy and it won’t melt smoothly in the mouth. When you temper chocolate the end result is shiny, even colored, smooth melting and with a crisp snap. Basically, tempered chocolate is what you want because it’s better in every way.  Simply put, the process involves heating the chocolate to a certain temperature, then cooling it down to a certain temperature, and then heating it back up to a working temperature that is lower than the initial temperature to which it was initially heated up.

The reason for the difference is a bit complicated, it has to do with different types of crystals forming in the cocoa butter at different times, to understand it fully you’d have to learn about the behavior of the chocolate crystals at a molecular level.  To simplify the explanation, in tempered chocolate the crystals have formed in a uniform way which gives us great looking and tasting chocolate.

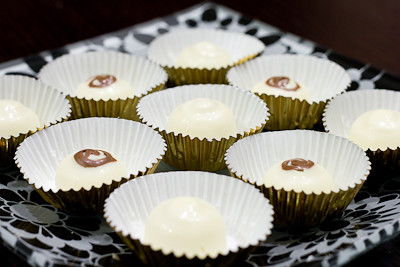
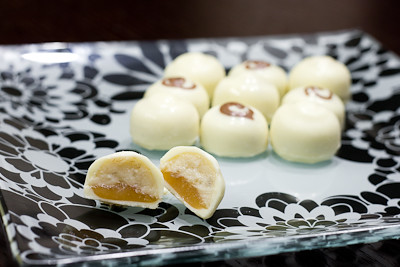
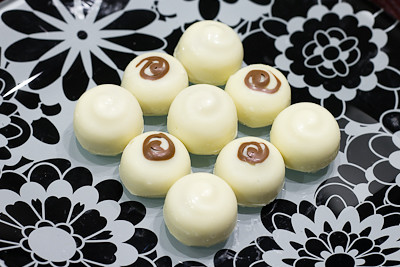
Our challenge was to make two different types of candies, with at least one being chocolate.  For the first candy, I decided to make chocolates that involved the flavors of one of my favorite desserts - Bananas Foster! I caramelized some bananas in brown sugar and rum, then pureed them and mixed them into a swiss meringue buttercream to create a bananas foster buttercream.  I then filled my white chocolate candies with this buttercream, and added in a layer of salted caramel.  These Bananas Foster Chocolates were delicious!

I used the marble slab/granite method for tempering my chocolate and although it is a fairly straightforward process, I have to admit that I had to stop, let my chocolate set, and start over multiple times because my chocolate would quickly get over the working temperature.  One second it would be way under the temperature I was shooting for and then next thing I knew, it was rising so quickly I would over heat the chocolate.  I think this may have had something to do with the fact that I was using a glass bowl for my double boiler, and the glass would retain so much heat that even after I removed the bowl from the heat, the chocolate's temperature would continue to rise dramatically.  If you work quickly, you can dump the chocolate onto the counter before it over heats, but it's hard when you're working with a very hot bowl, a thermometer, and a spatula all at the same time.  So instead of glass, I would probably recommend using a metal bowl.

I don't have a palette knife or bench scraper, but found that using a rigid spatula worked just fine.  It was a little messy, but a suitable substitute if you're not wanting to go out and buy something just for this recipe.  Funny thing was that when I first poured my chocolate onto the counter and started spreading it out and folding it to get it to cool down, I was very careful because the recipe states "keep the motions neat and tidy, if you’re not working with a lot of chocolate you don’t want to spread it too far otherwise you may end up with chocolate that begins to cool too quickly and start to set as well as drops below."

I was also glad to have my digital thermometer, because it's a multi-tasker in the kitchen! I did not realize until we did this challenge, but you cannot use a regular candy thermometer for tempering chocolate because candy thermometers do not go below 100F.  So this digital thermometer is perfect because it goes low enough for making chocolate, high enough for making candy, and of course it can be used for cooking meat as well.  It has a heat safe cord so it can be left in the oven while the meat is cooking, too.  It has been well worth the investment!

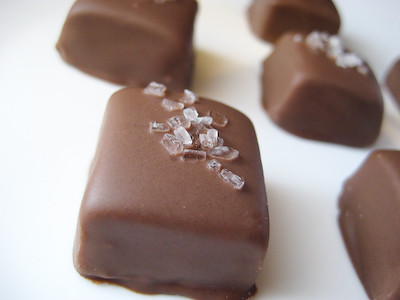
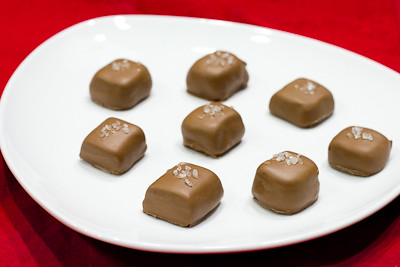
The second candy I decided to make was chocolate covered sea salt caramels. I adore anything with caramel, so it just made sense to go with that choice. I have to admit that while my white chocolate candies turned out pretty well, my chocolate covered caramels didn't turn out quite as well as I had hoped. The chocolates didn't have as much shine to them as they should have, but that was my fault because after redoing the tempering about 5 times, I just gave up and said "close enough" when it was off by 1 degree because I was too tired to redo it again.
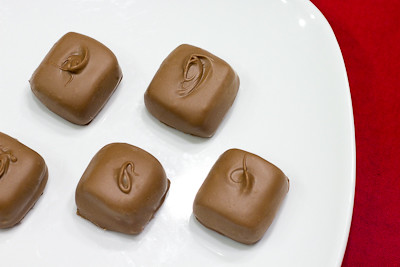

My caramel, while still soft, also came up much firmer that what was depicted in some photos by our hosts. Instead a nice gooey, drizzle-over-the-top-of-your-ice-cream-sundae caramel, I got a firm, chewy caramel.  At first I thought it was because I let the caramel get 2-3 degrees hotter than I was supposed to, but then I made a second batch, keeping close watch on the thermometer, and it still came out fairly firm. This was fine, because then instead of making filled chocolate candies, I simply made chocolate covered caramels by dipping them in the tempered chocolate.  These were delicious, with just the right amount of salt to complement the sweetness of the caramels.
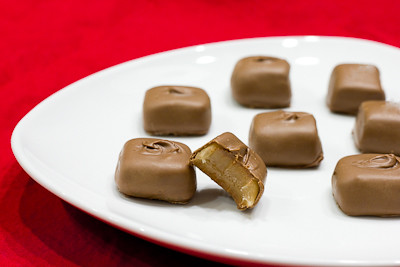

Thanks Lisa and Mandy, for hosting this month's challenge.  I had a great time learning how to temper chocolate and making homemade candies! There's a lot of scrolling to do on this post to get to the recipes due to the lengthy information below on how to temper chocolate, so to jump down to the white chocolate bananas foster candies recipe just click here, and for the chocolate covered sea salt caramels click here. Make sure you check out the Daring Bakers' Blogroll to see how creative everyone else got with their chocolately confections!

* Recipe notes - 
- When tempering chocolate use a metal bowl instead of a glass bowl.  If you want to help keep it at the working temperature during the final stage, then you can transfer it to a glass bowl which will retain the heat better so you don't have to keep re-warming it so much.
- When you are getting close to your goal temperature, really do stick to heating it for 10-15 seconds at a time.  This ensures that you don't over heat the chocolate and have to start over so many times like I did!
- If you have trouble getting your chocolate down to 80.6F, you can cool down your counter/marble slab with an ice pack (or bag of frozen veggies) beforehand, just be sure to wipe it down very thoroughly before pouring your chocolate onto it, because any water droplets left on there will cause the chocolate to seize. 
- I added milk chocolate swirls on top of my white chocolate candies for contrast, but found that it is better to add the milk chocolate swirl on top after unmolding the finished chocolates (as opposed to piping the swirl into the mold and letting it set before adding in the white chocolate).

Tempering Chocolate:

Method 1: On marble or granite

Marble slab, chocolate or bench scraper, dipping forks and chocolate thermometer
Tempering Ranges:
Celcius
Dark: 45°C-50°C/ 27°C / 32°C
Milk: 45°C / 27°C/ 30°C
White: 45°C /  27°C / 29°C
Fahrenheit
Dark: 113°F-122°F / 80.6°F / 89.6°F
Milk: 113°F /  80.6°F / 86°F
White: 113°F / 80.6°F / 84.2°F

Chocolate is melted and heated until it reaches 45°C / 113°F. It is then poured onto a marble surface and moved around the surface with a scraper until it has thickened and cools to 27°C / 80.6°F. Once cooled it is then put back into the bowl and over heat to bring it back up to 32°C/30°C/29°C /// 89.6°F/86°F/84.2°F depending on the chocolate you’re tempering. It is now ready for using in molds, dipping and coating.

Tempering using a marble surface
• Finely chop chocolate if in bar/slab form.
• Place chocolate in a heatproof bowl.
• Place bowl over a saucepan of simmering water (make sure the bowl does not touch the water).
Tip: Make sure that your bowl fits snuggly into the saucepan so that there’s no chance of steam forming droplets that
may fall into your chocolate. If water gets into your chocolate it will seize!
• Using a rubber spatula, gently stir the chocolate so that it melts evenly
• Once it’s melted, keep an eye on the thermometer, as soon as it reaches 45°C / 113°F remove from heat (between 45°C-50°C / 113°F-122°F for dark chocolate)
• Pour ¾ of the melted chocolate onto a marble or granite slab or worktop
• Using a scraper or large palette knife move the chocolate around the surface to help it cool
Tip: Keep the motions neat and tidy, if you’re not working with a lot of chocolate you don’t want to spread it too far otherwise you may end up with chocolate that begins to cool too quickly and start to set as well as drops below
• the necessary temperature. Use a motion that folds the chocolate on itself
• Check temperature regularly with a thermometer
• Once it reaches 27°C / 80°F put the chocolate back into the heatproof bowl with the remaining chocolate
• Gently stir together with a rubber spatula
• Check the temperature to see if it’s risen back up to the working temperature of the chocolate (milk, dark or white) as seen in the above chart
• If the temperature has not risen to its working temperature, put the bowl back over the simmering water, stirring gently
• IMPORTANT: You really need to keep an eye on the temperature as it can rise quicker than you think, so as soon as it’s up to its working temperature, remove from heat
• It’s now tempered and ready to use
Tip: If you’re using the chocolate to dip a lot of truffles etc. which means the chocolate will be sitting off heat for a while it will naturally start to thicken as it cools. To keep it at an ideal viscosity for even coating, put the bowl over steam for 30sec-1min every 5-10mins, just do not let the temperature go over the working temperature!
Tip: Having the chocolate in a warmed glass bowl and wrapped in hot kitchen towel can also help keep the chocolate at its working temperature for longer
Tip: It is also easier to keep the heat if you work with larger amounts of chocolate rather than small amounts. Any leftover chocolate can be kept to be used later and then re-tempered
Tip: Remember, don’t let any water get into your chocolate at any stage of the tempering process!

Method 2: With tempered chocolate pieces, also called “seeding”

Tempering Ranges:
Celcius
Dark: 45°C-50°C/ 27°C / 32°C
Milk: 45°C / 27°C/ 30°C
White: 45°C /  27°C / 29°C
Fahrenheit
Dark: 113°F-122°F / 80.6°F / 89.6°F
Milk: 113°F /  80.6°F / 86°F
White: 113°F / 80.6°F / 84.2°F

Chocolate is melted and heated until it reaches 45°C / 113°F. Tempered un-melted chocolate is then stirred and melted in until it brings the temperature down to 27°C/80.6°F. It is then put back over heat and brought up to its working temperature of 32°C/30°C/29°C /// 89.6°F/86°F/84.2°F depending on the chocolate you’re using. It is now ready for using in molds, dipping and coating.

Tempering using the seeding method with couverture callets
• Finely chop chocolate if in bar/slab form (about the size of almonds).
• Place about ⅔ of the chocolate in a heatproof bowl
• Set aside ⅓ of the chocolate pieces
• Place bowl over a saucepan of simmering water (make sure the bowl does not touch the water)
Tip: Make sure that your bowl fits snuggly into the saucepan so that there’s no chance of steam forming droplets that may fall into your chocolate. If water gets into your chocolate it will seize!
• Using a rubber spatula, gently stir the chocolate so that it melts evenly
• Once it’s melted, keep an eye on the thermometer, as soon as it reaches 45°C / 113°F remove from heat (between 45°C-50°C / 113°F-122°F for dark chocolate)
• Add small amounts of the remaining ⅓ un-melted chocolate (seeds) and stir in to melt
• Continue to add small additions of chocolate until you’ve brought the chocolate down to 27°C/80.6°F (You can bring the dark chocolate down to between 80°F and 82°F)
• Put it back on the double boiler and bring the temperature back up until it reaches its working temperature of the chocolate (milk, dark or white) as seen in the above chart. (32°C/89.6°F for dark, 30°C/86°F for milk and 29°C/84.2°F for white)
• If you still have a few un-melted bits of chocolate, put the bowl back over the simmering water, stirring gently and watching the thermometer constantly.
IMPORTANT: You really need to keep an eye on the temperature so that it doesn’t go over its working temperature
It’s now tempered and ready to use
Tip: Another way of adding the "seed" is by dropping in one large chunk of tempered chocolate (the seed). That way you only need to fish out one piece of unmelted chocolate and don't need to fish out several small bits of unmelted chocolate once the chocolate has reached temper.

Other Tips

• If you’re using the chocolate to dip a lot of truffles etc. which means the chocolate will be sitting off heat for a while it will naturally start to thicken as it cools. To keep it at an ideal viscosity for even coating, put the bowl over steam for 30sec - 1min every 10 - 15mins, just do not let the temperature go over the working temperature!
• Having the chocolate in a warmed glass bowl and wrapped in hot kitchen towel can also help keep the chocolate at its working temperature for longer
• It is also easier to keep the heat if you work with larger amounts of chocolate rather than small amounts. Any leftover chocolate can be kept to be used later and then re-tempered
• Remember, don’t let any water get into your chocolate at any stage of the tempering process!
• Unless you’ve been working with chocolate for a while and have developed a feel for the tempering process and can tell the chocolate’s temperature by touching it to your lower lip like a pro, it’s imperative that you use a thermometer to determine the temperature, as going a few degrees either way can ruin the temper.
• If at any stage you do make a mistake with the tempering process you can simply start again from the beginning.
• While a marble or granite top is ideal for cooling the chocolate in the first method, you can also cool it on a countertop that’s laminated, glass or steel. It will take longer to cool, but it’s possible! (but I definitely wouldn’t recommend a wood or rough textured counter top)
• Any chocolate left over after making your molded or dipped chocolate can be stored away in a cool place and then re-tempered before using again. There’s no need to ever waste good chocolate!
• Wooden spoons can retain moisture so it’s best to use a rubber spatula while tempering

Chocolate Covered Sea Salt Caramels
caramel recipe from CandyBarLab.com

Dark or milk chocolate melted, preferably tempered, about 1 lb / 450g
1 cup (225g / 8oz) Granulated White Sugar
1/2 cup (125ml / 4 fluid oz) Light Corn Syrup
1/2 cup (125ml / 4 fluid oz) Water
4 Tbsp (60g / 2 oz) Unsalted Butter
2 Tbsp (30ml / 1 fluid oz) Heavy Cream
1/4 cup (60ml / 2 fluid oz) Passion Fruit Puree
1/2 Tbsp salt

Place the sugar, corn syrup and water in a medium saucepan.

Set over medium-high heat and stir to combine.

Bring the mixture to a boil and cook until dark amber in color 310°F-315°F / 155°C-158°C, about 5 minutes.

Use a pastry brush, dipped in water, to wash down sides of pan to prevent crystallization as the mixture boils.

Remove saucepan from the heat and gradually whisk in the passion fruit puree, heavy cream and butter.

Transfer to an 8-inch square pan that has been lined with buttered aluminum foil.

Once cooled, removed the aluminum foil from the pan and cut the chocolates with a sharp knife (coated in butter) into 1-inch squares.

Carefully lower each square of marzipan into the chocolate with a dipping fork

Tap the fork on the side of the bowl to remove excess chocolate

Place chocolate on parchment paper

Decorate as you like

Tip: You can use transfers or sprinkle sea salt on top.  You can also wait for the chocolate to be semi set then use your dipping fork to mark the top of the chocolate

Once fully set, cut off any feet with a sharp knife

White Chocolate Bananas Foster Candies
from Good Eats 'n Sweet Treats

2 pounds of high quality white chocolate (do not use white chocolate chips)
1 bananas foster swiss meringue buttercream recipe, see below
1/2 of salted caramel recipe, see below

Coat the molds with chocolate; there are a few ways to do this.  While holding mold over bowl of tempered chocolate, take a nice ladle of the chocolate and pour over the mold, making sure it cover and fills every well. Knock the mold a few times against a flat surface to get rid of air bubbles, then turn the mold upside down over the bowl of chocolate, and knock out the excess chocolate. Turn right side up and drag a bench or plastic scraper across so all the chocolate in between the wells is scraped off cleanly, leaving you with only chocolate filled wells. Put in the fridge to set, about 5 to 10 minutes. Alternatively, you could take a small brush and paint the tempered chocolate into each mold, or spoon it in if you’d like.

Remove from refrigerator and fill each well with some of the bananas foster buttercream, leaving a little room for a layer of caramel.  Squeeze a thin layer of caramel on top of the buttercream (make sure the caramel is cool, or else it will melt the buttercream).

Again take a ladle of chocolate and pour it on top of the filled chocolate wells, knocking against a flat surface to settle it in. Scrape excess chocolate off the mold with the bench scraper then refrigerate until set.

Once fully set, carefully knock the chocolates out of the mold.

Bananas Foster Swiss Meringue Buttercream
from Good Eats 'n Sweet Treats, adapted from Baking: From My Home to Yours

1/4 cup granulated sugar
1 large egg white
6 tbsp unsalted butter, at room temperature
1 bananas foster recipe, see below
1 tsp rum

Put the sugar and egg white in a mixer bowl or another large heatproof bowl, fit the bowl over a plan of simmering water and whisk constantly, keeping the mixture over the heat, until it feels hot to the touch, about 3 minutes.

The sugar should be dissolved, and the mixture will look like shiny marshmallow cream. Remove the bowl from the heat.

Working with the whisk attachment or with a hand mixer, beat the meringue on medium speed until it is cool, about 5 minutes.

Switch to the paddle attachment if you have one, and add the butter one tablespoon at a time, beating until smooth.

Once all the butter is in, beat in the buttercream on medium-high speed until it is thick and very smooth, 6-10 minutes (during this time the buttercream may curdle or separate – just keep beating and it will come together again).

On medium speed, gradually beat in the bananas foster, waiting until each addition is absorbed before adding more, and then add in the rum.

You should have a shiny smooth, velvety buttercream. Press a piece of plastic against the surface of the buttercream and set aside briefly.

Bananas Foster Recipe (for the buttercream filling)
1 tbsp tightly packed brown sugar
1/2 tbsp rum
1/2 banana, sliced

Add the brown sugar and rum to a small saucepan over medium heat until the brown sugar melts.  Add the banana slices and cook for a few minutes on each side, until the bananas are soft and cooked through.  Remove from heat and mash well with a fork, or puree in a food processor.  Allow to cool completely before adding to the buttercream recipe.

Salted Caramel
from CandyBarLab.com

1 cup (225g / 8oz) Granulated White Sugar
1/2 cup (125ml / 4 fluid oz) Light Corn Syrup
1/2 cup (125ml / 4 fluid oz) Water
4 Tbsp (60g / 2 oz) Unsalted Butter
2 Tbsp (30ml / 1 fluid oz) Heavy Cream
1/2 Tbsp salt
Place the sugar, corn syrup and water in a medium saucepan.

Set over medium-high heat and stir to combine.

Bring the mixture to a boil and cook until dark amber in color 310°F-315°F / 155°C-158°C, about 5 minutes.

Use a pastry brush, dipped in water, to wash down sides of pan to prevent crystallization as the mixture boils.

Remove saucepan from the heat and gradually whisk in the heavy cream, butter, and sea salt.

Transfer to a medium bowl and let cool.

Transfer cooled caramel to a pastry bag fitted with a medium plain tip or a squeeze bottle.

Tuesday, December 7, 2010

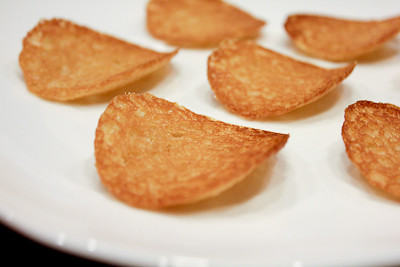
Translucent Maple Tuiles (TWD)

This week's Tuesdays with Dorie (TWD) recipe was chosen by Hindy of Bubie’s Little Baker: Translucent Maple Tuiles. I was honestly a bit intimidated about these because they look so beautiful and delicate and in the book. When I read the recipe and realized how quick and easy they are, I decided to give them a try.

The dough is simply butter, brown sugar, and maple syrup with just a little bit of flour. It can be made in a matter of minutes but requires a bit of refrigeration so you'll need to plan ahead when making these. Luckily, the dough will also keep in the refrigerator for up to a week, so you can make it ahead of time.


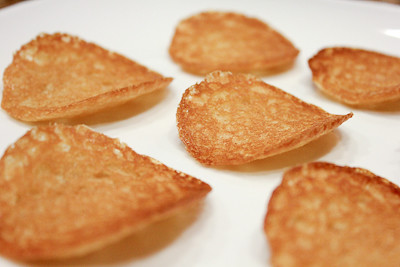
My tuiles did not turn out at all! They look more like pringles than translucent tuiles! I think my idea of a small cherry is a little different from Dorie's so my dough balls were a bit too big. So I ended up with cookies that did not spread as much as they should have but luckily only the appearance was affected because the taste was amazing! These tuiles are like part cookie, part candy.

Thanks Hindy, for hosting this week.  I will definitely be making this again - next time I will be sure to roll out smaller balls of dough so they'll actually get their characteristic honeycomb appearance. If you would like the recipe, you can find it here.

Make sure you check out the TWD Blogroll, to see how these are really supposed to look :)

* Recipe notes:
- Keep a close eye on these to make sure you don't burn them! Mine were done after a short 4-5 minutes in the oven!
- Make sure you make your balls of dough really small, as they spread quite a bit in the oven and a little bit goes a long way.
- For more recipe tips, click here

Thursday, July 15, 2010

Brrrrr-ownies (TWD)


This week's Tuesdays with Dorie (TWD) recipe was chosen by Karen of Welcome to our Crazy Blessed Life: Brrrrr-ownies. Classic chocolate brownies studded with bits of York Peppermint Patties! I love the combination of chocolate and mint together, so the idea of these brownies sounded terrific.

I was traveling this week, so my post is a few days late. I also had to adapt the recipe a bit, based on what I had on hand because I haven't had a chance to go grocery shopping yet since coming home yesterday.

So, my brrrr-ownies were made with 4.5 ounces of peppermint patties (I had some on hand, but had already eaten over half the bag - ha!) and dark chocolate instead of bittersweet chocolate.  Ideally, I would have used semisweet chocolate chips (convenient, no chopping!), but my husband ate all the chocolate chips while I was gone!

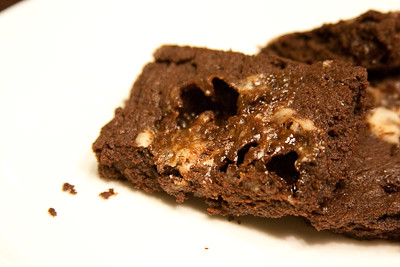
I had read some comments about the brownies sticking to the foil, so I made sure to butter my foil generously, and had no such issues. I had also read that the bits of peppermint patties kind of melted away into the brownies for others, so I chopped each patty into six pieces, thinking the larger chunks wouldn't melt away. Well, they didn't quite melt away, but they did form these nice little craters in the majority of my brownies!


This seemed to be mostly a cosmetic flaw, as they were pretty tasty. Kind of like thin mints meets brownies. Thanks Karen, for hosting this week. If you would like the recipe, you can find it here. Make sure you check out the TWD Blogroll, to see how everyone else enjoyed this minty, chocolate treat!

Also, congratulations to the Mini Moment Giveaway winners! Mary, Court, Lindsay, Brooke, Shelly, Mrs. Z, Natalie, Sandra, Beth, and Tiffany... please email me at goodeatsblog [at] gmail [dot] com with your address so I can get your coupons sent to you!

* Recipes notes:
- I baked my brownies in a 9-inch square pan and decreased the baking time to 25 minutes. 
- I used dark chocolate instead of bittersweet chocolate, but next time I will probably use semisweet chocolate instead - just not a dark or bittersweet chocolate kind of girl.
- For tips from other TWD bakers, click here.

Monday, May 3, 2010

Peanut Butter Truffles (SMS)


This week's Sweet Melissa Sundays (SMS) recipe was chosen by Mara of Love Your Mother: Peanut Butter Truffles. I'm a day late with this one but could not pass up chocolatey peanut butter candies!

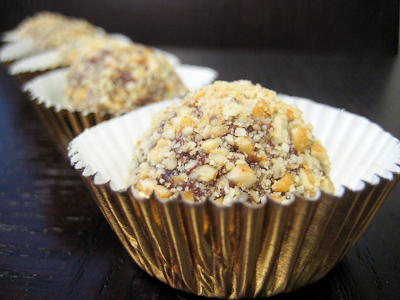
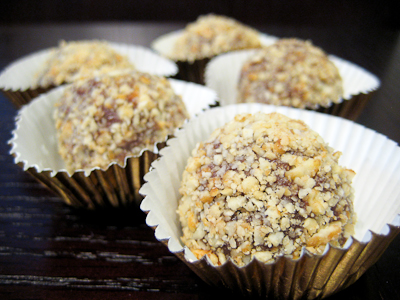
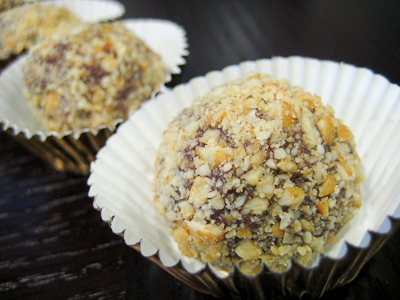
The recipe is straight forward and easy. Just heat up some cream and peanut butter, pour it over some chopped chocolate to melt the chocolate, then add some butter. Refrigerate until firm, then form into balls and roll in peanuts. That's it.


I found the chocolate to be very soft and hard to work with, even after chilling in the refrigerator for 6 hours. The best way to make these would probably be to roll them into balls and then freeze them. You can then take the frozen truffle balls and dip them in chocolate. Several SMS bakers did this with great success. I made a few truffles as directed in the recipe, and have the rest in the freezer right now so I can dip them in chocolate... but, since I'm already a day late posting, I thought I'd get this post up with at least what I've made so far.


Based on recommendations from other SMS bakers, I went ahead and doubled the amount of peanut butter in these truffles and I think they turned out great. You can certainly taste the peanut butter in them and the chocolate is so smooth and creamy. If you would like the recipe, you can find it here. Make sure you check out the Sweet Melissa Sundays Blog Roll to see how everyone else enjoyed these peanut buttery treats.

* Recipe notes:
- I used semisweet chocolate chips instead of bittersweet chocolate.
- I also doubled the peanut butter and used a half cup.
- For more tips, click here.

Sunday, January 10, 2010

All-American Baby Ruth Pie (SMS)


This week's Sweet Melissa Sundays (SMS) recipe was chosen by Donna of L’Amour de Tarte: Chocolate Pie Crust. We were given the opportunity to fill the pie crust with the filling of our choice, using a recipe outside of the cookbook. I've seen chocolate cookie crusts before, but never a chocolate pie crust, so I was curious to try this one. The recipe looked like most pie crust recipes, with the addition of some cocoa powder.
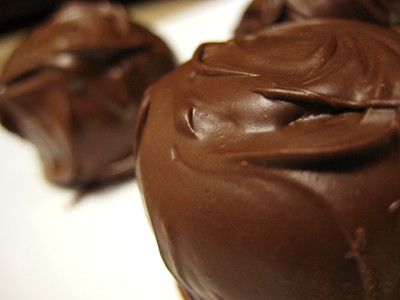

Although it's winter, I decided to try an ice cream "pie" recipe that I have had tucked away for quite some time. It was from a Nestle calendar I got in the mail, but you can also find it on verybestbaking.com. I simply used the chocolate pie crust from the Sweet Melissa Baking Book instead of the chocolate cookie crust. I also made my own chocolate ice cream, the recipe for which I'll post later.

How did it turn out? Sadly, the chocolate pie crust was a bit of a disappointment. I am not sure if it was just the shortening I used, but the crust had a very strong after taste of shortening that was unpleasant to say the least. The ice cream pie was great, but next time I need to make sure that I chop my Baby Ruth bars into even smaller pieces (or serve it after just one hour in the freezer) because the candy bits got a bit hard and difficult to eat.


If you would like to try the chocolate pie crust recipe, you can find it here. The Baby Ruth Pie recipe is below (I'd recommend sticking with the cookie crust), and I'll be posting the chocolate ice cream recipe soon.
All-American Baby Ruth Pie
from VeryBestBaking.com

18 (about 1 1/2 cups) crushed creme-filled chocolate cookies (Oreos)
3 tablespoons butter or margarine, melted
2 pints chocolate ice cream, softened
3 (2.1 ounces each) NESTLÉ BABY RUTH Candy Bars, finely chopped; or 9 fun size bars (I used 8 fun size bars)
1 cup miniature marshmallows
NESTLÉ NESQUIK Chocolate Flavor Syrup

Combine crushed cookies and butter in small bowl. Press onto bottom of 9-inch pie plate; freeze for 5 minutes.

Combine ice cream, chopped Baby Ruth and marshmallows in large bowl; spoon into prepared crust. Freeze for about 1 hour or until firm. Drizzle with Nesquik before serving.

Saturday, December 19, 2009

Sugared Cranberries


Here's a great holiday recipe I found last year. It's so quick and easy! (If I had time to do this for Thanksgiving less than two weeks after having my baby, then surely you have time to make these too.)

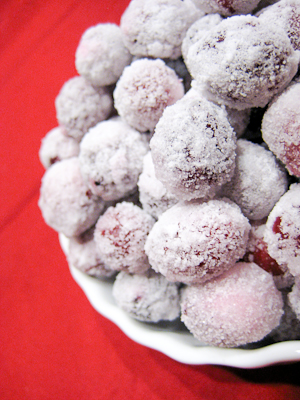
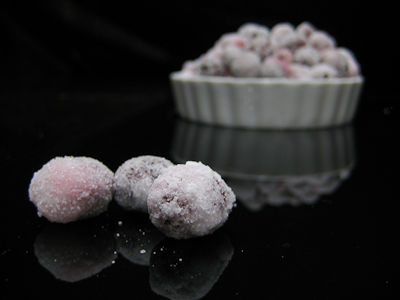
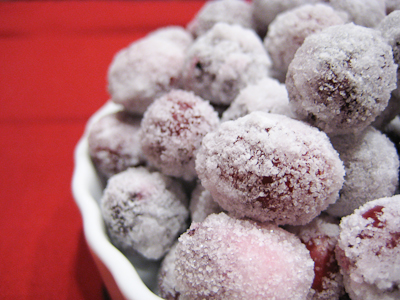
All you have to do is make a simple syrup with equal parts sugar and water. Then steep the cranberries in the syrup overnight. The next day, drain them and roll them in some superfine sugar to coat. That's it!


I really like that the sugared cranberries aren't overly sweet. They're slightly tart since you're using fresh cranberries, and then the sugar balances out the tartness with just a little bit of sweet. If you don't have superfine sugar, just toss some regular granulated sugar in your food processor and give it a whirl.


These would be great for your holiday table next week, so give them a try!

Sugared Cranberries
from Cooking Light

2 cups granulated sugar
2 cups water
2 cups fresh cranberries
3/4 cup superfine sugar


Combine granulated sugar and water in a small saucepan over low heat, stirring mixture until sugar dissolves. Bring to a simmer; remove from heat. (Do not boil or the cranberries may pop when added.) Stir in cranberries; pour mixture into a bowl. Cover and refrigerate 8 hours or overnight.

Drain cranberries in a colander over a bowl, reserving steeping liquid, if desired. Place superfine sugar in a shallow dish. Add the cranberries, rolling to coat with sugar. Spread sugared cranberries in a single layer on a baking sheet; let stand at room temperature 1 hour or until dry.

Note: The steeping liquid clings to the berries and helps the sugar adhere. Store in an airtight container in a cool place for up to a week.

Yield: 9 servings (serving size: about 1/3 cup)

Saturday, December 20, 2008

Fleur de Sel Vanilla Bean Caramels


Last month's Daring Bakers Challenge was Caramel Cake, with the additional (and optional) challenge of Golden Vanilla Bean Caramels. I was more excited about the caramels than the cake, to be honest, and was really upset that I did not get a chance to complete them in time for posting day.


I had trouble getting my hands on some golden syrup, a key ingredient in the caramels. What's the difference between golden syrup and corn syrup? Golden syrup is made during the process of refining sugar cane juice into sugar, whereas corn syrup is made from corn starch. There are several "recipes" out there where you can use corn syrup to come up with a substitute for golden syrup, but I really wanted to try the recipe as written. After multiple trips to World Market only to find that they were out of stock, I finally found some golden syrup during a trip to Super Walmart.


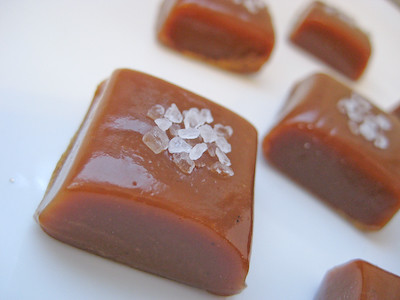
So, I finally got to try my hand at making caramels for the first time. I was so nervous that these would not turn out, as I had read reports from others that they followed the instructions to a "T" and ended up with a block of toffee instead of soft and chewy caramel. I am not sure what happened in those cases, because I pretty much followed the recipe verbatim and ended up with the most wonderful Fleur de Sel Vanilla Bean Caramels! The salty, crunchy sea salt is a great contrast (and complement) to the sweet vanilla bean caramels.


The only change I would probably make next time is to only cook the sugar mixture up to 260F, instead of 265F. I had intended to do that in the first place, but while I was turning around to re-read the recipe to see what temperature they needed to get to, the temperature jumped from 255F to 265F and there was no turning back! Next time, I'll be more careful to keep a closer eye on it. It really takes a long time for it to heat up to 245F... so much so that I was worried it never would. That's partly why I was caught by surprise when it jumped up to 265F so quickly.


My only complaint with this recipe is that the instructions to heat the sugar mixture until it "boils energetically but not violently" is very vague. I think I'd need a video demonstration before I could really tell you what the difference is between "energetic" and "violent." In any case, I had my burner on medium heat the entire time, and that seemed to work out just fine.

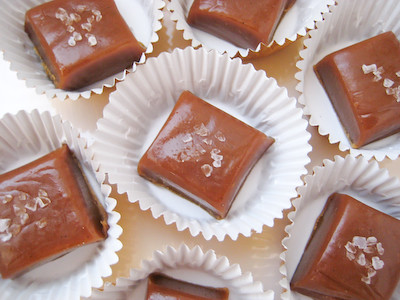
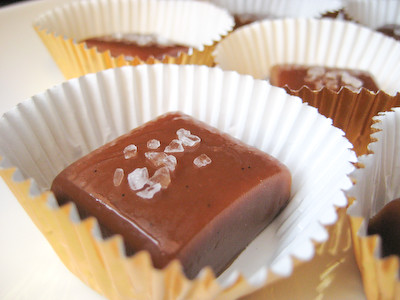
These were another great addition to my gift packages of homemade holiday goodies. I packaged them up in three different ways. I left some of them as is, in gold Wilton candy cups (also called party cups - I also got these at Walmart).

Look at those vanilla bean specks! :)

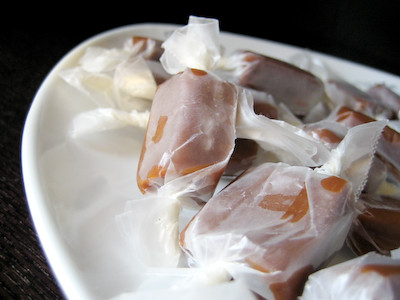
I wrapped several others in wax paper...


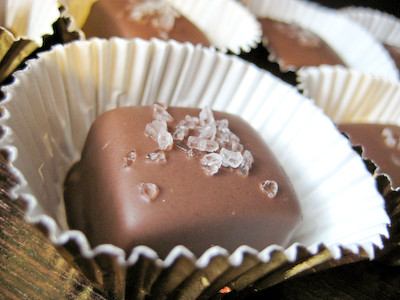
Then I dipped the remaining caramels in melted almond bark. Almond bark is an artificial chocolate that works really well as a chocolate coating. It is made with vegetable fats instead of cocoa butter so it melts easily and hardens nicely at room temperature. If you prefer not to use almond bark, you can also use semisweet chocolate chips, or the premium chocolate of your choice. Simply use the ratio of 1 cup of chocolate chips or 8 ounces of finely chopped chocolate with 1 teaspoon of vegetable shortening (i.e. Crisco) and melt in the microwave or on a double boiler.


I love caramels. I am so excited that I now know how to make them at home myself! If you are worried about working with sugar, please get over your fears and give this recipe a try. These are so good! If you have never tried making candy because you lack a candy thermometer, please go out and buy this digital thermometer. Unlike most candy thermometers, this digital thermometer has many uses. I was able to purchase it for $15 (using a $5 off coupon) and I use it all the time. It is wonderful - it allows you to read the temperature of the meat you are cooking even with the oven door closed... it also has an alarm that sounds when the preset temperature is reached. Even better, it is safe up to 400F, making it the perfect candy thermometer. So what are you waiting for now? Give these a try!

GOLDEN VANILLA BEAN CARAMELS
from Pure Dessert by Alice Medrich

Ingredients
1 cup golden syrup (I used Steen's Syrup which I found at Walmart; you can also get Lyle's Golden Syrup from World Market)
2 cups sugar
3/8 teaspoon fine sea salt
2 cups heavy cream
1 1/2 teaspoons pure ground vanilla beans, purchased or ground in a coffee or spice grinders, or 1 tablespoon plus 1 teaspoon pure vanilla extract (I used vanilla beans from 1 pod + 1 tsp vanilla extract)
3 tablespoons unsalted butter, cut into chunks, softened

Equipment
A 9-inch square baking pan
Candy thermometer (I used my digital thermometer)

Line the bottom and sides of the baking pan with aluminum foil and grease the foil. Combine the golden syrup, sugar, and salt in a heavy 3-quart saucepan and cook over medium heat, stirring with a silicone spatula or wooden spoon, until the mixture begins to simmer around the edges. Wash the sugar and syrup from the sides of the pan with a pastry brush dipped in water. (Don't skip this step - it helps prevent recrystallization of your sugars.) Cover and cook for about 3 minutes. (Meanwhile, rinse the spatula or spoon before using it again later.) Uncover the pan and wash down the sides once more. Attach the candy thermometer to the pan, without letting it touch the bottom of the pan, and cook, uncovered (without stirring) until the mixture reaches 305°F. Meanwhile, combine the cream and ground vanilla beans (not the extract) in a small saucepan and heat until tiny bubbles form around the edges of the pan. Turn off the heat and cover the pan to keep the cream hot.

When the sugar mixture reaches 305°F, turn off the heat and stir in the butter chunks. Gradually stir in the hot cream; it will bubble up and steam dramatically, so be careful. Turn the burner back on and adjust it so that the mixture boils energetically but not violently (I did this at medium heat). Stir until any thickened syrup at the bottom of the pan is dissolved and the mixture is smooth. Continue to cook, stirring occasionally, to about 245°F. Then cook, stirring constantly, to 260°f for soft, chewy caramels or 265°F; for firmer chewy caramels.

Remove the pan from the heat and stir in the vanilla extract, if using it. Pour the caramel into the lined pan. Let set for 4 to 5 hours, or overnight until firm.

Lift the pan liner from the pan and invert the sheet of caramel onto a sheet of parchment paper. Peel off the liner. Cut the caramels with an oiled knife. Wrap each caramel individually in wax paper or cellophane. (I cut out pieces of wax paper that were about 3" x 4". From a standard roll, simply cut out a strip about 3" wide, then fold in thirds and cut the strip into thirds.)


Variations

Fleur de Sel Caramels:
Extra salt, in the form of fleur de sel or another coarse flaked salt, brings out the flavor of the caramel and offers a little ying to the yang. Add an extra scant 1/4 teaspoon of coarse sea salt to the recipe. Or, to keep the salt crunchy, let the caramel cool and firm. Then sprinkle with two pinches of flaky salt and press it in. Invert, remove the pan liner, sprinkle with more salt. Then cut and wrap the caramels in wax paper or cellophane.

Nutmeg and Vanilla Bean Caramels:
Add 1/2 teaspoon freshly grated nutmeg to the cream before you heat it.

Cardamom Caramels:
Omit the vanilla. Add 1/2 teaspoon slightly crushed cardamom seeds (from about 15 cardamom pods) to the cream before heating it. Strain the cream when you add it to the caramel; discard the seeds.

Caramel Sauce:
Stop cooking any caramel recipe or variation when it reaches 225°F or, for a sauce that thickens like hot fudge over ice cream, 228°F. Pour it into a sauceboat to serve or into a heatproof jar for storage. The sauce can be stored in the refrigerator for ages and reheated gently in the microwave or a saucepan just until hot and flowing before use. You can stir in rum or brandy to taste. If the sauce is too thick or stiff to serve over ice cream, it can always be thinned with a little water or cream. Or, if you like a sauce that thickens more over ice cream, simmer it for a few minutes longer.

Yield: eighty-one 1-inch caramels

Sunday, March 16, 2008

All Liquored Up


One of my favorite Italian desserts is tiramisù. It is a "cake" consisting of ladyfingers soaked in an espresso/coffee liqueur/rum syrup, layered with mascarpone cheese (Italian cream cheese).

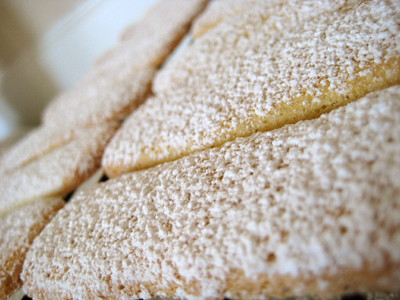
Ladyfingers, known in Italy as "savoiardi," are sweet, delicate, light and airy sponge cakes. They are named so because they are shaped like large, fat fingers. If you buy your ladyfingers from the store, this then becomes a completely no bake dessert that is incredibly easy to assemble.


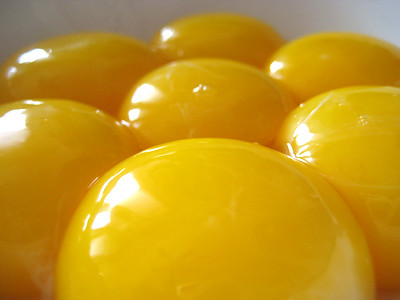
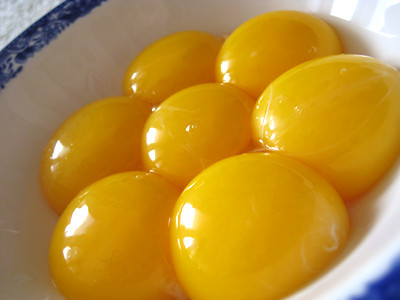
Although I wasn't sure what the end result would be, I was inspired by the Pastry Queen to make my own ladyfingers from scratch. Imagine how pleased I was, then, when I tasted one after pulling them from the oven and found that it tasted remarkably similar to the ladyfingers I had eaten as a child. As I was separating the eggs for this recipe, the egg yolks caught my attention. Look at how beautiful the yolks look:


They look like a bright yellow flower :)


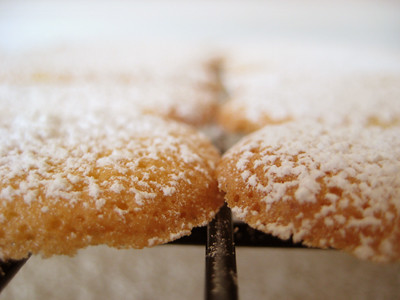
My only complaint about the ladyfingers is that I was able to taste the texture of the powdered sugar that was on the them within the tiramisù, and it distracted from its flavors. I've since read online that sometimes powdered sugar is sprinkled on top of the ladyfingers before baking to give them a soft crust. I might try that next time, or just omit the powdered sugar altogether.

This particular tiramisù was rather cheesy. It contains 1-1/2 pounds of cream cheese and then another pound of mascarpone. My coworkers likened it to a "tiramisù cheesecake." They said it was delicious, but thought that it had a stronger cheese flavor than traditional tiramisù. I agree and did not mind the cream cheese flavor. This is something that I would definitely make again. If you're a cheesecake lover, you will enjoy this. However, next time I make tiramisù, I plan to try Michelle's recipe to see if a more subtle cream cheese flavor would be better.


I love that this can be made ahead of time. It will keep covered, in the refrigerator, for at least 2 weeks. The flavors actually become better with time as they get the chance to "cure."

If you're looking for something fun to do with this, you can use it to make little bite-sized truffles. I've included instructions on how to make those at the bottom.


This is my contribution to Emiline's St. Paddy's Day Pub Crawl Event. If you'd like to participate, the deadline is March 17th, so hurry! (I know, I'm a procrastinator and waited until the last minute.) Make sure you head on over to Sugar Plum on March 20th for the Pub Crawl/roundup!


Tiramisù with Homemade Ladyfingers
from The Pastry Queen, by Rebecca Rather

Ladyfingers 1/2 cup powdered sugar for dusting the ladyfingers, plus extra for dusting the baking sheets (I only used 1/4 cup and will probably omit this next time, or try dusting them lightly before baking)
7 large eggs, separated
3/4 cup plus 4 tbsp granulated sugar
2 tsp vanilla extract
1 cup all purpose flour

Soaking Syrup 1/2 cup water
1-1/2 cups sugar
2 tsp instant espresso powder
1/4 cup coffee liqueur, such as Kahlua
1/8 to 1/4 cup dark rum, such as Myers's (I used somewhere in between 1/8 and 1/4 cup and the flavor was perfect)
1 tbsp vanilla extract

Filling 3 (8 ounce) packages cream cheese, at room temperature (I used 1/3 less fat Neufchatel cheese)
2 cups sugar
1 (16 ounce) tub mascarpone cheese, at room temperature
1 tbsp boiling water
2 tbsp instant espresso powder
Dark cocoa powder or grated bittersweet chocolate, for dusting (I used cocoa powder)

To Make the Ladyfingers:
Preheat the oven to 375F. Line two 12 by 17-inch baking sheets with parchment paper. Use a fine-mesh sieve to dust the paper with a light coating of powdered sugar. Using a mixer fitted with a paddle attachment, beat the egg yolks, the 3/4 cup granulated sugar, and the vanilla in a large bowl on high speed about 5 minutes, until the yolks become thick and pale yellow. In a separate clean, large bowl, use a mixer fitted with a whisk attachment to beat the egg whites on high speed until stiff peaks form. Add the 4 tablespoons granulated sugar, 1 tablespoon at a time, beating after each addition. Fold the egg white mixture gently into the egg yolk mixture. Use a sieve to sift the flour over the batter. Gently fold in the flour just until incorporated.

Spoon the batter into a pastry bag fitted with a large round tip. Pipe the batter onto the prepared baking sheets, making each ladyfinger about 4 inches long and 2 inches wide. (This takes a little practice. Don't worry if your first attempts are a little wobbly.) You'll be able to fit about 5 ladyfingers across and 4 down on each sheet. Bake about 10 minutes, until lightly browned. Sift the 1/2 cup powdered sugar over the ladyfingers just as they come out of the oven. Cool for 5 minutes and use a spatula to transfer them from the baking sheet to cooling racks.


To Make the Soaking Syrup:
Simmer the water and sugar in a heavy saucepan set over medium heat about 10 minutes, until slightly thickened. Remove the mixture from the heat and stir in the espresso powder, liqueur, rum, and vanilla. Set aside to cool.

To Make the Filling:
Using a mixer fitted with a paddle attachment, combine the cream cheese and sugar in a large bowl on high speed. Add the mascarpone and beat on medium speed just until incorporated. Combine the boiling water and espresso powder in a small bowl. Stir 1/4 cup of the cooled soaking syrup and 1 tablespoon of the espresso liquid into the filling. Spoon half of the cream cheese mixture into a medium bowl. Stir the remaining 1 tablespoon of espresso liquid into the second bowl of cream cheese mixture. You will have 1 bowl of light brown cream cheese filling and 1 bowl of dark brown cream cheese filling.

Coat a 9 by 13-inch baking pan with cooking spray. Dip both sides of 1 ladyfinger in the cooled soaking syrup and place in the bottom of the pan. Repeat with more ladyfingers and syrup to line the whole pan. Spoon the light-colored cream cheese mixture evenly over the ladyfingers and smooth gently with a spatula. Cover with a second layer of dipped ladyfingers. Spoon on the dark-colored cream cheese mixture and smooth the top as before. (Leftover ladyfingers can be wrapped and frozen up to 1 month). Use a fine-mesh sieve to dust the top with a light coating of dark cocoa, or sprinkle grated bittersweet chocolate evenly on top.

Cover the tiramisù and refrigerate for at least 2 hours or overnight. Serve cold from the refrigerator. Cut in squares and serve with a spatula.

Tip: The Microplane grater is the perfect tool for creating an even dusting of bittersweet chocolate over the tiramisù. Move the tool slowly over the dessert while you grate.

Yield: 16 to 20 Servings.


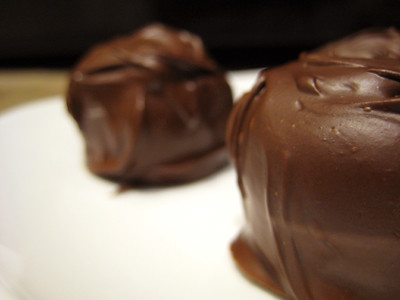
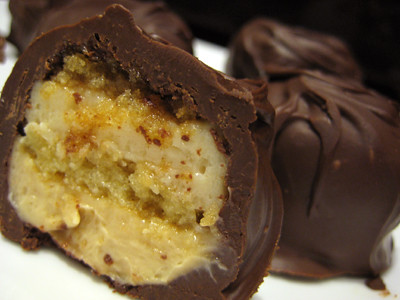
Tiramisù Truffles
from Good Eats 'n Sweet Treats


Using the tiramisù made from above, take a cookie scoop to make little round balls. Place them on a baking sheet and put them in the freezer at least 2 hours, or overnight.

After they are frozen, remove them from the freezer and dip them in some melted chocolate (you can use this method if you'd like). Place them onto a baking sheet lined with wax paper.


Keep the truffles in the freezer until you are ready to serve them. Thaw for just a few minutes before serving. Enjoy!

Friday, December 14, 2007

Oreo Truffles


I heard about these oreo truffles last year, and knew I wanted to make them the moment I saw the recipe. Unfortunately, I never got around to it. Now that it is the holiday season, everyone is talking about them again on the What's Cooking? board. I had already decided to make the cookie dough truffles for my holiday gift packages, but figured no one would mind if I included a second type of truffle as well :)


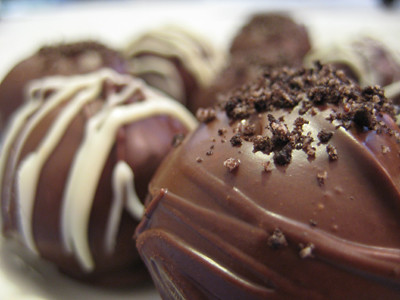
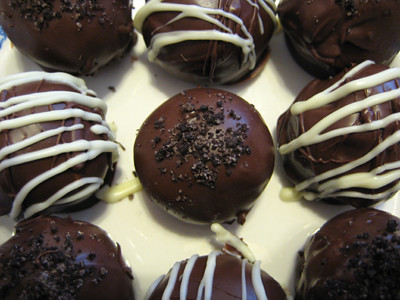
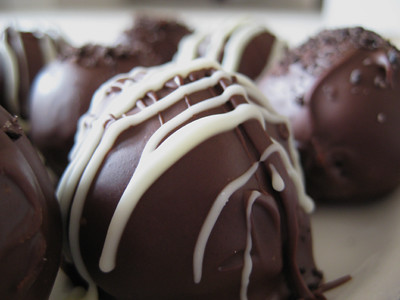
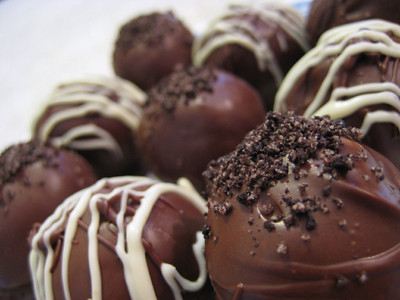
This is another one of those super simple recipes that is sure to impress. As with the cookie dough truffles, I found the best way to dip these was to use a fork. Place the prepared ball on a fork and immerse it in the chocolate; tap the fork against the edges of the bowl lightly to remove the excess chocolate. Invert the truffle onto a baking sheet - more likely than not, the top of the truffle will be slightly exposed since it was the side that was stuck to the fork. Drizzle some melted chocolate over the top and smooth it over. I topped half of my truffles with the oreo cookie crumbs and the other half I drizzled with white chocolate (approx. 1/2 cup white chocolate chips with 1/2 tsp shortening).


Easy Oreo Truffles
from Kraft Foods


1 pkg. (1 lb. 2 oz.) Oreo Chocolate Sandwich Cookies, finely crushed, divided
1 pkg. (8 oz.) Cream Cheese, softened
2 pkg. (8 squares each) Baker's Semi-Sweet Baking Chocolate, melted

Mix 3 cups of the cookie crumbs and the cream cheese until well blended (You don't need to measure out the 3 cups... just reserve about 1 tablespoon of cookie crumbs for the topping. When I only used 3 cups for the truffles, I ended up with leftover crumb topping). Shape into 42 (1-inch) balls. (I used my cookie scoop to measure, then rolled them into balls)

Dip balls in melted chocolate (I placed mine in the freezer for 15 minutes before dipping); place on waxed paper-covered baking sheet. (Any leftover melted chocolate can be stored in tightly covered container at room temperature and saved for another use.) Sprinkle with remaining cookie crumbs (other ideas include a drizzle of white chocolate or chopped Andes mints).

Refrigerate 1 hour or until firm. Store any leftover truffles in tightly covered container in refrigerator.

Yield: 42 Truffles.