Showing posts with label bacon. Show all posts

Tuesday, April 3, 2012

Pizza Rustica (TWD)


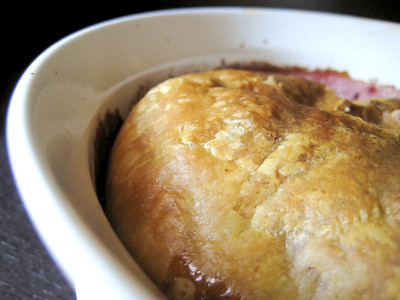
This week's Tuesdays with Dorie: Baking with Julia was hosted by Emily of Capital Region Dining and Raelynn of The Place They Call Home: Pizza Rustica.  I'm not sure where this got its name.  Rustic it is, pizza it's not.  It's more like a quiche, but heavy on the cheese and light on the eggs.  The base of the filling is ricotta cheese.  Then you mix in some mozarella and romano cheeses, some parsley, and some prosciutto.

I didn't have any fresh parsley on hand, so I subbed in 2 teaspoons of dried parsley.  Also used cooked bacon instead of proscuitto, and asiago cheese instead of romano cheese.  Sometimes a quiche tastes to "eggy" for me, so this "pizza" was more appealing to me.

There were some mixed opinions among the group about the pie crust, which was very sweet.  I decreased the amount of sugar in it, just a bit, based on comments that it was too sweet.  In the end, I'm not sure if I liked this savory and sweet combination.  I think cutting the sugar in half with this recipe would be absolutely fine.

I thought this was a pretty good dish; my husband not so much.  He would not eat more than one bite :( He usually isn't very picky, either.  So, this is unfortunately probably the first and last time I'll make this one.... in its entirety at least.  I'll probably make the pie crust recipe again, as this is the first one I've ever made that I didn't have huge problems with and it was delicious :)

Thanks to Emily and Raelynn for hosting; you can find the recipe on their blogs here and here.  Make sure you check here, too, to see what everyone else thought of this non-traditional pizza.

Wednesday, March 28, 2012

Dutch Crunch Bread (DB)


Sara and Erica of Baking JDs were our March 2012 Daring Bakers' hostesses! Sara & Erica challenged us to make Dutch Crunch bread, a delicious sandwich bread with a unique, crunchy topping. Sara and Erica also challenged us to create a one of a kind sandwich with our bread!

Technically, Dutch Crunch doesn’t refer to the type of bread, but rather the topping that is spread over the bread before baking. In Dutch it’s called Tijgerbrood or “tiger bread” after the tiger-like shell on the bread when it comes out of the oven. The final product has a delightful sweet crunch to it that makes it perfect for a sandwich roll. It’s a common option at sandwich shops all over the Bay Area and is often one of the first breads to run out.
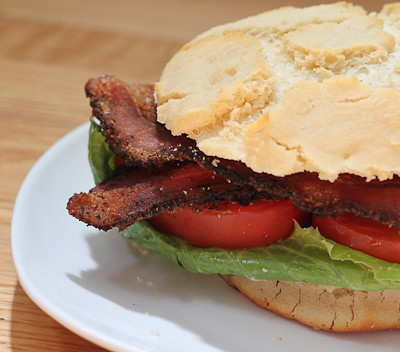
I've never had Dutch Crunch bread before, so I was curious to try this one out.  It was a pretty straightforward recipe, and I did not come across any issues making this bread.  It was actually kind of fun schmearing the topping all over the bread prior to baking :) (would be fun for the kids to get involved too!)

I wasn't too creative with my sandwich making.  I just went with a classic BLT.  I'm a bacon lover, so the lettuce and tomato are basically just there to make me feel less guilty (otherwise I'd just be eating plain bacon!).  The dutch crunch topping was a nice textural change to plain bread, but I think this type of soft white roll would have lent itself better to another type of sandwich.  The BLT seems to work better with traditional toasted bread.  Still, I had fun with this challenge and I am glad I tried it.
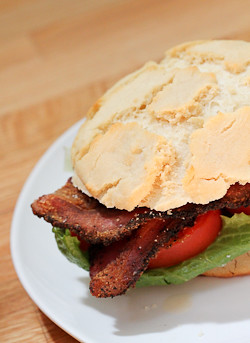
Thanks Sara and Erica, for hosting this month's challenge.  You'll find the recipe below - be sure to read the note at the bottom about rice flour if you are not familiar with this ingredient. Also be sure to check out the Daring Bakers' Blogroll to see what kind of sandwiches everyone else came up with.

Soft White Roll

Servings: Six sandwich rolls
This recipe approximates the quintessential white sandwich roll found throughout the Bay Area. The recipe is simple, quick, and addictive.

Ingredients
1 tablespoon (1 packet) (15 ml) (7 gm/ ¼ oz) active dry yeast
¼ cup (60 ml) warm water (105-110º F) (41-43°C) (No need to use a thermometer – it should feel between lukewarm and hot to the touch).
1 cup (240 ml) warm milk (105-110º F) (41-43°C) (We’ve tried both nonfat and 2%, with no noticeable difference)
1½ tablespoons (22½ ml) (20 gm/ ⅔ oz) sugar
2 tablespoons (30 ml) vegetable oil (plus additional olive or vegetable oil for greasing bowl during rising)
1½ teaspoons (7½ ml) (9 gm/⅓ oz) salt
Up to 4 cups (960 ml) (600 gm/21oz) all purpose flour

Directions:
1. In the bowl of an electric mixer or large mixing bowl, combine yeast, water, milk and sugar. Stir to dissolve and let sit for about 5 minutes (The mixture should start to bubble or foam a bit and smell yeasty).
2. Add in vegetable oil, salt and 2 cups of flour. Using the dough hook attachment or a wooden spoon, mix at medium speed until the dough comes together. (The photo to below is with the first 2 cups of flour added).
3. Add remaining flour a quarter cup at time until the dough pulls away from the sides of the bowl, as shown in the photo below (For us, this usually required an additional 1½ to 2 cups of flour).
4. Turn out onto a lightly floured surface and knead for about 4 minutes, until smooth and elastic.
5. Place in a lightly greased bowl and cover with plastic wrap. Let rise for 1 hour, or until doubled (or more) in size (see photo comparison).
6. Once the dough has risen, turn it out onto a lightly floured surface and divide it into 6 equal portions (if you’d like to make rolls) or 2 equal portions (if you’d like to make a loaf) (using a sharp knife or a dough scraper works well). Shape each into a ball or loaf and place on a parchment-lined baking sheet (try not to handle the dough too much at this point).
7. Cover with plastic wrap and let rise for 15 minutes while you prepare the topping.
8. Coat the top of each roll or loaf with the topping as described above. While the original recipe recommends letting them stand for 20 minutes after applying the topping, I got better results by putting them directly into the oven.
9. Once you’ve applied the topping, bake in a preheated moderately hot 380ºF/190°C/gas mark 5 for 25-30 minutes, until well browned. Let cool completely on a wire rack before eating.
Our finished products: Note the roll in the foreground on the left. This is what happens if you don’t put enough topping on the bread – no cracking! So be sure to load on the topping.

Dutch Crunch Topping

Servings: This recipe should make sufficient topping for two 9x5 loaves (23cmx13cm) or 12 rolls. If you make only 6 rolls in the first soft white roll recipe, you can cut the topping recipe in half.

You should not prepare the topping until the bread you’ve selected to bake is almost finished rising (~15 minutes from baking). 


Ingredients
2 tablespoons (2 packets) (30 ml) (15 gm/½ oz) active dry yeast
1 cup (240 ml) warm water (105-115º F) (41-46°C)
2 tablespoons (30 ml) (30 gm/1 oz) sugar
2 tablespoons (30 ml) vegetable oil
½ teaspoon (2½ ml) (3 gm) salt
1½ cups (360 ml) (240 gm/8½ oz) rice flour (white or brown; NOT sweet or glutinous rice flour) (increase by 1 cup or more for home-made rice flour)

Directions:
1. Combine all ingredients in a large bowl and beat with a whisk; beat hard to combine. The consistency should be like stiff royal icing – spreadable, but not too runny. If you pull some up with your whisk, as shown below, it should drip off slowly. Add more water or rice flour as necessary. Let stand 15 minutes.
2. Coat the top of each loaf or roll with a thick layer of topping. We tried coating it with a brush but it worked better just to use fingers or a spoon and kind of spread it around. You should err on the side of applying too much topping – a thin layer will not crack properly.
3. Let stand, uncovered, for any additional time your recipe recommends. With the Soft White Roll, you can place the rolls directly into the oven after applying the topping. With the Brown Rice Bread, the loaves should stand for 20 minutes with the topping before baking.
4. When baking, place pans on a rack in the center of the oven and bake your bread as you ordinarily would. The Dutch Cruch topping should crack and turn a nice golden-brown color.

A Note about Rice Flour: If it’s not in your local grocery store, check in a specialty shop (somewhere that would sell gluten-free foods) or online (e.g., amazon.com). Be sure not to buy the sweet or glutinous variety, though either white or brown rice flour works just fine.

If you are unable to find it, or if you’re just curious about how to make it yourself, it’s not very hard to do at all. There are a number of tutorials online, but the basic idea is to put rice in a spice grinder or something else that can break grains, and grind it until it is a fine flour-like powder. You will likely need to sift the final product through a sieve.

Home-made rice flour alters the balance of ingredients in the topping recipe, specifically requiring more rice flour to make it the appropriate paste-like consistency.  You want the topping to form a thick layer on the bread. If it’s too watery or drippy, it will not stay on top of the bread and crack like it’s supposed to.

Thursday, April 9, 2009

Blog Makeover & Southwestern Potatoes


I've been dying to do a makeover for my blog for quite some time now. Sure, it was very simple and classic looking, but I wanted something a bit more colorful and fun.

Thanks to my amazing friend Lisa over at Surviving Oz, I was finally able to give my blog a face lift! I am beyond thrilled with how everything turned out and I cannot begin to thank her enough! I still have to work on finishing up some additional content for the blog, but for now at least it has a new look :)

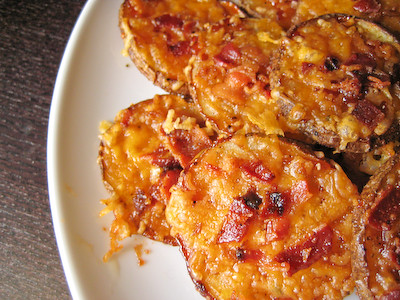
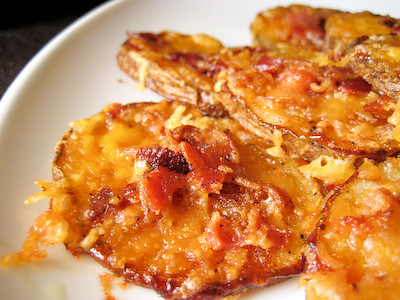
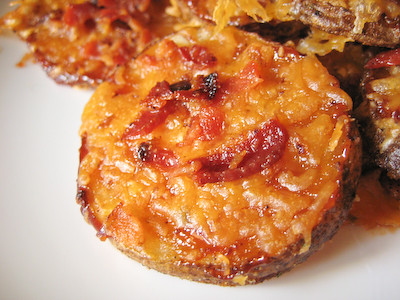
In honor of my blog makeover, I'm going to share with you one of the best recipes I have come across in a long time! I bookmarked this particular recipe several months ago. My only regret now is not making it sooner!! I promise that this is something you need to try! It's about as simple as simple gets. You simply slice some potatoes, toss them in olive oil, salt, and pepper, then bake them in the oven for about 15 minutes. Next, top them with some barbeque sauce, cheddar cheese, and bacon bits. After a few more minutes in the oven, you've got the tastiest potato side or appetizer you've ever eaten!


I made these two times in two days they were so good! My husband calls them crack :) I would bring these to a party any day over the alleged "crack dip."

Southwestern Potatoes
from cooking this and that

1 package bacon bits, or 4 slices of bacon, cooked and crumbled
2 unpeeled large potatoes, scrubbed
3 tablespoons olive oil
1 teaspoon garlic salt
1 teaspoon black pepper
1/4 cup barbecue sauce
1 cup shredded cheddar cheese
1/2 sour cream, optional (for dipping)


Line 2 large baking sheets with foil and preheat oven to 450 degrees. (I was able to fit it all on one baking sheet.)
Cut potatoes into 1/4 inch slices. Toss the potatoes, olive oil, garlic salt and pepper in a big ziploc bag to coat the potatoes.

Arrange potatoes in a single layer on the baking sheets. Bake until lightly browned, about 15-20 minutes.

Brush with barbecue sauce, then top with the shredded cheese and bacon bits. Bake until the cheese melts, about 3-5 minutes. Top with sour cream, if desired.

Yield: 4 servings (only 2 in our household!)


Friday, January 30, 2009

Super Bowl Appetizers

With the Super Bowl coming up this weekend, I know that many are on the lookout for great appetizers and finger foods that they can serve up for the big game. Last year, I was able to feature a variety of recipes leading up to the big weekend. Unfortunately, time was not on my side this year, and I was unable to try out any new recipes.

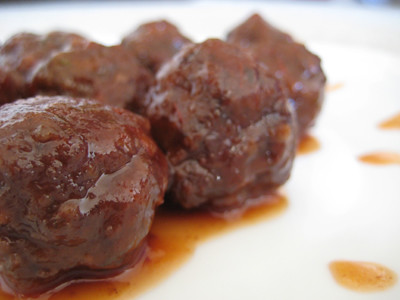
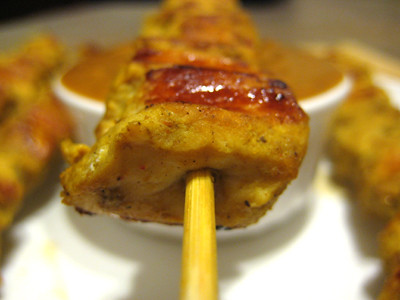
Regardless, I'd still like to feature some great appetizer recipes. I hope that you'll give some of them a try and enjoy them during the big game this weekend! Not sure which one to try? I have to say that the most popular recipe (out of all the recipes, not just appetizer recipes) on my blog to date is the Sweet and Sour Meatballs recipe; the second most popular recipe is the Chicken Satay with Peanut Dipping Sauce.

Buffalo Chicken Dip (aka Crack Dip)


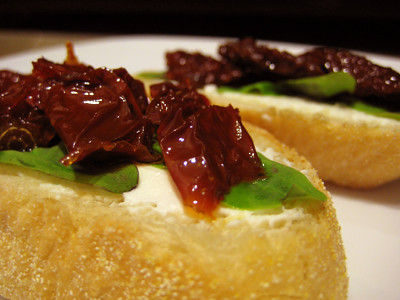
Sun Dried Tomato Dip


Friday, May 30, 2008

Beautiful Bones and BBQ Baked Beans


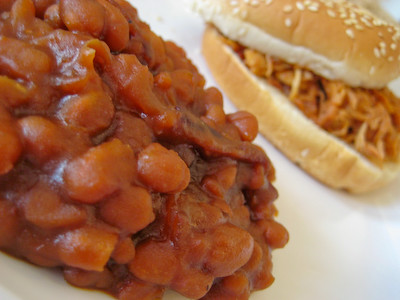
Growing up in California, the only barbeque I ever had was at Tony Roma's (sad, I know). Then I moved to North Carolina where I got a taste of real barbeque - barbeque pork, that is. And now I live in Texas where if you're going to have barbeque - that means barbeque beef. Regardless of what kind of barbeque I'm having, one of my favorite sides is barbeque baked beans.

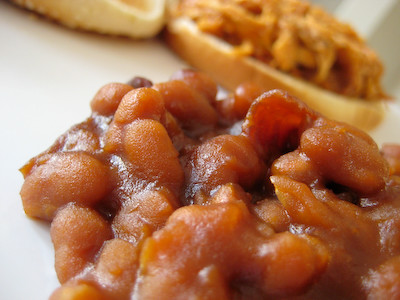
This was my first time making my own barbeque baked beans. I sort of 'cheated' by using canned beans as a base, but that is part of what I love about this recipe - how quick and easy it is. I went in search of a good recipe and found so many my eyes starting spinning. Ingredients varied anywhere from mustard to ketchup to Worcestershire sauce to molasses. I looked at several recipes and then came up with my own. It's a bit on the sweet side, but that's how I like my baked beans. I also added bacon to mine because well, everything is better with bacon :)


I'm submitting this to Susan's Beautiful Bones Event, to help raise awareness about osteoporosis and help encourage women to take the necessary steps to protect their bone health. This subject hits particularly close to home, because I know that I am in a high risk group to get osteoporosis, not only because I am Asian, but also because I do not eat very many calcium rich foods (I hate milk) and cannot for the life of me remember to take my vitamins daily. I never knew that beans were a good source of calcium. Thanks to Susan, I am now more aware of what the calcium rich foods are so that I can try to incorporate them more often into my diet. If you want to learn more about calcium rich foods, click here and be sure to visit Susan at Food Blogga when she presents the round up for this event.

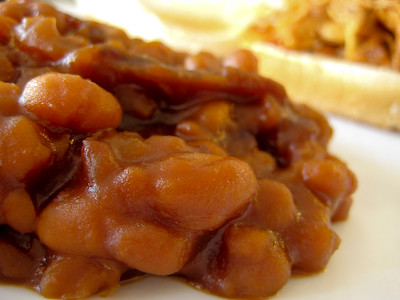
The photo below is also my submission to the Click! May Event. Click! is a monthly food photography event that is theme-based (not blog-based), so all you need is a good photograph to participate. This month's theme is beans 'n lentils. I don't have any spectacular photos to submit this month, but since I happened to make something that fits this month's theme, I decided to participate anyway. If you want to participate in this month's contest (or just read some pretty funny stuff about farts), click here (deadline is tonight at midnight!).

Click! Beans 'n Lentils

Barbeque Baked Beans
from Good Eats 'n Sweet Treats

53 oz can of Pork and Beans (I used Van Camp’s)
1/4 cup barbeque sauce (I use Sweet Baby Ray's)
1/4 cup molasses
1 cup brown sugar
1-1/2 cups diced onions (I used red onions)
8 strips bacon, cooked, and then cut into small pieces (optional)

Preheat oven to 375 degrees.

Drain about half of the liquid from the canned beans and remove the chunks of fat from the beans. Add the beans, barbeque sauce, molasses, brown sugar, diced onions, and bacon to a 1-1/2 quart casserole dish and mix well. Bake, uncovered, for 45 minutes.

Note: If you're not too worried about your waistline, you can also add the bacon grease from your cooked bacon to the beans as you're mixing all of the other ingredients together for additional flavor.

Yield: 8 Servings

Friday, February 1, 2008

Game Day Choices


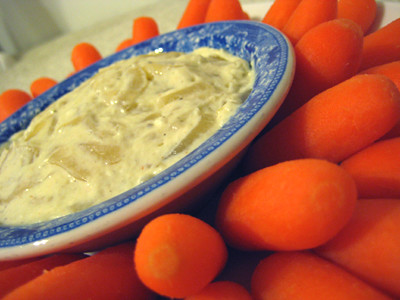
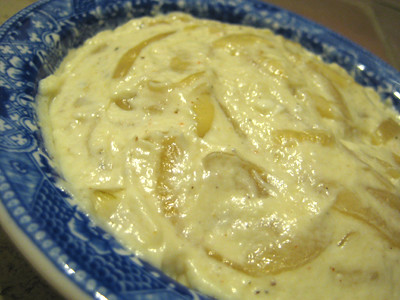
I love caramelized onions. When I saw this recipe on eat me, delicious, I knew I had to try it (by the way, if you haven't visited Ashley's blog yet, check it out! She's got tons of great recipes). I actually saw this recipe months ago when I was browsing FoodNetwork.com, but never got around to making it. When I saw it on Ashley's blog, I totally got a craving for it.

I did cook the onions longer than indicated in the recipe, based on Ashley's suggestion. I was working with a pretty large onion, so I only used one instead of two. Because my onion was so large, I probably should have cut my onion slices into smaller pieces. I might also dice the onion next time instead of slicing it, just so the dip isn't so stringy. Even though the photos don't look all that appealing (onion dip isn't exactly the most photogenic food), it's so rich, creamy, and delicious! If you're still looking for a great Super Bowl appetizer, consider adding this to your list! :)

I was hoping to feature a few more of my favorite appetizers before the Big Game, but I'm out of time. Other game day recipes you might want to consider:
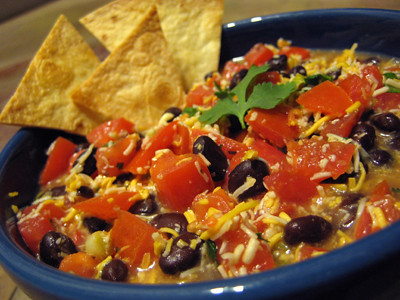
Tex Mex Salsa with Homemade Tortilla Chips
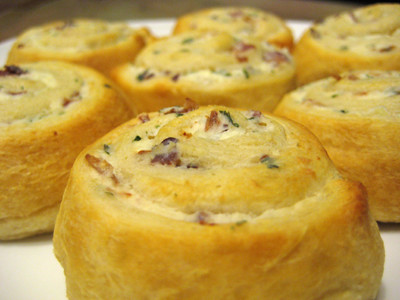
Bacon Pinwheels
Chicken Satay
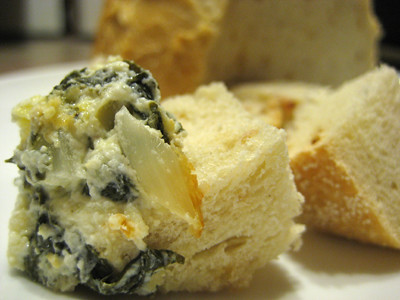
Hot Spinach & Artichoke Dip
Sweet and Sour Meatballs
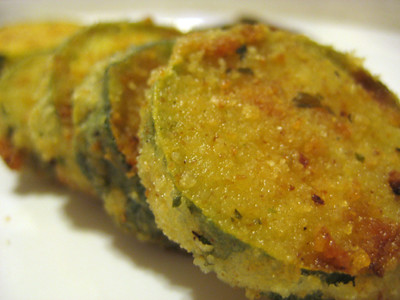
Baked Zucchini Coins
Sun Dried Tomato Dip
Buffalo Chicken Dip aka Crack Dip

Pan-Fried Onion Dip
from The Barefoot Contessa

2 large yellow onions
4 tablespoons unsalted butter
1/4 cup vegetable oil
1/4 teaspoon ground cayenne pepper
1 teaspoon kosher salt
1/2 teaspoon freshly ground black pepper
4 ounces cream cheese, at room temperature
1/2 cup sour cream
1/2 cup good mayonnaise


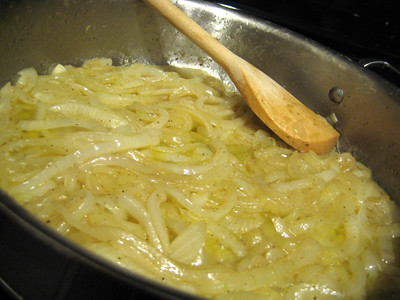
Cut the onions in half and then slice them into 1/8-inch thick half-rounds. (You will have about 3 cups of onions.) Heat the butter and oil in a large saute pan over medium heat. Add the onions, cayenne, salt, and pepper and saute for 10 minutes. Reduce the heat to medium-low and cook, stirring occasionally, for 20 more minutes until the onions are browned and caramelized (I cooked mine for 1 hour). Allow the onions to cool.

Cooking the onions (before they have caramelized)

Place the cream cheese, sour cream and mayonnaise in the bowl of an electric mixer fitted with the paddle attachment and beat until smooth. Add the onions and mix well. Taste for seasonings. Serve at room temperature.

Yield: 2 cups

Saturday, January 26, 2008

Eating Well: The 5 Basic Food Groups


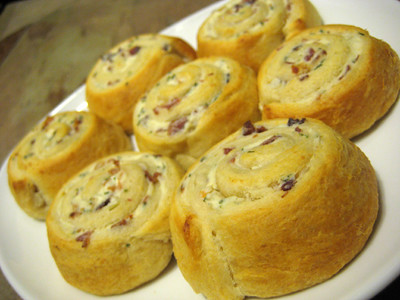
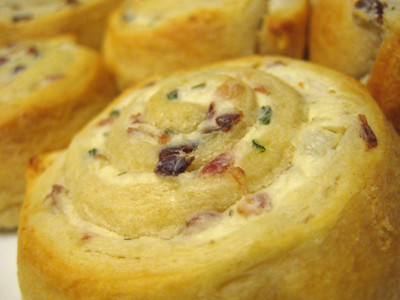
When Emily of Rediscovering the Joy of Cooking shared this recipe, I knew by looking at the ingredient list that it would be good. With bacon, onions, Parmesan, and cream cheese... what's not to love?! :) This recipe includes things from 4 out of the 5 basic food groups: bread (crescent roll), vegetables (onions, parsley), meat (bacon), and dairy (Parmesan, cream cheese, milk). The only thing missing is fruit, but I don't think this would taste so good with the addition of any kind of fruit ;) With 4 out of 5, that makes it good for you, right? So you can eat these without feeling too guilty :)

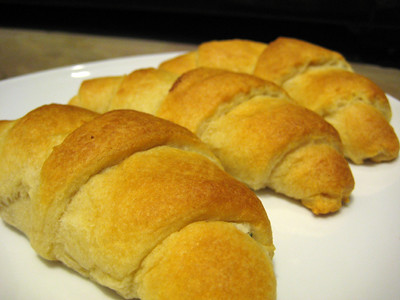
By rolling the dough up from the short ends, you wind up with things that look more like wedges than crescents. So instead of making little wedges as directed in the recipe, I decided to make pinwheels and crescents rolls. If you click here, you can see what they are 'supposed' to look like. I may be biased, but I think they look a lot more appetizing my way :)


I also adapted the recipe to suit our tastes (read: more bacon!), and included my changes below. These are so good and really come together in no time. This is another great appetizer for your upcoming Super Bowl party :)


Bacon Appetizer Crescents (or Bacon Pinwheels)
from KraftFoods.com

1 pkg. (8 oz.) cream cheese, softened (I used 7 oz. of 1/3 less fat Neufchatel cheese)
8 slices bacon, crisply cooked, crumbled (I used 12 slices!)
1/3 cup grated Parmesan cheese
1/4 cup finely chopped onion
2 Tbsp. chopped fresh parsley (I used 2 tsp dried parsley flakes)
1 Tbsp. milk
1/4 tsp crushed red pepper flakes
2 cans (8 oz. each) refrigerated crescent dinner rolls (I used two 10.1 oz cans)

Preheat oven to 375°F. Mix cream cheese, bacon, Parmesan cheese, onions, parsley, crushed red pepper flakes and milk until well blended; set aside.

Separate each can of dough into four rectangles; firmly press perforations together to seal. Spread each rectangle with 2 rounded tablespoonfuls of the cream cheese mixture. Cut each rectangle into 12 wedges. Roll up wedges, starting at short ends. Place, seam-sides down, on greased baking sheet.

To create the crescents:
Follow directions as above, except roll each wedge starting with the wide edge.


To create the pinwheels:
Take two triangular pieces of dough and press the perforations together to seal and create a rectangle.

If you are using the 8 oz. cans of dough, divide the cream cheese mixture into 4 equal parts and spread 1/4th of the mixture evenly on the dough. If you are using the larger cans of dough, divide the cream cheese mixture into 6 equal parts and evenly spread 1/6th of the mixture on the dough. (You'll just end up with a little less filling if you use the larger cans of dough, which I thought was fine.)

Cut the dough lengthwise into 4 equal pieces, approximately 1/2 to 3/4-inches wide (if you look closely in the photo below, you can see how it is cut). Roll the dough up into a pinwheel and place on baking sheet.


Bake 12 to 15 minutes or until golden brown. Serve warm.

Yield: 8 dozen crescents (or 24 pinwheels, approx. 3-inches in diameter)

Wednesday, October 10, 2007

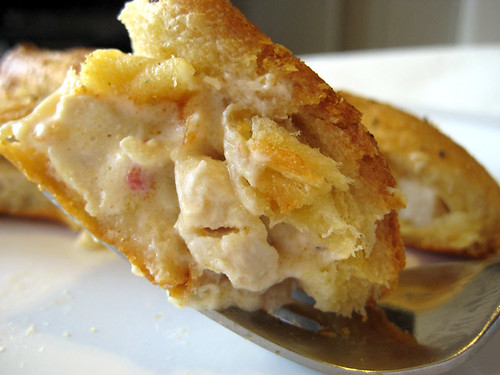
Savory Crescent Chicken Squares


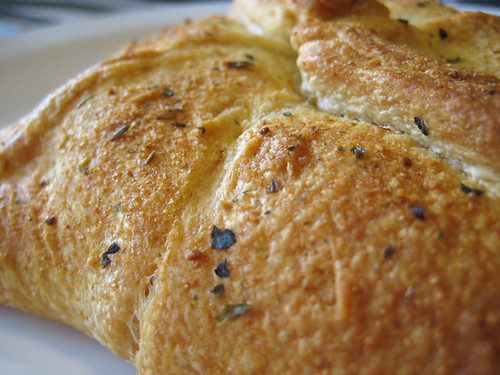
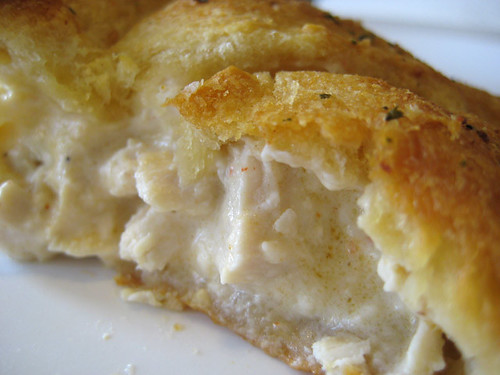
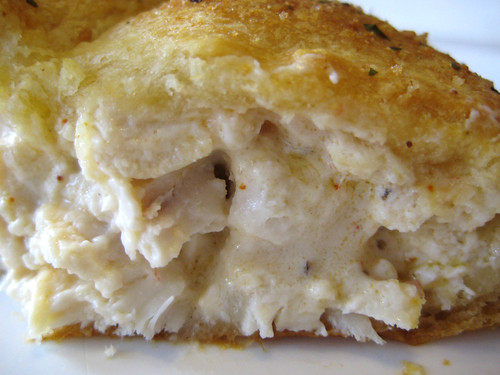
I discovered this Pillsbury recipe quite some time ago, and it has become one of our favorites. It's a very simple recipe, and makes for a great weeknight meal :) It really reminds me of the "chicken bake" you can get at Costco. Though I've never tried it, I think these would be fabulous with some bacon crumbles added to the mix. It really is a great base recipe, and you can modify it to suit your tastes, like I did.

Savory Crescent Chicken Squares
from Doris Castle on Pillsbury.com


3 oz. cream cheese, softened
1 tbsp butter or margarine, softened
2 cups cubed cooked chicken (this is 2-3 chicken breasts, depending on the size)
1 tbsp chopped fresh chives or onion (I often omit this, as we rarely have any on hand)
1/4 tsp salt
1/8 tsp pepper
2 tbsp milk
1 tbsp chopped pimientos, if desired (I omit this, but add 1/2 tsp Sambal Oelek chili paste since we like everything spicy!)
2 tbsp ranch dressing
1 (8 oz) can Pillsbury Refrigerated Crescent Dinner Rolls
1 tbsp butter or margarine, melted (I only use 1/2 tbsp)
3/4 cup seasoned croutons, crushed (I sprinkle with Johnny's Great Caesar Garlic Spread and Seasoning instead)

Heat oven to 350°F. In medium bowl, combine cream cheese and 1 tablespoon softened margarine; beat until smooth. Add chicken, chives, salt, pepper, milk and pimientos; mix well.

Separate dough into 4 rectangles. Firmly press perforations to seal. Spoon 1/2 cup chicken mixture onto center of each rectangle. Pull 4 corners of dough to center of chicken mixture; twist firmly. Pinch edges to seal. Place on ungreased cookie sheet. Brush tops of sandwiches with 1 tablespoon melted margarine; sprinkle with crushed croutons.


Bake at 350°F. for 25 to 30 minutes or until golden brown.

Tuesday, September 18, 2007

Quiche Lorraine

I'm weird about eggs. I hate the smell of hard boiled eggs. For the most part, I don't like to eat eggs. I will, however, eat eggs if they are scrambled! I can't eat them plain, though. Aside from seasoning them with the usual salt & pepper... I'm one of those people who eats their scrambled eggs with ketchup *gasp*

Seeing as a quiche is basically a fancy French version of scrambled eggs, I do enjoy quiches :) This was my first homemade quiche. I first got the idea after receiving an email from allrecipes.com I subscribe to their "Daily Dish" emails and the recipe for Monday September 17th was "Quick Quiche." The recipe caught my attention and gave me a craving for quiche. I may one day try that recipe; however, tonight I had some pie crust in the fridge that I wanted to use so I searched Allrecipes to find a quiche recipe worth trying.

That's how I stumbled across this recipe for Quiche Lorraine. It's a great basic quiche recipe, and as you can see from all the reviews, it can be modified in a variety of ways to suit your taste. Many reviewers seem to use half & half instead of milk to make it richer; however, this quiche already has enough fat it in so I did not try that but simply used skim milk. Others added ingredients such as ham, broccoli, spinach, etc. The possibilities with this quiche are endless; however, I do have to say that it is delicious as is. The bacon and onion give it an excellent flavor.

One small side note -- the original Quiche Lorraine recipe calls for heavy cream, and does not include cheese; and the addition of onion to the dish makes it quiche alsacienne. Whatever you want to call this dish, I can guarantee you'll be going back for seconds :)

Based on the many reviews on the website, I made several modifications to the recipe, noted below in red.

Quiche Lorraine
from allrecipes.com

1 recipe pastry for a 9 inch single crust pie (I used a Pillsbury pie crust)
6 slices bacon
1 onion, chopped (1 small onion was plenty; if you don't love onion, I would use 1/2 onion)
3 eggs, beaten (I used 4 eggs)
1-1/2 cup milk (I used 1 cup)
1/4 teaspoon salt (I used 1/8 tsp garlic salt - the bacon adds enough saltiness to this dish)
1-1/2 cups shredded Swiss cheese (I used 2 cups of a shredded cheddar & monterey jack cheese blend)
1 tablespoon all-purpose flour

Preheat oven to 450 degrees F (I set my oven to 350 F).

Line pastry with a double layer of aluminum foil. Bake in preheated oven for 8 minutes. Remove foil and bake for 4 to 5 minutes more, or until crust is set. Reduce oven temperature to 325 degrees F (165 degrees C). (I simply unrolled my pre-made pie crust and placed it in an ungreased 9-inch pyrex pie pan and baked at 350 F for 8 to 10 minutes until the crust was just barely golden.)

Place bacon in a large, deep skillet. Cook over medium high heat until evenly brown. Remove bacon from pan, crumble and set aside. Reserve 2 tablespoons bacon grease in skillet. Cook onion in reserved drippings until tender; drain and set aside.

In a large bowl, mix together eggs, milk and salt. Stir in bacon and onion. In a separate bowl, toss cheese and flour together. Add cheese to egg mixture; stir well. Pour mixture into hot pastry shell.

Bake in preheated oven for 35 to 40 minutes (I baked mine at 350 F for 55 minutes), or until knife inserted into center comes out clean. If necessary, cover edges of crust with foil to prevent burning (I used a pie crust shield). Let quiche cool for 10 minutes before serving.

Wednesday, September 5, 2007

Baked Potato and Broccoli Soup

After I saw this recipe in Annie's Eats, I knew I had to try it because broccoli cheddar soup is one of my favorites (second to Tomato Basil). My experience creating this soup reminds me of a similar experience I recently had while visiting my sister-in-law in Washington DC. We always enjoying cooking/baking together, and during this particular visit, we decided to make strawberry ice cream. While we were making it, she joked about how horrible she is in the kitchen and how she always feels like she is messing up recipes. So to make the ice cream, she started reading off the directions for the recipe while I threw everything together in the kitchen. Well, it wasn't until after I had mixed all the sugar with the strawberries to macerate them, that she read off the part about dividing the sugar into two parts. So, in an attempt to salvage the recipe, we tried to pull out as much of the sugar out of the strawberry/sugar mixture as possible (we weren't very successful). Lesson learned: even if you're in a rush, always read the full recipe before starting. So when I made this soup I followed the instructions exactly. I started out and mixed the broth and flour until smooth. I proceeded to combine the remaining ingredients, as instructed, until I got to the line that read: "Gradually stir in flour mixture." OOPS! It was at that moment that I realized I was supposed to set the broth/flour mixture aside after creating it, and I laughed at myself and instantly thought about this previous ice cream mishap :) Luckily, I don't think it made much of a difference. However, I have modified the recipe instructions below to reflect this, to help other cooks avoid the same mistake ;) And although we keep our fridge/pantry fairly well stocked, I did not realize we were out of milk until I got to that step of the recipe (we always have milk!)... so I substituted 1 cup of half and half for the milk. The only other thing I did differently was with regard to the cheese. For convenience, we buy pre-shredded cheese. I'm not sure how many cups of shredded cheese can be produced from an 8 oz block of cheese, so I just continued adding shredded cheese until the soup seemed cheesy enough for me :) I did not have any problems melting the cheese, either, despite the note at the bottom of the recipe. This soup would be wonderful in a bread bowl, or served with some sourdough on the side.

Baked Potato and Broccoli Soup
from CookingLight

Ingredients:
¼ cup all-purpose flour
29 oz (2 x 14.5 oz cans) low sodium, fat-free chicken broth, divided
3 cups peeled, cubed potatoes (about 1.25 lbs)
2 cups broccoli florets, chopped (I used frozen for convenience)
1 small onion, chopped
1 ¼ cups 2% reduced fat milk (I used 1 cup half and half since I was out of milk; another time I used skim and it was still good)
1 (8 oz) block 2% reduced fat sharp cheddar cheese, shredded (I used 2-1/2 cups shredded)
2% reduced fat sharp cheddar cheese, shredded, for topping (optional)
Chopped green onions for topping (optional)
Fully cooked bacon pieces for topping (optional)
Freshly ground pepper (to taste)
Salt (to taste)

*Note: Freshly shredded cheese is recommended (versus pre-shredded) for additional creaminess and even melting.

Directions:
Whisk together flour and 1/3 cup chicken broth until smooth. Set aside for later use.

Combine remaining chicken broth, potatoes, broccoli and onion in a Dutch oven (or large saucepan). Bring to a boil; cover, reduce heat, and simmer 8 minutes or until potatoes are tender. Gradually stir in flour mixture. Cook, stirring often, 5 minutes.


Stir in milk & 8 oz. of freshly shredded cheese. Cook mixture over medium-low heat, stirring constantly, until cheese melts. Add salt and pepper to taste (I found it to be too bland otherwise). Top each serving of soup with shredded cheese, green onions, and bacon pieces as desired.