Showing posts with label fish. Show all posts

Sunday, November 7, 2010

My Sunday with Dorie


A few weeks ago (Sunday, October 24th) I had the utmost pleasure of meeting Dorie Greenspan! Dorie's been all over the US to promote her newest book, Around My French Table.  I had already booked a trip before I found out about her book tour.  As luck would have it, though, I was returning to Dallas the day before Dorie was scheduled to do her cooking class here - so I was able to make it! I checked with my husband to see if he'd be okay with me attending, and to my surprise he immediately said yes.  I think after being part of Tuesdays with Dorie for nearly three years, he actually gets how much I adore Dorie!!! :)
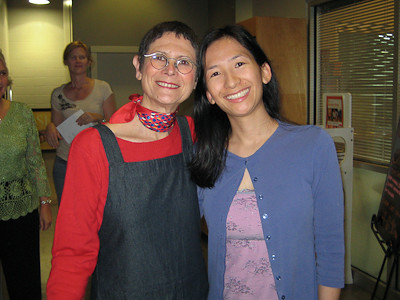

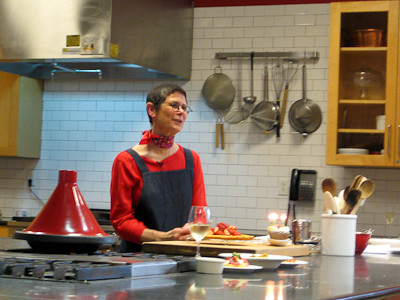
Being able to finally meet Dorie was amazing, and then some.  She is so sweet and charming. Unfortunately, I left my DSLR at home (don't know what I was thinking), so all I had was my little point-and-shoot camera (Canon Powershot SD1000).  My photos didn't come out too great due to the low lighting during the late afternoon, so to make up for it, I took some video clips of the cooking class so you could see what Dorie is really like.  I think her personality really shines through when you watch these videos :)

This first video is Dorie talking about her relationship with her mother, who (surprisingly) rarely ever cooked/baked for her! Next, you'll see Dorie telling a funny story about what she learned about cheese when she was in Paris.  Then someone in the audience asked Dorie if she was done writing cookbooks, or if there would be another one in the future and you can see what Dorie says about that here.  She's actually going to go hang out with all of her baking idols and then write a book full of recipes based on what she learns from each of them - how cool is that? Not only was I lucky enough to meet Dorie, but I was able to do so on her birthday! At the end of the cooking class, the Central Market staff presented Dorie with a birthday cupcake and we all sang "Happy Birthday" to her - see her reaction here - she is too cute!

Now on to the cooking class itself.  Dorie made a few different dishes for us from her book.  She said that she wants to make cooking simple and easy and I think she has definitely accomplished that with her book.  While at first glance, some of the recipes from this book may look a bit involved, there wasn't really anything that she made for us that day that I felt would be too difficult or time consuming for me (and I am much more of a baker than a cook!).  I feel like a lot of today's quick dinner ideas involve a lot of prepackaged or processed foods - Dorie's book allows the home cook to make simple dinners that taste like they took hours to prepare.

So without further ado, here's what Dorie showed us how to make during her cooking class:
(all recipes from Around My French Table)

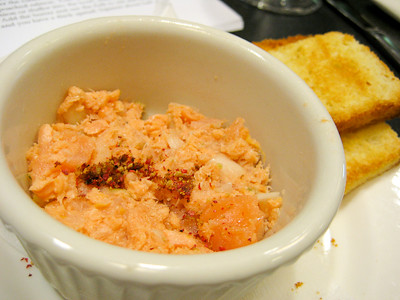
Salmon Rillettes - I've never tried smoked salmon before. I've never wanted to. I know smoked salmon is "cooked" but I've always felt like it was still raw and could not bring myself to try it. But here I was, with a recipe that Dorie had created and I thought I'd better try it because if Dorie loves it, it has to be good, right? So I was brave and tried a bite... and then another bite... and then another until my little ramekin was empty! I think because the smoked salmon was mixed up with the chunks of poached salmon, I wasn't really able to recognize the texture of the smoked salmon. The hint of lemon with the salmon in this appetizer was fabulous and I could totally see myself making this in the future for dinner guests because it's something you could easily make in advance.

Fresh Tuna, Mozzarella & Basil Pizza - This was delicious, even without the tuna.  I don't generally eat sushi, but I wanted to taste this "pizza" as Dorie intended so I tried a bite with the tuna, and then had the rest sans tuna.  I'm usually not a very adventurous eater, but again, I had to give it a try because it was Dorie's creation.
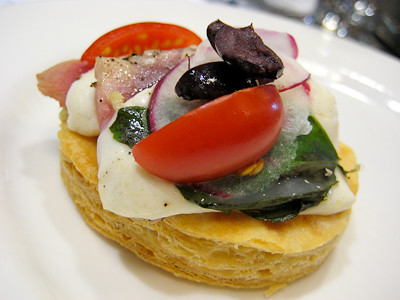

Look at all those wonderful layers of puff pastry!


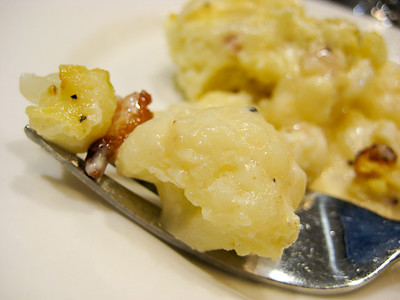
Cauliflower-Bacon Gratin - Creamy goodness! And it has to be healthy because cauliflower is the main ingredient, right? ;) This is better than any green bean casserole and will definitely be served for Thanksgiving at our house this year!

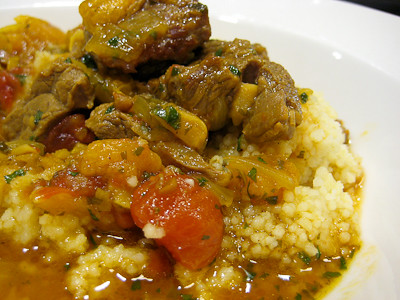
Lamb & Dried Apricot Tagine - Another first for me. Not my first time trying lamb, but my first time actually enjoying it! The lamb I've previously tasted was always gamey and had a funny taste to it. This lamb was tender and moist and I would not have known it was lamb unless you told me it was. The apricots imparted a sweet and delicious flavor to this dish that complemented the spices very well. I was glad to find out that this dish can be made in a dutch oven, as I do not have a tagine.

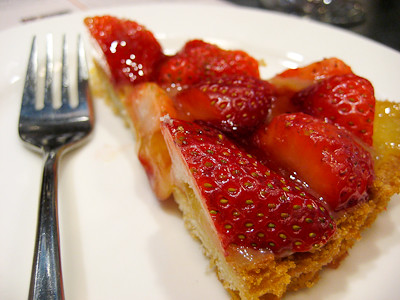
Sable Breton Galette with Berries - Simple and elegant. Strawberries atop a layer of lemon curd that has been spread across a buttery, cookie crust. Yum.

Neither the salmon rillettes nor the lamb tagine would be dishes that I would ever make on my own from the book.  Yet I thoroughly enjoyed them and plan to make them in the future.  So, while 9 times out of 10 you'll find me baking instead of cooking in the kitchen, I look forward to participating in French Fridays with Dorie because it will push me to try recipes I wouldn't otherwise try, and to develop my cooking skills in the kitchen.  My participation in that group will be intermittent at best, as I already have a lot on my plate, but I look forward to cooking along whenever possible with the group.

Along with getting to meet Dorie, I had the pleasure of meeting Jessica of My Baking Heart, Paula of Salad in a Jar, and Amy of Sing for Your Supper.  Hop on over to their blogs, as they got some great photos (better images than the ones I was able to get with my point-and-shoot camera) from that day to share, too.

Thanks, Dorie, for a wonderful and memorable day.  I know it must have been difficult for you to be away from home, family, and friends on your birthday but I am so grateful that I had the pleasure of spending those few hours with you! I look forward to the release of your next cookbook, and have already set aside a special spot for it on my shelf!
Sunday, October 5, 2008

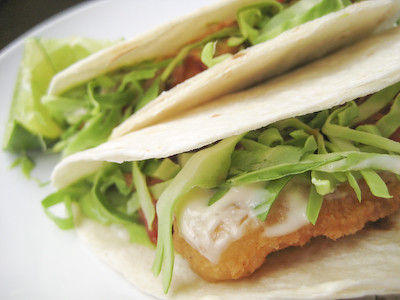
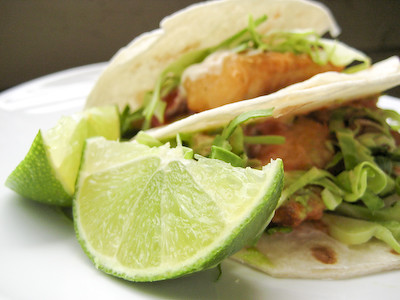
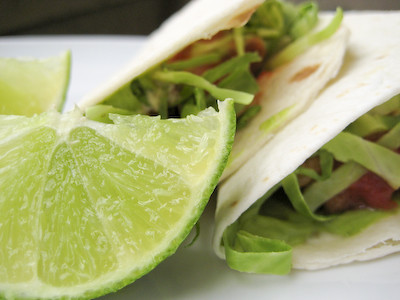
Baja Fish Tacos


Having grown up in southern California, I love fish tacos. I've only ever had them in restaurants, though... so I thought it was about time that I tried making them myself. Luckily, these are so simple to make. When I went in search of a great fish taco recipe, I decided to turn to none other than Susan of Food Blogga, who lives in San Diego. Being so close to the Mexican border, she's had the opportunity to taste some of the best fish tacos around.


This recipe is so easy as is - but you can simplify it even more if you're short on time. Use a store bought salsa if you don't want to make pico de gallo from scratch. Bottled hot sauce can also be used in place of the chilies de arbol sauce. Use store bought guacamole or simply dice the avocado if you don't want to dirty up your food processor making the avocado sauce. And for those who won't eat anything with mayonnaise, please make the mayonesa sauce - just go light on the sauce when you assemble the fish tacos - it's just not the same if you don't use the it. (My husband, the mayo hater, didn't even notice that I snuck some mayonesa sauce into his fish tacos!)


These were delicious. The next time I make fish tacos, I think I'd like to try Susan's baked fish taco recipe instead (which can be found here - just scroll down). I don't really like frying things in my kitchen, and I'm sure they'd still taste just as good without the extra calories.


If you're a fan of fish tacos - or even if you've never tried them - you need to try these now! :) This is a wonderful weeknight meal for those who are busy because you can put it together in no time (and you can make everything except the avocado sauce ahead of time). Thanks Susan, for sharing this awesome recipe with us!

Baja-Style Fish Tacos
from Susan of Food Blogga, as seen on NPR

Tacos


Makes 24 servings, enough for 6 to 8 people

2 cups all-purpose flour
1 1/2 teaspoon baking powder
1/2 teaspoon granulated garlic
1/4 teaspoon cayenne
1/2 teaspoon dry mustard
1/2 teaspoon dried whole Mexican oregano, rubbed to a powder* (I didn't have any so I just used regular oregano)
Kosher salt
1/2 teaspoon freshly ground black pepper
12 ounces (1 bottle) cold beer, plus more to thin the batter if necessary
2 pounds firm, meaty fish (I use halibut or Pacific sea bass) (I used halibut; tilapia also works well)
A little squeeze of fresh lime juice, from 2 to 3 limes
Canola oil, for frying

Serve with:

24 (6-inch) corn tortillas, warmed (you can substitute flour tortillas, but the corn imparts a more authentic flavor) (I used flour tortillas)
Avocado sauce (recipe below)
Lime wedges
Mayonesa secret sauce (recipe below)
Salsa de chilies de arbol (recipe below)
Pico de gallo (use your own favorite recipe, or try this one)
Finely shredded green cabbage (not lettuce)
Cilantro leaves (optional)

For the batter, whisk together the flour, baking powder, garlic, cayenne, mustard, oregano and salt and pepper in a large bowl until well blended. Stir in the beer until there are no lumps. (The batter can be made several hours ahead and refrigerated.)

Cut fish into pieces the size and shape of your index finger. Sprinkle with some lime juice and salt.

Pour oil into a deep, wide pan to the depth of 2 inches and heat over medium-heat to 350 degrees (if you have a deep-fry thermometer). Otherwise, test the heat by dropping a little bit of the batter into the oil. It should quickly bounce to the surface and be surrounded by tiny bubbles.

Pat the fish dry with paper towel. Check the thickness of the batter by dipping a piece of fish in it; it should be the consistency of medium-thick pancake batter, coating the fish easily and dripping very little. Add a little beer or water if it seems too thick.

Add a few pieces of fish to the batter. Using tongs, lightly swish each piece until thoroughly coated. Remove fish, letting excess batter drip into the bowl before gently placing in the hot oil. Cook a few pieces at a time until they float and the batter is set but still light in color, about 2 to 3 minutes. If a piece sticks to the bottom of the pan, just leave it, and it will release itself.

Remove the fish to a rack to drain, reserving the frying oil. At this point the fish can be cooled and refrigerated, uncovered, if you're preparing ahead.

When you are ready to serve, reheat the oil to 350 degrees, and quickly refry the fish a few pieces at a time for about 1 minute until crisp and golden brown.

Heat tortillas on a dry griddle for 1 minute per side or, using metal tongs, simply hold over an open flame until warmed and slightly charred. (I wrapped my tortillas in foil and warmed in them in the oven at 375F for 10 minutes.)

To serve, place refried fish, warmed tortillas and condiments on a table so guests can make their own tacos. To assemble tacos, hold a tortilla in your hand, and spread a spoonful of avocado sauce on it (you can use diced avocados or guacamole instead). Place a piece of fried fish on top and sprinkle with a little lime juice. Drizzle with some mayonesa sauce, a few drops of chilies de arbol sauce (you can use bottled hot sauce instead) and some pico de gallo (or store bought salsa). Top it off with some shredded green cabbage and fresh cilantro.

*Whole Mexican oregano can be found in the Mexican food section of most major supermarkets or in Latin American markets.

Avocado Sauce

Makes 1/2 cup

1/4 ripe avocado, peeled
Pinch of salt
A few drops of lime juice
1 to 2 tablespoons water or milk
2 cilantro springs, stemmed and chopped (optional)

Place the avocado, salt and lime juice in a small food processor. Add 1 tablespoon water or milk (for a slightly creamier consistency) and pulse. Add more liquid as necessary until sauce is the consistency of thick cream. Add the cilantro and pulse until just blended.

Mayonesa Secret Sauce

Makes 1/2 cup

1/2 cup mayonnaise
1 teaspoon white vinegar
1 1/2 tablespoon water or milk

Place the mayonnaise in a small bowl and slowly stir in vinegar. Add water or milk until the sauce is thick and creamy.

Chilies de Arbol Sauce

Makes 1/2 cup

1 garlic clove, smashed with the side of a large knife
1 teaspoon canola oil
1 cup dried chilies de arbol (about 30 chilies), stemmed**
1/3 cup water
1/2 teaspoon salt
1 teaspoon white vinegar

Pour canola oil in a small skillet over low heat. Add smashed garlic and cook 4 to 5 minutes until golden and aromatic. Place in a small food processor.

Wearing gloves, seed the chilies (unless you want hotter sauce, in which case, leave the seeds), and place in the processor. Process until well pulverized. Add water and salt and puree until as smooth as possible. Scrape into a bowl and add the vinegar. Let stand at least 30 minutes. Taste for seasoning, adding more salt and/or vinegar as necessary.

**Chilies de arbol are thin, red chilies about 3 inches long, and can be found in the Mexican food section of most major supermarkets or in Latin American markets. These small chilies are big on heat, so use this sauce sparingly.

Saturday, December 8, 2007

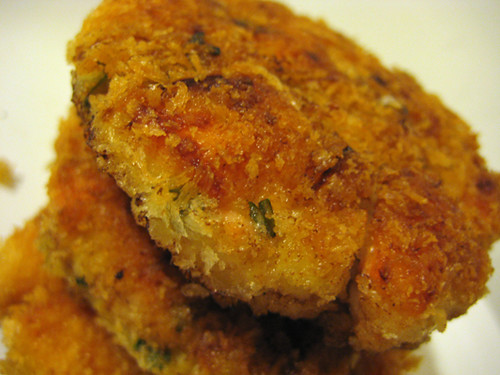
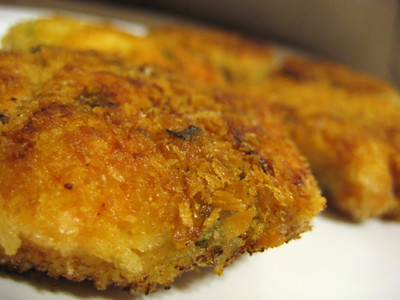
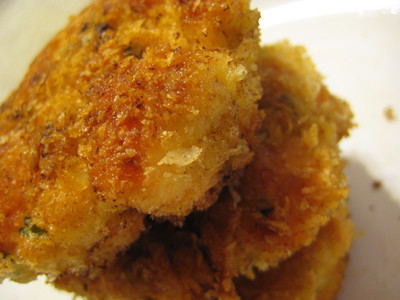
Pan-Fried Fresh Salmon Cakes


I saw this recipe on Ashley's blog, Delish. I'm always on the lookout for great fish recipes, and I knew this was a good one when I saw it. I even thought this might be something that my husband might eat, despite the fact that he does not like seafood.

Panko is Japanese breadcrumbs made from wheat bread. It is larger and coarser than traditional bread crumbs. You can find it in the international/asian foods aisle at your grocery store, but if you cannot find it there, try a specialty foods store like Whole Foods, Trader Joe's, or Central Market. Any local asian grocery store will carry it as well. The panko really gives these salmon cakes a great texture, so I would not recommend substituting the panko with traditional bread crumbs.

Ashley commented that these seemed to take forever to make, but I did not feel that way at all. By the time I was done making these, I was pleasantly surprised by how little work and prep they required. I served these with a spinach salad, and I think the meal came together in under 30 minutes. Even though there is not that much lemon juice in these, the lemon flavor really shines in this recipe. The salmon, parsley, and onion are excellent together. Even my husband liked them :) I definitely plan to make these again the next time salmon is on sale!

Pan-Fried Fresh Salmon Cakes
from Delish


1-1/4 lb salmon fillets, skinned, any bones removed
1 slice high-quality white sandwich bread, such as Pepperidge Farm, crusts removed & finely chopped (I used whole wheat bread)
1/4 cup grated onion
2 tbsp fresh parsley leaves
2 tbsp mayonnaise
3/4 tsp salt
1-1/2 tbsp fresh lemon juice
1/2 cup all-purpose flour
2 large eggs
3-4 tbsp olive oil
3/4 cup panko, or plain dry bread crumbs

Chop salmon into 1/2-inch pieces and mix with chopped bread, onion, parsley, mayonnaise, salt & lemon juice in medium bowl. Scoop a generous 1/4 cup portion and use your hands to form into a patty measuring roughly 2 1/2 inches in diameter and 3/4 inch thick. Place on parchment-lined baking sheet and repeat with remaining mixture, making 6-8 patties. Freeze the patties until the surface moisture has evaporated, about 15 minutes.

Meanwhile, spread the flour in a shallow dish. Beat the eggs in a second shallow dish. Spread the bread crumbs in a third. Dip the chilled salmon patties in the flour to cover and shake off the excess. Transfer to the beaten egg and with a slotted spatula, turn to coat; let the excess drip off. Transfer to the panko, shaking the dish to coat the patties completely. Return breaded patties to baking sheet.

Heat olive oil in large heavy skillet over medium-high heat until simmering, about 3 minutes. Add salmon patties and cook until medium golden brown on the bottoms. Flip cakes and cook until medium golden brown on the other side.

Transfer to a paper towel lined plate and allow to drain for a minute. Serve hot.

Yield: 6-8 salmon cakes (3-4 Servings)

Monday, December 3, 2007

Grocery Store Recipe


I find most of my recipes online, using websites like allrecipes.com, myrecipes.com, and foodieview.com. I like to read all the reviews for a recipe to see how people liked it, and what modifications are generally agreed upon. A good number of the recipes I try now are also from online food blogs.


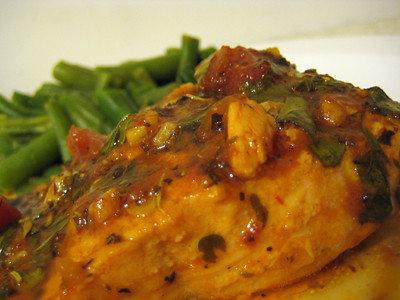
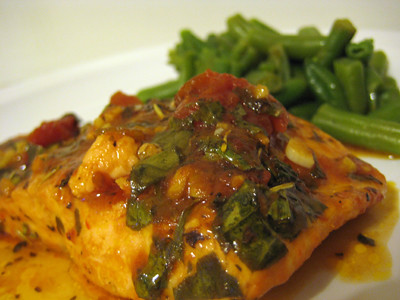
This is a simple, yet very flavorful way to prepare salmon. I actually came across this recipe at my local grocery store. They were having a special on salmon, and had a guy standing in front of the seafood department handing out samples of the salmon cooked in a tomato sauce. When I told him how much I enjoyed my sample, he asked me if I wanted the recipe. So, that's where I got this recipe - from the guy at Kroger! :)


I've had this recipe for a few months now, but finally got around to making it tonight. Our local Albertson's had fresh Atlantic Salmon fillets on sale for $4.99/lb. My husband does not really like fish, but I'm trying to cook with it more often now that we are trying to eat healthier. After dinner tonight, he asked me if there was more so he could have seconds! :) I was in utter disbelief, and he responded by saying, "What?! It was good!" This is another great weeknight meal, as it all comes together in less than 20 minutes.

Salmon with Italian Tomato Sauce (I like to call this Tomato Basil Salmon)
from the Kroger Guy

4 tbsp olive oil
3 tbsp white wine
2 tbsp butter (optional) (I did not use any)
1 tsp lime juice (I used lemon juice)
2-3 cloves garlic, finely chopped
Italian seasoning, sprinkle generously (I used 1 tbsp)
Lemon pepper, sprinkle lightly (I used 1/8 tsp, might try 1/4 tsp next time)
Cajun seasoning, sprinkle lightly (I used 1/8 tsp)
1/4 cup Italian tomato basil sauce (homemade or store bought) (I used Prego Tomato, Onion & Garlic)
1 tsp Worcestershire sauce
Sprinkle with parsley flakes (I used about 1/4 tsp)
1/4 cup chopped fresh basil
1 lb salmon, skin removed


Combine all of the ingredients except the salmon in a pan at low heat. Cook for approximately 1-2 minutes. Increase the heat and bring the sauce to a gentle boil, and then reduce the heat, add the salmon, and simmer. Cook until fish flakes off with a fork (4-10 minutes).

Yield: 3 servings

Monday, October 22, 2007

15-Minute Meal


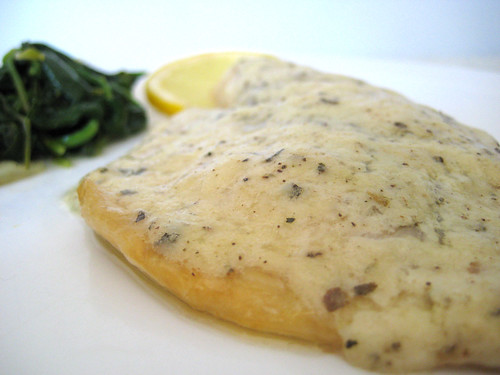
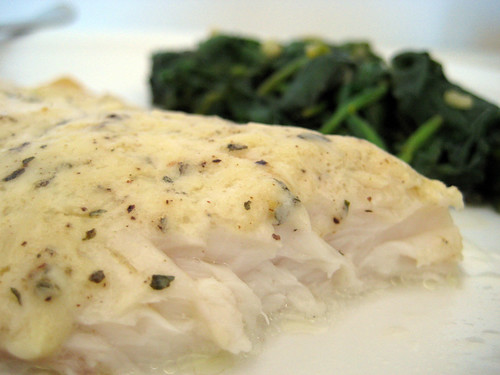
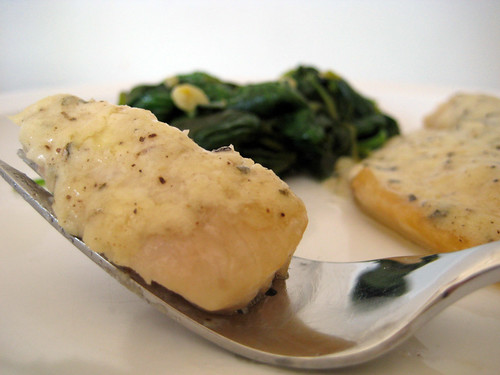
This is another great weeknight meal idea! Between prepping and cooking, this probably took me all of 15 minutes or so. While the tilapia was in the oven, I prepared the parmesan cheese mixture/sauce and started the spinach. The proportions for the tilapia serve two, so if you want to the original proportions (serves 8) go to Allrecipes.com

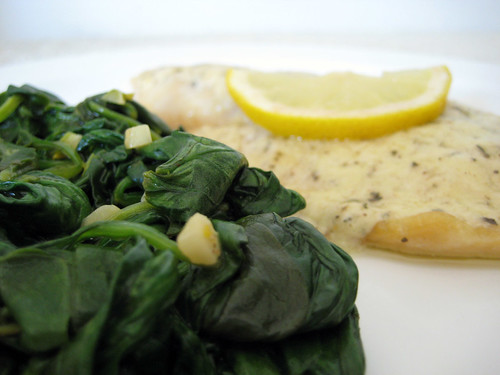
I served this with a lemon garlic spinach. I simply sautéed some fresh spinach in garlic and lemon. This is about as complex of a recipe you'll ever see me make up on my own ;) I'm not a very creative cook, and rely heavily on recipes!

Broiled Tilapia Parmesan
from Allrecipes.com


2 tablespoons Parmesan cheese
1 tablespoon butter, softened
2-1/4 teaspoons mayonnaise
1-1/2 teaspoons fresh lemon juice
1/8 teaspoon dried basil
1/8 teaspoon ground black pepper
1/8 teaspoon onion powder (I substituted garlic powder)
1/8 teaspoon celery salt (I didn't have any on hand so I added a pinch of celery seeds and salt)
1/2 pound tilapia fillets (2 fillets)

Preheat your oven's broiler. Grease a broiling pan or line pan with aluminum foil.


In a small bowl, mix together the Parmesan cheese, butter, mayonnaise and lemon juice. Season with dried basil, pepper, onion powder and celery salt. Mix well and set aside.


Arrange fillets in a single layer on the prepared pan. Broil a few inches from the heat for 2 to 3 minutes. Flip the fillets over and broil for a couple more minutes. Remove the fillets from the oven and cover them with the Parmesan cheese mixture on the top side. Broil for 2 more minutes or until the topping is browned and fish flakes easily with a fork. Be careful not to over cook the fish.


Lemon Garlic Spinach
from Me!


olive oil
3 garlic cloves, minced
8 oz. fresh spinach
2 tsp lemon juice
1 tsp lemon zest
salt and pepper, to taste

Using just enough olive oil to coat a sauté pan, cook garlic over medium-low heat until golden.

Add the spinach to the pan, then season with lemon juice, zest, salt, and pepper. Stir until the spinach is just barely cooked.

Remove from pan and serve immediately.

Saturday, September 22, 2007

Lemon Garlic Tilapia with Baked Garlic Rice

My husband doesn't care much for fish in general, but we're trying to be healthy and eat more fish. This is a very simple white fish recipe that I found on Allrecipes.com that he actually likes :) I followed the recipe, but made minor modifications in the quantity of each ingredient to suit our tastes. Unfortunately, this time around I accidentally let the garlic cook too long in the butter, causing it to brown, but it still tasted great!

The rice recipe is from Jessica's blog, What's Cooking in the Orange Kitchen? The garlic infuses the rice with a nice, subtle flavor. I can't even begin to describe how wonderful the house begins to smell as it bakes... the only thing that smells better is roasted garlic! :)

Lemon Garlic Tilapia
from allrecipes.com

4 tilapia fillets
3 tbsp fresh lemon juice (I used 4 tbsp)
1 tbsp butter (I used 2 tbsp)
1 clove of garlic, finely chopped (I used 6 - love garlic!)
1 tsp dried parsley flakes
pepper to taste (I seasoned with salt as well)

Preheat oven to 375 degrees F (I set my oven to 400 degrees F). Spray a baking dish with non-stick cooking spray.

In a pan, melt the butter and sauté the garlic and parsley on low heat. While the garlic is cooking, rinse tilapia fillets under cool water, and pat dry with paper towels. Place fillets in baking dish and season with pepper (and salt). Pour lemon juice over fillets.

Drizzle garlic butter over the fish.

Bake in preheated oven until the fish is white and flakes when pulled apart with a fork, about 15 minutes. (I baked mine for 25-30 minutes.)

Baked Garlic Rice Pilaf
from What's Cooking in the Orange Kitchen?

2 tablespoons butter
3 garlic cloves, crushed (I used 4 cloves - love garlic!)
1 cup long-grain white rice (I used what we had on hand, jasmine rice)
2 1/2 cups chicken broth, divided
1/2 teaspoon salt
1/2 teaspoon black pepper

Preheat oven to 375 F.

Heat butter in a skillet; add garlic and rice and cook until both are golden brown. (I cooked mine over low/medium heat.) Add 1 cup of broth and the salt and pepper. Bring to a boil and pour into a covered casserole; bake for 25 minutes.

Stir in remaining 1-1/2 cups broth; cook for another 45 minutes. This recipe can be doubled without increasing the cooking time.