Showing posts with label egg whites. Show all posts

Monday, January 30, 2012

Kids' Thumbprints (TWD)


I'm a horrible blogger :( I haven't posted in weeks... and I made these cookies back in December and I am just now getting around to blogging about it! *sigh* My life is now consumed with play dates, story time, craft time, little gym, etc. so I haven't had nearly as much time as I used to for baking, blogging, and visiting other blogs :( Thank you to those who are still around, reading each blog post that I'm able to put up! I did want to put a question out there to my readers... do you enjoy the posts about food-related coupons and deals? I started with them on my Facebook page, then posted a few here on the blog... but wasn't sure if that was something that people were interested in? Should I stick with just the recipe posts, or would you like to see deals posted too? Please leave me a comment and let me know! :)

So anyway, without further ado... the very last Tuesdays with Dorie (TWD) recipe was chosen by none other than Dorie Greenspan herself, author of Baking: From My Home to Yours.  She chose Kids' Thumbprints.  These were kind of like grown up peanut butter and jelly cookies.  You take a peanut butter cookie dough and rough it into a ball, then dip it in egg whites and roll it in some chopped up peanuts.  Then proceed like you would with any other thumbprint cookie recipe and press your thumb gently into the center and fill with jam after the cookies have baked.

I only needed one egg white for my cookies, otherwise I followed the recipe exactly as written.  These were incredibly addicting cookies! I found that if you let the jam cool just a little bit after warming it up, the cookies are a little bit easier to fill because then the jam isn't quite so runny.  I shared these with my neighbor and she loved them, too.

If you would like the recipe, you can find here.  This is the last blog post for Tuesdays with Dorie - Baking: From My Home to Yours. I can't believe that after 4 years, we've finally baked through the entire book! It's been so much fun... not only baking everything, but meeting so many other wonderful bloggers out there.  I've had a blast and I have learned so much with the group baking week by week through the book.  I'm still not the best cake decorator out there, but I can make some pretty good pastries and brioche now! I'm so proud of what I have done with the group.  While we are putting Baking back up on the shelf, our group is getting ready to embark on another adventure... as we bake our way through Baking with Julia.  So, if you are interested in baking along with us, please join us as Tuesdays with Dorie: Baking with Julia starts on February 7th!

Sunday, November 27, 2011

Sans Rival (DB)


Catherine of Munchie Musings was our November Daring Baker’s host and she challenged us to make a traditional Filipino dessert – the delicious Sans Rival cake! And for those of us who wanted to try an additional Filipino dessert, Catherine also gave us a bonus recipe for Bibingka which comes from her friend Jun of Jun-blog.

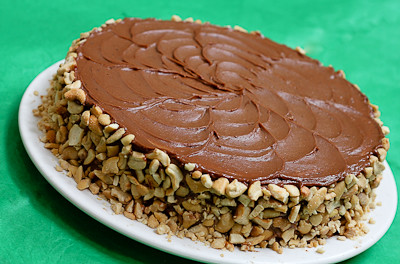
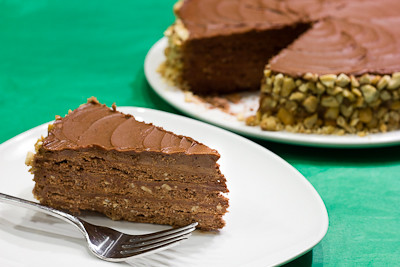
With all the cooking and backing involved with the Thanksgiving holiday, I only had time to make the Sans Rival cake. “Sans rival” means “without rival” and any Filipino will argue with you that this is true. Although it’s one of the most popular desserts in the Philippines, its origins are certainly French. In the 1920’s to 30’s there were many Filipinos who went abroad to study. A good number went to France and learned many French cooking techniques which they then brought home. A Sans Rival is made with layers of dacquoise, typically using crushed cashews, with very rich French buttercream frosting. The dacquoise is allowed to bake and dry to a crispy layer so that there is the crunch of pastry and nuts with the buttery, silky frosting. I went the traditional route with cashews, but the non-traditional route by making mine chocolate based.


The recipe really isn't more difficult than any other layered cake.  In fact, it's a little easier because each layer is baked as is so you don't even need to halve the layers and worry about slicing them perfectly!  It's basically meringue with crushed nuts folded in, then layered with buttercream.

It was fun to make, but I have to be honest and say that it didn't really "wow" me.  I like cashews but wasn't a big fan of a cashew flavored cake.  Perhaps almonds or peanuts would have been a better choice for me? Both my parents thought the cake was good, while my husband didn't really care for it.  So I guess it just depends on who you ask!


Thanks Catherine, for hosting this month's challenge.  Make sure you check out the Daring Bakers' Blogroll to see how everyone else enjoyed this Filipino cake!

Sans Rival
from Catherine of Munchie Musings 

Ingredients
10 large egg whites, room temp
1 cup (240 ml) (225 gm) (8 oz) white granulated sugar
1 teaspoon (5 ml) (3 gm) cream of tartar
¼ cup (60 ml) (20 gm) (2/3 oz) Dutch processed cocoa (optional and not traditional)
2 cups (480 ml) (240 gm) (8½ oz) chopped, toasted cashews

Directions:

Note: You will need four layers which will mean that you might have to bake in two batches. Be sure to use fresh parchment paper and cooled pans for each batch.

1. Preheat oven to moderate 325°F/160°C/gas mark 3.
2. Line cake pan bottoms with parchment paper and butter and flour the sides really well.
3. In a large clean, dry glass or metal mixing bowl, beat egg whites on medium until foamy (2 mins.). Sprinkle with cream of tartar. Gradually add sugar, a couple of tablespoons at a time, continuing to beat now at high speed until stiff shiny peaks form. (about 7-10 mins.)
4. Fold in nuts, reserving enough to use for decoration.
(Note the more finely ground for folding into meringue. The coarsely ground for is decoration of finished cake.)
5. Divide meringue into four equal parts. Spread in pans, evenly to edges. If doing batches, use fresh parchment paper and cooled pans for each batch.
6. Bake in preheated oven for 30 minutes, or until golden brown. Remove the meringue from the baking pans while still hot; allow to cool slightly. Peel off the parchment paper while it is still warm, it is difficult to remove sometimes when they have completely cooled.
7. When cool, trim edges so that all 4 meringue layers are uniformly shaped. Set aside.

French Buttercream:

Ingredients
5 large egg yolks, room temperature
1 cup (240 ml) (225 gm) (8 oz) white granulated sugar
1/4 cup (60 ml) water
1¼ cup (300 ml) (2½ sticks) (285 gm) (10 oz) unsalted butter, room temperature
Optional Flavorings: 2 oz (55 gm) unsweetened chocolate, melted, or 1½ teaspoon (7 ½ ml) almond extract, or 1½ teaspoon (7 ½ ml) vanilla extract, or any flavor you like

Directions:
1. Put the egg yolks in a mixing bowl. Beat at high speed until the yolks have doubled in volume and are a lemon yellow.
2. Put the sugar and water in a heavy pan and cook over medium heat, stirring the sides down only until all the sugar is dissolved and the syrup reaches 235°F/112°C (or thread stage).
3. With the mixer on high, very slowly pour the syrup down the sides of the bowl, until all has been added. Be careful as the very hot syrup could burn you if it splashes from the beaters. Continue beating on high until the mixture is ROOM TEMPERATURE (about 15 mins). Still on high, beat in the soft, room temperature butter a tablespoon at a time. Add flavoring after you beat in the butter. Refrigerate the buttercream for at least an hour, and whip it smooth just before you use it.

Assembly:

Set bottom meringue on cake board with a dab of butter cream to hold it in place. Spread a
thin layer of buttercream and then place another meringue on top. Repeat with a thin layer of
buttercream, meringue, thin layer of buttercream, meringue, and finally buttercream the top and
sides. Decorate with reserved nuts.
Refrigerate until ready to serve. It is easier to cut cold. May freeze.

Yield: 12 Servings

Notes:
• Brushing the parchment paper with some oil will help you to peel it off after the dacquoise is baked.
• Do not grind the nuts down to a fine flour/powder. This recipe is better with the nuts in a grainy/sandy grind.
• It is important to peel off the parchment within a couple of minutes of it coming out of the oven. Certainly while it is still warm.
• After you’ve removed the paper, return it into the warm oven to dry out more as the oven is cooling down. You want crunchy layers.

Tuesday, August 2, 2011

Cocoa Almond Meringues (TWD)


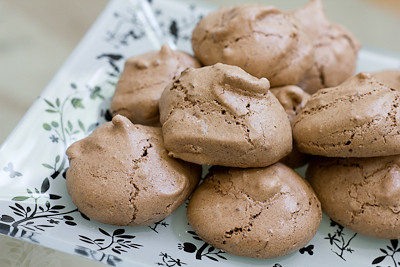
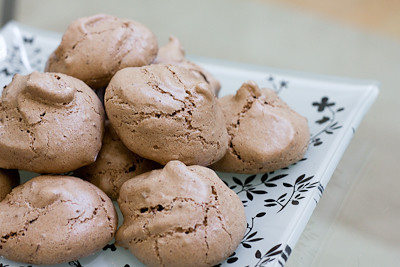
This week's Tuesdays with Dorie (TWD) was chosen by Mike of Ugly Food for an Ugly Dude: Cocoa Almond Meringues.  Dorie describes them as small cookies that "have the rough, craggy surface of stone nuggets.  Their interiors are wonderfully chewy and their flavor a bit caramelish, slightly nutty and quite chocolaty."

I loved how quick and easy these cookies were to make.  I think "slightly nutty" is a good description because despite being called Cocoa Almond Meringues, I'm not sure you'd know there were (ground) almonds in them unless you saw the recipe.  Regardless, these are especially great if you're craving something chocolate but want something light.


Thanks Mike, for hosting this week. If you would like the recipe, you can find it here. Make sure you check out the TWD Blogroll, to see how everyone else enjoyed these crunchy, chewy, chocolately treats!

Wednesday, July 27, 2011

Fresh Frasiers (DB)

Jana of Cherry Tea Cakes was our July Daring Bakers’ host and she challenges us to make Fresh Frasiers inspired by recipes written by Elisabeth M. Prueitt and Chad Robertson in the beautiful cookbook Tartine.  The Frasier is a light, moist layered chiffon cake, split and filled with sliced fresh fruit and pastry cream, then topped with a thin sheet of almond paste.

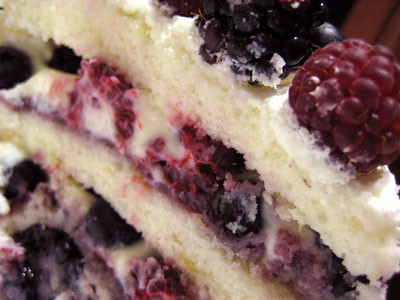
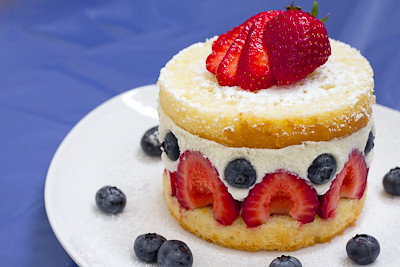
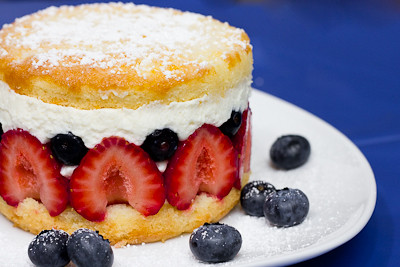
I love fresh fruit and this challenge was the perfect way to showcase some of summer's fresh fruits! I omitted the optional layer of almond paste on top, mostly just because I didn't have any on hand, but followed the rest of the recipe exactly. I made an orange chiffon cake and filled it with strawberries and blueberries. I made the simple syrup with 2 tablespoons of orange juice and 2 tablespoons of triple sec. I was concerned the flavor of the alcohol would be too strong if I added the full 4 tablespoons of alcohol, but in retrospect I think it would have been much better that way.
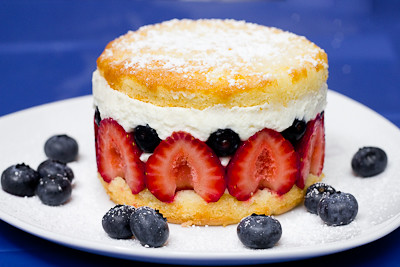
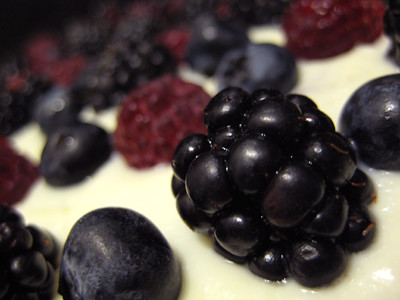
Regardless, this cake was amazing. The chiffon had an incredibly light but moist crumb.  (It is also special to me because this was the first time that my 20 month old helped me make a cake! She helped mix the cake batter (before the egg whites were added!) and it was so great to see how much fun she was having helping her mommy out.)  The pastry cream was delicious, though I think calling it a "pastry cream" makes it sound heavier than it actually is. Most pastry creams are made with multiple egg yolks (thus lending them their richness); this one is made with just one whole egg. So it's more like whipped cream with a little pastry cream added in. This keeps the dessert from being too heavy, and adds just a touch of richness to it. I basically loved everything about this dessert. Just look at all those fresh berries swimming in pastry cream! Yum!
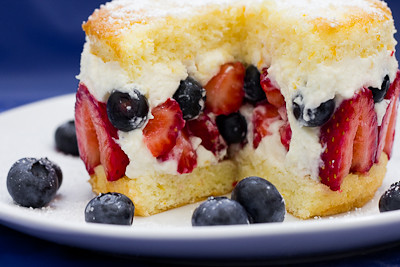
While this dessert is compromised of several components, each part on its own is very simple and you can make each individual component ahead of time and then assemble it all when needed.  Plus, if you are short on time, you can just make a trifle with the cake, fruit, and pastry cream!  It's every bit as good without any of the fuss.

Thanks Jana, for hosting this month's challenge.  I've never had or made a Fresh Frasier before, but I fell in love with them and definitely plan to make them again in the future! Make sure you check out the Daring Bakers' Blogroll to see how everyone else enjoyed this sweet, summery treat.

* Recipe notes - 
- When cutting parchment rounds for your pan(s), don't forget to check out my helpful tip here!
- I made my chiffon cakes in mini springform pans.  One chiffon cake recipe (below) will fit in four to five mini springform pans (depending on how thick you want them to be).  Depending on how thick or thin you want your cake layers to be, you can cut them into either three or four layers once they are cooled.  (I made four mini cakes and found that cutting them into two layers yielded layers that were too thick for this dessert.)
- Please note that the cake, like all chiffon cakes, will rise quite a bit, so do not overfill your pan(s)! You only want to fill them about half way, or two-thirds at most.
- Baking time was approximately 30 minutes for the mini cakes.

Fresh Frasiers
Basic Chiffon Cake:

Ingredients:
1 cup + 2 tablespoons (270 ml) (5½ oz/155 gm) all-purpose flour
1 teaspoon (5 ml) (4 gm) baking powder
3/4 cups (180 ml) (6 oz /170 gm) sugar
1/2 teaspoon (2½ ml) (1½ gm) salt, preferably kosher
1/4 cup (2 fl oz/60 ml) vegetable oil
3 large egg yolks
⅓ cup + 1 tablespoon (3.17 fl oz/95 ml) water
1 teaspoon (5 ml) pure vanilla extract
3/4 teaspoon (3¾ ml) (3 gm) lemon zest, grated
5 large egg whites
¼ teaspoon (1¼ ml) (1 gm) cream of tartar

Directions:

Preheat the oven to moderate 325°F (160°C/gas mark 3).

Line the bottom of an 8-inch (20 cm) spring form pan with parchment paper. Do not grease the sides of the pan.

In a large mixing bowl, stir together the flour and baking powder. Add in all but 3 tablespoons (45 ml.) of sugar, and all of the salt. Stir to combine.

In a small bowl combine the oil, egg yolks, water, vanilla and lemon zest. Whisk thoroughly.

Combine with the dry ingredients and mix thoroughly for about one minute, or until very smooth.

Put the egg whites into a stand mixer, and beat on medium speed using a whisk attachment on a medium speed, until frothy. Add cream of tartar and beat on a medium speed until the whites hold soft peaks. Slowly add the remaining sugar and beat on a medium-high speed until the whites hold firm and form shiny peaks.

Using a grease free rubber spatula, scoop about ⅓ of the whites into the yolk mixture and fold in gently. Gently fold in the remaining whites just until combined.

Pour the batter into the prepared pan. Bake for 45 to 55 minutes or until toothpick inserted into the center comes out clean.

Removed the cake from the oven and allow to cool in the pan on a wire rack.

To unmold, run a knife around the sides to loosen the cake from the pan and remove the spring form sides. Invert the cake and peel off the parchment paper. Refrigerate for up to four days.

Variations to the Basic Chiffon Cake:

Lemon Chiffon Cake

Ingredient Alterations:
Reduce water to 1/4 cup (60 ml)
Add 1/8 cup (30 ml) lemon juice
Increase lemon zest to 1½ teaspoon (7½ ml) (5 gm)
Remove the vanilla from the recipe

Direction Alterations:
Follow the directions, same as above, adding the lemon juice and zest to the oil, egg yolks and water in step 4.

Orange Chiffon Cake

Ingredient Alterations:
Replace the full amount of water with orange juice
Replace lemon zest with the zest of one orange
Remove the vanilla from the recipe

Direction Alterations:
Follow the directions, same as above, adding the orange juice and zest to the oil, and egg yolks in step 4.

Coconut Chiffon Cake

Ingredient Alterations:
Add ¼ teaspoon (1¼ ml) (1 gm) freshly ground nutmeg
Reduce oil to 1/8 cup (1 fl oz/30ml)
Reduce water to 1/8 cup (1 fl oz/30ml)
Add 1/3 cup (2 ⅔fl oz/80 ml) unsweetened coconut milk
Remove the vanilla from the recipe

Direction Alterations:
Follow the directions, same as above, adding the nutmeg to the flour mixture in step 3, and the coconut milk to the oil, water and egg yolks in step 4.

Chocolate Chiffon Cake

Ingredient Alterations:
Reduce all-purpose flour to ¾ cup + 1 tablespoon (195 ml) (4 oz/110 g)
Add 1/4 cup (60 ml) (3/4 oz/20 g) cocoa powder

Direction Alterations:
Follow the directions, same as above, adding the cocoa to the flour mixture in step 3.

Pastry Cream Filling:

Ingredients:
1 cup (8 fl oz/250 ml) whole milk
1/2 teaspoon (2½ ml) pure vanilla extract
1/8 teaspoon (1/2 ml) (¼ gm) salt, preferably kosher
2 tablespoons (30 ml) (10 gm)cornstarch
1/4 cup (60 ml) (2 oz/55 gm) sugar
1 large egg
2 tablespoons (30 ml) (1 oz/30 gm) unsalted butter
3/4 teaspoon (3¾ ml) (4 gm) gelatin
1/2 tablespoon (7½ ml) water
1 cup (8 fl oz/250 ml) heavy cream

Directions:

Pour the milk, vanilla, and salt into a heavy sauce pan. Place over medium-high heat and scald, bringing it to a near boiling point. Stir occasionally.

Meanwhile, in a stand mixer add the cornstarch and sugar. Whisk to combine

Add the eggs to the sugar and cornstarch and whisk until smooth.

When the milk is ready, gently and slowly while the stand mixer is whisking, pour the heated milk down the side of the bowl into the egg mixture.

Pour the mixture back into the warm pot and continue to cook over a medium heat until the custard is thick, just about to boil and coats the back of a spoon.

Remove from heat and pass through a fine mesh sieve into a large mixing bowl. Allow to cool for ten minutes stirring occasionally.

Cut the butter into four pieces and whisk into the pastry cream a piece at a time until smooth.

Cover the cream with plastic wrap, pressing the plastic wrap onto the top of the cream to prevent a skin from forming. Chill in the refrigerator for up to five days.

In a small dish, sprinkle the gelatin over the water and let stand for a few minutes to soften.

Put two inches (55 mm) of water into a small sauce pan and bring to a simmer over a medium heat.

Measure 1/4 cup (2 oz/60 ml) of the chilled pastry cream into a small stainless steel bowl that will sit across the sauce pan with the simmering water, without touching the water.

Heat the cream until it is 120 F (48.8 C). Add the gelatin and whisk until smooth. Remove from the water bath, and whisk the remaining cold pastry cream in to incorporate in two batches.

In a stand mixer, fitted with the whisk attachment, whip the cream until it holds medium-stiff peaks.

Immediately fold the whipped cream into the pastry cream with a rubber spatula.

Simple Syrup:

You may choose to flavor the syrup. One way is to use flavored sugar (for example: apple cider sugar, orange sugar, or vanilla sugar) or to stir in 1-2 teaspoons of flavored extract. You may also infuse with herbs or spices, if desired or add four tablespoons (60 ml) of fruit juice or liqueur while the syrup is cooling.
Ingredients:
1/3 cup (2⅔ fl oz/80 ml) (2⅔ oz/75 gm) of sugar, flavored or white
1/3 cup (2⅔ fl oz/80 ml) of water

Directions:

Combine the water and sugar in a medium saucepan.

Bring the mixture to a boil and let the sugar dissolve. Stirring is not necessary, but will not harm the syrup.

Remove the syrup from the heat and cool slightly.

Transfer syrup to a lidded container or jar that can be stored in the refrigerator. Simple syrup can be stored for up to one month.


Fraisier Assembly:

Components:
1 baked 8 inch (20 cm) chiffon cake
1 recipe pastry cream filling
⅓ cup (80 ml) simple syrup or flavored syrup
2 lbs (900 g) strawberries
confectioners’ sugar for dusting
½ cup (120 ml) (5 oz/140 gm) almond paste

Directions:

Line the sides of a 8-inch (20 cm) spring form pan with plastic wrap. Do not line the bottom of the pan.

Cut the cake in half horizontally to form two layers.

Fit the bottom layer into the prepared spring form pan. Moisten the layer evenly with the simple syrup.

When the cake has absorbed enough syrup to resemble a squishy sponge, you have enough.

Hull and slice in half enough strawberries to arrange around the sides of the cake pan. Place the cut side of the strawberry against the sides of the pan, point side up forming a ring.

Pipe cream in-between strawberries and a thin layer across the top of the cake.

Hull and quarter your remaining strawberries and place them in the middle of the cake. Cover the strawberries and entirely with the all but 1 tbsp. (15 ml) of the pastry cream.

Place the second cake layer on top and moisten with the simple syrup.

Lightly dust a work surface with confectioners' sugar and roll out the almond paste to a 10-inch (25 cm) round 1/16 inch (1.5 mm) thick. Spread the remaining 1 tablespoon (15 ml) of pastry cream on the top of the cake and cover with the round of almond paste.

Cover with plastic wrap and refrigerate for at least 4 hours.

To serve release the sides of the spring form pan and peel away the plastic wrap.

Serve immediately or store in the refrigerator for up to 3 days.

Sunday, March 27, 2011

Yeasted Meringue Coffee Cake (DB)


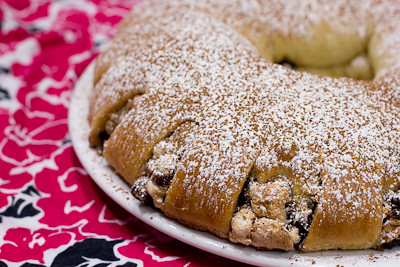
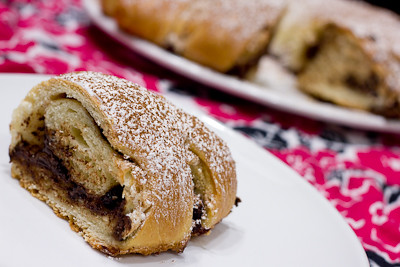
The March 2011 Daring Bakers’ challenge was hosted by Ria of Ria’s Collection and Jamie of Life’s a Feast. Ria and Jamie challenged The Daring Bakers to bake a yeasted Meringue Coffee Cake. Jamie found this recipe on a piece of yellowed paper in her dad’s collection of clipped out and hand-written recipes from the 1970’s, no source, no date, and she tried the recipe and loved it! It's a gorgeous brioche-like dough rolled jellyroll style around a layer of whipped meringue, cinnamon, sugar, and chocolate chips, then shaped into a wreath and baked.

I halved this recipe because I didn't really see the need to have two coffee cakes around the house tempting me! The recipe was easy to follow, and instead of kneading the dough by hand I let my KitchenAid dough hook do the work for me.  I did have to add a little extra flour until the dough was ready and was no longer sticking to the sides of the bowl, but otherwise the recipe was really straightforward.  I used the filling recommended by Jamie, sans nuts, and simply doubled the amount of cinnamon in the mixture.  It came out just right!

I wasn't sure what to expect from the meringue layer that is rolled into this cake, but as Ria and Jamie describe, the meringue "miraculously melts into the dough as it bakes leaving behind just a hint of sweetness and adding to the perfect moistness of the cake."  Some of it does ooze out between the slits cut into the cake, and that part of the meringue bakes up into slightly crisp, ooey gooey goodness!


Thanks Ria and Jamie, for hosting this month's challenge.  It was delicious and I'll definitely be making it again. Make sure you check out the Daring Bakers' Blogroll to see how everyone else enjoyed this wonderful breakfast treat.

And don't forget - I'm giving you two chances right now to enter to win a $100 Visa gift card.  There are just a few days left to enter the giveaway that ends on March 31st.  You have until April 11th to enter my second giveaway here.

FILLED MERINGUE COFFEE CAKE
Makes 2 round coffee cakes, each approximately 10 inches in diameter
The recipe can easily be halved to make one round coffee cake

Ingredients
For the yeast coffee cake dough:
4 cups (600 g / 1.5 lbs.) flour
¼ cup (55 g / 2 oz.) sugar
¾ teaspoon (5 g / ¼ oz.) salt
1 package (2 ¼ teaspoons / 7 g / less than an ounce) active dried yeast
¾ cup (180 ml / 6 fl. oz.) whole milk
¼ cup (60 ml / 2 fl. oz. water (doesn’t matter what temperature)
½ cup (135 g / 4.75 oz.) unsalted butter at room temperature
2 large eggs at room temperature
10 strands saffron for Ria’s version (Saffron might be hard to find and it’s expensive, so you can substitute with ½ - 1 teaspoon of ground cardamom or ground nutmeg. Or simply leave it plain like Jamie’s version)

For the meringue:
3 large egg whites at room temperature
¼ teaspoon salt
½ teaspoon vanilla
½ cup (110 g / 4 oz.) sugar

For the filling:
Jamie’s version: (this recipe is for 1 coffee cake)
1 cup (110 g / 4 oz.) chopped pecans or walnuts
2 Tablespoons (30 g / 1 oz.) granulated sugar
¼ teaspoon ground cinnamon
1 cup (170 g / 6 oz.) semisweet chocolate chips or coarsely chopped chocolate

Ria’s version:
1 cup (130 g / 5 oz.) chopped cashew nuts
2 Tablespoons (30 g / 1 oz.) granulated sugar
½ teaspoon garam masala (You can make it at home – recipe below - or buy from any Asian/Indian grocery store)
1 cup (170g / 6 oz.) semisweet chocolate chips ( I used Ghirardelli)
Egg wash: 1 beaten egg
Cocoa powder (optional) and confectioner’s sugar (powdered/icing sugar) for dusting cakes

**Garam (means “hot”) masala (means “mixture”) is a blend of ground spices and is used in most Indian savory dishes. It is used in limited quantities while cooking vegetables, meats & eggs. There is no “one” recipe for it as every household has a recipe of their own. Below, I am going to share the recipe which I follow.
4 or 5 sticks (25 g) Cinnamon Sticks (break a stick and open the scroll)
3 ½ tablespoons (25 g / less than an ounce) Cloves, whole
100 g. (3.5 oz.) Fennel seeds
4 tablespoons (25 g / less than an ounce) Cumin seeds
1 ½ tablespoons (10 g / less than half an ounce) Peppercorns
25 g (less than half an ounce) Green Cardamom pods

In a small pan on medium heat, roast each spice individually (it hardly takes a minute) until you get a nice aroma. Make sure you stir it throughout so that it doesn’t burn. As soon as each spice is roasted, transfer it to a bowl to cool slightly. Once they are all roasted, grind into a fine powder by using a coffee grinder, or pestle & mortar. Store in an airtight container and use as needed.

Directions:
Prepare the dough:
In a large mixing bowl, combine 1 ½ cups (230 g) of the flour, the sugar, salt and yeast.
In a saucepan, combine the milk, water and butter and heat over medium heat until warm and the butter is just melted. Ria’s version: add the 10 saffron threads to the warmed liquid and allow to steep off of the heat for 10 minutes. This will give the mixture a distinct aroma and flavor and a yellowish-orange hue.

With an electric mixer on low speed, gradually add the warm liquid to the flour/yeast mixture, beating until well blended. Increase mixer speed to medium and beat 2 minutes. Add the eggs and 1 cup (150 g) flour and beat for 2 more minutes.

Using a wooden spoon, stir in enough of the remaining flour to make a dough that holds together. Turn out onto a floured surface (use any of the 1 ½ cups of flour remaining) and knead the dough for 8 to 10 minutes until the dough is soft, smooth, sexy and elastic, keeping the work surface floured and adding extra flour as needed.
Place the dough in a lightly greased (I use vegetable oil) bowl, turning to coat all sides. Cover the bowl with plastic wrap and a kitchen towel and let rise until double in bulk, 45 – 60 minutes. The rising time will depend on the type of yeast you use.

Prepare your filling:In a small bowl, combine the cinnamon and sugar for the filling if using. You can add the chopped nuts to this if you like, but I find it easier to sprinkle on both the nuts and the chocolate separately.

Once the dough has doubled, make the meringue:
In a clean mixing bowl – ideally a plastic or metal bowl so the egg whites adhere to the side (they slip on glass) and you don’t end up with liquid remaining in the bottom – beat the egg whites with the salt, first on low speed for 30 seconds, then increase to high and continue beating until foamy and opaque. Add the vanilla then start adding the ½ cup sugar, a tablespoon at a time as you beat, until very stiff, glossy peaks form.

Assemble the Coffee Cakes:
Line 2 baking/cookie sheets with parchment paper.

Punch down the dough and divide in half. On a lightly floured surface, working one piece of the dough at a time (keep the other half of the dough wrapped in plastic), roll out the dough into a 20 x 10-inch (about 51 x 25 ½ cm) rectangle. Spread half of the meringue evenly over the rectangle up to about 1/2-inch (3/4 cm) from the edges. Sprinkle half of your filling of choice evenly over the meringue (ex: half of the cinnamon-sugar followed by half the chopped nuts and half of the chocolate chips/chopped chocolate).

Now, roll up the dough jellyroll style, from the long side. Pinch the seam closed to seal. Very carefully transfer the filled log to one of the lined cookie sheets, seam side down. Bring the ends of the log around and seal the ends together, forming a ring, tucking one end into the other and pinching to seal.
Using kitchen scissors or a sharp knife (although scissors are easier), make cuts along the outside edge at 1-inch (2 ½ cm) intervals. Make them as shallow or as deep as desired but don’t be afraid to cut deep into the ring.

Repeat with the remaining dough, meringue and fillings.

Cover the 2 coffee cakes with plastic wrap and allow them to rise again for 45 to 60 minutes.

Preheat the oven to 350°F (180°C).

Brush the tops of the coffee cakes with the egg wash. Bake in the preheated oven for 25 to 30 minutes until risen and golden brown. The dough should sound hollow when tapped.
 
Remove from the oven and slide the parchment paper off the cookie sheets onto the table. Very gently loosen the coffee cakes from the paper with a large spatula and carefully slide the cakes off onto cooling racks. Allow to cool.

Just before serving, dust the tops of the coffee cakes with confectioner’s sugar as well as cocoa powder if using chocolate in the filling. These are best eaten fresh, the same day or the next day.

Sunday, June 27, 2010

Chocolate Pavlovas with Chocolate Mascarpone Mousse (DB)


The June 2010 Daring Bakers’ challenge was hosted by Dawn of Doable and Delicious. Dawn challenged the Daring Bakers’ to make Chocolate Pavlovas and Chocolate Mascarpone Mousse. The challenge recipe is based on a recipe from the book Chocolate Epiphany by Francois Payard.

I made a half recipe that yielded enough to serve at least 4-6 people.  I also made my own mascarpone cheese, after learning how easy it is to make.  For the half recipe, you'll need to make 3/4 of the mascarpone cheese recipe linked here.

I love chocolate, but this was almost too much for me.  Each individual component was good on its own (the chocolate meringue, the chocolate mascarpone mousse, etc.), but somehow when you put everything together it was just too chocolatey and sweet for me.  My husband didn't find that to be the case at all, so I am sure it just depends on who you ask.  It was only after making these that I learned that pavlovas are traditionally served with fresh fruit.  I think the fruit would have balanced out all the chocolate quite well with these, and I might have enjoyed them a bit more served that way.

Thanks Dawn, for hosting this month's challenge.  Make sure you check out the Daring Bakers' Blogroll to see how everyone else enjoyed these chocolately treats.

Chocolate Pavlovas with Chocolate Mascarpone Mousse
from Chocolate Epiphany by Francois Payard
Printable PDF Recipe

Recipe 1: Chocolate Meringue (for the chocolate Pavlova):

3 large egg whites
½ cup plus 1 tbsp (110 grams) white granulated sugar
¼ cup (30 grams) confectioner’s (icing) sugar
1/3 cup (30 grams) cocoa powder

Directions:

1. Place a rack in the center of the oven and preheat to 200º F (95º C) degrees. Line two baking sheets with silpat or parchment and set aside.

2. Put the egg whites in a bowl and whip until soft peaks form. Increase speed to high and gradually add granulated sugar about 1 tbsp at a time until stiff peaks form. (The whites should be firm but moist.)

3. Sift the confectioner’s sugar and cocoa powder over the egg whites and fold the dry ingredients into the white. (This looks like it will not happen. Fold gently and it will eventually come together.)

4. Fill a pastry bag with the meringue. Pipe the meringue into whatever shapes you desire. Alternatively, you could just free form your shapes and level them a bit with the back of a spoon. (Class made rounds, hearts, diamonds and an attempt at a clover was made!)

5. Bake for 2-3 hours until the meringues become dry and crisp. Cool and store in an airtight container for up to 3 days.


Recipe 2: Chocolate Mascarpone Mousse (for the top of the Pavlova base):

1 ½ cups (355 mls) heavy cream (cream with a milk fat content of between 36 and 40 percent)
grated zest of 1 average sized lemon
9 ounces (255 grams) 72% chocolate, chopped
1 2/3 cups (390 mls) mascarpone (you can easily make your own at home for a fraction of the cost! recipe here)
pinch of nutmeg
2 tbsp (30 mls) Grand Marnier (or orange juice)

Directions:

1. Put ½ cup (120 mls) of the heavy cream and the lemon zest in a saucepan over medium high heat. Once warm, add the chocolate and whisk until melted and smooth. Transfer the mixture to a bowl and let sit at room temperature until cool.

2. Place the mascarpone, the remaining cup of cream and nutmeg in a bowl. Whip on low for a minute until the mascarpone is loose. Add the Grand Marnier and whip on medium speed until it holds soft peaks. (DO NOT OVERBEAT AS THE MASCARPONE WILL BREAK.)

3. Mix about ¼ of the mascarpone mixture into the chocolate to lighten. Fold in the remaining mascarpone until well incorporated. Fill a pastry bag with the mousse. Again, you could just free form mousse on top of the pavlova.

Recipe 3: Mascarpone Cream (for drizzling):

1 recipe crème anglaise
½ cup (120 mls) mascarpone (you can easily make your own at home for a fraction of the cost! recipe here)
2 tbsp (30 mls) Sambucca (optional)
½ cup (120 mls) heavy cream

Directions:

1. Prepare the crème anglaise. Slowly whisk in the mascarpone and the Sambucca and let the mixture cool. Put the cream in a bowl and beat with electric mixer until very soft peaks are formed. Fold the cream into the mascarpone mixture.

Recipe 4: Crème Anglaise (a component of the Mascarpone Cream above):

1 cup (235 mls) whole milk
1 cup (235 mls) heavy cream
1 vanilla bean, split or 1 tsp pure vanilla extract
6 large egg yolks
6 tbsp (75 grams) sugar

Directions:

1. In a bowl, whisk together the egg yolks and sugar until the mixture turns pale yellow.
2. Combine the milk, cream and vanilla in a saucepan over medium high heat, bringing the mixture to a boil. Take off the heat.

3. Pour about ½ cup of the hot liquid into the yolk mixture, whisking constantly to keep from making scrambled eggs. Pour the yolk mixture into the pan with the remaining cream mixture and put the heat back on medium. Stir constantly with a wooden spoon until the mixture thickens enough to lightly coat the back of a wooden spoon. DO NOT OVERCOOK.
4. Remove the mixture from the heat and strain it through a fine mesh sieve into a bowl. Cover and refrigerate until the mixture is thoroughly chilled, about 2 hours or overnight.

Sunday, June 13, 2010

Chocolate Orange Macaroons (SMS)


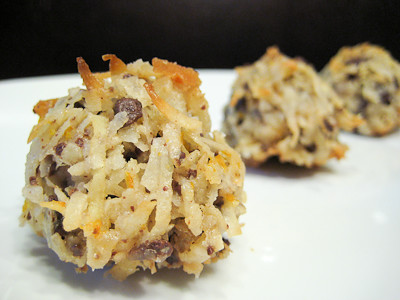
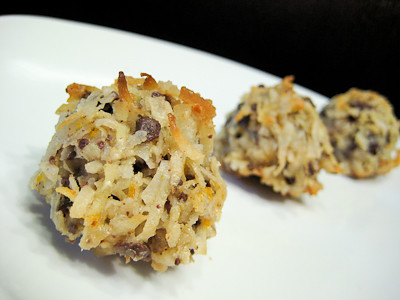
This week's Sweet Melissa Sundays (SMS) recipe was chosen by Ellen of Blue Tree Green Heart: Chocolate Orange Macaroons. I love coconut, and so does my husband, so making this recipe was a no brainer. I also love chocolate infused with orange. Plus, it doesn't hurt that this recipe only takes a few minutes to come together - a bonus these days for this busy mommy!


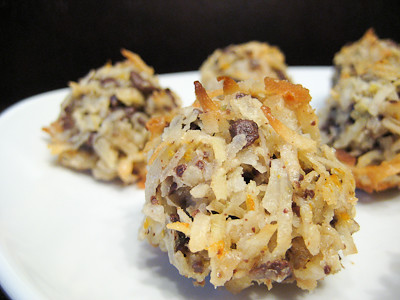
The recipe is short and sweet. Rub the zest of an orange with some shredded coconut, then add some sugar and chopped chocolate, and mix with egg whites. Scoop and then bake! That's it! The only thing I did differently was that I chose to rub the sugar in with the zest as well, instead of just mixing it with the chocolate. I figured that would give the macaroons an even stronger orange flavor.


These came out perfect! Crisp on the outside, chewy in the middle, with bits of chocolate and plenty of orange flavor.  Some found these to be a bit too sweet, and while you could probably decrease the amount of sugar in them to cut back on some calories, I didn't find them too sweet at all.  I'll definitely be making these again and again! They're a great way to use up egg whites after all the ice cream I've been making this summer and much more fun than angel food cake.

Thanks Ellen, for hosting this week.  If you would like the recipe, you can find it here. Make sure you check out the Sweet Melissa Sundays Blog Roll to see how everyone else enjoyed these delicious treats.

* Recipe notes:
- I used semisweet chocolate chips in this recipe instead of bar chocolate.
- If you tend to prefer cookies that aren't super sweet, use unsweetened coconut or decrease the amount of sugar in the recipe to one half cup.

- I used a medium cookie scoop and got about 36 cookies, not 24 from the recipe.
- Keep a close eye on these to prevent them from burning - mine were done a few minutes early, around 22 minutes.
- For more tips, click here.

Sunday, December 27, 2009

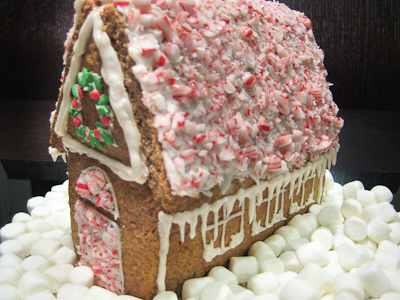
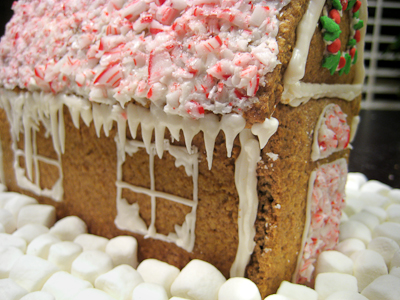
Gingerbread House (DB)


The December 2009 Daring Bakers’ challenge was brought to you by Anna of Very Small Anna and Y of Lemonpi. They chose to challenge Daring Bakers’ everywhere to bake and assemble a gingerbread house from scratch. They chose recipes from Good Housekeeping and from The Great Scandinavian Baking Book as the challenge recipes.


I wasn't able to participate in November's challenge due to the birth of my little one, and almost let this one pass me by but I was able to find some time at the last minute today to get this gingerbread house completed. As Katrina of Baking and Boys! commented on my previous post, everyone says you have to "sleep when baby sleeps," but when you're a Daring Baker you have to "bake when baby sleeps" instead ;)


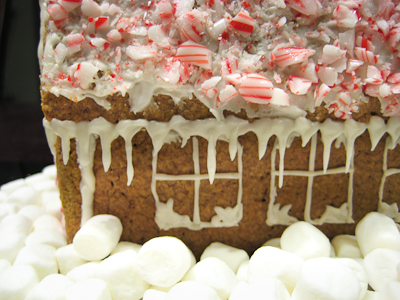
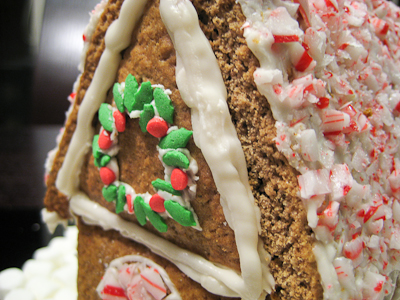
The gingerbread was simple enough to make - just a few minutes to prep and then two hours to chill in the refrigerator. A few bakers noted that their dough was too dry, but I had no such issues with mine. The more time consuming aspect was (obviously) the assembly and decoration of the gingerbread house. I wish I could have made mine more elaborate, but with only short spurts of time available to me today, I had to go simple. I made a half recipe of gingerbread and a full recipe of royal icing and that seemed to be just right for my little house.

Thanks Anna and Y, for hosting this month's challenge. It was fun making my very first gingerbread house. Make sure you check out the Daring Bakers' Blogroll to see all the other wonderful creations.


Scandinavian Gingerbread (Pepparkakstuga)
from The Great Scandinavian Baking Book by Beatrice Ojakangas

1 cup butter, room temperature [226g]
1 cup brown sugar, well packed [220g]
2 tablespoons cinnamon
4 teaspoons ground ginger
3 teaspoons ground cloves
2 teaspoons baking soda
½ cup boiling water
5 cups all-purpose flour [875g]

1. In a large bowl, cream the butter and sugar until blended. Add the cinnamon, ginger and cloves. Mix the baking soda with the boiling water and add to the dough along with the flour. Mix to make a stiff dough. (*Make sure you don't overmix the dough initially as you'll over develop the gluten and make your dough tough and shrinky.) If necessary add more water, a tablespoon at a time. Chill 2 hours or overnight.

2. Cut patterns for the house, making patterns for the roof, front walls, gabled walls, chimney and door out of cardboard.

3. Roll the dough out on a large, ungreased baking sheet and place the patterns on the dough. Mark off the various pieces with a knife, but leave the pieces in place.

4. [I rolled out the dough on a floured bench, roughly 1/8 inch thick (which allows for fact that the dough puffs a little when baked), cut required shapes and transferred these to the baking sheet. Any scraps I saved and rerolled at the end.]

5. Preheat the oven to 375'F (190'C). Bake for 12 to 15 minutes until the cookie dough feels firm. After baking, again place the pattern on top of the gingerbread and trim the shapes, cutting the edges with a straight-edged knife. Leave to cool on the baking sheet.

Royal Icing:

1 large egg white
3 cups (330g) powdered sugar
1 teaspoon white vinegar
1 teaspoon almond extract

Beat all ingredients until smooth, adding the powdered sugar gradually to get the desired consistency (I used about 2.5 cups of powdered sugar). Pipe on pieces and allow to dry before assembling. If you aren't using it all at once you can keep it in a small bowl, loosely covered with a damp towel for a few hours until ready to use. You may have to beat it slightly to get it an even consistency if the top sets up a bit. Piped on the house, this will set up hard over time.

Tuesday, October 27, 2009

Macarons (DB)


The 2009 October Daring Bakers’ challenge was brought to us by Ami S. She chose macarons from Claudia Fleming’s The Last Course: The Desserts of Gramercy Tavern as the challenge recipe.

I have long been intimidated by the French macaron, so I was excited to see this was the October challenge because I finally had that extra push I needed to overcome my fears. I am sad to report that after baking along with the Daring Bakers for over a year and half now, I failed my first challenge. Despite my efforts, I could not get those characteristic "feet" at the bottom of my macarons.


I made a full batch but baked the first half using the oven drying method described in the recipe. This is supposed to dry the egg whites out to help them grow the "feet." I was sorely disappointed when I pulled my macarons out of the oven and they did not have any feet. So with the second half batch I let the macarons air dry on the counter for one hour and then did the additional oven drying method. Alas, this still did not produce the desired effect :( According to David Lebovitz, a "perfect macaron needs to be folded just-so. One extra fold, and it's all over. Not enough, and you won't get that little foot." Some bakers note that you'll know when the batter is just right because it will flow like "magma." Honestly, I am still not sure what I did wrong... and I would have persisted until I was successful but I am 38 weeks pregnant now and did not have the time nor the energy to make another batch.

The good news was that despite their lack of feet, these macarons were delicious! I made gingerbread macarons inspired by Tartelette and filled my macarons with chocolate ganache. The gingerbread flavor was very subtle (but just right in my opinion) because I used 1/4 teaspoons ground ginger, 1/8 teaspoon ground cinnamon, 1/8 teaspoon ground nutmeg, and 1/8 teaspoon ground cloves in the below recipe whereas Tartelette's recipe uses the same amount for just 3 egg whites.


Thanks Ami, for hosting this month's challenge. You finally gave me the push I needed to try my hand at macarons... I am only sad to report that I was unsuccessful. But I am proud to say that at least I tried and that's what being a Daring Baker is all about, right? I promise to try again in the future. Make sure you check out the Daring Bakers' Blogroll to see how everyone else enjoyed these classic French sweets.

Macarons
from Claudia Fleming’s The Last Course: The Desserts of Gramercy Tavern

Ingredients
Confectioners’ (Icing) sugar: 2 ¼ cups (225 g, 8 oz.)
Almond flour: 2 cups (190 g, 6.7 oz.)
Granulated sugar: 2 tablespoons (25 g , .88 oz.)
Egg whites: 5 (Have at room temperature)

Directions:

1. Preheat the oven to 200°F (93°C). Combine the confectioners’ sugar and almond flour in a medium bowl. If grinding your own nuts, combine nuts and a cup of confectioners’ sugar in the bowl of a food processor and grind until nuts are very fine and powdery.
2. Beat the egg whites in the clean dry bowl of a stand mixer until they hold soft peaks. Slowly add the granulated sugar and beat until the mixture holds stiff peaks.
3. Sift a third of the almond flour mixture into the meringue and fold gently to combine. If you are planning on adding zest or other flavorings to the batter, now is the time. Sift in the remaining almond flour in two batches. Be gentle! Don’t overfold, but fully incorporate your ingredients.
4. Spoon the mixture into a pastry bag fitted with a plain half-inch tip (Ateco #806). You can also use a Ziploc bag with a corner cut off. It’s easiest to fill your bag if you stand it up in a tall glass and fold the top down before spooning in the batter.
5. Pipe one-inch-sized (2.5 cm) mounds of batter onto baking sheets lined with nonstick liners (or parchment paper).
6. Bake the macaroon for 5 minutes. Remove the pan from the oven and raise the temperature to 375°F (190°C). Once the oven is up to temperature, put the pans back in the oven and bake for an additional 7 to 8 minutes, or lightly colored.
7. Cool on a rack before filling.

Yield: 10 dozen. Ami's note: My yield was much smaller than this. I produced about two dozen filled macaroons.

Tuesday, August 25, 2009

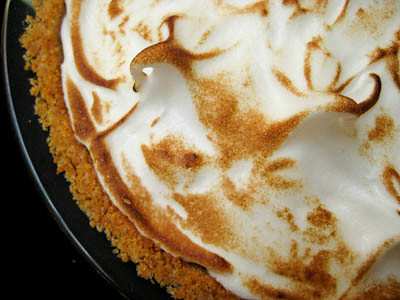
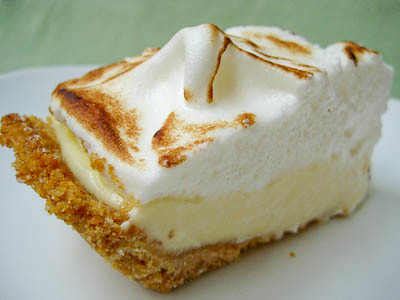
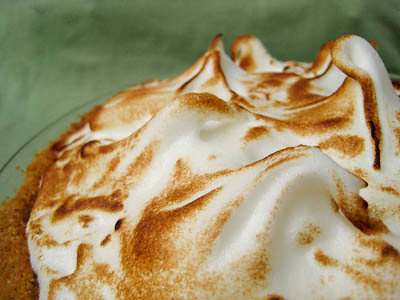
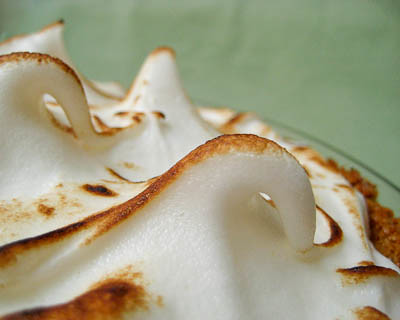
Creamiest Lime Cream Meringue Pie (TWD)


This week's Tuesdays with Dorie (TWD) recipe was chosen by Linda of Tender Crumb: Creamiest Lime Cream Meringue Pie. I'm not a big lemon meringue pie person, but I really liked Dorie's Florida Pie so I thought this recipe would also be worth a try.


It's like your traditional lemon meringue pie, except with lime cream instead. But this isn't just any lime cream - it's a super tart, absolutely creamy, spiked with ginger - lime cream. I almost ate it all by the spoonful instead of putting it into my pie crust! It is definitely rich, but so good. I actually only added 2 sticks of butter (yes, 2 sticks!!!) into this cream instead of the 2 1/2 you are supposed to use. I know others omitted a whole stick and still ended up with great results.


The only problem I had with this recipe was getting the cream up to 180F. This did not take 10 minutes, but rather 30-35 minutes. I had to increase the heat on the double boiler to bring the water to a boil instead of just a simmer, because it seemed that it would never reach 180F at just a simmer. Despite whisking constantly, I did end up with bits of scrambled egg in my cream. No worries, though, because though were removed when I passed the cream through the strainer to remove the lime zest. Otherwise, this recipe was really easy. It requires a lot of planning, as the cream requires 4 hours of refrigeration and the assembled pie needs to be refrigerated for at least 3 hours, but otherwise it doesn't take much time at all.


I used a graham cracker crust, so this really tasted like a key lime pie with a meringue top. I loved it! My husband and I actually ate half of it all by ourselves! Thanks Linda, for picking this recipe - I will definitely be making it again. If you would like the recipe, you can find it here. Make sure you check out the TWD Blogroll, to see how everyone else enjoyed this wonderful, tart treat.

* Recipes notes:
- You can cut back on the butter by 1/2 - 1 stick, but to get the full creamy effect, use all 2 1/2 sticks! :)
- Watch your pie very very carefully once you stick it under the broiler - it will go from beautifully browned to completely burnt in no time!
- For tips, click here.

Monday, July 27, 2009

Chocolate Covered Marshmallow Cookies (DB)


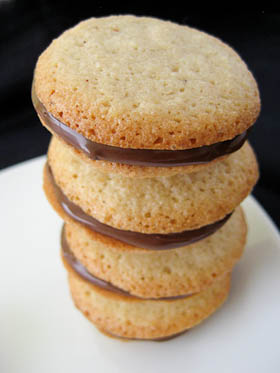
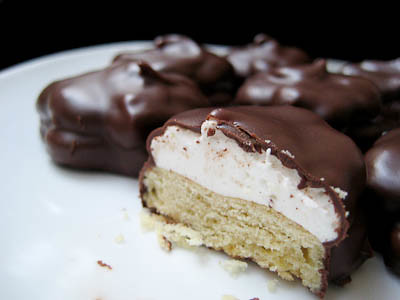
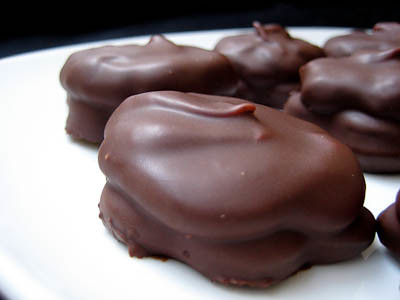
The July Daring Bakers' challenge was hosted by Nicole at Sweet Tooth. She chose Chocolate Covered Marshmallow Cookies and Milan Cookies from pastry chef Gale Gand of the Food Network. I was really excited to see cookies as the challenge, especially ones that involved making our own marshmallows! My favorite Pepperidge Farm Cookies are the Orange Milan Cookies, too.

Sadly, I ended up running out of time and didn't get a chance to make the Orange Milan Cookies, but I did make the Chocolate Covered Marshmallow Cookies. I was really nervous about making the homemade marshmallows... just something about it always had me worried that I would end up with a solid chunk of mess instead of fluffy white clouds of sweetness.


I am happy to report that I overcame my fear of marshmallows and the recipe was completed without a hitch! I was thrilled with the results and so surprised by how easy the marshmallows were to make. The only problem I had was with how quickly the marshmallows started to set. The recipe states that you should allow 2-3 hours for the marshmallows to set before dipping the cookies in the chocolate, so I thought I would have plenty of time to pipe my marshmallows onto the cookies. Unfortunately, that wasn't the case. I think they started to set after about 10-15 minutes... good thing was, that I found giving them another whir in the mixer bought me a little more time.


I don't have any round cookie cutters, so I used my flower-shaped cookie cutters that I got when I made the cupcake pops. I thought they would look cute, but in the end I think the regular round cookies probably would have looked better. I was able to get about 60 (1-1/2") cookies from the recipe, but only had enough marshmallow to pipe onto about 40 cookies, so I would recommend making an extra half batch of marshmallow if you try this recipe.


Everyone who tried these loved them, but I felt that these cookies were good, but not great. I think what would make them great would be a layer of soft caramel sandwiched between the cookie and marshmallow layer. So if I make these again, I will definitely do that. That said, they are fairly time consuming to make, so I'm not sure if I'll be doing that anyway. Still, these were fun to make and would be great to bring to a get together.

Thanks to Nicole of Sweet Tooth for hosting this month's challenge. I finally got to tackle the task of making homemade marshmallows and now I know how easy it is! Make sure you check out the Daring Bakers' Blogroll to see how everyone else enjoyed these cookies.

Mallows (Chocolate Covered Marshmallow Cookies)
Recipe courtesy Gale Gand


Prep Time: 10 min
Inactive Prep Time: 5 min
Cook Time: 10 min
Serves: about 2 dozen cookies (I got 5 dozen 1.5-inch cookies from a single batch)

• 3 cups (375grams/13.23oz) all purpose flour
• 1/2 cup (112.5grams/3.97oz) white sugar
• 1/2 teaspoon salt
• 3/4 teaspoon baking powder
• 3/8 teaspoon baking soda
• 1/2 teaspoon ground cinnamon
• 12 tablespoons (170grams/ 6 oz) unsalted butter, softened
• 3 eggs, whisked together
• Homemade marshmallows, recipe follows (I would recommend making 1.5x the recipe)
• Chocolate glaze, recipe follows

1. In a mixer with the paddle attachment, blend the dry ingredients.
2. On low speed, add the butter and mix until sandy.
3. Add the eggs and mix until combine.
4. Form the dough into a disk, wrap with clingfilm or parchment and refrigerate at least 1 hour and up to 3 days.
5. When ready to bake, grease a cookie sheet or line it with parchment paper or a silicon mat.
6. Preheat the oven to 375 degrees F.
7. Roll out the dough to 1/8-inch thickness, on a lightly floured surface. Use a 1 to 1 1/2 inches cookie cutter to cut out small rounds of dough.
8. Transfer to the prepared pan and bake for 10 minutes or until light golden brown. Let cool to room temperature.
9. Pipe a “kiss” of marshmallow onto each cookie. Let set at room temperature for 2 hours.
10. Line a cookie sheet with parchment or silicon mat.
11. One at a time, gently drop the marshmallow-topped cookies into the hot chocolate glaze.
12. Lift out with a fork and let excess chocolate drip back into the bowl.
13. Place on the prepared pan and let set at room temperature until the coating is firm, about 1 to 2 hours.

Note: if you don’t want to make your own marshmallows, you can cut a large marshmallow in half and place on the cookie base. Heat in a preheated 350-degree oven to slump the marshmallow slightly, it will expand and brown a little. Let cool, then proceed with the chocolate dipping.

Homemade marshmallows:
• 1/4 cup water
• 1/4 cup light corn syrup
• 3/4 cup (168.76 grams/5.95oz) sugar
• 1 tablespoon powdered gelatin
• 2 tablespoons cold water
• 2 egg whites , room temperature
• 1/4 teaspoon pure vanilla extract

1. In a saucepan, combine the water, corn syrup, and sugar, bring to a boil until “soft-ball” stage, or 235 degrees on a candy thermometer.
2. Sprinkle the gelatin over the cold water and let dissolve.
3. Remove the syrup from the heat, add the gelatin, and mix.
4. Whip the whites until soft peaks form and pour the syrup into the whites.
5. Add the vanilla and continue whipping until stiff.
6. Transfer to a pastry bag.

Chocolate glaze:
• 12 ounces semisweet chocolate
• 2 ounces cocoa butter or vegetable oil

1. Melt the 2 ingredients together in the top of a double boiler or a bowl set over barely simmering water.

Tuesday, June 30, 2009

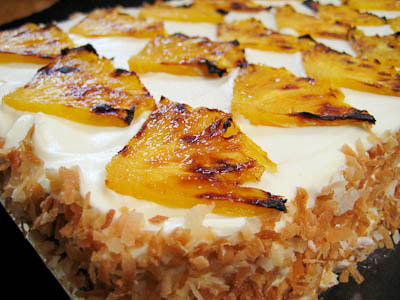
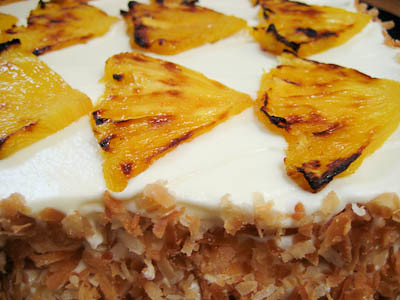
Perfect Party Cake and Coconut-Roasted Pineapple Dacquoise (TWD)


This week's Tuesdays with Dorie (TWD) recipe was chosen by Carol of mix, mix... stir, stir: Perfect Party Cake. I actually made this cake last year as part of one of The Daring Bakers' challenges. The first time I made it, I frosted it with white chocolate whipped cream because I don't particularly care for buttercream frosting. I made it again at the end of last year for my mother-in-law's birthday party and used Dorie's buttercream recipe and loved it. It was not until I tried this buttercream recipe that I realized not all buttercreams are created equal. So if you make this cake, I urge you to try it with the buttercream because it is delicious. You can read more about my experiences with this cake and see more photos of it here. This would be a perfect cake for a Fourth of July celebration, topped with blueberries and raspberries!


I'm sorry Carol, but I did not have time to make this cake again. I barely got the June Daring Bakers' challenge posted at the last minute this weekend, and then had some catching up to do as well. Last week, Andrea of Andrea in the Kitchen chose the Coconut-Roasted Pineapple Dacquoise (pronounced da-kwaz). I did not have a chance to make it due to the passing of my grandmother, but promised I would get to it soon.

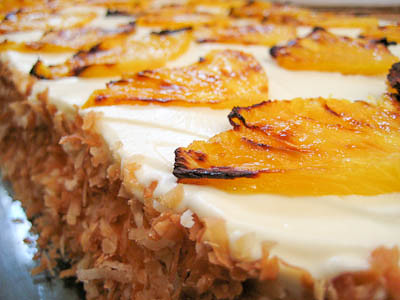
I have wanted to make Coconut-Roasted Pineapple Dacquoise from the moment I got the cookbook. There is a lovely picture of it in the book that just jumps out at you. I grew up in southern California, only thirty minutes from the beach. During the summer, we'd always stop at Thrifty's on the way home from the beach for some ice cream. One of my favorite ice cream flavors there was pineapple coconut. So I knew that with roasted pineapple, coconut, and white chocolate ganache, this was going to be one really great dessert.


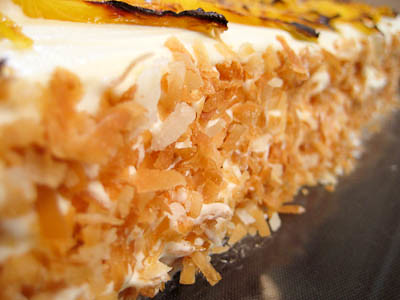
The recipe was fairly straightforward, though extremely time consuming. First, there's the coconut almond meringue layer made with ground almonds, coconut and egg whites. Though it can be made one day in advance, it takes three hours to fully bake.


The white chocolate ganache is made with white chocolate and heavy cream. You boil the heavy cream, then pour it over the white chocolate, and mix until the chocolate is completely melted. Then the ganache needs to be refrigerated for three hours before it is whipped up for the final dessert.


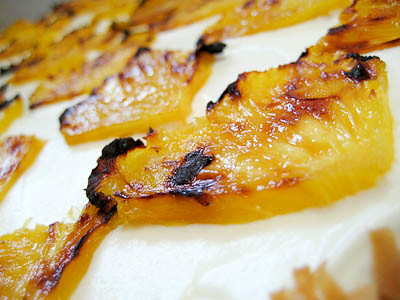
The roasted pineapple is probably the quickest part of this recipe, though cutting and slicing the pineapple does take some time. Simply quarter your pineapple, slice it into 1/8-inch thick pieces, sprinkle with some confectioners' sugar and place it under the broiler. After a quick 8 minutes in the oven, you've got some delicious, roasted pineapple.


Aside from the three hour bake time required for the meringue and the three hour refrigeration time for the ganache, after the dessert is assembled, it needs to chill in the refrigerator for at least four hours! So needless to say, if you're going to make this, plan ahead.


I had already read about how many people loved this dessert last week so I was excited to take my first bite. It absolutely lived up to all the hype I had heard about it. There is just something so great about pineapple and coconut together. It was a bit sweet, so if you don't like overly sweet desserts I would recommend using slightly sweetened whipped cream between each layer of meringue instead of the ganache.

Thanks Andrea, for a great pick. Though a bit late, I am so glad that I finally got to make this. If you would like the recipe, you can find it here. If you visit the TWD Blogroll, you'll see how much everyone else enjoyed this tropical treat!

* Recipes notes:
- While the recipe calls for a 4.25 pound pineapple, I bought a 2 pound pineapple and had just enough.
- I ended up with quite a bit of leftover white chocolate ganache (about 3 cups), so next time I make this I will make 1/2 of the ganache recipe.
- While some complained the ganache was too sweet and recommended using regular whipped cream in between each layer instead, I found the ganache to be just fine. I actually thought the pineapple was a bit too sweet and would probably omit the dusting of confectioners' sugar next time - I'm sure the natural sugars in the pineapple would be sufficient.
- Don't want such a big dessert? Or prefer something easier to serve at a get together? Consider making cute little individual servings like Vibi did here.
- For more tips, click here.

Tuesday, February 17, 2009

Sweet Treats in Paris and Devil's Food White-Out Cake (TWD)


I'm back! I had a whirlwind of a week, visiting France and England last week. I had the opportunity to visit Paris, Montpellier and Aigues-Mortes (at the southern coast of France), London, and Leicestershire (north of London). If you're here to read about the Devil's Food White-Out Cake, just scroll down a bit. If you're curious to hear more about my trip first, then read on...


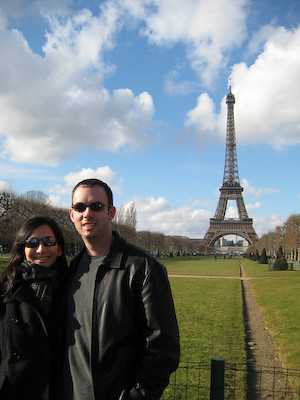
It was freezing there - quite literally! Here were are, all bundled up in the 32°F weather. (At least the skies are clear here - it was pouring rain the following day.)

Look at these spectacular views we captured from the top of the Eiffel Tower! (I'm proud to say we climbed 600+ steps to get to the second platform of the tower before taking the lift to the top!)


Of course my favorite part of the trip was Paris and all the good eats there. Eating fresh baked bread, hot out of the oven... brie... mmmm... I could spend forever just eating in Paris! Unfortunately, we only had two very short days to spend there... but trust me, I spent a good deal of it seeking out some really good eats and sweet treats!

With such a short period of time in Paris, I knew I had to prioritize. Who better than Dorie to point me in the right direction, then?! Armed with a detailed list of some of Dorie's favorite places, I hit the ground running when we arrived there. I really wish that we had had more time in Paris to visit more of the places on Dorie's list, but since we didn't, I focused most of my attention on the sweet treats.

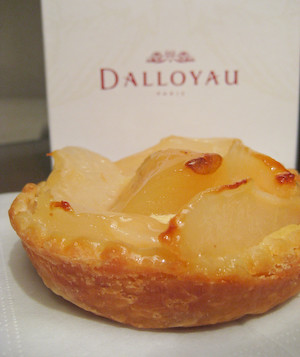
The first place we went to was Dalloyau. I actually stumbled upon this shop and was pleasantly surprised to find it as we were walking towards the Champs-Élysées. I instantly recognized the name from Dorie's list.


We got two different tarts here - a pear tart and an apricot tart. My husband had the apricot tart so I can't say much about it, but the pear tart was definitely scrumptious. The tart crust was just the perfect combination of buttery and flaky; the pears had a really nice, fresh flavor. While it was delicious, I'd have to say that I like Dorie's French Pear Tart slightly more. The almond filling in Dorie's tart was very memorable and sets it apart from other traditional fruit tarts.


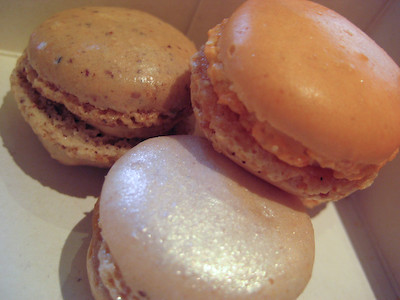
Of course I also had to try some macarons there. Did you know that they make about 55 tons of macarons per year there?! That's a lot of egg whites!! They had a nice selection there; my favorite flavors were Cognac/champagne and mandarin orange. These macarons were good, but there wasn't quite enough filling in them for my taste.


Our next stop was Patrick Roger's Boutique. Dorie says that he's one of the finest chocolatiers in Paris. Here, we sampled chocolate that was bursting with flavor - I had a piece that was lemongrass with basil. I would have never thought that adding herbs to chocolate would be good, but I loved it. While we were there, I was able to pick up a nice assortment of chocolates for my mom for her birthday.

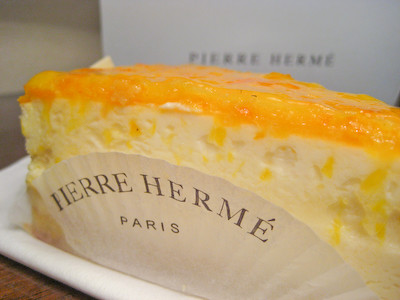
Our next destination was just a few minutes' walk away. Of course we could not leave Paris without visiting the boutique of Dorie's dear friend Pierre Hermé. After making and tasting the Most Extraordinary Lemon Cream Tart (a recipe Dorie got from Pierre), I was beside myself to visit his boutique. Oh the choices! I really wish we could have afforded to try more things there, but alas - my husband would have killed me ;)

I got the most darling little orange cheesecake tart that tasted every bit as good as it looked.


My husband went with a simple slice of cheesecake topped with some sort of orange or citrusy top layer. I didn't get to sample it, but my husband wasn't a big fan of it. I'm pretty sure it was fabulous, and like to think that his palate just isn't sophisticated enough to enjoy the creations of an icon such as Pierre Hermé ;)


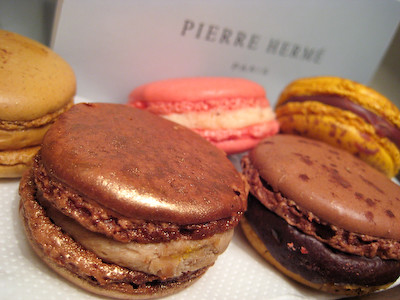
Of course I could not leave there without getting an assortment of macarons as well. I tried the Chocolate & Caramel, Coffee, Passion Fruit and Milk Chocolate, Fleur de Sel Caramel, Chocolate, Rose, and Chestnut & Matcha Green Tea. I've seen other flavors mentioned, but did not find them while I was there. The Chestnut & Matcha Green Tea macaron was extremel soft and delicate, but one of my favorite flavors. The Passion Fruit and Milk Chocolate macaron was my second favorite.


The macarons at Pierre Hermé were noticeably larger than the ones I had from Dalloyau, though it doesn't really matter because you are charged by weight. Pierre's macarons were slightly better - I definitely noticed that there was a considerably larger amount of filling in them than the ones from from Dalloyau (at least three times more). Personally, I would have preferred something in between - with a moderate amount of filling but not quite so much. If you really like your macarons with lots of filling, then you'll want to get them from Pierre. If you prefer to savor the flavor and texture of the crisp outer shells, then you might be better off getting them from Dalloyau. (In case you're wondering - because I was curious about this too - but macarons will keep in the refrigerator for about 4 days.)

We visited a few other small pastry shops, but that more or less sums up the highlights from our trip to Paris in a nutshell! I have to say that I would not have even know what many of the sweets in these shops were, had it not been for my participation in the food blogging community. While I was there, I saw opéra cakes, kugelhopf, financiers, brioche, etc. If you had asked me what those all were before I started this blog, I wouldn't have had a clue. It's amazing how much I have learned...

So anyway, we'll now return to our regularly scheduled Tuesdays with Dorie post!

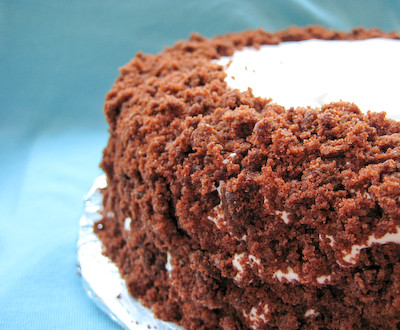
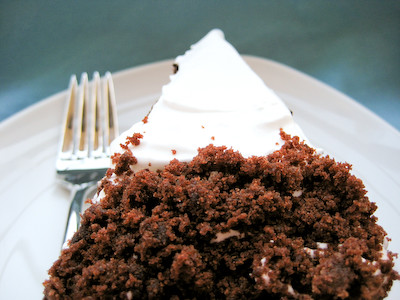
This week's Tuesdays with Dorie (TWD) recipe was chosen by Stephanie of Confessions of a City Eater: Devil's Food White-Out Cake. This cake is on the cover of the book, and I think pretty much of all us wanted to make this cake as soon as we saw it.


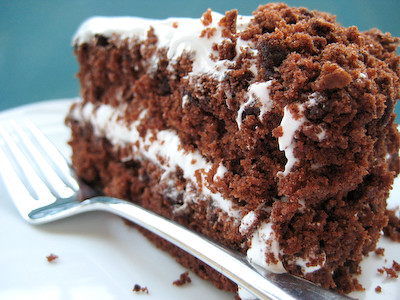
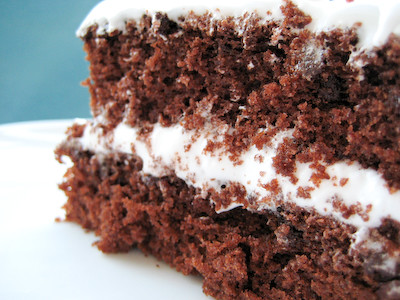
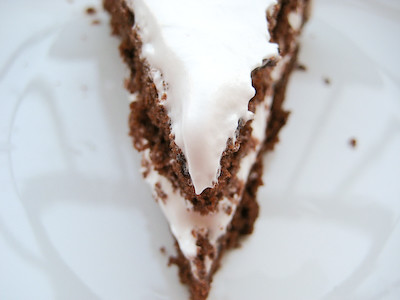
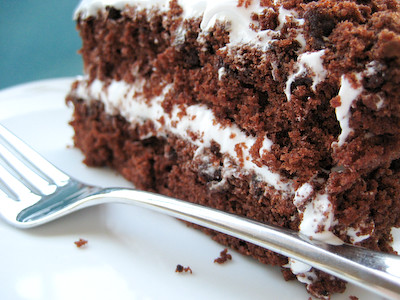
It's a moist, chocolate cake studded with chocolate chunks, cushioned between fluffy marshmallow frosting. What's not to love? :)


You're supposed to bake the cakes in two 8-inch round pans, divide each cake into two layers, and then create a 3-layer cake. The fourth layer is crumbled up and pressed into the frosting around the outside of the cake.


I used two 9-inch round cake pans, and had some slight doming on each cake. So once I leveled off each cake, I didn't think they were thick enough to slice each layer horizontally in half. Instead, I created a two-layer cake and used the cake I sliced off each dome for the crumbles.


The frosting is different from any other I've made before. You basically whip some egg whites up and then slowly pour in boiling sugar syrup until you end up with a beautiful, white fluff. By itself (if you're the type of person inclined to dip your finger into the frosting after it's made), the frosting actually has an odd taste to it. Slightly sour with a weird after taste to it. In combination with the cake, however, you no longer taste it.


This is a great cake for chocolate lovers. If you serve it chilled, the cake is very dense and almost fudgey, like a brownie. I brought it to work and it was very well received. I'm not much of a cake decorator, so I enjoyed the fact that this cake doesn't have to look perfect :)


Thanks Stephanie, for choosing this scrumptious recipe. It's a wonderful chocolate cake and it is definitely something that I will make again. If you would like the recipe, you can find it here. Make sure you visit the TWD Blog Roll to see how everyone else enjoyed this chocolately treat.

And before ending this post, I'd like to send a huge thank you to Dorie for sharing some of her favorites places in Paris with us.

* Recipes notes:
- I used two 9-inch round cake pans and created a 2-layer instead of 3-layer cake. Consider doubling the frosting recipe if you go the 3-layer route.
- The cake alone can be frozen for up to 2 months, but once it is frosted, it can be stored in the refrigerator for only 2 days.
- For more tips, click here.