Showing posts with label brownies. Show all posts

Friday, November 25, 2011

Ginger Jazzed Brownies and Fall Butternut Squash Pie (TWD)

I hope everyone had a wonderful Thanksgiving filled with lots of good eats and sweet treats! We had a pretty impressive spread at our house, and of course we're still enjoying leftovers today.

This week we're posting for Tuesdays with Dorie (TWD) on Friday.  This was to allow everyone the time to get ready for Thanksgiving.  There was no specific recipe chosen for this week, we were simply given the liberty to do a "rewind," meaning we could go back and bake a recipe from the past that we may have missed.  I'll be posting about the Ginger Jazzed Brownies and the Depths-of-Fall Butternut Squash Pie.

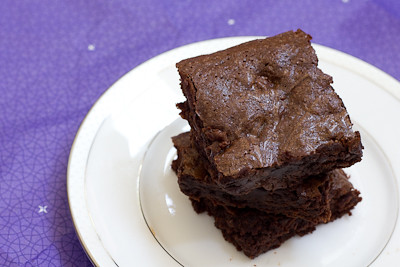
The ginger jazzed brownies were actually chosen by Hindy of Bubie’s Little Baker as the recipe of the week for October 18 and I made them a few weeks ago.  I just never got around to posting about them! I didn't have any fresh ginger on hand, so I added extra ground ginger to the brownies, as Dorie suggested.  My brownies came out with very little ginger flavor to them, which was a big disappointment because I love ginger.  I had contemplated adding in chopped candied/crystallized ginger to the brownies, and should have... because I munched on some while eating these brownies and found that the ginger and chocolate flavors together were great.  So, next time I make these, I will definitely add in chopped crystallized ginger instead of fresh ginger.  Otherwise, these brownies were super moist and dense like you would expect brownies to be.


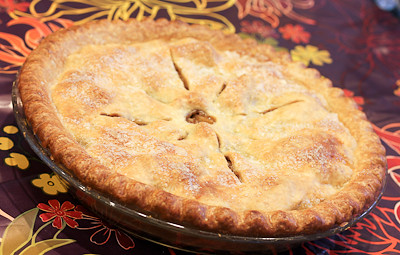
The Fall Butternut Squash Pie was chosen by Valerie of Une Gamine dans la Cuisine. I am not a big butternut squash fan, but I still wanted to try this pie because that's what TWD is all about - trying recipes you wouldn't otherwise try. So, I made this one for Thanksgiving. Aside from the butternut squash, this pie is filled with pears, brown sugar, spices, walnuts, and raisins (or dried cranberries or diced apples).


This pie was met with mixed reviews. I really didn't care for it much. I think I would have liked it better if there had been more sugar in it because I think it was lacking in sweetness. My mom thought it was good, but attributed that to the fact that there was a lot of other filling ingredients besides squash. I think if it had a little bit less squash and lots of pears and apples, it would be very good. Just enough to have a hint of squash in it, but not overwhelmingly squashy ;)


If you're interested, head on over here for the Ginger Jazzed Brownies recipe and here for the Fall Butternut Squash Pie recipe.

Tuesday, September 13, 2011

Classic Brownies (TWD)


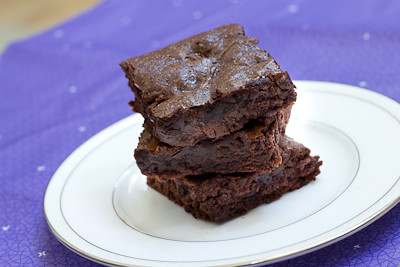
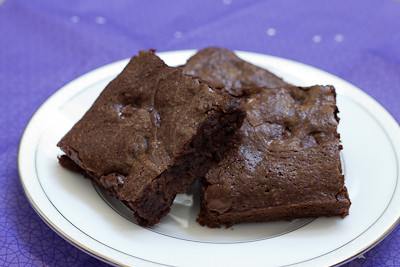
This week's Tuesdays with Dorie (TWD) recipe was chosen by Anne of Anne Strawberry: Classic Brownies.  There's really no explanation needed for these - they're just your traditional brownies, no bells or whistles.

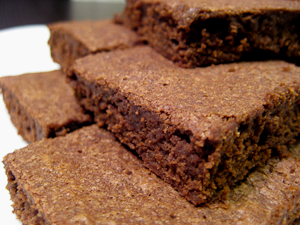
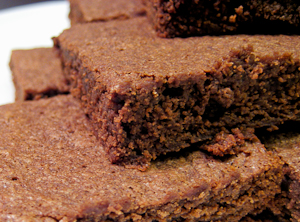
These brownies were extremely easy to make. Simply melt some butter and chocolate, add the sugar, eggs, vanilla, and then some flour. Instead of nuts, I added chocolate chips to the mix. These baked up perfectly and were slighty cakey but mostly fudgey and very chocolately.


With how simple (yet delicious) these brownies are, I really don't see any reason to use a box mix to make brownies.  The prep time was virtually the same.  I'm sure that inclusion of nuts in these brownies would be welcomed by any nut lover, but I enjoyed the extra chocolately goodness provided to these brownies by the substitution of chocolate chips :)


Thanks Anne, for hosting this week.  I'll definitely be making these again.  If you would like the recipe, you can find it here. Make sure you check out the TWD Blogroll, to see how everyone else enjoyed these chocolately treats!

* Recipe notes:
- I used semisweet chocolate chips instead of chopped bittersweet chocolate.
- I used a 9-inch pan instead of an 8-inch pan and the brownies were done baking in 20 minutes.

Sunday, July 18, 2010

Chocolate (Walnut) Brownies (SMS)


This week's Sweet Melissa Sundays (SMS) recipe was chosen by Tiffany of A Spoonful of Laughter and a Heap of Love: Chocolate Walnut Brownies. Melissa says these are based on a Julia Child recipe and describes them as "the best brownies I've ever met."  So I could not pass these up, even though I just made York Peppermint Patty Brownies last week for Tuesdays with Dorie!

I followed the recipe exactly as written, except I did not include the optional walnuts because I don't like nuts in my brownies. Unfortunately, I used my convection oven to bake these up and forgot to reduce the baking time :( So, instead of moist fudgey brownies, I ended up with dry, barely edible brownies! I was sorely disappointed because I knew that with two (yes, two!) sticks of butter in this recipe, these brownies had to be good. Oh well. Lesson learned. I will have to give these brownies another try in the future.

Thanks Tiffany, for hosting this week. If you would like the recipe, you can find it here. Make sure you check out the Sweet Melissa Sundays Blog Roll to see how everyone else enjoyed these classic, chocolate treats.

Thursday, July 15, 2010

Brrrrr-ownies (TWD)


This week's Tuesdays with Dorie (TWD) recipe was chosen by Karen of Welcome to our Crazy Blessed Life: Brrrrr-ownies. Classic chocolate brownies studded with bits of York Peppermint Patties! I love the combination of chocolate and mint together, so the idea of these brownies sounded terrific.

I was traveling this week, so my post is a few days late. I also had to adapt the recipe a bit, based on what I had on hand because I haven't had a chance to go grocery shopping yet since coming home yesterday.

So, my brrrr-ownies were made with 4.5 ounces of peppermint patties (I had some on hand, but had already eaten over half the bag - ha!) and dark chocolate instead of bittersweet chocolate.  Ideally, I would have used semisweet chocolate chips (convenient, no chopping!), but my husband ate all the chocolate chips while I was gone!

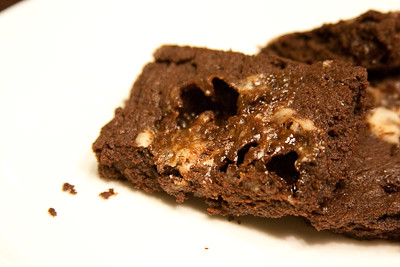
I had read some comments about the brownies sticking to the foil, so I made sure to butter my foil generously, and had no such issues. I had also read that the bits of peppermint patties kind of melted away into the brownies for others, so I chopped each patty into six pieces, thinking the larger chunks wouldn't melt away. Well, they didn't quite melt away, but they did form these nice little craters in the majority of my brownies!


This seemed to be mostly a cosmetic flaw, as they were pretty tasty. Kind of like thin mints meets brownies. Thanks Karen, for hosting this week. If you would like the recipe, you can find it here. Make sure you check out the TWD Blogroll, to see how everyone else enjoyed this minty, chocolate treat!

Also, congratulations to the Mini Moment Giveaway winners! Mary, Court, Lindsay, Brooke, Shelly, Mrs. Z, Natalie, Sandra, Beth, and Tiffany... please email me at goodeatsblog [at] gmail [dot] com with your address so I can get your coupons sent to you!

* Recipes notes:
- I baked my brownies in a 9-inch square pan and decreased the baking time to 25 minutes. 
- I used dark chocolate instead of bittersweet chocolate, but next time I will probably use semisweet chocolate instead - just not a dark or bittersweet chocolate kind of girl.
- For tips from other TWD bakers, click here.

Tuesday, December 22, 2009

Brown Sugar Brownies


My mom always says that everything you bake tastes better with brown sugar, so she substitutes brown sugar for granulated white sugar in almost every recipe. Often times, that's fine, but sometimes (as with cookies) there's a precise ratio of brown sugar to white sugar that needs to be adhered to, or else you end up with the wrong texture.

So when I saw this recipe for Brown Sugar Brownies, I immediately thought of my mom. Was she right? Are brownies better when made with brown sugar? Well, the answer is yes and no. I loved the caramel-y undertone that the brown sugar lends to these brownies, but these are cakey, not fudgey brownies... and when it comes to brownies, I prefer a more fudgey brownie. So if you like cakey brownies, you should give this recipe a try. For something a bit more decadent (but super easy), check out one of my favorites - Gooey Caramel Brownies.

These brownies were made thanks to the generous folks at C&H Sugar who sent me a $20 gift card. Visit their site for great homemade gifts ideas this holiday season - they have recipes for cookie jar gifts, as well as some fabulous looking homemade sugar scrub!

Brown Sugar Brownies
from C&H Sugar

1 cup C&H Pure Cane Golden Brown Sugar, packed
1/2 cup butter or margarine (1 stick), softened
2 eggs
2 oz. unsweetened chocolate (2 squares), melted
1/2 cup all-purpose flour
1 cup walnuts, coarsely chopped (I omitted these)


Preheat oven to 325°F. Grease 8x8x2-inch square baking pan (I used a 9-inch square pan so my brownies were thinner). In large bowl beat sugar and butter until fluffy. Beat in eggs, one at a time. Beat in chocolate, then flour. Stir in nuts. Pour into pan. Bake 20 to 25 minutes. Cool in pan and cut into bars.

Yield: 24 squares

Tuesday, October 27, 2009

Cherry Fudge Brownie Torte (TWD)


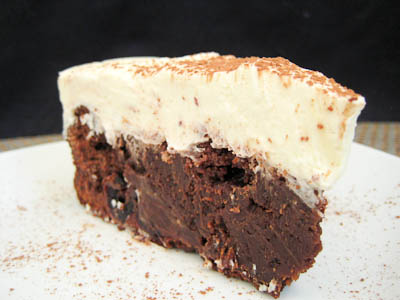
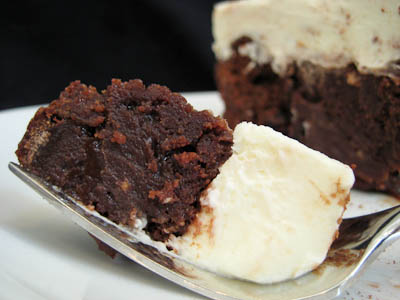
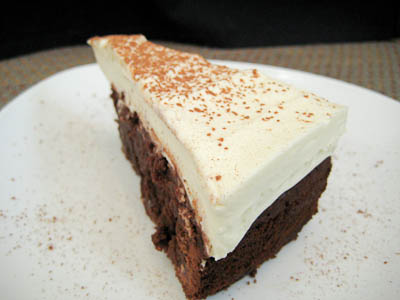
This week's Tuesdays with Dorie (TWD) recipe was chosen by April of short + rose: Cherry Fudge Brownie Torte. It's a fudgey brownie layer full of chocolate and cherries, topped with a creamy mascarpone mousse.

The brownie layer is very rich and dense. It's nicely contrasted with the light and creamy mascarpone mousse. An interesting ingredient in the brownie layer is ground black pepper. It adds a very subtle flavor to this torte but isn't overpowering. I only added one teaspoon of black pepper - I think two teaspoons would probably be too much. The cherries are a wonderful surprise to bite into and keep this dessert from being too basic.


The torte is simple enough to make but yields a very decadent dessert perfect for serving guests. Thanks April, for picking this recipe, I would definitely make it again. If you would like the recipe, you can find it here. Make sure you check out the TWD Blogroll, to see how everyone else enjoyed this fudgey treat.


* Recipes notes:
- I used semisweet chocolate chips instead of chopped chocolate.
- I omitted the kirsch due to my little bun in the oven :) I simply boiled the cherries and water until almost all of the water was evaporated, then added the preserves with a splash of water until it seemed a good consistency.
- For more tips, click here.
com

Tuesday, September 1, 2009

Espresso Cheesecake Brownies (TWD)


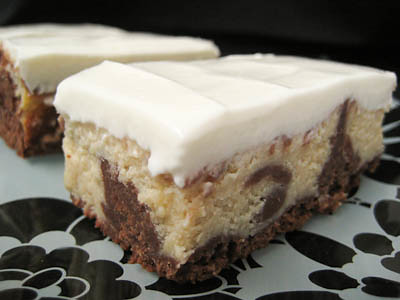
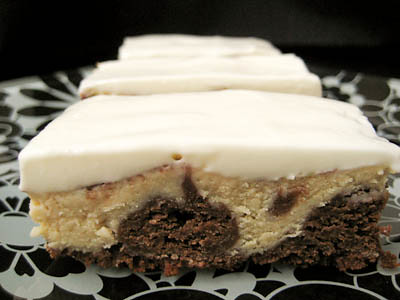
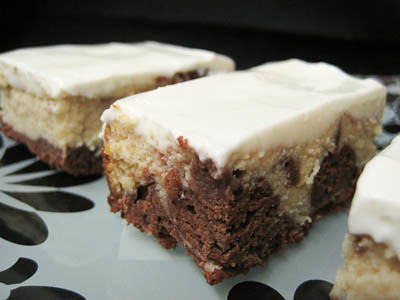
This week's Tuesdays with Dorie (TWD) recipe was chosen by Melissa of Life in a Peanut Shell: Espresso Cheesecake Brownies. There's a bottom brownie layer, topped with a cheesecake layer with swirled in brownie batter, topped with a sweetened sour cream glaze.

These were pretty simple to make, but do require several long periods of refrigeration - I wanted to eat these straight from the oven! I'll admit I was a bit unsure about this recipe, but it really surprised me. They're definitely not as chocolately as I thought they would be, but this is a great way to satiate a cheesecake craving without having to go through all the trouble of making a cheesecake. I'd probably describe these more as cheesecake bites than I would brownies, probably because the chocolate flavor is pretty subtle.


The sour cream topping was just barely tart and slightly sweet and was an excellent contrast to the cheesecake and brownie layers. I know several people omitted this, but I would really recommend giving it a try. If I make it without the sour cream topping in the future, then I'll probably cut them into bite size pieces, dip them in chocolate, and then freeze them like those Sara Lee cheesecake bites! :)


Thanks Melissa, for picking this recipe. I enjoyed trying something new. If you would like the recipe, you can find it here. Make sure you check out the TWD Blogroll, to see how everyone else enjoyed this creamy, chocolatey treat.

* Recipes notes:
- I used 1 tsp of espresso powder instead of 1.5 tsp and felt this had plenty of coffee flavor!
- I baked my brownies in a dark pan and they were done right at 35 minutes.
- Wrapped well, these will keep in the freezer for 2 months (without the glaze).
- For tips, click here.

Tuesday, August 11, 2009

Brownie Buttons (TWD)


This week's Tuesdays with Dorie (TWD) recipe was chosen by Jayma of Two Scientists Experimenting in the Kitchen: Brownie Buttons. They are these adorable little brownies made in mini muffin pans. Only problem was that I don't have mini muffin pans and did not want to go out and buy them just for this recipe.


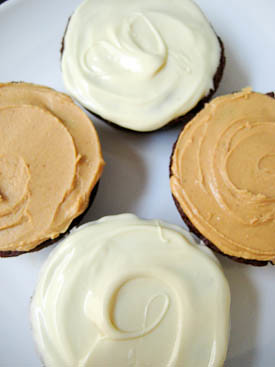
So I made these in a regular sized muffin pan instead, and ended up with four regular sized brownies. I have to say that making brownies this way so easy and convenient - no need to slice them when you're done, and there is a great ratio of crispy edge to soft fudgey middle. No need for a special edge pan! The prep time was literally 5 minutes, and then they were in the oven - easiest brownie recipe ever!


Since my brownie "buttons" were so large, I "frosted" them instead of dipping them. I put melted white chocolate on half of them, and melted peanut butter chips on the other half. These had a nice crisp edge around them but they were soft and fudgey in the middle. My husband and I both loved these - our only complaint was that the recipe only yielded four! I would definitely recommend making a double batch if you try this.


Thanks Jayma, for picking this recipe, I will definitely be making it again - it may be my go-to brownie recipe from now on simply because it is so simple and easy! If you would like the recipe, you can find it here. Make sure you check out the TWD Blogroll, to see how everyone else enjoyed this chocolatey treat.

* Recipes notes:
- I baked my brownies in a regular muffin pan and they were done after 21 minutes.
- Wrapped airtight, these will keep in the freezer for 2 months.
- For tips, click here.

Tuesday, July 7, 2009

Tribute to Katherine Hepburn Brownies (TWD)


This week's Tuesdays with Dorie (TWD) recipe was chosen by my wonderful friend Lisa of Surviving Oz: Tribute to Katherine Hepburn Brownies. Although Lisa is not a member of TWD, she had the honor of choosing this week's recipes because she won our recent logo contest. If you look at my blog sidebar, you'll see the newly redesigned TWD logo! Isn't it cute? Even Dorie loves it.

These brownies are Dorie's tribute to Miss Hepburn's well loved brownies, which include very little flour compared to most brownie recipes. Dorie spruces them up a bit with the addition of cinnamon, coffee, and chopped chocolate.

I baked my brownies in a 9-inch square pan (instead of 8-inch) so these already thin brownies became even thinner. Consequently, my brownies were completely done after 30 minutes in the oven. Others seemed to have issues with their brownies being under-baked after 30 minutes, but that was likely due to the brownies being thicker in the 8-inch pan, so if you're using the 8-inch pan make sure you leave the brownies in the oven for a few extra minutes.


While these brownies were simple to make, I wasn't the biggest fan. My husband loved them, but the coffee flavor was a bit too strong for me. (Keep in mind I don't drink coffee anyway.) I'm not sure if that's because I substituted instant coffee granules for espresso powder, but I've done this in the past without any problems. Usually, the coffee just brings out a better flavor to the chocolate, but in this case it seems that the coffee flavor was in the forefront (which is fine as long as you like coffee). I'm sure that most people would love these brownies, as they were all gobbled up by my husband's co-workers. Me? My favorite brownies are still the Chipster-Topped Brownies we made back in May.


Thanks Lisa, for choosing this recipe. There are just as many variations in brownie recipes as there are chocolate chip cookies, and I enjoyed trying another brownie recipe. If you would like the recipe, you can find it here. Make sure you visit the TWD Blogroll to see what everyone else thought about these chocolately treats.

* Recipes notes:
- I used a 9-inch square pan and still baked mine for the full 30 minutes and the brownies were not overdone. If you are baking in an 8-inch pan, bake for about 35 minutes.
- I omitted the nuts from this recipe - sorry, don't like them.
- I also used semisweet chocolate chips in place of chopped bittersweet chocolate - not a fan of bittersweet chocolate.
- Wrapped well, these brownies will keep in your freezer for 2 months.
- For more tips, click here.

Tuesday, May 26, 2009

Chipster-Topped Brownies (TWD)


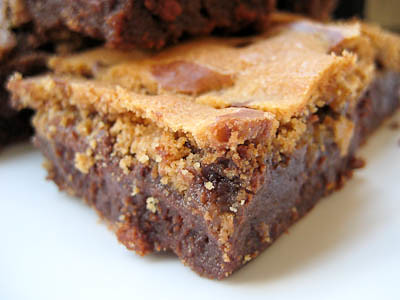
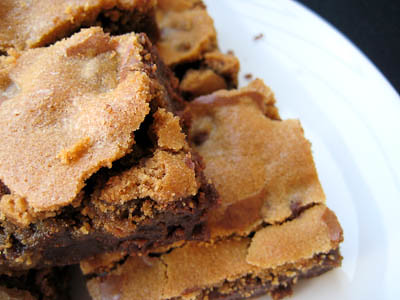
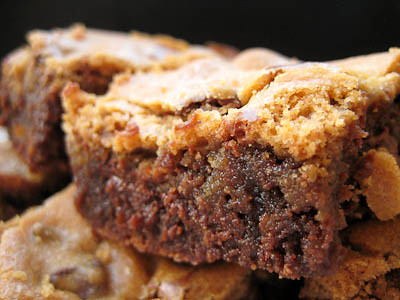
This week's Tuesdays with Dorie (TWD) recipe was chosen by Beth of Supplicious: Chipster-Topped Brownies. They are Dorie's brilliant idea to put a layer of chocolate chip cookie dough on top of a layer of brownies. Why haven't I seen this concept before?!


There was a lot of chatter about the recipe this week. Some had issues w/the raw cookie dough sinking into the brownie layer - I seemed to avoid this by dropping very small amounts at a time. There was also mention of the cookie layer browning and finishing cooking before the bottom brownie layer. Some pre-baked the brownie layer for a few minutes before adding the cookie dough and baking the two layers together. I considered doing that, but then decided to just make the recipe as written because if the brownie layer needed to be pre-baked, wouldn't Dorie have discovered that in her test kitchen?


So I decided to bake the brownies for the full 55 minutes to make sure the brownie layer wasn't undercooked. To avoid burning the cookie layer, I covered it with foil after 40 minutes in the oven. I probably should have done so at the 30 minute mark, but lost track of time. Still, this seemed to do the trick because my brownie layer was moist and chocolatey and my cookie layer was golden brown and crunchy.


To say that these brownies were good is an understatement. We loved them and my husband said they were one of the best things I have ever baked. I am not sure how they taste with the bittersweet chocolate, but I thought they were great with the semisweet chocolate I substituted. I loved these and will definitely be making them again.


Thanks Beth, for choosing this recipe - I am not sure how I missed this recipe in all the times I have flipped through the book, but I am so glad you pointed me towards it! If you would like the recipe, you can find it here. Make sure you visit the TWD Blogroll to see what everyone else thought about this awesome cookie/brownie combination.

* Recipes notes:
- I used 9 oz of semisweet chocolate chips in place of the 6 oz bittersweet and 3 oz of unsweetened chocolate.
- I omitted the walnuts from my brownie layer.
- I had to place a foil tent over my brownies about 40 minutes into baking to prevent the cookie layer from over browning, but I would recommend adding it at 30 minutes.
- I had to bake my brownies for the full 55 minutes before they were done.
- For more tips, click here.

Tuesday, October 7, 2008

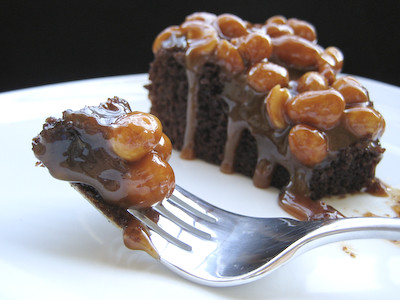
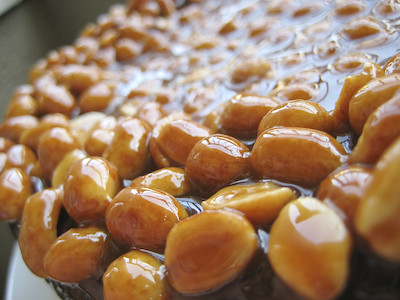
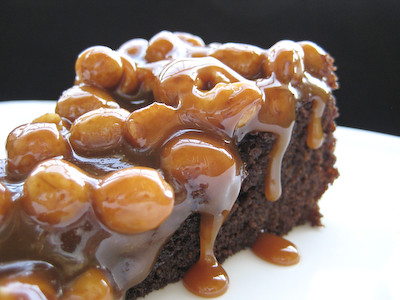
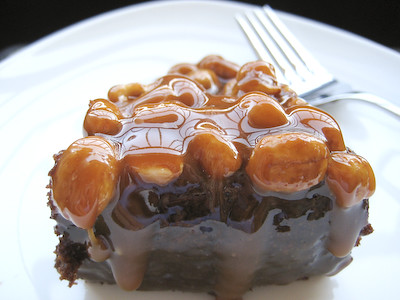
Caramel-Peanut-Topped Brownie Cake (TWD)


This week's Tuesdays with Dorie (TWD) recipe was chosen by Tammy of Wee Treats by Tammy: Caramel Peanut Topped Brownie Cake. I've been wanting to make this cake ever since I got the cookbook because there is the most drool worthy picture of it in the book.


Chocolate cake topped with gooey caramel and peanuts. What's not to love? Well, the nuts actually. I don't like nuts but I will eat peanuts in things like Snickers bars, so I figured this would be similar and I would probably like it. So instead of omitting the nuts like I do with most recipes, I decided to go ahead and use the nuts.


I actually liked the nuts on this cake. Unfortunately, that wasn't the case with several of the people to whom I served this cake. Everyone agreed that the cake itself was delicious, as was the gooey caramel, but several picked the nuts off of it. I guess you can't please everyone!


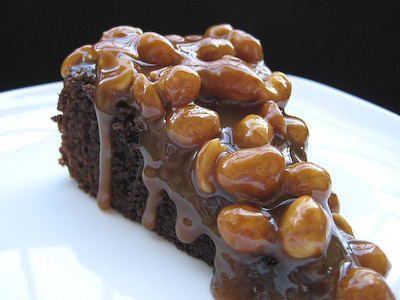
The biggest problem most TWD bakers seemed to have with this recipe was with the caramel. There's a very fine line between golden amber, delicious caramel and dark amber, bitter and burnt tasting caramel. For the most part, I think a lot of us found that it took much longer than the recommended 10 minutes for the sugar to caramelize - probably closer to 15 minutes. Just keep a very close eye on it as it starts to change color and if you aren't sure, remove it from the heat while you are trying to decide. Those few seconds while you are trying to make up your mind might be the critical juncture where the sugar changes from caramelized to burnt ;) (Dorie's tip to drop a bit on a white plate to check the color works well, too.)


My cake sank quite a bit in the center after I removed it from the oven. This resulted in a pool of caramel and nuts in the middle of the cake. The caramel peanut topping thickened and partially set as it cooled, but did not ever become completely set. So after cutting into the cake, all the topping just spilled into the space where the missing slice was taken. I wouldn't recommend cutting into this cake until you are ready serve because of this. It's not a huge problem, but it's kind of messy having to scoop up all the nuts and caramel on to the adjacent pieces when you're serving them.


One last thing - the recipe calls for lining your springform pan with parchment or wax paper. If you're sick of tracing circles and working so carefully to cut them out, make sure you check out my tips on a much easier way to accomplish this here.


Thanks Tammy, for choosing this scrumptious cake. If you would like the recipe, you can find it here. Make sure you visit the TWD Blog Roll to see how everyone else enjoyed their gooey little treats!

*A few recipe notes:
- I used a 9" springform pan (instead of 8") and the cake was not too thin.
- I used salted butter and omitted the salt from the recipe.
- I used semisweet chocolate chips instead of coarsely chopped bittersweet chocolate.
- I used honey roasted peanuts instead of salted peanuts. I also used an extra 1/4 cup since my cake was larger, 9" in diameter instead of 8".
- It's okay to top the cake with the caramel and nuts well in advance of serving. I topped my cake the night before and then brought it into work the next day. Wrapped, the cake will keep at room temperature for 1-2 days.
- The cake itself, without the topping, can be wrapped airtight and frozen for up to 2 months.
- For more recipe tips, click here.


Thursday, July 10, 2008

Razcherries


A few weeks ago, someone from Oh! Nuts contacted me. They were interested in sending me some of their products so I could try them in my recipes. I was skeptical at first, but when my goodies arrived in the mail, I was thrilled. (If you're interested in opportunities like this to blog about free food, make sure you check out Blake Makes.)

I gave them a short list of some dried fruit and nuts I would be interested in trying, and they ended up sending me 3 pounds! I received a pound each of: roasted macadamia nuts, dried guava slices, and razcherries.
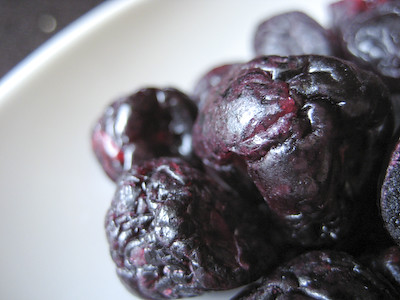

I was particularly excited about the "razcherries" - gourmet cherries infused with raspberry flavor! They were so good, I wanted to eat them all straight out of the bag :)
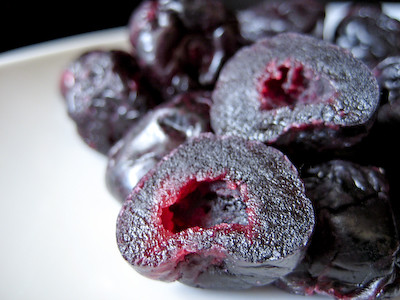

I thought long and hard about what I should make with these and ended up with two different ideas, both involving chocolate, as chocolate and cherries seemed like a natural combination.

The first thing I decided to bake was Dorie's French Chocolate Brownies. The first time I made them for Tuesdays with Dorie (TWD), I used tart cherries instead of raisins. I loved them so much, I knew they would be good with the razcherries.
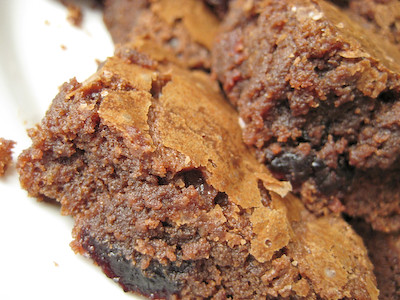

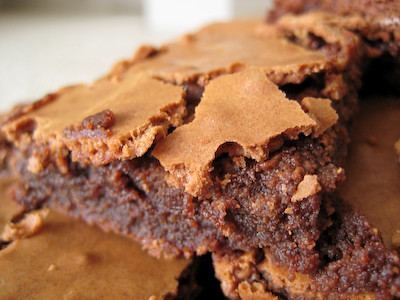
The problem I had with these brownies the first time around was that they seemed to form a super thick crust that crumbled into pieces when the brownies were cut into. I gathered from visiting the various TWD blogs that this was due to too much air being whipped into the eggs. Having discovered my mistake, I made sure not to over beat the eggs and sugar this time. It worked like a charm, because this time I ended up with only the thin, flaky crust typical of most brownies.
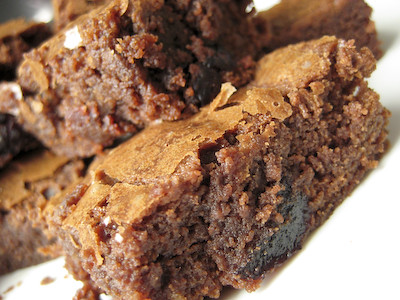

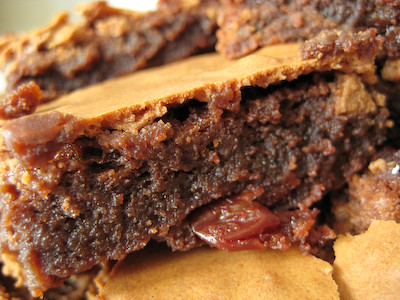
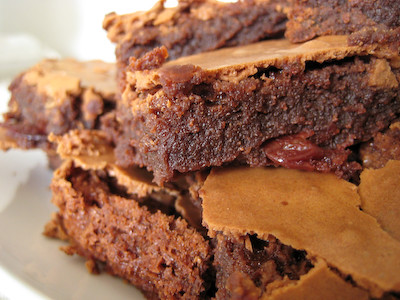
So how did the razcherries taste in these brownies? Delightful. The brownies were light and moist, super chocolately, and each bite that included a razcherry was a burst of tart cherry followed by a sweet raspberry flavor.
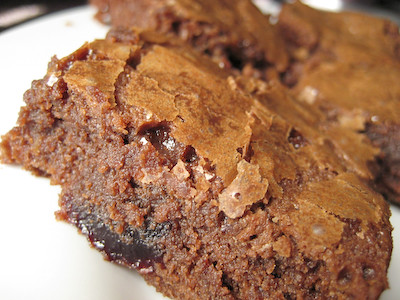

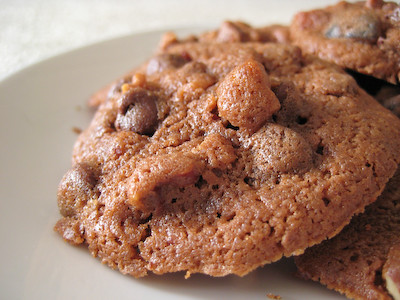
The next thing I decided to make with the razcherries was cookies. I flipped through my cookbooks and finally settled upon a recipe in The Pastry Queen - Café Chocolate Cherry Bites. I've only tried a handful of recipes from this book, but I've enjoyed each and every one. I even found my favorite carrot cake recipe in this book. So when I saw these chocolate cookies, I knew they would be perfect for the razcherries.
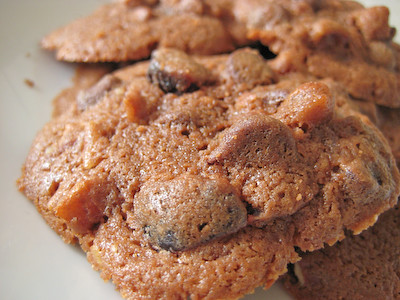

I've actually never made chocolate cookies before, so I was excited to try these. They have a hint of coffee, that was nicely complemented by the razcherries. As with most baked goods, I decided to omit the nuts. Seeing as I had some leftover pecans from the pecan honey sticky buns, however, I decided to make a half batch with the nuts. If you decide to omit the nuts, make sure you add more chocolate chips and cherries to the dough. I realized after I pulled my first batch out of the oven that I did not account for the volume of the pecans in the recipe -- the cookies that did not have any pecans in them were much runnier and flattened out quite a bit. I guess I should have anticipated that, but now you can learn from my mistake and avoid that problem :)
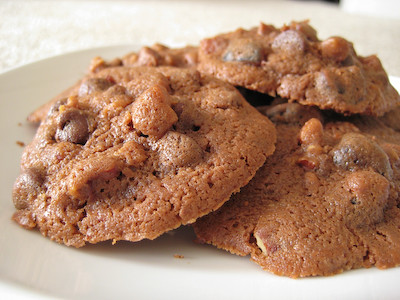

Overall, these cookies were good, but I think I've decided that I'm just not a huge fan of chocolate cookies (except Oreos, of course). I was, however, impressed with the razcherries from Oh! Nuts. This company seems to have a nice selection of products with decent prices. I found that some of their prices are better than Nuts Online, another company I've seen recommended (not all of their products are cheaper, though, so you just have to shop around). Of course shipping prices are a factor whenever buying online, so I did a side by side comparison and Oh! Nuts seems to offer rates that are just slightly cheaper than Nuts Online.

What about the rest of the goodies I received? Well, I've been considering several different recipes for the roasted macadamia nuts and dried guava slices, so stay tuned. If you have any ideas or suggestions, I'd love to hear them - so leave a comment or send me an email.

Café Chocolate Cherry Bites
from The Pastry Queen, by Rebecca Rather


1 cup pecans
1 cup (2 sticks) unsalted butter, at room temperature
1-1/4 cups firmly packed golden brown sugar
2 large eggs
1 tbsp instant espresso powder
1 tbsp boiling water
1 tbsp vanilla extract
1-1/4 cups all purpose flour
1/4 cup unsweetened cocoa powder
1 tsp baking powder
1/4 tsp salt
1 cup bittersweet or semisweet chocolate chips
1-1/2 cups dried cherries, halved or quartered (I used razcherries)

Preheat the oven to 350 degrees F. Arrange the pecans on a baking sheet in a single layer and toast for 7 to 9 minutes, until golden brown and aromatic. Cool the nuts for 5 minutes, then coarsely chop.

Line baking sheets with parchment paper or silicone mats, or grease generously with butter or cooking spray. Using a mixer fitted with a paddle attachment, beat the butter and sugar in a large bowl on medium speed about 1 minute, until fluffy. Add the eggs and beat on medium speed about 30 seconds. In a small bowl, stir the espresso powder into the boiling water until dissolved. Add the espresso liquid and the vanilla to the cookie batter and beat for 30 seconds. Add the flour, cocoa, baking soda, and salt all at once, mixing on low speed just until incorporated. Stir in the pecans, chocolate chips, and cherries. (The dough will be softer and wetter than the average cookie dough.)

Using a 1-3/4-inch-diameter scoop, drop the cookie dough on the prepared baking sheets, spacing 1-3/4 inches apart. Bake for 8 to 10 minutes, until the cookies have spread and have no lighter-colored, raw-looking dough in the middle. Cool the cookies on the baking sheets about 10 minutes, until they are no longer too soft to remove. Transfer the cookies to racks and cool completely before serving. The cookies will keep for 2 to 3 days in an airtight container and can be frozen, well wrapped, for up to 1 month.

Tip: Heed the one-minute rule: It can take as little as sixty seconds for cookies to turn from underdone to overbaked. To ensure the best results, start checking cookies about a minute before the end of the specified cooking time, and check every minute from then on.

Yield: About 3-1/2 Dozen.

Tuesday, June 3, 2008

TWD: French Chocolate Brownies


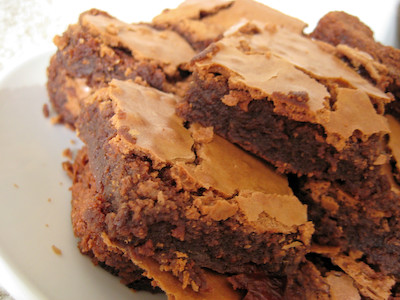
This week's Tuesdays with Dorie (TWD) recipe was chosen by Di of Di's Kitchen Notebook: French Chocolate Brownies. When Dorie made these, she was playing on the idea of the French chocolate "fondant," a cake known for its chocolatiness and its soft, moist texture. What she didn't expect, however, was for all of her guests to proclaim them as brownies! Whether you decide to call this a cake or a brownie, I think you will enjoy it.


Several TWD bakers decided to omit the raisins in this recipe, due to their dislike of them. I have no problem with raisins and enjoy them quite a bit, but decided that it would be fun to try dried cherries instead (who doesn't like cherries and chocolate?). Some bakers mentioned that they had trouble igniting their rum for the flambé. I didn't have that issue at all, but it was quite a contrast to the first time I flambéed, when I made the brioche raisin snails. Last time, I had plenty of time to oooh and aaah at the flames... so much so that I was able to think to myself 'that would make a really cool picture,' and still have time to grab my camera to capture a few photos. I had no such luck this time. I was even prepared with camera in hand before I lit the match, but the flames died down way too quickly for me to capture anything.


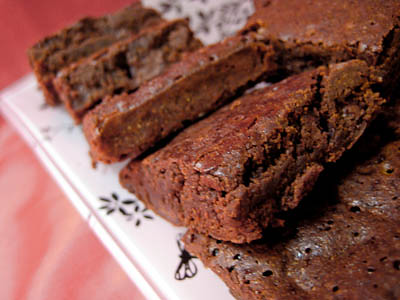
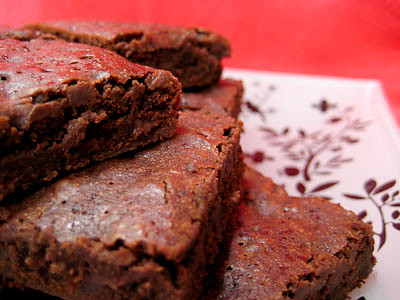
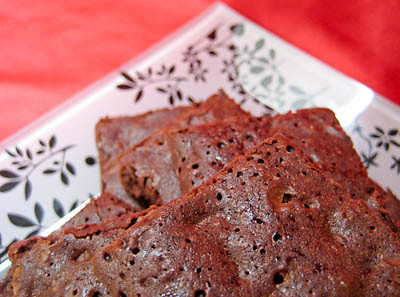
Another issue that many seemed to have with these (that I did as well) was with the top, or crust, of the brownies. Everyone knows that brownies seem to have a crackly 'skin' on top. But these brownies seemed to form a hard upper crust (perhaps I over beat the eggs and sugar?). It was impossible to cut into the brownies without causing the crust to shatter into pieces. The crust was actually pretty tasty, but it made these brownies less than photogenic.


Overall, I was very pleased with this recipe. The brownies were nothing like what I had anticipated them to be, but that doesn't mean they were not good. They have enough chocolate in them to satisfy any chocolate craving, the cherries are a pleasant surprise when you bite into them, and I was delighted at how light and moist they are. Most brownies are fairly dense, and these seemed to almost melt in my mouth. Thanks Di, for picking a great recipe. Make sure you check out the Tuesdays with Dorie blogroll to see everyone else's chocolatey treats.

French Chocolate Brownies
from Baking: From My Home to Yours, by Dorie Greenspan

1/2 cup all-purpose flour
1/8 teaspoon salt (I omitted this)
1/8 teaspoon cinnamon
1/3 cup raisins, dark or golden (I used dried tart Montmorency cherries)
1 1/2 tablespoons water
1 1/2 tablespoons dark rum
6 ounces bittersweet chocolate, finely chopped (I used semi-sweet)
1 1/2 sticks (12 tablespoons) unsalted butter, at room temperature and cut into 12 pieces (I used salted butter and omitted the salt from the recipe)
3 large eggs
1 cup sugar

Getting Ready:
Center a rack in the oven and preheat the oven to 300°F. Line an 8-inch square baking pan (I used a 9-inch square pan) with foil, butter the foil, place the pan on a baking sheet, and set aside.

Whisk together the flour, salt and cinnamon.

Put the raisins in a small saucepan with the water, bring to a boil over medium heat and cook until the water almost evaporates. Add the rum, let it warm for about 30 seconds, turn off the heat, stand back and ignite the rum. Allow the flames to die down, and set the raisins aside until needed.

Put the chocolate in a heatproof bowl and set the bowl over a saucepan of simmering water. Slowly and gently melt the chocolate, stirring occasionally. Remove the bowl from the saucepan and add the butter, stirring so that it melts. It's important that the chocolate and butter not get very hot. However, if the butter is not melting, you can put the bowl back over the still-hot water for a minute. If you've got a couple of little bits of unmelted butter, leave them—it's better to have a few bits than to overheat the whole. Set the chocolate aside for the moment.
Working with a stand mixer with the whisk attachment, or with a hand mixer in a large bowl, beat the eggs and sugar until they are thick and pale, about 2 minutes.


Lower the mixer speed and pour in the chocolate-butter.


Mix only until it is incorporated—you'll have a thick, creamy batter.


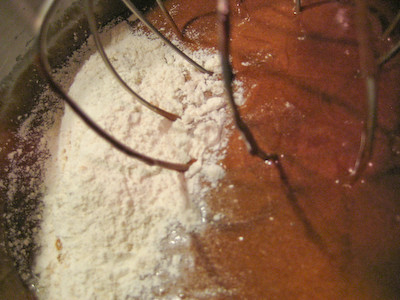
Add the dry ingredients,


and mix at low speed for about 30 seconds—the dry ingredients won't be completely incorporated and that's fine.


Finish folding in the dry ingredients by hand with a rubber spatula, then fold in the raisins along with any liquid remaining in the pan.

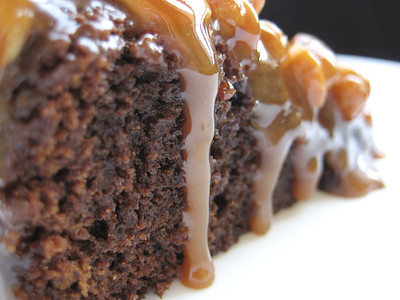
Scrape the batter into the pan and bake 50 to 60 minutes, or until the top is dry and crackled and a knife inserted into the center of the cake comes out clean (Although I used a larger pan, I still had to bake mine for the full 60 minutes before my knife would come out clean). Transfer the pan to a rack and allow the brownies to cool to warm or room temperature.

Carefully lift the brownies out of the pan, using the foil edges as handles, and transfer to a cutting board. With a long-bladed knife, cut the brownies into 16 squares, each roughly 2 inches on a side, taking care not to cut through the foil.

Serving: The brownies are good just warm or at room temperature; they're even fine cold. I like these with a little something on top or alongside—good go-alongs are whipped crème fraiche or whipped cream, ice cream or chocolate sauce or even all three!

Storing: Wrapped well, these can be kept at room temperature for up to 3 days or frozen for up to 2 months.

Yield: 16 brownies