Showing posts with label egg yolks. Show all posts

Wednesday, May 2, 2012

Hungarian Shortbread (TWD)


I'm a day late posting, but this week's Tuesdays with Dorie: Baking with Julia recipe was hosted by Lynette of 1smallkitchen and Cher of The not so exciting adventures of a dabbler…: Hungarian Shortbread.  This shortbread recipe is very similar to most traditional shortbreads - made with flour, sugar, and a lot of butter.  However, instead of rolling out the dough, half of it is grated into the pan and then topped with fruit preserves, and then topped with more grated dough.

The dough recipe was simple, and the results quite delicious.  However, I think I spent a good 30 minutes grating all of the dough! It kept getting too soft to grate so I'd have to put it back in the fridge to chill while I grated the other ball of dough. So, while these were buttery, crumbly, and delicious, I'm afraid I won't be making them again simply because I cannot put myself through another 30 minutes straight of grating again!

Thanks to Lynette and Cher for hosting; you can find the recipe on their blogs here and here.  Make sure you check here, too, to see what everyone else thought of these sweet, buttery treats.

* Recipe notes:
- I used a 13 x 9 inch pyrex pan to bake my shortbread.
- Instead of 8 oz of fruit preserves, I used 16 oz.  This seemed to be a good amount.  I think 8 oz would result in a layer of fruit preserves that was too thin.  I would recommend using at least 12 oz.
- I had to bake my shortbread for an extra 15 minutes before it was golden brown on top.  Some bakers noted that the bottom layer seemed undercooked but I did not have this problem since I baked mine longer.

Tuesday, May 31, 2011

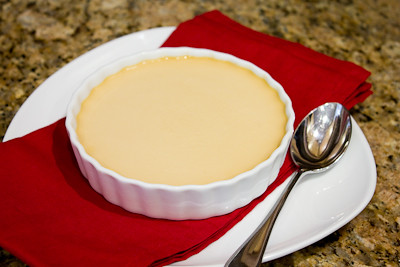
Caramel Pots de Creme (TWD)


This week's Tuesdays with Dorie (TWD) recipe was chosen by Peggy of Peggy the Baker: Caramel Pots de Creme.  These little pots of cream (or ramekins, in my case) are made with caramelized sugar.  I think I was too worried about burning my sugar that I didn't let it caramelize quite enough.  The caramel flavor in this custard wasn't quite as strong as I was hoping it would be.  Still, these were delicious. 

Thanks Peggy, for hosting this week. I'll definitely be making this again! If you would like the recipe, you can find it here. Make sure you check out the TWD Blogroll, to see how everyone else enjoyed this creamy, caramel-y treat!

Tuesday, April 19, 2011

Tourtely Apple Tart (TWD)


Things have been crazy busy here lately; I can't believe that it's been two weeks since I last posted! Where did the time go?! I hope to have some time in the coming week to get caught up with things so I can finally get around to blogging about some of the great recipes I've recently tried...

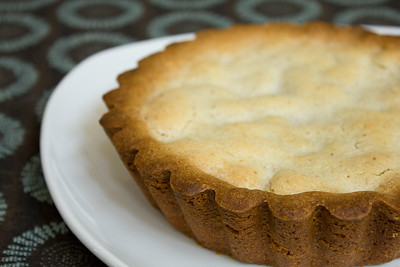
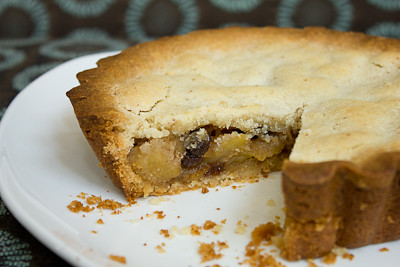
But, without further ado, here's my Tuesdays with Dorie (TWD) post.  This week's recipe was chosen by Jeannette of The Whimsical Cupcake: Tourtely Apple Tart.  This is about as homey as you can get.  It's a filling of apples cooked in brown sugar, tossed together with nutty browned butter, raisins, and ground almonds.  The aroma of the filling after is just made is simply amazing.  I love browned butter.  The filling is then sandwiched between two layers of sweet, sugary almond cookie dough.

I only had one (very large, one pound) Fuji apple left in the house, so I made a half recipe which was just enough for one mini tart.  The filling probably could have used a few more apple chunks, but that was more my fault than the recipe's fault since I didn't have any more apples on hand.  If you've never browned butter before, I'd suggest turning the heat down just a tad because it does go from brown to burnt very quickly if you don't watch it closely (and it will brown at the lower heat, it will just take longer).  I did add the "optional" cinnamon to the filling, and added more than a pinch, just because it seems wrong to make an apple dessert without cinnamon :) (I know that Grace would agree.)


The result was a very homey, comforting dessert.  It was like a cross between an apple pie and an apple tart.  I find that a lot of Dorie's desserts are quite sweet, but this one was just barely sweet.... and that was more from the tart crust than from the filling itself.  I love that you can make the tart dough and the filling ahead of time, and then just assemble and bake the tart when you're ready.  I'll definitely be making this one again.  (And next time I'll be more careful not to over bake the crust so much!)

Thanks Jeannette, for hosting this week.  If you would like the recipe, you can find it here. Make sure you check out the TWD Blogroll, to see how everyone else enjoyed this sweet, appley treat!
 
* Recipe tips:
- When baking your crust, instead of removing the foil completely after 20 minutes, gently remove it, cut a hole in the center to create a "pie crust shield," and then put it back over your tart.  This will allow the center to brown without burning the edges of your crust.  I forgot to do that this time, resulting in the very brown edges you see in my photos!
 - For more recipe tips, click here.

Saturday, March 27, 2010

Orange Tian (DB)


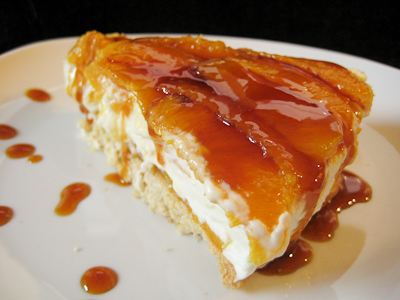
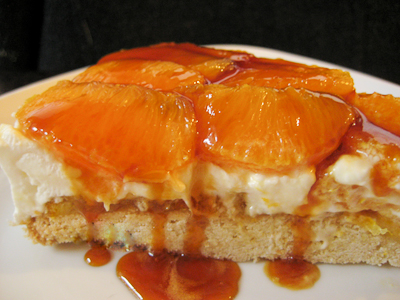
The 2010 March Daring Baker’s challenge was hosted by Jennifer of Chocolate Shavings. She chose Orange Tian as the challenge for this month, a dessert based on a recipe from Alain Ducasse’s Cooking School in Paris. What is a tian, you ask? Yeah, I had to ask that too. I had never heard of a tian before. Apparently it's as simple as any layered dish. So a 7-layer bean dip is considered a tian just as much as the orange pastry you see above is.


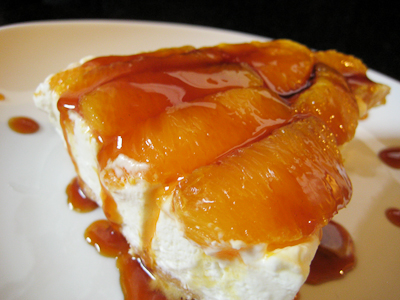
In this case, the orange tian is a layered dessert consisting of a sweet tart dough base, topped with orange marmalade, an orange flavored whipped cream, and then fresh orange segments, garnished with a luscious orange caramel sauce on top.

While this recipe was fairly straightforward, I did get to learn several new techniques through this challenge. To start off, I made my very first marmalade. I love orange marmalade and could eat it plain by the spoonful. In fact, that's what I did with a few spoonfuls of this homemade goodness! In making the marmalade, I also learned how to extract my own pectin from orange seeds! I somehow forgot to put pectin on my grocery list and by the time I started making this recipe, there was no way I was going back out to get it. So, I checked out the forum and found another baker had suggested extracting your own. You basically just stick the seeds in a piece of cheesecloth, let it soak in some warm water for a few hours, and then squeeze the living daylights out of the cheesecloth and seeds until you get some gloopy goodness that is pectin. So cool.

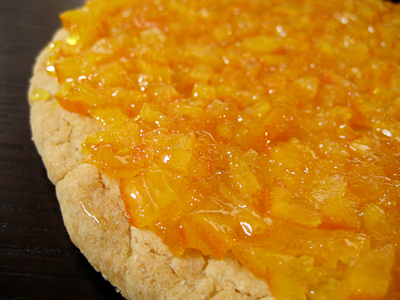
Beautiful layer of orange marmalade atop the pate sablee.

I also learned how to segment an orange during this process. As simple as it is, I had never done this before. The youtube video that was linked was a great tutorial and I had all eight oranges segmented in no time. This is definitely my preferred way to eat a grapefruit from now on (I used to always just slice it in half and then dig in with a spoon!).

Instead of making mini desserts with cookie cutters, I opted to make one large tart using my springform pan. I simply cut out a piece of parchment that would fit into my pan and then used that as a guide as I rolled out the dough.


This dessert is perfect for spring or summer. It would be great for entertaining, as you could get all of the components together ahead of time and then just assembled it right before the party. Even simpler if you used store bought marmalade or jam. I loved this dessert, especially with the orange caramel sauce on top! I've never had anything like it. My husband isn't a huge fan of citrus, but did think that this would be even better with raspberry jam on the bottom and fresh raspberries on top! I think the different flavor combinations are endless.

Thanks Jennifer, for hosting this month's challenge. Make sure you check out the Daring Bakers' Blogroll to see how everyone else enjoyed this citrus-y treat.


Orange Tian
Recipe slightly adapted from Alain Ducasse‘s Cooking School in Paris, France
Stabilized whipped cream (http://tamsin-cakes.com/2009/06/05/tamsincakes-on-flickr-adventures-in-s...)

For the Pate Sablee:

Ingredients U.S. Imperial Metric Instructions for Ingredients
2 medium-sized egg yolks at room temperature (you can use 2 large egg yolks without a problem)
granulated sugar 6 tablespoons + 1 teaspoon; 2.8 oz; 80 grams
vanilla extract ½ teaspoon
Unsalted butter ¼ cup + 3 tablespoons; 3.5 oz; 100 grams ice cold, cubed
Salt 1/3 teaspoon; 2 grams
All-purpose flour 1.5 cup + 2 tablespoons; 7 oz; 200 grams
baking powder 1 teaspoon ; 4 grams

Directions:
Put the flour, baking powder, ice cold cubed butter and salt in a food processor fitted with a steel blade.

In a separate bowl, add the eggs yolks, vanilla extract and sugar and beat with a whisk until the mixture is pale. Pour the egg mixture in the food processor.

Process until the dough just comes together. If you find that the dough is still a little too crumbly to come together, add a couple drops of water and process again to form a homogenous ball of dough. Form into a disc, cover with plastic wrap and leave to rest in the fridge for 30 minutes.
Preheat your oven to 350 degree Fahrenheit.

Roll out the dough onto a lightly floured surface until you obtain a ¼ inch thick circle. (I refrigerated my dough overnight so when it came time to roll it out, I had to let it sit on the counter for a bit to warm up and soften a little before I could roll it out.)

Using your cookie cutter, cut out circles of dough and place on a parchment (or silicone) lined baking sheet. Bake for 20 minutes or until the circles of dough are just golden. (I used a springform pan so I simply rolled out my dough into a circle that would fit into the pan.)

For the Marmalade:

Ingredients U.S. Imperial Metric Instructions for Ingredients
Freshly pressed orange juice ¼ cup + 3 tablespoons; 3.5 oz; 100 grams
1 large orange used to make orange slices
cold water to cook the orange slices
pectin 5 grams (If you do not have pectin, take all your orange seeds after segmenting the oranges and place them in a small piece of cheesecloth. Soak in warm water for a few hours, then squeeze out the pectin. It should be thick like corn syrup.)
granulated sugar: use the same weight as the weight of orange slices once they are cooked

Finely slice the orange. Place the orange slices in a medium-sized pot filled with cold water. Simmer for about 10 minutes, discard the water, re-fill with cold water and blanch the oranges for another 10 minutes.

Blanch the orange slices 3 times. This process removes the bitterness from the orange peel, so it is essential to use a new batch of cold water every time when you blanch the slices.

Once blanched 3 times, drain the slices and let them cool.

Once they are cool enough to handle, finely mince them (using a knife or a food processor).

Weigh the slices and use the same amount of granulated sugar . If you don’t have a scale, you can place the slices in a cup measurer and use the same amount of sugar.

In a pot over medium heat, add the minced orange slices, the sugar you just weighed, the orange juice and the pectin. Cook until the mixture reaches a jam consistency (10-15 minutes).

Transfer to a bowl, cover with plastic wrap and put in the fridge.

For the Orange Segments:

For this step you will need 8 oranges.

Cut the oranges into segments over a shallow bowl and make sure to keep the juice. Add the segments to the bowl with the juice.

[See YouTube video for additional information on segmenting oranges.]

For the Caramel:

Ingredients U.S. Metric Imperial Instructions for Ingredients
granulated sugar 1 cup; 7 oz; 200 grams
orange juice 1.5 cups + 2 tablespoons; 14 oz; 400 grams

Place the sugar in a pan on medium heat and begin heating it. (You can gently swirl the pan to prevent burning, but do not stir the sugar.)

Once the sugar starts to bubble and foam, slowly add the orange juice. (At this point, the caramel will harden... just keep heating and stirring and it will dissolve back into solution.) As soon as the mixture starts boiling, remove from the heat and pour half of the mixture over the orange segments.

Reserve the other half of the caramel mixture in a small bowl — you will use this later to spoon over the finished dessert. When the dessert is assembled and setting in the freezer, heat the kept caramel sauce in a small saucepan over low heat until it thickens and just coats the back of a spoon (about 10 minutes). You can then spoon it over the orange tians. (The caramel sauce will seem too thin after 10 minutes of additional heating. Refrain from continuing to heat it, because it will thicken nicely as it cools. I continued to heat it until it was thick and then once it cooled it was way too thick.)

[Tip: Be very careful when making the caramel — if you have never made caramel before, I would suggest making this step while you don’t have to worry about anything else. Bubbling sugar is extremely, extremely hot, so make sure you have a bowl of ice cold water in the kitchen in case anyone gets burnt!]

For the Whipped Cream:

Ingredients U.S. Metric Imperial Instructions for Ingredients
heavy whipping cream 1 cup; 7 oz; 200 grams
3 tablespoons of hot water
1 tsp Gelatine
1 tablespoon of confectioner's sugar
orange marmalade (see recipe above) 1 tablespoon

In a small bowl, add the gelatine and hot water, stirring well until the gelatine dissolves. Let the gelatine cool to room temperature while you make the whipped cream. Combine the cream in a chilled mixing bowl. Whip the cream using a hand mixer on low speed until the cream starts to thicken for about one minute. Add the confectioner sugar. Increase the speed to medium-high. Whip the cream until the beaters leave visible (but not lasting) trails in the cream, then add the cooled gelatine slowly while beating continuously. Continue whipping until the cream is light and fluffy and forms soft peaks. Transfer the whipped cream to a bowl and fold in the orange marmalade.
[Tip: Use an ice cold bowl to make the whipped cream in. You can do this by putting your mixing bowl, cream and beater in the fridge for 20 minutes prior to whipping the cream.]

Assembling the Dessert:

Make sure you have some room in your freezer. Ideally, you should be able to fit a small baking sheet or tray of desserts to set in the freezer.

Line a small tray or baking sheet with parchment paper or a silicone sheet. Lay out 6 cookie cutters onto the parchment paper/silicone.

Drain the orange segments on a kitchen towel.

Have the marmalade, whipped cream and baked circles of dough ready to use.

Arrange the orange segments at the bottom of each cookie cutter. Make sure the segments all touch either and that there are no gaps. Make sure they fit snuggly and look pretty as they will end up being the top of the dessert. Arrange them as you would sliced apples when making an apple tart.

Once you have neatly arranged one layer of orange segments at the bottom of each cookie cutter, add a couple spoonfuls of whipped cream and gently spread it so that it fills the cookie cutter in an even layer. Leave about 1/4 inch at the top so there is room for dough circle.

Using a butter knife or small spoon, spread a small even layer of orange marmalade on each circle of dough.

Carefully place a circle of dough over each ring (the side of dough covered in marmalade should be the side touching the whipping cream). Gently press on the circle of dough to make sure the dessert is compact.

Place the desserts to set in the freezer to set for 10 minutes.

Using a small knife, gently go around the edges of the cookie cutter to make sure the dessert will be easy to unmold. Gently place your serving plate on top of a dessert (on top of the circle of dough) and turn the plate over. Gently remove the cookie cutter, add a spoonful of caramel sauce and serve immediately.

Tuesday, March 16, 2010

Soft Chocolate and Raspberry Tart (TWD)


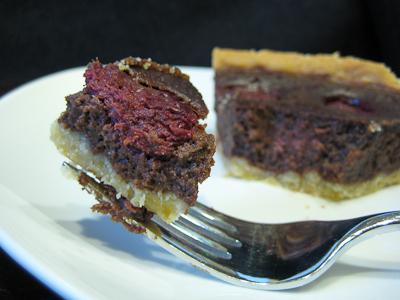
This week's Tuesdays with Dorie (TWD) recipe was chosen by Rachelle of Mommy? I’m Hungry!: Soft Chocolate and Raspberry Tart. I actually made this tart quite some time ago, for my husband's birthday because he requested something chocolatey, and I needed something quick and simple to throw together. Let me just say that chocolate and raspberry were just meant for each other :)

I know that in recipes like this, the flavor of the tart comes from the type of chocolate you use, so you should really use a high quality chocolate, but I was busy and didn't have time to run to the store, so I just used what I had on hand - semisweet chocolate chips! I'm really not that picky when it comes to chocolate, so I have to say that the tart still came out pretty tasty using "inferior" chocolate, so I can only imagine how great it would be with good chocolate.

I think blueberries would be nice to try in this tart too, but really you can't go wrong with the classic chocolate and raspberry combination. This recipe was really quick to throw together, especially since I already had some premade sweet tart dough in the freezer. It would make a great dessert for entertaining, since you could make the tart ahead of time and the chocolate filling only takes minutes to prepare.

Thanks, Rachelle, for hosting this week. I loved it. The chocolate filling is really soft and creamy after it is baked and each bite that contains raspberry is a delight. If you would like the recipe, you can find it here. Make sure you check out the TWD Blogroll, to see how everyone else enjoyed this chocolatey treat!

* Recipes notes:
- I used semisweet chocolate chips in this recipe, mostly for convenience.
- I would probably use more raspberries next time, as the bites I had that were without fruit just weren't as good.
- I found that the baking time was much longer for my mini tarts, maybe because they were higher/thicker than one large tart? Not sure but mine took an extra 15 minutes to bake up. Just watch the tarts as they bake and you will see the top of the chocolate layer change in consistency. It will start to change from the outside edges of the tart and move inward, so once that appearance is uniform throughout the tart, you'll know it's done.
- For tips from other TWD bakers, click here.

Saturday, March 6, 2010

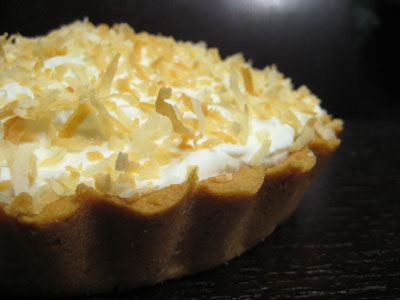
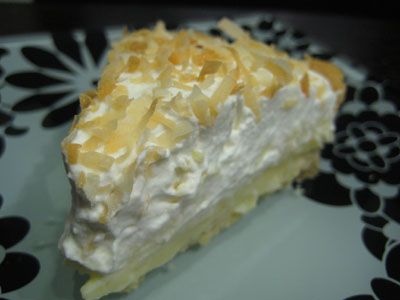
Toasted-Coconut Custard Tart (TWD)


This week's Tuesdays with Dorie (TWD) recipe was chosen by Beryl of Cinemon Girl: Toasted-Coconut Custard Tart. I actually made this last weekend, but I'm a bit late posting this because unfortunately the power cord to my laptop died and I had to order a new one, but better late than never right? So back to this past week's pick... I love all things coconut, so I was eager to try this recipe.


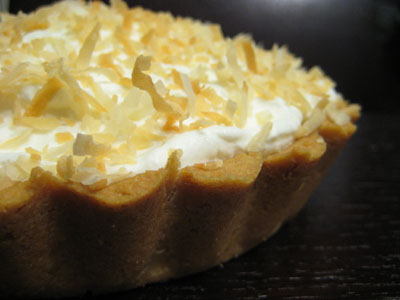
It's basically a rum infused vanilla pastry cream chock full of toasted coconut atop Dorie's wonderful sweet tart crust, topped with a rum flavored whipped cream. With six egg yolks in the pastry cream, I was worried that this tart was going to be overly rich and creamy. Surprisingly, this tart was very light and airy and not heavy at all. The coconut flavor was well complemented with the rum, and you can't ever go wrong with Dorie's sweet tart dough.

While I thoroughly enjoyed this tart, if you love coconut, I would highly recommend that you try Dorie's Florida Pie, which is like a coconut filled key lime pie :)


Thanks, Beryl, for hosting this week. I loved it. If you would like the recipe, you can find it here. Make sure you check out the TWD Blogroll, to see how everyone else enjoyed this light, coconut-y treat!

* Recipes notes:
- For tips from other TWD bakers, click here.

Tuesday, December 8, 2009

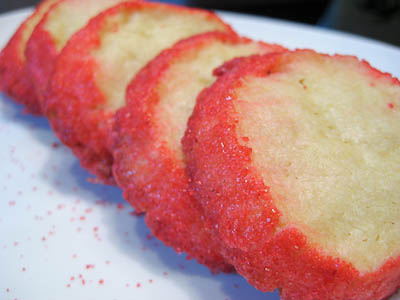
Sablés (TWD)


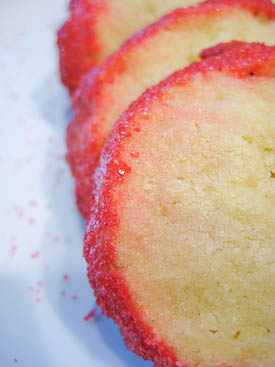
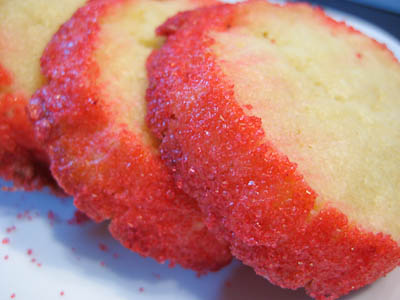
This week's Tuesdays with Dorie (TWD) recipe was chosen by Barbara of Bungalow Barbara: Sablés. Sablés are shortbread-like French butter cookies known for their sandy texture (in fact, "sablés" means "sand" in French).


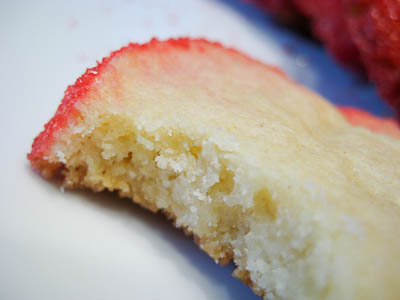
This post is going to be short and sweet because I'm still adjusting to life with a newborn... but let me just say that for a cookie that is so simple to make, the outcome is wonderful. I really enjoyed the crumbly, sandy texture of these cookies, as well as the intense butter flavor. It's a shame that this recipe contains two whole sticks of butter (and yields only 2 dozen cookies), otherwise I'd be more inclined to make these more often! These would be great for holiday gift giving, though.


If you would like the recipe, you can find it here on Barbara's blog. She's also got some great tips on shaping the dough into a log and how to help keep the logs from flattening out while chilling. Make sure you check out the TWD Blogroll, to see how everyone else enjoyed these buttery treats.


* Recipes notes:
- The recipe instructions call for 2 egg yolks to be added to the dough and then an additional yolk to coat the logs before sprinkling them with sugar. The third egg yolk is not listed in the ingredients list but rest assured that the dough is supposed to contain two yolks, not just one.
- I decorated my cookies with red decorating sugar but I think turbinado sugar yields a more classic, elegant look.
- The cookies will keep in a tin at room temperature for about 5 days. If you do not sprinkle the sablés with sugar, they can be wrapped airtight and frozen for up to 2 months. Because the sugar will melt in the freezer, the decorated cookies are not suitable for freezing.
- For tips from other TWD bakers, click here.

Tuesday, October 6, 2009

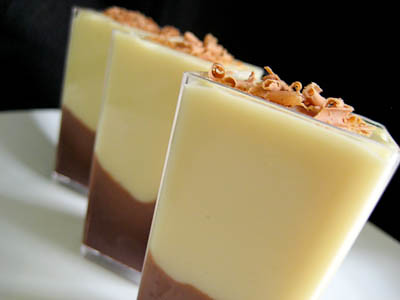
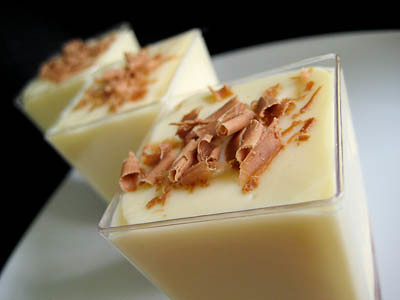
Split Level Pudding (TWD)


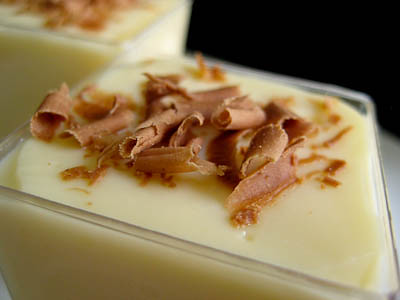
This week's Tuesdays with Dorie (TWD) recipe was chosen by Garrett of Flavor of Vanilla: Split Level Pudding. It's homemade vanilla pudding atop a layer of chocolate ganache.

We've made chocolate pudding before for TWD, so I was curious to see how this recipe compared. The method was pretty much the same, using a food processor to help create a perfectly smooth and creamy pudding. The only difference with this recipe is that the chocolate is in a layer beneath the pudding, instead of incorporated into the pudding.


I think if you're in the mood for chocolate, that regular chocolate pudding would be better, but if you want just a hint of chocolate, then this recipe is perfect. Not too chocolately, but enough chocolate to satisfy a chocolate craving.

While homemade pudding is far superior to store bought, I just don't love pudding enough to make it from scratch all the time. So while I enjoyed trying this recipe, I probably won't be making it again. If you're a pudding lover, though, you definitely need to try this.


Thanks Garrett, for picking this. If you would like the recipe, you can find it here. Make sure you check out the TWD Blogroll, to see how everyone else enjoyed this rich, creamy treat.


* Recipes notes:
- If you really like chocolate, I'd double the chocolate ganache recipe so you have a thicker chocolate layer on the bottom. Otherwise, this recipe was great as is.
- For more tips, click here.

Tuesday, July 28, 2009

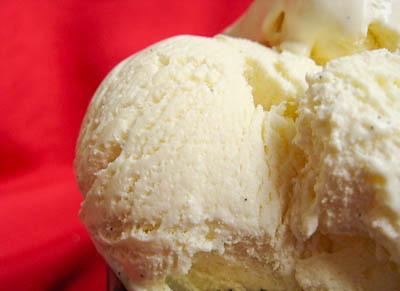
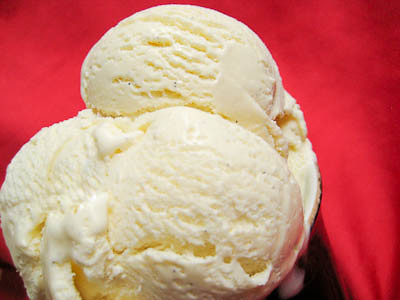
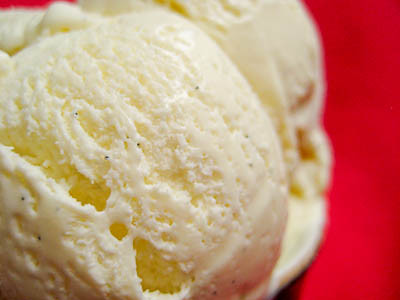
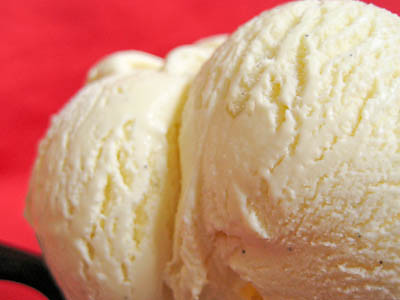
Vanilla Ice Cream (TWD)


This week's Tuesdays with Dorie (TWD) recipe was chosen by Lynne of Cafe LynnyLu: Vanilla Ice Cream. What a perfect pick for summer! It's your basic custard ice cream recipe, flavored with either a vanilla bean or some vanilla extract. For those who have never had homemade vanilla ice cream before, I promise you won't be disappointed.


I used to not make much ice cream because it was always such a pain to buy whole milk. The small containers are just as expensive as a whole gallon of milk, and if I bought anything bigger, it would go bad before I could use it all. Since discovering how to make whole milk from regular milk and half & half/heavy cream, I've been making a lot more ice cream :) It's so convenient because we always have milk and half & half on hand.


The smell of this custard before it was frozen was so fragrant, I could tell it was going to be good ice cream. We recently made Brown Sugar Vanilla Ice Cream for Sweet Melissa Sundays and I was anxious to see how Dorie's vanilla ice cream would compare to Melissa's.

Dorie's ice cream was rich and creamy, perfect by itself or drenched in some hot fudge or caramel sauce. Using vanilla beans in place of vanilla extract definitely gave the ice cream a fuller flavor. I have to say that in this case, though, the Brown Sugar Vanilla Ice Cream I made a few weeks ago was better. The brown sugar flavor was very subtle, but still made it extra special. I encourage you to try both recipes for yourself and see!


Thanks Lynne, for picking this recipe. If you would like the recipe, you can find it here. Check out the TWD Blogroll, and see how everyone else enjoyed this cool, summer treat!

* Recipes notes:
- For tips, click here.

Sunday, July 5, 2009

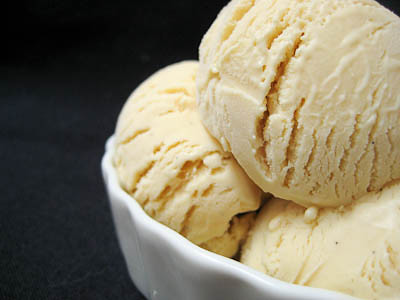
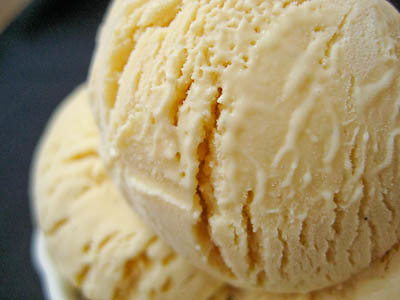
Bananas Foster over Brown Sugar Vanilla Ice Cream (SMS)


This week's Sweet Melissa Sundays (SMS) recipe was chosen by Karen of Karen's Cookies Cakes & More: Brown Sugar Vanilla Ice Cream with Hot Fudge Sauce or Butterscotch Sauce. I've always heard about how homemade vanilla ice cream is so much better than store-bought vanilla ice cream, so I was excited to try this recipe. Throw in the brown sugar component and it makes it sound all that more interesting.

This recipe is actually a custard ice cream, with the addition of eggs that makes it richer and creamier than regular ice cream. This was probably about the easiest custard recipe I've made so far because it doesn't require tempering the eggs by adding a hot milk/cream mixture slowly to an egg/sugar mixture. All you do is mix all the ingredients together in a bowl, set it over a double boiler, and the stir until it reaches 180F.


I actually had trouble getting my custard to reach 180F, and noticed that in Dorie's ice cream recipes (like the burnt sugar ice cream) she only recommends heating the mixture to 170-180F. So after I mine reached 170F, I went ahead and stopped cooking it and started chilling it. This didn't seem to affect the outcome at all. Although the recipe states that you need an ice cream maker, you actually don't - I made ice cream last year without an ice cream maker using this method.


This is a rich and creamy vanilla ice cream. The brown sugar does lend some extra depth to the flavor but is not overly noticeable. I think most people wouldn't even notice the brown sugar in it.

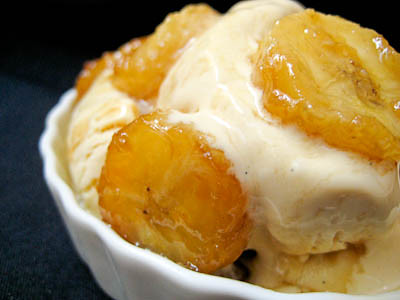
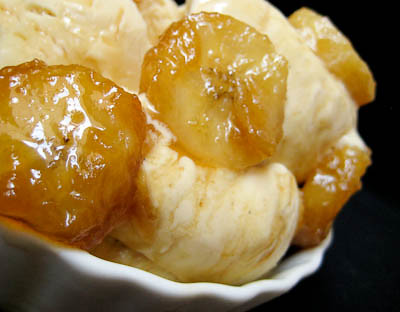
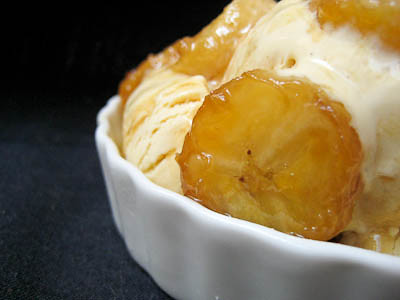
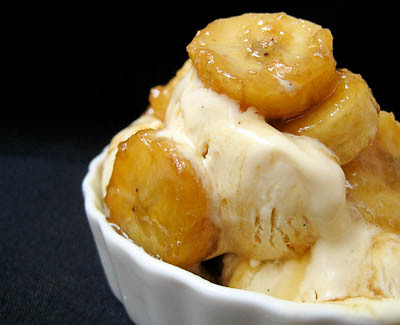
Instead of serving this with the hot fudge sauce or butterscotch sauce recipes in the book, I decided to make my favorite ice cream accompaniment - Bananas Foster! It was the perfect way to serve this brown sugar vanilla ice cream. Bananas Foster is so easy to make and so delicious (I've included the recipe below). Usually bananas foster is made by flambéeing bananas, but I usually skip the fire show and it seems to taste just as good. I also omit butter from the recipe to save a few calories (every bit counts right? ha!).


Thanks Karen, for choosing this recipe - I loved it! If you would like the recipe, you can find it here. Make sure you visit the SMS Blogroll to see what everyone else thought about this creamy summertime treat.

* Recipe tips:
- Carnation makes a non-fat skim milk powder that you can usually find at your grocery store. If you can't find any skim milk powder, just omit it from the recipe.
- Don't have a candy thermometer? I recommend this digital thermometer which is great because it works a low temperatures for checking meat, but also reads high enough to double as a candy thermometer.
- Save those leftover egg whites for later so you can make something yummy like the Coconut-Roasted Pineapple Dacquoise! Freeze your egg whites, as discussed here.
- As long as your mixture gets above 170F, it should be safe for consumption.
- For more tips, click here.


Bananas Foster Ice Cream
from Good Eats 'n Sweet Treats

1/3-1/2 cup loosely packed brown sugar (depends on how much gooey brown sugar syrup you want!)
1 tbsp dark rum
1 ripe banana, cut into 1/4" slices


Add the brown sugar and rum to a saute pan and cook over medium heat. Once the sugar starts to dissolve in the rum, add the banana slices. Continue cooking for about one minute, then flip the banana slices over and cook for another minute until bananas are cooked through.

Let cool for a few minutes, then serve over your favorite vanilla ice cream.

Yield: 1-2 Servings

Saturday, June 27, 2009

Bakewell Tart


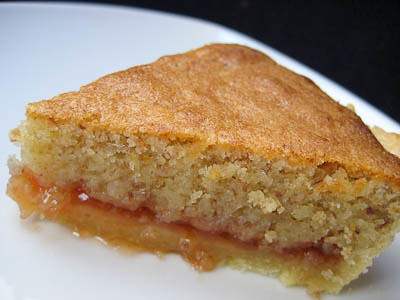
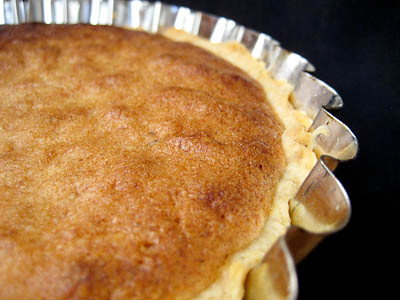
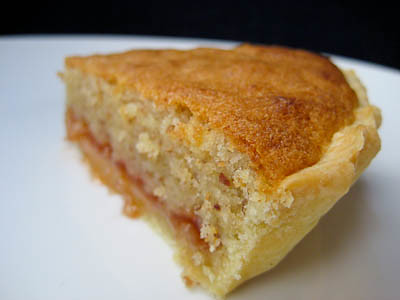
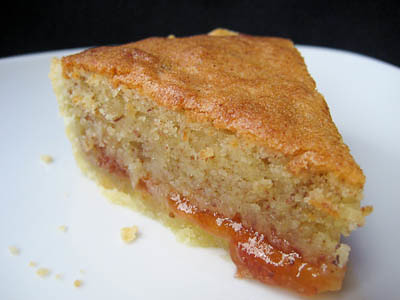
The June Daring Bakers' challenge was hosted by Jasmine of Confessions of a Cardamom Addict and Annemarie of Ambrosia and Nectar. They chose a Traditional (UK) Bakewell Tart... er... pudding that was inspired by a rich baking history dating back to the 1800's in England.


Like many regional dishes there’s no “one way” to make a Bakewell Tart…er…Pudding, but most of today’s versions fall within one of two types. The first is the “pudding” where a layer of jam is covered by an almondy pastry cream and baked in puff pastry. The second is the “tart” where a rich shortcrust pastry holds jam and an almondy sponge cake-like filling. The version the Daring Bakers made this month was a combination of the two: a sweet almond-flavoured shortcrust pastry, frangipane and jam.

This recipe was among the simpler and less time consuming recipes that the Daring Bakers has made. It's really something that anyone could make. I usually use a food processor to make my crusts, but the hosts challenged us to make this one by hand so that's what I did. The crust did turn out flaky and not too tough, but I'll probably continue to use a food processor in the future - it's so much easier :)

I don't have a 9-inch tart pan so I made two smaller tarts. I made one with strawberry-guava jam and the other one with passion fruit jelly. I probably should not have used the jelly (it turned out a bit runny), but I ran out of jam. I really loved the frangipane almond filling - the flavor was very fragrant. The jam complemented the frangipane well. The recipe calls for 1/2 cup to 1 cup of jam - I made one tart with the smaller amount and the other tart with the larger amount. I definitely liked the one with more jam in it, but I'm sure it just depends on your personal preference.

One problem I had was with the top of the tart browning too quickly. I covered it with foil after I caught on to this, but it was already a bit too late and it had browned a bit too much. Next time, I'll cover it with foil after about 15 minutes.


Thanks to Jasmine and Annemarie for introducing me to this lovely dessert! I enjoyed it and would definitely make it again. Make sure you visit the Daring Bakers' Blogroll to see thousands of other tarts!

Bakewell Tart History and Lore

Flan-like desserts that combine either sweet egg custard over candied fruit or feature spiced ground almonds in a pastry shell have Mediaeval roots. The term “Bakewell pudding” was first penned in 1826 by Meg Dods; 20 years later Eliza Acton published a recipe that featured a baked rich egg custard overtop 2cm of jam and noted,

“This pudding is famous not only in Derbyshire, but in several of our northern counties where it is usually served on all holiday occasions.”

By the latter half of the 1800s, the egg custard evolved into a frangipane-like filling; since then the quantity of jam decreased while the almond filling increased.

This tart, like many of the world's great foods has its own mythic beginnings…or several mythic beginnings. Legend has it in 1820 (or was it in the 1860s?) Mrs. Greaves, landlady of The White Horse Inn in Bakewell, Derbyshire (England), asked her cook to produce a pudding for her guests. Either her instructions could have been clearer or he should have paid better attention to what she said because what he made was not what she asked for. The cook spread the jam on top of the frangipane mixture rather than the other way around. Or maybe instead of a sweet rich shortcrust pastry case to hold the jam for a strawberry tart, he made a regular pastry and mixed the eggs and sugar separately and poured that over the jam—it depends upon which legend you follow.

Regardless of what the venerable Mrs. Greaves’ cook did or didn’t do, lore has it that her guests loved it and an ensuing pastry-clad industry was born. The town of Bakewell has since played host to many a sweet tooth in hopes of tasting the tart in its natural setting.

Bakewell tarts are a classic English dessert, abounding in supermarket baking sections and in ready-made, mass-produced forms, some sporting a thick sugary icing and glazed cherry on top for decorative effect.

Enjoy it with a cup of tea or coffee or just eat it sneaky slice by sneaky slice until, to your chagrin, you realise the whole tart has somehow disappeared despite you never having pulled out a plate, fork or napkin with which to eat it.


Bakewell Tart...er...pudding

Makes one 23cm (9” tart)
Prep time: less than 10 minutes (plus time for the individual elements)
Resting time: 15 minutes
Baking time: 30 minutes
Equipment needed: 23cm (9”) tart pan or pie tin (preferably with ridged edges), rolling pin

One quantity sweet shortcrust pastry (recipe follows)
Bench flour
250ml (1cup (8 US fl. oz)) jam or curd, warmed for spreadability
One quantity frangipane (recipe follows)
One handful blanched, flaked almonds (I omitted these)

Assembling the tart
Place the chilled dough disc on a lightly floured surface. If it's overly cold, you will need to let it become acclimatised for about 15 minutes before you roll it out. Flour the rolling pin and roll the pastry to 5mm (1/4”) thickness, by rolling in one direction only (start from the centre and roll away from you), and turning the disc a quarter turn after each roll. When the pastry is to the desired size and thickness, transfer it to the tart pan, press in and trim the excess dough. Patch any holes, fissures or tears with trimmed bits. Chill in the freezer for 15 minutes.

Preheat oven to 200C/400F.

Remove shell from freezer, spread as even a layer as you can of jam onto the pastry base. Top with frangipane, spreading to cover the entire surface of the tart. Smooth the top and pop into the oven for 30 minutes. Five minutes before the tart is done, the top will be poofy and brownish. Remove from oven and strew flaked almonds on top and return to the heat for the last five minutes of baking.

The finished tart will have a golden crust and the frangipane will be tanned, poofy and a bit spongy-looking. (Make sure it doesn't jiggle too much - if it does, it's not fully cooked yet.) Remove from the oven and cool on the counter. Serve warm, with crème fraîche, whipped cream or custard sauce if you wish.

When you slice into the tart, the almond paste will be firm, but slightly squidgy and the crust should be crisp but not tough.

Jasmine’s notes:
• If you cannot have nuts, you can try substituting Victoria sponge for the frangipane. It's a pretty popular popular cake, so you shouldn't have any troubles finding one in one of your cookbooks or through a Google search. That said, our dear Natalie at Gluten a Go Go has sourced some recipes and linked to them in the related alt.db thread.
• You can use whichever jam you wish, but if you choose something with a lot of seeds, such as raspberry or blackberry, you should sieve them out.
• The jam quantity can be anywhere from 60ml (1/4 cup) to 250ml (1cup), depending upon how “damp” and strongly flavoured your preserves are. I made it with the lesser quantity of home made strawberry jam, while Annemarie made it with the greater quantity of cherry jam; we both had fabulous results. If in doubt, just split the difference and spread 150ml (2/3cup) on the crust.
Annemarie’s notes:
• The excess shortcrust can be rolled out and cut into cookie-shapes (heck, it’s pretty darned close to a shortbread dough).

Sweet Shortcrust Pastry

Prep time: 15-20 minutes
Resting time: 30 minutes (minimum)
Equipment needed: bowls, box grater, cling film

225g (8oz) all purpose flour
30g (1oz) sugar
2.5ml (½ tsp) salt
110g (4oz) unsalted butter, cold (frozen is better)
2 (2) egg yolks
2.5ml (½ tsp) almond extract (optional)
15-30ml (1-2 Tbsp) cold water

Sift together flour, sugar and salt. Grate butter into the flour mixture, using the large hole-side of a box grater. Using your finger tips only, and working very quickly, rub the fat into the flour until the mixture resembles bread crumbs. Set aside.

Lightly beat the egg yolks with the almond extract (if using) and quickly mix into the flour mixture. Keep mixing while dribbling in the water, only adding enough to form a cohesive and slightly sticky dough.

Form the dough into a disc, wrap in cling and refrigerate for at least 30 minutes

Jasmine’s notes:
• I make this using vanilla salt and vanilla sugar.
• If you wish, you can substitute the seeds of one vanilla bean, one teaspoon of vanilla paste or one teaspoon of vanilla extract for the almond extract

Frangipane

Prep time: 10-15 minutes
Equipment needed: bowls, hand mixer, rubber spatula

125g (4.5oz) unsalted butter, softened
125g (4.5oz) icing sugar
3 (3) eggs
2.5ml (½ tsp) almond extract
125g (4.5oz) ground almonds
30g (1oz) all purpose flour

Cream butter and sugar together for about a minute or until the mixture is primrose in colour and very fluffy. Scrape down the side of the bowl and add the eggs, one at a time, beating well after each addition. The batter may appear to curdle. In the words of Douglas Adams: Don’t panic. Really. It’ll be fine. After all three are in, pour in the almond extract and mix for about another 30 seconds and scrape down the sides again. With the beaters on, spoon in the ground nuts and the flour. Mix well. The mixture will be soft, keep its slightly curdled look (mostly from the almonds) and retain its pallid yellow colour.

Annemarie’s notes:
• Add another five minutes or more if you're grinding your own almonds or if you're mixing by hand (Heaven help you).

Tuesday, June 16, 2009

Honey-Peach Ice Cream (TWD)


This week's Tuesdays with Dorie (TWD) recipe was chosen by Tommi of Brown Interior: Honey-Peach Ice Cream. This was the perfect recipe to start off the summer!

I love ice cream. I pretty much love all kinds of ice cream... from plain vanilla to rich and creamy chocolate to fruit-based flavors. So I was excited to see this recipe picked. It was a bit time consuming to peel and dice all the peaches, but otherwise this didn't take too long. This recipe gave me the perfect opportunity to test out the Boos cutting board I received from KaTom Restaurant Supply. It's a good, solid cutting board. The size is a bit small, but it is large enough to handle most tasks. Since I only use it for non-meat items like fruits and veggies, it does the job just fine.


If you don't have an ice cream maker (you should really invest in one, though!), no worries. You can learn how to make ice cream without an ice cream maker here. Though time consuming, it's a very simple method that yields wonderful results.


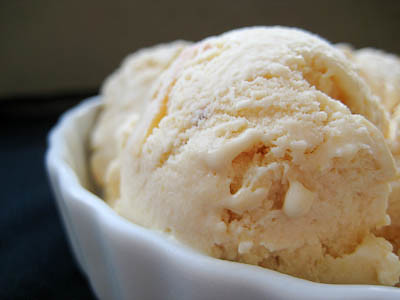
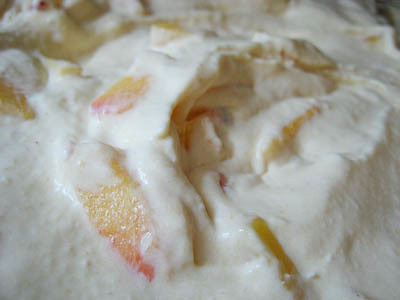
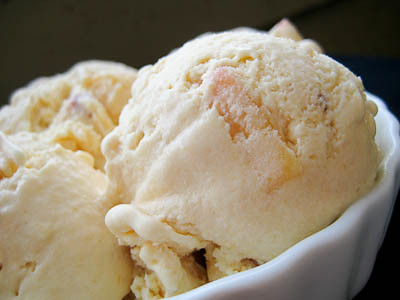
The honey flavor in this ice cream was lovely, and complemented the peaches well. If you don't have peaches (or don't like them), you can substitute other fruits such as nectarines or plums. I actually found that the bits of peaches became too hard/frozen after the ice cream was done, so the next time I make this, I will definitely dice them into even smaller pieces. Thanks Tommi, for a great pick. If you would like the recipe, you can find it here. Make sure you visit the TWD Blogroll to see what everyone else thought about this cool, summery treat.

* Recipes notes:
- Dice your peaches into super teeny tiny pieces to avoid biting into large chunks of icey fruit in the ice cream.
- No whole milk? No problem. Learn how to make your own whole milk from skim/1%/2% milk and heavy cream or half & half here.
- For more tips, click here.

Sunday, May 31, 2009

Bee Stings (SMS)


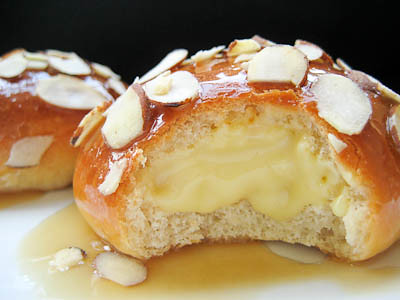
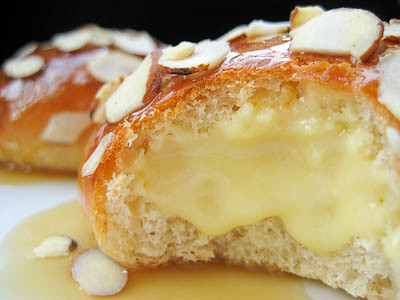
This week's Sweet Melissa Sundays (SMS) recipe was my pick! After pouring through the pages of this cookbook, I finally decided that I wanted to make the Bee Stings. These are Melissa's version of baked doughnuts - they're "sweet and tender brioche-style buns filled with pastry cream and then dipped in honey caramel and sprinkled with toasted almonds."
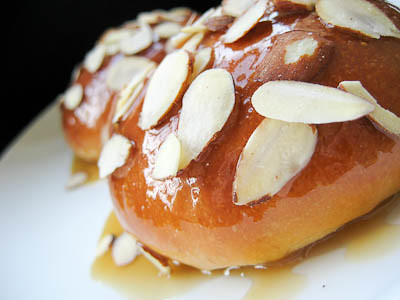

This is definitely a recipe that you'll have to plan ahead for. The dough needs 2-3 hours to rise after being kneaded, then it needs to be refrigerated overnight. When I read through the recipe, I was concerned because I have never seen a yeast dough recipe where there is only an exact amount of flour. Typically, the amount of flour you need to add will vary based on how much moisture is present in your kitchen, the flour, etc. I found that I had to add quite a bit more flour before my dough was no longer sticking to the sides of the bowl. I lost track of how much I added, but it was at least 1/4 cup more. The amount you'll need to add will be different, but in general if you add one tablespoon at a time, you won't over do it. As with most brioche doughs, it helps if you have a stand mixer, but it's not absolutely required. You just have to be ready to get a really good workout if you don't have one.


Aside from requiring extra flour, I had no problems with the dough. My dough took about 3 hours to double in volume, but that's partly because I didn't use "rapid rise" yeast. I also use my oven as a proofing box. I'll preheat it for a minute or two to get it warm, then turn the oven off and place my dough inside to rise. This guarantees that whether it's summer or winter, my dough will always rise nicely.

I found that my buns were golden brown after a short 19 minutes in the oven (11 minutes early) - so be sure to keep an eye on your buns to prevent them from burning!
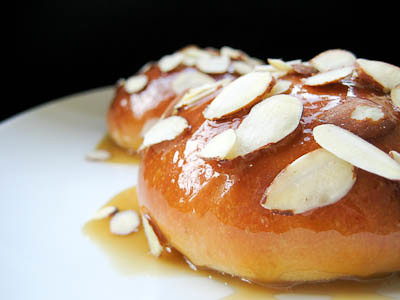

While the dough was simple enough, I had major issues with the pastry cream. It's not that I've never made pastry cream before. I am used to making Dorie’s pastry cream and this one took forever to thicken up. At first, I thought it was because the water in my double boiler was just at a simmer (the recipe says not to boil it). After patiently whisking for over 20 minutes, however, I increased the heat to get the water to a boil… I then whisked for probably another 40 minutes until it started to thicken just slightly. It never got extremely thick like Dorie’s, but I gave up and stuck it in the fridge. After chilling overnight, it was thicker, but not nearly as thick as most pastry creams – not sure if this is Melissa’s intention. It reminds me of the cream you would find in a cream-filled doughnut, so perhaps this was her intention.

The honey caramel glaze is very simple to make. The honey adds a very nice flavor to the traditional flavor of caramel.
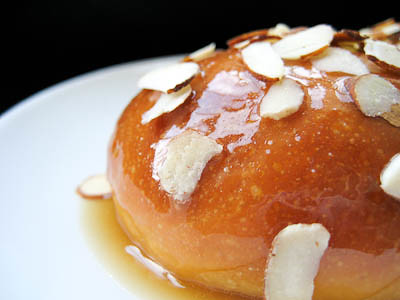

So how did these taste? They were good, but not quite what I had imagined when reading the recipe. The dough was sweet but wasn't quite as delicate as I had imagined. (This may have been my fault because I kneaded the dough much longer than the recipe indicated, while adding all the additional flour.) The pastry cream, in my opinion, was just okay. I much prefer Dorie’s pastry cream and will probably use that recipe instead the next time I make these. The honey caramel glaze was my favorite component of this recipe and tasted better than I had anticipated. Overall, I was glad I tried these, and while they're not my new favorite pastry, I could see myself making these again if I had a free weekend.

Make sure you visit the SMS Blogroll to see what everyone else thought about these sticky little treats!

Bee Stings
from The Sweet Melissa Baking Book

1/3 cup whole milk
1 large egg, at room temperature
1/3 cup sour cream, at room temperature
1 tsp pure vanilla extract
2 ¼ cups + 2 tbsp all-purpose flour
2 ¼ tsp (1 package) active dry yeast
1 tsp kosher salt
½ cup sugar
5 tbsp unsalted butter, softened
1/3 cup sliced blanched almonds, toasted, for garnish (Mine were not blanched, and then I forgot to toast them)

Vanilla Bean Pastry Cream, recipe follows
Honey Caramel Glaze, recipe follows


Line two cookie sheets with parchment or aluminum foil.

In the bowl of an electric mixer fitted with the whip attachment, combine the milk, egg, sour cream, vanilla and half of the flour. Mix on medium speed until it is a sticky paste.

Change the mixer attachment to the dough hook. Add the remaining flour, yeast, salt and sugar and mix on low speed to combine. Add the butter in pieces and beat on medium speed for 10-15 minutes until the dough forms a ball and is no longer sticking to the sides of the bowl. (If your dough is still very sticky, add more flour, one tablespoon at a time, until it is no longer sticking to the sides of the bowl. I had to add at least an extra 1/4 cup.)

*Edit: Please check out the tips at Pink Stripes - Wendy figured out how to make these without adding the extra flour, resulting is a lighter, not so dense bee sting!

Place the dough in a lightly greased bowl and cover is with plastic wrap. Set aside in a warm place to rise until doubled in volume, 2 to 3 hours.

When the dough has doubled, punch it down and turn it out onto a work surface. Divide it into 12 even pieces, each weighing about 2 ounces. (Due to the extra flour I added, mine were about 2.5 ounces each.)

Roll the dough into balls and place them 2 ½ inches apart on the prepared sheets (6 on each pan). Spray lightly with nonstick vegetable cooking spray and cover with plastic wrap (or lightly butter one side of the plastic wrap). Refrigerate overnight.

When you are ready for the final rise, remove the buns from the refrigerator. Bring about 3 quarts of water to a boil. Place an empty roasting pan large enough to hold the water on the bottom of your cold oven. Pour the boiling water into the pan.

Remove the plastic wrap from the buns. Position a rack in the top and bottom thirds of your oven. Place the cookie sheets on the racks in the oven (do not turn the oven on!)and shut the oven door. The steam of the water will help the buns in their final rise. The buns will just about double in size in about 40 minutes. (If your fridge is on a super-cold setting, your buns may take a little longer to rise. If they need more time, just boil some more water and refill the roasting pan.) When the buns have doubled in volume, remove them (and the roasting pan filled with water) from the oven.

Preheat the oven to 350 degrees.

Bake for 30 minutes, or until golden brown. (Watch them carefully - mine were done at just 19 minutes!)

Remove to a wire rack to cool completely before filling.

Honey Caramel Glaze:

1/3 cup firmly packed light brown sugar
3 tbsp heavy cream
3 tbsp clover honey
2 tbsp cold unsalted butter, cut into 1/2-inch pieces
1/4 tsp fresh lemon juice

In a small saucepan over medium heat, bring the brown sugar, cream, honey and butter to a boil. Cook for 30 seconds more, then remove the pan from the heat.

Stir in the lemon juice and let cool slightly.

Vanilla Bean Pastry Cream:

1 cup whole milk
¼ cup sugar
1/2 vanilla bean, split, or ¾ tsp pure vanilla extract
3 large egg yolks
2 tbsp cornstarch
2 tbsp cold unsalted butter

Fill a medium saucepan with 3 inches of water and bring to a simmer. Set a bowl over the top, but make sure that the bottom of the bowl does not touch the water. (Remove the bowl and use it for the egg yolk mixture.)

In a separate saucepan, stir together the milk, half of the sugar, and the vanilla seeds and pod and heat to scalding, or until the milk is steaming and tiny bubbles are forming around the edges. Do not boil. (At this point you'll also want to strain the hot milk to remove the vanilla bean.) If using vanilla extract, add it at the end of the recipe after the butter.

In the reserved bowl, whisk together the egg yolks and the remaining half of sugar until pale yellow. Whisk in the cornstarch. Little by little, whisk the hot milk into the egg mixture.

Place the bowl in the top of the double boiler, over simmering, not boiling, water. Cook, constantly whisking, until thick, about 5 minutes. (I had to increase the heat and whisk for much longer than 5 minutes.)

Remove from the heat and whisk in the butter and vanilla extract, if using. Lay a piece of plastic wrap on the surface of the custard (to prevent a skin from forming) and refrigerate in an airtight container for up to 4 days. Whisk until smooth before using.

To Complete the Buns:

Poke a hole through the side of each bun, and hollow it out a bit. I find it easiest to do this with the pointy end of a stick thermometer or a metal skewer (a chopstick works great too!). Poke a hole large enough for an Ateco #801 1/4-inch round pastry tip to fit into. Once the stick is inside the bun, wiggle it from side to side, making room for the cream. Be careful not to poke through the other side - you don't want any of that cream coming out!

Whisk the pastry cream until smooth. Put it into the pastry bag fitted with the tip. Fill each bun with as much cream as you can without it spilling out. You should be able to fit at least 2 tablespoons into each bun.

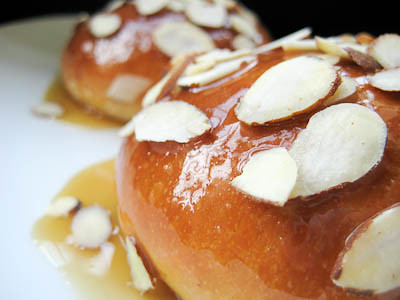
Holding the filled bun upside down, dip the top of each bun into the honey caramel, (flip them back over) and then sprinkle with the almonds. Repeat with the remaining buns. Bee Stings are best eaten as soon a they are made, but stay yummy all day.

Tip: Freeze the buns! Once you form the dough into buns, you can place them in the freezer uncovered on the sheet before they start to rise again. Once they are frozen, cover with plastic wrap. They will keep frozen for up to 1 week. When you are ready to bake, take them from the freezer, and let them thaw unwrapped at room temperature. Proceed with the final rising before baking.

Yield: 12 Buns