Sunday, March 30, 2008

Let Them Eat Cake!


When I found out that this month's challenge, chosen by Morven of Food Art and Random Thoughts, was going to be Dorie's Perfect Party Cake, I breathed a huge sigh of relief. You see, last month was my very first Daring Baker's challenge... and Julia Child's French Bread was quite the challenge for me! I had never made French Bread before, I hardly had any of the equipment required for the recipe, and I was still learning how to work with yeast. So when I saw that we were going to make a simple layer cake this month, I was thrilled :) Now granted, I am still very new to the world of layer cakes, but the only challenging thing I find about making them is how to cut the layers evenly so you don't end up with a lopsided cake (*Tip: use toothpicks to mark your cake and then cut it). Otherwise, they're pretty straight forward.

I also knew that the cake itself would not disappoint, as every recipe I have made from Dorie's book, Baking: From My Home to Yours, has been wonderful. If you don't believe me, just check out all the great things we've baked up over at Tuesdays with Dorie! TWD is a group of foodies who pick one recipe from Dorie's book to bake each week; the recipe is then posted on everyone's blogs on Tuesday. If you're a Dorie fan and haven't joined us yet, head on over to the TWD blog to sign up.

Ok, so enough about TWD. Back to the DB challenge. I was even more excited to read that Morven had given us free reign over this recipe to "play around with it," as Dorie calls it, and personalize it to our own tastes. Not a buttercream fan? Just use sweetened whipped cream instead. Don't like raspberries? Use any other type of berry preserve you'd prefer. Enjoy fresh fruit in your cakes? Then go ahead and add them... you can add them just between each cake layer, or on top as well!

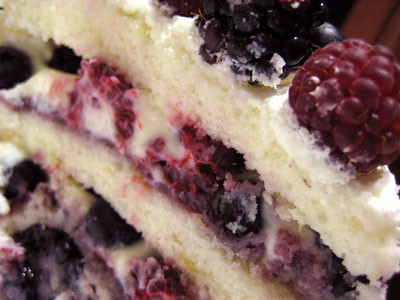
It seems that several DBers had problems with their cakes not rising enough to cut them in half in order to create the four layers. I'm not sure if that was because some did not use cake flour, but I had no such problems. Initially, when I removed them from the pans, I wasn't sure if they were thick enough to cut in half, but I went ahead and tried and they turned out ok. I'm not sure exactly how much the cake is supposed to rise, but I think my layers were about the same thickness as the ones depicted in the book.
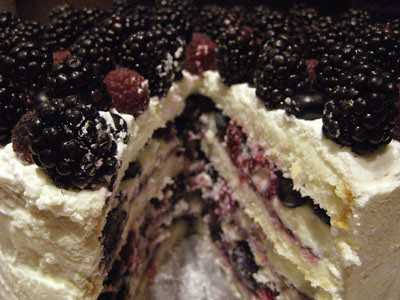

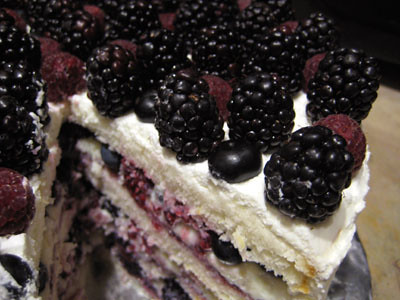
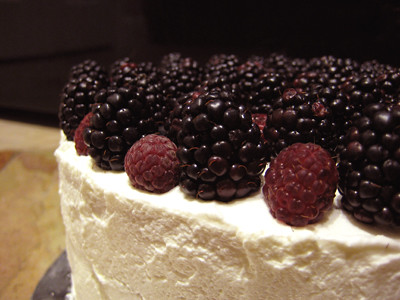
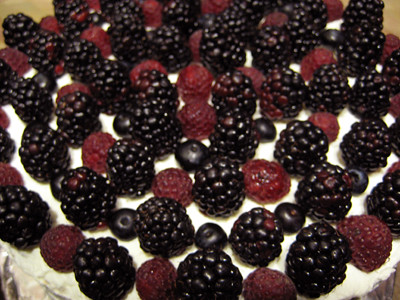
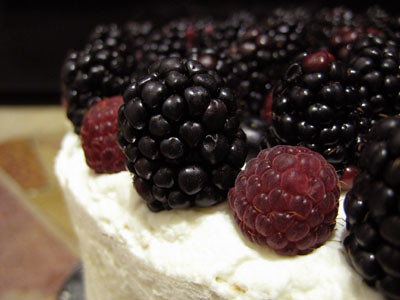
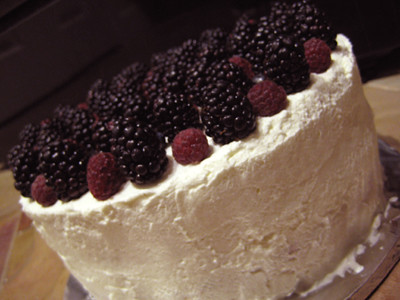
I'm not a big fan of buttercream (it isn't very good for you anyway - 3 sticks of butter?!), so I decided to use white chocolate whipped cream (from Dorie's Black and White Cake) between the cake layers and firmly whipped sweetened cream to frost the top and sides of the cake. Instead of raspberry preserves, I used Forest Berry Favorit Swiss Preserves (raspberries, blueberries, blackberries, cranberries, and strawberries). I also added fresh fruit (raspberries, blueberries, and blackberries) between each cake layer and on top of my cake. My blackberries were a bit on the larger side, so next time I think I will slice them in half before adding them in between the cake layers.
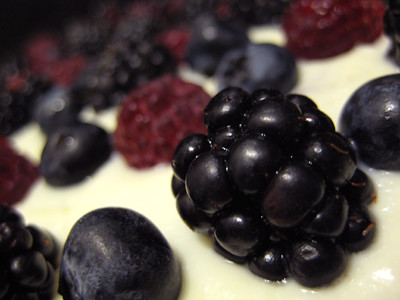

This cake was delicious and truly perfect! I thought the lemon flavor in the cake was subtle, but nice. It had a fairly dense crumb, but was super moist and not too heavy. The fresh berries really made this cake what it was. I just don't think it would be as impressive if it was just preserves and cream. My only regret was that I only had one slice before it was devoured by everyone else! This is definitely a cake that I will make again.

I can't wait to see how everyone else's rendition of this Perfect Party Cake turned out. Be sure to visit the Daring Baker's blogroll to see all the beautiful cakes created this month!


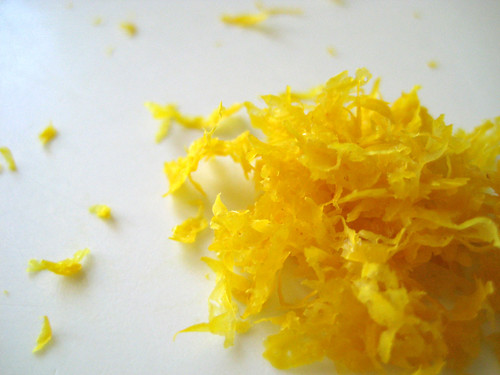
I'm also submitting this to Tasty Tools. This month's tool is the microplane. It's perfect for zesting fruit for recipes like this. I used to do this the old fashioned way by very carefully peeling my fruit and mincing the peels into a fine zest - it is so much faster and easier with the microplane! If you don't have one yet, I highly suggest that you invest in this tasty tool. I also use it for grating cinnamon, nutmeg, chocolate, ginger, and cheese :) And here's a tip - whenever you have some fruit, use your microplane to zest it and then store your zest in airtight container or ziploc baggy in the freezer. That way, you can have some on hand whenever a recipe calls for it!

Perfect Party Cake
from Baking: From My Home to Yours, by Dorie Greenspan (p. 250)

For the Cake
2 ½ cups cake flour
1 tablespoon baking powder
½ teaspoon salt
1 ¼ cups whole milk or buttermilk (I prefer buttermilk with the lemon) (Dorie also recommends having this at room temperature)
4 large egg whites (Dorie recommends having these at room temperature)
1 ½ cups sugar
2 teaspoons grated lemon zest
1 stick (8 tablespoons or 4 ounces) unsalted butter, at room temperature
½ teaspoon pure lemon extract

For the Buttercream
1 cup sugar
4 large egg whites
3 sticks (12 ounces) unsalted butter, at room temperature
¼ cup fresh lemon juice (from 2 large lemons)
1 teaspoon pure vanilla extract
(I used Dorie's white chocolate whipped cream recipe + 1 cup heavy cream whipped up with some sugar)

For Finishing
2/3 cup seedless raspberry preserves stirred vigorously or warmed gently until spreadable (I used Forest Berry preserves)
About 1 ½ cups sweetened shredded coconut (I omitted this)
About 3/4 cup fresh blueberries
About 1-1/2 cups fresh raspberries
About 2-1/2 cups fresh blackberries

Getting Ready
Center a rack in the oven and preheat the oven to 350°F. Butter two 9 x 2 inch round cake pans and line the bottom of each pan with a round of buttered parchment or wax paper. Put the pans on a baking sheet.

To Make the Cake
Sift together the flour, baking powder and salt.

Whisk together the milk and egg whites in a medium bowl.

Put the sugar and lemon zest in a mixer bowl or another large bowl and rub them together with your fingers until the sugar is moist and fragrant. Add the butter and working with the paddle or whisk attachment, or with a hand mixer, beat at medium speed for a full 3 minutes, until the butter and sugar are very light. Beat in the extract, then add one third of the flour mixture, still beating on medium speed. Beat in half of the milk-egg mixture, then beat in half of the remaining dry ingredients until incorporated. Add the rest of the milk and eggs beating until the batter is homogeneous, then add the last of the dry ingredients. Finally, give the batter a good 2- minute beating to ensure that it is thoroughly mixed and well aerated. Divide the batter between the two pans and smooth the tops with a rubber spatula.

Bake for 30-35 minutes, or until the cakes are well risen and springy to the touch – a thin knife inserted into the centers should come out clean. Transfer the cakes to cooling racks and cool for about 5 minutes, then run a knife around the sides of the cakes, unfold them and peel off the paper liners. Invert and cool to room temperature, right side up (the cooled cake layers can be wrapped airtight and stored at room temperature overnight or frozen for up to two months).

To Make the Buttercream
Put the sugar and egg whites in a mixer bowl or another large heatproof bowl, fit the bowl over a plan of simmering water and whisk constantly, keeping the mixture over the heat, until it feels hot to the touch, about 3 minutes. The sugar should be dissolved, and the mixture will look like shiny marshmallow cream. Remove the bowl from the heat.

Working with the whisk attachment or with a hand mixer, beat the meringue on medium speed until it is cool, about 5 minutes. Switch to the paddle attachment if you have one, and add the butter a stick at a time, beating until smooth. Once all the butter is in, beat in the buttercream on medium-high speed until it is thick and very smooth, 6-10 minutes. During this time the buttercream may curdle or separate – just keep beating and it will come together again. On medium speed, gradually beat in the lemon juice, waiting until each addition is absorbed before adding more, and then the vanilla. You should have a shiny smooth, velvety, pristine white buttercream. Press a piece of plastic against the surface of the buttercream and set aside briefly.

To Assemble the Cake
Using a sharp serrated knife and a gentle sawing motion, slice each layer horizontally in half.
Put one layer cut side up on a cardboard cake round or a cake plate protected by strips of wax or parchment paper. Spread it with one third of the preserves. Cover the jam evenly with about one quarter of the buttercream. (I used white chocolate whipped cream instead of buttercream; I also added a layer of fresh berries on top of the whipped cream here.)
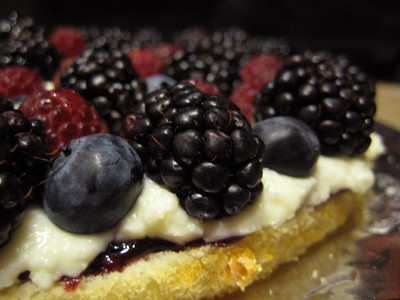

Top with another layer, spread with preserves and buttercream (For me it was more preserves, whipped cream, and berries).
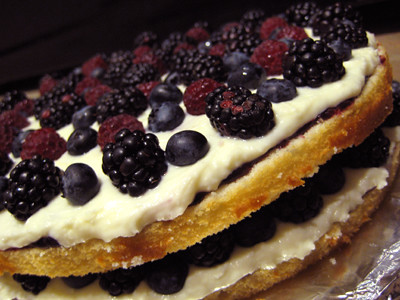


Then do the same with a third layer (you’ll have used all the jam and have buttercream leftover).


Place the last layer cut side down on top of the cake and use the remaining buttercream to frost the sides and top. Press the coconut into the frosting, patting it gently all over the sides and top.

Serving
The cake is ready to serve as soon as it is assembled, but I think it’s best to let it sit and set for a couple of hours in a cool room – not the refrigerator. Whether you wait or slice and enjoy it immediately, the cake should be served at room temperature; it loses all its subtlety when it’s cold. Depending on your audience you can serve the cake with just about anything from milk to sweet or bubbly wine.

Storing
The cake is best the day it is made, but you can refrigerate it, well covered, for up to two days. Bring it to room temperature before serving. If you want to freeze the cake, slide it into the freezer to set, then wrap it really well – it will keep for up to 2 months in the freezer; defrost it, still wrapped overnight in the refrigerator.

Playing Around
Since lemon is such a friendly flavour, feel free to make changes in the preserves: other red preserves – cherry or strawberry – look especially nice, but you can even use plum or blueberry jam.


Fresh Berry Cake
If you will be serving the cake the day it is made, cover each layer of buttercream with fresh berries – use whole raspberries, sliced or halved strawberries or whole blackberries, and match the preserves to the fruit. You can replace the coconut on top of the cake with a crown of berries, or use both coconut and berries. You can also replace the buttercream between the layers with fairly firmly whipped sweetened cream and then either frost the cake with buttercream (the contrast between the lighter whipped cream and the firmer buttercream is nice) or finish it with more whipped cream. If you use whipped cream, you’ll have to store the cake the in the refrigerator – let it sit for about 20 minutes at room temperature before serving.
Thursday, March 27, 2008

Weeknight Couscous


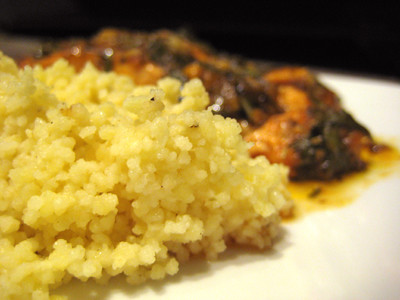
I first saw this recipe on Two Novice Chefs, One Tiny Kitchen. I really wish I had found it sooner, because I never realized how easy (and quick!) it was to make couscous at home. I plan to make this all the time now, as it's something I can easily throw together after I get home from work.

This was the perfect accompaniment to the tomato basil salmon that we were having. This combination is going to be part of our regular weeknight rotation from now on. While the salmon is cooking, you can make the couscous and voila! Within 15 to 20 minutes, you've got dinner on the table.

Weeknight Couscous
from Bella Lately

1 garlic clove, finely minced or pressed
1 Tbsp olive oil
1 cup couscous
1 1/3 cup chicken broth
1/4 - 1/2 cup finely grated Parmesan cheese
salt and pepper to taste

Heat garlic in sauce pan with olive oil. Stir and cook until fragrant. Add couscous, toss until couscous is coated.

Add broth, bring to a boil, place lid on saucepan, set to the side for 5 minutes. When 5 minutes is up, fluff with a fork and throw in Parmesan, salt, and pepper.

Yield: 2-4 Servings.

Tuesday, March 25, 2008

TWD: Caramel-Topped Flan


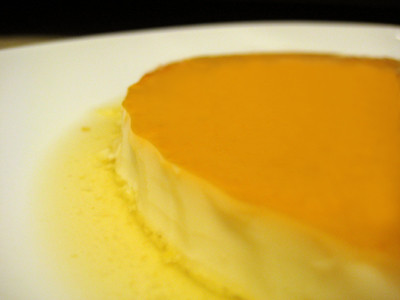
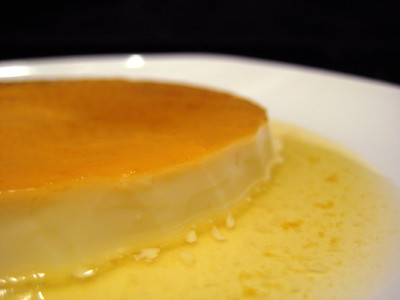
This week's Tuesdays with Dorie (TWD) recipe was chosen by Steph of A Whisk and A Spoon: Caramel-Topped Flan. My mom makes some of the best flan. So Dorie's recipe had a lot to live up to. My previous attempt at making flan was a flop; I don't think I really did anything wrong, I just don't think the recipe was very good. So I was eager to see how Dorie's version would compare to my mom's.

I enjoyed this quite a bit. It was nice and creamy. It was a bit heavier in texture than what I am used to, though, so next time I make this I plan to make Dorie's Caramel-Topped Coconut Flan, which is supposed to be lighter.

I didn't have an 8-x-2-inch round cake pan so I used 6-ounce ramekins instead. I halved the recipe and was able to get 3 ramekins filled. It was a little tricky halving it when it calls for 3 eggs, but here's what I did: I placed the 3 eggs in a small bowl, gently whisked them together until combined. Then I transferred them to a measuring cup and used half for the flan and the other half for scrambled eggs. I like a lot of caramel sauce, so I did not halve the caramel recipe. So if you decide to make the full flan recipe, I would recommend doubling the caramel sauce. My mom likes to add a splash of rum to the caramel sauce after transferring the flan to a serving plate; I think it adds a nice flavor to the dessert.

Thanks Steph, for picking this week's recipe. This was only my second time making flan and I was so pleased with the result! Make sure you check out the Tuesdays with Dorie blogroll to see everyone else's sweet creations.


Caramel-Topped Flan
from Baking: From My Home to Yours, by Dorie Greenspan

For the Caramel
1/3 cup sugar
3 tbsp water
squirt of fresh lemon juice
For the Flan
1-1/2 cups heavy cream
1-1/4 cups whole milk
3 large eggs
2 large egg yolks
1/2 cup sugar
1 tsp pure vanilla extract

Getting Ready:
Center a rack in the oven and preheat the oven to 350 degrees F. Line a roasting pan or a 9-x-13-inch baking pan with a double thickness of paper towels. Fill a teakettle with water and put it on to boil; when the water boils, turn off the heat.

Put a metal 8-x-2-inch round cake pan-not a nonstick one-in the oven to heat while you prepare the caramel.
*Note: if making the individual servings, skip warming the containers before pouring in the caramel.

To Make the Caramel:
Stir the sugar, water and lemon juice together in a small heavy-bottomed saucepan. Put the pan over medium-high heat and cook until the sugar becomes an amber-colored caramel, about 5 minutes-remove the pan from the heat at the first whiff of smoke.

Remove the cake pan from the oven and, working with oven mitts, pour the caramel into the pan and immediately tilt the pan to spread the caramel evenly over the bottom; set the pan aside.

To Make the Flan:
Bring the cream and milk just to a boil.

Meanwhile, in a 2-quart glass measuring cup or in a bowl, whisk together the eggs, yolks and sugar. Whisk vigorously for a minute or two, and then stir in the vanilla. Still whisking, drizzle in about one quarter of the hot liquid-this will temper, or warm, the eggs so they won't curdle. Whisking all the while, slowly pour in the remainder of the hot cream and milk. Using a large spoon, skim off the bubbles and foam that you worked up.

Put the caramel-lined cake pan in the roasting pan. Pour the custard into the cake pan and slide the setup into the oven. Very carefully pour enough hot water from the kettle into the roasting pan to come halfway up the sides of the cake pan. (Don't worry if this sets the cake pan afloat.) Bake the flan for about 35 minutes, or until the top puffs a bit and is golden here and there. A knife inserted into the center of the flan should come out clean.
*Note: if making the individual servings, start checking for doneness around the 25-minute mark.


Remove the roasting pan from the oven, transfer the cake pan to a cooking rack and run a knife between the flan and the sides of the pan to loosen it. Let the flan cool to room temperature on the rack, then loosely cover and refrigerate for at least 4 hours.

When ready to serve, once more, run a knife between the flan and the pan. Choose a rimmed serving platter, place the platter over the cake pan, quickly flip the platter and pan over and remove the cake pan-the flan will shimmy out and the caramel sauce will coat the custard.

Caramel-Topped Coconut Flan
For a more tropical flan with a somewhat lighter texture, replace the heavy cream with a 15-ounce can of unsweetened coconut milk (not sweetened coconut cream) and reduce the amount of milk to 1 cup.

Yield: 6 to 8 Servings.

Monday, March 24, 2008

30-Minute Meal


Now I have to agree with the vast majority of people who think that Rachael Ray is uber annoying. I can't stand her cooking show. I can't believe her garbage bowl is a big seller, either. C'mon now. The concept of putting all your trash in one place while you're cooking so you don't make a mess of the whole kitchen is a good idea, but why on earth would you need a special bowl for that purpose? I've got a million bowls in my kitchen that I could easily use as a "garbage bowl." (I hope that those who own this don't take offense.)

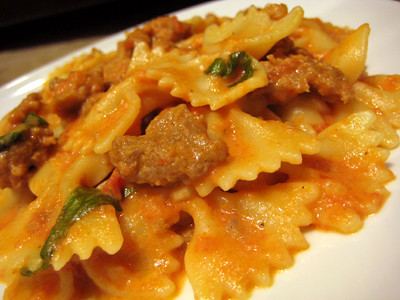
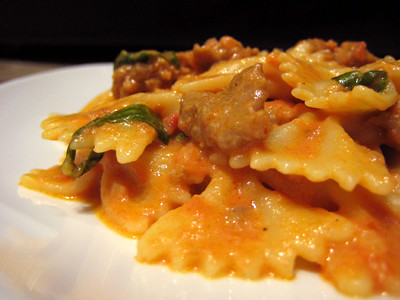
While I can't stand Rachael Ray, I have to admit that I actually like some of her food. I have no problem with her recipes, I just can't watch her cook them. So when I came across this Rachael Ray recipe, I knew I wanted to try it. Tomato and basil are just about my two favorite ingredients in Italian cooking, and then add tomato cream sauce on top with some spicy sausage? Sounded like a winner to me.


This meal came together in - no surprise - under thirty minutes, perfect for that weeknight dinner you want to throw together (though I've made some of her recipes before that definitely were not "30-minute meals"). We love spicy food, so I used all hot Italian sausage instead of the sweet and spicy combination that Rachael suggests. If you like things milder, I would stick with Rachael's recommendations, or use all sweet Italian sausage. This is definitely something I will making again.


Peasant Pasta
from
Rachael Ray

1 tablespoon extra-virgin olive oil, 1 turn of the pan
1/2 pound hot Italian sausage, available in bulk at butcher counter or, 2 links, casings removed (I used 1-1/2 pounds of hot Italian sausage)
1 pound sweet Italian sausage, available in bulk at butcher counter or, 4 links, casings removed (I omitted these)
3 to 4 cloves garlic, chopped, optional (I added some garlic and shallots)
1/2 cup chicken or vegetable broth (I have also used white wine when I don't have any broth on hand)
1 (28-ounce) can crushed tomatoes
1/2 cup heavy cream
Salt and freshly ground black pepper (I only used pepper; the sausage is salty enough)
1 cup frozen green peas (I omitted these)
24 leaves fresh basil, torn or thinly sliced
1 pound penne rigate pasta, cooked to al dente (I used farfalle pasta)
Grated Italian cheese, for passing

Heat a large, deep skillet over medium high heat. Add extra-virgin olive oil, 1 turn of the pan.

Add sausage meat. Crumble sausage meat as it browns. Add chopped garlic to the pan. When all of the crumbles have browned evenly, deglaze the pan drippings using chicken or vegetable broth.

Stir in crushed tomatoes and bring the sauce up to a bubble, then reduce the heat to a simmer. Stir cream into your sauce, this will blush the color and cut the acidity of the tomatoes.

Season with salt and pepper. Stir peas and basil into your sauce to combine. Toss hot drained penne rigate in pan with the sauce, then transfer pasta to serving bowl.

Yield: 6 Servings.

Sunday, March 23, 2008

Spring Hiatus

Photo taken during our honeymoon (September 2005).

Happy Easter! I hope everyone has fun with their Easter egg hunts, gets a huge Easter basket, and enjoys their family time together :) The Easter Bunny will not be visiting us this year, as we are leaving today for a much needed vacation! We are going to enjoy two magnificent weeks relaxing on the beach. (Since I don't have any photos of our trip to share yet, I've included one from our honeymoon above.)

Not to worry, though, as I am a dedicated food blogger and I have already set blogger to continue posting updates while I am gone. I have been baking away feverishly, so as not to miss the Tuesdays with Dorie recipes, or the Daring Baker's March Challenge. So do continue to stop on by my blog and visit :) I may or may not be able to promptly answer any questions/comments left on my blog, but I promise to read each and every comment when I return.

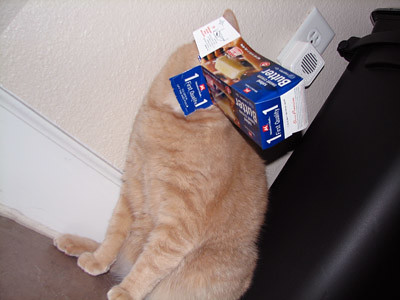
Before I leave, I need to share one more thing with you. My cats love to get into boxes, as evidenced by the pictures here. Well, apparently they do not discriminate and love boxes of any size or shape. I was in the kitchen when I heard my cat Stitch let out the most pathetic meow as if he was saying "help me!" Of course like a good mom, I did not come to his rescue but ran to grab the camera first! ;) Sorry Stitch, but I could not stop laughing when I saw this! So for now, I leave you with this humorous photo...

Saturday, March 22, 2008

A Berry Nice Breakfast


When I find a recipe on Williams-Sonoma and want to know if it's any good, I check out Annie's Eats. Many of the recipes that she blogs about are from their website, and for good reason - most of their recipes are really great.

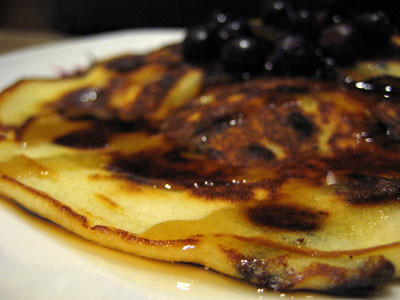
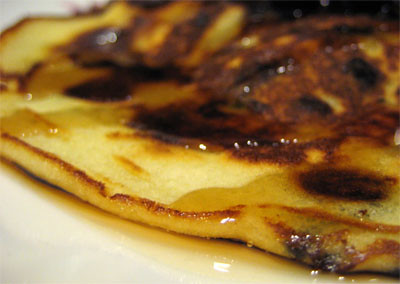
So when I got a craving for pancakes and found that I had some blueberries in the freezer, I went in search of a blueberry pancake recipe on the Williams-Sonoma site. I came across this one, and then went to Annie's blog to see if she had tried it. Sure enough, she had. She thought the pancakes were delicious, so I knew it would be worth trying the recipe.

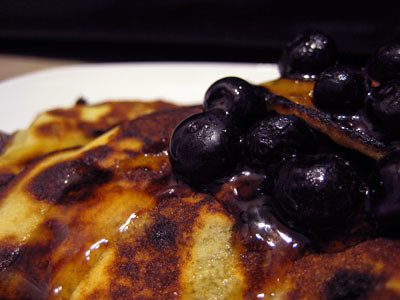
These were so good! I'm not a big breakfast person so I had never made pancakes from scratch before. I never realized how easy they were to make! I really like that you add the blueberries to these after you add the batter to the pan, thus controlling the quantity of blueberries in each pancake--keeps the batter from turning blue, plus I'm the kind of person who loves her pancakes loaded with blueberries.


So if you are looking for a quick, no fuss breakfast idea or even a simple "breakfast for dinner," you should try these. I'm sure they are better with fresh blueberries, but I found that they were still delicious with the frozen ones.

Blueberry-Buttermilk Pancakes
from Williams-Sonoma


2 eggs
2 cups all-purpose flour, sifted
3 Tbs. sugar
2 tsp. baking powder
1 tsp. baking soda
1 tsp. salt
2 1/4 cups buttermilk
4 Tbs. (1/2 stick) unsalted butter, melted
1/2 tsp. vanilla extract
1 to 2 Tbs. vegetable oil or nonstick
cooking spray
1 cup fresh blueberries (I used frozen)
Confectioners’ sugar for dusting
Softened butter for serving
Warm maple syrup for serving

Preheat an oven to 200ºF.

In a bowl, using an electric mixer, beat the eggs on medium speed until frothy. Add the flour, sugar, baking powder, baking soda, salt, buttermilk, melted butter and vanilla. Stir just until the batter is smooth and no lumps of flour remain; do not overmix.

Heat an electric griddle to medium-high heat until a few drops of water flicked onto the surface skitter across it. Lightly grease the griddle with oil or spray with nonstick cooking spray. Using a batter dispenser set on the large setting, dispense the batter onto the griddle. Alternatively, ladle about 1/3 cup batter onto the griddle for each pancake. Scatter 1 Tbs. blueberries evenly over each pancake. Cook until bubbles form on top and the batter is set, 1 to 2 minutes. Using a spatula, flip the pancakes and cook until golden brown on the other side, 2 to 3 minutes. Transfer to a baking sheet and keep warm in the oven while cooking the remaining pancakes.

Dust the pancakes with confectioners' sugar and serve warm with butter and maple syrup. Makes about 16 pancakes; serves 4.

Tuesday, March 18, 2008

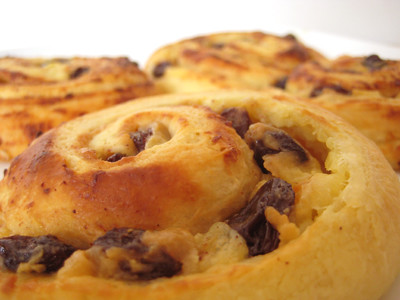
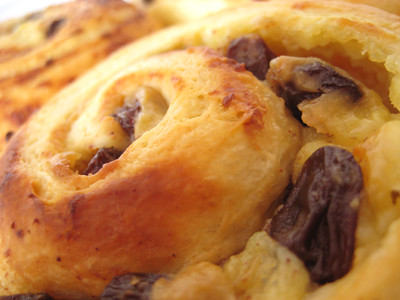
TWD: Brioche Raisin Snails


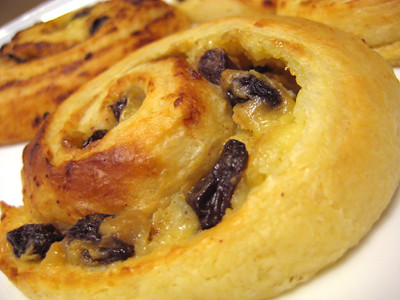
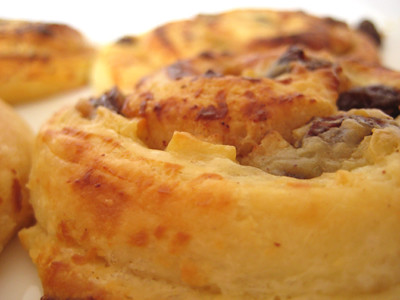
This week's Tuesdays with Dorie (TWD) recipe was chosen by Peabody of Culinary Concoctions by Peabody: Brioche Raisin Snails. I think Dorie probably put it best; she says "there's something about the plump little swirls--the buttery brioche dough, the silky pastry cream, the rum-soaked raisins--that makes them impossibly good and impossible to enjoy in moderation."

This was my first time making brioche. To be quite honest, I didn't really know what brioche was until I entered the food blogging community! (Yes, I am still very much a young and blossoming foodie.) Brioche is a rich but delicate French bread that almost tastes like a pastry. It is a yeast bread that is enriched with butter and eggs. You need to plan ahead when making this recipe. The brioche needs to be refrigerated overnight, and the pastry cream needs to be chilled for several hours.


Brioche is made with butter, and I wasn't sure if I had messed up the recipe when I let my butter get too soft. It's supposed to be at room temperature, but still firm, when added to the dough. I set my butter out a little early, and by the time I was adding it in, my butter was quite soft. Thankfully, this didn't seem to affect my brioche, as it still came out wonderfully.

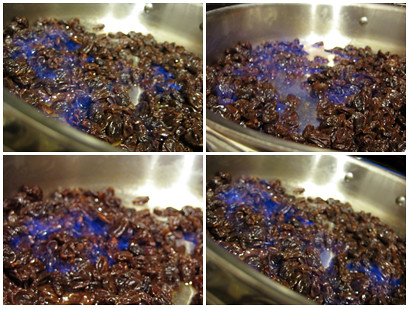
I have to admit that I was a little frightened of scorching my hand when it came to flambéeing the raisins. I had never done it before, and all I had were regular, short matchsticks. Instead of using a saucepan, I decided to use a sauté pan instead, so I could easily reach over the edge of the pan instead of having my hand down into a saucepan when the flames came up. I very slowly brought my lit match towards the rum soaked raisins and poof! There were blue flames everywhere as the raisins were flambéed! Even though I knew it was going to ignite, I still jumped back a little, startled by the flames coming up. I used a damp wooden spoon to stir the raisins while the flames burned off the alcohol. It was actually kind of fun, and now I know I don't need to be quite so scared of doing it.


These were so good. The brioche had a light, buttery texture, and the pastry cream wasn't too sweet. The flavor of the rum in the raisins was more pronounced than I expected it to be, but in a good way. I was initially planning on glazing these, but they were perfect as is.

I love that you can freeze these and just bake them as needed. This recipe only requires half of the brioche recipe, but Dorie does not recommend halving it. Instead, you can use it to make Dorie's Pecan Honey Sticky Buns, or freeze it for later use. I opted to just make up a double batch of brioche raisin snails (I was that confident I would love them) and freeze a bunch. I love that whenever I get a craving for them now, I can just grab a few out of the freezer and pop them in the oven :)


Thanks Peabody, for picking this week's recipe. While it wasn't my first time working with yeast, it was my first time making brioche! I will definitely be making these again. Make sure you check out the blogroll on the Tuesdays with Dorie blog to see what everyone else thought of these sweet, buttery treats!

Brioche Raisin Snails
from Baking: From My Home to Yours, by Dorie Greenspan


1 cup moist, plump raisins
3 tablespoons dark rum
1-1/2 teaspoons sugar
Scant 1/4 teaspoon ground cinnamon
1/2 recipe for Golden Brioche Loaves (page 48), chilled and ready to shape (make the full recipe and cut the dough in half after refrigerating overnight) - recipe below
1/2 recipe Pastry Cream (page 448) - recipe below

For The Optional Glaze
3/4 cup confectioners' sugar, sifted
About 1 teaspoon water
Drop of pure vanilla extract

Getting Ready:
Line one large or two smaller baking sheets with parchment or silicone mats.

Put the raisins in a small saucepan, cover them with hot water and let them steep for about 4 minutes, until they are plumped. Drain the raisins, return them to the saucepan and, stirring constantly, warm them over low heat. When the raisins are very hot, pull the pan from the heat and pour over the rum. Standing back, ignite the rum. Stair until the flames go out, then cover and set aside. (The raisins and rum an be kept in a covered jar for up to 1 day.)

Mix the sugar and cinnamon together.

On a flour dusted surface, roll the dough into a rectangle about 12 inches wide and 16 inches long, with a short end toward you. Spread the pastry cream across the dough, leaving 1-inch strip bare on the side farthest from you. Scatter the raisins over the pastry cream and sprinkle the raisins and cream with the cinnamon sugar. Starting wit the side nearest you, roll the dough into a cylinder, keeping the roll as tight as you can. (At this point, you can wrap the dough airtight and freeze it up to 2 months; see Storing for further instructions. Or, if you do not want to make the full recipe, use as much of the dough as you'd like and freeze the remainder.)

With a chef's knife, using a gentle sawing motion, trim just a tiny bit from the ends if they're ragged or not well filled, then cut the log into rounds a scant 1 inch thick. Put the snails on the lined baking sheet(s), leaving some puff space between them.

Lightly cover the snails with wax paper and set the baking sheet(s) in a warm place until the snails have doubled in volume--they'll be puffy and soft--about 1 hour and 30 minutes.

Getting Ready To Bake:
When the snails have almost fully risen, preheat the oven: depending on the number of baking sheets you have, either center a rack in the oven or position the racks to divide the oven into thirds and preheat the oven to 375 degrees F.

Remove the wax paper, and bake the snails for about 25 minutes (rotate the sheets if you're using two, from top to bottom and front to back after 15 minutes) (I only baked mine 15 minutes before they were perfectly golden), or until they are puffed and richly browned. Using a metal spatula, transfer the snails onto a cooling rack.

If You Want To Glaze The Snails:
Put a piece of wax paper under the rack of warm rolls to act as a drip catcher. Put the confectioners' sugar into a small bowl, and stir in a teaspoon of water. Keep adding water drop by drop until you have an icing that falls from the tip of a spoon. Add the vanilla extract, then drizzle the icing over the hot snails.

Golden Brioche Loaves
2 packets active dry yeast
1/3 cup just-warm-to-the-touch water
1/3 cup just-warm-to-the-touch whole milk
3-3/4 cups all-purpose flour
2 teaspoons salt
3 large eggs, at room temperature
1/4 cup sugar
3 sticks (12 ounces) unsalted butter, at room temperature but still slightly firm

For The Glaze
1 large egg
1 tablespoon water

To Make The Brioche:
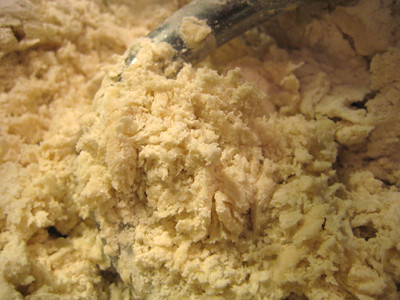
Put the yeast, water and milk in the bowl of a stand mixer and, using a wooden spoon, stir until the yeast is dissolved. Add the flour and salt, and fit into the mixer with the dough hook, if you have one. Toss a kitchen towel over the mixer, covering the bowl as completely as you can-- this will help keep you, the counter and your kitchen floor from being showered in flour. Turn the mixer on and off a few short pulses, just to dampen the flour (yes, you can peek to see how you're doing), then remove the towel, increase the mixer speed to medium-low and mix for a minute or two, just until the flour is moistened. At this point, you'll have a fairly dry, shaggy mess.


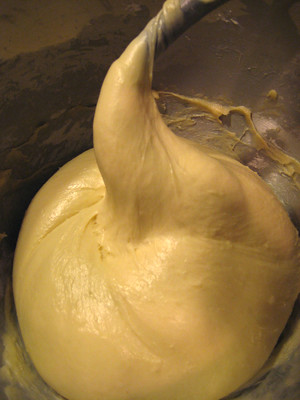
Scrape the sides and bottom of the bowl with a rubber spatula, set the mixer to low and add the eggs, followed by the sugar. Increase the mixer speed to medium and beat for about 3 minutes, until the dough forms a ball (I never put my KA on anything higher than speed 4, since I was worried something horrible would happen - KA does not recommend using it on speeds higher than 2 with the dough hook). Reduce the speed to low and add the butter in 2-tablespoon-size chunks, beating until each piece is almost incorporated before adding the next. You'll have a dough that is very soft, almost like batter. Increase the speed to medium-high (again, I only did this on speed 4) and continue to beat until the dough pulls away from the sides of the bowl, about 10 minutes.


Transfer the dough to a clean bowl (or wash out the mixer bowl and use it), cover with plastic wrap and leave at room temperature until nearly doubled in size, 40 to 60 minutes, depending upon the warmth of your room.

Deflate the dough by lifting it up around the edges and letting it fall with a slap to the bowl. Cover the bowl with the plastic wrap and put it in the refrigerator. Slap the dough down in the bowl every 30 minutes until it stops rising, about 2 hours, then leave the uncovered dough in the refrigerator to chill overnight.

The next day, butter and flour two 8 1/2-x-4 1/2-inch pans.

Pull the dough from the fridge and divide it into 2 equal pieces. Cut each piece of the dough into 4 equal pieces and roll each piece into a log about 3 1/2 inches long. Arrange 4 logs crosswise in the bottom of each pan. Put the pans on a baking sheet lined with parchment or a silicone mat, cover the pans lightly with wax paper and leave the loaves at room temperature until the dough almost fills the pans, 1 to 2 hours. (Again, rising time with depend on how warm the room is.)

Getting Ready To Bake:
Center a rack in the oven and preheat the oven to 400 degrees F.

To Make the Glaze:
Beat the egg with the water. Using a pastry brush, gently brush the tops of the loaves with the glaze.

Bake the loaves until they are well risen and deeply golden, 30 to 35 minutes. Transfer the pans to racks to cool for 15 minutes, then run a knife around the sides of the pans and turn the loaves out onto the racks. Invert again and cool for at least 1 hour.

Pastry Cream
2 cups whole milk
6 large egg yolks
1/2 cups sugar
1/3 cup cornstarch, sifted
1 1/2 teaspoons pure vanilla extract
3 1/2 tablespoons unsalted butter, cut into bits at room temperature

Bring the milk to a boil in a small saucepan.

Meanwhile, in a medium heavy-bottomed saucepan, whisk the egg yolks together with the sugar and cornstarch until thick and well blended. Still whisking, drizzle in about 1/4 cup of the hot milk-- this will temper, or warm, the yolks so they won't curdle. Whisking all the while, slowly pour in the remainder of the milk. Put the pan over medium heat and, whisking vigorously, constantly and thoroughly (making sure to get the edges of the pot), bring the mixture to a boil. Keep at a boil, still whisking, for 1 to 2 minutes, then remove the pan from the heat.

Whisk in the vanilla extract. Let sit for 5 minutes, then whisk in the bits of butter, stirring until they are full incorporated and the pastry cream is smooth and silky. Scrape the cream into a bowl. You can press a piece of plastic wrap against the surface of the cream to create an airtight seal and refrigerate the pastry cream until cold or, if you want to cool it quickly--as I always do--put the bowl into a larger bowl filled with ice cubes and cold water, and stir the pastry cream occasionally until it is thoroughly chilled, about 20 minutes.