Sunday, June 8, 2008

The Ultimate Comfort Food


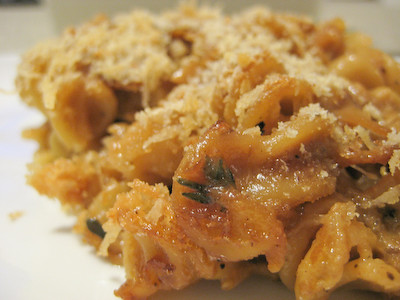
One of the many blogs I like to visit is Picky Palate. Not only does Jenny have lots of great, easy to make recipes, but she often enters cooking and baking competitions as well. When I found out that she was going to be on the Ultimate Recipe Showdown on the Food Network, I made sure to tune in that episode! Jenny's Southwest Chicken Mac and Cheese looks fabulous and is definitely on my list of recipes to try, but one of her competitor's recipes also caught my attention - the French Onion "Soup" Mac and Cheese.


I like Mac and Cheese, but sometimes it's a little too boring for me. I love French Onion Soup. So the idea of combining these two dishes together seemed promising to me. I was intrigued and nervous at the same time as to how this would turn out. Honestly, when I read the recipe, it sounded like it might be good, but like it might also be a bit gross at the same time. I figured that if the judges on the show loved it so much, though, that it was a pretty safe bet.


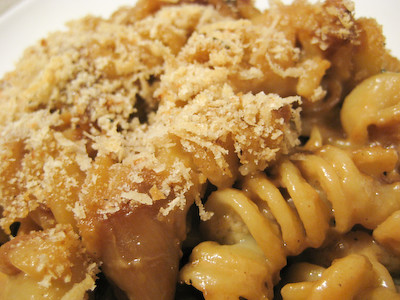
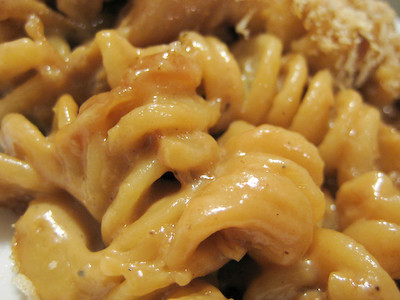
Wow, was this good! It's not exactly a recipe for those on Weight Watcher's, but if you're looking for something delicious and comforting, you've come to the right place. It's basically a super cheesy pasta dish with a yummy onion flavor to it. The beef stock and thyme are subtle flavors that complement the dish, and the Parmesan bread crumb topping gives each bite a nice crunch. It wasn't a thirty minute meal, but it is definitely something that I will make again.


French Onion "Soup" Mac and Cheese
from Brett Greenberg

Topping:
1/4 cup bread crumbs
1/4 cup grated Parmesan

Bechamel Sauce:
4 tablespoons butter
4 tablespoons all-purpose flour
2 cups whole milk or half-and-half
Salt and freshly ground black pepper
8 ounces Gruyere, grated
3 ounces mozzarella grated

French Onion "Soup":
2 tablespoons butter, plus 1 tablespoon (or nonstick spray)
1 tablespoon extra-virgin olive oil
3 large white onions, thinly sliced
6 cloves garlic, peeled and chopped
2 tablespoons honey
Salt and freshly ground black pepper
1 cup dry sherry
2 cups beef stock
8 sprigs fresh thyme leaves
1 pound pasta, cooked al dente (elbow macaroni, ziti, or fusilli work well)

Preheat oven to 350 degrees F.

Topping:
Combine bread crumbs and Parmesan cheese in a small bowl and set aside.

Bechamel Sauce:
Melt 4 tablespoons of the butter over low heat in a medium saucepan. Add the flour and stir to combine. Stir constantly, for about 3 minutes. Increase heat to medium and whisk in the milk or half-and-half, adding a little at a time and cook until thickened, about 4 to 5 minutes. Lower heat, season with the salt and pepper and add Gruyere and mozzarella cheeses. Stir until cheese is melted and sauce is smooth. Set aside.

French Onion "Soup:"
Heat 2 tablespoons of the butter and olive oil over medium-high heat in a large saucepan. Add onions, cover, and cook 10 to 15 minutes, stirring frequently. Remove cover, add garlic and honey, and continue to cook uncovered, stirring frequently, until onions are caramelized, about 10 to 15 minutes. Season with salt and a generous amount of pepper. Remove pot from heat and add sherry. Return to heat and stir to remove browned bits from bottom of pan. Reduce sherry by half, then add stock and thyme and cook until almost all liquid is evaporated. Remove from heat.

Grease a 3-quart baking dish or casserole with the last tablespoon of butter or spray with nonstick cooking spray. Combine cooked pasta with onion "soup" mixture and bechamel sauce, and stir well to combine. Transfer pasta to baking dish and sprinkle with bread crumb/Parmesan topping.

Bake until top is golden brown and cheese is bubbly, about 35 to 40 minutes. Remove from oven and let cool slightly before serving.

Yield: 8 to 10 Servings

Tuesday, June 3, 2008

TWD: French Chocolate Brownies


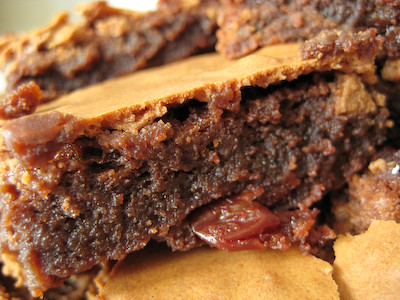
This week's Tuesdays with Dorie (TWD) recipe was chosen by Di of Di's Kitchen Notebook: French Chocolate Brownies. When Dorie made these, she was playing on the idea of the French chocolate "fondant," a cake known for its chocolatiness and its soft, moist texture. What she didn't expect, however, was for all of her guests to proclaim them as brownies! Whether you decide to call this a cake or a brownie, I think you will enjoy it.


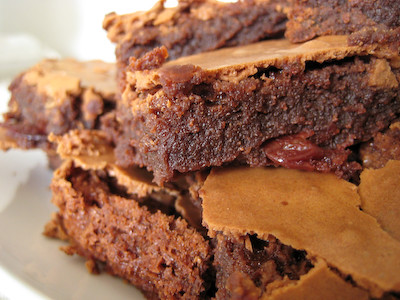
Several TWD bakers decided to omit the raisins in this recipe, due to their dislike of them. I have no problem with raisins and enjoy them quite a bit, but decided that it would be fun to try dried cherries instead (who doesn't like cherries and chocolate?). Some bakers mentioned that they had trouble igniting their rum for the flambé. I didn't have that issue at all, but it was quite a contrast to the first time I flambéed, when I made the brioche raisin snails. Last time, I had plenty of time to oooh and aaah at the flames... so much so that I was able to think to myself 'that would make a really cool picture,' and still have time to grab my camera to capture a few photos. I had no such luck this time. I was even prepared with camera in hand before I lit the match, but the flames died down way too quickly for me to capture anything.


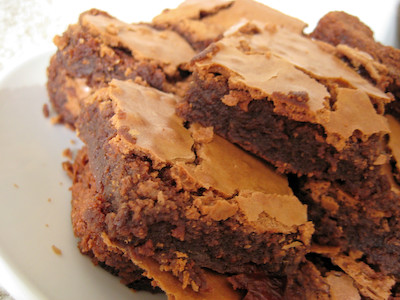
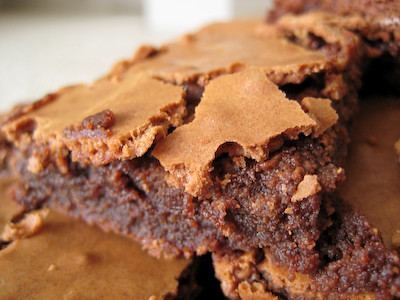
Another issue that many seemed to have with these (that I did as well) was with the top, or crust, of the brownies. Everyone knows that brownies seem to have a crackly 'skin' on top. But these brownies seemed to form a hard upper crust (perhaps I over beat the eggs and sugar?). It was impossible to cut into the brownies without causing the crust to shatter into pieces. The crust was actually pretty tasty, but it made these brownies less than photogenic.


Overall, I was very pleased with this recipe. The brownies were nothing like what I had anticipated them to be, but that doesn't mean they were not good. They have enough chocolate in them to satisfy any chocolate craving, the cherries are a pleasant surprise when you bite into them, and I was delighted at how light and moist they are. Most brownies are fairly dense, and these seemed to almost melt in my mouth. Thanks Di, for picking a great recipe. Make sure you check out the Tuesdays with Dorie blogroll to see everyone else's chocolatey treats.

French Chocolate Brownies
from Baking: From My Home to Yours, by Dorie Greenspan

1/2 cup all-purpose flour
1/8 teaspoon salt (I omitted this)
1/8 teaspoon cinnamon
1/3 cup raisins, dark or golden (I used dried tart Montmorency cherries)
1 1/2 tablespoons water
1 1/2 tablespoons dark rum
6 ounces bittersweet chocolate, finely chopped (I used semi-sweet)
1 1/2 sticks (12 tablespoons) unsalted butter, at room temperature and cut into 12 pieces (I used salted butter and omitted the salt from the recipe)
3 large eggs
1 cup sugar

Getting Ready:
Center a rack in the oven and preheat the oven to 300°F. Line an 8-inch square baking pan (I used a 9-inch square pan) with foil, butter the foil, place the pan on a baking sheet, and set aside.

Whisk together the flour, salt and cinnamon.

Put the raisins in a small saucepan with the water, bring to a boil over medium heat and cook until the water almost evaporates. Add the rum, let it warm for about 30 seconds, turn off the heat, stand back and ignite the rum. Allow the flames to die down, and set the raisins aside until needed.

Put the chocolate in a heatproof bowl and set the bowl over a saucepan of simmering water. Slowly and gently melt the chocolate, stirring occasionally. Remove the bowl from the saucepan and add the butter, stirring so that it melts. It's important that the chocolate and butter not get very hot. However, if the butter is not melting, you can put the bowl back over the still-hot water for a minute. If you've got a couple of little bits of unmelted butter, leave them—it's better to have a few bits than to overheat the whole. Set the chocolate aside for the moment.

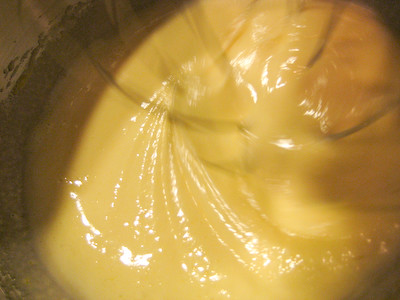
Working with a stand mixer with the whisk attachment, or with a hand mixer in a large bowl, beat the eggs and sugar until they are thick and pale, about 2 minutes.


Lower the mixer speed and pour in the chocolate-butter.


Mix only until it is incorporated—you'll have a thick, creamy batter.


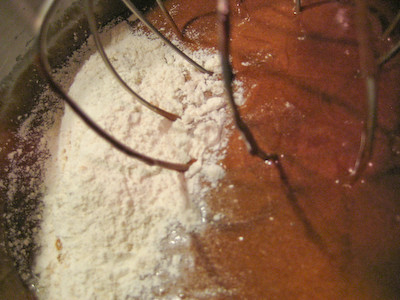
Add the dry ingredients,


and mix at low speed for about 30 seconds—the dry ingredients won't be completely incorporated and that's fine.


Finish folding in the dry ingredients by hand with a rubber spatula, then fold in the raisins along with any liquid remaining in the pan.

Scrape the batter into the pan and bake 50 to 60 minutes, or until the top is dry and crackled and a knife inserted into the center of the cake comes out clean (Although I used a larger pan, I still had to bake mine for the full 60 minutes before my knife would come out clean). Transfer the pan to a rack and allow the brownies to cool to warm or room temperature.

Carefully lift the brownies out of the pan, using the foil edges as handles, and transfer to a cutting board. With a long-bladed knife, cut the brownies into 16 squares, each roughly 2 inches on a side, taking care not to cut through the foil.

Serving: The brownies are good just warm or at room temperature; they're even fine cold. I like these with a little something on top or alongside—good go-alongs are whipped crème fraiche or whipped cream, ice cream or chocolate sauce or even all three!

Storing: Wrapped well, these can be kept at room temperature for up to 3 days or frozen for up to 2 months.

Yield: 16 brownies

Friday, May 30, 2008

Beautiful Bones and BBQ Baked Beans


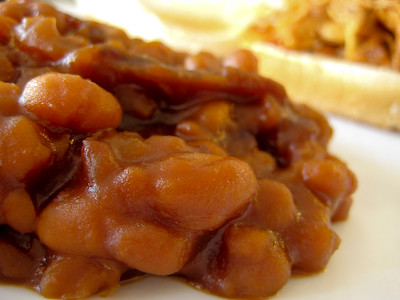
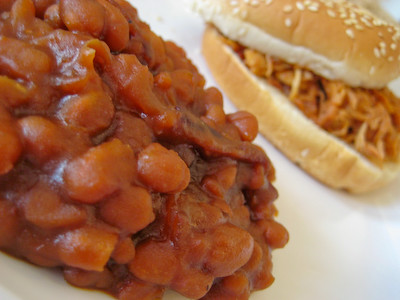
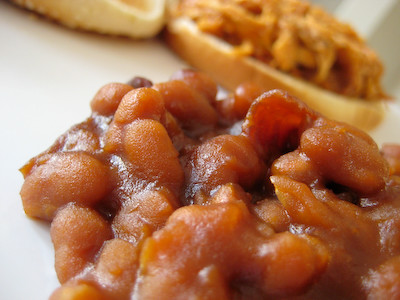
Growing up in California, the only barbeque I ever had was at Tony Roma's (sad, I know). Then I moved to North Carolina where I got a taste of real barbeque - barbeque pork, that is. And now I live in Texas where if you're going to have barbeque - that means barbeque beef. Regardless of what kind of barbeque I'm having, one of my favorite sides is barbeque baked beans.

This was my first time making my own barbeque baked beans. I sort of 'cheated' by using canned beans as a base, but that is part of what I love about this recipe - how quick and easy it is. I went in search of a good recipe and found so many my eyes starting spinning. Ingredients varied anywhere from mustard to ketchup to Worcestershire sauce to molasses. I looked at several recipes and then came up with my own. It's a bit on the sweet side, but that's how I like my baked beans. I also added bacon to mine because well, everything is better with bacon :)


I'm submitting this to Susan's Beautiful Bones Event, to help raise awareness about osteoporosis and help encourage women to take the necessary steps to protect their bone health. This subject hits particularly close to home, because I know that I am in a high risk group to get osteoporosis, not only because I am Asian, but also because I do not eat very many calcium rich foods (I hate milk) and cannot for the life of me remember to take my vitamins daily. I never knew that beans were a good source of calcium. Thanks to Susan, I am now more aware of what the calcium rich foods are so that I can try to incorporate them more often into my diet. If you want to learn more about calcium rich foods, click here and be sure to visit Susan at Food Blogga when she presents the round up for this event.

The photo below is also my submission to the Click! May Event. Click! is a monthly food photography event that is theme-based (not blog-based), so all you need is a good photograph to participate. This month's theme is beans 'n lentils. I don't have any spectacular photos to submit this month, but since I happened to make something that fits this month's theme, I decided to participate anyway. If you want to participate in this month's contest (or just read some pretty funny stuff about farts), click here (deadline is tonight at midnight!).

Click! Beans 'n Lentils

Barbeque Baked Beans
from Good Eats 'n Sweet Treats

53 oz can of Pork and Beans (I used Van Camp’s)
1/4 cup barbeque sauce (I use Sweet Baby Ray's)
1/4 cup molasses
1 cup brown sugar
1-1/2 cups diced onions (I used red onions)
8 strips bacon, cooked, and then cut into small pieces (optional)

Preheat oven to 375 degrees.

Drain about half of the liquid from the canned beans and remove the chunks of fat from the beans. Add the beans, barbeque sauce, molasses, brown sugar, diced onions, and bacon to a 1-1/2 quart casserole dish and mix well. Bake, uncovered, for 45 minutes.

Note: If you're not too worried about your waistline, you can also add the bacon grease from your cooked bacon to the beans as you're mixing all of the other ingredients together for additional flavor.

Yield: 8 Servings

Wednesday, May 28, 2008

Opéra Cake


This month's Daring Bakers Challenge was chosen by Lis of La Mia Cucina, Ivonne of Cream Puffs in Venice, Fran of Apples Peaches Pumpkin Pie, and Shea of Whiskful: the Opéra Cake. Frankly, I had never heard of the Opéra Cake before. It is a French dessert that is believed to have been created in the early 1900's. It is sometimes referred to as Clichy Cake because it is believed to have been invented by a man named Louis Clichy.

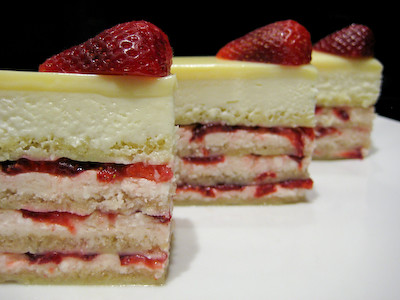
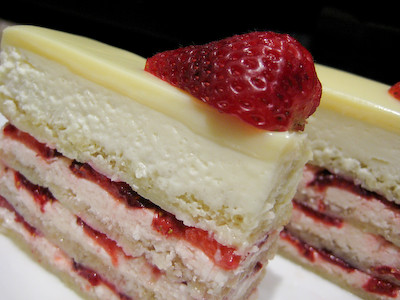
The Opéra Cake is made up of five components: a joconde (a cake layer), a syrup (to wet the joconde), a buttercream (to fill some of the layers), a ganache or mousse (to top the final cake layer) and a glaze (to cover the final layer of cake or of ganache/mousse).

Due to many different factors, I was unable to participate in Barbara's LiveSTRONG event earlier this month. So I was glad to see that in honor of Barbara, the Daring Bakers were making Opéra Cakes that were light in both color and flavor (traditionally, the cake is flavored with darker flavors such as chocolate or coffee). This month's challenge is dedicated to Barbara and the loved ones who are no longer with us, those who are still fighting, and those who have won the fight against cancer.

There were several rules set up for this challenge. We were not allowed to use chocolate, coffee, or cocoa in this cake. Instead, we were encouraged to use light flavors such as vanilla, coconut, lemon, almond, etc. We were also allowed to use another buttercream recipe of our choice, as long as we remained true to the "light" color and flavor theme. I had heard so many great things about Dorie's buttercream after last month's challenge, but had not made it in the Perfect Party Cake because I do not like buttercream. So I thought this was the perfect opportunity to finally try it. I have only made my own buttercream once or twice before, but let me just say that Dorie's buttercream was absolutely delicious. I hate to admit it, but I even licked the spatula after I was done!
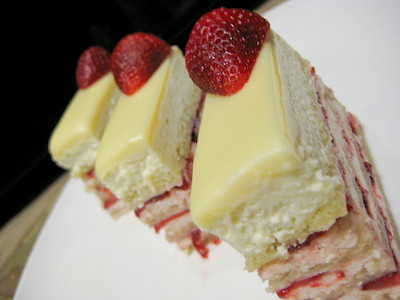

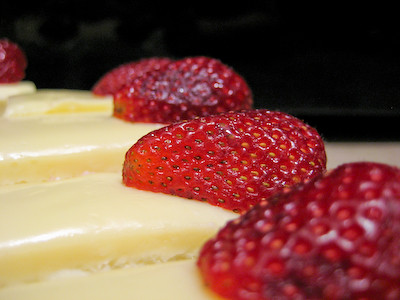
My Opéra Cake was an orange/almond joconde flavored with an orange liqueur syrup, layered with strawberry buttercream and sliced strawberries, topped with an orange infused white chocolate ganache/mousse and a white chocolate glaze.

I am not sure if it was because I made my own almond meal, but I did not really like the texture of the joconde. I made the almond meal as fine as I could, but the joconde still had a slightly coarse texture to it. My favorite part of this cake was the fresh strawberries in it. I don't think that I would have really enjoyed it without the strawberries (it would have been just too much cake and cream for me). Several bakers noted that the cake was too sweet with the ganache/mousse and omitted it, but I wanted to stay as true to the original recipe as possible so I decided to make it. It was pretty sweet, but several people told me that it was the best part of the cake.


Everyone who tried the cake was beaming about how good it was (some even said it was the best cake they had ever had), but I was not as impressed by it. I just didn't enjoy the texture of the joconde. I am glad that I stepped up to the challenge, though, because quite frankly, I was pretty intimidated by it at the beginning. It seemed so complex and the pictures looked so much more impressive than anything I could ever make. In the end, it really isn't that difficult as long as you take it one step at a time (several components can be made ahead of time so you can make it over the course of several days). I am eager to try this recipe again to see if I will like it better with the more popular flavors of coffee, hazelnut, and chocolate. So thank you Lis, Ivonne, Fran, and Shea for choosing this recipe. You challenged me to make a cake that I would have never made on my own, and helped me discover that not all buttercreams are created equal :)

I am so impressed by all of the beautiful Opéra Cakes that I have already seen, so make sure you visit the Daring Bakers Blogroll and see how all the other talented bakers stacked up!


Opéra Cake
Based on OpĂ©ra Cake recipes in Dorie Greenspan’s Paris Sweets and Tish Boyle and Timothy Moriarty’s Chocolate Passion.

For the joconde

(Note: The joconde can be made up to 1 day in advance and kept wrapped at room temperate)

What you’ll need:

2 12½ x 15½-inch (31 x 39-cm) jelly-roll pans (Note: If you do not have jelly-roll pans this size, do not fear! You can use different-sized jelly-roll pans like 10 x 15-inches.) (I used two 13x8" half sheet pans)
a few tablespoons of melted butter (in addition to what’s called for in the ingredients’ list) and a brush (to grease the pans)
parchment paper
a whisk and a paddle attachment for a stand mixer or for a handheld mixer
two mixing bowls (you can make do with one but it’s preferable to have two)

Ingredients:

6 large egg whites, at room temperature
2 tbsp. (30 grams) granulated sugar
2 cups (225 grams) almond meal (available in bulk food stores or health food stores)
2 cups icing sugar, sifted
6 large eggs
½ cup (70 grams) all-purpose flour
3 tbsp. (1½ ounces; 45 grams) unsalted butter, melted and cooled

I used approximately 1-2/3 cups of whole almonds to get the 2 cups of ground almonds for this recipe.


If you've never blanched almonds before, it's really easy. Simply place them in boiling water for about 45-60 seconds (you'll know they're done when they start floating to the top!). Remove them from the boiling water and briefly rinse with cold water. The skins will then easily pop off between your fingers (Just be careful because they are pretty slippery - our dog happily stood next to me, catching almonds as they went flying out from between my fingertips!).

To make the almond meal, just pulse the blanched almonds in your food processor with a
tablespoon or two of the flour that you would use in the cake (to prevent the almonds from turning oily or pasty in the processor).


1. Divide the oven into thirds by positioning a rack in the upper third of the oven and the lower third of the oven.

2. Preheat the oven to 425◦F. (220◦C).

3. Line two 12½ x 15½- inch (31 x 39-cm) jelly-roll pans with parchment paper and brush with melted butter.

4. In the bowl of a stand mixer fitted with the whisk attachment (or using a handheld mixer), beat the egg whites until they form soft peaks. Add the granulated sugar and beat until the peaks are stiff and glossy. If you do not have another mixer bowl, gently scrape the meringue into another bowl and set aside.

5. If you only have one bowl, wash it after removing the egg whites or if you have a second bowl, use that one. Attach the paddle attachment to the stand mixer (or using a handheld mixer again) and beat the almonds, icing sugar and eggs on medium speed until light and voluminous, about 3 minutes.

6. Add the flour and beat on low speed until the flour is just combined (be very careful not to overmix here!!!).

7. Using a rubber spatula, gently fold the meringue into the almond mixture and then fold in the melted butter. Divide the batter between the pans and spread it evenly to cover the entire surface of each pan.

8. Bake the cake layers until they are lightly browned and just springy to the touch. This could take anywhere from 5 to 9 minutes depending on your oven. Place one jelly-roll pan in the middle of the oven and the second jelly-roll pan in the bottom third of the oven.

9. Put the pans on a heatproof counter and run a sharp knife along the edges of the cake to loosen it from the pan. Cover each with a sheet of parchment or wax paper, turn the pans over, and unmold.

10. Carefully peel away the parchment, then turn the parchment over and use it to cover the cakes. Let the cakes cool to room temperature.

For the syrup

(Note: The syrup can be made up to 1 week in advance and kept covered in the refrigerator.)

What you’ll need:

a small saucepan

Ingredients:

½ cup (125 grams) water
⅓ cup (65 grams) granulated sugar
1 to 2 tbsp. of the flavouring of your choice (i.e., vanilla extract, almond extract, cognac, limoncello, coconut cream, honey etc.) (I used 2 tbsp Triple Sec)

1. Stir all the syrup ingredients together in the saucepan and bring to a boil.

2. Remove from the heat and let cool to room temperature.

For the buttercream

(Note: The buttercream can be made up to 1 month in advance and packed in an airtight container. If made way in advance, you can freeze the buttercream. Alternatively you can refrigerate it for up to 4 days after making it. To use the buttercream simply bring it to room temperature and then beat it briefly to restore its consistency.)

What you’ll need:

a small saucepan
a candy or instant-read thermometer
a stand mixer or handheld mixer
a bowl and a whisk attachment
rubber spatula

Ingredients:

1 cup (100 grams) granulated sugar
¼ cup (60 grams) water
seeds of one vanilla bean (split a vanilla bean down the middle and scrape out the seeds) or 1 tbsp. pure vanilla extract (I omitted this)
1 large egg
1 large egg yolk
1¾ sticks (7 ounces; 200 grams) unsalted butter, at room temperature
flavouring of your choice (a tablespoon of an extract, a few tablespoons of melted white chocolate, citrus zest, etc.) (I used 1 tbsp Triple Sec)

1. Combine the sugar, water and vanilla bean seeds or extract in a small saucepan and warm over medium heat just until the sugar dissolves.

2. Continue to cook, without stirring, until the syrup reaches 225◦F (107◦C) [*Note: Original recipe indicates a temperature of 255◦F (124◦C), however, when testing the recipe I found that this was too high so we heated to 225◦F and it worked fine] on a candy or instant-read thermometer. Once it reaches that temperature, remove the syrup from the heat.

3. While the syrup is heating, begin whisking the egg and egg yolk at high speed in the bowl of your mixer using the whisk attachment. Whisk them until they are pale and foamy.

4. When the sugar syrup reaches the correct temperature and you remove it from the heat, reduce the mixer speed to low speed and begin slowly (very slowly) pouring the syrup down the side of the bowl being very careful not to splatter the syrup into the path of the whisk attachment. Some of the syrup will spin onto the sides of the bowl but don’t worry about this and don’t try to stir it into the mixture as it will harden!

5. Raise the speed to medium-high and continue beating until the eggs are thick and satiny and the mixture is cool to the touch (about 5 minutes or so).

6. While the egg mixture is beating, place the softened butter in a bowl and mash it with a spatula until you have a soft creamy mass.

7. With the mixer on medium speed, begin adding in two-tablespoon chunks. When all the butter has been incorporated, raise the mixer speed to high and beat until the buttercream is thick and shiny.

8. At this point add in your flavouring and beat for an additional minute or so.

9. Refrigerate the buttercream, stirring it often, until it’s set enough (firm enough) to spread when topped with a layer of cake (about 20 minutes).

To Make the (Strawberry) Buttercream
(I used Dorie's Buttercream recipe from the Perfect Party Cake)

1 cup sugar

4 large egg whites
3 sticks (12 ounces) unsalted butter, at room temperature
¼ cup fresh lemon juice (from 2 large lemons) (I used 1/2 cup of strawberry puree made with 4 ounces of strawberries and 1 tbsp sugar)
1 teaspoon pure vanilla extract

Put the sugar and egg whites in a mixer bowl or another large heatproof bowl, fit the bowl over a plan of simmering water and whisk constantly, keeping the mixture over the heat, until it feels hot to the touch, about 3 minutes. The sugar should be dissolved, and the mixture will look like shiny marshmallow cream. Remove the bowl from the heat.

Working with the whisk attachment or with a hand mixer, beat the meringue on medium speed until it is cool, about 5 minutes. Switch to the paddle attachment if you have one, and add the butter a stick at a time, beating until smooth. Once all the butter is in, beat in the buttercream on medium-high speed until it is thick and very smooth, 6-10 minutes. During this time the buttercream may curdle or separate – just keep beating and it will come together again. On medium speed, gradually beat in the lemon juice, waiting until each addition is absorbed before adding more, and then the vanilla. You should have a shiny smooth, velvety, pristine white buttercream. Press a piece of plastic against the surface of the buttercream and set aside briefly.

For the white chocolate ganache/mousse (this step is optional – please see Elements of an OpĂ©ra Cake below)

(Note: The mousse can be made ahead and refrigerated until you’re ready to use it.)

What you’ll need:

a small saucepan
a mixer or handheld mixer

Ingredients:

7 ounces white chocolate
1 cup plus 3 tbsp. heavy cream (35% cream)
1 tbsp. liquer of your choice (Bailey’s, Amaretto, etc.) (I used Triple Sec)

1. Melt the white chocolate and the 3 tbsp. of heavy cream in a small saucepan.
2. Stir to ensure that it’s smooth and that the chocolate is melted. Add the tablespoon of liqueur to the chocolate and stir. Set aside to cool completely.
3. In the bowl of a stand mixer, whip the remaining 1 cup of heavy cream until soft peaks form.
4. Gently fold the whipped cream into the cooled chocolate to form a mousse.
5. If it’s too thin, refrigerate it for a bit until it’s spreadable.
6. If you’re not going to use it right away, refrigerate until you’re ready to use.

For the glaze
(Note: It’s best to make the glaze right when you’re ready to finish the cake.)

What you’ll need:

a small saucepan or double boiler

Ingredients:

14 ounces white chocolate, coarsely chopped (I used 9 ounces)
½ cup heavy cream (35% cream)

1. Melt the white chocolate with the heavy cream. Whisk the mixture gently until smooth.
2. Let cool for 10 minutes and then pour over the chilled cake. Using a long metal cake spatula, smooth out into an even layer.
3. Place the cake into the refrigerator for 30 minutes to set.

Assembling the Opéra Cake

(Note: The finished cake should be served slightly chilled. It can be kept in the refrigerator for up to 1 day).

Line a baking sheet with parchment or wax paper.

Working with one sheet of cake at a time, cut and trim each sheet so that you have two pieces (from each cake so you’ll have four pieces in total): one 10-inch (25-cm) square and one 10 x 5-inch (25 x 12½-cm) rectangle. (I simply cut each sheet in half to create 4 equal rectangles)

Place one square of cake on the baking sheet and moisten it gently with the flavoured syrup.

Spread about three-quarters of the buttercream over this layer.

Top with the two rectangular pieces of cake, placing them side by side to form a square. Moisten these pieces with the flavoured syrup.

Spread the remaining buttercream on the cake and then top with the third square of joconde. Use the remaining syrup to wet the joconde and then refrigerate until very firm (at least half an hour).

Prepare the ganache/mousse (if you haven’t already) and then spread it on the top of the last layer of the joconde. Refrigerate for at least two to three hours to give the ganache/mousse the opportunity to firm up.

Make the glaze and after it has cooled, pour/spread it over the top of the chilled cake. Refrigerate the cake again to set the glaze.

(I made a 4 layer cake using one-third of the buttercream on each layer of cake and then topped each buttercream layer with sliced strawberries (I used about 1 lb strawberries). The fourth layer of cake was then topped with the ganache/mousse and glaze.)

Serve the cake slightly chilled. This recipe will yield approximately 20 servings.

Tuesday, May 27, 2008

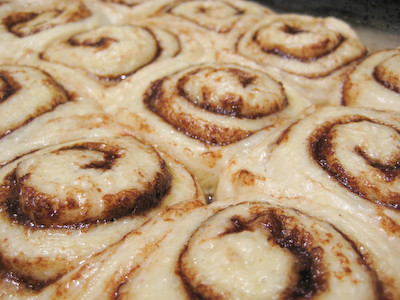
TWD: Pecan Honey Sticky Buns


This week's Tuesdays with Dorie (TWD) recipe was chosen by Madam Chow of Madam Chow's Kitchen: Pecan Honey Sticky Buns. I hate nuts. People call me crazy, but I don't see what their appeal is. You won't see many things in my blog containing nuts. If a recipe calls for nuts, I may make it, but I omit the nuts. I do like peanuts sometimes, so you will see peanuts here and there in my blog (like when I made the Snickery Squares). But I don't like almonds, I don't like walnuts, and I do not like pecans.

So when I first found out that this week's recipe was Pecan Honey Sticky Buns, I debated whether I would be making Pecan Honey Sticky Buns or Honey Sticky Buns :) I figured the recipe would still be good sans nuts, but since I was planning on sharing these with my coworkers, I decided I would make them with the pecans and just pick the pecans off of mine.

I had already made the brioche dough once for a previous edition of TWD when Peabody chose the brioche raisin snails, so I knew I wouldn't have any problems with the dough. This is one recipe where you'll really want to use your stand mixer. Dorie warns that it will probably burn out the motor of your hand mixer, so if you don't have a stand mixer, you'll need a sturdy wooden spoon and some elbow grease! Several TWD bakers noted that even their stand mixers had some trouble with the dough - some even joked about how it was dancing across the counter and they had to keep it from leaping off! For those using their KitchenAid Stand Mixers for the recipe, rest assured that I never turned my mixer up higher than level 4 (already higher than the recommended maximum speed of 2) and the recipe turned out just fine.


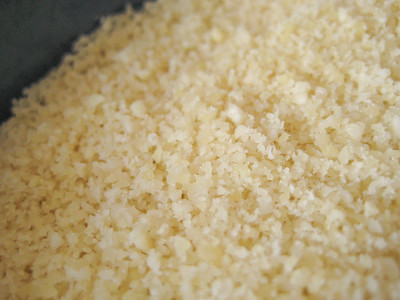
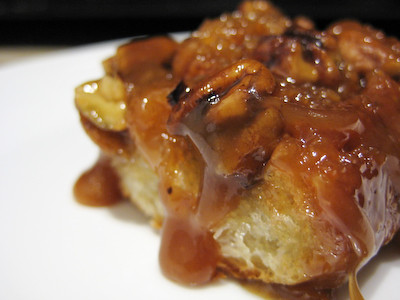
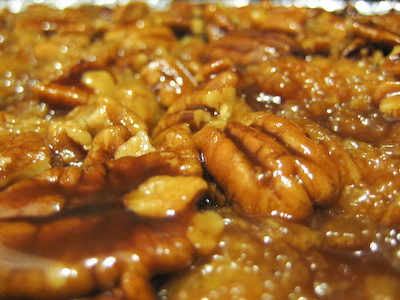
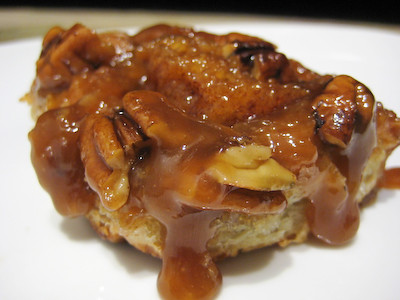
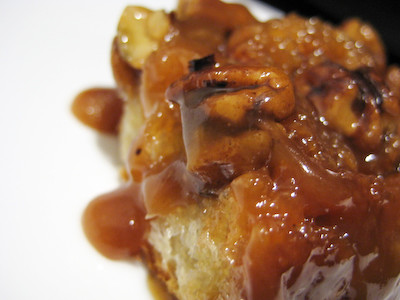
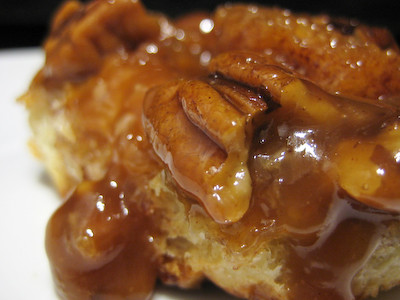
I could not wait to try these as soon as they came out of the oven! All the goo just looked so marvelous! And guess what?! I actually enjoyed the pecans on these! As Dorie points out, the baking process turns these into delicious, caramelized pralines. While I wasn't in love with the pecans, I was able to enjoy the sticky buns without picking the pecans off. For those who know me, that's saying a lot! Oh, and my coworkers loved them - I had one person exclaim, "Mmmmm! These taste like heaven!" Now I really want to try this recipe I saw on the Food Network - it's hard for me to imagine a sticky bun better than Dorie's, but I'm curious to see how it compares.


Thanks Madam Chow, for picking this week's recipe. I may have never made this recipe if it weren't for you (the pecans were keeping me from making it!), and now I've found a new favorite! (I even made a double batch using the other half of the brioche dough and stuck it in the freezer so the next time I get a craving for these, I'll be able to bake them up in no time!) Never in a million years did I think that I would like something with nuts in (or on) it! Make sure you check out the Tuesdays with Dorie blogroll to see everyone else's gooey treats.

Pecan Honey Sticky Buns
from Baking: From My Home to Yours, by Dorie Greenspan


For the Glaze:
1 cup (packed) light brown sugar
1 stick (8 tablespoons) unsalted butter, cut into 4 pieces
1/4 cup honey
1-1/2 cups pecans (whole or pieces) (I used 1 cup)

For the Filling:
1/4 cup sugar
3 tablespoons (packed) light brown sugar
1 tablespoon ground cinnamon
3 tablespoons unsalted butter, at room temperature

For the Buns:
1/2 recipe dough for Golden Brioche loaves (see below), chilled and ready to shape (make the full recipe and cut the dough in half after refrigerating it overnight)

Generously butter a 9-x-13-inch baking pan (a Pyrex pan is perfect for this).

To Make the Glaze:
In a heavy-bottomed saucepan, bring the brown sugar, butter, and honey to a boil over medium-low heat, stirring frequently to dissolve the sugar. Pour the glaze into the buttered pan, evening it out as best you can by tilting the pan or spreading the glaze with a heatproof spatula. Sprinkle over the pecans.

To Make the Filling:
Mix the sugars and cinnamon together in a bowl. If necessary, in another bowl, work the butter with a spatula until it is soft, smooth and spreadable.

Golden Brioche Dough (this recipe makes enough for two brioche loaves. If you divide the dough in half, you would use half for the sticky buns, and you can freeze the other half for a later date, or make a brioche loaf out of it!):

2 packets active dry yeast (each packet of yeast contains approx. 2 1/4 teaspoons)
1/3 cup just-warm-to-the-touch water
1/3 cup just-warm-to-the-touch whole milk
3 1/3 cups all-purpose flour
2 teaspoons salt
3 large eggs, at room temperature
1/4 cup sugar
3 sticks (12 ounces) unsalted butter, at room temperature but still slightly firm

To Make The Brioche:
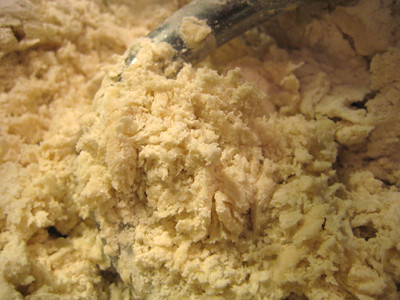
Put the yeast, water and milk in the bowl of a stand mixer and, using a wooden spoon, stir until the yeast is dissolved. Add the flour and salt, and fit into the mixer with the dough hook, if you have one. Toss a kitchen towel over the mixer, covering the bowl as completely as you can-- this will help keep you, the counter and your kitchen floor from being showered in flour (I did not find the towel necessary). Turn the mixer on and off a few short pulses, just to dampen the flour (yes, you can peek to see how you're doing), then remove the towel, increase the mixer speed to medium-low and mix for a minute or two, just until the flour is moistened. At this point, you'll have a fairly dry, shaggy mess.


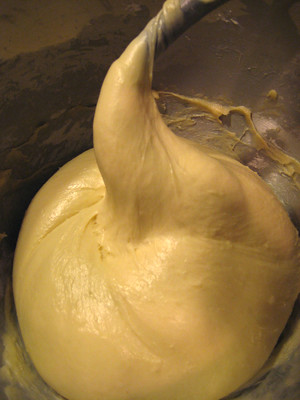
Scrape the sides and bottom of the bowl with a rubber spatula, set the mixer to low and add the eggs, followed by the sugar. Increase the mixer speed to medium and beat for about 3 minutes, until the dough forms a ball. (I never put my KA on anything higher than speed 4, since I was worried something horrible would happen - KA does not recommend using it on speeds higher than 2 with the dough hook). Reduce the speed to low and add the butter in 2-tablespoon-size chunks, beating until each piece is almost incorporated before adding the next. You'll have a dough that is very soft, almost like batter. Increase the speed to medium-high (again, I only did this on speed 4) and continue to beat until the dough pulls away from the sides of the bowl, about 10 minutes.


Transfer the dough to a clean bowl (or wash out the mixer bowl and use it), cover with plastic wrap and leave at room temperature until nearly doubled in size, 40 to 60 minutes, depending upon the warmth of your room.

Deflate the dough by lifting it up around the edges and letting it fall with a slap to the bowl. Cover the bowl with the plastic wrap and put it in the refrigerator. Slap the dough down in the bowl every 30 minutes until it stops rising, about 2 hours, then leave the uncovered dough in the refrigerator to chill overnight. (After this, you can proceed with the recipe to make the brioche loaves, or make the sticky buns instead, or freeze all or part of the dough for later use.)

To Shape the Buns:
On a flour-dusted work surface, roll the chilled dough into a 16-inch square. Using your fingers or a pastry brush, spread the softened butter over the dough. Sprinkle the dough with the cinnamon sugar, leaving a 1-inch strip bare on the side farthest from you. Starting with the side nearest you, roll the dough into a cylinder, keeping the roll as tight as you can. (At this point, you can wrap the dough airtight and freeze it for up to 2 months . . . . Or, if you want to make just part of the recipe now, you can use as much of the dough as you'd like and freeze the remainder. Reduce the glaze recipe accordingly).

With a chef's knife, using a gentle sawing motion, trim just a tiny bit from the ends of the roll if they're very ragged or not well filled, then cut the log into 1-inch thick buns. (Because you trim the ragged ends of the dough, and you may have lost a little length in the rolling, you will get 15 buns, not 16.) Fit the buns into the pan cut side down, leaving some space between them.

Lightly cover the pan with a piece of wax paper and set the pan in a warm place until the buns have doubled in volume, about 1 hour and 45 minutes. The buns are properly risen when they are puffy, soft, doubled and, in all likelihood, touching one another.


Getting Ready to Bake:
When the buns have almost fully risen , center a rack in the oven and preheat the oven to 375 degrees F.

Remove the sheet of wax paper and put the pan on a baking sheet lined with parchment or a silicone mat. Bake the sticky buns for about 30 minutes, or until they are puffed and gorgeously golden; the glaze will be bubbling away merrily. Pull the pan from the oven.

The sticky buns must be unmolded minutes after they come out of the oven. If you do not have a rimmed platter large enough to hold them, use a baking sheet lined with a silicone mate or buttered foil. Be careful - the glaze is super-hot and super-sticky.

Yield: 15 buns

Tuesday, May 20, 2008

TWD: Hidden Berry Cream Cheese Torte


This week's Tuesdays with Dorie (TWD) recipe was chosen by Tara of Smells Like Home: Traditional Madeleines. Unfortunately, I don't have those cute little madeleine molds, and my husband would kill me if I bought another specialty baking pan to squeeze into our tiny little kitchen, so I opted to make one of the previous TWD recipes.

I joined TWD after its third week running, so between the two weeks I wasn't able to participate in and the first three weeks' worth of recipes, I had the following recipes to choose from: Brown Sugar-Pecan Shortbread, Quintuple Chocolate Brownies, Hidden Berry Cream Cheese Torte, Marshmallows, and Fluted Polenta and Ricotta Cake. Being a cheesecake lover, I decided to try the Hidden Berry Cream Cheese Torte.

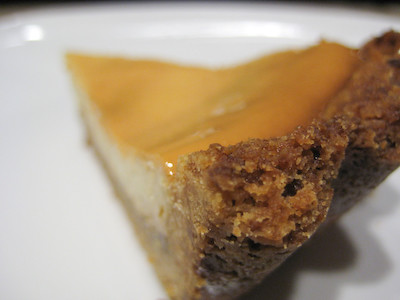
I have to admit that part of what drew me to this torte was the photo in the book. Unfortunately, mine looks nothing like the one in the book. It browned quite a bit on top and didn't look quite as elegant as Dorie's. Apparently, two out of the three bakers who made this torte (yes, the TWD group used to be that small!) had the same problem as well. Maybe next time I will cover mine with foil in order to get it as pure and white as Dorie's? Aesthetics aside, this torte still tasted great. It was smooth and creamy, and the jam on the bottom was just the right amount of tart and sweet (and based on reviews, I increased the amount of jam in the recipe). It was much lighter than cheesecake, probably owing to the cottage cheese in the filling. I would definitely make this again, especially if I was in the mood for something creamy, but not too heavy.


Thanks Tara, for picking this week's recipe. I've always wanted to make madeleines, and I really wish I could have participated, but maybe next time! Make sure you check out the Tuesdays with Dorie blogroll to see everyone else's cute madeleine cookies.

Hidden Berry Cream Cheese Torte
from Baking: From My Home to Yours, by Dorie Greenspan

For the Crust:
1 3/4 Cup all-purpose flour
1/2 Cup sugar
1/4 tsp salt
1 1/2 sticks (12 Tbsp) unsalted butter, cut into small pieces and chilled
2 large egg yolks
1 tsp pure vanilla extract

For the filling:
1/3 cup thick berry or cherry jam (I used 1/2 cup raspberry peach champagne jam)
9 oz. cream cheese, at room temperature
8 oz (1 cup) cottage cheese, at room temperature
3/4 Cup sugar
1/4 tsp salt
Pinch of ground cinnamon
Pinch of ground nutmeg
2 large eggs, preferably at room temperature

Getting Ready:
Butter a 9-inch spring form pan, dust the inside with flour and tap out the excess. Place on a baking sheet lined with parchment or a silicone mat.

To Make the Crust:
Put the flour, sugar and salt in a food processor and pulse just to blend. Toss in the pieces of butter and pulse until the mixture resembles coarse mail. Stir the egg yolks and villa together with a fork, and, still pulsing the machine, add them and continue to pulse until the dough comes together in clumps and curds-restrain yourself, and don't allow the dough to form a ball.

Turn the dough out onto a work surface. If you want to roll the dough, gather it into a ball, wrap it in plastic wrap and refrigerate ti for about 20 minutes before rolling. Or simply press the dough into the pan. The dough should come about 1 1/2 inches up the sides of the spring form. Refrigerate for at least 30 minutes.

Center a rack in the oven and preheat the oven to 375 degrees.

Fit a piece of buttered aluminum foil against the crust, covering it completely. Fill the crust lightly with rice, dried beans or pie weights and slide the sheet into the oven. Bake the crust for 20 minutes, then carefully remove the foil and weights and bake for another 5 minutes or so-you don't want the crust to get too brown. Transfer to a rack to cool while you make the filling.

Lower the oven temp for 350 degrees.

To Make the Filling:
Stir the jam, and spread it over the bottom of the crust-it's okay to do this while the crust is still warm.

Put the cream cheese and cottage cheese into the food processor and process, scraping down the sides of the bowl a few times, for 2 minutes, until you've got a smooth, satiny mix. Add the sugar, salt and spices and process for another 30 seconds. With the machine running, add the eggs and process, scraping the bowl as needed, for a final minute. Pour the filling over the jam.
Bake the cake for 60-70 minutes, or until the filling is uniformly puffed and no longer jiggly. Gently transfer the spring form pan to a cooking rack and allow the torte to cool to room temperature, during which time the filling will collapse into a thin, elegant layer.

Run a blunt knife between the crust and the sides of the pan, then open and remove the sides of the spring form pan. If the sides of the crust extend above the filling and you don't like this look, very gently saw off the excess crust using a serrated knife. Chill the torte slightly or thoroughly before serving.

Yield: 8 Servings.

Tuesday, May 13, 2008

TWD: The Best (Key Lime) Florida Pie


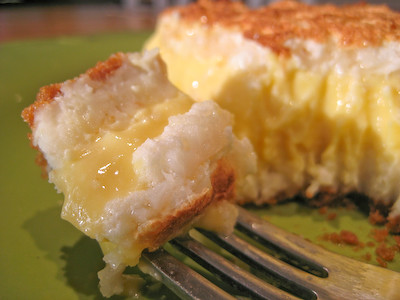
This week's Tuesdays with Dorie (TWD) recipe was chosen by Dianne of Dianne's Dishes: Florida Pie. This is basically Dorie's version of a fancy Key Lime Pie. It's Key Lime Pie filling sandwiched between a layer of coconut cream and coconut meringue - genius!

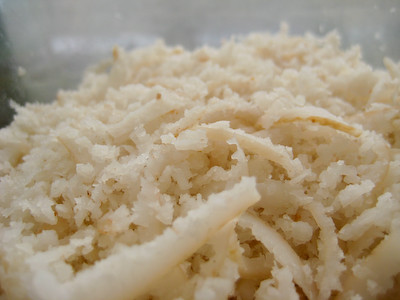
This recipe was extra special because my mom made the shredded sweetened coconut. Yep, she cracked the coconut open, used some special coconut shredding device she found in my grandmother's garage, and then she cooked/sweetened the coconut just for me. So perhaps it was the fresh, shredded sweetened coconut I used, or perhaps it was Dorie's brilliant recipe (or a bit of both?), but I absolutely loved this Florida Pie! I thought I already had my favorite key lime pie recipe, but Dorie totally blew it out of the water. If you're not a fan of coconut, I do recommend you try the other recipe (because it really is a good one), but if you do enjoy coconut, then you must give this recipe a try!


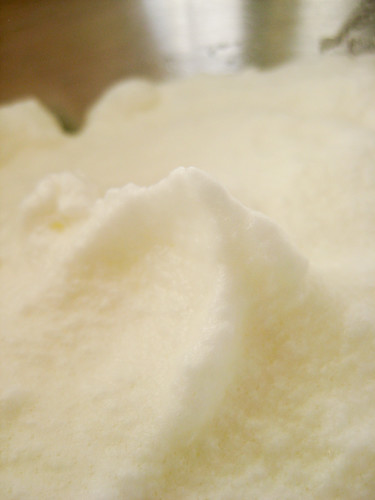
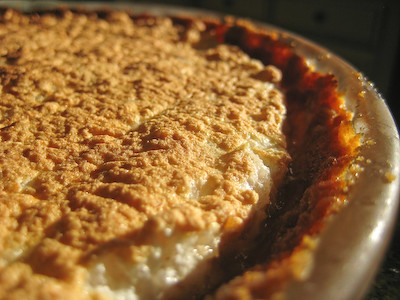
I have to admit that I almost didn't post any finished pictures of this pie. You see, I somehow managed to over whip my egg whites and instead of a beautiful, soft, foamy meringue, I ended up with a curdled white, lumpy mess (and not enough eggs to give it a second try). Then on top of that, I happened to turn my back on the broiler just a few seconds too long and almost burnt my meringue. To add insult to injury, I was taking pictures at my mom's house, with totally different lighting from what I am used to, and couldn't really get any good shots.

I know that everyone else is going to have the prettiest meringue - from smooth and swirly to spiky and fun. Mine was flat and boring. But in the spirit of showing you that we all have those moments in the kitchen when things don't turn out quite right, I'm posting my pictures. Regardless of how my pie looks, I promise that it still tasted great.


As with last week's recipe, I'm not sure who Dorie is serving, but the recipe states that you can get 6 servings out of this pie. Those would be six HUGE slices. I suppose with how popular this pie was at our Mother's Day family gathering, some would prefer to eat 1/6th of the pie, but you could easily get 8-10 servings out of this (we had a lot of people, and probably got about 12 slices out of it).


Thanks Dianne, for picking this week's recipe. This is my new go-to Key Lime Pie recipe! Make sure you check out the Tuesdays with Dorie blogroll to see everyone else's citrusy sweets.

Florida Pie
from Baking: From My Home to Yours, by Dorie Greenspan

For the Pie:
1 9-inch graham cracker crust (recipe below), fully baked and cooled, or a store-bought crust
1 1/3 cups heavy cream
1 1/2 cups shredded sweetened coconut (1 cup for the coconut cream layer, 1/2 cup for the meringue)
4 large eggs, separated
1 14-ounce can sweetened condensed milk
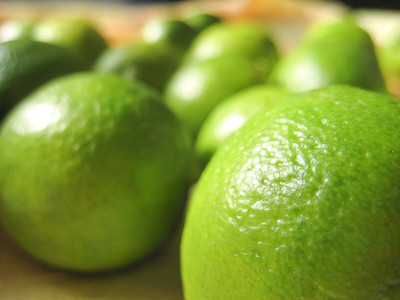
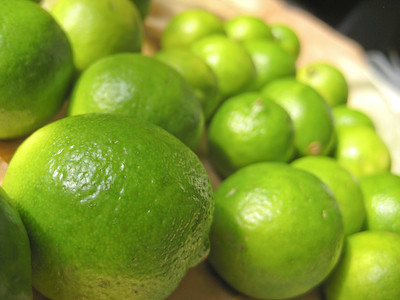
1/2 cup fresh Key (or regular) lime juice (from about 5 regular limes) (I used about 25 Key limes - about 3/4 lb)
1/4 cup of sugar

For the Crust:
1 3/4 cups graham cracker crumbs (I used cinnamon grahams)
3 tablespoons sugar
Pinch of salt
1/2 stick (4 tablespoons) unsalted butter, melted

To Make the Crust:
Butter a 9-inch pan. Stir the crumbs, sugar and salt together in a medium bowl. Pour over the melted butter and stir until all of the dry ingredients are uniformly moist. (I do this with my fingers.) Turn the ingredients into the pan and use your fingers to pat an even layer of crumbs over the bottom of the pan and up the sides. Put the pan in the freezer while you preheat the oven. (The crust can be covered and frozen for up to 2 months.)

Center a rack in the oven, preheat the oven to 350 degrees F and place the pan on a baking sheet. Bake for 10 minutes. Set the crust aside to cool on a rack while you make the pie filling.

Getting Ready:
Center a rack in the oven and preheat the oven to 350 degrees F. Put the pie plate on a baking sheet lined with parchment of a silicone mat.

Put the cream and 1 cup of the coconut in a small saucepan and bring it to a boil over medium-low heat, stirring almost constantly. Continue to cook and stir until the cream is reduced by half and the mixture is slightly thickened. Scrape the coconut cream into a bowl and set it aside while you prepare the lime filling.


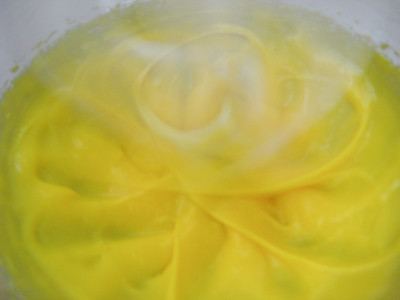
Working with a stand mixer, preferably fitted with a paddle attachment, or with a hand mixer in a large bowl beat the egg yolks at high speed until thick and pale.


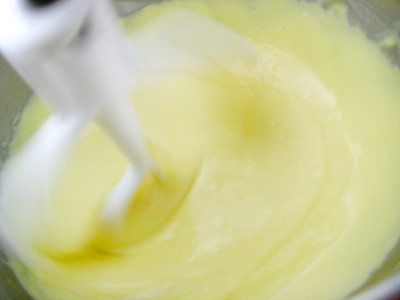
Reduce the mixer speed to low and beat in the condensed milk.


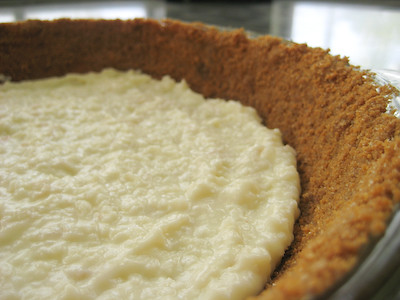
Still on low, add half of the lime juice. When it is incorporated, add the remaining juice, again mixing until it is blended. Spread the coconut cream in the bottom of the graham cracker crust,


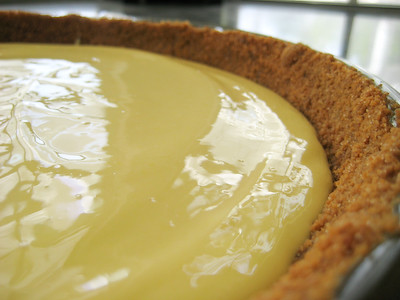
and pour over the lime filling.


Bake the pie for 12 minutes. Transfer the pie to a cooling rack and cool for 15 minutes, then freeze the pie for at least 1 hour.

To Finish the Pie with Meringue:
Put the 4 egg whites and the sugar in a medium heavy-bottomed saucepan and heat over medium-low heat, whisking all the while, until the whites are hot to the touch. Transfer the whites to a stand mixer, fitted with the whisk attachment, or use a hand mixer in a large bowl, and beat the whites at high speed until they reach room temperature and hold firm peaks. (Be careful not to over whip them!)


Using a rubber spatula, fold the remaining 1/2 cup coconut into the meringue.

Spread the meringue over the top of the pie, and run the pie under the broiler until the top of the meringue is golden brown. (Or, if you've got a blowtorch, you can use it to brown the meringue.)


Return the pie to the freezer for another 30 minutes or for up to 3 hours before serving.

Yield: 6 Servings.