Tuesday, November 4, 2008

Rugelach (TWD)


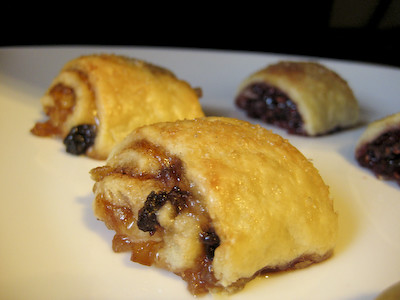
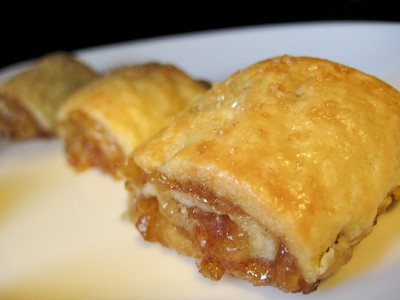
This week's Tuesdays with Dorie (TWD) recipe was chosen by Piggy of Piggy's Cooking Journal: Rugelach. Rugelach is a Jewish pastry made with a dough that often contains cream cheese. It's typically filled with some type of fruit preserve, cinnamon and sugar, dried fruit, and nuts.


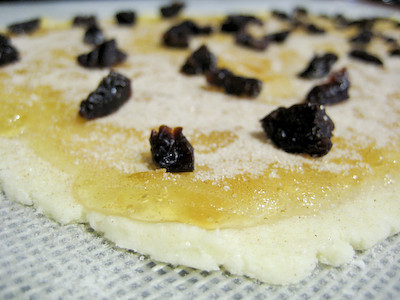
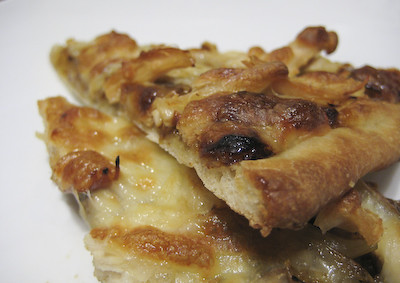
Being the nut hater that I am, I omitted the nuts from this recipe. I decided to go with two different types of fillings. I still had ginger preserves in my refrigerator from when we made the Blackberry Nectarine Galette, so I thought it would be perfect here. So the first batch I made with ginger preserves, cinnamon and sugar, and tart Montmorency cherries.


The other batch I made with raspberry preserves, cinnamon and sugar, chocolate, and orange flavored cranberries from Trader Joe's.


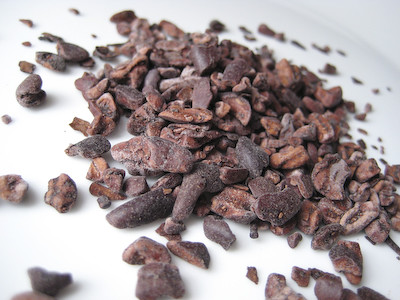
I didn't have any mini chocolate chips on hand, so I chopped up some regular chocolate chips. I only added a small amount of chocolate, though, as a few TWD bakers noted that the chocolate in this recipe was overpowering. For a few of the pastries, I also tried adding in some cacao nibs I received from TCHO Chocolate.


Cacao nibs are small pieces of crushed roasted cacao beans. They have a delicate citrusy undertone.


In small quantities, the chocolate complemented the other flavors in these quite well. Rugelach is one of my favorite pastries because I love fruit preserves and it is so simple to make. Between the two different types I made this time, both my husband and myself preferred the ginger and cherry combination. (They didn't last long enough for us to share them with anyone else.)


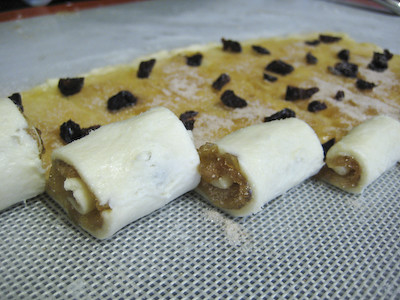
Having made rugelach in the past, I've never had much success making them in the nice crescent shape, as depicted in the book. I simply roll the dough out into a rectangle, then cut it into strips and then roll them up individually. I know a few TWD bakers mentioned rolling it up into a log and then cutting them into pieces, as you would a cinnamon roll, but I find that it's easier to get the rolls tighter if you do it this way instead.


The recipe I've used in the past to make rugelach is from the Barefoot Contessa. Both recipes are good, but I like that Ina's recipe only requires 1 hour of refrigeration before assembly (plus the dough can be made in the mixer instead of in the food processor). I'll probably continue to use her recipe in the future, but I will use Dorie's method of just popping the preserves in the microwave before spreading instead of pureeing them in the food processor like Ina does. There wasn't a noticeable difference between the two methods, and I'd rather not dirty the food processor if I don't have to.


Thanks Piggy, for choosing these delicious pastries. Dorie gives several tips for this baking these here. If you would like the recipe, you can find it here, or on Piggy's Cooking Journal. Make sure you visit the TWD Blog Roll to see all the various fillings everyone else came up with!

*Recipe notes:
- When making these, make sure you plan ahead. The dough only takes a few minutes to make and the assembly doesn't take too long, either, but the dough requires quite some time in the refrigerator. It needs to be chilled for 2 hours after you make it, and then another 30 minutes after the filling has been added.
- I'd recommend chopping your dried fruit in half - having larger pieces can make it difficult to roll the dough up.
- As noted above, unless you really love chocolate, I'd decrease the quantity in this recipe. (I didn't measure it out, but you can see from the picture above about how much chocolate I added - about 4-5 small pieces per roll.)
- If you're going to roll them up like I did, you'll want to roll your dough out until into a rectangle that is approximately 9" wide by 6" long and 1/8" thick. Cut your dough into strips that are about 1.5" wide.
- I had to bake my rugelach longer than recommended. It took 30 minutes before becoming nice and golden.
- The fruit preserves can ooze a lot with these, so if you are not using a rimmed baking sheet, make sure you don't place them too close to the edges or else the juices will drip on to the bottom of your oven, making a mess.

- Wrapped airtight, these can be frozen for up to 2 months.
- For more recipe tips, click here.

Wednesday, October 29, 2008

Barbeque Chicken Pizza


This month's Daring Bakers Challenge was chosen by Rosa of Rosa's Yummy Yums: Pizza! This challenge is dedicated to Sher of What Did You Eat? Sher was set to co-host this month with Rosa, but tragically passed away in July from a heart attack. It was originally Sher's idea for homemade pizza to be what the Daring Bakers made this month.


I was excited to try this recipe because while I've made pizza at home several times (with my own sauces and toppings), I've never made pizza dough from scratch.

If you decide to try this recipe, make sure you plan ahead. The flour needs to be chilled and the dough requires an overnight rest in the refrigerator before baking. (The dough can be frozen for later use to save some time.)
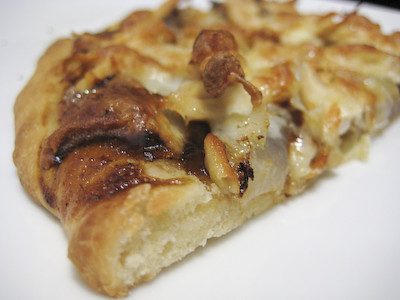

I don't know what happened to this month, but before I knew it, the posting date for this challenge had snuck up on me. I just got back from my vacation on the 25th, so I barely had enough time to complete this. I almost decided to sit this one out, but ended up throwing together a Barbeque Chicken Pizza.
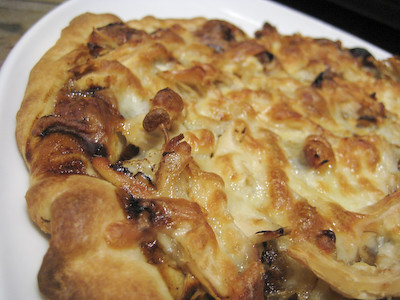

The real challenge this month (at least for me) was to actually toss the dough instead of rolling it out. I had every intention of doing this - at least trying - but in the end it just wasn't in the cards for me. After allowing the dough to rest on the counter for two hours, it was way too soft to toss. I think my mistake was that I overlooked the part of the recipe that indicates that the flour needs to be chilled first. Consequently, my dough was too warm by the time I had finished kneading it. Regardless of my mistake, the pizza still tasted great (the dough was just really hard to work with).

Thanks Rosa, for choosing pizza for this month's challenge and honoring Sher. I hope that next time, I can follow the instructions a little better and actually get it right! The recipe for the pizza dough can be found below; if you'd like the recipe for the Barbeque Chicken Pizza you can find it here. Make sure you visit the Daring Bakers Blogroll to see how hundreds of others fared with this challenge!


Basic Pizza Dough
from The Bread Baker's Apprentice: Mastering The Art of Extraordinary Bread, by Peter Reinhart

Makes 6 pizza crusts (about 9-12 inches/23-30 cm in diameter).

Ingredients:
4 1/2 Cups (20 1/4 ounces/607.5 g) Unbleached high-gluten (%14) bread flour or all purpose flour, chilled - For Gluten Free (GF): 4 ½ cups GF Flour Blend with xanthan gum or 1 cup brown rice flour, 1 cup corn flour, 1 cup oat flour, 1 ½ cup arrowroot, potato or tapioca starch + 2 tsp xanthan or guar gum
1 3/4 Tsp Salt
1 Tsp Instant yeast - FOR GF use 2 tsp
1/4 Cup (2 ounces/60g) Olive oil or vegetable oil (both optional, but it’s better with)
1 3/4 Cups (14 ounces/420g or 420ml) Water, ice cold (40° F/4.5° C)
1 Tb sugar - FOR GF use agave syrup
Semolina/durum flour or cornmeal for dusting

DAY ONE

Method:
1. Mix together the flour, salt and instant yeast in a big bowl (or in the bowl of your stand mixer).

2. Add the oil, sugar and cold water and mix well (with the help of a large wooden spoon or with the paddle attachment, on low speed) in order to form a sticky ball of dough. On a clean surface, knead for about 5-7 minutes, until the dough is smooth and the ingredients are homogeneously distributed. If it is too wet, add a little flour (not too much, though) and if it is too dry add 1 or 2 teaspoons extra water.

NOTE: If you are using an electric mixer, switch to the dough hook and mix on medium speed for the same amount of time.The dough should clear the sides of the bowl but stick to the bottom of the bowl. If the dough is too wet, sprinkle in a little more flour, so that it clears the sides. If, on the contrary, it clears the bottom of the bowl, dribble in a teaspoon or two of cold water.
The finished dough should be springy, elastic, and sticky, not just tacky, and register 50°-55° F/10°-13° C.

Or

2. FOR GF: Add the oil, sugar or agave syrup and cold water, then mix well (with the help of a large wooden spoon or with the paddle attachment, on low speed) in order to form a sticky ball of dough.

3. Flour a work surface or counter. Line a jelly pan with baking paper/parchment. Lightly oil the paper.

4. With the help of a metal or plastic dough scraper, cut the dough into 6 equal pieces (or larger if you want to make larger pizzas).

NOTE: To avoid the dough from sticking to the scraper, dip the scraper into water between cuts.

5. Sprinkle some flour over the dough. Make sure your hands are dry and then flour them. Gently round each piece into a ball.

NOTE: If the dough sticks to your hands, then dip your hands into the flour again.

6. Transfer the dough balls to the lined jelly pan and mist them generously with spray oil. Slip the pan into plastic bag or enclose in plastic food wrap.

7. Put the pan into the refrigerator and let the dough rest overnight or for up to thee days.

NOTE: You can store the dough balls in a zippered freezer bag if you want to save some of the dough for any future baking. In that case, pour some oil (a few tablespoons only) in a medium bowl and dip each dough ball into the oil, so that it is completely covered in oil. Then put each ball into a separate bag. Store the bags in the freezer for no longer than 3 months. The day before you plan to make pizza, remember to transfer the dough balls from the freezer to the refrigerator.

DAY TWO

8. On the day you plan to eat pizza, exactly 2 hours before you make it, remove the desired number of dough balls from the refrigerator. Dust the counter with flour and spray lightly with oil. Place the dough balls on a floured surface and sprinkle them with flour. Dust your hands with flour and delicately press the dough into disks about 1/2 inch/1.3 cm thick and 5 inches/12.7 cm in diameter. Sprinkle with flour and mist with oil. Loosely cover the dough rounds with plastic wrap and then allow to rest for 2 hours.

Or

8. FOR GF: On the day you plan to eat pizza, exactly 2 hours before you make it, remove the number of desired dough balls from the refrigerator. Place on a sheet of parchment paper and sprinkle with a gluten free flour. Delicately press the dough into disks about ½ inch/1.3 cm thick and 5 inches/12.7 cm in diameter. Sprinkle the dough with flour, mist it again with spray oil. Lightly cover the dough round with a sheet of parchment paper and allow to rest for 2 hours.

9. At least 45 minutes before making the pizza, place a baking stone on the lower third of the oven. Preheat the oven as hot as possible (500° F/260° C).

NOTE: If you do not have a baking stone, then use the back of a jelly pan. Do not preheat the pan.

10. Generously sprinkle the back of a jelly pan with semolina/durum flour or cornmeal. Flour your hands (palms, backs and knuckles). Take 1 piece of dough by lifting it with a pastry scraper. Lay the dough across your fists in a very delicate way and carefully stretch it by bouncing it in a circular motion on your hands, and by giving it a little stretch with each bounce. Once the dough has expanded outward, move to a full toss.

Or

10. FOR GF: Press the dough into the shape you want (about 9-12 inches/23-30 cm in diameter - for a 6 ounces/180g piece of dough).

NOTE: Make only one pizza at a time.
During the tossing process, if the dough tends to stick to your hands, lay it down on the floured counter and reflour your hands, then continue the tossing and shaping.
In case you would be having trouble tossing the dough or if the dough never wants to expand and always springs back, let it rest for approximately 5-20 minutes in order for the gluten to relax fully,then try again.
You can also resort to using a rolling pin, although it isn’t as effective as the toss method.

11. When the dough has the shape you want (about 9-12 inches/23-30 cm in diameter - for a 6 ounces/180g piece of dough), place it on the back of the jelly pan, making sure there is enough semolina/durum flour or cornmeal to allow it to slide and not stick to the pan.

Or

11. FOR GF: Lightly top it with sweet or savory toppings of your choice.

12. Lightly top it with sweet or savory toppings of your choice.

Or

12. FOR GF: Place the garnished pizza on the parchment paper onto the stone in the oven or bake directly on the jelly pan. Close the door and bake for about 5-8 minutes.

NOTE: Remember that the best pizzas are topped not too generously. No more than 3 or 4 toppings (including sauce and cheese) are sufficient.

13. Slide the garnished pizza onto the stone in the oven or bake directly on the jelly pan. Close the door and bake for about 5-8 minutes (I baked mine for 10 minutes).

Or

13. FOR GF: Follow the notes for this step.

NOTE: After 2 minutes baking, take a peek. For an even baking, rotate 180°.

If the top gets done before the bottom, you will need to move the stone or jelly pane to a lower shelf before the next round. On the contrary, if the bottom crisps before the cheese caramelizes, then you will need to raise the stone or jelly.

14. Take the pizza out of the oven and transfer it to a cutting board or your plate. In order to allow the cheese to set a little, wait 3-5 minutes before slicing or serving.

Helpful Tossing Links:
http://www.wikihow.com/Toss-Pizza-Dough, http://www.vids.myspace.com/index.cfm?f … D=35480534, http://www.ehow.com/how_2066953_toss-pizza-dough.html, http://www.classic-hand-tossed-pizza.bl … hands.html, http://www.youtube.com/watch?v=mhcTKeslAmk, http://www.ask.yahoo.com/20050222.html

Tuesday, October 28, 2008

Chocolate-Chocolate Cupcakes (TWD)


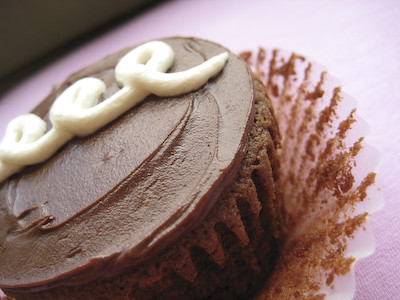
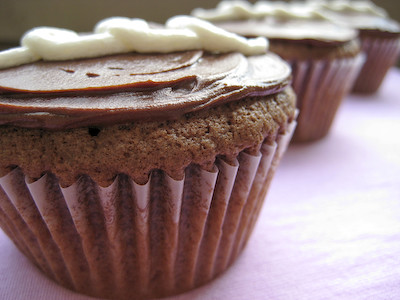
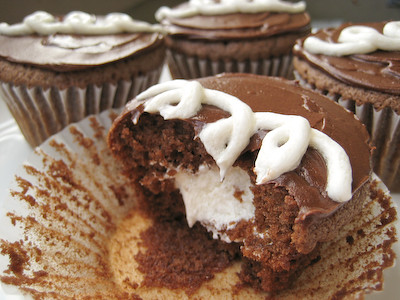
This week's Tuesdays with Dorie (TWD) recipe was chosen by Clara of I Heart Food4Thought: Chocolate-Chocolate Cupcakes. When I saw this recipe, I immediately knew I wanted to make them like the Hostess CupCakes many of us grew to love as kids - chocolate cupcakes filled with a delicious vanilla cream filling.


Dorie notes that you can use marshmallow fluff to fill these cupcakes, but I could not find any at my grocery store. All I could find was marshmallow creme. I've since discovered that "Marshmallow Fluff" is just a brand of marshmallow creme (ha!). Thinking I did not have any marshmallow fluff to use, I searched several blogs for a suitable filling recipe. There was one on Annie's Eats, but she noted that while it was good, it wasn't the same as the Hostess CupCake filling. The recipe on Baking Bites, however, was supposed to be spot on.


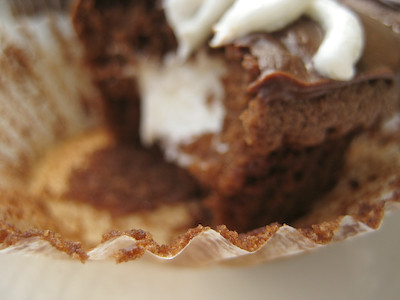
It has honestly been quite a while since I've had a Hostess CupCake, so it's hard for me to comment on the filling. It sure seemed close to what I remember. Authentic or not, the filling was pretty good. My only complaint about the filling was that it seemed to slightly separate, so it did not appear as smooth as the real thing.


As for the cupcakes themselves, these were wonderful. They were moist, light, and fluffy. The perfect chocolate cupcake. It seems that a lot of other TWD bakers found these to be too dry, but that was not the case with mine. I guess I was lucky in that these cupcakes turned out perfectly for me.


The next time I make these, I'll try just filling them with the marshmallow creme and see how they compare (that would certainly be simpler). I also love Dorie's suggestions to fill these with Nutella or chocolate ganache. I think these would also be great with a creamy, peanut butter filling. The possibilities are endless.


Thanks Clara, for choosing these delightful chocolate cupcakes. I've included the recipe below for the vanilla cream filling I used. If you would like the recipe for the cupcakes, you can find it here. Make sure you visit the TWD Blog Roll to see how everyone else enjoyed these chocolatey treats!

Don't forget... for those who have been on the fence about joining Tuesdays with Dorie - you have until October 31st to join. After Friday, membership in the group will be closed.


*A few recipe notes:
- The baking time is still 22-25 minutes if you halve the recipe. Mine was finished after 24 minutes.
- Many bakers found these cupcakes to be too dry. There was much debate as to whether this was due to overbaking, or too much flour. Part of this debate was due to the ambiguity as to how much 1 cup of flour weighs... Heidi over at Suburban Food found that Dorie uses the dip and sweep method of measuring and one cup of flour using this method weighs 4.8 ounces).

- Make sure you melt your chocolate first. That way it is completely cool by the time you need it (at the end).
- I used semisweet chocolate instead of bittersweet.
- I only have one muffin pan so I had to bake these in two batches. I hate not knowing how full to fill each muffin cup ("divide the batter evenly" is so vague). So I weighed it out for next time. Each muffin cup should be filled with approximately 1.75 ounces of batter (that weight is including the weight of the liner as well).
- There was just barely enough ganache to frost these cupcakes lightly. If you like to frost your cupcakes heavily, I would recommend doubling the recipe.
- Wrapped airtight (glazed or unglazed), these can be frozen for up to 2 months.
- For more recipe tips, click here.

Vanilla Cream Filling
from Baking Bites

3 tbsp all purpose flour
1/2 cup milk (low fat is fine) (I used skim)
1/2 cup butter (or trans fat-free shortening)
1/2 cup granulated sugar
1/2 scraped vanilla bean or 1 tsp vanilla extract

Whisk together the flour and milk and cook in a small saucepan over medium heat until thick (this will only take a few minutes). Stir continuously to prevent the mixture from clumping and do not bring it all the way to a boil. (Do not walk away from it! It will be slightly clumpy as it thickens but you should not get large clumps if you stir continuously.) When thickened (consistency will be that of a thin pudding or custard), strain with a mesh strainer into a small bowl, cover with plastic wrap and let cool completely to room temperature.

When the milk mixture is cool, cream the butter (or shortening) and sugar together in a medium bowl until light. Add in the milk/flour mixture and the scraped vanilla bean seeds (or vanilla extract) and beat at high speed with an electric mixer for 7 minutes, until light and fluffy.

Scrape into a pastry bag fitted with a plain tip, or a large ziplock bag with the corner cut off, and set aside until ready to fill your cupcakes.

Friday, October 24, 2008

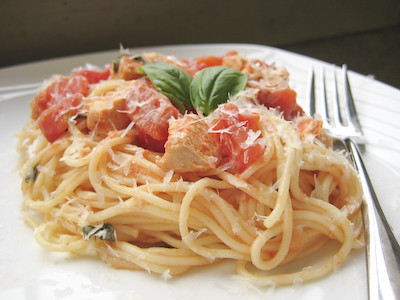
Basil Chicken over Angel Hair Pasta


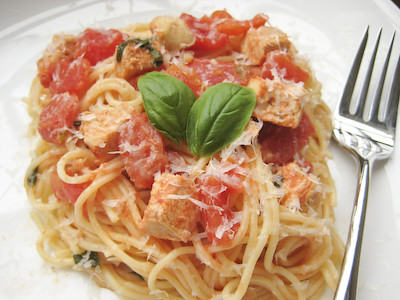
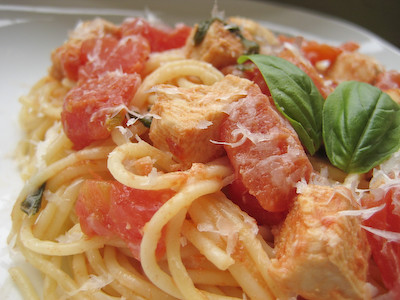
This is a very basic pasta dish that is great for weeknights. The flavors in it are classic - garlic, onion, tomato and basil. I adapted the recipe slightly to suit my tastes. I love basil, so I added three times as much basil to this :) I also love spicy food, so I added extra pepper (of course if you don't care for the additional heat, just omit the hot pepper sauce). While I did add some heavy cream to this to balance out some of the acidity from the tomatoes, it is still a very light meal.


You can use dried basil (4 teaspoons) if you don't have any fresh basil on hand, but it really won't taste as good. If you hate paying an arm and a leg for fresh basil at the grocery store, there are two lower cost alternatives. The first is to find your local Asian grocery store. If you live in a decently sized city, chances are you have some local Asian grocery stores around. There, you can get a huge bundle of basil (30+ leaves) for $1 versus the $2-3 you pay at your neighborhood grocery store for 8-10 leaves of basil. The other way to get cheap basil is to plant your own. I bought a tiny little starter basil plant a few months ago (for $3), and it has grown so much now that I have enough basil to cook something with it once a week. Don't worry if you don't have a green thumb - I don't either and mine hasn't died yet ;) For tips on how to grow an herb garden, click here.


Save time and money by using canned, diced tomatoes in this instead of fresh. You can also save time by cooking the chicken ahead of time. That way, all you have to do is throw the sauce together while the pasta is cooking.

This is my submission to the weekly Presto Pasta Nights, hosted by Ruth over at Once Upon a Feast.

Basil Chicken over Angel Hair Pasta from Allrecipes

1 (8 ounce) package angel hair pasta
2 teaspoons olive oil
1/2 cup finely chopped onion
1 clove garlic, chopped
2 1/2 cups chopped tomatoes (I used a 28 oz can of diced tomatoes, undrained) 2 cups boneless chicken breast halves, cooked and cubed (I poached my chicken*)
1/4 cup chopped fresh basil (I used 3/4 cup)
1/2 teaspoon salt
1/8 teaspoon hot pepper sauce (I used about 1/2 tsp crushed red pepper flakes) 1/4 cup heavy cream
1/4 cup grated Parmesan cheese

* To poach your chicken, put the chicken breast halves in a large saucepan and add lightly salted water to cover. Bring to a boil over high heat, reduce the heat to low and simmer for 30 minutes. You can do this with frozen chicken breasts, too.

In a large pot of salted boiling water, cook angel hair pasta until it is al dente, about 8 to 10 minutes. Drain, and set aside.

In a large skillet, heat oil over medium-high heat. Saute the onions and garlic. Stir in the tomatoes, chicken, basil, salt and hot pepper sauce. Reduce heat to medium, and cover skillet. Simmer for about 5 minutes, stirring frequently, until mixture is hot and tomatoes are soft.

Toss sauce with hot cooked angel hair pasta to coat. Serve with Parmesan cheese.

Yield: 4 Servings

Tuesday, October 21, 2008

Pumpkin Muffins (TWD)


This week's Tuesdays with Dorie (TWD) recipe was chosen by Kelly of Sounding My Barbaric Gulp: Pumpkin Muffins. Dorie describes these as having a "moist and tender cakey crumb," with "a gentle spiciness," and a "sprinkling of sunflower seeds across their crowns."


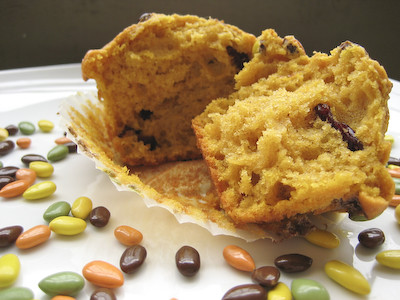
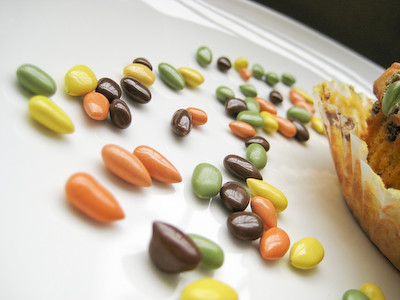
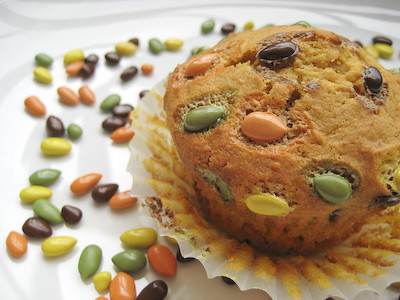
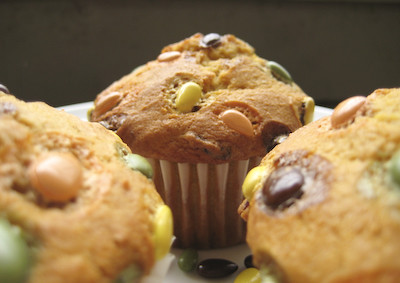
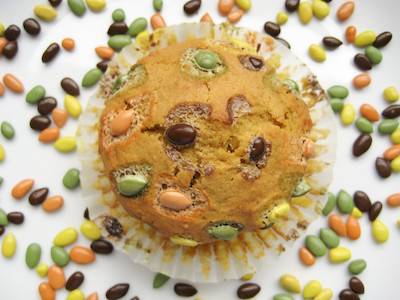
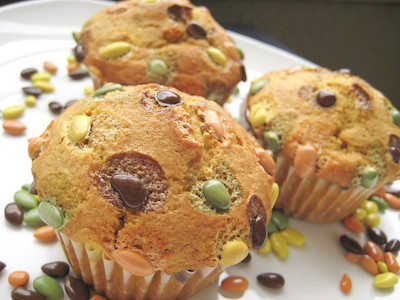
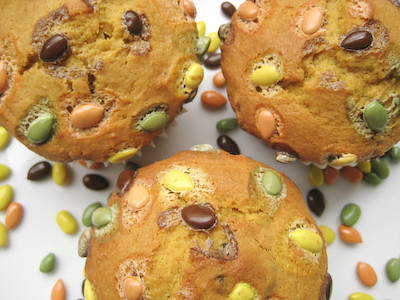
When I saw that this recipe called for sunflower seeds, I immediately knew I wanted to use the chocolate covered sunflower seeds I had on hand. Why did I have chocolate covered sunflower seeds in my pantry? Because of Peabody. Several months ago, when I saw this post on her blog for chocolate covered sunflower seed cookies, I fell in love with the cute little candies. They are from Trader Joe's, and although I live nowhere near a Trader Joe's, I make myself a list of things to get from them whenever I go back to visit my family in California. After seeing them on Peabody's blog, I made sure to pick them up on my last trip to California.


I recently made some pumpkin cookies that, while very delicious, were very blah looking and bland. So I decided to use these chocolate covered sunflower seeds to add a little color and pop to the pictures. After using them in that post, I had a few readers comment that you can also sometimes find something similar at some of your more upscale grocery or specialty stores. So, if you're one of those poor souls who doesn't live near a Trader Joe's (like me), you might not be totally out of luck.


Like most muffin recipes, this one was very simple. I substituted dried cranberries for the raisins (not because I don't like raisins, but just because that's what I had on hand). I don't like nuts, so I omitted the pecans/walnuts from this recipe, instead added more dried cranberries in their place. Some TWD bakers added chocolate chips as well. This is a highly adaptable recipe. It's also another great recipe to make when you have a little leftover canned pumpkin, as it calls for 3/4 cup (also make sure you use canned pumpkin and not pumpkin pie filling).


It seems that the opinions about these muffins among the TWD group were mixed, though I think the vast majority of bakers seemed to love them. I was in the minority - I didn't fall in love with them. They were okay, but didn't "wow" me like some of Dorie's other recipes did. I found the pumpkin flavor to be fairly subtle (a plus for those who don't particularly care for pumpkin, I guess). Like the orange berry muffins, I found the crumb to be perfectly moist and tender, but not sweet enough at all. Perhaps they might be better with some orange marmalade or apricot jam to increase the sweet factor, as Dorie suggests.


While these were adorable and fun to photograph, I probably won't be making them again. They were perfect for breakfast now that it's fall, but I just don't see myself ever having a craving for these and baking them. When I want an indulgent pumpkin treat, I'll make the pumpkin cookies instead. Don't let that stop you from trying these, though, because like I said, a lot of others in the group really enjoyed them.


Thanks Kelly, for choosing this week's pick. If you would like the recipe, you can find it here. Make sure you visit the TWD Blog Roll to see what everyone else thought of this fall treat. For those who have been on the fence about joining Tuesdays with Dorie - you have until October 31st to join. I've really enjoyed baking my way through this book with the group, and would encourage anyone who is interested to join now. After the end of this month, membership in the group will be closed.


*A few recipe notes:
- I used dried cranberries instead of raisins. I also added 3/4 cup instead of 1/2 cup.
- I used a dark metal muffin pan and my muffins were finished baking after 22 minutes instead of the full 25 minutes indicated. Some bakers found that their muffins were done as early as 17 minutes.
- I used chocolate covered sunflower seeds instead of raw sunflower seeds on top.
- Wrapped airtight, these can be frozen for up to 2 months. Rewarm in a 350F oven, or split and toast the muffins before serving.
- For more recipe tips, click here.

Sunday, October 19, 2008

YouBars - Fresh, Handmade Nutrition Bars


I'm a bit late to post this, but better late than never right? A few months ago, I received some free samples of YouBar nutrition bars from a giveaway on Blake Makes. They are completely customizable protein bars made by a company called Fed-UP Bars, based in Los Angeles.


Customizing a bar is simple. You choose the base such as cashew butter, macadamia butter, dates, etc. Then select the protein powders, nuts, dried fruits, and grains you would like added in. Finish them out by choosing the sweeteners (i.e. agave nectar, brown rice syrup, honey) and seasonings (i.e. chocolate, cinnamon, peppermint oil).


I received a few different samples. Two bars were the base alone with no add ins. The others were samples with various mix ins like nutty rice cereal, dried cherries, etc. While I wasn't a big fan of the "naked" bars that were only the base, I absolutely loved the samples that were completely put together with all the mix ins. (For the base, I loved the honey cashew but did not really like the "great date with chocolate.")

One particular bar that I enjoyed contained the following ingredients: organic dates, cashew macadamia butter, almonds, organic clover honey, organic dried cherries, cranberries, whey protein, nutty rice cereal, and all-one rice base vitamin and mineral powder.

I usually don't care for the taste of most nutrition bars, but I could absolutely eat these on a daily basis. If you'd like more information on how to order your own YouBars, visit their website or call them at the number below :)

Saturday, October 18, 2008

Anti-Rain Dance

Photo taken during our honeymoon (September 2005).

This post is going to be short and sweet because I'm leaving in just a few minutes for the airport! I'm going to be gone for a week, (hopefully) basking in the sun and enjoying the warm waters of Belize. I say hopefully because the forecast doesn't look great right now... so here's my request: could everyone please to do a little anti-rain dance for me? :) I would love to see clear skies and beautiful blue waters this week, like in the picture above :)

Updates to this blog will continue uninterrupted, as I've written a few posts that will go up in my absence. I may or may not be able to promptly answer any emails or address comments left on my blog, but I promise to read each and every one when I return.