Tuesday, April 27, 2010

Chockablock Cookies (TWD)


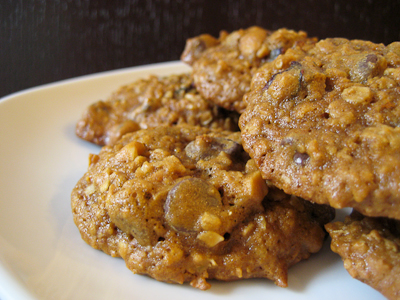
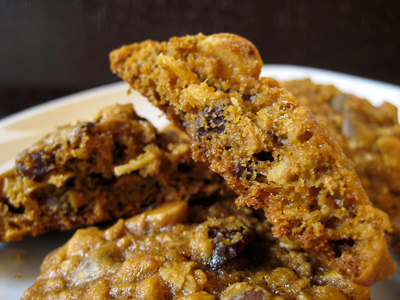
This week's Tuesdays with Dorie (TWD) recipe was chosen by Mary of Popsicles and Sandy Feet: Chockablock Cookies. They're chocolate cookies sweetened with molasses, then chock full of chocolate chips, nuts, oats, and dried fruit!

I have to say that I wish I had seen the comments from the other bakers before I made these because I'm not really a big fan of shortening. Apparently a lot of bakers just used butter in place of the shortening without any problems. I would have preferred to have done that, but of course did not think to.

These cookies were just okay to me. I don't particularly care for chocolate cookies, so I think that was the main reason. The molasses and chocolate combination was just fine in my opinion (there were reservations among the group about this).


Thanks Mary, for hosting this week. If you would like the recipe, you can find it here. Make sure you check out the TWD Blogroll, to see how everyone else enjoyed this sweet, chocolatey treat! Also, don't forget to enter my $100 gift card giveaway while you're here :)

* Recipes notes:
- For tips from other TWD bakers, click here.

Apple Steamed Pudding with Sticky Toffee Sauce (DB)


If you're here for Tuesdays with Dorie, check back later today for my post about Chockablock Cookies! Also, don't forget to enter my $100 gift card giveaway while you're here :)

The April 2010 Daring Bakers’ challenge was hosted by Esther of The Lilac Kitchen. She challenged everyone to make a traditional British pudding using, if possible, a very traditional British ingredient: suet.

Suet is the hard but flaky fat found on the inside of a cow or sheep around the kidneys and that area of the body. Now, I am well aware that many good things are made with fat, or even lard for that matter. But I am one of those people who believes that ignorance is bliss. I can enjoy something made with lard as long as I don't know that there is lard in it :) So, even though I am sure that traditional British pudding made with suet is delicious, I simply could not bring myself to make anything with it!

Thankfully, Esther gave us the option to make a pudding without suet. The only requirement was that it be a steamed pudding. So, having discovered my love for sticky toffee pudding while vacationing in Grand Cayman, I decided that I would make that for this challenge :)


It seems to me that most recipes for sticky toffee pudding are baked in the oven, so I had to do some real searching before I could find a true pudding. I finally found a recipe on BBC Good Food - I think it's like the British version of epicurious :) This recipe was slightly different from traditional sticky toffee pudding in that it included apples instead of dates, but I love anything with baked apples, so I figured it was worth a try. (Plus I had apples in my fridge and no dates in my pantry!)

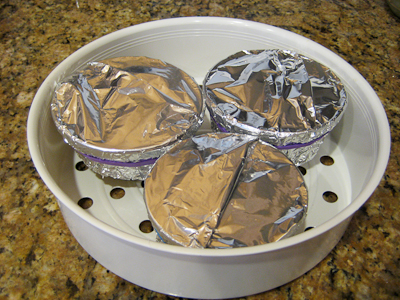
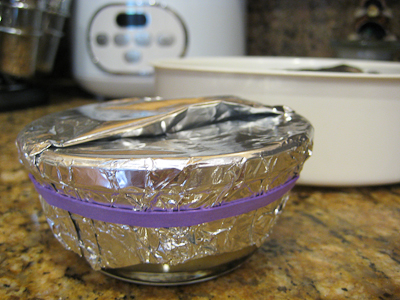
For this challenge my rice cooker came in really handy. You see, it comes with a steamer insert that made steaming my pudding a piece of cake (no pun intended). The only problem was that the steamer is fairly shallow, so I couldn't put a large bowl in it. So, I decided to use ramekins and make mini versions instead. In the end, the ramekins simplified things for me, as I didn't have any string on hand so I had to improvise. Instead of using string to seal the foil over the ramekins, I used rubber bands.


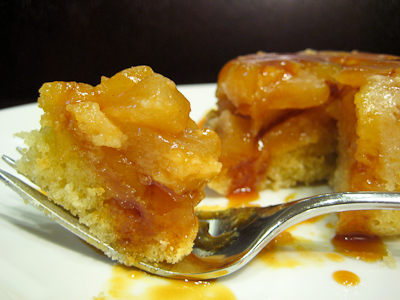
Here's how my pudding looked after it was done steaming!


I was a little worried about how this would taste, as I am fairly certain that every sticky toffee pudding I've ever tried was baked, not steamed. I am not sure why, but the thought of eating a dessert that was steamed just seemed weird to me. Luckily, I found my concerns to be completely unfounded - this was delicious! My husband even told me to hide the rest from him because he's trying to lose some weight and didn't want to eat all of it!

I've included the recipe I used below, though I apologize to those who do not have a kitchen scale. I intended to measure everything out so I could include it with the recipe but was rushed and did not get the chance to do this. You may want to use this link to figure out the conversions.

Thanks Esther, for hosting this month's challenge. I'm sorry I wasn't "daring" enough to make a pudding with suet, but I did challenge myself to try steamed pudding. Make sure you check out the Daring Bakers' Blogroll to see how everyone else enjoyed this traditional British dessert.


Apple Steamed Pudding with Sticky Toffee Sauce
from Olive Magazine as seen on BBC Good Food

175g unsalted butter , softened
4 eating apples, peeled, cored and cut into 2cm chunks (I used Fuji apples. I also added some cinnamon, to taste)
130g golden caster sugar (called superfine sugar in the US - if you don't have any, just put some sugar in your food processor and make your own)
50g walnuts , toasted & roughly chopped (I don't like nuts so I omitted these)
3 eggs , beaten
150g self-raising flour

Toffee Sauce:
175g light muscovado sugar (unrefined brown sugar)
125g unsalted butter
200g crème fraîche

Melt 25g butter in a large frying pan, add the apple chunks and cook until just tender and starting to turn golden. Add 1 tbsp sugar and continue to cook for a couple of minutes until the apples start to caramelize. Cool and add the walnuts.

To make the sauce, tip all of the ingredients into a saucepan and cook until the butter and crème fraîché have melted. Bring to the boil and simmer for 2 minutes.

Tip the apple and walnut mixture into a buttered 1.5 litre pudding basin. Pour a third of the toffee sauce over, set aside.

Beat together the remaining butter and caster sugar until pale and creamy. Gradually add the beaten eggs, mixing well between each addition. Fold in the flour with a pinch of salt. Carefully spoon the mixture on top of the apples and spread level. Cover with a pleated sheet of baking parchment and foil, tie securely with string and trim off any excess paper and foil. Put the bowl in a large saucepan and pour boiling water around the bowl so that it comes halfway up the sides. Cover with a lid and steam for 1-1/2 hours, adding more water to the pan halfway though if needed.

Rest the pudding for 2 minutes before turning out into a dish and serving with the remaining warm toffee sauce.

Monday, April 26, 2010

Big Giveaway Announcement

I'm excited to announce that I'm giving away a $100 gift card!

To find out where you'll be able to redeem the gift card, and details on how to enter to win, click here. You have until 5pm (PST) on May 26th to enter. Good luck!

Saturday, April 24, 2010

Sweet Cream Biscuits (TWD)


First, let me say that I've got a BIG giveaway coming up on my blog! You'll have to keep coming back to check over the next few days to find out what it is, but I promise it's something you don't want to miss out on! :)

This week's Tuesdays with Dorie (TWD) recipe was chosen by Melissa of Love At First Bite: Sweet Cream Biscuits. But wait you say... it's not Tuesday! It's Saturday, and basically almost Sunday! Ok, ok, you're right. I'm super late this week with my post, but better late than never right? Really I have no excuse for posting late this week, especially when the recipe takes just minutes to prep... but, seems like I hardly have any time for baking these days :(

At first I thought I had made a mistake when I realized I had not put any butter in these biscuits. It's no mistake! These biscuits have cream instead of butter in them. I wasn't sure how they would turn out but they were surprisingly very similar to traditional biscuits.

If you look closely in the photo, you'll see that my biscuits were flower shaped :) That's because I used a cookie cutter to make my biscuits since I don't have a biscuit cutter. So how did these taste? These aren't as sweet as the name implies, and I think I may miss the nice buttery taste that comes with traditional biscuits, but if you're making biscuits at the last minute and realize you're out of butter, then these would make a great alternative.

I enjoyed my biscuits with some wild raspberry honey that I won from Blake Makes courtesy of Bee Raw. They say that the flavor of the honey comes from the flowers that the bees have pollinated and it's so true. The floral raspberry flavor in this honey is subtle, but definitely there. I really enjoyed it.

Thanks Melissa, for hosting this week. If you would like the recipe, you can find it here. Make sure you check out the TWD Blogroll, to see how everyone else enjoyed this breakfast treat!

* Recipes notes:
- Make sure you add enough cream to get the dough moist enough to stick together so it doesn't crumble when you roll it out, but not too moist to where it's too sticky to work with.
- For tips from other TWD bakers, click here.

Tuesday, April 13, 2010

Swedish Apple Cake (TWD)


This week's Tuesdays with Dorie (TWD) recipe was chosen by Nancy of The Dog Eats the Crumbs: Swedish Visiting Cake. I guess this is the kind of cake you throw together when you have unexpected company, because it takes about 5 minutes to throw together and tastes pretty great! Maybe that's why it's called a "visiting" cake? :)

Since I didn't have any sliced almonds around (probably because I don't like almonds anyway), I opted to make the Swedish Apple Cake that Dorie adapted from Ann Brettingen. The longest part of this recipe was peeling and slicing the apple!


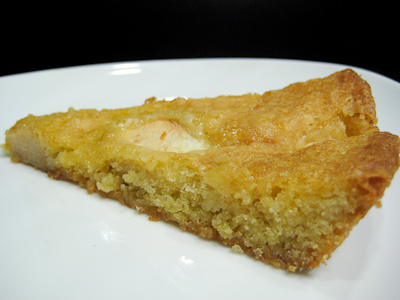
I need to measure my cast iron skillet because I think it's probably a 10-inch one, not a 9-inch, so my cake came out a tad thin. Regardless, it still tasted great. The only change I made to the recipe was to add 1/8 of a teaspoon of cinnamon because you can't have apples without cinnamon! I would have added more, but with only 3/4 cup of flour in the cake, I didn't want the cinnamon to be overpowering. In the end, I think it was just perfect.


Thanks Nancy, for hosting this week. It's a great go-to recipe for last minute entertaining! If you would like the recipe for the Swedish Visiting Cake, you can find it here. Otherwise, I've posted the recipe for the Swedish Apple Cake below. Make sure you check out the TWD Blogroll, to see how everyone else enjoyed this simple treat!

* Recipes notes:
- My cake was done after 35 minutes, probably because I baked it in a larger skillet.
- Add 1/8 teaspoon of cinnamon to the dry ingredients to complement the apples.
- For tips from other TWD bakers, click here.


Ann Brettingen’s Swedish Apple Cake
adapted by Dorie Greenspan

3/4 cup all-purpose flour
1 teaspoon baking powder
Pinch of salt (optional)
1 extra-large egg or 1 large egg plus 1 large egg yolk
3/4 cup sugar
1/2 teaspoon pure vanilla extract (optional)
1 stick (4 ounces) unsalted butter, melted and cooled
1 to 1 1/2 apples (I used Fujis), peeled, cored and cut into 1/2-inch thick wedges
Apple, quince or ginger jelly or preserves, for glazing the cake (optional)
Procedure

1. Center a rack in the oven and preheat the oven to 350°F. (345°F if your oven will do that.) Generously butter a 9-inch deep-dish pie plate or a similar sized cast-iron skillet.

2. Whisk together the flour, baking powder and salt, if you’re using it, and keep at hand.

3. Working in a mixing bowl with the whisk, beat the egg(s) and sugar together until thick and pale. Stir in the vanilla, if you’re using it, and then the melted butter. The mixture will be smooth and shiny. Stir in the dry ingredients and scrape the batter into the prepared pan. Top with the apples, making a spiral pattern. Leave some space between each slice, so the batter can puff up between the wedges – it looks much nicer with the puffs.

4. Slide the pan into the oven and bake for about 40 minutes, or until a knife inserted into the cake comes out clean. Transfer the cake to a cooling rack.

5. If you want to glaze the cake, warm a few spoonfuls of jelly and a splash of water in a microwave oven (or a saucepan) until the jelly liquefies. Brush the jelly over the hot cake.

6. Let the cake cool for at least 15 minutes, or wait until it reaches room temperature, before you cut it into wedges to serve.

Yield: 6 Servings.

Storing: Cooled and covered, the cake will keep overnight at room temperature, but it’s best served shortly after it’s baked.

Tuesday, April 6, 2010

Coconut Tea Cake (TWD)


This week's Tuesdays with Dorie (TWD) recipe was actually the Mocha-Walnut Marbled Bundt Cake, but in the spirit of Easter, our leader Laurie let us swap weeks and we were allowed to make the Coconut Tea Cake from last week, chosen by Carmen of Carmen Cooks.

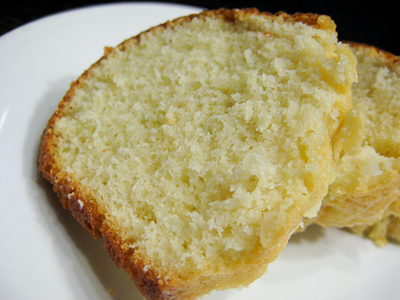
Time was short, and this recipe was a breeze to whip up. I made the coconut lime version, with the use of lime sugar and rum in the batter. The lime flavor was subtle, though I could definitely see pretty little flecks of lime zest in the finished product. As for the coconut, I could recognize the bits of shredded coconut in each bite, but I was hoping that the addition of coconut milk would lend a stronger coconut flavor.


Still, the cake came out pretty moist and we all enjoyed it on Easter. I had intentions of making a nice glaze or a coconut cream cheese frosting for this cake, but time got away from me and I had more fun taking pictures of my dear daughter (she'll be 5 months next week already!!!) and her first Easter instead :)


Thanks, Carmen, for hosting this (last) week. If you would like the recipe, you can find it here. Make sure you check out the TWD Blogroll, to see how everyone else enjoyed this coconut-y treat!

* Recipes notes:
- Take the cake out just as it begins to turn a nice golden color. Leave it in too long and it will dry out. Mine was done right around 60 minutes.
- For tips from other TWD bakers, click here.

Saturday, March 27, 2010

Orange Tian (DB)


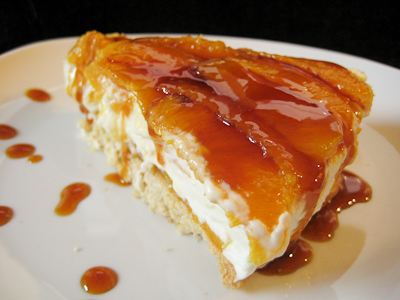
The 2010 March Daring Baker’s challenge was hosted by Jennifer of Chocolate Shavings. She chose Orange Tian as the challenge for this month, a dessert based on a recipe from Alain Ducasse’s Cooking School in Paris. What is a tian, you ask? Yeah, I had to ask that too. I had never heard of a tian before. Apparently it's as simple as any layered dish. So a 7-layer bean dip is considered a tian just as much as the orange pastry you see above is.
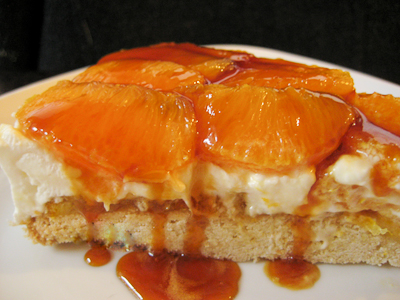

In this case, the orange tian is a layered dessert consisting of a sweet tart dough base, topped with orange marmalade, an orange flavored whipped cream, and then fresh orange segments, garnished with a luscious orange caramel sauce on top.

While this recipe was fairly straightforward, I did get to learn several new techniques through this challenge. To start off, I made my very first marmalade. I love orange marmalade and could eat it plain by the spoonful. In fact, that's what I did with a few spoonfuls of this homemade goodness! In making the marmalade, I also learned how to extract my own pectin from orange seeds! I somehow forgot to put pectin on my grocery list and by the time I started making this recipe, there was no way I was going back out to get it. So, I checked out the forum and found another baker had suggested extracting your own. You basically just stick the seeds in a piece of cheesecloth, let it soak in some warm water for a few hours, and then squeeze the living daylights out of the cheesecloth and seeds until you get some gloopy goodness that is pectin. So cool.
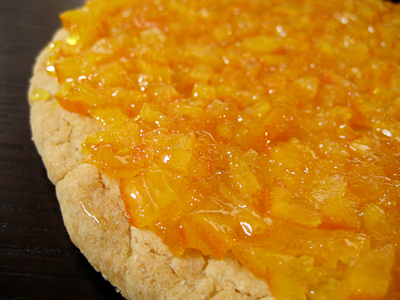
Beautiful layer of orange marmalade atop the pate sablee.

I also learned how to segment an orange during this process. As simple as it is, I had never done this before. The youtube video that was linked was a great tutorial and I had all eight oranges segmented in no time. This is definitely my preferred way to eat a grapefruit from now on (I used to always just slice it in half and then dig in with a spoon!).

Instead of making mini desserts with cookie cutters, I opted to make one large tart using my springform pan. I simply cut out a piece of parchment that would fit into my pan and then used that as a guide as I rolled out the dough.


This dessert is perfect for spring or summer. It would be great for entertaining, as you could get all of the components together ahead of time and then just assembled it right before the party. Even simpler if you used store bought marmalade or jam. I loved this dessert, especially with the orange caramel sauce on top! I've never had anything like it. My husband isn't a huge fan of citrus, but did think that this would be even better with raspberry jam on the bottom and fresh raspberries on top! I think the different flavor combinations are endless.

Thanks Jennifer, for hosting this month's challenge. Make sure you check out the Daring Bakers' Blogroll to see how everyone else enjoyed this citrus-y treat.
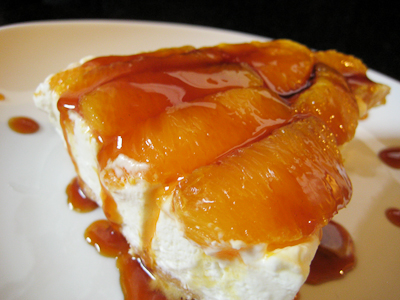

Orange Tian
Recipe slightly adapted from Alain Ducasse‘s Cooking School in Paris, France
Stabilized whipped cream (http://tamsin-cakes.com/2009/06/05/tamsincakes-on-flickr-adventures-in-s...)

For the Pate Sablee:

Ingredients U.S. Imperial Metric Instructions for Ingredients
2 medium-sized egg yolks at room temperature (you can use 2 large egg yolks without a problem)
granulated sugar 6 tablespoons + 1 teaspoon; 2.8 oz; 80 grams
vanilla extract ½ teaspoon
Unsalted butter ¼ cup + 3 tablespoons; 3.5 oz; 100 grams ice cold, cubed
Salt 1/3 teaspoon; 2 grams
All-purpose flour 1.5 cup + 2 tablespoons; 7 oz; 200 grams
baking powder 1 teaspoon ; 4 grams

Directions:
Put the flour, baking powder, ice cold cubed butter and salt in a food processor fitted with a steel blade.

In a separate bowl, add the eggs yolks, vanilla extract and sugar and beat with a whisk until the mixture is pale. Pour the egg mixture in the food processor.

Process until the dough just comes together. If you find that the dough is still a little too crumbly to come together, add a couple drops of water and process again to form a homogenous ball of dough. Form into a disc, cover with plastic wrap and leave to rest in the fridge for 30 minutes.
Preheat your oven to 350 degree Fahrenheit.

Roll out the dough onto a lightly floured surface until you obtain a ¼ inch thick circle. (I refrigerated my dough overnight so when it came time to roll it out, I had to let it sit on the counter for a bit to warm up and soften a little before I could roll it out.)

Using your cookie cutter, cut out circles of dough and place on a parchment (or silicone) lined baking sheet. Bake for 20 minutes or until the circles of dough are just golden. (I used a springform pan so I simply rolled out my dough into a circle that would fit into the pan.)

For the Marmalade:

Ingredients U.S. Imperial Metric Instructions for Ingredients
Freshly pressed orange juice ¼ cup + 3 tablespoons; 3.5 oz; 100 grams
1 large orange used to make orange slices
cold water to cook the orange slices
pectin 5 grams (If you do not have pectin, take all your orange seeds after segmenting the oranges and place them in a small piece of cheesecloth. Soak in warm water for a few hours, then squeeze out the pectin. It should be thick like corn syrup.)
granulated sugar: use the same weight as the weight of orange slices once they are cooked

Finely slice the orange. Place the orange slices in a medium-sized pot filled with cold water. Simmer for about 10 minutes, discard the water, re-fill with cold water and blanch the oranges for another 10 minutes.

Blanch the orange slices 3 times. This process removes the bitterness from the orange peel, so it is essential to use a new batch of cold water every time when you blanch the slices.

Once blanched 3 times, drain the slices and let them cool.

Once they are cool enough to handle, finely mince them (using a knife or a food processor).

Weigh the slices and use the same amount of granulated sugar . If you don’t have a scale, you can place the slices in a cup measurer and use the same amount of sugar.

In a pot over medium heat, add the minced orange slices, the sugar you just weighed, the orange juice and the pectin. Cook until the mixture reaches a jam consistency (10-15 minutes).

Transfer to a bowl, cover with plastic wrap and put in the fridge.

For the Orange Segments:

For this step you will need 8 oranges.

Cut the oranges into segments over a shallow bowl and make sure to keep the juice. Add the segments to the bowl with the juice.

[See YouTube video for additional information on segmenting oranges.]

For the Caramel:

Ingredients U.S. Metric Imperial Instructions for Ingredients
granulated sugar 1 cup; 7 oz; 200 grams
orange juice 1.5 cups + 2 tablespoons; 14 oz; 400 grams

Place the sugar in a pan on medium heat and begin heating it. (You can gently swirl the pan to prevent burning, but do not stir the sugar.)

Once the sugar starts to bubble and foam, slowly add the orange juice. (At this point, the caramel will harden... just keep heating and stirring and it will dissolve back into solution.) As soon as the mixture starts boiling, remove from the heat and pour half of the mixture over the orange segments.

Reserve the other half of the caramel mixture in a small bowl — you will use this later to spoon over the finished dessert. When the dessert is assembled and setting in the freezer, heat the kept caramel sauce in a small saucepan over low heat until it thickens and just coats the back of a spoon (about 10 minutes). You can then spoon it over the orange tians. (The caramel sauce will seem too thin after 10 minutes of additional heating. Refrain from continuing to heat it, because it will thicken nicely as it cools. I continued to heat it until it was thick and then once it cooled it was way too thick.)

[Tip: Be very careful when making the caramel — if you have never made caramel before, I would suggest making this step while you don’t have to worry about anything else. Bubbling sugar is extremely, extremely hot, so make sure you have a bowl of ice cold water in the kitchen in case anyone gets burnt!]

For the Whipped Cream:

Ingredients U.S. Metric Imperial Instructions for Ingredients
heavy whipping cream 1 cup; 7 oz; 200 grams
3 tablespoons of hot water
1 tsp Gelatine
1 tablespoon of confectioner's sugar
orange marmalade (see recipe above) 1 tablespoon

In a small bowl, add the gelatine and hot water, stirring well until the gelatine dissolves. Let the gelatine cool to room temperature while you make the whipped cream. Combine the cream in a chilled mixing bowl. Whip the cream using a hand mixer on low speed until the cream starts to thicken for about one minute. Add the confectioner sugar. Increase the speed to medium-high. Whip the cream until the beaters leave visible (but not lasting) trails in the cream, then add the cooled gelatine slowly while beating continuously. Continue whipping until the cream is light and fluffy and forms soft peaks. Transfer the whipped cream to a bowl and fold in the orange marmalade.
[Tip: Use an ice cold bowl to make the whipped cream in. You can do this by putting your mixing bowl, cream and beater in the fridge for 20 minutes prior to whipping the cream.]

Assembling the Dessert:

Make sure you have some room in your freezer. Ideally, you should be able to fit a small baking sheet or tray of desserts to set in the freezer.

Line a small tray or baking sheet with parchment paper or a silicone sheet. Lay out 6 cookie cutters onto the parchment paper/silicone.

Drain the orange segments on a kitchen towel.

Have the marmalade, whipped cream and baked circles of dough ready to use.

Arrange the orange segments at the bottom of each cookie cutter. Make sure the segments all touch either and that there are no gaps. Make sure they fit snuggly and look pretty as they will end up being the top of the dessert. Arrange them as you would sliced apples when making an apple tart.

Once you have neatly arranged one layer of orange segments at the bottom of each cookie cutter, add a couple spoonfuls of whipped cream and gently spread it so that it fills the cookie cutter in an even layer. Leave about 1/4 inch at the top so there is room for dough circle.

Using a butter knife or small spoon, spread a small even layer of orange marmalade on each circle of dough.

Carefully place a circle of dough over each ring (the side of dough covered in marmalade should be the side touching the whipping cream). Gently press on the circle of dough to make sure the dessert is compact.

Place the desserts to set in the freezer to set for 10 minutes.

Using a small knife, gently go around the edges of the cookie cutter to make sure the dessert will be easy to unmold. Gently place your serving plate on top of a dessert (on top of the circle of dough) and turn the plate over. Gently remove the cookie cutter, add a spoonful of caramel sauce and serve immediately.