Sunday, August 29, 2010

Ice Cream Petit Fours (DB)


The August 2010 Daring Bakers’ challenge was hosted by Elissa of 17 and Baking. For the first time, The Daring Bakers partnered with Sugar High Fridays for a co-event and Elissa was the gracious hostess of both. Using the theme of beurre noisette, or browned butter, Elissa chose to challenge Daring Bakers to make a pound cake to be used in either a Baked Alaska or in Ice Cream Petit Fours. The sources for Elissa’s challenge were Gourmet magazine and David Lebovitz’s “The Perfect Scoop”.

I decided to make the petit fours since I've never made them before.  I'm a few days late posting, but I had some technical difficulties with my ice cream machine! For some reason, I couldn't get the container to freeze, and I didn't realize this until the last minute. So, I had to stick the second container in the freezer and wait for it to freeze before I could make my ice cream.  Otherwise, this recipe went off without a hitch.

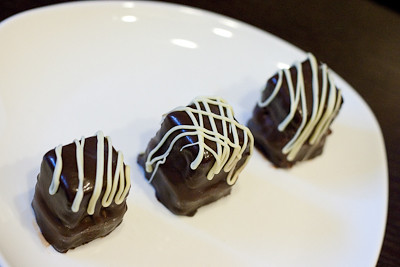
I made Dorie Greenspan's chocolate ganache ice cream for my petit fours, instead of David Lebovitz' vanilla ice cream.  The chocolate ice cream sandwiched between the brown butter cake pound cake, drenched in the chocolate glaze was any chocolate lover's dream come true!
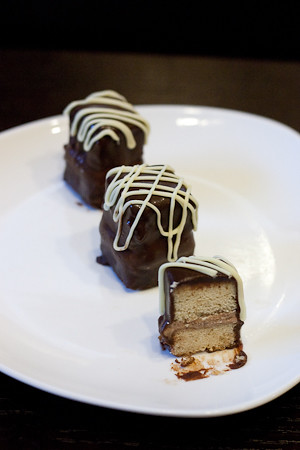

My favorite part of this recipe was actually the brown butter pound cake.  One of my favorite pastas is the one from Spaghetti Factory that is served with browned butter and mizithra cheese.  So I am very familiar with the wonderful nutty aroma of browned butter.  This pound cake was moist and delicious and much better than any traditional pound cake I've had.  I'll definitely be making it again.

Thanks Elissa, for hosting this month's challenge.  I had fun making petit fours for the very first time! Make sure you check out the Daring Bakers' Blogroll to see how everyone else enjoyed this cool and creamy summer treat.

Ice Cream Petit Fours

Preparation time:
Ice cream – 45 min active time, ice cream rests/chills for 1 hour then overnight. Without an ice cream maker, the ice cream chills 2-3 hours and must be stirred every 30 minutes.

Brown Butter Pound Cake – 2 hours (includes cooling time)

Chocolate Glaze – 15 minutes

Assembly of Ice Cream Petit Fours – Ice cream must be frozen ahead of time several hours, then the cake and ice cream freeze overnight. After dipping, the petit fours freeze for one hours.

Equipment required:
• Small and medium saucepans
• Paring knife
• 2 quart (2 litres) bowl
• Electric mixer
• Whisk
• Spatula
• Sieve
• 9”x9” (23cmx23cm) square baking pan
• 10” (25 cm) skillet
• Cake leveler/serrated knife
• Cooling racks
• Rimmed half sheets
• Teacups
• Plastic wrap
• Piping bags (optional)
• Ice cream maker (optional)
• Cooking blow torch (optional)

Directions:

Vanilla Ice Cream

1 cup (250ml) whole milk
A pinch of salt
3/4 cup (165g) sugar
1 vanilla bean, split lengthwise OR 2 teaspoons (10ml) pure vanilla extract
2 cups (500ml) heavy (approx 35% butterfat) cream
5 large egg yolks
1 teaspoon (5ml) pure vanilla extract

1. Heat the milk, salt, and sugar in a medium saucepan until the liquid steams. Scrape out the seeds of the vanilla bean with a paring knife and add to the milk, along with the bean pod. Cover, remove from heat, and let infuse for an hour. (If you do not have a vanilla bean, simply heat the milk, salt, and sugar in a medium saucepan until the liquid steams, then let cool to room temperature.)

2. Set up an ice bath by placing a 2-quart (2 litre) bowl inside a large bowl partially filled with water and ice. Put a strainer on top of the smaller bowl and pour in the cream.

3. In another bowl, lightly beat the egg yolks together. Reheat the milk in the medium saucepan until warmed, and then gradually pour ¼ cup warmed milk into the yolks, constantly whisking to keep the eggs from scrambling. Once the yolks are warmed, scrape the yolk and milk mixture back into the saucepan of warmed milk and cook over low heat. Stir constantly and scrape the bottom with a spatula until the mixture thickens into a custard which thinly coats the back of the spatula.

4. Strain the custard into the heavy cream and stir the mixture until cooled. Add the vanilla extract (1 teaspoon [5ml] if you are using a vanilla bean; 3 teaspoons [15ml] if you are not using a vanilla bean) and refrigerate until thoroughly chilled, preferably overnight.

5. Remove the vanilla bean and freeze in an ice cream maker. If you don’t have an ice cream maker, you can make it without a machine. See instructions from David Lebovitz: http://www.davidlebovitz.com/archives/2007/07/making_ice_crea_1.html

Brown Butter Pound Cake

19 tablespoons (9.5 oz) (275g) unsalted (sweet) butter
2 cups (200g) sifted cake flour (not self-rising; sift before measuring) (See “Note” section for cake flour substitution)
1 teaspoon (5g) baking powder
1/2 teaspoon (3g) salt
1/2 cup (110g) packed light brown sugar
1/3 (75g) cup granulated sugar
4 large eggs
1/2 teaspoon pure vanilla extract

1. Preheat the oven to 325°F/160°C and put a rack in the center. Butter and flour a 9”x9” (23cmx23cm) square pan.

2. Place the butter in a 10” (25cm) skillet over medium heat. Brown the butter until the milk solids are a dark chocolate brown and the butter smells nutty. (Don’t take your eyes off the butter in case it burns.) Pour into a shallow bowl and chill in the freezer until just congealed, 15-30 minutes.

3. Whisk together cake flour, baking powder, and salt.

4. Beat the brown butter, light brown sugar, and granulated sugar in an electric mixer until light and fluffy, about 2 minutes. Beat in the eggs one at a time, mixing well, and then the vanilla extract.

5. Stir in the flour mixture at low speed until just combined.

6. Scrape the batter into the greased and floured 9”x9” (23cmx23cm) square pan. Smooth the top with a rubber spatula and rap the pan on the counter. Bake until golden brown on top and when a toothpick inserted into the center comes out clean, about 25 minutes.

7. Cool in the pan 10 minutes. Run a knife along the edge and invert right-side-up onto a cooling rack to cool completely.

Chocolate Glaze (For the Ice Cream Petit Fours)

9 ounces (250g) dark chocolate, finely chopped
1 cup (250 ml) heavy (approx 35% butterfat) cream
1 1/2 tablespoons (32g) light corn syrup, Golden syrup, or agave nectar
2 teaspoons (10ml) vanilla extract

Stir the heavy cream and light corn syrup in a small saucepan over medium heat until it comes to a boil. Remove from heat and add the dark chocolate. Let sit 30 seconds, then stir to completely melt the chocolate. Stir in the vanilla and let cool until tepid before glazing the petit fours.

Assembly Instructions 
1. Line a 9”x9” (23cmx23cm) pan with plastic wrap, so that no sides of the pan are exposed and so there is some extra plastic wrap hanging off the sides. Spread 1 ¾ to 2 cups (450ml to 500ml) ice cream into the pan. Cover with more plastic wrap and freeze several hours.

2. Once the brown butter pound cake has completely cooled, level the top with a cake leveler or a serrated knife. Then split the cake in half horizontally to form two thin layers.

3. Unwrap the frozen ice cream. Flip out onto one of the layers of cake and top with the second layer of cake. Wrap well in plastic wrap and return to the freezer overnight.

4. Make the chocolate glaze (see above.)

5. While the glaze cools, trim ¾” (2cm) off each side of the ice cream cake to leave a perfectly square 7.5” (19cm) ice cream cake. Cut the cake into twenty five petit fours, each 1.5”x1.5” (4cmx4cm).

6. Glaze the petit fours one at a time: place a petit four on a fork and spoon chocolate glaze over it.

7. Place the petit fours on a parchment-lined baking sheet and return to the freezer for one hour.

Tuesday, August 24, 2010

Crunchy and Custardy Peach Tart (TWD)


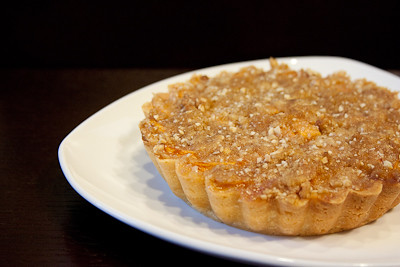
This week's Tuesdays with Dorie (TWD) recipe was chosen by Rachel of Sweet Tarte: Crunchy and Custardy Peach Tart.  I was excited about this week's pick because I love anything with baked fruit and I especially love anything with a streusel topping... so this tart was calling my name! :)

Instead of one large tart I had to make a mini tart because while my husband was out at the store picking up some things, I asked him to go ahead and get me three large peaches. I did specify on the list large peaches. What did he come home with? Three small peaches. Nothing is inherently wrong with small peaches, but it would have been nice if he had bought more peaches to compensate for the fact that these were small and not large. Not my dear husband, of course. He simply bought what I asked him to buy (sort of) - three peaches. So sadly, I had to settle for a smaller peach tart instead of a magnificent 9-inch tart! :(


I halved everything in this recipe, except for the streusel topping because you really can't have too much of a good thing :) In the end, I think the amount of topping was just right (although it did obscure my beautifully slices peaches). If I ever get around to making the full-sized version of this tart, I will definitely double the topping!

Thanks Rachel, for hosting this week.  I loved this tart. The creamy custard had just a hint of almond that complemented the peaches perfectly. I think I'd choose this tart over a peach pie, any day. If you would like the recipe, you can find it here. Make sure you check out the TWD Blogroll, to see how everyone else enjoyed this peachy treat!

Tuesday, August 17, 2010

Oatmeal Breakfast Bread (TWD)


This week's Tuesdays with Dorie (TWD) recipe was chosen by Natalie of Oven Love: Oatmeal Breakfast Bread. Yikes! I actually made this a week ago but almost forgot to post today!

The recipe is super simple and I love that it mostly uses applesauce instead of oil or butter. I omitted the nuts from the streusel topping, and still got a nice, sugary, crumbly crust on top (my favorite part!). As the name implies, the bread is packed with a good bit of oatmeal, but I have to say that I could not really taste much of the oats. Still, the combination of spices was wonderful (I might add some apples to this the next time I make it) and the oatmeal definitely made the bread seem "healthier" so the entire loaf was devoured within 24 hours in our household ;) 

Thanks Natalie, for hosting this week. If you would like the recipe, you can find it here. Make sure you check out the TWD Blogroll, to see how everyone else enjoyed this wonderful breakfast treat!

Sunday, August 8, 2010

Chocolate Raspberry Truffle Torte (SMS)


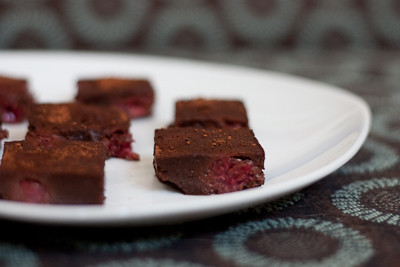
This week's Sweet Melissa Sundays (SMS) recipe was chosen by Jennifer of The Rookie Baker: Chocolate Raspberry Truffle Torte. I think the name is actually a bit of a misnomer because a torte is made with eggs, sugar, and ground nuts instead of flour.  This is actually just a flourless chocolate cake studded with fresh raspberries.  Unlike most flourless chocolate cakes, however, this one is not dense and overwhelming.  On the other hand, the name is quite fitting because it tastes just like a chocolate truffle.

I made my "torte" in a 9-inch springform pan (instead of 8-inch) so my torte ended up thinner than it was supposed to be, but thankfully it still turned out just fine despite no change on my part in the baking time. Since I was sending this to work with my husband, I ended up cutting the torte into easy to serve squares (and kept the odd shaped pieces for myself!). The torte really does taste like rich and creamy raspberry truffles.

Thanks Jennifer, for hosting this week. I loved the simplicity of this recipe and will definitely be making this one again. If you would like the recipe, you can find it here. Make sure you check out the Sweet Melissa Sundays Blog Roll to see how everyone else enjoyed this chocolatey treat.

*Recipe notes:
- The flavor of this torte will be reflected by the quality of chocolate you choose so choose a high quality chocolate. I, however, substituted semisweet chocolate chips in place of the bittersweet chocolate and still enjoyed the flavor :)
- After the 25 minute baking time, this torte may not look like it's fully baked but simply let it cool as directed and it will set just fine.

Tuesday, August 3, 2010

Gingered Carrot Cookies (TWD)


This week's Tuesdays with Dorie (TWD) recipe was chosen by Natalia of gatti fili e farina : Gingered Carrot Cookies.  I actually almost skipped this week because Dorie describes these cookies as tasting almost like scones and I'm not a big scone fan.  I'm so glad I decided to give it a go, though, because these cookies are fabulous!

When Dorie first created these, she set out to make a cookie that tasted like carrot cake.  They definitely don't taste like carrot cake at all, but that doesn't mean that they aren't good.  They are delicious little morsels! I'm not quite sure if I would consider these scone-like, but they are definitely cakey cookies.  All the add-ins - the carrots, coconut, and raisins (I omitted the nuts) - gave these cookies a nice chewy texture.  The ginger gave these cookies the perfect little boost too!

Thanks Natalia, for hosting this week. If you would like the recipe, you can find it here. Make sure you check out the TWD Blogroll, to see how everyone else enjoyed these sweet treats!

Tuesday, July 27, 2010

Swiss Roll Ice Cream Cake (DB)


The July 2010 Daring Bakers’ challenge was hosted by Sunita of Sunita’s world – life and food. Sunita challenged everyone to make an ice-cream filled Swiss roll that’s then used to make a bombe with hot fudge. Her recipe is based on an ice cream cake recipe from Taste of Home.

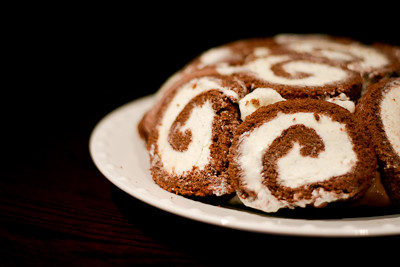
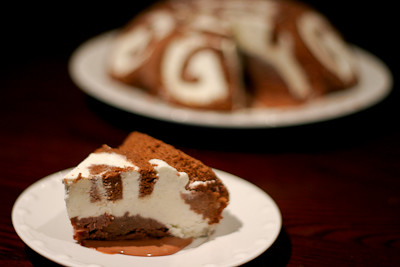
This ice cream cake was a welcome challenge during the hot summer months! I decided to halve the entire recipe and made a mini cake (that was still large enough to serve 12 people).

The first component was a swiss roll that is filled with a vanilla whipped cream.  I was familiar with the rolling method, as I've made pumpkin rolls in the past.  The only change I made here was to use a 13x9-inch pan instead.  Even though I followed the recipe exactly, I felt like there was way too much whipped cream for the amount of cake present.  Plus, I think the cake would have been better if the roll had been filled with ice cream instead of just whipped cream.  So, if I make this again, I'd probably fill it with chocolate ice cream instead.


The ice cream layers and fudge sauce came together quite nicely.  I was at my mom's place when I made this recipe, so I made the ice cream without an ice cream maker.  If you don't have an ice cream maker, you can find instructions on how to make your own ice cream here.  I think my favorite part of this cake was the chocolate ice cream.  I loved how it was rich and creamy without being a custard ice cream recipe.  I will definitely be making it again.

As a whole, this recipe was fun to make, but I'm not sure if I'd make it again.  I'll definitely make the chocolate ice cream again, but when it comes to ice cream cakes, I think I prefer a traditional ice cream cake.

Thanks Sunita, for hosting this month's challenge. Make sure you check out the Daring Bakers' Blogroll to see how everyone else enjoyed this cool and creamy summer treat.

Swiss roll ice cream cake
by Sunita (inspired by the Swiss swirl ice cream cake from the Taste of Home website)
Printable PDF Recipe

The Swiss rolls-
Preparation time- 10 minutes
Baking time- 10-12 minutes
Rolling and cooling time- at least 30 minutes
Filling-5-8 minutes
Filling and rolling- 5-10 minutes
Ingredients-
6 medium sized eggs
1 C / 225 gms caster sugar /8 oz+ extra for rolling
6 tblsp / 45gms/ 3 oz of all purpose (plain) flour + 5 tblsp/40gm /2.5 oz of natural unsweetened cocoa powder, sifted together
2 tblsp /30ml / 1 fl oz of boiling water
a little oil for brushing the pans

For the filling-
2C / 500 mls/ 16 fl oz of whipping cream
1 vanilla pod, cut into small pieces of about ½ cm (or 1 tsp vanilla extract)
5 tblsp / 70gms/2.5oz of caster sugar

Method-
    1. Pre heat the oven at 200 deg C /400 deg F approximately. Brush the baking pans ( 11 inches by 9 inches ) with a little oil and line with greaseproof baking paper. If you have just one pan, bake one cake and then let the pan cool completely before using it for the next cake.
    2. In a large mixing bowl, add the eggs and sugar and beat till very thick; when the beaters are lifted, it should leave a trail on the surface for at least 10 seconds.
    3. Add the flour mixture, in three batches and fold in gently with a spatula. Fold in the water.
    4. Divide the mixture among the two baking pans and spread it out evenly, into the corners of the pans.
    5. Place a pan in the centre of the pre heated oven and bake for about 10-12 minutes or till the centre is springy to the touch.
    6. Spread a kitchen towel on the counter and sprinkle a little caster sugar over it.
    7. Turn the cake on to the towel and peel away the baking paper. Trim any crisp edges.
    8. Starting from one of the shorter sides, start to make a roll with the towel going inside. Cool the wrapped roll on a rack, seam side down.
    9. Repeat the same for the next cake as well.
    For the filling
      1. Grind together the vanilla pieces and sugar in a food processer till nicely mixed together. If you are using vanilla extract, just grind the sugar on its own and then add the sugar and extract to the cream.
      2. In a large bowl, add the cream and vanilla-sugar mixture and beat till very thick.
      3. Divide the cream mixture between the completely cooled cakes.
      4. Open the rolls and spread the cream mixture, making sure it does not go right to the edges (a border of ½ an inch should be fine).
      5. Roll the cakes up again, this time without the towel. Wrap in plastic wrap and chill in the fridge till needed, seam side down.

        The vanilla ice cream-
        Preparation time-5 minutes+freezing
        I have made the ice cream without an ice cream maker.
        Ingredients-
        2 and ½ C / 625 ml / 20 fl oz of whipping cream
        1 vanilla bean, minced or 1 tsp/ 5 ml/ .15 fl oz vanilla extract
        ½ C / 115gms/ 4 oz of granulated sugar

        Method-
        Grind together the sugar and vanilla in a food processor. In a mixing bowl, add the cream and vanilla –sugar mixture and whisk lightly till everything is mixed together. If you are using the vanilla extract, grind the sugar on its own and then and the sugar along with the vanilla extract to the cream.

        Pour into a freezer friendly container and freeze till firm around the edges. Remove from the freezer, beat till smooth and return to the freezer. Do this 3-4 times and then set completely.

        The Hot fudge sauce- I made this just after adding the layer of vanilla ice cream to the cake.
        Preparation time-2 minutes
        Cooking time-2 minutes
        Ingredients-
        1 C / 230gms/ 8 oz of caster sugar
        3 tblsp / 24gms/1.5 oz of natural unsweetened cocoa powder
        2 tblsp /15gms/ 1 oz of cornflour/cornstarch
        1 and ½ C /355ml /12 fl oz of water
        1 tblsp /14gms/ 1 oz butter
        1 tsp/5 ml / .15 fl oz vanilla extract

        Method-
        1. In a small saucepan, whisk together the sugar, cocoa powder, cornflour and water.
        2. Place the pan over heat, and stir constantly, till it begins to thicken and is smooth (for about 2 minutes).
        3. Remove from heat and mix in the butter and vanilla. Keep aside to cool .

        The chocolate ice cream-
        Preparation time- 5 minutes + freezing
        Ingredients-
        2C/ 500 ml whipping cream
        1 C/230gms/8 oz caster sugar
        3 tblsp/ 24 gms/1.5 oz of natural unsweetened cocoa powder

        Method-
        1. Grind together the sugar and the cocoa powder in a food processor .
        2. In a saucepan, add all the ingredients and whisk lightly.
        3. Place the pan over heat and keep stirring till it begins to bubble around the edges.
        4. Remove from heat and cool completely before transferring to a freezer friendly container till firm around the edges. If you are using an ice cream maker, churn the ice cream according to the manufacturer’s instruction, after the mixture has cooled completely. 
        5. Remove from the freezer, beat till smooth and return to the freezer. Do this 3-4 times and then set completely.
        Assembly-


        1. Cut the Swiss rolls into 20 equal slices ( approximately 2 cms each ).
        2. Cover the bottom and sides of the bowl in which you are going to set the dessert with cling film/plastic wrap.
        3. Arrange two slices at the bottom of the pan, with their seam sides facing each other. Arrange the Swiss roll slices up the bowl, with the seam sides facing away from the bottom, to cover the sides of the bowl. Cover the bowl with plastic wrap and freeze till the slices are firm (at least 30 minutes).
        4. Soften the vanilla ice cream. Take the bowl out of the freezer, remove the cling film cover and add the ice cream on top of the cake slices. Spread it out to cover the bottom and sides of the bowl. Cover the bowl with plastic wrap and freeze till firm ( at least 1 hour)
        5. Add the fudge sauce over the vanilla ice cream, cover and freeze till firm . ( at least an hour)
        6. Soften the chocolate ice cream and spread it over the fudge sauce. Cover with plastic wrap and freeze for at least 4-5 hours till completely set .
        7. Remove the plastic cover, and place the serving plate on top of the bowl. Turn it upside down and remove the bowl and the plastic lining. If the bowl does not come away easily, wipe the outsides of the bowl with a kitchen towel dampened with hot water. The bowl will come away easily.
        8. Keep the cake out of the freezer for at least 10 minutes before slicing, depending on how hot your region is. Slice with a sharp knife, dipped in hot water.
        * Recipe Notes -
        • You do not need an ice cream maker for this recipe. But if you will be using one, make sure you churn the ice cream according to the manufacturer’s instructions after mixing the ingredients.
        • Whipping cream is a lighter version of double cream, with at least 35 per cent fat, and it whips beautifully without being quite so rich.
        • Vanilla extract is made from vanilla beans that have been steeped in alcohol while vanilla essence is commercial manufactured by chemicals.
        • Caster sugar is finely ground granulated sugar. It can also be found as “superfine sugar”, “fruit sugar” or “quick dissolving sugar”. If you can’t find it, you can make your own by whizzing some regular granulated sugar in the food processor or blender.
        • Keep aside enough time for cooling and chilling the rolls and also for the layers to firm up before adding the next one. Moreover, the ice creams have also got to be made before assembling. I spread out the challenge over two days. I made the cakes and ice creams on the first day, and the fudge topping and assembly on the second day.
        • While adding the final layer with the second ice-cream, make sure not to add it right to the brim. It may spill and will not look good.
        • While inverting the final dessert onto the serving plate, if the cling film refuses to budge from the bowl, just wipe the outside of the bowl with a kitchen towel dampened with hot water. The bowl will release from the dessert very easily.
        • Take the dessert out of the freezer at least 10 minutes before serving, of course depending on how hot it is in your neck of the woods.
        • Dip the knife in hot water for easy slicing.

          Sunday, July 25, 2010

          Toasted Almond Lemon Bars (SMS)


          This week's Sweet Melissa Sundays (SMS) recipe was chosen by Rebecca of Indecisive Baker: Toasted Almond Lemon Bars.  I love a good lemon bar - there is just something to be said about a crumbly shortbread crust and sweet, tart, lemon filling!

          Melissa's shortbread crust is actually an almond shortbread crust.  This, along with the almond extract that is added to the filling sets it apart from traditional lemon bars.  I really think the almond extract added an extra dimension to these bars so please don't skip it if you make these!

          I actually had some issues with my crust.  I froze my crust for 1 hour before baking, and even then my pie weights (old socks filled with rice) caused the dough to stick to my foil! Next time I will butter the foil before covering the crust.  Luckily the crust took longer than the indicated 20-25 minutes to bake because I was able to scrape the dough that was stuck to the foil (which would have left a big hole in my crust!) and put it back into the pan! I then continued to bake the crust, uncovered, for another 10 minutes or so until it was lightly golden brown and baked through.

          The filling was a cinch and I had no issues there, though I wonder if I maybe whipped the eggs a little too much because I did end up with a little bit of a bubbly crust on top.  It didn't matter though, as it did not affect the taste of the lemon bars and I was able to cover the top up with the powdered sugar.


          All in all, I enjoyed these lemon bars and will definitely be making them again.  If you're looking to make some fancy lemon bars, try these Slammin' Citrus Squares which are lemon bars topped with white chocolate lemon balm icing.  The filling also contains orange and lime zest which gives it an added little zip!

          Thanks Rebecca, for hosting this week. If you would like the recipe, you can find it here. Make sure you check out the Sweet Melissa Sundays Blog Roll to see how everyone else enjoyed these sweet, tart treats.

          *Recipe notes:
          - I would recommend freezing the crust for at least 1-2 hours before baking.  Then, butter the foil before covering the crust and putting it in the oven.  If you freeze the dough long enough, you will not need to use pie weights when baking.
          - My crust took about 35 minutes to bake, not the indicated 20-25 minutes.