Sunday, October 5, 2008

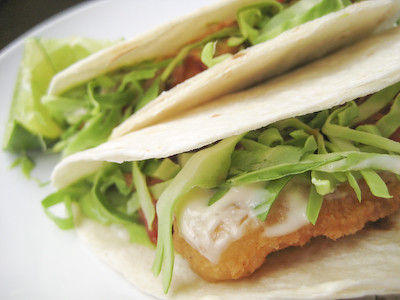
Baja Fish Tacos


Having grown up in southern California, I love fish tacos. I've only ever had them in restaurants, though... so I thought it was about time that I tried making them myself. Luckily, these are so simple to make. When I went in search of a great fish taco recipe, I decided to turn to none other than Susan of Food Blogga, who lives in San Diego. Being so close to the Mexican border, she's had the opportunity to taste some of the best fish tacos around.
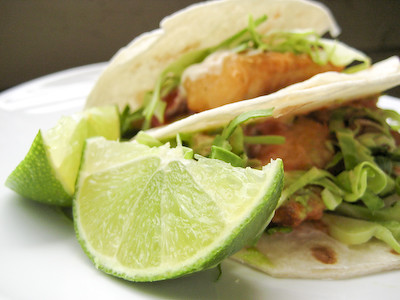

This recipe is so easy as is - but you can simplify it even more if you're short on time. Use a store bought salsa if you don't want to make pico de gallo from scratch. Bottled hot sauce can also be used in place of the chilies de arbol sauce. Use store bought guacamole or simply dice the avocado if you don't want to dirty up your food processor making the avocado sauce. And for those who won't eat anything with mayonnaise, please make the mayonesa sauce - just go light on the sauce when you assemble the fish tacos - it's just not the same if you don't use the it. (My husband, the mayo hater, didn't even notice that I snuck some mayonesa sauce into his fish tacos!)


These were delicious. The next time I make fish tacos, I think I'd like to try Susan's baked fish taco recipe instead (which can be found here - just scroll down). I don't really like frying things in my kitchen, and I'm sure they'd still taste just as good without the extra calories.
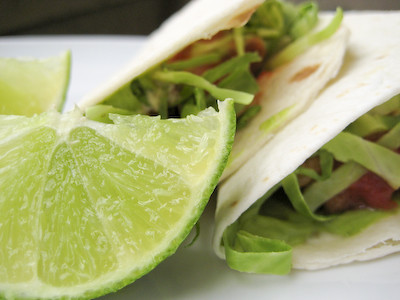

If you're a fan of fish tacos - or even if you've never tried them - you need to try these now! :) This is a wonderful weeknight meal for those who are busy because you can put it together in no time (and you can make everything except the avocado sauce ahead of time). Thanks Susan, for sharing this awesome recipe with us!

Baja-Style Fish Tacos
from Susan of Food Blogga, as seen on NPR

Tacos


Makes 24 servings, enough for 6 to 8 people

2 cups all-purpose flour
1 1/2 teaspoon baking powder
1/2 teaspoon granulated garlic
1/4 teaspoon cayenne
1/2 teaspoon dry mustard
1/2 teaspoon dried whole Mexican oregano, rubbed to a powder* (I didn't have any so I just used regular oregano)
Kosher salt
1/2 teaspoon freshly ground black pepper
12 ounces (1 bottle) cold beer, plus more to thin the batter if necessary
2 pounds firm, meaty fish (I use halibut or Pacific sea bass) (I used halibut; tilapia also works well)
A little squeeze of fresh lime juice, from 2 to 3 limes
Canola oil, for frying

Serve with:

24 (6-inch) corn tortillas, warmed (you can substitute flour tortillas, but the corn imparts a more authentic flavor) (I used flour tortillas)
Avocado sauce (recipe below)
Lime wedges
Mayonesa secret sauce (recipe below)
Salsa de chilies de arbol (recipe below)
Pico de gallo (use your own favorite recipe, or try this one)
Finely shredded green cabbage (not lettuce)
Cilantro leaves (optional)

For the batter, whisk together the flour, baking powder, garlic, cayenne, mustard, oregano and salt and pepper in a large bowl until well blended. Stir in the beer until there are no lumps. (The batter can be made several hours ahead and refrigerated.)

Cut fish into pieces the size and shape of your index finger. Sprinkle with some lime juice and salt.

Pour oil into a deep, wide pan to the depth of 2 inches and heat over medium-heat to 350 degrees (if you have a deep-fry thermometer). Otherwise, test the heat by dropping a little bit of the batter into the oil. It should quickly bounce to the surface and be surrounded by tiny bubbles.

Pat the fish dry with paper towel. Check the thickness of the batter by dipping a piece of fish in it; it should be the consistency of medium-thick pancake batter, coating the fish easily and dripping very little. Add a little beer or water if it seems too thick.

Add a few pieces of fish to the batter. Using tongs, lightly swish each piece until thoroughly coated. Remove fish, letting excess batter drip into the bowl before gently placing in the hot oil. Cook a few pieces at a time until they float and the batter is set but still light in color, about 2 to 3 minutes. If a piece sticks to the bottom of the pan, just leave it, and it will release itself.

Remove the fish to a rack to drain, reserving the frying oil. At this point the fish can be cooled and refrigerated, uncovered, if you're preparing ahead.

When you are ready to serve, reheat the oil to 350 degrees, and quickly refry the fish a few pieces at a time for about 1 minute until crisp and golden brown.

Heat tortillas on a dry griddle for 1 minute per side or, using metal tongs, simply hold over an open flame until warmed and slightly charred. (I wrapped my tortillas in foil and warmed in them in the oven at 375F for 10 minutes.)

To serve, place refried fish, warmed tortillas and condiments on a table so guests can make their own tacos. To assemble tacos, hold a tortilla in your hand, and spread a spoonful of avocado sauce on it (you can use diced avocados or guacamole instead). Place a piece of fried fish on top and sprinkle with a little lime juice. Drizzle with some mayonesa sauce, a few drops of chilies de arbol sauce (you can use bottled hot sauce instead) and some pico de gallo (or store bought salsa). Top it off with some shredded green cabbage and fresh cilantro.

*Whole Mexican oregano can be found in the Mexican food section of most major supermarkets or in Latin American markets.

Avocado Sauce

Makes 1/2 cup

1/4 ripe avocado, peeled
Pinch of salt
A few drops of lime juice
1 to 2 tablespoons water or milk
2 cilantro springs, stemmed and chopped (optional)

Place the avocado, salt and lime juice in a small food processor. Add 1 tablespoon water or milk (for a slightly creamier consistency) and pulse. Add more liquid as necessary until sauce is the consistency of thick cream. Add the cilantro and pulse until just blended.

Mayonesa Secret Sauce

Makes 1/2 cup

1/2 cup mayonnaise
1 teaspoon white vinegar
1 1/2 tablespoon water or milk

Place the mayonnaise in a small bowl and slowly stir in vinegar. Add water or milk until the sauce is thick and creamy.

Chilies de Arbol Sauce

Makes 1/2 cup

1 garlic clove, smashed with the side of a large knife
1 teaspoon canola oil
1 cup dried chilies de arbol (about 30 chilies), stemmed**
1/3 cup water
1/2 teaspoon salt
1 teaspoon white vinegar

Pour canola oil in a small skillet over low heat. Add smashed garlic and cook 4 to 5 minutes until golden and aromatic. Place in a small food processor.

Wearing gloves, seed the chilies (unless you want hotter sauce, in which case, leave the seeds), and place in the processor. Process until well pulverized. Add water and salt and puree until as smooth as possible. Scrape into a bowl and add the vinegar. Let stand at least 30 minutes. Taste for seasoning, adding more salt and/or vinegar as necessary.

**Chilies de arbol are thin, red chilies about 3 inches long, and can be found in the Mexican food section of most major supermarkets or in Latin American markets. These small chilies are big on heat, so use this sauce sparingly.

Thursday, October 2, 2008

Make Ahead Manicotti


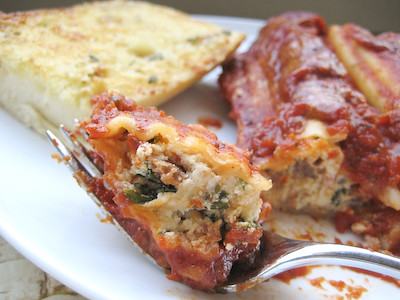
I love baked pasta dishes, but I'm not a big fan of baked ziti. It's a little too plain for me - just pasta, sauce, and cheese. I love this baked manicotti dish, though, because it has a nice blend of cheese and spinach. (I would bet that most picky kids wouldn't mind the spinach in this dish, either!) Sometimes I like to throw some hot Italian sausage and crushed red peppers into the mix to kick it up a notch too.

It can be time consuming stuffing the manicotti, but you can have it done in no time if you use a ziploc bag with the corner cut out or pastry bag. I've used a fork in the past to to fill them too. If you use freshly ground black pepper in this recipe, another tip I learned (from Alton Brown) is that twelve turns of your average pepper grinder will yield 1/8 teaspoon.

It's great because as the name states, you can make this ahead of time and then just pop it into the oven to bake when you get home from work and have dinner on the table in less than an hour. If you don't have the time to refrigerate this overnight, no worries... I have baked it immediately after assembly as well and it was still just as good. If you try this, you have to serve it with some homemade roasted garlic bread.


I'm also submitting this to the weekly Presto Pasta Nights, hosted by Ruth over at Once Upon a Feast.

Make Ahead Manicotti
from Allrecipes

1 pint ricotta cheese (I used part skim ricotta)
2 eggs
1 (10 ounce) package frozen chopped spinach, thawed and drained
1 cup shredded mozzarella cheese
1/2 cup grated Parmesan cheese
1 1/2 tablespoons white sugar (I omit this)
1/8 teaspoon salt
1/4 teaspoon ground black pepper (24 turns of the pepper grinder)
1/2 pound hot Italian sausage, crumbled and browned (optional)
1/4-1/2 tsp crushed red pepper flakes (optional - if you're using the sausage)
12 manicotti shells
1 (32 ounce) jar spaghetti sauce (I use 2 jars)

In a medium bowl, mix together ricotta cheese and eggs until blended. Stir in spinach, mozzarella cheese, 1/4 cup of the Parmesan cheese, sugar, salt and pepper (plus the sausage and crushed red pepper flakes if you are using them). Stuff mixture into uncooked pasta shells.

Spread 1/2 cup spaghetti sauce in the bottom of a medium baking dish (I use a 13 x 9-inch). Arrange stuffed pasta shells in a single layer over the sauce. Pour the remainder of the sauce over the shells (if you don't cover your pasta with enough sauce, it won't cook/soften properly in the oven), cover dish, and chill in the refrigerator for 8 hours, or overnight.

Preheat oven to 400 degrees F (200 degrees C). Bake covered for 40 minutes. Sprinkle with remaining Parmesan cheese, and bake for another 15 minutes.

Tuesday, September 30, 2008

Crème Brûlée (TWD)


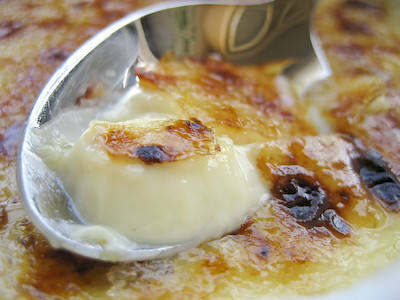
This week's Tuesdays with Dorie (TWD) recipe was chosen by Mari of Mevrouw Cupcake: Crème Brûlée. Crème brûlée - meaning "burnt cream" in French - is a simple dessert. It's a creamy baked custard topped with a sweet, crackly, caramelized sugar topping.


I love crème brûlée. It used to be one of my favorite desserts to order when dining out - until I realized how simple it is to make. My favorite part is the caramelized sugar on top - so when I first learned how to make this at home, I was thrilled because I could make the topping as thick as I wanted (the restaurants always make it too thin, in my opinion).


Crème brûlée is the perfect dessert to serve to dinner guests. It's simple to make, can be prepared ahead of time, and will impress most people because they only enjoy it at restaurants. The ingredient list is also short and sweet: cream, milk, eggs, sugar, and vanilla.


My caramelized sugar topping didn't turn out quite as lovely as the one depicted in Dorie's book, despite the fact that I used a crème brûlée torch. I'm not sure if that was because (a) I used brown sugar instead of white, (b) I didn't sift my sugar as directed in the recipe, or (c) I'm just not that talented ;) If you don't have a torch, you can always use your oven broiler to caramelize the sugar (I even used my toaster oven broiler before I acquired the torch) - but just be sure to keep a close eye on it because it goes from sweet and caramelized to bitter and burnt in just a few seconds!


My favorite type of crème brûlée is chocolate, but I wanted to try Dorie's basic vanilla crème brûlée recipe unaltered first, before playing around with it - in order to have a good basis of comparison. I found Dorie's recipe to be delightfully creamy without being too heavy. My favorite recipe contains four egg yolks, so it's heavier and more dense. I'm not sure that I prefer one over the other per se; they're just different and I think it depends on what you're in the mood for :) I also found the flavor of the vanilla in this to be quite strong - perhaps too strong - so I would consider decreasing the vanilla extract to one teaspoon the next time I make it. (Though my husband thought the vanilla flavor was just right.)


Thanks, Mari, for choosing this week's recipe. I loved it. If you would like the recipe, you can find it here. If you're a chocolate lover and have never tried chocolate crème brûlée, you have to try this other recipe. Make sure you visit the TWD Blog Roll to see how everyone else enjoyed this elegant dessert.

*A few notes about this recipe:
- Dorie does not use a water bath for this recipe; instead she uses a very low baking temperature (200F).
- You don't need to strain the mixture into the ramekins as long as you temper the eggs appropriately. Just add the hot liquid a tablespoon at a time until you've added 1/4 of it and you shouldn't have any problems. The straining will also help with some of the bubbles, but the caramelized sugar layer will hide any bubbles on top of your custard.
- Next time, I will add 1-1.5 teaspoons vanilla extract instead of 2 teaspoons.
- If you don't have whole milk on hand, you can use the other recipe I posted instead.
- Although I used shallow 4 ounce crème brûlée ramekins, I only got four servings from this recipe, instead of six.
- If you have the smaller, deeper ramekins like these, you'll have to increase your baking time. I think other TWD bakers noted that it took approximately 90-100 minutes to completely set.
- For more recipe tips, click here.

Saturday, September 27, 2008

Lavash Crackers with Roasted Red Pepper Dip


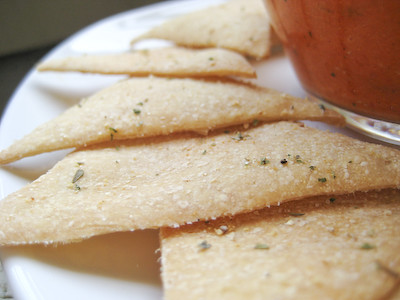
This month's Daring Bakers Challenge was chosen by Natalie of Gluten A Go Go and Shel of Musings From the Fishbowl: Lavash Crackers. Lavash is an Armenian-style cracker similar to other middle eastern and northern African flatbreads such as mankoush, pita, and kesret. The primary difference among these flatbreads is either how thick or thin they are rolled out or the type of oven in which they are baked.

I recently made some homemade crackers to serve with my baked brie, so I already knew how simple and delicious homemade crackers can be. Unfortunately, somehow the month go away from me and I thought the posting date for this month's challenge was a little closer to the end of the month. Imagine my surprise, then, when I went to check to see what the post date was a few days ago, only to find out I had two days left! Luckily, this challenge was not too labor intensive, so I was able to complete it in one day. I started these after lunch today, and here I am, posting them now :)

This month's challenge was different from most because for the first time, we were required to make something vegan. We also had the option of making these both vegan and gluten free, but seeing as no one in this household has gluten allergies, mine are not gluten free. We also had to make a vegan dip, spread, relish, or salsa to serve with these, but otherwise we had complete freedom to make whatever we desired.


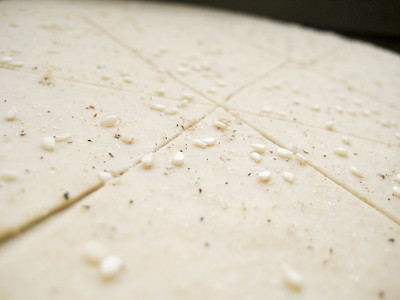
You can top these crackers with numerous different seasonings and spices, including poppy seeds, sesame seeds, paprika, cumin seeds, caraway seeds, or kosher salt. I decided to make half with salt, coarsely ground black pepper, and sesame seeds


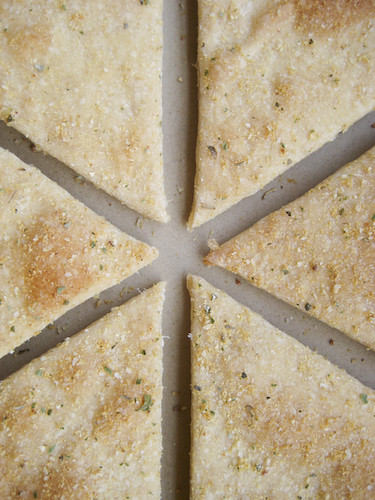
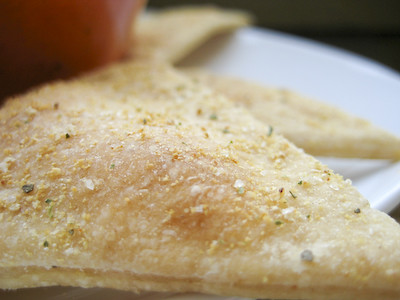
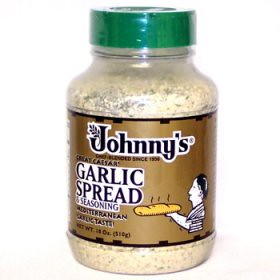
and the other half with Johnny's Great Caesar Garlic Spread and Seasoning.


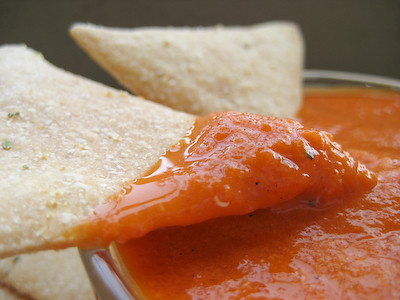
I originally wanted to serve these with some of my favorite homemade guacamole, but they didn't have any ripe avocados at the store this morning so I decided to make a roasted red pepper dip instead. Most of the roasted red pepper dips I came across online were not vegan, but I was able to find a vegan recipe on Delish.


This dip was so simple to make. The longest step was roasting the garlic, but you can use fresh minced garlic instead if you'd prefer. I simply placed the garlic cloves on some foil, drizzled them with olive oil, wrapped them up tightly in the foil and placed them in the oven with the crackers while they were baking. After the crackers were done, so was my roasted garlic! If you don't count the time it takes to roast the garlic, this dip only takes five minutes to prepare! This roasted red pepper dip was light and delicious. Next time I might add some chopped fresh basil as well for a little more flavor.


The crackers were very simple to make. I made them two different thicknesses. One batch I made paper thin and they came out super crispy and light. The second batch I made a bit thicker, and they came out more like pita chips. It really just depends on what you prefer. I really like the ones that were seasoned with the garlic seasoning; the other ones were a little bland, but maybe that was my fault for not adding enough (I seasoned very lightly since the recipe warns that a little bit goes a long way).


Thanks to Natalie and Shel for hosting this month's challenge. I really enjoyed trying another recipe for homemade crackers. Make sure you visit the Daring Bakers Blogroll to see hundreds of other variations on these!


Lavash Crackers
from The Bread Baker's Apprentice: Mastering the Art of Extraordinary Bread, by Peter Reinhart

The key to a crisp lavash is to roll out the dough paper-thin. The sheet can be cut into crackers in advance or snapped into shards after baking. The shards make a nice presentation when arranged in baskets.

Makes 1 sheet pan of crackers

1 1/2 cups (6.75 oz) unbleached bread flour or gluten free flour blend (If you use a blend without xanthan gum, add 1 tsp xanthan or guar gum to the recipe)
1/2 tsp (.13 oz) salt
1/2 tsp (.055 oz) instant yeast
1 Tb (.75 oz) agave syrup or sugar
1 Tb (.5 oz) vegetable oil
1/3 to 1/2 cup + 2 Tb (3 to 4 oz) water, at room temperature
Poppy seeds, sesame seeds, paprika, cumin seeds, caraway seeds, or kosher salt for toppings

1. In a mixing bowl, stir together the flour, salt yeast, agave, oil, and just enough water to bring everything together into a ball. You may not need the full 1/2 cup + 2 Tb of water, but be prepared to use it all if needed.

2. For Non Gluten Free Cracker Dough: Sprinkle some flour on the counter and transfer the dough to the counter. Knead for about 10 minutes, or until the ingredients are evenly distributed. The dough should pass the windowpane test (click here for a discription of this) and register 77 degrees to 81 degrees Fahrenheit (I used my dough hook on the KitchenAid Mixer and kneaded it on Speed 2 for at least 30 minutes - it never became a beautiful, thin, windowpane, but it did stretch a little more). The dough should be firmer than French bread dough, but not quite as firm as bagel dough (what I call medium-firm dough), satiny to the touch, not tacky, and supple enough to stretch when pulled. Lightly oil a bowl and transfer the dough to the bowl, rolling it around to coat it with oil. Cover the bowl with plastic wrap.

or

2. For Gluten Free Cracker Dough: The dough should be firmer than French bread dough, but not quite as firm as bagel dough (what I call medium-firm dough), and slightly tacky. Lightly oil a bowl and transfer the dough to the bowl, rolling it around to coat it with oil. Cover the bowl with plastic wrap.

3. Ferment at room temperature for 90 minutes, or until the dough doubles in size. (You can also retard the dough overnight in the refrigerator immediately after kneading or mixing).

4. For Non Gluten Free Cracker Dough: Mist the counter lightly with spray oil and transfer the dough to the counter. Press the dough into a square with your hand and dust the top of the dough lightly with flour. Roll it out with a rolling pin into a paper thin sheet about 15 inches by 12 inches. You may have to stop from time to time so that the gluten can relax. At these times, lift the dough from the counter and wave it a little, and then lay it back down. Cover it with a towel or plastic wrap while it relaxes. When it is the desired thinness, let the dough relax for 5 minutes. Line a sheet pan with baking parchment. Carefully lift the sheet of dough and lay it on the parchment. If it overlaps the edge of the pan, snip off the excess with scissors.

or

4. For Gluten Free Cracker Dough: Lay out two sheets of parchment paper. Divide the cracker dough in half and then sandwich the dough between the two sheets of parchment. Roll out the dough until it is a paper thin sheet about 15 inches by 12 inches. Slowly peel away the top layer of parchment paper. Then set the bottom layer of parchment paper with the cracker dough on it onto a baking sheet.

5. Preheat the oven to 350 degrees Fahrenheit with the oven rack on the middle shelf. Mist the top of the dough with water and sprinkle a covering of seeds or spices on the dough (such as alternating rows of poppy seeds, sesame seeds, paprika, cumin seeds, caraway seeds, kosher or pretzel salt, etc.) Be careful with spices and salt - a little goes a long way. If you want to precut the cracker, use a pizza cutter (rolling blade) and cut diamonds or rectangles in the dough. You do not need to separate the pieces, as they will snap apart after baking. If you want to make shards, bake the sheet of dough without cutting it first.

5. Bake for 15 to 20 minutes, or until the crackers begin to brown evenly across the top (the time will depend on how thinly and evenly you rolled the dough).

6. When the crackers are baked, remove the pan from the oven and let them cool in the pan for about 10 minutes. You can then snap them apart or snap off shards and serve.

Roasted Red Pepper Dip
adapted from Delish

12 ounces canned fire roasted red peppers (alternatively, you can roast your own*)
3 cloves of garlic, roasted**
1 Tbsp extra virgin olive oil
Splash of red wine vinegar
1/4 tsp coarse salt
1/8 tsp ground black pepper

Combine all ingredients in food processor/mini prep/blender until combined.

Yield: Approximately 1/2 cup

*How to Roast a Red Pepper:

If you have a gas stove, you can place the peppers over the open flame until the skin becomes blackened. Once the skins are brownish-black, remove from the oven and immediately place in a bowl and cover with plastic wrap. Let sit for 20 minutes or so (or until the peppers have time to cool and “sweat”). Once they have cooled you will be able to peel the skins right off.

Otherwise, you can use the oven method. Cut the peppers in half and clean out the seeds and innards. Place them on a baking sheet skin side up. Place the sheet in a 450-500 degree oven set on broil. The skin will start to blacken and soften in 7-10 minutes. Once the skins are brownish-black, remove from the oven and immediately place in a bowl and cover with plastic wrap. Let sit for 20 minutes or so (or until the peppers have time to cool and “sweat”). Once they have cooled you will be able to peel the skins right off.

** How to Roast Garlic:

Place the garlic cloves on a piece of aluminum foil. Drizzle olive oil over the garlic and then wrap it up in the foil. Bake at 350F for 30 minutes. You can also use finely minced garlic in this recipe to save time if you don't want to roast the garlic.

Tuesday, September 23, 2008

Lemon Basil Dimply Peach Cake (TWD)


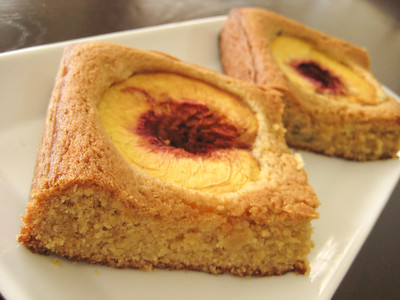
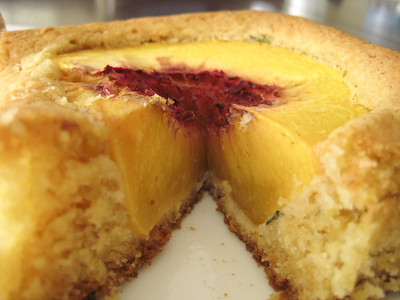
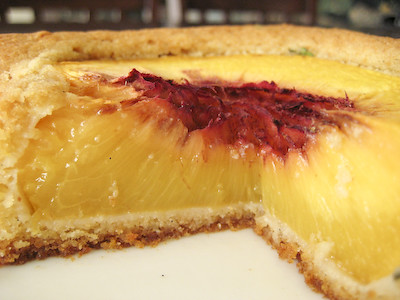
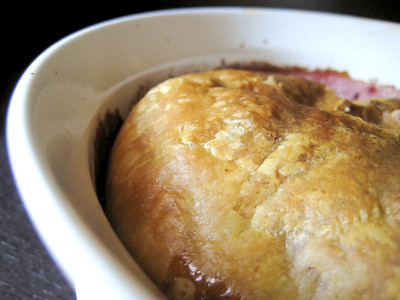
This week's Tuesdays with Dorie (TWD) recipe was chosen by Michelle of Fool for Food: Dimply Plum Cake. I was at home with my parents these past few days, so I had to work with what was on hand. They didn't have any plums, but they did have plenty of peaches so I went with Dorie's suggestion to adapt the recipe into a Lemon Basil Dimply Peach Cake instead.


I also didn't have any vanilla extract, so I used a vanilla bean instead. Look at those beautiful flecks of vanilla bean seeds and lemon zest! :)


This cake was just okay for me. I'm not sure why, because it seems like all the other TWD bakers loved it. The flavors of the lemon and basil in this cake were wonderful, but I found the cake itself to be very dry. Perhaps I overbaked it? I used a 9-inch pan instead of an 8-inch pan and still baked it for the full 40 minutes, but I tried to check it early and it did not test done at 30 minutes. I probably should have tested it again at 35 minutes. Or maybe it was because I used unbleached flour? If you have any ideas, let me know.

I've included the adapted recipe below, as I made it. If you would like the original recipe, you can find it here (with recipe tips here). Make sure you visit the TWD Blog Roll to see how everyone else enjoyed this dimply little treat.

Sorry this post is a bit shorter than usual, but I've been out of town for a few days to attend my grandmother's funeral and barely had the chance to get this done. It's still hard to believe that she's gone, even though we knew her time left with us was short (she had liver cancer). It was only by God's grace that she passed away without any pain or suffering. We find solace knowing that she is in a better place now.

Lemon Basil Dimply Peach Cake
adapted from Baking: From My Home to Yours, by Dorie Greenspan

1 1/2 cups all-purpose flour
2 teaspoons baking powder
1/8 teaspoon salt (alternatively, you can use unsalted butter and 1/4 tsp salt)
5 tablespoons salted butter, at room temperature
3/4 cup (packed) light brown sugar
2 large eggs
1/3 cup flavorless oil, such as canola or sunflower
Grated zest of 1 lemon
1 vanilla bean, split in half lengthwise and seeded - learn how here (or 1 1/2 teaspoons pure vanilla extract)
2 large peaches, halved and pitted
3 basil leaves, finely chopped


Getting ready:
Center a rack in the oven and preheat the oven to 350 degrees F. Butter an 8-inch square baking pan, dust the inside with flour, tap out the excess and put the pan on a baking sheet. (I used a 9-inch pan so my cake was thinner - consequently, I had to slice off the bottoms of my peaches so they wouldn't be popping up over the cake. My peaches were about 1-inch thick/tall after I sliced them.)

Whisk together the flour, baking powder, and salt.

Working with a mixer, beat the butter at medium speed until it’s soft and creamy, about 3 minutes. Add the sugar and beat for another 3 minutes, then add the eggs, one at a time, and beat for a minute after each egg goes in. Still working on medium speed, beat in the oil, zest and vanilla bean seeds—the batter will look smooth and creamy, almost satiny. Reduce the mixer speed to low and add the dry ingredients, mixing only until they are incorporated.

Add the chopped basil and run a spatula around the bowl and under the batter, mixing just to make sure there are no dry spots, then scrape the batter into the pan and smooth the top. Arrange the peaches cut side up in the batter and jiggle the peaches a tad just so they settle comfortably into the batter.

Bake for about 40 minutes, or until the top is honey brown and puffed around the plums and a thin knife inserted into the center of the cake comes out clean. Transfer the cake to a rack and cool for 15 minutes—during which time the plums’ juices will seep back into the cake—then run a knife around the sides of the pan and unmold the cake. Invert and cool right side up.

Storing: You can wrap the cake and keep it at room temperature for up to 2 days, during which time it will get softer and moister.

Yield: 8 servings


Friday, September 19, 2008

Baked Brie with Homemade Crackers


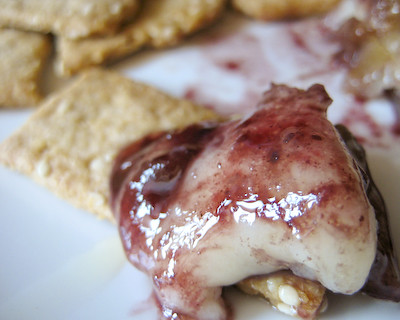
I was first introduced to Baked Brie several years ago by my friend Kari. She brought it for a potluck and I instantly fell in love with it. Even more so when I found out just how easy it is to make! It's the perfect appetizer to bring to a party when you don't have much time on your hands because it only takes about thirty minutes for both the prep and baking!


I recently found myself craving some baked brie. I had everything I needed, except the crackers to go with them. Usually I love to serve baked brie with wheat thins, as I like how their salty, grainy flavor complements the sweet and smooth flavor of the brie. I was too lazy to put on a change of clothes and run to the store, though, so I found myself flipping through The King Arthur Flour Baker's Companion for a cracker recipe.


I never thought I'd ever make my own crackers - or choose to make them from scratch instead of running to the store to get them. Once you realize how much better homemade stuff is, compared to the store bought prepackaged stuff you can get, you're much more motivated to making things yourself though. Making homemade pita bread was definitely a testament to that. So with that experience in mind, I forged ahead with this cracker recipe.


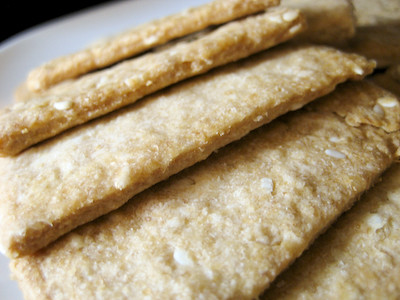
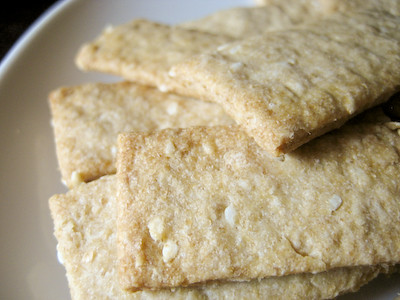
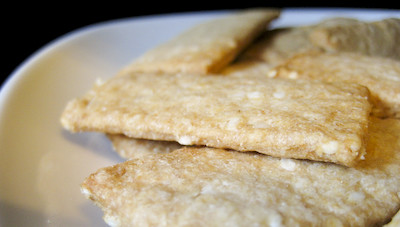
I was surprised at how easy it was to make these crackers - the method was very similar to making biscuits, except you roll the doll out into a super thin layer and then cut them into rectangles. These crackers are called "Thin Wheat Crackers" and I thought they might taste like Wheat Thins, but they didn't really taste like those at all. The sesame seeds were definitely a nice touch, and these crackers were really good... but I wouldn't call them Wheat Thins. They sort of remind me of the little sesame crackers you get in those Asian snack mixes. If you're not a big fan of sesame seeds, just omit them from the recipe.


When my husband saw me baking these, he asked me what I was making. I informed him that I was making crackers from scratch, at which point he laughed at me and then walked away. After these came out of the oven, he could not keep his hands off of them. I told him he should never doubt me again! ;)


Baked Brie

1 Puff Pastry Sheet, thawed
1 round of Brie (I like to remove the white "skin" from my brie using a vegetable peeler but that is optional)
12 ounces fruit preserves (my favorite is cherry)

Preheat oven to 350F

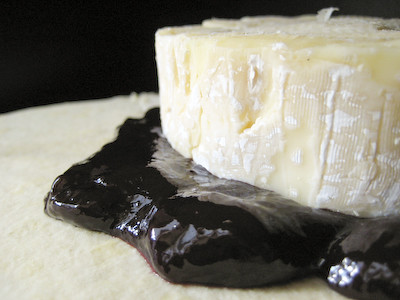
Unfold the puff pastry into a single layer on a baking sheet. Spread the fruit preserves over the center. Place the brie on top of the fruit preserves.


Fold the pastry dough over the top of the brie and press the edges together to seal tightly.

You can bake the brie as is on the baking sheet, but I prefer to invert it into an oven safe bowl so the seams are on the bottom, and any juices that leak will stay in the bowl.

Bake for 25 minutes. Let cool for 10 to 15 minutes before serving. Serve with your favorite crackers or some sliced apples.


Thin Wheat Crackers
from The King Arthur Flour Baker's Companion

1 cup (4.25 ounces) unbleached pastry flour or unbleached all purpose flour (I used bleached all purpose flour)
1 cup (5 ounces) whole wheat flour or white whole wheat flour
1/4 cup (1.25 ounces) sesame seeds
1/4 cup (1.75 ounces) granulated sugar
1/2 tsp salt
4 tbsp (1/2 stick, 2 ounces) butter
scant 1/2 cup (3.75 ounces) milk (I used skim)
Coarse salt (optional)

Preheat oven to 325F.

In a large bowl, combine the flours, sesame seeds, sugar and salt. Cut in the butter (use a pastry blender or two knives), then stir in the milk, adding just enough milk to form a workable dough.

Divide the dough into three pieces and roll it out ultra-thin, one piece at a time- 1/16 inch, if you can manage it (the thinner they are, the better; the thicker ones don't taste as good). Sprinkle with a bit of coarse salt, if desired, and use the rolling pin to press the salt into the dough.

Cut the dough into 1 x 2-inch rectangles. Transfer the crackers to baking sheets and bake for 20 to 25 minutes, until they begin to brown. Cool on a rack.

Yield: About 8 Dozen Crackers

Tuesday, September 16, 2008

Chocolate Chunkers (TWD)


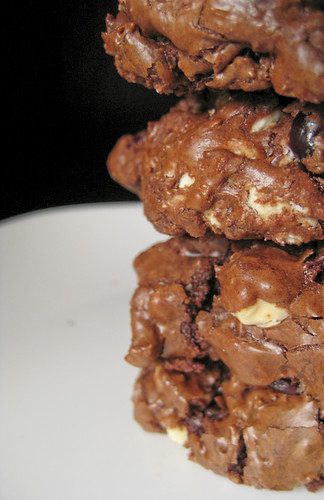
This week's Tuesdays with Dorie (TWD) recipe was chosen by Claudia of Fool for Food: Chocolate Chunkers. I already said last week that I'm not a big fan of chocolate cookies, but Dorie proved me wrong with her Chocolate Malted Whopper Drops, so I went into this with an open mind.


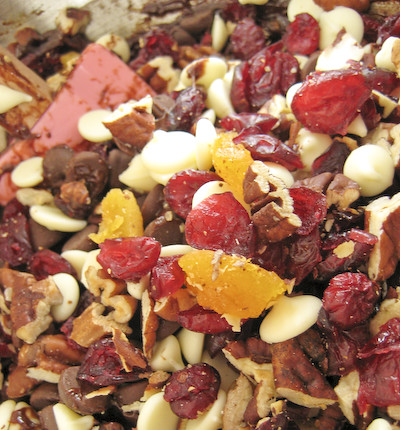
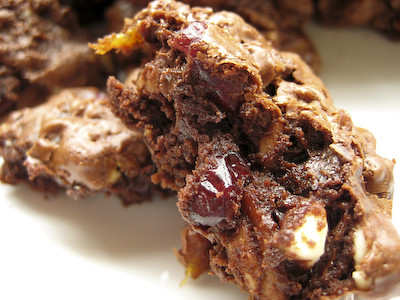
These definitely earn their name of "Chunkers" as they're chock full of chocolate chips, white chocolate chips, nuts, and raisins. There are actually more add-ins with this cookie than dough! I made some changes to the recipe, by decreasing the amount of nuts and increasing the amount of dried fruit. I hate nuts and usually omit them from all recipes, but I thought that I might not notice the nuts in these since they have so much going on with them. So I tried them with the nuts, just less of them.


I thought these cookies were okay. I'm just not a chocolate cookie fan. I didn't care for the nuts at all and wish I had just omitted them, and added more chocolate and dried fruit instead. I'm probably in the minority, though, because these seemed to be a really big hit among most of the other TWD bakers.


I've included the adapted recipe below, as I made them. If you would like the original recipe, you can find it here (with recipe tips here). Make sure you visit the TWD Blog Roll to see how everyone else enjoyed these chunky treats.

Chocolate Chunkers
adapted from Baking: From My Home to Yours, by Dorie Greenspan

1/3 cup all purpose flour
1/4 cup unsweetened cocoa powder
1/4 tsp baking powder
3/8 tsp salt (alternatively, you can use 3 tbsp unsalted butter with 1/2 tsp salt)
3 tbsp salted butter, cut into 3 pieces
12 ounces semisweet chocolate chips, divided
1 ounce unsweetened chocolate, coarsely chopped
2 large eggs, at room temperature
2/3 cup sugar
1 tsp pure vanilla extract
6 ounces white chocolate chips
1 cup toasted pecans, coarsely chopped (I would omit these next time)
1 cup dried cranberries
1/4 cup finely chopped moist, plump dried apricots (I would add 1 cup next time to make up for the volume lost by omitting the nuts)


Center the rack in the oven and preheat the oven to 350F. Line two baking sheets with parchment or silicone mats.

Sift together the flour, cocoa, baking powder, and salt.

Set a heatproof bowl over a saucepan of simmering water. Add the butter, 6 ounces of semisweet chocolate chips and unsweetened chocolate and heat, stirring occasionally, just until melted--the chocolate and and butter should be smooth and shiny but not so hot that the butter separates. Remove the bowl from the heat and set it on the counter to cool.

Working with a stand mixer, preferably fitted with a paddle attachment, or with a hand mixer in a large bowl, beat the eggs and sugar together on medium speed for about 2 minutes, until they are pale and foamy. Beat in the vanilla extract, then scrape down the bowl. Reduce the mixer speed to low and add the melted butter and chocolate, mixing only until incorporated. With a rubber spatula, scrape down the bowl, then, on low speed, add the dry ingredients. Mix just until the dry ingredients disappear in the dough, which will be thick, smooth and shiny. Scrape down the bowl and, using the rubber spatula, mix in the rest of the semisweet chocolate chips (6 ounces), white chocolate chips, nuts, and dried fruit--you'll have more crunchies than dough at this point. (The dough can be wrapped in plastic and kept refrigerated for up to 3 days).

Drop the dough by generously heaping tablespoonfuls on to the baking sheets, leaving about an inch of space between the mounds of dough. (These cookies do not spread very much - you may want to press them down a little with the bottom of a glass before baking.)

Bake the cookies one sheet at a time for 10 to 12 minutes. The tops of the cookies will look a little dry but the interiors should still be soft. Let the cookies rest for 2 to 3 minutes before using a wide metal spatula to transfer them to the racks to cool to room temperature.

Repeat with the remaining dough, cooling the baking sheets between batches.

If, when the cookies are cooled, the chocolate is still gooey and you'd like it to be a bit firmer, just pop the cookies into the fridge for about 10 minutes.