Tuesday, May 31, 2011

Caramel Pots de Creme (TWD)


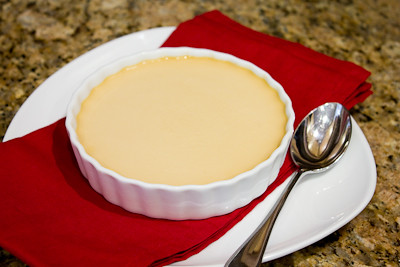
This week's Tuesdays with Dorie (TWD) recipe was chosen by Peggy of Peggy the Baker: Caramel Pots de Creme.  These little pots of cream (or ramekins, in my case) are made with caramelized sugar.  I think I was too worried about burning my sugar that I didn't let it caramelize quite enough.  The caramel flavor in this custard wasn't quite as strong as I was hoping it would be.  Still, these were delicious. 

Thanks Peggy, for hosting this week. I'll definitely be making this again! If you would like the recipe, you can find it here. Make sure you check out the TWD Blogroll, to see how everyone else enjoyed this creamy, caramel-y treat!

Friday, May 27, 2011

Chocolate Marquise (DB)


The May 2011 Daring Bakers’ challenge was hosted by Emma of CookCraftGrow and Jenny of Purple House Dirt. They chose to challenge everyone to make a Chocolate Marquise. The inspiration for this recipe comes from a dessert they prepared at a restaurant in Seattle.

When we were presented with this month's challenge, we were told to "imagine a cube of spicy and creamy chocolate resting on a tuft of something that tastes like burnt marshmallow cream, drizzled with tequila caramel, spicy nuts, and some cacao nibs." Talk about enticing, right?

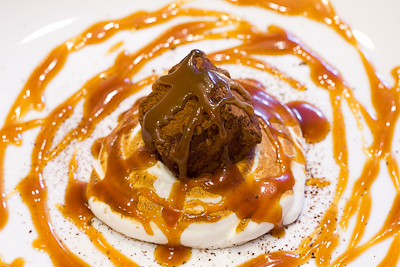
If you glance over the recipe it can definitely seem overwhelming at first.  However, if you take it one step at a time it is really not that difficult, just a bit time consuming.  The chocolate marquise tastes a bit like a cross between chocolate mousse and chocolate ice cream, and the meringue really does taste like soft, pillowy, marshmallow cream.  I used hazelnut chocolate instead of bittersweet chocolate because I don't care much for bittersweet chocolate.  The end result was a very rich and creamy frozen chocolate concoction.

My favorite part of this challenge, however, was probably the caramel.  I love caramel but I've never added liquor to it before.  I found the amount added to the recipe was just enough to give it a good flavor without being too strong.  I used rum instead of tequila and loved it.  I think the rum caramel would be delicious over some ice cream!
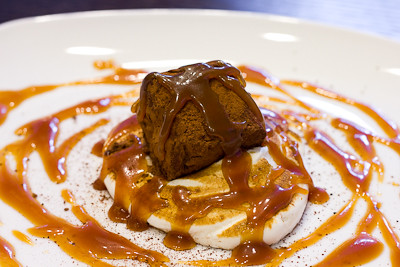


Thanks Emma and Jenny, for hosting this month's challenge.  While this challenge was admittedly daunting at first, in the end it was very do-able and I enjoyed trying a new dessert for the first time.  Not sure if I'll be making the marquise again, but I'll definitely be making the rum caramel again! Make sure you check out the Daring Bakers' Blogroll to see how everyone else enjoyed this chocolately, caramely treat.


Chocolate Hazelnut Marquise over Torched Meringue with Rum Caramel Sauce

Chocolate Base

Servings: n/a - this is an ingredient for the chocolate marquise, not meant to be used separately

Ingredients
3 oz (85 grams/ 6 tablespoons) bittersweet chocolate (about 70% cocoa) (I used hazelnut chocolate instead of bittersweet)
1/3 cup + 2 teaspoons (90 ml/3 fluid oz.) heavy cream
1/8 teaspoon salt
1/16 teaspoon cayenne
1 tablespoon (15 ml/ 1/2 fluid oz.) tequila (I used rum)
1 tablespoon (15 ml/ 1/2 fluid oz.) light corn syrup
1/4 teaspoon vanilla
1 tablespoon/(less than 1/4 ounce) cocoa powder (we used extra brut, like Hershey's Special Dark, but any Dutch-processed cocoa would be fine. Do not substitute natural cocoa powder.)
dash freshly ground black pepper
1/4 oz unsalted butter (1/2 tablespoon/8 grams), softened

Place the chocolate in a small mixing bowl. In a double-boiler, warm the cream until it is hot to the touch (but is not boiling). Remove from the heat and pour over the chocolate. Allow it to sit for a minute or two before stirring. Stir until the chocolate is melted completely and is smooth throughout.

Add the remaining ingredients and stir to combine. Set aside until cooled to room temperature. Do not refrigerate, as the base needs to be soft when added to the marquise mixture. If you make it the day before, you may need to warm it slightly. Whisk it until it is smooth again before using it in the marquise recipe.

Chocolate Marquise

Servings: six 2" x 2" (5 cm x 5 cm) cubes

Ingredients
3 large egg yolks at room temperature
1 large egg
2 tablespoons + 2 teaspoons (40 ml) (40 grams/ 1½ oz) sugar
1 tablespoon + 1 teaspoon (2/3 fluid oz/ 20 ml.) water
Chocolate Base, barely warm (recipe follows)
½ cup (4 fluid oz./ 120 ml.) heavy cream
½ cup Dutch process cocoa powder (for rolling) (Note: We used extra brut, like Hershey's Special Dark. Make sure it's a Dutch processed cocoa, not a natural cocoa powder.)
Torched meringue (recipe follows)
Spiced almonds (recipe follows)
Cacao nibs (optional)

In the bowl of a stand mixer, combine the egg yolks and whole eggs. Whip on high speed until very thick and pale, about 10 - 15 minutes.

When the eggs are getting close to finishing, make a sugar syrup by combining the sugar and water in a small saucepan. Bring the syrup to a boil and then cook to softball stage (235F/115C). If you have a cake tester with a metal loop for a handle, the right stage for the syrup is reached when you can blow a bubble through the loop (as seen in the following pictures).

With the mixer running on low speed, drizzle the sugar syrup into the fluffy eggs, trying to hit that magic spot between the mixing bowl and the whisk.

When all of the syrup has been added (do it fairly quickly), turn the mixer back on high and whip until the bowl is cool to the touch. This will take at least 10 minutes.

In a separate mixing bowl, whip the heavy cream to soft peaks. Set aside.

When the egg mixture has cooled, add the chocolate base to the egg mixture and whisk to combine. Try to get it as consistent as possible without losing all of the air you've whipped into the eggs. We used the stand mixer for this, and it took about 1 minute.

Fold 1/3 of the reserved whipped cream into the chocolate mixture to loosen it, and then fold in the remaining whipped cream.

Pour into the prepared pans and cover with plastic wrap (directly touching the mixture so it doesn't allow in any air). Freeze until very firm, at least 2 - 4 hours (preferably 6 – 8 hours).

When you're ready to plate, remove the marquise from the freezer at least 15 minutes before serving. While it's still hard, remove it from the pan by pulling on the parchment 'handles' or by flipping it over onto another piece of parchment.

Cut it into cubes and roll the cubes in cocoa powder. These will start to melt almost immediately, so don't do this step until all of your other plating components (meringue, caramel, spiced nuts, cocoa nibs) are ready. The cubes need to sit in the fridge to slowly thaw so plating components can be done during that time. They don’t need to be ready before the cubes are rolled in the cocoa powder.

Plate with the torched meringue and drizzled caramel sauce, and toss spiced almonds and cocoa nibs around for garnish. You want to handle the cubes as little as possible because they get messy quickly and are difficult to move. However, you want to wait to serve them until they've softened completely. The soft pillows of chocolate are what make this dessert so unusual and when combined with the other elements, you'll get creamy and crunchy textures with cool, spicy, salty, bitter, and sweet sensations on your palate.

Torched Meringue

Servings: Makes about 1 cup of meringue.

Ingredients
3 large egg whites
1/2 cup less 1 tablespoon (105 ml) (3½ oz or 100 gms) sugar
Splash of apple cider vinegar
1/8 teaspoon vanilla

Tequila Caramel

Servings: Makes about 1/4 cup of caramel

Ingredients
1/4 cup (60 ml/2 fluid oz) (2 oz/55 gm) sugar
2 tablespoons (1 fluid oz./ 30 ml.) water
1/4 cup (2 fluid oz./ 60 ml.) heavy cream
1/4 teaspoon salt
1/2 tablespoon tequila (I used rum)

Combine the egg whites, sugar and vinegar in the bowl of a stand mixer. Using your (clean, washed) hand, reach in the bowl and stir the three together, making sure the sugar is moistened evenly by the egg whites and they make a homogeneous liquid.

Over a saucepan of simmering water, warm the egg white mixture. Use one hand to stir the mixture continuously, feeling for grains of sugar in the egg whites. As the liquid heats up, the sugar will slowly dissolve and the egg whites will thicken. This step is complete when you don't feel any more sugar crystals in the liquid and it is uniformly warm, nearly hot.

Remove the mixing bowl from the saucepan and return it to the stand mixer with the whisk attachment. Whisk until you reach soft peaks. In the last 10 seconds of mixing, add the vanilla to the meringue and mix thoroughly.

When you're ready to plate the dessert, spoon the meringue onto a plate (or use a piping bag) and use a blowtorch to broil.

Spiced Almonds

Servings: Makes about 1 cup of spiced almonds

Ingredients
1/2 cup (4 oz.) sugar
1 teaspoon cinnamon
1/4 teaspoon cayenne
1/2 teaspoon salt
1 large egg white
1 cup (145 grams/ 5 oz.) blanched whole almonds

Directions:

Preheat the oven to 350F. Line a sheet pan with parchment paper or foil.
In a small bowl, combine the sugar, cinnamon, cayenne, and salt.
In a larger mixing bowl whisk the egg white until it's frothy and thick.
Add the spice mix to the egg white and whisk to combine completely.
Add the nuts to the egg white mixture and toss with a spoon.
Spoon the coated nuts onto the parchment paper-lined baking sheet.
Bake the nuts for 30 minutes, or until they turn light brown. Allow the nuts to cool completely and they will get very crunchy. Set aside until ready to serve.
Tuesday, May 17, 2011

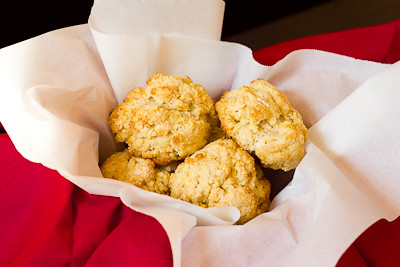
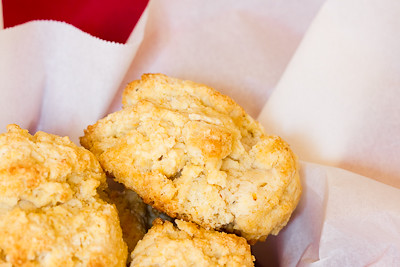
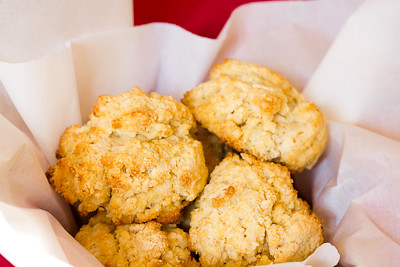
Maple Cornmeal Biscuits (TWD)


This week's Tuesdays with Dorie (TWD) recipe was chosen by Lindsay of A Little Something...Sweeet!: Maple Cornmeal Biscuits. Cornmeal biscuits don't sound all too exciting, but since these are maple cornmeal biscuits, I was willing to give them a try ;) I love maple syrup and anything maple-flavored, so I figured these were worth a taste.  (Truth be told, I only had a tablespoon of maple syrup left in the jug after making these biscuits and I just licked it right out of the container!)


Like most biscuits, this recipe was quick and easy.  Even easier than some biscuit recipes because they are drop biscuits that don't need to be rolled and cut.  The baking time for these was several minutes less than indicated in the recipe, so be sure to keep a close eye on them!

I was a bit disappointed that the maple flavor wasn't very prominent in these biscuits.  They were, however, delicious on their own without any butter or jam.  Perhaps adding more maple syrup and less milk would make them taste more like maple cornmeal biscuits?


Thanks Lindsay, for hosting this week. I think these would be great alongside some chili instead of traditional cornbread. If you would like the recipe, you can find it here. Make sure you check out the TWD Blogroll, to see how everyone else enjoyed this homey treat!

Tuesday, May 10, 2011

Brown Sugar Bundt Cake (TWD)


This week's Tuesdays with Dorie (TWD) recipe was chosen by Peggy of Pantry Revisited: Brown Sugar Bundt Cake.  It doesn't sound like anything special, but there is something to be said about brown sugar - I love anything flavored with brown sugar or caramel.

The addition of prunes is quite unusual, and when my husband saw me making the cake he asked me, "You're making a cake... with prunes?!" I told him that I had made muffins not too long ago with prunes that he liked, but he had no recollection of prunes in anything I had made!  I swapped out the fresh pears in the recipe for some apples, and the combination of apples and prunes was quite good.  I know some may find the idea of prunes in a cake to be odd, but Dorie was really on to something when she came up with this cake.  If you are absolutely against having prunes in your cake, you can also substitute other dried fruit such as raisins, dried apricots, or dried cranberries.

This cake is extremely moist and the caramel undertone that the brown sugar gives it is delightful.  The flavors definitely ripen if you're able to wait a day before cutting into it. 

Thanks Peggy for hosting this week. I'll definitely be making this one again! If you would like the recipe, you can find it here. Make sure you check out the TWD Blogroll, to see how everyone else enjoyed this incredibly moist treat!

Tuesday, May 3, 2011

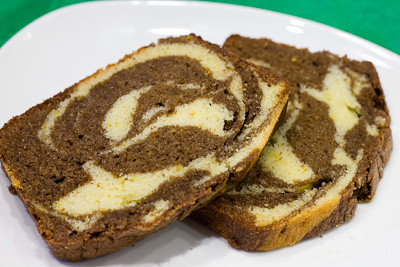
Chocolate Orange Marbled Loaf Cake (TWD)


This week's Tuesdays with Dorie (TWD) recipe was chosen by Carol of The Bake More: Basic Marbled Loaf Cake. Dorie gives several "playing around" options, with the peppermint version being her favorite.  I would have loved to have tried it but did not have any peppermint extract on hand.  Instead, I decided to make the chocolate orange marbled loaf cake. 

My loaf cake only had a hint of orange to it because I did not have any orange extract, either.  However, to bring out as much orange flavor as possible, I rubbed the orange zest with the sugar before mixing it in with the creamed butter.  I took the loaf out right at 1 hour and 20 minutes, and it was nice and moist, although I wonder if I may have over baked it by just a few minutes because I had envisioned the cake being more moist than it was.  Still, it was good and enjoyed by all. 

I was especially pleased with how the marbling turned out with this one, as it was only my third attempt at marbling a cake (and I failed the first and second attempts miserably!).  Overall, I enjoyed this cake but probably won't be making it again.  There's nothing wrong with it per se, I just feel like there are so many other recipes that I enjoy more than this one.

Thanks Carol, for hosting this week. If you would like the recipe, you can find it here. Make sure you check out the TWD Blogroll, to see how everyone else enjoyed this swirly treat!

Wednesday, April 27, 2011

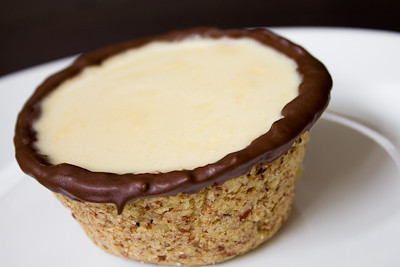
Maple Mousse in Chocolate Dipped Almond Bowls (DB)


The April 2011 Daring Bakers’ challenge was hosted by Evelyne of the blog Cheap Ethnic Eatz. Evelyne chose to challenge everyone to make a maple mousse in an edible container. Prizes are being awarded to the most creative edible container and filling, so vote on your favorite from April 27th to May 27th at http://thedaringkitchen.com!

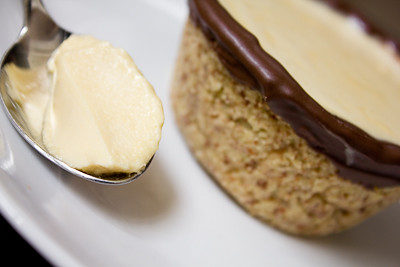
Sadly, I didn't have time to get real creative with this challenge, so I simply made the recipes as they were posted and did not come up with my own unique "edible container."  I made a half recipe of the maple mousse and poured it into two edible almond cups.  I would have loved to have tried making some bacon cups for the mousse (I love salty and sweet combos!), but I ran out of time.


The flavor in the maple mousse was absolutely amazing, though probably slightly too sweet for my taste.  I hardly ever complain of anything being too sweet, so you know it must be pretty sweet! I did read that some bakers cut back about 25% on the amount of maple syrup in the recipe to decrease the sweetness just a tad.  If you've never had good quality maple syrup, you really need to try it.  Especially if you've been using maple-flavored pancake syrup which is nothing compared to pure maple syrup! If you're looking for a good deal, you can get a 32 oz. jug of Coomb's Family Farms 100% Pure Organic Maple Syrup for $16.83 (with subscribe & save).  (If you don't use maple syrup all that often, you may want to pay a little more and get two 16 oz. jugs for $17.88 since the syrup can mold after a while but has a long shelf life as long as it's sealed.)

Thanks Ria and Jamie, for hosting this month's challenge.  It was the perfect way to showcase the wonderful flavor of maple syrup and I'll definitely be making it again. I've seen some pretty amazing creations on some other blogs already, so make sure you check out the Daring Bakers' Blogroll to see how everyone else enjoyed this sweet, maple-y treat.

Maple Mousse:
Ingredients:
• 1 cup (240 ml/ 8 fluid oz.) pure maple syrup (not maple-flavoured syrup)
• 4 large egg yolks
• 1 package (7g/1 tbsp.) unflavoured gelatine
• 1 1/2 cups (360 ml. g/12 fluid oz) whipping cream (35% fat content)
Directions:
1. Bring maple syrup to a boil then remove from heat.
2. In a large bowl, whisk egg yolks and pour a little bit of the maple syrup in while whisking (this is to temper your egg yolks so they don’t curdle).
3. Add warmed egg yolks to hot maple syrup until well mixed.
4. Measure 1/4 cup of whipping cream in a bowl and sprinkle it with the gelatine. Let it rest for 5 minutes. Place the bowl in a microwave for 45 seconds (microwave for 10 seconds at a time and check it in between) or place the bowl in a pan of barely simmering water, stir to ensure the gelatine has completely dissolved.
5. Whisk the gelatine/whipping cream mixture into the maple syrup mixture and set aside.
6. Whisk occasionally for approximately an hour or until the mixture has the consistency of an unbeaten raw egg white.
7. Whip the remaining cream. Stir 1/4 of the whipped cream into the maple syrup mixture. Fold in the remaining cream and refrigerate for at least an hour.
8. Remove from the fridge and divide equally among your edible containers.

Bacon Cups:
Ingredients:
• 24 thin slices good quality bacon

Directions:
1. Pre-heat the oven to 400 degrees F/200 degrees C.
2. Take a muffin pan or 6 small ½ cup capacity heat-proof bowls, turn upside down and carefully form aluminum foil covers on the back of 6 muffin cups or the bowls.
3. Taking 2 strips of bacon at a time crisscross the strips over the backs of the muffin cups and cut to size a tad longer then the bottom part of the cup. Now use 1 to 2 more strips to cover the sides of the muffin cups in a weaving fashion. You want a full tight weave because bacon shrinks a lot. For smaller cups I used a shot glass with a square of bacon for the bottom and I wrapped 1 strip around the side.
4. Tuck the ends of the bacon strips inside otherwise they will curl while cooking. A good idea is to insert 4 toothpicks where the crisscrossed bacon meets in the weave.
5. Place muffin pan in a cookie tray to catch drippings. Bake in oven for about 25 to 40 minutes, or until the bacon is golden and crisp but not burned.
6. Cool completely, a good hour, before removing your cups delicately from the foil.

Nut Bowls:
Ingredients:
• 1 1/2 cups crushed nuts of your choice such as almonds, hazelnuts or walnuts
• 1 egg, beaten, at room temperature
• 2 tbsp sugar
• 1/2 cup dark chocolate pieces

Directions:
1. Use a food processor or a zip-lock back with a rolling pin to crush your nuts if whole, use about 1 cup of whole nuts to get 3/4 cups crushed. You want it somewhat coarse.
2. In a bowl mix the nuts with the beaten egg and the sugar.
3. Take 6 small ½ cup capacity Pyrex cups or a similar container and line the inside with aluminum foil. Spread ¼ cup of the mixture in the bowl, all the way up to the sides making sure you have a thin and even clean layer all around.
4. Bake at 350 degrees F/175 degrees C. until the nuts are golden and fragrant (about 15 minutes). Let cool completely before unmolding.
5. Melt chocolate (either in the microwave or over a double boiler). Dip the rims of the cooled nut bowls in the chocolate. Place in the freezer for at least 15 minutes or until the chocolate has hardened and is set.

Vegan Maple Mousse:
Ingredients:
• 1 package (12 oz.) soft silken tofu
• ¾ cup (14 fluid oz.) pure maple syrup
• 2 tsp agar-agar

Directions:
1. Let tofu come to room temperature. Using a food processor, blender, or hand mixer, blend tofu until just smooth.
2. Sprinkle agar-agar on the maple syrup and let it rest for 10 minutes. Heat maple syrup on the stove to a boil and then let it simmer 5 minutes until the agar-agar has dissolved.
3. In a food processor, blender, or a large bowl, blend the tofu with the maple syrup until creamy.
4. Refrigerate for at least one hour. Remove from the fridge and divide among your edible containers.

Meringue (optional):
Ingredients:
• 3 large egg whites at room temperature
• ¾ cup (165 g./5.5 oz) sugar

Directions:
1. Preheat the oven to 300 degrees F/150 degrees C.
2. Put the egg whites in a large bowl. Using an electric mixer beat for a few minutes until the whites become stiff. Now add the sugar, a little at a time, whisking until the mixture is stiff and glossy. You should be able to turn the bowl upside down and the mixture won’t fall out.
3. Place baking parchment on to a clean baking sheet. Using a spoon or a piping bag, dollop the meringue into circles that fit inside the rim of your edible cups. (See mine, I wanted height but they fell a bit...which is OK...freeform art)
4. Put the tray in the oven, then immediately turn the oven down to 250 degrees F/130 degrees C. and bake for 45 minutes.
5. Turn off the oven and allow the meringues to cool in the oven for a few hours.
6. Place meringues as decoration on your maple mousse which has already be spooned into your edible containers.

Recipe Notes (from Evelyne):
• Putting aluminum foil on the muffin pan heat-proof bowls is essential or they will be stuck to the form. Be gentle when removing the aluminum foil from bacon cups.
• Bacon shrinks a lot so make sure weave is tight on the form. Tuck the ends of the bacon strips inside otherwise they will curl while cooking. A good idea is to insert 4 toothpicks where the crisscrossed bacon meets in the weave.
• For the nut bowls, use about 1 cup of whole nuts to get 3/4 cups of crushed.
• In the maple mousse recipe, after the gelatine has bloomed (softened) in the cold whipping cream, the gelatine MUST be heated to melt completely…contrary to popular belief. Follow the directions as described and never let gelatine boil or it will become stringy and unusable.
• If you make the meringues let them cool in the oven once they are baked… just don’t forget to turn off the oven when they are done. This cooling process will help then dry out nicely and be crispier.

Tuesday, April 26, 2011

Cornmeal Shortbread Cookies (TWD)


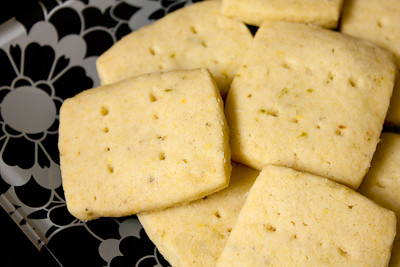
This week's Tuesdays with Dorie (TWD) recipe was chosen by Valerie of Une Gamine dans la Cuisine: Cornmeal Shortbread Cookies. I have to admit that I almost skipped out on this recipe.  When you compare it to a lot of the other recipes in the book, this one just doesn't sound that exciting! They're traditional shortbread cookies with a twist - aside from substituting some of the flour for cornmeal, the zest of a lemon (or lime, in my case) is rubbed in with the sugar to give it a little extra something.


Boy am I glad that I didn't skip this one! The cookies are buttery sweet and crumbly like you'd expect shortbread cookies to be, but the citrus zest gives it the most wonderful flavor.  The cornmeal gives it an interesting crunch (they have just the slightest gritty texture), though I wouldn't really know that there was cornmeal in these cookies unless you told me there was.

Thanks Valerie, for hosting this week.  I'm so glad you got me to try a recipe I'd probably otherwise skip in this book! If you would like the recipe, you can find it here. Make sure you check out the TWD Blogroll, to see how everyone else enjoyed this buttery, crumbly treat!