Wednesday, July 27, 2011

Fresh Frasiers (DB)

Jana of Cherry Tea Cakes was our July Daring Bakers’ host and she challenges us to make Fresh Frasiers inspired by recipes written by Elisabeth M. Prueitt and Chad Robertson in the beautiful cookbook Tartine.  The Frasier is a light, moist layered chiffon cake, split and filled with sliced fresh fruit and pastry cream, then topped with a thin sheet of almond paste.

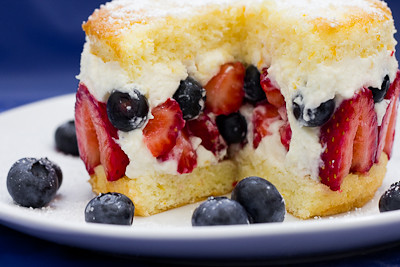
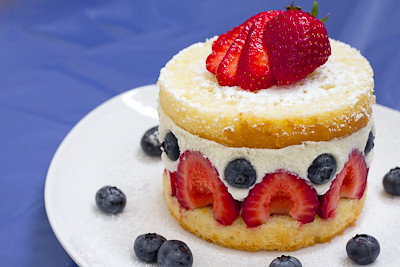
I love fresh fruit and this challenge was the perfect way to showcase some of summer's fresh fruits! I omitted the optional layer of almond paste on top, mostly just because I didn't have any on hand, but followed the rest of the recipe exactly. I made an orange chiffon cake and filled it with strawberries and blueberries. I made the simple syrup with 2 tablespoons of orange juice and 2 tablespoons of triple sec. I was concerned the flavor of the alcohol would be too strong if I added the full 4 tablespoons of alcohol, but in retrospect I think it would have been much better that way.
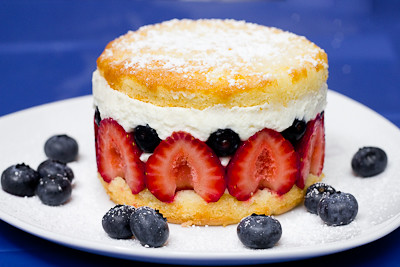
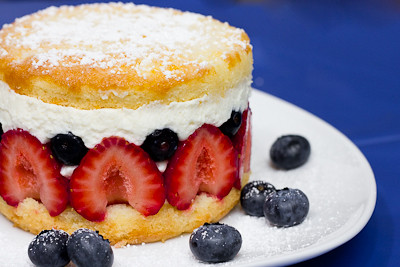
Regardless, this cake was amazing. The chiffon had an incredibly light but moist crumb.  (It is also special to me because this was the first time that my 20 month old helped me make a cake! She helped mix the cake batter (before the egg whites were added!) and it was so great to see how much fun she was having helping her mommy out.)  The pastry cream was delicious, though I think calling it a "pastry cream" makes it sound heavier than it actually is. Most pastry creams are made with multiple egg yolks (thus lending them their richness); this one is made with just one whole egg. So it's more like whipped cream with a little pastry cream added in. This keeps the dessert from being too heavy, and adds just a touch of richness to it. I basically loved everything about this dessert. Just look at all those fresh berries swimming in pastry cream! Yum!
While this dessert is compromised of several components, each part on its own is very simple and you can make each individual component ahead of time and then assemble it all when needed.  Plus, if you are short on time, you can just make a trifle with the cake, fruit, and pastry cream!  It's every bit as good without any of the fuss.

Thanks Jana, for hosting this month's challenge.  I've never had or made a Fresh Frasier before, but I fell in love with them and definitely plan to make them again in the future! Make sure you check out the Daring Bakers' Blogroll to see how everyone else enjoyed this sweet, summery treat.

* Recipe notes - 
- When cutting parchment rounds for your pan(s), don't forget to check out my helpful tip here!
- I made my chiffon cakes in mini springform pans.  One chiffon cake recipe (below) will fit in four to five mini springform pans (depending on how thick you want them to be).  Depending on how thick or thin you want your cake layers to be, you can cut them into either three or four layers once they are cooled.  (I made four mini cakes and found that cutting them into two layers yielded layers that were too thick for this dessert.)
- Please note that the cake, like all chiffon cakes, will rise quite a bit, so do not overfill your pan(s)! You only want to fill them about half way, or two-thirds at most.
- Baking time was approximately 30 minutes for the mini cakes.

Fresh Frasiers
Basic Chiffon Cake:

Ingredients:
1 cup + 2 tablespoons (270 ml) (5½ oz/155 gm) all-purpose flour
1 teaspoon (5 ml) (4 gm) baking powder
3/4 cups (180 ml) (6 oz /170 gm) sugar
1/2 teaspoon (2½ ml) (1½ gm) salt, preferably kosher
1/4 cup (2 fl oz/60 ml) vegetable oil
3 large egg yolks
⅓ cup + 1 tablespoon (3.17 fl oz/95 ml) water
1 teaspoon (5 ml) pure vanilla extract
3/4 teaspoon (3¾ ml) (3 gm) lemon zest, grated
5 large egg whites
¼ teaspoon (1¼ ml) (1 gm) cream of tartar

Directions:

Preheat the oven to moderate 325°F (160°C/gas mark 3).

Line the bottom of an 8-inch (20 cm) spring form pan with parchment paper. Do not grease the sides of the pan.

In a large mixing bowl, stir together the flour and baking powder. Add in all but 3 tablespoons (45 ml.) of sugar, and all of the salt. Stir to combine.

In a small bowl combine the oil, egg yolks, water, vanilla and lemon zest. Whisk thoroughly.

Combine with the dry ingredients and mix thoroughly for about one minute, or until very smooth.

Put the egg whites into a stand mixer, and beat on medium speed using a whisk attachment on a medium speed, until frothy. Add cream of tartar and beat on a medium speed until the whites hold soft peaks. Slowly add the remaining sugar and beat on a medium-high speed until the whites hold firm and form shiny peaks.

Using a grease free rubber spatula, scoop about ⅓ of the whites into the yolk mixture and fold in gently. Gently fold in the remaining whites just until combined.

Pour the batter into the prepared pan. Bake for 45 to 55 minutes or until toothpick inserted into the center comes out clean.

Removed the cake from the oven and allow to cool in the pan on a wire rack.

To unmold, run a knife around the sides to loosen the cake from the pan and remove the spring form sides. Invert the cake and peel off the parchment paper. Refrigerate for up to four days.

Variations to the Basic Chiffon Cake:

Lemon Chiffon Cake

Ingredient Alterations:
Reduce water to 1/4 cup (60 ml)
Add 1/8 cup (30 ml) lemon juice
Increase lemon zest to 1½ teaspoon (7½ ml) (5 gm)
Remove the vanilla from the recipe

Direction Alterations:
Follow the directions, same as above, adding the lemon juice and zest to the oil, egg yolks and water in step 4.

Orange Chiffon Cake

Ingredient Alterations:
Replace the full amount of water with orange juice
Replace lemon zest with the zest of one orange
Remove the vanilla from the recipe

Direction Alterations:
Follow the directions, same as above, adding the orange juice and zest to the oil, and egg yolks in step 4.

Coconut Chiffon Cake

Ingredient Alterations:
Add ¼ teaspoon (1¼ ml) (1 gm) freshly ground nutmeg
Reduce oil to 1/8 cup (1 fl oz/30ml)
Reduce water to 1/8 cup (1 fl oz/30ml)
Add 1/3 cup (2 ⅔fl oz/80 ml) unsweetened coconut milk
Remove the vanilla from the recipe

Direction Alterations:
Follow the directions, same as above, adding the nutmeg to the flour mixture in step 3, and the coconut milk to the oil, water and egg yolks in step 4.

Chocolate Chiffon Cake

Ingredient Alterations:
Reduce all-purpose flour to ¾ cup + 1 tablespoon (195 ml) (4 oz/110 g)
Add 1/4 cup (60 ml) (3/4 oz/20 g) cocoa powder

Direction Alterations:
Follow the directions, same as above, adding the cocoa to the flour mixture in step 3.

Pastry Cream Filling:

Ingredients:
1 cup (8 fl oz/250 ml) whole milk
1/2 teaspoon (2½ ml) pure vanilla extract
1/8 teaspoon (1/2 ml) (¼ gm) salt, preferably kosher
2 tablespoons (30 ml) (10 gm)cornstarch
1/4 cup (60 ml) (2 oz/55 gm) sugar
1 large egg
2 tablespoons (30 ml) (1 oz/30 gm) unsalted butter
3/4 teaspoon (3¾ ml) (4 gm) gelatin
1/2 tablespoon (7½ ml) water
1 cup (8 fl oz/250 ml) heavy cream

Directions:

Pour the milk, vanilla, and salt into a heavy sauce pan. Place over medium-high heat and scald, bringing it to a near boiling point. Stir occasionally.

Meanwhile, in a stand mixer add the cornstarch and sugar. Whisk to combine

Add the eggs to the sugar and cornstarch and whisk until smooth.

When the milk is ready, gently and slowly while the stand mixer is whisking, pour the heated milk down the side of the bowl into the egg mixture.

Pour the mixture back into the warm pot and continue to cook over a medium heat until the custard is thick, just about to boil and coats the back of a spoon.

Remove from heat and pass through a fine mesh sieve into a large mixing bowl. Allow to cool for ten minutes stirring occasionally.

Cut the butter into four pieces and whisk into the pastry cream a piece at a time until smooth.

Cover the cream with plastic wrap, pressing the plastic wrap onto the top of the cream to prevent a skin from forming. Chill in the refrigerator for up to five days.

In a small dish, sprinkle the gelatin over the water and let stand for a few minutes to soften.

Put two inches (55 mm) of water into a small sauce pan and bring to a simmer over a medium heat.

Measure 1/4 cup (2 oz/60 ml) of the chilled pastry cream into a small stainless steel bowl that will sit across the sauce pan with the simmering water, without touching the water.

Heat the cream until it is 120 F (48.8 C). Add the gelatin and whisk until smooth. Remove from the water bath, and whisk the remaining cold pastry cream in to incorporate in two batches.

In a stand mixer, fitted with the whisk attachment, whip the cream until it holds medium-stiff peaks.

Immediately fold the whipped cream into the pastry cream with a rubber spatula.

Simple Syrup:

You may choose to flavor the syrup. One way is to use flavored sugar (for example: apple cider sugar, orange sugar, or vanilla sugar) or to stir in 1-2 teaspoons of flavored extract. You may also infuse with herbs or spices, if desired or add four tablespoons (60 ml) of fruit juice or liqueur while the syrup is cooling.
Ingredients:
1/3 cup (2⅔ fl oz/80 ml) (2⅔ oz/75 gm) of sugar, flavored or white
1/3 cup (2⅔ fl oz/80 ml) of water

Directions:

Combine the water and sugar in a medium saucepan.

Bring the mixture to a boil and let the sugar dissolve. Stirring is not necessary, but will not harm the syrup.

Remove the syrup from the heat and cool slightly.

Transfer syrup to a lidded container or jar that can be stored in the refrigerator. Simple syrup can be stored for up to one month.


Fraisier Assembly:

Components:
1 baked 8 inch (20 cm) chiffon cake
1 recipe pastry cream filling
⅓ cup (80 ml) simple syrup or flavored syrup
2 lbs (900 g) strawberries
confectioners’ sugar for dusting
½ cup (120 ml) (5 oz/140 gm) almond paste

Directions:

Line the sides of a 8-inch (20 cm) spring form pan with plastic wrap. Do not line the bottom of the pan.

Cut the cake in half horizontally to form two layers.

Fit the bottom layer into the prepared spring form pan. Moisten the layer evenly with the simple syrup.

When the cake has absorbed enough syrup to resemble a squishy sponge, you have enough.

Hull and slice in half enough strawberries to arrange around the sides of the cake pan. Place the cut side of the strawberry against the sides of the pan, point side up forming a ring.

Pipe cream in-between strawberries and a thin layer across the top of the cake.

Hull and quarter your remaining strawberries and place them in the middle of the cake. Cover the strawberries and entirely with the all but 1 tbsp. (15 ml) of the pastry cream.

Place the second cake layer on top and moisten with the simple syrup.

Lightly dust a work surface with confectioners' sugar and roll out the almond paste to a 10-inch (25 cm) round 1/16 inch (1.5 mm) thick. Spread the remaining 1 tablespoon (15 ml) of pastry cream on the top of the cake and cover with the round of almond paste.

Cover with plastic wrap and refrigerate for at least 4 hours.

To serve release the sides of the spring form pan and peel away the plastic wrap.

Serve immediately or store in the refrigerator for up to 3 days.

Tuesday, July 26, 2011

Creamy Dark Chocolate Sorbet (TWD)


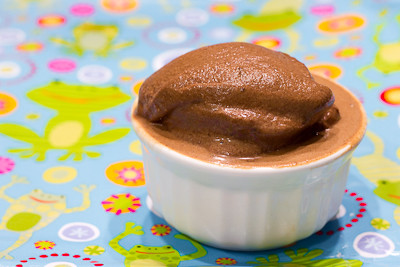
Chocolate Sorbet.  Did you even know there was such a thing as chocolate sorbet?! I always thought that sorbets were fruit flavored.  Wow, where have you been all my life, chocolate sorbet?

Rich and creamy and so delicious.  I did not believe Dorie when she said this.  How could something made with skim milk and no cream or eggs turn out to be rich and creamy? I don't know how, but I now know that I should not have been skeptical.  My only complaint is that it melts really quickly - I mean, you blink and it's melted! So, it ends up a little bit more like a soft serve or a milk shake, but that won't stop me from making this one again (especially when this is so much easier and lower in fat than ice cream!)

Thanks to Steph of A Whisk and A Spoon for this week's Tuesdays with Dorie (TWD) pick.  If you would like the recipe, you can find it here. Make sure you check out the TWD Blogroll, to see how everyone else enjoyed this smooth, chocolately treat!

* Recipe notes:
- Only change I made was to use semisweet chocolate chips in place of the bittersweet chocolate in this recipe.

Tuesday, July 12, 2011

Cream Scones (TWD)


This week's Tuesdays with Dorie (TWD) recipe was chosen by Lynne of Cafe LynnyLu: Cream Scones.  I almost didn't make this one because I just got back from a long trip, but scones are quick and easy so I went ahead and threw this recipe together.

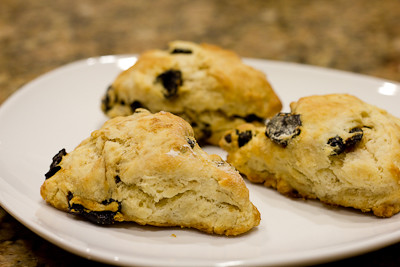
After returning home, my fridge was pretty bare, and I did not have any heavy cream on hand.  I decided to substitute whole milk for the cream.  Instead of currants, I added dried cherries to my scones.  I'm not sure if it was just me, but I made the scones, cut them, and put them on the baking sheet... and then looked over and saw my dried cherries still sitting on the counter! I freaked out, because they weren't in there and if I added them now, I knew I would risk over working the dough.  Worried that the scones would be too plain, though, I went ahead and put all the dough back into my mixing bowl, added the dried cherries, and gently mixed them in with the spatula. I was convinced that they wouldn't turn out because of how much mixing I had to do to get the cherries evenly incorporated into the dough, but to my surprise, they still came out perfect!


After the scones went into the oven, I went back to the recipe to see if I had missed the addition of the cherries.  I've re-read the recipe four or five times now, and I still don't see where you're supposed to add the dried fruit!  I think it was just an oversight on Dorie's part, but if I'm just blind and don't see it, please let me know :)

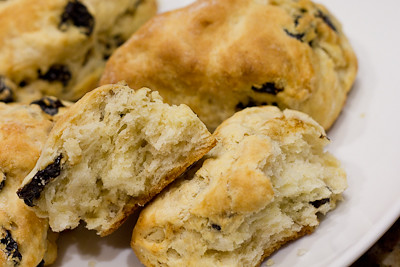
Thanks Lynne, for hosting this week.  The scones were delicious.  They were nice and flaky, and perfect without any butter or jam.  If you would like the recipe, you can find it here. Make sure you check out the TWD Blogroll, to see how everyone else enjoyed this breakfast treat!

Also - big congrats to Aaron Richards and Heather (comments #10 and #15) - you're the winners of my recent Tropi Treats Giveaway! You have 48 hours to contact me with your mailing address; after that, I'll choose an alternate winner.

* Recipe notes:
- My scones were done about 3-4 minutes early, so be sure to check them frequently.
- A tip for making good scones (or biscuits) is to grate your butter ahead of time and then stick it in the freezer for a few minutes to chill before adding it to the flour.  Alternatively, you can simply grate frozen butter into your flour.

Tuesday, June 28, 2011

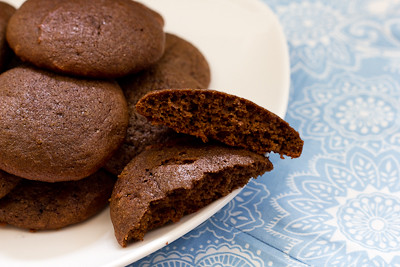
Sour Cream Chocolate Cake Cookies (TWD)


This week's Tuesdays with Dorie (TWD) recipe was chosen by Spike of Spike Bakes: Sour Cream Chocolate Cake Cookies.  I almost didn't make this one because there were some lukewarm reviews of these cookies on the P&Q.  However, the recipe looked pretty simple, so I decided to forge ahead.

I included both raisins and dried cherries in my cookies, and like Dorie, found that biting into the little bits of dried fruit was wonderful.  I thought the dried cherries were better than the raisins in this cookie, just because they were tart and stood out more than the raisins did.  I can definitely see how those who omitted the dried fruit found the cookies to be a little plain.  (However, if you do make these cookies without the dried fruit, because they have a very cake-like crumb, they do make for the base of some fantastic chocolate whoopie pies.)

Thanks Spike, for hosting this week.  If you would like the recipe, you can find it here. Make sure you check out the TWD Blogroll, to see how everyone else enjoyed this chocolately treat! Also don't forget to enter my giveaway here before it ends on June 24th.

Monday, June 27, 2011

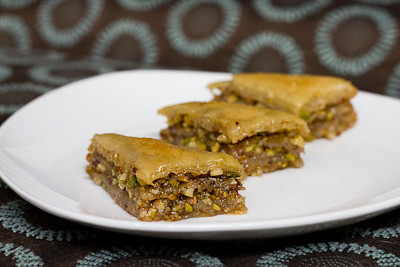
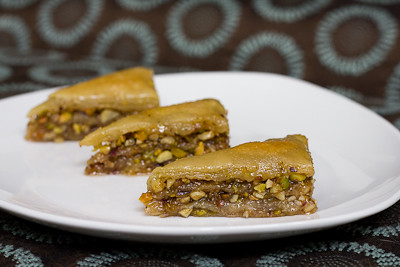
Baklava (DB)


Erica of Erica’s Edibles was our host for the Daring Bakers’ June challenge. Erica challenged us to be truly DARING by making homemade phyllo dough and then to use that homemade dough to make Baklava.  For those who are not familiar with baklava, it is a sweet rich pastry made with layers of phyllo dough and nuts sweetened with a simple syrup or honey syrup. Baklava is widely known as a Greek dessert, but its origin has really never been pinpointed as many Middle Eastern countries also name it as their own.

I was really excited to try this recipe.  I was pretty thrilled when I made puff pastry from scratch for the first time, so trying my hand at homemade phyllo dough sounded like a great challenge! It was actually not as hard as I had expected.  I think the hardest part for me was trying to get the sheets as thin as possible without tearing holes in them.  Thankfully the baklava is forgiving and you can put several partial sheets together to form one complete layer and no one will ever know the difference! :) It was a lot of fun stretching it out and seeing it get super thin!


Instead of an almond/walnut/pistachio nut mix, I simply used 1 cup of pistachios and 1/2 cup of almonds.  I don't generally like nuts in baked goods, but I'll eat them in something like this.

Unfortunately, I think I under baked my baklava a little bit.  I took it out about 20 minutes early because it was starting to become golden brown on the top and I was concerned about it burning.  As a result, I don't think my inner layers of phyllo got as crisp as they should have.  Still, the baklava turned out great and we all enjoyed it.  The recipe is definitely a keeper.

Thanks Erica, for hosting this month's challenge.  It was great to go beyond my comfort zone and try something completely new and challenging that I would never have thought to try on my own.  While I probably won't ever make my own phyllo dough again (store bought is just too convenient in this case), it's nice to have another skill under my belt.  Make sure you check out the Daring Bakers' Blogroll to see how everyone else enjoyed this sweet and flaky treat.


Homemade Baklava

Phyllo Dough:

*Note 1: To have enough to fill my 9” x 9” baking dish with 18 layers of phyllo I doubled this recipe.
*Note 2: Single recipe will fill a 8” x 5” baking dish.
*Note 3: Dough can be made a head of time and froze. Just remove from freezer and allow to thaw
and continue making your baklava

Ingredients:
1 1/3 cups (320 ml) (185 gm/6½ oz) unbleached all purpose (plain) flour
1/8 teaspoon (2/3 ml) (¾ gm) salt
1/2 cup less 1 tablespoon (105 ml) water, plus more if needed
2 tablespoons (30 ml) vegetable oil, plus additional for coating the dough
1/2 teaspoon (2½ ml) cider vinegar, (could substitute white wine vinegar or red wine vinegar, but could affect the taste)

Directions:

1. In the bowl of your stand mixer combine flour and salt

2. Mix with paddle attachment
3. Combine water, oil and vinegar in a small bowl.

4. Add water & oil mixture with mixer on low speed, mix until you get a soft dough, if it appears dry add a little more water (I had to add a tablespoon more)

5. Change to the dough hook and let knead approximately 10 minutes. You will end up with beautiful smooth dough. If you are kneading by hand, knead approx. 20 minutes.
6. Remove the dough from mixer and continue to knead for 2 more minutes. Pick up the dough and through it down hard on the counter a few times during the kneading process.

7. Shape the dough into a ball and lightly cover with oil

8. Wrap tightly in plastic wrap and let rest 30-90 minutes, longer is best ( I let mine rest 2 hours and it was perfect)


Rolling the dough:
1. Unwrap your dough and cut off a chunk slightly larger then a golf ball. While you are rolling be sure to keep the other dough covered so it doesn’t dry out.

2. Be sure to flour your hands, rolling pin and counter. As you roll you will need to keep adding, don’t worry, you can’t over-flour.

** Remove all rings and jewelry so it does not snag the dough**

Use whatever means you have to get the dough as thin as you can. Here is a fantastic video on how to roll out your phyllo dough, using a wooden dowel, which worked perfectly for me. You may also use a pasta machine if you have one, or a normal rolling pin whatever works for you.


3. Roll out the dough a bit to flatten it out.

4. Wrap the dough around your rolling pin/dowel

5. Roll back and forth quickly with the dough remaining on the dowel (see attached video for a visual, its much easier then it sounds)

6. Remove; notice how much bigger it is!

7. Rotate and repeat until it is as thin as you can it. Don’t worry if you get rips in the dough, as long as you have one perfect one for the top you will never notice.

8. When you get it as thin as you can with the rolling pin, carefully pick it up with well floured hands and stretch it on the backs of your hands as you would a pizza dough, just helps make it that much thinner. Roll out your dough until it is transparent. NOTE: you will not get it as thin as the frozen phyllo dough you purchase at the store, it is made by machine

9. Set aside on a well-floured surface. Repeat the process until your dough is used up. Between each sheet again flower well. You will not need to cover your dough with a wet cloth, as you do with boxed dough, it is moist enough that it will not try out.


Baklava Recipe

Adapted from Alton Brown, The Food Network
30 servings

Ingredients

For the syrup:
· 1 1/4 cups (300 ml) honey
· 1 1/4 cups (300ml) water
· 1 1/4 cups (300 ml) (280 gm/10 oz) sugar
· 1 cinnamon stick
· 1 (2-inch/50 mm) piece fresh citrus peel (lemon or orange work best)
· a few cloves or a pinch or ground clove

When you put your baklava in the oven start making your syrup. When you combine the two, one of them needs to be hot, I find it better when the baklava is hot and the syrup has cooled

Directions

1. Combine all ingredients in a medium pot over medium high heat. Stir occasionally until sugar has dissolved

2. Boil for 10 minutes, stir occasionally.

3. Once boiled for 10 minutes remove from heat and strain cinnamon stick and lemon, allow to cool as baklava cooks

Ingredients for the Filling:

1 (5-inch/125 mm piece) cinnamon stick, broken into 2 to 3 pieces or 2 teaspoons (10 ml) (8 gm) ground cinnamon
15 to 20 whole allspice berries ( I just used a few pinches)
3/4 cup (180 ml) (170 gm/6 oz) blanched almonds
3/4 cup (180 ml) (155 gm/5½ oz) raw or roasted walnuts
3/4 cup (180 ml) (140 gm/5 oz) raw or roasted pistachios
2/3 cup (160 ml) (150 gm/ 5 1/3 oz) sugar
phyllo dough (see recipe above)
1 cup (2 sticks) (240 ml) (225g/8 oz) melted butter ** I did not need this much, less then half**

Directions:

1. Preheat oven to moderate 350°F/180°C/gas mark 4.
2. Combine nuts, sugar and spices in a food processor and pulse on high until finely chopped. If you do not have a food processor chop with a sharp knife as fine as you can. Set aside

3. Trim your phyllo sheets to fit in your pan

4. Brush bottom of pan with butter and place first phyllo sheet

5. Brush the first phyllo sheet with butter and repeat approximately 5 times ending with butter. (Most recipes say more, but homemade phyllo is thicker so it's not needed)
6. Sprinkle 1/3 of the nut mixture on top

7. Continue layering phyllo and buttering repeating 4 times
8. Sprinkle 1/3 of the nut mixture on top
9. Continue layering phyllo and buttering repeating 4 times
10. Sprinkle 1/3 of the nut mixture on top
11. Continue layering and buttering phyllo 5 more times. On the top layer, make sure you have a piece of phyllo with no holes if possible, just looks better.
12. Once you have applied the top layer tuck in all the edges to give a nice appearance.

13. With a Sharp knife cut your baklava in desired shapes and number of pieces. If you can't cut all the ways through don’t worry you will cut again later. A 9x9 pan cuts nicely into 30 pieces. Then brush with a generous layer of butter making sure to cover every area and edge

14. Bake for approximately 30 minutes; remove from oven and cut again this time all the way through. Continue baking for another 30 minutes. (Oven temperatures will vary, you are looking for the top to be a golden brown, take close watch yours may need more or less time in the oven)

15. When baklava is cooked remove from oven and pour the cooled (will still be warmish) syrup evenly over the top, taking care to cover all surfaces when pouring. It looks like it is a lot but over night the syrup will soak into the baklava creating a beautifully sweet and wonderfully textured baklava!

16. Allow to cool to room temperature. Once cooled cover and store at room temperature. Allow the baklava to sit overnight to absorb the syrup.17. Serve at room temperature

Freezing/Storage Instructions/Tips: There are a few ways to store your Baklava. It is recommended that you store your baklava at room temperature in an airtight container. Stored at room temperature your baklava will last for up to 2 weeks. You will notice as the days pass it will get a little juicier and chewier. You may choose to store it in the fridge; this will make it a little harder and chewy, but does increase the shelf life. You can also freeze your baklava and then just set it out at room temperature to thaw.

Tuesday, June 21, 2011

Date (Nut) Loaf (TWD)


I can't believe it's been two weeks since I last posted! Where does the time go? I really need to get better about posting, especially since I have some great good eats to post about!

This week's Tuesdays with Dorie (TWD) recipe was chosen by Mary of Popsicles and Sandy Feet: Date-Nut Loaf. I love dates, but I'm not so keen on nuts so my cake was a Date Loaf sans nuts.  The recipe was straightforward and easy.  While I was creaming the butter, cream cheese, and sugar together, I chopped the dates up.  After that, it was just a few more minutes to add in the eggs, extracts, and dry ingredients.  My loaf was done baking about 10 minutes early, so I was glad I checked on it, because it was just a tad on the dry side as it is.


Thanks Mary, for hosting this week.  I just finished baking the loaf today and I've only had a few bites so far, because I wanted to wrap the loaf and lets the flavors "ripen" overnight, as Dorie suggests.  The dates were delicious in this loaf, and I imagine dried apricots would be quite nice, too.  I'll have to report back later on the final verdict after I try it again tomorrow!

If you would like the recipe, you can find it here. Make sure you check out the TWD Blogroll, to see how everyone else enjoyed this sweet treat! Also don't forget to enter my giveaway here before it ends on June 24th.

* Recipe notes - 
- I checked my loaf and it was done 10 minutes early, though next time I'll probably start checking it 20 minutes out to make sure the loaf doesn't dry out.

Tuesday, June 7, 2011

Blueberry-Brown Sugar Plain Cake (TWD)


This week's Tuesdays with Dorie (TWD) recipe was chosen by Cindy of Everyday Insanity: Blueberry-Brown Sugar Plain Cake. Dorie says this cake, with "no crumbs, streusel, nuts, icing or filling--is just plain appealing. It's got soft crumbs, a strong streak of caramel brown sugar flavor and the here-and-there surprise of sweet tart berries."

I have to say that this is probably the best "plain cake" I've had in a while! It's tempting to want to put a glaze or streusel topping on it, but give it a try as is and I promise you won't be disappointed!  The sweet, caramel undertone from the brown sugar is well complimented by the layer of blueberries.  Yes, like many other bakers noted, all of my blueberries sank to the bottom of the cake while it was in the oven (and I even rolled them in flour first!).  So, I ended up with a nice blue layer on the bottom of my cake. Thankfully this did not affect the taste at all ;)


Thanks Cindy, for hosting this week. I'll definitely be making this again! It was such a simple recipe but the flavor combination was spectacular. If you would like the recipe, you can find it here. Make sure you check out the TWD Blogroll, to see how everyone else enjoyed this sweet, blueberry treat! Also don't forget to enter my giveaway here before it ends on June 24th.

* Recipe notes - 
- I baked my cake in a 9 inch square pan and that did not seem to affect the baking time.
- I did have to cover the cake loosely with a foil tent to prevent the top from over browning.