Saturday, March 27, 2010

Orange Tian (DB)


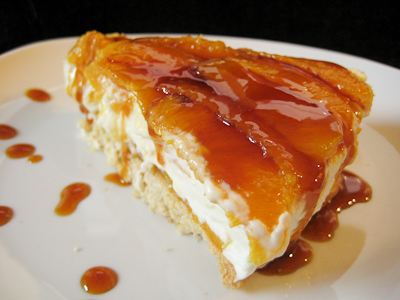
The 2010 March Daring Baker’s challenge was hosted by Jennifer of Chocolate Shavings. She chose Orange Tian as the challenge for this month, a dessert based on a recipe from Alain Ducasse’s Cooking School in Paris. What is a tian, you ask? Yeah, I had to ask that too. I had never heard of a tian before. Apparently it's as simple as any layered dish. So a 7-layer bean dip is considered a tian just as much as the orange pastry you see above is.
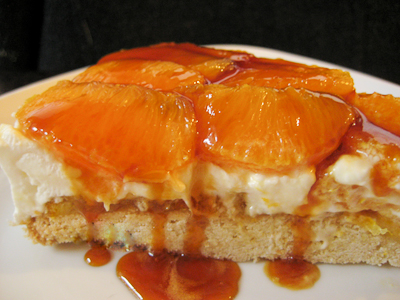

In this case, the orange tian is a layered dessert consisting of a sweet tart dough base, topped with orange marmalade, an orange flavored whipped cream, and then fresh orange segments, garnished with a luscious orange caramel sauce on top.

While this recipe was fairly straightforward, I did get to learn several new techniques through this challenge. To start off, I made my very first marmalade. I love orange marmalade and could eat it plain by the spoonful. In fact, that's what I did with a few spoonfuls of this homemade goodness! In making the marmalade, I also learned how to extract my own pectin from orange seeds! I somehow forgot to put pectin on my grocery list and by the time I started making this recipe, there was no way I was going back out to get it. So, I checked out the forum and found another baker had suggested extracting your own. You basically just stick the seeds in a piece of cheesecloth, let it soak in some warm water for a few hours, and then squeeze the living daylights out of the cheesecloth and seeds until you get some gloopy goodness that is pectin. So cool.
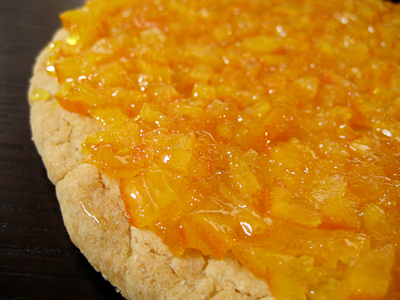
Beautiful layer of orange marmalade atop the pate sablee.

I also learned how to segment an orange during this process. As simple as it is, I had never done this before. The youtube video that was linked was a great tutorial and I had all eight oranges segmented in no time. This is definitely my preferred way to eat a grapefruit from now on (I used to always just slice it in half and then dig in with a spoon!).

Instead of making mini desserts with cookie cutters, I opted to make one large tart using my springform pan. I simply cut out a piece of parchment that would fit into my pan and then used that as a guide as I rolled out the dough.


This dessert is perfect for spring or summer. It would be great for entertaining, as you could get all of the components together ahead of time and then just assembled it right before the party. Even simpler if you used store bought marmalade or jam. I loved this dessert, especially with the orange caramel sauce on top! I've never had anything like it. My husband isn't a huge fan of citrus, but did think that this would be even better with raspberry jam on the bottom and fresh raspberries on top! I think the different flavor combinations are endless.

Thanks Jennifer, for hosting this month's challenge. Make sure you check out the Daring Bakers' Blogroll to see how everyone else enjoyed this citrus-y treat.
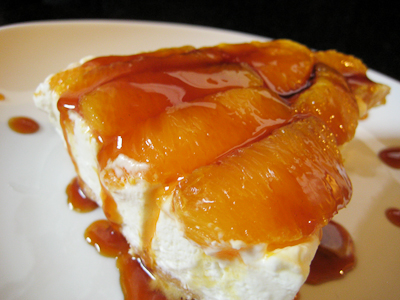

Orange Tian
Recipe slightly adapted from Alain Ducasse‘s Cooking School in Paris, France
Stabilized whipped cream (http://tamsin-cakes.com/2009/06/05/tamsincakes-on-flickr-adventures-in-s...)

For the Pate Sablee:

Ingredients U.S. Imperial Metric Instructions for Ingredients
2 medium-sized egg yolks at room temperature (you can use 2 large egg yolks without a problem)
granulated sugar 6 tablespoons + 1 teaspoon; 2.8 oz; 80 grams
vanilla extract ½ teaspoon
Unsalted butter ¼ cup + 3 tablespoons; 3.5 oz; 100 grams ice cold, cubed
Salt 1/3 teaspoon; 2 grams
All-purpose flour 1.5 cup + 2 tablespoons; 7 oz; 200 grams
baking powder 1 teaspoon ; 4 grams

Directions:
Put the flour, baking powder, ice cold cubed butter and salt in a food processor fitted with a steel blade.

In a separate bowl, add the eggs yolks, vanilla extract and sugar and beat with a whisk until the mixture is pale. Pour the egg mixture in the food processor.

Process until the dough just comes together. If you find that the dough is still a little too crumbly to come together, add a couple drops of water and process again to form a homogenous ball of dough. Form into a disc, cover with plastic wrap and leave to rest in the fridge for 30 minutes.
Preheat your oven to 350 degree Fahrenheit.

Roll out the dough onto a lightly floured surface until you obtain a ¼ inch thick circle. (I refrigerated my dough overnight so when it came time to roll it out, I had to let it sit on the counter for a bit to warm up and soften a little before I could roll it out.)

Using your cookie cutter, cut out circles of dough and place on a parchment (or silicone) lined baking sheet. Bake for 20 minutes or until the circles of dough are just golden. (I used a springform pan so I simply rolled out my dough into a circle that would fit into the pan.)

For the Marmalade:

Ingredients U.S. Imperial Metric Instructions for Ingredients
Freshly pressed orange juice ¼ cup + 3 tablespoons; 3.5 oz; 100 grams
1 large orange used to make orange slices
cold water to cook the orange slices
pectin 5 grams (If you do not have pectin, take all your orange seeds after segmenting the oranges and place them in a small piece of cheesecloth. Soak in warm water for a few hours, then squeeze out the pectin. It should be thick like corn syrup.)
granulated sugar: use the same weight as the weight of orange slices once they are cooked

Finely slice the orange. Place the orange slices in a medium-sized pot filled with cold water. Simmer for about 10 minutes, discard the water, re-fill with cold water and blanch the oranges for another 10 minutes.

Blanch the orange slices 3 times. This process removes the bitterness from the orange peel, so it is essential to use a new batch of cold water every time when you blanch the slices.

Once blanched 3 times, drain the slices and let them cool.

Once they are cool enough to handle, finely mince them (using a knife or a food processor).

Weigh the slices and use the same amount of granulated sugar . If you don’t have a scale, you can place the slices in a cup measurer and use the same amount of sugar.

In a pot over medium heat, add the minced orange slices, the sugar you just weighed, the orange juice and the pectin. Cook until the mixture reaches a jam consistency (10-15 minutes).

Transfer to a bowl, cover with plastic wrap and put in the fridge.

For the Orange Segments:

For this step you will need 8 oranges.

Cut the oranges into segments over a shallow bowl and make sure to keep the juice. Add the segments to the bowl with the juice.

[See YouTube video for additional information on segmenting oranges.]

For the Caramel:

Ingredients U.S. Metric Imperial Instructions for Ingredients
granulated sugar 1 cup; 7 oz; 200 grams
orange juice 1.5 cups + 2 tablespoons; 14 oz; 400 grams

Place the sugar in a pan on medium heat and begin heating it. (You can gently swirl the pan to prevent burning, but do not stir the sugar.)

Once the sugar starts to bubble and foam, slowly add the orange juice. (At this point, the caramel will harden... just keep heating and stirring and it will dissolve back into solution.) As soon as the mixture starts boiling, remove from the heat and pour half of the mixture over the orange segments.

Reserve the other half of the caramel mixture in a small bowl — you will use this later to spoon over the finished dessert. When the dessert is assembled and setting in the freezer, heat the kept caramel sauce in a small saucepan over low heat until it thickens and just coats the back of a spoon (about 10 minutes). You can then spoon it over the orange tians. (The caramel sauce will seem too thin after 10 minutes of additional heating. Refrain from continuing to heat it, because it will thicken nicely as it cools. I continued to heat it until it was thick and then once it cooled it was way too thick.)

[Tip: Be very careful when making the caramel — if you have never made caramel before, I would suggest making this step while you don’t have to worry about anything else. Bubbling sugar is extremely, extremely hot, so make sure you have a bowl of ice cold water in the kitchen in case anyone gets burnt!]

For the Whipped Cream:

Ingredients U.S. Metric Imperial Instructions for Ingredients
heavy whipping cream 1 cup; 7 oz; 200 grams
3 tablespoons of hot water
1 tsp Gelatine
1 tablespoon of confectioner's sugar
orange marmalade (see recipe above) 1 tablespoon

In a small bowl, add the gelatine and hot water, stirring well until the gelatine dissolves. Let the gelatine cool to room temperature while you make the whipped cream. Combine the cream in a chilled mixing bowl. Whip the cream using a hand mixer on low speed until the cream starts to thicken for about one minute. Add the confectioner sugar. Increase the speed to medium-high. Whip the cream until the beaters leave visible (but not lasting) trails in the cream, then add the cooled gelatine slowly while beating continuously. Continue whipping until the cream is light and fluffy and forms soft peaks. Transfer the whipped cream to a bowl and fold in the orange marmalade.
[Tip: Use an ice cold bowl to make the whipped cream in. You can do this by putting your mixing bowl, cream and beater in the fridge for 20 minutes prior to whipping the cream.]

Assembling the Dessert:

Make sure you have some room in your freezer. Ideally, you should be able to fit a small baking sheet or tray of desserts to set in the freezer.

Line a small tray or baking sheet with parchment paper or a silicone sheet. Lay out 6 cookie cutters onto the parchment paper/silicone.

Drain the orange segments on a kitchen towel.

Have the marmalade, whipped cream and baked circles of dough ready to use.

Arrange the orange segments at the bottom of each cookie cutter. Make sure the segments all touch either and that there are no gaps. Make sure they fit snuggly and look pretty as they will end up being the top of the dessert. Arrange them as you would sliced apples when making an apple tart.

Once you have neatly arranged one layer of orange segments at the bottom of each cookie cutter, add a couple spoonfuls of whipped cream and gently spread it so that it fills the cookie cutter in an even layer. Leave about 1/4 inch at the top so there is room for dough circle.

Using a butter knife or small spoon, spread a small even layer of orange marmalade on each circle of dough.

Carefully place a circle of dough over each ring (the side of dough covered in marmalade should be the side touching the whipping cream). Gently press on the circle of dough to make sure the dessert is compact.

Place the desserts to set in the freezer to set for 10 minutes.

Using a small knife, gently go around the edges of the cookie cutter to make sure the dessert will be easy to unmold. Gently place your serving plate on top of a dessert (on top of the circle of dough) and turn the plate over. Gently remove the cookie cutter, add a spoonful of caramel sauce and serve immediately.

Tuesday, March 16, 2010

Soft Chocolate and Raspberry Tart (TWD)


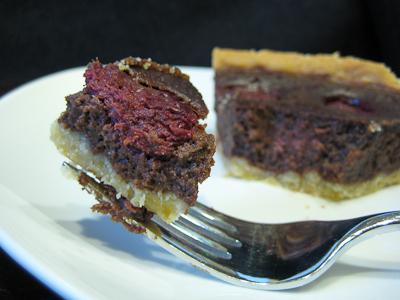
This week's Tuesdays with Dorie (TWD) recipe was chosen by Rachelle of Mommy? I’m Hungry!: Soft Chocolate and Raspberry Tart. I actually made this tart quite some time ago, for my husband's birthday because he requested something chocolatey, and I needed something quick and simple to throw together. Let me just say that chocolate and raspberry were just meant for each other :)

I know that in recipes like this, the flavor of the tart comes from the type of chocolate you use, so you should really use a high quality chocolate, but I was busy and didn't have time to run to the store, so I just used what I had on hand - semisweet chocolate chips! I'm really not that picky when it comes to chocolate, so I have to say that the tart still came out pretty tasty using "inferior" chocolate, so I can only imagine how great it would be with good chocolate.

I think blueberries would be nice to try in this tart too, but really you can't go wrong with the classic chocolate and raspberry combination. This recipe was really quick to throw together, especially since I already had some premade sweet tart dough in the freezer. It would make a great dessert for entertaining, since you could make the tart ahead of time and the chocolate filling only takes minutes to prepare.

Thanks, Rachelle, for hosting this week. I loved it. The chocolate filling is really soft and creamy after it is baked and each bite that contains raspberry is a delight. If you would like the recipe, you can find it here. Make sure you check out the TWD Blogroll, to see how everyone else enjoyed this chocolatey treat!

* Recipes notes:
- I used semisweet chocolate chips in this recipe, mostly for convenience.
- I would probably use more raspberries next time, as the bites I had that were without fruit just weren't as good.
- I found that the baking time was much longer for my mini tarts, maybe because they were higher/thicker than one large tart? Not sure but mine took an extra 15 minutes to bake up. Just watch the tarts as they bake and you will see the top of the chocolate layer change in consistency. It will start to change from the outside edges of the tart and move inward, so once that appearance is uniform throughout the tart, you'll know it's done.
- For tips from other TWD bakers, click here.

Sunday, March 14, 2010

Carrot Cake with Fresh Orange Cream Cheese Frosting (SMS)


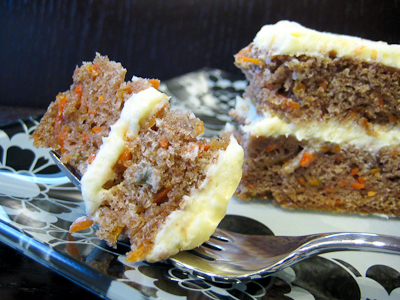
This week's Sweet Melissa Sundays (SMS) recipe was chosen by Julie of A Little Bit of Everything : Carrot Cake with Cream Cheese Frosting. I've tried Dorie's carrot cake recipe, but the Pastry Queen's remains my favorite, so I was eager to try another recipe to see how it compared.

Per my usual, I omitted the nuts from this recipe (sorry, don't like nuts). Then I realized that I was running low on sugar, only as I was in the middle of making this cake. So, it ended up having only 1.5 cups of sugar in it instead of the full 2 cups. My mom is always commenting on how dessert are often too sweet and cuts back on the sugar in most recipes anyway, so I wasn't too concerned about it.


Well, my mom was right because I couldn't even tell that the cake was missing a half cup of sugar. The cake itself was extremely moist, though I did miss the pineapple and coconut that it is in my favorite recipe. The cream cheese frosting didn't have a very strong cream cheese taste to it (which I generally love), but instead tasted light and airy (despite containing two sticks of butter in it!) with a strong citrus flavor.

Overall, I enjoyed this cake. It was a very light and refreshing carrot cake and the orange zest really makes it special. My favorite carrot cake is still this one though, so make sure you check it out if you like carrot cakes. If you would like to try this carrot cake recipe, you can find it here. Make sure you check out the Sweet Melissa Sundays Blog Roll to see how everyone enjoyed this cake, which would make a wonderful addition to any Easter table.

* Recipe notes:
- I only added 1.5 cups of sugar and found the cake to be just fine. Not sure if the full 2 cups would make it too sweet?
- Make sure you check out this link to see how you can quickly and easily make parchment rounds to line your cake pans.

- For more tips, click here.

Saturday, March 6, 2010

Toasted-Coconut Custard Tart (TWD)


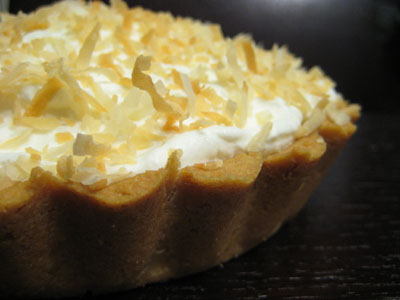
This week's Tuesdays with Dorie (TWD) recipe was chosen by Beryl of Cinemon Girl: Toasted-Coconut Custard Tart. I actually made this last weekend, but I'm a bit late posting this because unfortunately the power cord to my laptop died and I had to order a new one, but better late than never right? So back to this past week's pick... I love all things coconut, so I was eager to try this recipe.


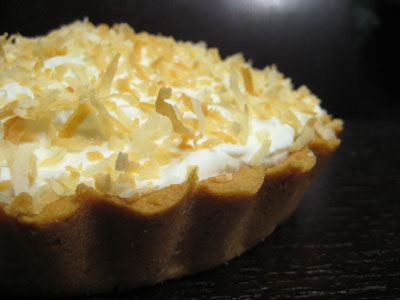
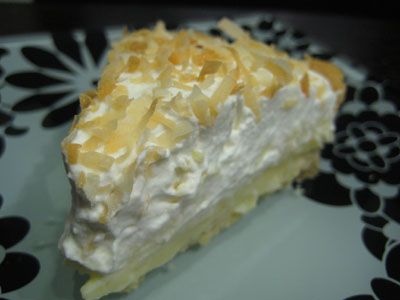
It's basically a rum infused vanilla pastry cream chock full of toasted coconut atop Dorie's wonderful sweet tart crust, topped with a rum flavored whipped cream. With six egg yolks in the pastry cream, I was worried that this tart was going to be overly rich and creamy. Surprisingly, this tart was very light and airy and not heavy at all. The coconut flavor was well complemented with the rum, and you can't ever go wrong with Dorie's sweet tart dough.

While I thoroughly enjoyed this tart, if you love coconut, I would highly recommend that you try Dorie's Florida Pie, which is like a coconut filled key lime pie :)


Thanks, Beryl, for hosting this week. I loved it. If you would like the recipe, you can find it here. Make sure you check out the TWD Blogroll, to see how everyone else enjoyed this light, coconut-y treat!

* Recipes notes:
- For tips from other TWD bakers, click here.

Saturday, February 27, 2010

Tiramisu (DB)


The February 2010 Daring Bakers’ challenge was hosted by Aparna of My Diverse Kitchen and Deeba of Passionate About Baking. They chose Tiramisu as the challenge for the month. Their challenge recipe is based on recipes from The Washington Post, Cordon Bleu at Home and Baking Obsession.

They chose Baltimore pastry chef Carminantonio Iannaccone’s version of tiramisu for a couple of reasons. Firstly, his recipe is different from most other tiramisu recipes as he makes a zabaglione, an egg custard which is flavoured with Marsala wine (I used coffee instead). Even more important is that his zabaglione is cooked so there is no risk from using raw eggs. He also makes a vanilla flavoured pastry cream which isn't seen in many other tiramisu recipes.


I've made tiramisu in the past, even with homemade ladyfingers... but I've never made the entire thing from start to finish from scratch (even the mascarpone cheese!). I have to say that my favorite part of this challenge was learning how to make the mascarpone cheese. I never realized how easy it is to make and that stuff is soooo expensive that I am glad I know how to make it now!

While this challenge took lots of advance planning with lots of overnight refrigeration required, each individual component was simple to execute.

For both the zabaglione and the pastry cream, I started the double boiler on low heat but had to increase it to medium in order to get the mixtures to thicken up. I also had to heat both for about 15 minutes longer than the recipe indicated. I'm not sure that keep the water in the double boiler at a low simmer would ever get the mixtures warm enough to thicken up.

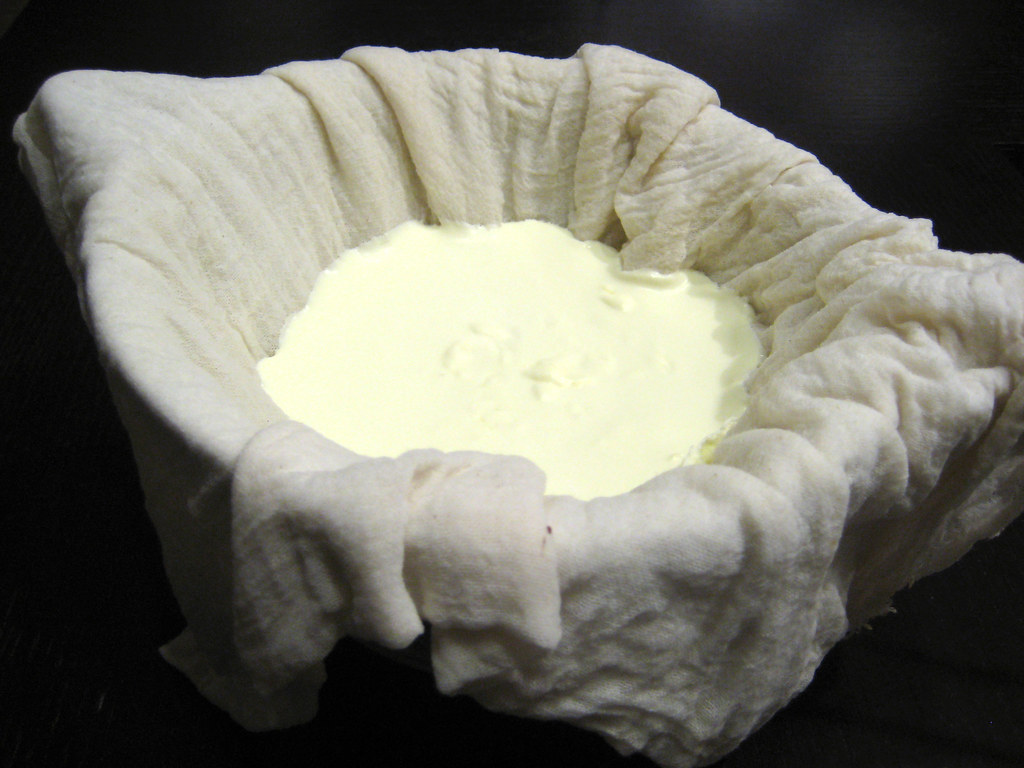
For the mascarpone cheese, I was a bit upset because the recipe says to use a wide skillet. It does not say to set up a double boiler. Sure, I thought it was odd that I was setting my bowl in a skillet with simmering water, but I thought I was following the instructions correctly. Had it said to set up a double boiler, I would have known right away that the bowl shouldn't be touching the bottom on the skillet. It was only after being unable to get my cream up to 190F that I went back to read the recipe notes and noticed that the hosts mention that it needs to be a double boiler and the cream needs to be in a stainless steel bowl that does not touch the bottom of the pan. I am not sure how deep everyone else's skillets are, but I don't have a skillet deep enough to serve as a double boiler so I think the recipe is a bit misleading. So, once I tossed that batch and started over using a saucepan for the double boiler and a stainless steel bowl for my cream, getting it up to 190F was a breeze and making the mascarpone cheese was very straightforward. Once I got the cream up to 190F, I added some lime juice and continued heating a litte bit longer, and then it thickened up quite nicely. A little chill time in the refrigerator overnight and I had mascarpone cheese! How cool :)

Honestly, when I couldn't get the mascarpone cheese to work out, I almost wanted to call it quits and cheat by using store bought. I figured that no one would be the wiser if I did that anyway... but I'm glad I persisted... and to that end, I have photographic evidence that I completed this part of the challenge:

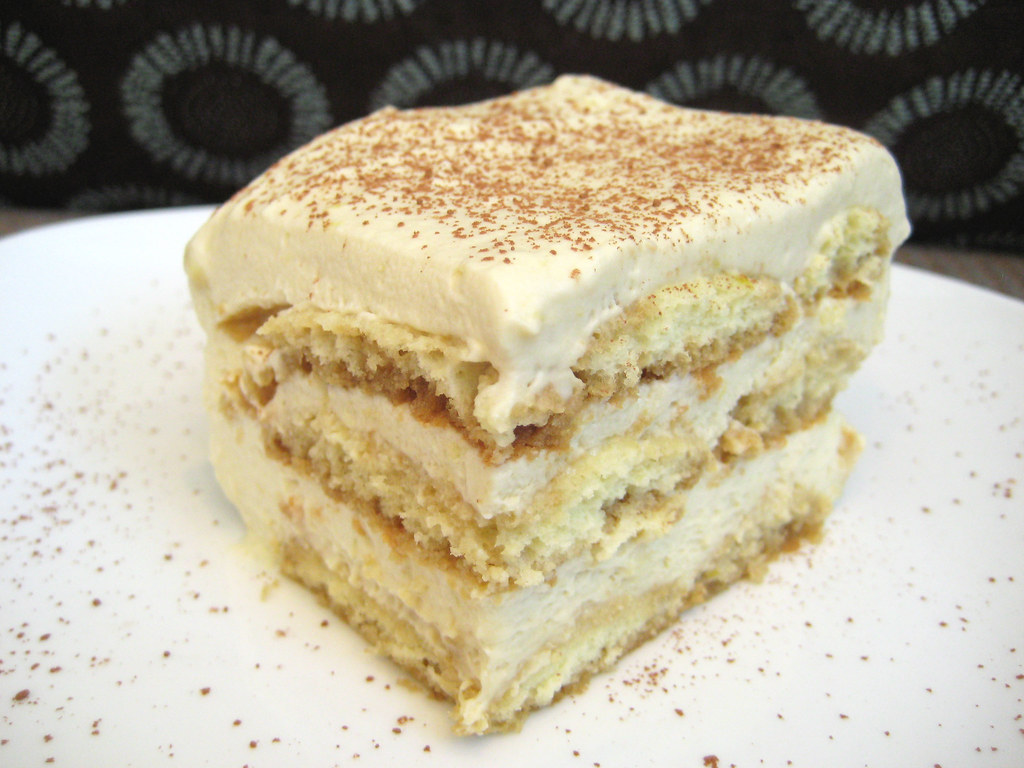
Assembling the tiramisu was easy, I didn't go for anything elaborate because these days I am lucky to even get any baking in with my 3 month old (almost 4 months - where does the time go?!) baby.

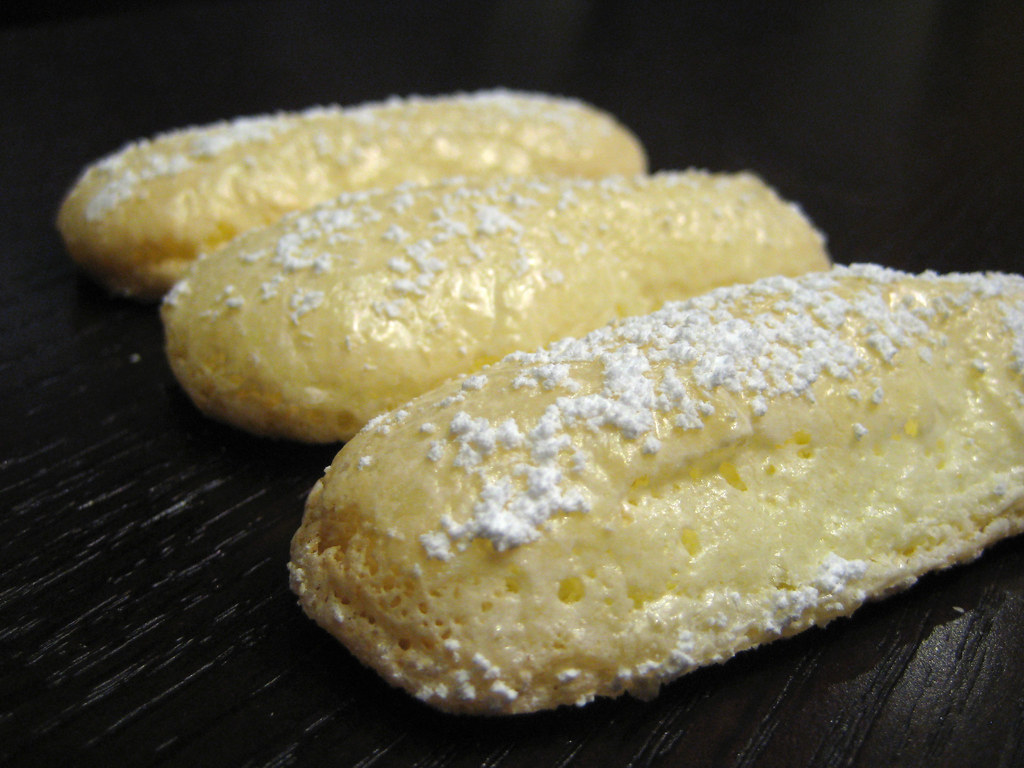
As for the taste? I used chocolate macadamia nut kona coffee instead of espresso, and added real rum instead of rum extract to my dipping solution. I really enjoyed this dessert. The ladyfingers from this recipe were better than the ones I had made previously, and the overall end result was much more like the traditional tiramisu that I am used to having, as opposed to the other recipe I tried which was very cream cheesey and more like a "tiramisu cheesecake" flavor. This will definitely be my go-to recipe for tiramisu from now on.


Thanks Aparna and Deeba, for hosting this month's challenge. I am so happy I learned how to make my own mascarpone cheese! Make sure you check out the Daring Bakers' Blogroll to see how everyone else enjoyed this classic Italian dessert.

Tiramisu:

Mascarpone Cheese – Vera’s Recipe (Baking Obsession) for Homemade Mascarpone Cheese.
Savoiardi/ Ladyfinger Biscuits – Recipe from Cordon Bleu At Home
Tiramisu – Carminantonio's Tiramisu from The Washington Post, July 11 2007

EQUIPMENT REQUIRED:

  • A double boiler (a stainless steel bowl that fits inside a large saucepan/ pot without touching the bottom will do)
  • Two or three large mixing bowls
  • Whisk
  • A medium sized heavy bottomed pan
  • Fine meshed strainer (to remove lumps from pastry cream, if any)
  • Electric mixer, hand held
  • Serving dish (or dishes) of choice (8" by 8" should be fine)
  • Spatula for folding and spoons as required
  • Plastic wrap/ clingfilm
  • Baking sheets
  • Parchment paper or nonstick liners
  • Pastry bag (can be disposable)
  • Plain 3/4" pastry bag tip or cut the end of pastry bag to this size (If you don’t have a pastry bag and/or tips, you can use a Ziploc bag with the corner snipped off)
  • Oven
  • Cooling rack
  • Thin-bladed spatula for removing ladyfinger biscuits from the baking sheets
  • Instant-read thermometer (optional)
  • Strainer
  • Cheesecloth or cotton napkin for draining mascarpone
  • Fine-mesh strainer for shaking cocoa powder on tiramisu

TIRAMISU

(Recipe source: Carminantonio's Tiramisu from The Washington Post, July 11 2007 )
This recipe makes 6 servings

Ingredients:
For the zabaglione:
2 large egg yolks
3 tablespoons sugar/50gms
1/4 cup/60ml Marsala wine (or port or coffee)
1/4 teaspoon/ 1.25ml vanilla extract
1/2 teaspoon finely grated lemon zest

For the vanilla pastry cream:
1/4 cup/55gms sugar
1 tablespoon/8gms all purpose flour
1/2 teaspoon finely grated lemon zest
1/2 teaspoon/ 2.5ml vanilla extract
1 large egg yolk
3/4 cup/175ml whole milk

For the whipped cream:
1 cup/235ml chilled heavy cream (we used 25%)
1/4 cup/55gms sugar
1/2 teaspoon/ 2.5ml vanilla extract

To assemble the tiramisu:
2 cups/470ml brewed espresso, warmed
1 teaspoon/5ml rum extract (optional)
1/2 cup/110gms sugar
1/3 cup/75gms mascarpone cheese
36 savoiardi/ ladyfinger biscuits (you may use less)
2 tablespoons/30gms unsweetened cocoa powder

Method:
For the zabaglione:
Heat water in a double boiler. If you don’t have a double boiler, place a pot with about an inch of water in it on the stove. Place a heat-proof bowl in the pot making sure the bottom does not touch the water.
In a large mixing bowl (or stainless steel mixing bowl), mix together the egg yolks, sugar, the Marsala (or espresso/ coffee), vanilla extract and lemon zest. Whisk together until the yolks are fully blended and the mixture looks smooth.
Transfer the mixture to the top of a double boiler or place your bowl over the pan/ pot with simmering water. Cook the egg mixture over low heat, stirring constantly, for about 8 minutes or until it resembles thick custard. It may bubble a bit as it reaches that consistency.
Let cool to room temperature and transfer the zabaglione to a bowl. Cover and refrigerate at least 4 hours or overnight, until thoroughly chilled.

For the pastry cream:
Mix together the sugar, flour, lemon zest and vanilla extract in a medium heavy-bottomed saucepan. To this add the egg yolk and half the milk. Whisk until smooth.
Now place the saucepan over low heat and cook, stirring constantly to prevent the mixture from curdling.
Add the remaining milk a little at a time, still stirring constantly. After about 12 minutes the mixture will be thick, free of lumps and beginning to bubble. (If you have a few lumps, don’t worry. You can push the cream through a fine-mesh strainer.)
Transfer the pastry cream to a bowl and cool to room temperature. Cover with plastic film and refrigerate at least 4 hours or overnight, until thoroughly chilled.

For the whipped cream:
Combine the cream, sugar and vanilla extract in a mixing bowl. Beat with an electric hand mixer or immersion blender until the mixture holds stiff peaks. Set aside.

To assemble the tiramisu:
Have ready a rectangular serving dish (about 8" by 8" should do) or one of your choice.
Mix together the warm espresso, rum extract and sugar in a shallow dish, whisking to mix well. Set aside to cool.
In a large bowl, beat the mascarpone cheese with a spoon to break down the lumps and make it smooth. This will make it easier to fold. Add the prepared and chilled zabaglione and pastry cream, blending until just combined. Gently fold in the whipped cream. Set this cream mixture aside.

Now to start assembling the tiramisu.
Workings quickly, dip 12 of the ladyfingers in the sweetened espresso, about 1 second per side. They should be moist but not soggy. Immediately transfer each ladyfinger to the platter, placing them side by side in a single row. You may break a lady finger into two, if necessary, to ensure the base of your dish is completely covered.
Spoon one-third of the cream mixture on top of the ladyfingers, then use a rubber spatula or spreading knife to cover the top evenly, all the way to the edges.
Repeat to create 2 more layers, using 12 ladyfingers and the cream mixture for each layer. Clean any spilled cream mixture; cover carefully with plastic wrap and refrigerate the tiramisu overnight.
To serve, carefully remove the plastic wrap and sprinkle the tiramisu with cocoa powder using a fine-mesh strainer or decorate as you please. Cut into individual portions and serve.

MASCARPONE CHEESE

(Source: Vera’s Recipe for Homemade Mascarpone Cheese)
This recipe makes 12oz/ 340gm of mascarpone cheese

Ingredients:
474ml (approx. 500ml)/ 2 cups whipping (36 %) pasteurized (not ultra-pasteurized), preferably organic cream (between 25% to 36% cream will do)
1 tablespoon fresh lemon juice

Method:

Bring 1 inch of water to a boil in a wide skillet. Reduce the heat to medium-low so the water is barely simmering. Pour the cream into a medium heat-resistant bowl, then place the bowl into the skillet. Heat the cream, stirring often, to 190 F. If you do not have a thermometer, wait until small bubbles keep trying to push up to the surface.
It will take about 15 minutes of delicate heating. Add the lemon juice and continue heating the mixture, stirring gently, until the cream curdles. Do not expect the same action as you see during ricotta cheese making. All that the whipping cream will do is become thicker, like a well-done crème anglaise. It will cover a back of your wooden spoon thickly. You will see just a few clear whey streaks when you stir. Remove the bowl from the water and let cool for about 20 minutes. Meanwhile, line a sieve with four layers of dampened cheesecloth and set it over a bowl. Transfer the mixture into the lined sieve. Do not squeeze the cheese in the cheesecloth or press on its surface (be patient, it will firm up after refrigeration time). Once cooled completely, cover with plastic wrap and refrigerate (in the sieve) overnight or up to 24 hours.
Vera’s notes: The first time I made mascarpone I had all doubts if it’d been cooked enough, because of its custard-like texture. Have no fear, it will firm up beautifully in the fridge, and will yet remain lusciously creamy.
Keep refrigerated and use within 3 to 4 days.

Once assembled, the tiramisu can be frozen till you need to serve it, in case you are not serving it immediately.

LADYFINGERS/ SAVOIARDI BISCUITS
(Source: Recipe from Cordon Bleu At Home)
This recipe makes approximately 24 big ladyfingers or 45 small (2 1/2" to 3" long) ladyfingers.

Ingredients:
3 eggs, separated
6 tablespoons /75gms granulated sugar
3/4 cup/95gms cake flour, sifted (or 3/4 cup all purpose flour + 2 tbsp corn starch)
6 tablespoons /50gms confectioner's sugar,

Method:

Preheat your oven to 350 F (175 C) degrees, then lightly brush 2 baking sheets with oil or softened butter and line with parchment paper.
Beat the egg whites using a hand held electric mixer until stiff peaks form. Gradually add granulate sugar and continue beating until the egg whites become stiff again, glossy and smooth.
In a small bowl, beat the egg yolks lightly with a fork and fold them into the meringue, using a wooden spoon. Sift the flour over this mixture and fold gently until just mixed. It is important to fold very gently and not overdo the folding. Otherwise the batter would deflate and lose volume resulting in ladyfingers which are flat and not spongy.
Fit a pastry bag with a plain tip (or just snip the end off; you could also use a Ziploc bag) and fill with the batter. Pipe the batter into 5" long and 3/4" wide strips leaving about 1" space in between the strips.
Sprinkle half the confectioner's sugar over the ladyfingers and wait for 5 minutes. The sugar will pearl or look wet and glisten. Now sprinkle the remaining sugar. This helps to give the ladyfingers their characteristic crispness.
Hold the parchment paper in place with your thumb and lift one side of the baking sheet and gently tap it on the work surface to remove excess sprinkled sugar.
Bake the ladyfingers for 10 minutes, then rotate the sheets and bake for another 5 minutes or so until the puff up, turn lightly golden brown and are still soft.
Allow them to cool slightly on the sheets for about 5 minutes and then remove the ladyfingers from the baking sheet with a metal spatula while still hot, and cool on a rack.
Store them in an airtight container till required. They should keep for 2 to 3 weeks.

Notes from the Challenge Hosts:

  1. If you cannot find Marsala, port wine is considered a good substitute.
  2. If you would rather not use alcohol in your tiramisu due to diet restrictions or because you want to serve it to children, you may replace the Marsala with an equal amount of espresso or coffee.
  3. Many people, especially those who are not excessively fond of coffee, might find brewed espresso very strong. In this case, please feel free to dilute the espresso or coffee to the desired strength.
  4. It is generally suggested that cream with 25% fat is best for making mascarpone, but 36% works just as well.
  5. We both used lime juice. Deeba has a recipe for mascarpone posted on her blog here.
  6. The mascarpone recipe below is for approximately 340gms of mascarpone. The tiramisu recipe requires only 1/3 cup/75gms so you may scale down the recipe to requirement or put the extra mascarpone cheese to other equally good use. (100gms cream will yield approximately 75gms mascarpone)
  7. While using the double boiler to make the mascarpone as well as the zabaglione, always ensure that the bottom of the bowl on top doesn't touch the bottom of the lower one. It is important to use a stainless steel bowl to pour your cream into, while making the mascarpone.
  8. Ladyfinger batter is very fragile so fold in the flour and yolks very carefully into the meringue so that the whites don't lose their volume.
  9. It might be a good idea to decide the size of the dish in which you intend to set the dessert, and make the fingers to a size which would fit that dish. This makes it easier when assembling the tiramisu later. Do remember that ladyfingers/ savioardi puff up a little while baking.
  10. Ladyfinger biscuits may be stored up to a week in an airtight container. We both made the savoiardi fingers 4-5 days in advance, and stored them in an airtight box in a cool place (or the refrigerator).
  11. We both made the zabaglione & pastry cream the previous day, and assembled the tiramisu the next morning. I (Aparna) then froze my tiramisu for 7 days before decorating and serving it.
  12. Placing the bowl (in which cream is to be whipped) and the beaters of the hand held electric mixer in the fridge for about 1/2 to 1 hour before hand makes the cream whip up very well.
  13. Do not dip the ladyfinger/ savoiardi into the coffee solution for more than ONE second, or they might become very fragile & disintegrate. Extra soaking is likely to spoil the end product, making it soggy. I (Aparna) dipped my biscuits only on one side and found they soaked up more than enough coffee solution.
  14. If you would like to de-mould your tiramisu from your dish (cutting can be easier and neater this way, you can line your dish with plastic wrap (leaving a little extra on the sides of the dish) and then start assembling your tiramisu. Once the tiramisu sets in the refrigerator, you can use the overhang to pull the tiramisu out of the dish.

Monday, February 22, 2010

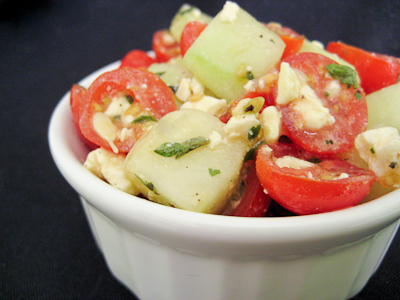
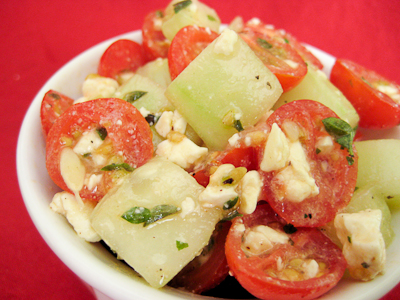
Cherry Tomato Cucumber Feta Salad


I know it's not quite spring or summer yet, but I've never been much of a winter person so I've been anxious to greet the warmer months, along with their fruits. So, I went in search of a good tomato salad recipe.

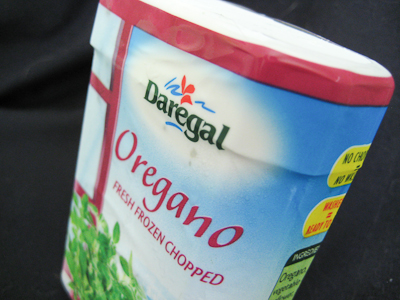
I decided to make a refreshing tomato cucumber feta salad using some fresh frozen herbs I received from Daregal Gourmet. Their herbs are frozen just after harvest to ensure fresh taste. I don't know about you, but whenever I buy fresh herbs from the supermarket, I never seem to be able to use them all before they go bad. I always feel really bad about it, too, because fresh herbs cost a pretty penny. Fresh frozen herbs seem to be a great alternative for cooks like me, because I can have the herbs on hand and use them whenever I'd like, without worry of them spoiling.


This salad takes minutes to prepare, and is so light and refreshing. It makes a great starter, but to be honest with you I loved it so much that I ate all of it myself in one sitting like it was an entree salad! The fresh frozen herbs were a great addition. I would say that they're not quite as good as fresh herbs, but much definitely better than dried herbs... so I'm glad to have them on hand in my kitchen. If you try this recipe, make sure you season this salad with lots of coarse salt and freshly ground pepper to bring out all of the flavors.

Cherry Tomato Cucumber Feta Salad
from Simply Recipes

2-3 cups of cherry and/or pear tomatoes, sliced in half
1 cup of chopped cucumber, peeled (and seeded if the seeds are bitter)
1/4 cup crumbled feta cheese
1 Tbsp chiffonaded mint leaves
1 teaspoon fresh, chopped oregano
1 Tbsp lemon juice
2 Tbsp of finely chopped shallots or green onions
2 teaspoons olive oil
Coarse salt and freshly ground black pepper to taste


Gently toss the tomatoes, cucumber, feta, onions, mint, and oregano together. Dress with lemon juice, olive oil, salt and pepper to taste.

Yield: 2-4 Servings

Tuesday, February 16, 2010

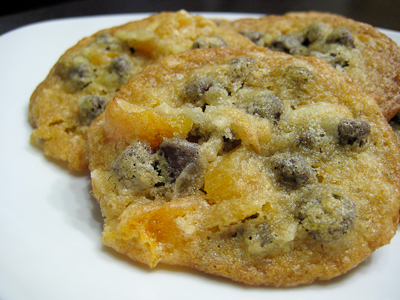
Dorie's Best (Coconut Apricot) Chocolate Chip Cookies (TWD)


This week's Tuesdays with Dorie (TWD) recipe was chosen by Kait of Kait's Plate: My Best Chocolate Chip Cookies. Of course every baker I know is always on the look out for "the best" chocolate chip cookies. So, I was anxious to try Dorie's favorite recipe. She says they are slightly crisp around the edges and chewy in the middle.

I wish I had read the P&Q before making these, because I ran into the same problem as everyone else... my cookies spread out and flattened like crazy in the oven! It seems the problem may be in the amount of flour in these cookies. Apparently most of us don't put as much flour as Dorie does in our measuring cups when spooning the flour in. Dorie recommends weighing out 4.75 ounces of flour for each cup, and the consensus seems that the additional flour prevents these cookies from spreading too much.


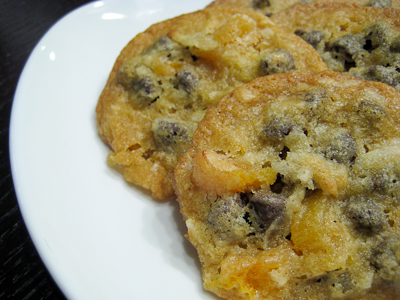
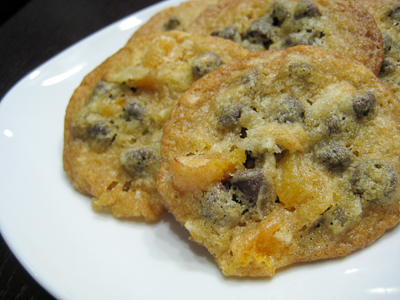
Luckily, I split my dough in half. The first batch I used to make regular chocolate chip cookies (without any nuts). These were the ones that flattened out and were just okay. With the second batch I used Dorie's "playing around" suggestion and added shredded coconut and dried apricot pieces. I absolutely loved these! The coconut and apricots made these cookies nice and chewy, plus I think they helped prevent them from spreading as much as the regular batch. I've always liked dried apricots dipped in chocolate, so I knew that I would enjoy this combination.


Thanks, Kait, for hosting this week. While I haven't found a new favorite basic chocolate chip cookie recipe, I will definitely make these coconut apricot chocolate chip cookies again! If you would like the recipe, you can find it here. Make sure you check out the TWD Blogroll, to see how everyone else enjoyed these classic cookies! (And if you're interested in trying my favorite chocolate chip cookie recipe, click here.)

* Recipes notes:
- It's best to weigh your flour instead of measuring it out. Dorie's "cup" is 4 3/4 oz per cup.
- I added 3/4 cup sweetened shredded coconut and 1/2 cup chopped dried apricot pieces into my half batch of cookie dough. I'll probably add 3/4 cup apricots next time.
- For tips from other TWD bakers, click here.