


One of my favorite Italian desserts is tiramisù. It is a "cake" consisting of ladyfingers soaked in an espresso/coffee liqueur/rum syrup, layered with mascarpone cheese (Italian cream cheese).
Ladyfingers, known in Italy as "savoiardi," are sweet, delicate, light and airy sponge cakes. They are named so because they are shaped like large, fat fingers. If you buy your ladyfingers from the store, this then becomes a completely no bake dessert that is incredibly easy to assemble.
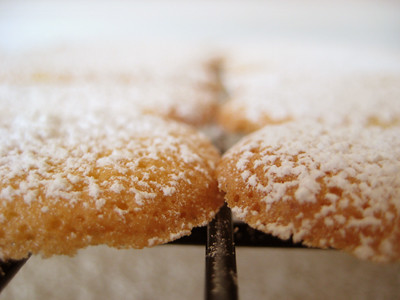
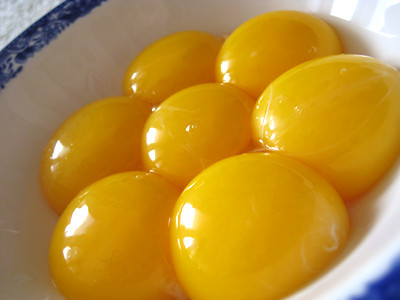
Although I wasn't sure what the end result would be, I was inspired by the Pastry Queen to make my own ladyfingers from scratch. Imagine how pleased I was, then, when I tasted one after pulling them from the oven and found that it tasted remarkably similar to the ladyfingers I had eaten as a child. As I was separating the eggs for this recipe, the egg yolks caught my attention. Look at how beautiful the yolks look:

They look like a bright yellow flower :)
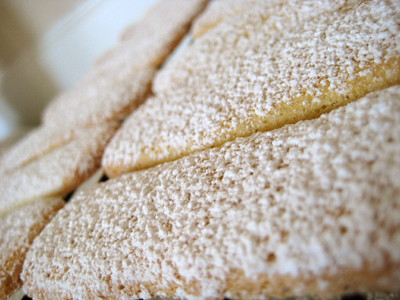
My only complaint about the ladyfingers is that I was able to taste the texture of the powdered sugar that was on the them within the tiramisù, and it distracted from its flavors. I've since read online that sometimes powdered sugar is sprinkled on top of the ladyfingers before baking to give them a soft crust. I might try that next time, or just omit the powdered sugar altogether.
This particular tiramisù was rather cheesy. It contains 1-1/2 pounds of cream cheese and then another pound of mascarpone. My coworkers likened it to a "tiramisù cheesecake." They said it was delicious, but thought that it had a stronger cheese flavor than traditional tiramisù. I agree and did not mind the cream cheese flavor. This is something that I would definitely make again. If you're a cheesecake lover, you will enjoy this. However, next time I make tiramisù, I plan to try Michelle's recipe to see if a more subtle cream cheese flavor would be better.

I love that this can be made ahead of time. It will keep covered, in the refrigerator, for at least 2 weeks. The flavors actually become better with time as they get the chance to "cure."
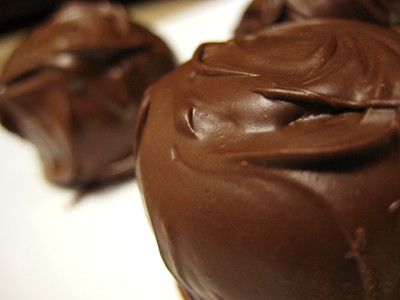
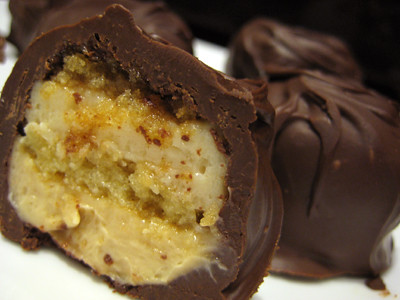
If you're looking for something fun to do with this, you can use it to make little bite-sized truffles. I've included instructions on how to make those at the bottom.
This is my contribution to Emiline's St. Paddy's Day Pub Crawl Event. If you'd like to participate, the deadline is March 17th, so hurry! (I know, I'm a procrastinator and waited until the last minute.) Make sure you head on over to Sugar Plum on March 20th for the Pub Crawl/roundup!

Tiramisù with Homemade Ladyfingers
from The Pastry Queen, by Rebecca Rather
Ladyfingers 1/2 cup powdered sugar for dusting the ladyfingers, plus extra for dusting the baking sheets (I only used 1/4 cup and will probably omit this next time, or try dusting them lightly before baking)
7 large eggs, separated
3/4 cup plus 4 tbsp granulated sugar
2 tsp vanilla extract
1 cup all purpose flour
Soaking Syrup 1/2 cup water
1-1/2 cups sugar
2 tsp instant espresso powder
1/4 cup coffee liqueur, such as Kahlua
1/8 to 1/4 cup dark rum, such as Myers's (I used somewhere in between 1/8 and 1/4 cup and the flavor was perfect)
1 tbsp vanilla extract
Filling 3 (8 ounce) packages cream cheese, at room temperature (I used 1/3 less fat Neufchatel cheese)
2 cups sugar
1 (16 ounce) tub mascarpone cheese, at room temperature
1 tbsp boiling water
2 tbsp instant espresso powder
Dark cocoa powder or grated bittersweet chocolate, for dusting (I used cocoa powder)
To Make the Ladyfingers:
Preheat the oven to 375F. Line two 12 by 17-inch baking sheets with parchment paper. Use a fine-mesh sieve to dust the paper with a light coating of powdered sugar. Using a mixer fitted with a paddle attachment, beat the egg yolks, the 3/4 cup granulated sugar, and the vanilla in a large bowl on high speed about 5 minutes, until the yolks become thick and pale yellow. In a separate clean, large bowl, use a mixer fitted with a whisk attachment to beat the egg whites on high speed until stiff peaks form. Add the 4 tablespoons granulated sugar, 1 tablespoon at a time, beating after each addition. Fold the egg white mixture gently into the egg yolk mixture. Use a sieve to sift the flour over the batter. Gently fold in the flour just until incorporated.
Spoon the batter into a pastry bag fitted with a large round tip. Pipe the batter onto the prepared baking sheets, making each ladyfinger about 4 inches long and 2 inches wide. (This takes a little practice. Don't worry if your first attempts are a little wobbly.) You'll be able to fit about 5 ladyfingers across and 4 down on each sheet. Bake about 10 minutes, until lightly browned. Sift the 1/2 cup powdered sugar over the ladyfingers just as they come out of the oven. Cool for 5 minutes and use a spatula to transfer them from the baking sheet to cooling racks.
To Make the Soaking Syrup:
Simmer the water and sugar in a heavy saucepan set over medium heat about 10 minutes, until slightly thickened. Remove the mixture from the heat and stir in the espresso powder, liqueur, rum, and vanilla. Set aside to cool.
To Make the Filling:
Using a mixer fitted with a paddle attachment, combine the cream cheese and sugar in a large bowl on high speed. Add the mascarpone and beat on medium speed just until incorporated. Combine the boiling water and espresso powder in a small bowl. Stir 1/4 cup of the cooled soaking syrup and 1 tablespoon of the espresso liquid into the filling. Spoon half of the cream cheese mixture into a medium bowl. Stir the remaining 1 tablespoon of espresso liquid into the second bowl of cream cheese mixture. You will have 1 bowl of light brown cream cheese filling and 1 bowl of dark brown cream cheese filling.
Coat a 9 by 13-inch baking pan with cooking spray. Dip both sides of 1 ladyfinger in the cooled soaking syrup and place in the bottom of the pan. Repeat with more ladyfingers and syrup to line the whole pan. Spoon the light-colored cream cheese mixture evenly over the ladyfingers and smooth gently with a spatula. Cover with a second layer of dipped ladyfingers. Spoon on the dark-colored cream cheese mixture and smooth the top as before. (Leftover ladyfingers can be wrapped and frozen up to 1 month). Use a fine-mesh sieve to dust the top with a light coating of dark cocoa, or sprinkle grated bittersweet chocolate evenly on top.
Cover the tiramisù and refrigerate for at least 2 hours or overnight. Serve cold from the refrigerator. Cut in squares and serve with a spatula.
Tip: The Microplane grater is the perfect tool for creating an even dusting of bittersweet chocolate over the tiramisù. Move the tool slowly over the dessert while you grate.
Yield: 16 to 20 Servings.

Tiramisù Truffles
from Good Eats 'n Sweet Treats
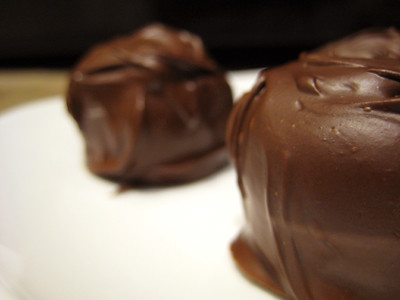
Using the tiramisù made from above, take a cookie scoop to make little round balls. Place them on a baking sheet and put them in the freezer at least 2 hours, or overnight.
After they are frozen, remove them from the freezer and dip them in some melted chocolate (you can use this method if you'd like). Place them onto a baking sheet lined with wax paper.

Keep the truffles in the freezer until you are ready to serve them. Thaw for just a few minutes before serving. Enjoy!
from Good Eats 'n Sweet Treats
Using the tiramisù made from above, take a cookie scoop to make little round balls. Place them on a baking sheet and put them in the freezer at least 2 hours, or overnight.
After they are frozen, remove them from the freezer and dip them in some melted chocolate (you can use this method if you'd like). Place them onto a baking sheet lined with wax paper.
Keep the truffles in the freezer until you are ready to serve them. Thaw for just a few minutes before serving. Enjoy!


Wow, Jaime, you have a beautiful blog!
ReplyDeleteThank you for suggesting Tuesdays with Dorie. It looks wonderful so I joined last week.
Julius
from Occasional Baker
Beautiful photography! I love the picture of the yolks.
ReplyDeleteThose look great! I love cheesecake and Tarimisu so I may try your recipe and how CUTE are those bonbons!! Love your blog and creativity.
ReplyDeleteOH MY!!! I *heart* tiramisu so, so much, but those bon bons make it look even better! WOW!!!
ReplyDeleteGorgeous pictures as well!
That looks so good! Great photos! I have been wanting to try tiramisù for a while now. The tiramisù balls are a great idea.
ReplyDeleteThat's beautiful! It's so neat and perfect looking. You know? Sometimes tiramisu is slopping looking. Great entry and a job well done.
ReplyDeleteI love the tiramisu truffle idea! Ladyfingers are not easy to find in the stores where I live - so its awesome to have the recipe! I will have to try my hand at tiramisu soon! It is one of my favorites! A big THANK YOU!
ReplyDeleteThose yolks are gorgeous! And as much as I love tiramisu... I think I love your truffles even more!
ReplyDeleteThis looks delicious! I've been wanting to try tiramisu soon and wanted to make the ladyfingers from scratch as well, so I think I'll use this recipe! I love the truffles too. It all looks fabulous!
ReplyDeleteOh my! Those look fabulous. And the bon bons, to die for.
ReplyDeleteWow, awesome pics...esp of those gleaming yolks :D Tiramisu is a fav here and the balls is a wonderful idea!!
ReplyDeleteLooks wonderful! Making your own lady fingers was so ambitious of you! And your eggs DO look beautiful :)
ReplyDeleteOh, and I love the balls!!
MMmm they look so good! I love the egg pics, they're adorable!
ReplyDeleteOh I am loving the truffle idea.
ReplyDeletethis is amazing, looks so rich and delicious!
ReplyDeleteThe tiramisu looks incredible! I've bookmarked it to try some time soon- thanks for sharing the recipe!
ReplyDeleteYou've been working hard! This looks so tasty! Great dish!
ReplyDeleteWow, Jaime!! Tiramisu with homemade ladyfingers?? You are so fancy. ;)
ReplyDeleteThanks for leading me to your beautiful blog! Your pictures are stunning. I have made Tiramisu before with Starbucks coffee liquor, and it is AMAZING! Also, I love your truffle idea for a cocktail party.
ReplyDeleteWow,
ReplyDeleteWhat beautiful pictures. The egg yolks are stunning. I love to see beautiful pictures of food. Very nice!
Another great truffle recipe. Sounds and look great!!
You have no idea how big of a hankering I have for tiramisu right now. HUGE HANKERING!
ReplyDeleteSo much to say! The egg yolks are beautiful! And you made your own lady fingers! So fantastic! And now you've inspired me to make some sort of tiramisu cheesecake! Thanks for sharing!
ReplyDeleteThose truffles look like a bit of heaven to me!
ReplyDeleteLovely! I want to make tiramisu this year, as i have never done it. I may need to make my own ladyfingers, so this will be a great help.
ReplyDeleteThese look SOOO amazing. And so creative! you never cease to amaze me with your amazing creations!
ReplyDeleteI love cheesecake so this is right up my alley! And those truffles are a great idea~
ReplyDeleteI love the idea of scooping cake up and making it into truffles! That's awesome!
ReplyDeleteOh my Jaime! I love tiramisu, and love even better that you made truffles out of them!
ReplyDeleteOh my goodness Jaime how awesome are you!! Not only making your own ladyfingers for this dessert but then making little tiramisu truffles?? I would LOVE to try one of those. What a great idea for doing something different with cake.
ReplyDeleteThis looks so good! I've been wanting to make tiramisu for so long but haven't had a good opportunity to try it. When I make it, I will most definitely use your idea of making the truffles!
ReplyDeleteI LOVE your idea of the Tiramisu truffles!!! I haven't made tiramisu in a while, and now I am totally inspired.. must... make... truffles... YUM! I have just found your blog, and I am enjoying browsing through it. You have wonderful photos too. I look forward to continuing to read your blog. :) Thank you!
ReplyDeleteI'll post the truffles when I do them- it will be soon.
Oh wow. I love your tiramisu truffle idea!!! I just made a batch of homemade tiramisu last night (though with store-bought lady fingers). If any survives after tonight's dessert I may try your truffle recipe!
ReplyDelete