


This is another one of those recipes that has been popping up everywhere on food blogs lately. It's from Baking Illustrated and I first saw it on Katie's blog, Good Things Catered. Like many, I've been on the quest to find the perfect chocolate chip cookie. Up until now, my favorite was the Soft Chocolate Chip Cookies. But now I have a new favorite - the Thick and Chewy Chocolate Chip Cookie!
It's actually quite similar to the Best Big, Fat, Chewy Chocolate Chip Cookie recipe I previously posted. Here are the only differences in the ingredient list between the Baking Illustrated recipe and the "Best Big, Fat, Chewy Chocolate Chip Cookie":
- 2 more tablespoons of flour
- 1 less teaspoon of vanilla extract
- 1/2 cup less chocolate chips
Otherwise, the only other place where these recipes differ is in the method of getting the cookie dough to the baking sheet. Chelle from Brown Eyed Baker was the first person I saw to post about this unique cookie-shaping method. Instead of simply dropping the cookie dough onto baking sheets by the spoonful (or with a cookie scoop), this recipe includes a few extra steps to make it look more like an authentic 'store bought' or bakery cookie (see below). Unlike traditional recipes, these cookies are cooled on the baking sheet, instead of on a cooling rack. This allows the cookies to continue baking after they are removed from the oven and results in the most delicious cookies.
Chelle makes an excellent point in her post in that there can be a significant difference between measuring ingredients out using cups and spoons versus weighing them with a kitchen scale. Perhaps that's where this recipe comes out on top? (If you're looking for a kitchen scale, this is the one that we have. I highly recommend it.) If you decide to try this recipe, I encourage you to try weighing the ingredients instead of measuring them - it's actually much quicker, too, I've found.
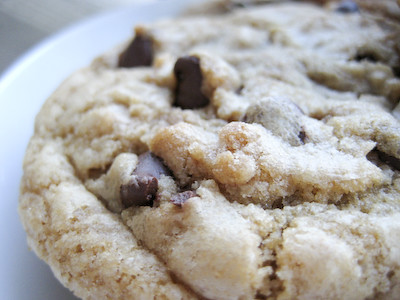
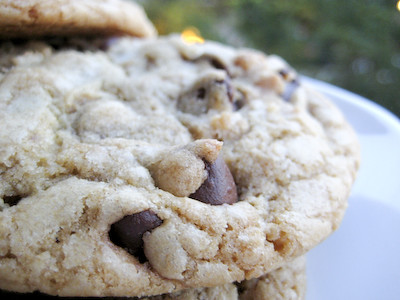
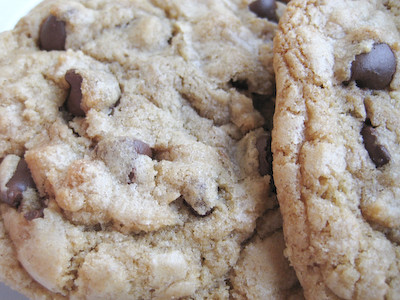
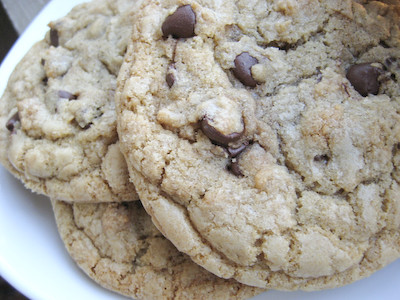
I have nothing but good things to say about this cookie. It has a nice crisp edge around it, but it's soft and chewy in the middle... just perfect. They really do taste just like the ones you would purchase from a gourmet cookie shop. More importantly, they still taste just as good the next day! (Many chocolate chip cookies are wonderful fresh out of the oven, but just aren't the same the day after.) If you haven't tried this recipe yet, you have to try it now! Trust me, you won't be disappointed.
Thick and Chewy Chocolate Chip Cookies
from Baking Illustrated, as seen on Good Things Catered and Brown Eyed Baker
These oversized cookies are chewy and thick, like many of the chocolate chip cookies sold in gourmet shops and cookie stores. They rely on melted butter and an extra egg yolk to keep their texture soft. These cookies are best served warm from the oven but will retain their texture even when cooled. To ensure the proper texture, cool the cookies on the baking sheet. Oversized baking sheets allow you to get all the dough into the oven at one time. If you’re using smaller baking sheets, put fewer cookies on each sheet and bake them in batches.
2 cups plus 2 tablespoons (10 5/8 ounces) unbleached all-purpose flour (I used bleached flour)
1/2 teaspoon baking soda
1/2 teaspoon salt
12 tablespoons (1 1/2 sticks) unsalted butter, melted and cooled until warm
1 cup packed (7 ounces) light or dark brown sugar
1/2 cup (3 1/2 ounces) granulated sugar
1 large egg plus 1 egg yolk
2 teaspoons vanilla extract
1-1 1/2 cups semisweet chocolate chips
Adjust the oven racks to the upper- and lower-middle positions and heat the oven to 325 degrees. Line 2 large baking sheets with parchment paper or spray them with nonstick cooking spray. (I used my Pampered Chef baking stone - no parchment or spray needed)
Whisk the flour, baking soda, and salt together in a medium bowl; set aside.
Either by hand or with an electric mixer, mix the butter and sugars until thoroughly blended. Beat in the egg, yolk, and vanilla until combined. Add the dry ingredients and beat at low speed just until combined. Stir in the chips to taste.
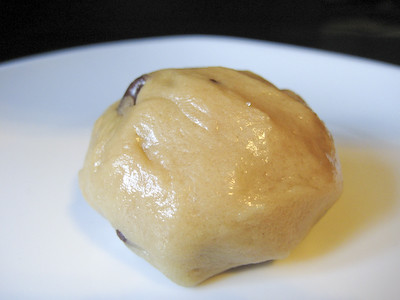
Roll a scant 1/4 cup of the dough into a ball.
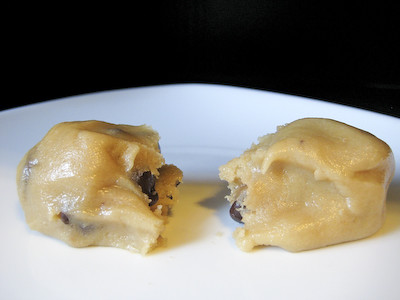
Hold the dough ball with the fingertips of both hands and pull into 2 equal halves.
Rotate the halves 90 degrees and, with jagged surfaces facing up, join the halves together at their base, again forming a single ball, being careful not to smooth the dough’s uneven surface.
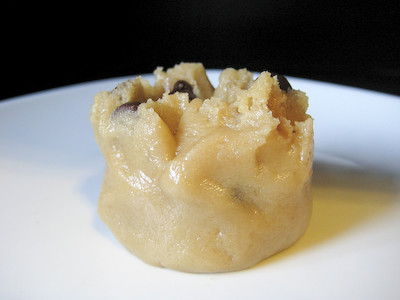
Place the formed dough balls on the prepared baking sheets, jagged surface up, spacing them 2 1/2 inches apart.

Bake until the cookies are light golden brown and the outer edges start to harden yet the centers are still soft and puffy, 15 to 18 minutes, rotating the baking sheets front to back and top to bottom halfway through the baking time. (It is essential that you do not let them brown too much in the oven because they will continue baking after you take them out.)
Cool the cookies on the sheets. (Make sure you follow this step - failure to do so will result in underbaked cookies.)
Remove the cooled cookies from the baking sheets with a side metal spatula.
Yield: About 18 large cookies.


These look great! Aren't they perfect? I made these right after Chelle reminded me that I needed to make them!
ReplyDeleteOooh, heavenly!!
ReplyDeleteThese pictures are making me drool! I am so in love with my usual chocolate chip cookie recipe that I've never tried this one... even though I've been telling myself I need to for months. I think I really need to just do it!
ReplyDeletemmm, I've been craving chocolate chip cookies. I may have to try this. Your pictures are fabulous
ReplyDeleteOh yum! I love the method of rolling and pulling the dough. I'll have to remember that!
ReplyDeleteI'm going to have to try these. I've been seeing these all over the place.
ReplyDeleteThey do look delicious and perfectly shaped!. You can probably achieve the same shape without the fancy molding steps by refrigerating the dough overnight. All of my cookies used to be flat until I realized my butter was too soft...
ReplyDeleteYum! So glad you enjoyed these! And great pics of the dough shaping! I think that it really gives these an awesome look!
ReplyDeleteThe Baking Illustrated/Cook's Illustrated chocolate chip cookie recipe is my favorite, too! I find that refrigerating the dough a few hours (or more - even overnight) before baking makes them even more wonderful - if that's possible!
ReplyDeleteless chocolate!?!?! dear me!
ReplyDeleteeh, i'll let it go, because what an interesting idea! i hadn't come across this particular baking method before and i'm anxious to try it out! :)
Mmmhhhh, what a great looking cookie. Being German I'm used to weighing baking ingredients, so I'll definitely give this a go.
ReplyDeleteoh. my. god. seeing these cookies at 6:30am is deadly - i want to skip work and just make them right now and eat them right now and crash from a sugar high.
ReplyDeletei haven't made these cookies yet because i just couldn't figure out what they were talking about when they said to break them apart and put them back together. thank you so much for showing it like that! i will definitely be making these soon.
ReplyDeleteYUM!!! I used to make a batch of these every week. They are certainly a crowd pleaser. I haven't since my wasit started expending b/c of them (haha), but I'm craving them all over again. Mmm... ps - thanks for the shout out! ;)
ReplyDeleteThese look wonderful! :)
ReplyDeleteThose cookies look amazing! What an interesting technique to shape them. Hmm...haven't even had breaky yet, and now I want a cc cookie. :)
ReplyDeleteThat's how I'll be making my next batch of choc chip cookies - these are perfect, Jaime!
ReplyDeleteI can never get enough of chocolate chip cookies! I've never seen that shaping method, it must give an interesting rough texture at the top, I'll sure try it next time i whip up a batch! They look great!
ReplyDeleteOooh! I can't wait to try these. The shaping method looks interesting. Great pictures of each step - very helpful.
ReplyDeleteThis is on my list to make soon!
ReplyDeletei'll have to make these soon! I'm still on the hunt for THE choc chip recipe. the method is interesting! i can't wait to try it out
ReplyDeleteI definitey agree with the search for a great chocolate chip cookie recipe. I feel like chocolate chips cookies and jeans go hand in hand for women - we're always on the search for the perfect ones!
ReplyDeleteWhen I saw your pictures i thought "oh wow what perfect looking cookies" and then I saw the way you made them look that way. I have a batch of dough in the fridge and am definitely going to do that for the baking. So cool!!
ReplyDeleteI'm surprised how many posts I see where people are searching for the perfect chocolate chip cookie. These, of course, look delicious. Thanks for the little tutorial on forming the perfect shape.
ReplyDeleteYours looks great. I've seen and heard about this recipe and made the Best, Big Fat ones many times and have been tempted to try this one. I'll have to put it at the top of my choc chip cookie list. I just made the ones Recipe Girl posted today. They are good. I've actually rarely met a ccc I didn't like! Still, will always be on a quest for the best. Great blog!
ReplyDeletethose look great, i will be making them. btw, i made your brownies on my blog...
ReplyDeleteI love trying new chocolate chip recipes! It is a fun recipe to play around with. These look great! I will add them to my list!
ReplyDeleteThose look delicious! I just made them too, but I had to smoosh them down to get them that flat. If I didn't, they'd probably end up rising.
ReplyDeleteMaybeyou heard this a lot but really I LOVE YOUR BLOG!!!! sincerely yours....Gloria
ReplyDeleteWow! These look reaaally nice :) I'm sure I've seen them on a blog called 'doughmesstic' a coupla weeks back - news really does travel fast, huh? Well, they will soon be featuring on my blog too, as I can never resist an excuse to bake cookies! And I need something that will still taste good even a while after you've taken them out of the oven, to send to somebody out at war [with my bakingGALS team - check em out to find out more at http://bakinggals.wordpress.com] Which you say these cookies will indeed do - *sigh of happiness* Yersh, I'm looking forward to baking these alright!!
ReplyDeleteBy the way, the tip for making them the same size as gourmet cookies... I LOVE! thanks, [a big fan] Emily :)
Thanks for sharing the cookie tips and this recipe. I will definitely bookmark and try next time. My favorite type of cookies are definitely chocolate chip, chewy, and soft! Great blog, btw.
ReplyDeletenow, were those pictures of the dough necessary? That was absolute torture...I wanted to reach out and grab that little ball of dough!
ReplyDeleteYum!!! is all i can say. I just made a small batch of these (freezing the rest of the dough) for my brother who's had a craving for a subway white choc chip cookie for days, so i promised him i'd make him some, they were so delish i think i'll have to make the rest later. I put white chocolate chunks and added a few macadamia nuts and they turned out great. It took me a while to research how much flour etc needs to be added, i'm not too sure the type of cup measurements you use, and i'd never heard of a stick of butter but i got there eventually.
ReplyDeleteThanks loads for your wonderful website, pictures and helpfull hints :)
Whoops just realised you had the measurements all written out..silly me :)
ReplyDeletethese are the BEST choc chip cookies I have ever made. so far i've made them six times and they just get better and better. A+++++ thanks so much for sharing this!!
ReplyDeleteThanks for the picture tutorial on how to form these cookies - I made them and they were incredible!
ReplyDeleteThis is the best tip for forming chocolate chip cookies ever! Oh, my, but I'm glad I stopped by! I bet this method would kick even the sacred Tollhouse recipe up a notch or two!
ReplyDeleteOh Wow! These cookies do look just like they came from a gourmet cookie shop! The chocolate chips look so perfect...do you place more on top once they are on the baking sheet?
ReplyDeleteoh yummy
ReplyDeleteHi!!
ReplyDeleteI just made these, and they have been rated 10/10 by my super-picky sister. I really like that you put the measurements in grams. I made a few changes (who doesn't??):
-I browned 1/2 of the amount of butter for a more buttery flavour
-I mixed the dry ingredients by hand (I don't want to overmix!)
-I used 2oz butterscotch chips, 2oz peanut butter chips and 4oz of semi-sweet chocolate chips.
-I beated the egg/butter/sugar mixture for a long, long time: this way, I get the ''crackled'' top that the bakeries have ;)
Thanks a lot, these are one of our favourite cookies, if not the best! Very ''bakery-worthy''!!
And Happy New Year!