Tuesday, June 29, 2010

Rum-Drenched Vanilla Cakes (TWD)


First things first! I've entered my little monkey in a photo contest and need your votes to win! You can vote once per day through Sunday and after yesterday, she is currently #41 out of over 2600 kids! :) Help us get to #1! It only takes a few seconds to vote, no registration required (just remember to enter the word verification after you click on the vote button). Here's the link. Thanks so much in advance.

Ok, now on to the our weekly installment of Tuesdays with Dorie (TWD). This week's recipe was chosen by Wendy of Pink Stripes: Rum-Drenched Vanilla Cakes. I love a good rum cake. The only recipes I've tried so far involve using a box of yellow cake mix, though. Nothing wrong with using a boxed cake mix, but of course when you make something from scratch, it's better. So I was really looking forward to trying this recipe.

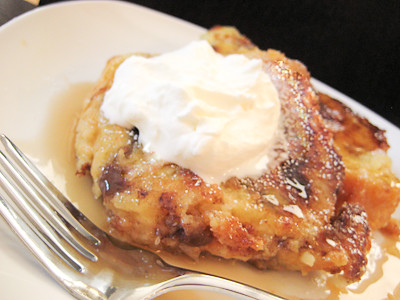
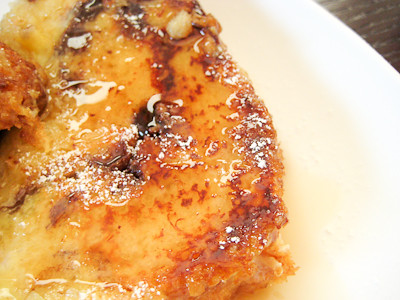
Well, funny story about this cake. I had to make it in my mom's kitchen since we are in California right now. So I wasn't accustomed to using her oven yet. I wasn't paying very much attention when I put the loaf pan in, and part way through the baking I realized that the loaf didn't have room to rise because the oven rack above it was too close to it. Of course by then the top already had a small indentation in it. Still, I took the loaf out, moved the oven rack out of the way, and then put the loaf pan back in the oven and continued baking it. When I went to take it out at the end, it had completely deflated and sunken in the middle! (You can't tell from the pictures, but that's because I photographed the cake upside down and didn't cut too far into it.) Not only that, but I think I left it in for a little too long so the outside was a little more brown than I would have liked.


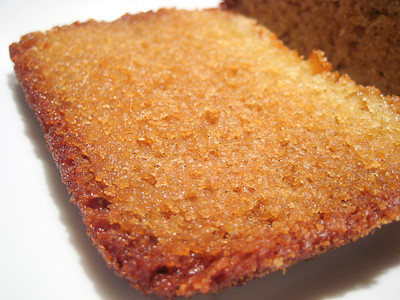
The only explanation for the sunken cake that I could come up with was that I probably jostled the cake too much when I was adjusting the oven rack, causing the cake to deflate. Well, the next day I went to bake something else and I asked my mom where she kept the baking soda in the pantry. She directed me to the shelf in the pantry where I proceeded to see two canisters side by side - one was baking powder and the other was baking soda. It was at that very moment that I realized what had happened!! I had used baking soda instead of powder in this recipe by mistake! See, the thing is that my mom picked up some baking supplies for me right before I made this.  So, when she unloaded all the groceries on the counter, I just grabbed the container and used it.  I have only ever seen baking soda in a box. I had never seen it in a canister before. When I was making this cake the canister was already sitting right there on the counter and I just assumed it was baking powder because of the container. I didn't even bother reading the label! Ha ha... so that explained why my cake didn't quite come out the way I thought it would.  The cake actually tasted pretty good, though I could tell the texture was a little off.  Nonetheless, it's good to know that you can still get a fairly decent cake if you don't have any baking powder at home and want to make this ;)

Thanks Wendy, for hosting this week.  The cake was delicious, even though I goofed it up; although I would probably add more rum to the syrup next time, as the rum flavor was very hard to distinguish.  If you would like the recipe, you can find it here. Make sure you check out the TWD Blogroll, to see how everyone else enjoyed this moist, delicious treat!

* Recipes notes:
- I would recommend either doubling the amount of rum in the syrup or perhaps just making a double batch of syrup for these cakes if you want to taste the rum. If you are wanting some very subtle, then make the recipe as is.
- For tips from other TWD bakers, click here.

Sunday, June 27, 2010

Chocolate Pavlovas with Chocolate Mascarpone Mousse (DB)


The June 2010 Daring Bakers’ challenge was hosted by Dawn of Doable and Delicious. Dawn challenged the Daring Bakers’ to make Chocolate Pavlovas and Chocolate Mascarpone Mousse. The challenge recipe is based on a recipe from the book Chocolate Epiphany by Francois Payard.

I made a half recipe that yielded enough to serve at least 4-6 people.  I also made my own mascarpone cheese, after learning how easy it is to make.  For the half recipe, you'll need to make 3/4 of the mascarpone cheese recipe linked here.

I love chocolate, but this was almost too much for me.  Each individual component was good on its own (the chocolate meringue, the chocolate mascarpone mousse, etc.), but somehow when you put everything together it was just too chocolatey and sweet for me.  My husband didn't find that to be the case at all, so I am sure it just depends on who you ask.  It was only after making these that I learned that pavlovas are traditionally served with fresh fruit.  I think the fruit would have balanced out all the chocolate quite well with these, and I might have enjoyed them a bit more served that way.

Thanks Dawn, for hosting this month's challenge.  Make sure you check out the Daring Bakers' Blogroll to see how everyone else enjoyed these chocolately treats.

Chocolate Pavlovas with Chocolate Mascarpone Mousse
from Chocolate Epiphany by Francois Payard
Printable PDF Recipe

Recipe 1: Chocolate Meringue (for the chocolate Pavlova):

3 large egg whites
½ cup plus 1 tbsp (110 grams) white granulated sugar
¼ cup (30 grams) confectioner’s (icing) sugar
1/3 cup (30 grams) cocoa powder

Directions:

1. Place a rack in the center of the oven and preheat to 200º F (95º C) degrees. Line two baking sheets with silpat or parchment and set aside.

2. Put the egg whites in a bowl and whip until soft peaks form. Increase speed to high and gradually add granulated sugar about 1 tbsp at a time until stiff peaks form. (The whites should be firm but moist.)

3. Sift the confectioner’s sugar and cocoa powder over the egg whites and fold the dry ingredients into the white. (This looks like it will not happen. Fold gently and it will eventually come together.)

4. Fill a pastry bag with the meringue. Pipe the meringue into whatever shapes you desire. Alternatively, you could just free form your shapes and level them a bit with the back of a spoon. (Class made rounds, hearts, diamonds and an attempt at a clover was made!)

5. Bake for 2-3 hours until the meringues become dry and crisp. Cool and store in an airtight container for up to 3 days.


Recipe 2: Chocolate Mascarpone Mousse (for the top of the Pavlova base):

1 ½ cups (355 mls) heavy cream (cream with a milk fat content of between 36 and 40 percent)
grated zest of 1 average sized lemon
9 ounces (255 grams) 72% chocolate, chopped
1 2/3 cups (390 mls) mascarpone (you can easily make your own at home for a fraction of the cost! recipe here)
pinch of nutmeg
2 tbsp (30 mls) Grand Marnier (or orange juice)

Directions:

1. Put ½ cup (120 mls) of the heavy cream and the lemon zest in a saucepan over medium high heat. Once warm, add the chocolate and whisk until melted and smooth. Transfer the mixture to a bowl and let sit at room temperature until cool.

2. Place the mascarpone, the remaining cup of cream and nutmeg in a bowl. Whip on low for a minute until the mascarpone is loose. Add the Grand Marnier and whip on medium speed until it holds soft peaks. (DO NOT OVERBEAT AS THE MASCARPONE WILL BREAK.)

3. Mix about ¼ of the mascarpone mixture into the chocolate to lighten. Fold in the remaining mascarpone until well incorporated. Fill a pastry bag with the mousse. Again, you could just free form mousse on top of the pavlova.

Recipe 3: Mascarpone Cream (for drizzling):

1 recipe crème anglaise
½ cup (120 mls) mascarpone (you can easily make your own at home for a fraction of the cost! recipe here)
2 tbsp (30 mls) Sambucca (optional)
½ cup (120 mls) heavy cream

Directions:

1. Prepare the crème anglaise. Slowly whisk in the mascarpone and the Sambucca and let the mixture cool. Put the cream in a bowl and beat with electric mixer until very soft peaks are formed. Fold the cream into the mascarpone mixture.

Recipe 4: Crème Anglaise (a component of the Mascarpone Cream above):

1 cup (235 mls) whole milk
1 cup (235 mls) heavy cream
1 vanilla bean, split or 1 tsp pure vanilla extract
6 large egg yolks
6 tbsp (75 grams) sugar

Directions:

1. In a bowl, whisk together the egg yolks and sugar until the mixture turns pale yellow.
2. Combine the milk, cream and vanilla in a saucepan over medium high heat, bringing the mixture to a boil. Take off the heat.

3. Pour about ½ cup of the hot liquid into the yolk mixture, whisking constantly to keep from making scrambled eggs. Pour the yolk mixture into the pan with the remaining cream mixture and put the heat back on medium. Stir constantly with a wooden spoon until the mixture thickens enough to lightly coat the back of a wooden spoon. DO NOT OVERCOOK.
4. Remove the mixture from the heat and strain it through a fine mesh sieve into a bowl. Cover and refrigerate until the mixture is thoroughly chilled, about 2 hours or overnight.

Tuesday, June 22, 2010

Dressy Chocolate Loafcake (TWD)


This week's Tuesdays with Dorie (TWD) recipe was chosen by Amy of Amy Ruth Bakes: Dressy Chocolate Loafcake.  It's a wonderfully moist chocolate cake thanks to the addition of some sour cream that also lends it a very subtle tang.  It's a moderately dense cake but does not seem too heavy at all. I layered my cake with some cherry preserves and it was so delicious.  This would be the perfect chocolate cake to serve to someone who loves chocolate but doesn't like the denseness of something like a flourless chocolate cake.

This post is extremely short and sweet because I've got one day left to finish up this month's Daring Bakers' challenge and pack for our big trip to California where our baby girl will get to meet my extended family (including her great grandfathers) for the very first time!


Thanks Amy, for hosting this week. I love how simple this cake was to make, yet at the same time it's 'dressy' enough to serve to dinner guests. If you would like the recipe, you can find it here. Make sure you check out the TWD Blogroll, to see how everyone else enjoyed this decadent, chocolately treat!

* Recipes notes:
- Definitely do the knife test to check this cake! When I pulled it out of the oven it was a bit wobbly and I thought that surely it was underdone in the middle but when I pulled the knife out I was shocked to see that it was done! If I hadn't checked it, I surely would have burned it or dried it out.
- For tips from other TWD bakers, click here.

Tuesday, June 15, 2010

Raisin Swirl Bread & Sugar-Crusted French Toast (TWD)


This week's Tuesdays with Dorie (TWD) recipe was chosen by Susan of Food.Baby: Raisin Swirl Bread.  I love cinnamon raisin bread! In fact, my go-to recipe is this brown sugar raisin bread recipe.  So, I was excited to try this recipe out and see how it compared.

I'm no stranger to yeast breads (though I used to be terrified of them!) so this recipe was fairly straightforward for me.  I did split the recipe into two days, just to simplify my life a little.  It's hard to find a huge stretch of time to bake these days (even though a lot of this recipe is waiting for the dough to rise) when my little monkey wants all my attention! :)


Unfortunately I let my dough warm up too much after taking it out of the refrigerator so I had a terribly hard time rolling up my dough.  Thankfully this did not affect the taste, but it did make for a not-so-pretty swirl.  If you want to see a perfectly swirled loaf, you'll have to visit Susan's blog (the host for this week).


The only optional spice that I added was the cocoa, at the recommendation of another baker.  I was truly surprised that I could not taste the cocoa at all, it simply enhanced the cinnamon flavor. Despite this, I think this recipe was lacking in the cinnamon department. If you're going to make a raisin bread, it's got to have a nice strong cinnamon flavor to it! Even though I could probably double (or triple) the amount of cinnamon in this recipe next time, I think my go-to recipe is still going to be the brown sugar raisin bread I've made in the past.  That bread is so good!


I do have to say, however, that I made the sugar-crusted french toast recipe that Dorie includes with this, and it was fantastic! It will probably be my go-to french toast recipe from now on :) Just make sure you let your french toast brown long enough on each side in order to allow the sugar to caramelize properly.  I'd recommend maybe 4-5 minutes on each side instead of 3 minutes like Dorie suggests.

Thanks Susan, for hosting this week.  I've included Dorie's french toast recipe below, but if you would like the recipe for the raisin swirl bread, you can find it here. Make sure you check out the TWD Blogroll, to see how everyone else enjoyed this sweet, cinnamon-y treat!

* Recipes notes:
- I would recommend doubling or even tripling the amount of cinnamon in this recipe.
- This bread is definitely much better the next day, and even better as french toast!
- Wrapped airtight, this loaf will keep in the freezer for up to 2 months.
- For tips from other TWD bakers, click here.


Sugar-Crusted French Toast
from Baking: From My Home to Yours by Dorie Greenspan

6 slices of raisin swirl bread (each 3/4 to 1-inch thick)
6 large eggs
3 large egg yolks
3-1/2 cups whole milk
2/3 cup sugar, plus 8 tbsp more for sprinkling
1 tbsp pure vanilla extract
1/2 tsp salt
6 tbsp unsalted butter

Mix the eggs, egg yolks, whole milk, 2/3 cup sugar, vanilla extract and salt in a large bowl. Soak the slices of bread in this mixture for 3 minutes.  (Make sure you don't leave them in too long or else your bread will get too soft and difficult to handle!)

When the bread is ready, put two large nonstick skillets over medium heat, add 3 tablespoons butter to each one and melt the butter. Sprinkle each skillet with 2 tablespoons of sugar and put 3 slices of soaked bread in each one.

Cook until the bread is golden brown on the bottom, about 3 minutes (I'd recommend leaving them for 4-5 minutes). Sprinkle the tops of the bread with sugar--again, using 2 tablespoons sugar for each skillet--and carefully flip the slices over.

Add more butter to the pans if needed, and cook for another 3 minutes, or until the undersides are also golden brown.

Serve the toast immediately with fruit, syrup, creme fraiche or jam, or with all of them.

Yield: 3-6 servings

Sunday, June 13, 2010

Chocolate Orange Macaroons (SMS)


This week's Sweet Melissa Sundays (SMS) recipe was chosen by Ellen of Blue Tree Green Heart: Chocolate Orange Macaroons. I love coconut, and so does my husband, so making this recipe was a no brainer. I also love chocolate infused with orange. Plus, it doesn't hurt that this recipe only takes a few minutes to come together - a bonus these days for this busy mommy!


The recipe is short and sweet. Rub the zest of an orange with some shredded coconut, then add some sugar and chopped chocolate, and mix with egg whites. Scoop and then bake! That's it! The only thing I did differently was that I chose to rub the sugar in with the zest as well, instead of just mixing it with the chocolate. I figured that would give the macaroons an even stronger orange flavor.


These came out perfect! Crisp on the outside, chewy in the middle, with bits of chocolate and plenty of orange flavor.  Some found these to be a bit too sweet, and while you could probably decrease the amount of sugar in them to cut back on some calories, I didn't find them too sweet at all.  I'll definitely be making these again and again! They're a great way to use up egg whites after all the ice cream I've been making this summer and much more fun than angel food cake.

Thanks Ellen, for hosting this week.  If you would like the recipe, you can find it here. Make sure you check out the Sweet Melissa Sundays Blog Roll to see how everyone else enjoyed these delicious treats.

* Recipe notes:
- I used semisweet chocolate chips in this recipe instead of bar chocolate.
- If you tend to prefer cookies that aren't super sweet, use unsweetened coconut or decrease the amount of sugar in the recipe to one half cup.

- I used a medium cookie scoop and got about 36 cookies, not 24 from the recipe.
- Keep a close eye on these to prevent them from burning - mine were done a few minutes early, around 22 minutes.
- For more tips, click here.

Friday, June 11, 2010

Strawberry Sour Cream Ice Cream


After making strawberry shortcakes last week, I had some leftover strawberries I needed to use up. With triple digit heat here in Dallas lately, ice cream sure sounded like a welcome treat! So, I went in search of a good strawberry ice cream recipe. I had tried the basic recipe that was included with the Cuisinart ice cream maker, but wanted to see if I could find something better. I've never been disappointed with David Lebovitz' The Perfect Scoop, so when I saw this recipe for Strawberry Sour Cream Ice Cream, I knew I had to try it.


I had made Blueberry Sour Cream Ice Cream in the past, so I knew that the tang from the sour cream would be good. Most of the ice cream recipes I've made are custard based ice creams, that involve cooking the yolks, milk, and cream on the stove. While those generally yield a richer and creamier ice cream, sometimes it's nice to have a simpler ice cream recipe like this one. You simply marinate the strawberries in some sugar and kirsch (I used orange liqueur), then blend them up and add them to some heavy cream, sour cream, and lemon juice.  Just pour the mixture into your ice cream maker and you're done! That's it!


I was pleasantly surprised when I tasted my first spoonful of this ice cream. It is actually pretty rich and creamy, considering it's not a custard ice cream. Having a bowl of this ice cream is like taking a big bowl of strawberries and just dipping them into some whipped cream. Just delicious and the perfect way to cool down on a hot summer's day...

Strawberry Sour Cream Ice Cream
from The Perfect Scoop by David Lebovitz

Makes about 1 1/4 quarts
1 pound fresh strawberries, rinsed and hulled
3/4 cup sugar
1 tbsp. vodka or kirsch (I used orange liqueur)
1 cup sour cream
1 cup heavy cream
1/2 tsp freshly squeezed lemon juice

Slice the strawberries and toss them in a bowl with the sugar and vodka or kirsch.  Stir until the sugar begins to dissolve.  Let stand at room temperature for 1 hour, stirring every so often.

Pulse the strawberries and their liquid with the sour cream, heavy cream and lemon juice in a blender or food processor until almost smooth, but still slightly chunky.

Freeze in your ice cream maker according to the manufacturer’s instructions.

Tuesday, June 8, 2010

Tender Shortcakes (TWD)


This week's Tuesdays with Dorie (TWD) recipe was chosen by Cathy of The Tortefeasor: Tender Shortcakes.  Who doesn't love strawberry shortcakes? Sweet, buttery biscuits topped with sugared strawberries and whipped cream? Yum.  It's the perfect treat to enjoy when strawberries are in season.

I took Dorie's suggestion on this one to spice up the shortcakes a bit so I added 1 teaspoon of ground ginger and about 3 tablespoons of diced candied ginger pieces.  While I enjoyed this variation and found that it definitely added another dimension of flavor to this dessert, I think I prefer the classic, unadulterated version.

I've made strawberry shortcakes from the Sweet Melissa Baking Book in the past, and while both recipes are quite similar, I think I slightly prefer Dorie's version over Melissa's.  Not so much for taste, but more for ease of execution.  With Melissa's recipe, you turn the dough out, pat it into a rectangle, then slice and bake. With Dorie's recipe, you simply scoop the dough out of the bowl and pat them into biscuits on your baking sheet.  Not a huge difference, but enough to make me more inclined to make Dorie's recipe from here on out.


Thanks Cathy, for hosting this week. If you would like the recipe, you can find it here. Make sure you check out the TWD Blogroll, to see how everyone else enjoyed this classic, summery treat!

* Recipes notes:
- Just remember that "less is more" when making biscuits and don't over work your dough and you will end up with fluffy shortcakes.
- You may want to make 15 smaller biscuits instead of the 10 that Dorie recommends in this recipe, as I found them to be quite large. Perhaps scooping 1/4 cup for each biscuit instead of 1/3 cup?
- For tips from other TWD bakers, click here.