Showing posts with label freezes well - good eats. Show all posts

Friday, July 27, 2012

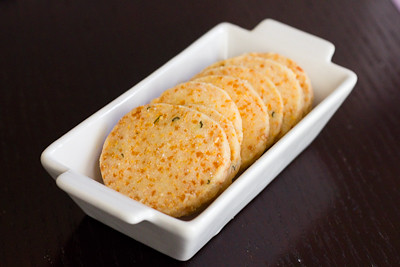
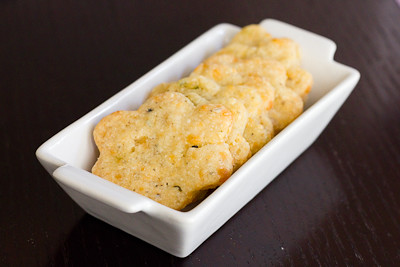
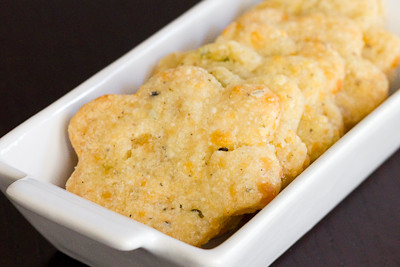
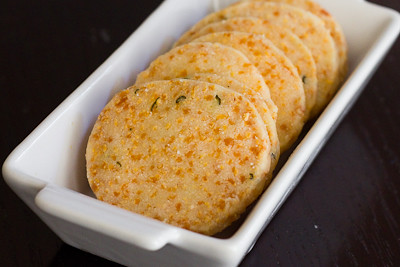
Homemade Crackers: Pepper Jack and Oregano Crackers and Cheddar Rosemary Icebox Crackers (DB)

Our July Daring Bakers' Host was Dana McFarland and she challenged us to make homemade crackers! Dana showed us some techniques for making crackers and encouraged to use our creativity to make each cracker our own by using ingredients we love.

It's been quite some time since I made homemade crackers, so it's hard for me to compare this experience with my previous one.  However, I found that both of these recipes were extremely quick and easy to execute.  The icebox crackers, in particular, were very simple.  Just mix everything together and form the dough into a log and refrigerate; then slice and bake when ready.


My schedule is a bit hectic these days, so I stuck with the recipes as written and didn't take any creative license with them.  The only thing I changed was to omit the walnuts from the cheddar rosemary crackers because I don't care for nuts.

Both types of crackers were very flavorful.  My only complaint would be that the cheddar rosemary crackers were way too salty; so I'll definitely cut back on the salt next time.  These crackers reminded me of a gourmet version of cheezits; the rosemary is such a wonderful addition.

I really enjoyed this challenge because it reminded me of how much I love making my own crackers.  With a toddler to feed, I love that I can make her a snack that doesn't have all the additives and preservatives that are found in store bought crackers.

Thanks Dana, for hosting this month's challenge.  You'll find the recipes below.  Also be sure to check out the Daring Bakers' Blogroll to see what everyone else thought of these savory homemade treats.

Pepper Jack and Oregano Crackers (Roll with pasta rollers or by hand):

Servings: Approximately 80 crackers

Ingredients

1⅔ cups (400 ml) (235 gm) (8¼ oz) all-purpose (plain) flour
2¼ cups (540 ml) (225 gm/8 oz) grated pepper jack cheese, firmly packed
2 teaspoons (10 ml) (1 gm) dried oregano
½ teaspoon (2½ ml) (3 gm) salt
½ teaspoon (2½ ml) (½ gm) black pepper
½ cup (120 ml) (4 fl oz) vegetable oil
½ cup (120 ml) (4 fl oz) water

Spice topping

¼ teaspoon (1¼ ml) (1/8 gm) cayenne
1 teaspoon (5 ml) (3 gm) kosher salt
1 teaspoon (5 ml) (5 gm) sugar

Directions:

1. Combine the spice topping and set aside.
2. Grate the cheese and put in the bowl of a food processor with flour, oregano, salt and pepper and pulse to combine. This can also be done by hand.

3. Add the oil and pulse until the consistency of wet sand is reached.
4. Add enough water for the dough to come together.
5. Form the dough into two disks, wrap with cling film and refrigerate for several hours or overnight.
6. Heat the oven to moderate 325°F/160°C/gas mark 3.
7. Working with a quarter of the dough at a time, either use a rolling pin or roll out in your pasta rollers to 1/8 of an inch (3 mm) thick. If you use pasta rollers, ensure the dough is well floured so as not to stick.
8. Cut the strips into cracker shapes or cut out using a cookie cutter.

9. Transfer to a parchment lined cookies sheet and sprinkle with the spice mixture.
10. Bake for 20-25 minutes until medium golden brown.
11. Store in an airtight container and eat within three days

Cheddar, Rosemary and Walnut Icebox Crackers (form into a log and slice):

Servings: Approximately 48 crackers

Ingredients

½ cup (120 ml) (1 stick) (115 gm/4 oz) butter, well softened
2¼ cups (540 ml) (225 gm/8 oz) grated aged cheddar cheese (the better the cheese, the better the cracker), firmly packed
1 cup plus 3 tablespoons (285 ml) (190 gm/6oz) all-purpose (plain) flour
1 teaspoon (5 ml) (6 gm) salt (I found this to be way too much! try 1/4-1/2 tsp)
1/2 cup (120 ml) (60 gm/2 oz) finely chopped walnuts
1 tablespoon (15 ml) (1¾ gm) finely chopped rosemary

Directions:

1. Combine butter, rosemary and cheese in a stand mixer and beat well (can also be done by hand)

2. Add the flour, salt and nuts and stir to combine
3. Form the dough into two tight logs and wrap with cling film

4. Chill for at least an hour and up to several days. The log can be frozen at this point for several months.
5. Heat the oven to moderate 325°F/160°C/gas mark 3.
6. Slice a log into 5mm (1/5 inch) coins and place on a parchment lined baking sheet
7. Bake about 10 minutes until golden brown
8. Store in an airtight container and eat within three days
9. Try this recipe with different cheeses, nuts (or no nuts), and spices. Get creative!

Storage and Freezing Instructions/Tips:

Generally crackers with less fat and cheese last for weeks in an airtight container and richer crackers only a few days. Dough can be made days ahead, stored in the fridge and baked when needed. The icebox cracker dough can be frozen for several months before thawed, sliced and baked.

Tuesday, April 3, 2012

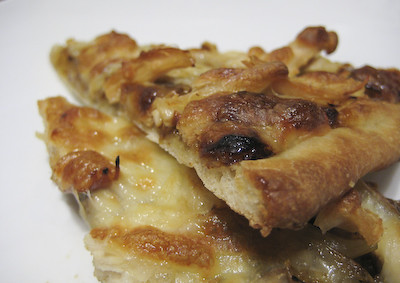
Pizza Rustica (TWD)


This week's Tuesdays with Dorie: Baking with Julia was hosted by Emily of Capital Region Dining and Raelynn of The Place They Call Home: Pizza Rustica.  I'm not sure where this got its name.  Rustic it is, pizza it's not.  It's more like a quiche, but heavy on the cheese and light on the eggs.  The base of the filling is ricotta cheese.  Then you mix in some mozarella and romano cheeses, some parsley, and some prosciutto.

I didn't have any fresh parsley on hand, so I subbed in 2 teaspoons of dried parsley.  Also used cooked bacon instead of proscuitto, and asiago cheese instead of romano cheese.  Sometimes a quiche tastes to "eggy" for me, so this "pizza" was more appealing to me.

There were some mixed opinions among the group about the pie crust, which was very sweet.  I decreased the amount of sugar in it, just a bit, based on comments that it was too sweet.  In the end, I'm not sure if I liked this savory and sweet combination.  I think cutting the sugar in half with this recipe would be absolutely fine.

I thought this was a pretty good dish; my husband not so much.  He would not eat more than one bite :( He usually isn't very picky, either.  So, this is unfortunately probably the first and last time I'll make this one.... in its entirety at least.  I'll probably make the pie crust recipe again, as this is the first one I've ever made that I didn't have huge problems with and it was delicious :)

Thanks to Emily and Raelynn for hosting; you can find the recipe on their blogs here and here.  Make sure you check here, too, to see what everyone else thought of this non-traditional pizza.

Tuesday, March 20, 2012

Irish Soda Bread (TWD) and Vitacost Deal on Coconut Oil


This week's Tuesdays with Dorie: Baking with Julia was hosted by Carla of Chocolate Moosey and Cathleen of my culinary mission.  The chosen recipe was Irish Soda Bread.  So named because instead of yeast, baking soda is used as the leavening agent in this bread.

It's pretty similar to most quick bread recipes (or biscuits), in that you mix all the dry ingredients together in one bowl, then pour the liquid ingredients in and mix it all together.  This recipe does call for a quick kneading, however, and I found the dough to be way too wet to knead.  I had to add quite a bit of extra flour before I could handle it.  Otherwise, this was a super easy recipe and it came together in just a matter of minutes!  I added dried cranberries and chopped dried apricots to mine, which gave it a slightly sweet but not overwhelmingly sweet flavor.  I saw that a few other bakers added cheese to theirs and I think that will be my next rendition of this recipe :)

Thanks to Carla and Cathleen for hosting; you can find the recipe on their blogs here and here.  Make sure you check here, too, to see all the other variations on this classic Irish bread.

Also, if you missed the last Vitacost deal I posted about, their free shipping promotion has been extended through 3/26 at 9am EST.
Right now, Vitacost.com is offering FREE shipping on orders that contain over $20 in Vitacost brand products.  (Normally their shipping fee is $4.95 for orders under $49 and free shipping for orders $49+)  Pair this free shipping offer with their $10 off $10 promo (for new customers) and you can get $20 worth of products for just $10.

You can get the 54oz Vitacost Coconut Oil for just $11.95 after the discount.  It's normally $18.89 on Amazon, so this is quite a savings.

Here's how:
1) Use this link to sign up and get a $10 promo code sent to your email.  After you register for an account with Vitacost.com (it must be through the link provided) you will receive an email with the subject line "Here's your $10 coupon for Vitacost.com" (this may take an hour)

2) Then add the Vitacost Coconut Oil to your cart for $19.95 (used to be $20.99 so it would qualify for free shipping alone).  Add the apple cider vinegar ($2) as a filler to bring your total to $20+.  Then use the $10 off code sent to your email, bringing your order total to $11.95 for both the coconut oil and the apple cider vinegar!

Of course, feel free to look around their website for other items.  You can view all Vitacost brand items that qualify for this free shipping offer here

Also, don't forget to add 2 free samples to your cart before checking out (they've got a few different teas and other samples available).  Happy shopping!

Tuesday, March 6, 2012

Rugelach (TWD)


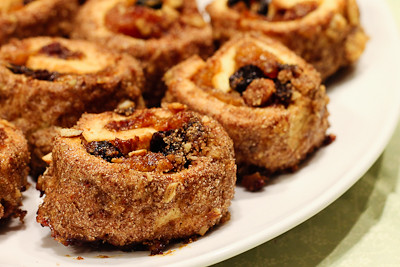
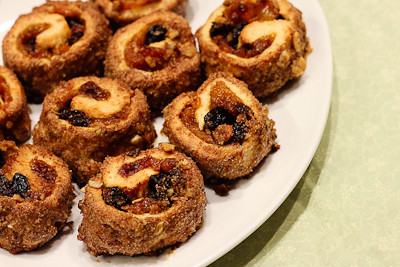
This week's Tuesdays with Dorie: Baking with Julia was co-hosted by Jessica of My Baking Heart and Margaret of The Urban Hiker.   The chosen recipe was rugelach.  Rugelach are actually Jewish pastries made with sour cream pastry dough.  They are made in the form of a crescent by rolling a triangle of dough around a filling of fruit, nuts, or fruit preserves.  The rugelach made in this recipe is slightly different in that it is made with a cream cheese pastry dough, and the rolled dough and filling is cut into slices before baking.

I've actually made rugelach a few times prior to this - love the stuff!  I love this Barefood Contessa recipe and we actually also made rugelach back in 2008 for TWD.  I'm not a nut person so I didn't put nuts in my filling, but I did put some nuts in the streusel that the pastries were rolled in.  I made apricot lekvar (homemade fruit butter) and filled my rugelach with dried cherries, raisins, and dried apricots.  I did not have any problems with this recipe, except that I did not look at it ahead of time and did not realize how much refrigeration time was required, so I did not finish baking them until very late today!

I have to say that I love this version of rugelach.  The sugar and cinnamon mixture that the pastries get rolled in caramelizes in the oven and gives it a wonderful, crisp texture.  Then you bite into the cream cheese pastry that is so light and flaky, and then you taste the apricot butter and dried fruit bits.  I think I just ate about ten of them in one sitting and my husband asked me to hide them from him because he can't stop eating them!

This recipe is definitely a keeper, and I can't wait to make it again.  Thanks to Jessica and Margaret for hosting; you can find the recipe on their blogs here and here.  Make sure you check here, too, to see how everyone else in our baking group enjoyed these pastries!

Also be sure to leave a comment below... I was visited recently by the Fairy Hobmother and received an unexpected gift... if you leave a comment here you might get a visit from the Fairy Hobmother too ;)

Monday, February 27, 2012

Green Onion, Cheddar & Asiago Beer Batter Bread (DB)


The Daring Bakers' February 2012 host was – Lis! Lisa stepped in last minute and challenged us to create a quick bread we could call our own. She supplied us with a base recipe and shared some recipes she loves from various websites and encouraged us to build upon them and create new flavor profiles.

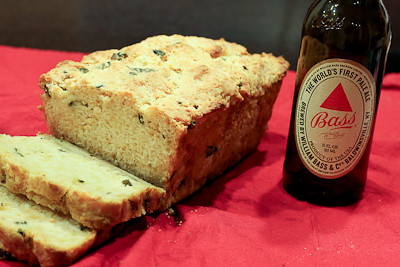
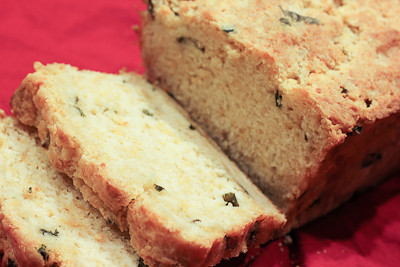
I was in the mood for something savory, not sweet (crazy, I know!) so I went with the green onion, cheddar & asiago beer batter bread!  Everything came together quickly and easily, and the smell of the bread baking in the oven was magnificent! I used a slightly smaller loaf pan (8.5" x 4.5") and that did not seem to affect the baking time much.

My bread was moist and fluffy and full of flavor! I love how the top of the loaf became crisp from brushing the butter on top! So good.  I think next time I'll also sprinkle some cheese on top as it's almost done baking to get a crisp, cheesy crust.  And maybe bake it in a muffin pan, to increase the ratio of buttery, cheesy crust to middle :) The best thing about this bread? It comes together so quickly! I'll definitely be making this one again.

Thanks Lis, for hosting this month's challenge.  You'll find the recipe below - be sure to read all the tips/notes below the recipe, as there is some useful information on quick breads there. Also be sure to check out the Daring Bakers' Blogroll to see how everyone else enjoyed the challenge.

Green Onion, Cheddar & Asiago Beer Batter Bread  
Makes one 9” x 5” (23 x 13 cm) loaf
Adapted from Recipe Girl’s Cheddar Chive Beer Batter Bread


Ingredients
1 tablespoon (15 ml) oil
1 cup (240 ml) (100 gm/3½ oz) sliced green (spring) onion
3 cups (720 ml) (420 gm/15 oz) all-purpose (plain) flour
3 tablespoons (45 ml) (45 gm/1½ oz) granulated sugar
2 teaspoons (10 ml) (10 gm) baking powder
1 teaspoon (5 ml) (6 gm) salt
1 cup (240 ml) (115 gm/4 oz) grated sharp cheddar cheese
½ cup (120 ml) (2 oz) grated Asiago cheese
One (12 fl oz/355 ml) (about 1½ cups) bottle beer (such as amber ale)
¼ cup (60 ml) (55 gm/2 oz) butter, melted and divided

Directions:
  1. Preheat oven to moderately hot 375°F/190°C/gas mark 5. Spray 9”×5″ (23 x 13 cm) loaf pan with cooking spray.
  2. Heat olive oil in a large nonstick skillet over medium heat. Add green onion and sauté 3-4 minutes or until tender. Cool to room temperature.
  3. Combine flour, sugar, baking powder and salt in a bowl; make a well in the center of the mixture. Add onion, cheeses, and beer. Stir just until moist.
  4. Spoon batter into prepared pan. Drizzle evenly with 2 tablespoons of butter. Bake for 35 minutes; brush with remaining 2 tablespoons butter. Bake an additional 23 minutes or until wooden pick inserted in the center comes out clean. Cool 5 minutes in pan on a wire rack; remove from pan. Cool completely on wire rack.
Quick bread primer
  • Quick breads can be sweet or savory, they are a modern innovation they became common after the introduction of baking powder and baking soda.
  • Baking powder is a combination of acid and alkaline that reacts together when moistened to form gases that raises the baked quick bread. Usage 1 to 2 teaspoons per cup of flour.
  • Baking soda (an alkaline salt, sodium bicarbonate) is used when the liquid is acidic, such as buttermilk, honey, molasses, tomato sauce etc. Usage ½ to 1 teaspoon per cup of acidic liquid.
  • Be sure your baking powder and baking soda are fresh.
  • Measure ingredients accurately, using the measuring tools and techniques suggested.
  • Preheat the oven to the correct baking temperature. Arrange racks so that the bread will bake in the center of the oven which has the best heat distribution in the oven.
  • To allow for good air circulation while baking, leave at least 1 inch of space between pans and between pans and sides of oven. Switch pan positions and rotate pans halfway through baking.
  • The two top secrets to moist, tender quick bread is 1)in the mixing always use a quick light technique so you don't over-mix the batter 2) don't over-bake since this cause dryness in the final baked product. .
  • Quick breads can be created by the following methods:
Muffin (or the two-bowl) method – The dry and wet ingredients are kept separate and then are combined quickly and gingerly by adding the wet to the dry, and folding the two together with only a few strokes. The idea is to not over-mix, basically moistening the ingredients and leaving the batter slightly lumpy, with wisps of flour showing (even small lumps are fine) so as not to overdevelop the gluten in the flour which will keep the bread tender. An over mixed batter creates tough and rubbery muffins/quick breads. Since over-mixing will cause "tunnels" – holes where the air bubbles can escape – which will make the quick bread tough.
Creaming method – The butter and sugar are beaten and creamed together until smooth and fluffy. Next, the egg and liquid flavoring are added to the butter and sugar mixture. The dry ingredients and other liquids are folded in last. This method is best when baking cakes since a lot of air pockets are added into the mixture. Folding in the ingredients creates even more air pockets to keep the cakes light and fluffy.
Cutting in method – The chilled fat is cut into the flour. The fat results in a flaky texture since the fat melts while in the oven. This method is best used when baking biscuits, scones or pie crusts.
  • Depending on the recipe and the type of quick bread, there are also three different types of batter:
Pour Batter: This type of batter has a dry:liquid ratio of 1:1. Because there is so much liquid in this type of batter, the result is very moist and dense.
Drop Batter: This batter has a dry:liquid ratio of 3:1. This batter will result in a moist but fluffy baked good.
Stiff Dough: This batter has a dry:liquid ratio of 7:1 This batter will result in a very light and fluffy baked good.
  • Lower gluten flours are best to make quick breads you can replace 4 tablespoons in each cup of all-purpose flour with cake flour in most recipes or replace 2 tablespoons in each cup of all-purpose flour with corn flour (cornstarch) if you wish to lower the gluten levels of your flour.
  • Flour should be sifted to aerate it which gives more rise therefore a lighter crumb to the final baked goods.
  • Add fruit, nuts, etc. after lightly combining the wet and dry ingredients. Then give the batter one more light-handed stir and you're done. Is the batter still thick and lumpy? That's exactly what you want
  • If you're adding dried fruit, try soaking it first. This will moisten the fruit, make it tender and juicy, and also preserve the bread's moisture. Don't sprinkle dried fruit on top of quick bread before baking, as it will burn before the loaf is done.
  • To lower the fat, for example, you can substitute some (or all) of the oil with an equal amount of almost any fruit puree (apple sauce, plum baby food, pumpkin puree, mashed bananas).
  • Glaze your baked quick breads for a nice finishing touch and burst of flavor. Make a simple mixture of confectioners' (icing) sugar and a little milk or fruit juice. Try orange and lemon juices, for their fragrant, tart zing; add curls of zest for extra color and flavor.
  • For most quick mix recipes as a general rule – less butter and sugar in a recipe makes it more bread-like, while more butter and sugar produces something closer to cake.
  • To prevent moist quick breads from spoiling, let them cool completely after baking. Then wrap them tightly in foil or plastic wrap and store at room temperature for up to 3 days. If your bread is made with cheese, cream cheese or other perishable foods, it should be refrigerated.
  • Quick breads such as banana, zucchini and cranberry slice and taste best when served a day after baking. Wrap the cooled bread in foil or plastic wrap; leave at room temperature overnight. Others like cornbread and coffee cakes are best served warm.
  • The quick bread is done if a toothpick inserted near the center comes out clean. If it is not done, test again in a few more minutes.
  • Cool in the pan for 10 minutes, unless recipe directs otherwise. Turn loaves out onto a wire rack to cool. Most quick bread should be cooled completely before slicing to prevent crumbling.
  • Using a sawing motion, cut loaves with a thin sharp knife. Use a serrated knife for quick breads that have fruits and/or nuts.
Common Problems and troubleshooting (ref http://allrecipes.com/howto/baking-quick-breads/)

Bread sticks to pan. Unless you're using high-quality non-stick metal or silicone baking pans, you should always grease the pans before you pour in the batter. The best thing to use for greasing the pan is shortening, because its melting point is higher than any other kind of fat, which helps maintain a "shield" between pan and batter while the bread is baking. A high-quality cooking spray--one that won't bake on to your pans and discolour them--is also a fast, easy fix. You can also prevent sticking by removing the bread from the pan sooner: let the bread cool for at least twenty minutes in order to set (Bundt loaves should cool twice as long) before inverting the pan.

There are big holes and "tunnels" in the bread, and/or the bread is tough. These problems are usually caused by over-mixing.

There's a big crack down the middle of the quick bread loaf. Don't worry--it's normal for quick breads. The crack on top happens when top of the loaf "sets" in the heat of the oven before the bread is finished rising. Drizzle the loaf with icing or dust with confectioners' (icing) sugar.

My blueberry muffins look green! By reacting with the alkaline baking soda, the blueberries' pigments can turn green. Toss the berries with the flour mixture before combining the ingredients; the coating should help. If you're using frozen berries, don't thaw them before using them.

The bread looks done on the outside but it's still raw in the middle. This is one of the most common quick bread problems, and it can be caused by a few different factors. The oven temperature could be too high. (Use an oven thermometer to check: they're cheap and available at most supermarkets.)

Try lowering the oven temperature and/or putting a loose tent of foil over the top of the bread so it won't burn before the middle has time to catch up.

Another cause of "raw center" syndrome could be using a different pan than the recipe calls for. One of the nice things about quick breads is that you can use the same batter to make muffins, mini loaves, jumbo loaves, or rounds. But each size requires different baking times--and some require different baking temperatures. The larger and thicker the loaf, the longer it's going to take to bake. If you're using a different size pan than your recipe calls for, adjust the baking time accordingly and check the bread often.

Tuesday, February 7, 2012

Basic White Loaves (TWD)

This is our inaugural post for the new group, Tuesdays with Dorie: Baking with Julia.  After four years, we are finally done baking our way through Baking: From My Home to Yours, and now we're diving head first into Baking with Julia. If you would like to join us, just grab a copy of the book Baking with Julia and sign up here.

Our hosts this week were Laurie and Jules.  They chose the basic white loaves.  Without actually looking at the recipe, I was a bit concerned that this would be a time consuming or difficult recipe because, of course, anything to do with Julia and yeast dough must be difficult, right?!

Well, I was pleasantly surprised to find that this recipe was pretty simple.  There are two 1-hour rest periods, but the actual prep time is about 15-20 minutes.  I started this recipe in the morning, and as Dorie notes, my loaves were done by lunch time.


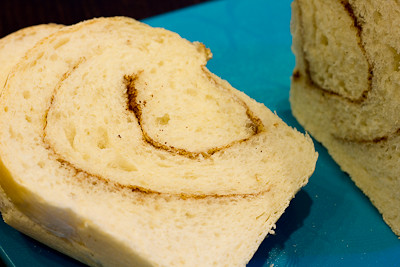
I actually didn't make the basic white loaves. I decided to kick them up a notch.  To my first loaf I added a generous smear of butter and then some Brady Street Cheese Sprinkle from Penzey's.  To my second loaf I added a generous smear of butter and then cinnamon and sugar.  I didn't really measure anything out, just eye balled it, and in retrospect, probably need to add a lot more cinnamon and sugar next time to get the flavors to really come out.  That said, my loaves turned out perfectly! They were golden on the outside and so soft and tender on the inside.  I will definitely be making this one again!

If you would like the recipe, you can find visit Laurie and Jules' blogs, Slush and Someone's in the Kitchen.  You can also go here, to see who else participated in this week's Tuesdays with Dorie.

* Recipe notes:
- I actually made this twice because the first time I used almost dead yeast.  So the second time around I was out of bread flour.  I made it with regular bleached all purpose flour and the bread still turned out fantastic! I am sure it is better with bread flour but if you don't have bread flour that's ok too.
- Another filling I would love to try the next time I make this: pesto or nutella!

Tuesday, December 27, 2011

French Country Bread (DB)


Our Daring Bakers' Host for December 2011 was Jessica of My Recipe Project and she showed us how fun it is to create Sour Dough bread in our own kitchens! She provided us with Sour Dough recipes from Bread Matters by Andrew Whitley as well as delicious recipes to use our Sour Dough bread in from Tonia George’s Things on Toast and Canteen’s Great British Food!

Sourdough is made without adding any yeast or leavening, by fermenting your own sourdough ‘starter’. The natural yeasts in the flour do the work of making a lovely loaf of bread – we just facilitate that process. Sourdough is basically bread as your great-, great- grandmother knew it, before the days of Chorleywood (i.e. factory-made, steamed, sliced, additive-filled) bread and packaged yeast. It takes time, but not too much active work. 

I have to say that while I had a lot of fun with this recipe, it was a colossal fail!  I've never made a starter before, and watching this one develop and bubble up was really cool.  Unfortunately, I let my dough proof too long (didn't realize that would be an issue), and while I ended up with what looks like a beautiful loaf, it was extremely dense and didn't quite develop the crumb I was hoping it would.  I was hoping to get a good picture of the cut loaf, but since I failed to successfully get a good crumb, I didn't photograph the inside of the loaf :(

The great thing about this recipe, though, is that you're left with a starter that you can keep on using... so I look forward to trying this recipe again! :) Thanks Jessica, for hosting this month's challenge.  Make sure you check out the Daring Bakers' Blogroll to see how everyone else rose to the challenge.

French Country Bread
Servings: 1 large loaf plus extra wheat starter for further baking
Wheat Starter - Day 1:

Ingredients
4 1/2 tablespoons (70 ml) (40 gm/1 ½ oz) stoneground breadmaking whole-wheat or graham flour
3 tablespoons (45 ml) water
Total scant ½ cup (115 ml) (3 oz/85 gm)

Directions:
1. In a Tupperware or plastic container, mix the flour and water into a paste.
2. Set the lid on top gently, cover with a plastic bag, to prevent messes in case it grows more than expected!
3. Set somewhere warm (around 86 F if possible). I sometimes put mine on a windowsill near a radiator, but even if it’s not that warm, you’ll still get a starter going – it might just take longer.

Wheat Starter - Day 2:


Ingredients
4 1/2 tablespoons (70 ml) (40 gm/1 ½ oz) stoneground breadmaking whole-wheat or graham flour
3 tablespoons (45 ml) water
scant 1/2 cup (115 ml) (3 oz/85 gm) starter from Day 1
Total scant cup (230 ml) (6 oz/170 gm)

Directions:
1. Stir the flour and water into the mixture from Day 1, cover, and return to its warm place.
Wheat Starter - Day 3:

Ingredients
4 1/2 tablespoons (70 ml) (40 gm/1 ½ oz) stoneground breadmaking whole-wheat or graham flour
4 teaspoons (20 ml) water
scant 1 cup (230 ml) (6 oz/170 gm) starter from Day 2
Total 1⅓ cup (320 ml) (230 gm/8-1/10 oz)

Directions:
1. Stir the flour and water into the mixture from Day 2, cover, and return to its warm place.
Wheat Starter - Day 4:

Ingredients
3/4 cup plus 1½ tablespoons (205 ml) (120 gm/4 ¼ oz) unbleached all-purpose flour
1/2 cup less 4 teaspoons (100 ml) water
1⅓ cup (320 ml) (230 gm/8 oz) starter from Day 3
Total scant 2⅔ cup (625 ml) (440 gm/15½ oz)

Directions:
1. Stir the flour and water into the mixture from Day 3, cover, and return to its warm place. At this point it should be bubbling and smell yeasty. If not, repeat this process for a further day or so until it is!

French Country Bread
Stage 1: Refreshing the leaven

Ingredients
1 cup less 1 tablespoon (225 ml) (160 gm/5 ⅔ oz) wheat Leaven Starter
6 tablespoons less 1 teaspoon (85 ml) (50 gm/1¾ oz) stoneground bread making whole-wheat or graham flour
1 cup plus 2 teaspoons (250 ml) (150 gm/5 ⅓ oz) unbleached all purpose flour
1/2 cup (120 ml) water
Production Leaven Total 2¾ cups plus 4 teaspoons (680 ml) (480 gm /1 lb 1 oz)

Directions:
1. Mix everything into a sloppy dough. It may be fairly stiff at this stage. Cover and set aside for 4 hours, until bubbling and expanded slightly.

French Country Bread
Stage 2: Making the final dough

Ingredients
3/4 cup less 1 teaspoon (175 ml) (100 gm/3 ½ oz) stoneground breadmaking whole-wheat or graham flour, plus more for dusting
2 cups plus 2 tablespoons (510 ml) (300gm/10 ½ oz) unbleached all-purpose flour
1¼ teaspoons (7½ ml) (7 gm/¼ oz) sea salt or ⅔ teaspoon (3⅓ ml) (3 gm/⅛ oz) table salt
1 ¼ cups (300 ml) water
1 ¾ cups (425 ml) (300 gm/10 ½ oz) production leaven – this should leave some (1 cup) for your next loaf.
Total 6 cups less 2 tablespoons 1415 ml (1007 gm/35 ½ oz/2 lb 3½ oz)

Directions:
1. Mix the dough with all the ingredients except the production leaven. It will be a soft dough.
2. Knead on an UNFLOURED surface for about 8-10 minutes, getting the tips of your fingers wet if you need to. You can use dough scrapers to stretch and fold the dough at this stage, or air knead if you prefer. Basically, you want to stretch the dough and fold it over itself repeatedly until you have a smoother, more elastic dough.
See my demonstration here: http://www.youtube.com/watch?v=OqS3raEGdwk
3. Smooth your dough into a circle, then scoop your production leaven into the centre. You want to fold the edges of the dough up to incorporate the leaven, but this might be a messy process. Knead for a couple minutes until the leaven is fully incorporated in the dough. See my demonstration here: http://www.youtube.com/watch?v=UPO97R4iO4U
4. Spread some water on a clean bit of your work surface and lay the dough on top. Cover with an upturned bowl, lining the rim of the bowl with a bit of water. Leave for an hour, so that the gluten can develop and the yeasts can begin to aerate the dough.
5. Once your dough has rested, you can begin to stretch and fold it. Using wet hands and a dough scraper, stretch the dough away from you as far as you can without breaking it and fold it back in on itself. Repeat this in each direction, to the right, towards you, and to the left. This will help create a more ‘vertical’ dough, ready for proofing. See my demonstration here: http://www.youtube.com/watch?v=rDoJRCMfclE
6. Heavily flour a banneton/proofing basket with whole wheat flour and rest your dough, seam side up, in the basket. Put the basket in a large plastic bag, inflate it, and seal it. Set aside somewhere warm for 3-5 hours, or until it has expanded a fair bit. It is ready to bake when the dough responds to a gently poke by slowly pressing back to shape.
7. Preheat the oven to hot 425°F/220°C/gas mark 7. Line a baking sheet with parchment, then carefully invert the dough onto the sheet. I like to put the baking sheet on top of the basket, then gently flip it over so as to disturb the dough as little as possible. Make 2-3 cuts on top of the loaf and bake for 40-50 minutes, reducing the temperature to moderately hot 400°F/200°C/gas mark 6 after 10 minutes.
8. Cool on a cooling rack.

Notes:
• Good bread starts with good flour. Beyond trying to find good quality, local (organic if possible) flour, Whitley recommends finding out three things: how was it milled? (stoneground ideally, to retain more nutrients); how much of the original grain is left in the flour (ideally 95-100 % for bread making); and lastly, how much protein is in the flour? (the more protein, the more gluten, leading to a more stretchy dough – ‘strong’ or ‘bread’ flour indicates a higher level of protein).
• Normal tap water is fine in most cases, unless you live in a municipality that heavily chlorinates the water. Chlorine will kill almost all bacteria, including your yeast, so you’ll want to use filtered water if you can. Whitley says that leaving water in a pitcher overnight can rid most of the chlorine.
• If you clean your kitchen with anti-bacterial products or harsh cleaners, try not to do it before baking and make sure your bowls are clean but have no chemical residue left on them! Many a bread has been deflated by an overly-sterilised kitchen.
• All of these recipes call for sea salt because it retains a higher level of minerals and has a stronger salt taste, meaning you can use less of it. Never add salt directly to your starter – it will kill the yeast, so use the following method: dissolve your starter in water, stir your salt through your flour, then mix the wet with the dry ingredients.
• When greasing pans for baking, try to use hard fats like butter because oil can drip down the pans and lead to a fried bottom on your loaf!
• When working with the dough, you might feel inclined to heavily flour your work surface or your hands. Resist this urge! Sourdough is meant to be wet and sticky – this helps to give the bread a nice crumb once it has baked. I work most doughs with my hands, but sometimes use a dough scraper to help lift and fold the dough. When I need to pick up or shape a loaf, I find damp hands work better than floured ones!
• If you don’t have dough scrapers, old bank cards/credit cards work just as well! But wash them thoroughly first.
• Try to work with your hands to make these recipes – mixing and kneading the dough by hand means you’ll get a better sense of how your dough should feel! We learn by doing!
• Remember, a lot of these timings are guidelines – pay attention as, depending on temperature and your starter, you may need more or less time to proof your dough. You want a dough that resists poking a bit (if you poke it, the hole will disappear) but not one that quivers all over and seems really fragile.
• Cutting the top of your loaf before it goes in the oven helps it to expand or split at those points. This means you don’t end up with funny outgrowths from your bread! You want to be quick, gentle, and use a very sharp blade – see the video at the end for tips.
• Notes on scheduling: For the Rye loaf, and all the other starters, I find it helpful to start the process on a Monday, so that come Friday/Saturday you are ready to bake. I refresh my starter (Stage 1) the night before baking, then do Stage 2 in the morning. For the French Country Bread, I refresh the starter in the morning, make the final dough at lunchtime, and bake at dinner time. For the Rice Sourdough, I soak the flaxseeds on a Friday morning, refresh my starter on Saturday morning, the prep the final dough at lunchtime, ready to bake at dinner.
• I would set the difficulty level of these recipes as: Rye – Easy!, French Country Bread – Med-Hard!, Rice Sourdough – Easy!
• Once you’ve finished baking, you’ll have some leftover starter. Keep this in a Tupperware container, as this is what you will use to start your next loaf (and so on…)! Some of the best starters are hundreds of years old – and they get better with time. If you bake daily, you can keep your starter at room temperature. If you bake weekly, I’d keep it in the fridge. You can also freeze starter if you bake very infrequently, but I find it does fine in the fridge so long as you feed it at least once a month. Simply refresh your starter according to the recipe – or with equal parts by weight of flour and water – and let it come back to life at room temperature.
• You might notice that your starter starts to smell a bit like acetone – this is completely normal. It may develop a grey liquid on top, which you can either pour off or stir back into the starter. When I refresh mine, I discard half of the original starter and add in fresh flour and water for the yeast to feed on.
• Sometimes, very rarely, a starter might get moldy. This is often due to being left at room temperature without feeding. If there is a lot of mold throughout the starter, I would discard it. But the odd bit is not always a problem. It is nearly impossible to kill a starter, unless you get salt or chemical products in it – so don’t fret! Often it is just a matter of feeding it over a few days and nursing it back to life.

Sunday, October 24, 2010

Birthday Wishes and Saint-Germain-des-Prés Onion Biscuits


Today is a very special day.  Do you know what today is? It's Dorie Greenspan's birthday!!! That's right, the author of Baking: From My Home to Yours and Around My French Table: More Than 300 Recipes from My Home to Yours is celebrating her birthday today.  What's more, she is spending part of the day with me! Well, truth be told she is not spending it with just little ole me.  She is teaching a cooking class at Central Market here in Dallas, to help promote the release of her new book, Around My French Table: More Than 300 Recipes from My Home to Yours.  I can't wait to finally meet her!

Back in January of 2008 I came across a group of three bakers - Laurie and two other bloggers, who had decided to bake one recipe a week out of Baking: From My Home to Yours.  Laurie called it Tuesdays with Dorie (TWD) because each week everyone posted their results on Tuesday.  I had just purchased the book myself, and thought it would be the perfect way to motivate myself to actually use a cookbook.  So I joined the group and now, nearly 3 years later, there are hundreds of others baking along.  It only seemed natural, then, that with the release of her most recent book, French Fridays with Dorie (FFwD) was born.

So, in honor of Dorie's birthday and the new blogging event French Fridays with Dorie, a few of us decided to get together and throw Dorie a "Surprise Birthday Party" using recipes from Around My French Table.

After looking through the book, I decided to bring an appetizer to the party.  There were several that caught my attention, but one in particular stood out - Saint-Germain-des-Prés Onion Biscuits.  Named for her neighborhood in Paris, Dorie considers these her "house specialty" when she is entertaining.  These biscuits, like any other biscuits, were quick and easy.  They are all-American baking powder biscuits filled with butter-sautéed onions.   I forgot that you're not supposed to twist the biscuit cutters when you're cutting you're biscuits, so mine did not rise very well :(

Still, these biscuits were delicious.  They had a great onion flavor without being too overwhelmingly onion-y (though I don't think there really is such a thing!).  I think these would be great if you added some cheddar to them as well.  Next time, I may try adding caramelized onions instead, too.

I will definitely be making these again.  I also think I'll be following Dorie's lead and make a batch to freeze and bake "on demand." Once the dough is cut, you can put the unbaked biscuits on a lined baking sheet, slide the sheet into the freezer and, once the rounds are solid, just pack them airtight. That way you can simply slide the frozen biscuits into the oven and bake them on a moment's notice.

If you'd like the recipe, you can find it below.  You'll have to get a copy of Around My French Table for most of the other recipes from this blogging event, but since this one can easily be found on Amazon I've posted it below. Make sure you visit Holly's blog, Phe.MOM.enon, to see what everyone else cooked up for Dorie's birthday.

While you're here, if you haven't already entered, check out the giveaway I'm doing here.

And of course a very big Happy Birthday to Dorie! I'm looking forward to meeting you this afternoon!!!!!!!

Saint-Germain-des-Prés Onion Biscuits
from Around My French Table: More Than 300 Recipes from My Home to Yours by Dorie Greenspan


6-1/2 tablespoons cold unsalted butter
1 small onion, peeled, trimmed, and finely diced (about 1/2 cup) (I found this to be just 1/2 of a small onion!)
2 cups all-purpose flour
1 tablespoon baking powder
2 teaspoons sugar
1/2 teaspoon salt
3/4 cup cold whole milk

Center a rack in the oven and preheat the oven to 425 degrees F. Have a biscuit or deep cookie cutter, one that’s between 1 and 2 inches in diameter, at hand.

Put 1/2 tablespoon of the butter in a small skillet or saucepan and cut the remaining 6 tablespoons butter into 12 pieces.

Set the pan over low heat, melt the butter, and add the onion. Cook, stirring, just until it softens, about 3 minutes. Pull the pan from the heat.

Put the flour, baking powder, sugar, and salt into a mixing bowl and whisk the ingredients to combine. Drop the butter pieces into the bowl and, using your fingers, rub the butter into the flour mixture until you’ve got a bowl full of flour-covered pieces, some small and flakey and some the size of peas.

Scatter the cooked onions over the mixture, then pour over the cold milk and, using a fork, toss and turn everything together until you’ve got a soft dough. If there are some dry bits at the bottom of the bowl, reach in and knead the dough gently a couple of times.

Lightly dust a work surface with flour, turn the dough out, and dust the top of the dough very lightly with flour. Pat the dough down gently with your hands (or roll it out with a pin) until it is about 1/2 inch thick. It doesn’t have to been an even square or round; it doesn't even have to be an even 1/2 inch thick. Just do the best you can and do it quickly.

Dip the biscuit cutter into the flour bin and cut out as many biscuits as you can--cutting the biscuits as close to one another as possible – and transfer the biscuits to the baking sheet, leaving a little space between each one. Gather the scraps of dough together, pat them down, and cut as many more biscuits as you can; put these on the lined baking sheet, too. (You can make the biscuits to this point, freeze them on the baking sheet and then, when they're solid, pack them airtight and freeze them for up to 2 months. Bake them without defrosting--just add a couple of minutes to the baking time.)

Alternatively (and perhaps more economically), you can pat or roll out the dough, then, using a long knife, cut square biscuits, making each biscuit about 1- to 1-1/2 inches on a side.

Bake the biscuits for 15 to 18 minutes, or until they are puffed and lightly browned.

Serving: 
Biscuits are always best right out of the oven or still warm. However, these are also good at room temperature--the deep onion flavor is enough to compensate for whatever is lost, namely some fluffiness, when the biscuit cools.

Storing:
While unbaked biscuits can be frozen for up to 2 months and baked straight from the freezer, once the biscuits are baked, they're best eaten quickly.

Saturday, April 24, 2010

Sweet Cream Biscuits (TWD)


First, let me say that I've got a BIG giveaway coming up on my blog! You'll have to keep coming back to check over the next few days to find out what it is, but I promise it's something you don't want to miss out on! :)

This week's Tuesdays with Dorie (TWD) recipe was chosen by Melissa of Love At First Bite: Sweet Cream Biscuits. But wait you say... it's not Tuesday! It's Saturday, and basically almost Sunday! Ok, ok, you're right. I'm super late this week with my post, but better late than never right? Really I have no excuse for posting late this week, especially when the recipe takes just minutes to prep... but, seems like I hardly have any time for baking these days :(

At first I thought I had made a mistake when I realized I had not put any butter in these biscuits. It's no mistake! These biscuits have cream instead of butter in them. I wasn't sure how they would turn out but they were surprisingly very similar to traditional biscuits.

If you look closely in the photo, you'll see that my biscuits were flower shaped :) That's because I used a cookie cutter to make my biscuits since I don't have a biscuit cutter. So how did these taste? These aren't as sweet as the name implies, and I think I may miss the nice buttery taste that comes with traditional biscuits, but if you're making biscuits at the last minute and realize you're out of butter, then these would make a great alternative.

I enjoyed my biscuits with some wild raspberry honey that I won from Blake Makes courtesy of Bee Raw. They say that the flavor of the honey comes from the flowers that the bees have pollinated and it's so true. The floral raspberry flavor in this honey is subtle, but definitely there. I really enjoyed it.

Thanks Melissa, for hosting this week. If you would like the recipe, you can find it here. Make sure you check out the TWD Blogroll, to see how everyone else enjoyed this breakfast treat!

* Recipes notes:
- Make sure you add enough cream to get the dough moist enough to stick together so it doesn't crumble when you roll it out, but not too moist to where it's too sticky to work with.
- For tips from other TWD bakers, click here.

Tuesday, October 20, 2009

Sweet Potato Biscuits (TWD)


This week's Tuesdays with Dorie (TWD) recipe was chosen by Erin of Prudence Pennywise: Sweet Potato Biscuits. I love biscuits but have never seen anything like this, so I was eager to try this recipe.

I've never had any problems with making biscuits. The key is to use really cold butter and to not overwork your dough. When cutting the biscuits you also need to make sure you press straight down, as twisting the cutters can inhibit some of the rise in the biscuits.


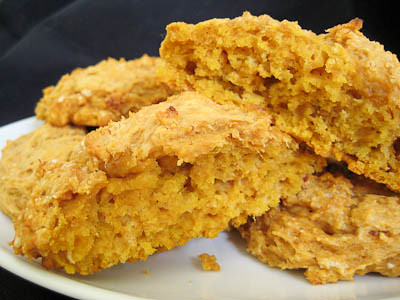
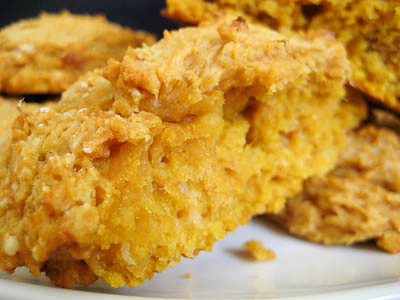
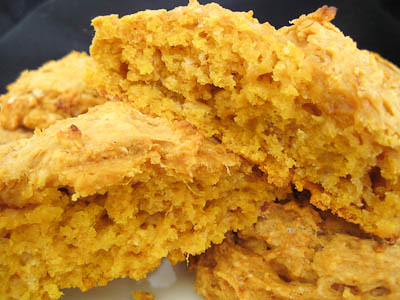
This recipe presented a lot of problems for me though. Even though I used 29 ounces of canned sweet potatoes (instead of 30 ounces), my dough was super sticky and moist. Not sure where the extra moisture came from? It was so hard to work with; I had a lot of trouble cutting my dough into biscuits. Then after they went in the oven, they hardly rose at all. I know my baking powder isn't too old, so that wasn't the issue. I am not sure what went wrong, but my biscuits look pretty pathetic.

Thankfully, aesthetics aside, these tasted great :) I enjoyed them with some butter and brown sugar. These would be great to make the morning after Thanksgiving, when you want something besides leftovers but don't want to spend too much time in the kitchen.


Thanks Erin for picking this recipe, I loved it. If you would like the recipe, you can find it here. Make sure you check out the TWD Blogroll, to see how everyone else enjoyed this perfect-for-fall breakfast treat.

* Recipes notes:
- Consider putting your butter in the freezer to get it extra cold before using it.
- For more tips, click here.

Sunday, March 29, 2009

Homemade Pasta


The Daring Bakers decided to go with a savory recipe this month. Our challenge was to make our own homemade spinach pasta!

The March 2009 challenge is hosted by Mary of Beans and Caviar, Melinda of Melbourne Larder and Enza of Io Da Grande. They have chosen Lasagne of Emilia-Romagna from The Splendid Table by Lynne Rossetto Kasper as the challenge.


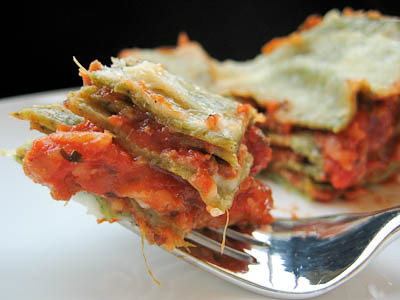
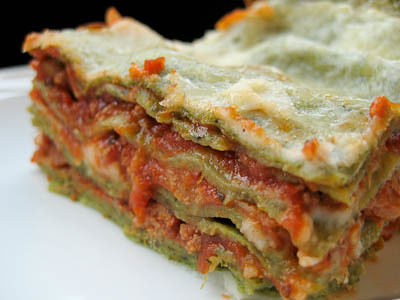
I was really excited about this recipe because I've made lasagna from scratch in the past, but I've never tried making spinach pasta. I had some trouble incorporating the spinach into the pasta. I used frozen spinach, and while the package said it was 10 ounces, when I thawed it and drained it, it came out to only 6 ounces total, so I used the entire "10 ounce but only weighs 6 ounces" package. So I'm not sure if I used too much spinach or not. Luckily, I was able to fix the lumpy mess by adding one extra egg. I was worried the whole thing was ruined, but after I added the egg it all came together like magic.

I followed the recipe for the bechamel sauce without any problems. Instead of using the meat sauce recipe recommended below, I used my go to meat sauce recipe from the World's Best Lasagna.


This lasagna was a big hit in our household. The only thing I would do differently next time is adding in more meat sauce. The recipe says to just add a thin layer, but in the end the dish seemed a bit lacking in sauce. That was easily fixed by spooning leftover meat sauce over the top of each slice!

Thank you to Mary, Melinda, and Enza for picking this month's challenge. I had a lot of fun making this pasta dish and I will definitely be using this recipe again.

The posting date for this month's challenge was originally today, but somewhere along the way they changed it to March 27th and I didn't notice this until today (oops). Better late than never, right? :) Please make sure you visit the Daring Bakers' Blogroll to see how everyone else stacked up with this challenge!

Lasagne of Emilia-Romagna (Lasagne Verdi al Forno)
from The Splendid Table: Recipes from Emilia-Romagna, the Heartland of Northern Italian Food by Lynne Rossetto Kasper

(Serves 8 to 10 as a first course, 6 to 8 as a main dish)

Preparation Time: 15 minutes to assemble and 40 minutes cooking time

10 quarts (9 litres) salted water
1 recipe Spinach Pasta cut for lasagna (recipe follows)#1
1 recipe Bechamel Sauce (recipe follows)#2
1 recipe Country Style Ragu (recipe follows)#3
1 cup (4 ounces/125g) freshly grated Parmigiano-Reggiano

Method
Working Ahead:
The ragu and the béchamel sauce can be made up to three days ahead. The ragu can also be frozen for up to one month. The pasta can be rolled out, cut and dried up to 24 hours before cooking. The assembled lasagne can wait at room temperature (20 degrees Celsius/68 degrees Fahrenheit) about 1 hour before baking. Do not refrigerate it before baking, as the topping of béchamel and cheese will overcook by the time the center is hot.

Assembling the Ingredients:
Have all the sauces, rewarmed gently over a medium heat, and the pasta at hand. Have a large perforated skimmer and a large bowl of cold water next to the stove. Spread a double thickness of paper towels over a large counter space. Preheat the oven to 350 degrees Fahrenheit (180 degrees Celsius). Oil or butter a 3 quart (approx 3 litre) shallow baking dish.

Cooking the Pasta:
Bring the salted water to a boil. Drop about four pieces of pasta in the water at a time. Cook about 2 minutes. If you are using dried pasta, cook about 4 minutes, taste, and cook longer if necessary. The pasta will continue cooking during baking, so make sure it is only barely tender. Lift the lasagne from the water with a skimmer, drain, and then slip into the bowl of cold water to stop cooking. When cool, lift out and dry on the paper towels. Repeat until all the pasta is cooked.

Assembling the Lasagne:
Spread a thin layer of béchamel over the bottom of the baking dish. Arrange a layer of about four overlapping sheets of pasta over the béchamel. Spread a thin layer of béchamel (about 3 or 4 spoonfuls) over the pasta, and then an equally thin layer of the ragu. Sprinkle with about 1&1/2 tablespoons of the béchamel and about 1/3 cup of the cheese. Repeat the layers until all ingredients are used, finishing with béchamel sauce and topping with a generous dusting of cheese.

Baking and Serving the Lasagne:
Cover the baking dish lightly with foil, taking care not to let it touch the top of the lasagne. Bake 40 minutes, or until almost heated through. Remove the foil and bake another 10 minutes, or until hot in the center (test by inserting a knife – if it comes out very warm, the dish is ready). Take care not to brown the cheese topping. It should be melted, creamy looking and barely tinged with a little gold. Turn off the oven, leave the door ajar and let the lasagne rest for about 10 minutes. Then serve. This is not a solid lasagne, but a moist one that slips a bit when it is cut and served.

#1 Spinach Egg Pasta (Pasta Verde)

Preparation: 45 minutes

Makes enough for 6 to 8 first course servings or 4 to 6 main course servings, equivalent to 1 pound (450g) dried boxed pasta.

2 jumbo eggs (2 ounces/60g or more) (I used 3 eggs)
10 ounces (300g) fresh spinach, rinsed dry, and finely chopped; or 6 ounces (170g) frozen chopped spinach, defrosted and squeezed dry (I used a 10 oz. package of frozen chopped spinach)
3&1/2 cups (14 ounces/400g) all purpose unbleached (plain) flour (organic stone ground preferred)

Working by Hand:

Equipment

A roomy work surface, 24 to 30 inches deep by 30 to 36 inches (60cm to 77cm deep by 60cm to 92cm). Any smooth surface will do, but marble cools dough slightly, making it less flexible than desired.

A pastry scraper and a small wooden spoon for blending the dough.

A wooden dowel-style rolling pin. In Italy, pasta makers use one about 35 inches long and 2 inches thick (89cm long and 5cm thick). The shorter American-style pin with handles at either end can be used, but the longer it is, the easier it is to roll the pasta.
Note: although it is not traditional, Enza has successfully made pasta with a marble rolling pin, and this can be substituted for the wooden pin, if you have one.

Plastic wrap to wrap the resting dough and to cover rolled-out pasta waiting to be filled. It protects the pasta from drying out too quickly.

A sharp chef’s knife for cutting pasta sheets.

Cloth-covered chair backs, broom handles, or specially designed pasta racks found in cookware shops for draping the pasta.

Mixing the dough:
Mound the flour in the center of your work surface and make a well in the middle. Add the eggs and spinach. Use a wooden spoon to beat together the eggs and spinach. Then gradually start incorporating shallow scrapings of flour from the sides of the well into the liquid. As you work more and more flour into the liquid, the well’s sides may collapse. Use a pastry scraper to keep the liquids from running off and to incorporate the last bits of flour into the dough. Don’t worry if it looks like a hopelessly rough and messy lump.

Kneading:
With the aid of the scraper to scoop up unruly pieces, start kneading the dough. Once it becomes a cohesive mass, use the scraper to remove any bits of hard flour on the work surface – these will make the dough lumpy. Knead the dough for about 3 minutes. Its consistency should be elastic and a little sticky. If it is too sticky to move easily, knead in a few more tablespoons of flour. Continue kneading about 10 minutes, or until the dough has become satiny, smooth, and very elastic. It will feel alive under your hands. Do not shortcut this step. Wrap the dough in plastic wrap, and let it relax at room temperature 30 minutes to 3 hours.

Stretching and Thinning:
If using an extra-long rolling pin work with half the dough at a time. With a regular-length rolling pin, roll out a quarter of the dough at a time and keep the rest of the dough wrapped. Lightly sprinkle a large work surface with flour. The idea is to stretch the dough rather than press down and push it. Shape it into a ball and begin rolling out to form a circle, frequently turning the disc of dough a quarter turn. As it thins outs, start rolling the disc back on the pin a quarter of the way toward the center and stretching it gently sideways by running the palms of your hands over the rolled-up dough from the center of the pin outward. Unroll, turn the disc a quarter turn, and repeat. Do twice more.

Stretch and even out the center of the disc by rolling the dough a quarter of the way back on the pin. Then gently push the rolling pin away from you with one hand while holding the sheet in place on the work surface with the other hand. Repeat three more times, turning the dough a quarter turn each time.

Repeat the two processes as the disc becomes larger and thinner. The goal is a sheet of even thickness. For lasagne, the sheet should be so thin that you can clearly see your hand through it and see colours. Cut into rectangles about 4 by 8 inches (10 x 20 cm). Note: Enza says that transparency is a crucial element of lasagne pasta and the dough should be rolled as thinly as possible. She says this is why her housekeeper has such strong arms!

Dry the pasta at room temperature and store in a sealed container or bag.

#2 Bechamel

Preparation Time: 15 minutes

4 tablespoons (2 ounces/60g) unsalted butter
4 tablespoons (2 ounces/60g) all purpose unbleached (plain) flour, organic stone ground preferred
2&2/3 cups (approx 570ml) milk
Salt and freshly ground pepper to taste
Freshly grated nutmeg to taste

Using a medium-sized saucepan, melt the butter over low to medium heat. Sift over the flour, whisk until smooth, and then stir (without stopping) for about 3 minutes. Whisk in the milk a little at a time and keep the mixture smooth. Bring to a slow simmer, and stir 3 to 4 minutes, or until the sauce thickens. Cook, stirring, for about 5 minutes, until the sauce thickens. Season with salt, pepper, and a hint of nutmeg.

#3 Country Style Ragu’ (Ragu alla Contadina)

Preparation Time: Ingredient Preparation Time 30 minutes and Cooking time 2 hours

Makes enough sauce for 1 recipe fresh pasta or 1 pound/450g dried pasta)

3 tablespoons extra virgin olive oil (45 mL)
2 ounces/60g pancetta, finely chopped
1 medium onion, minced
1 medium stalk celery with leaves, minced
1 small carrot, minced
4 ounces/125g boneless veal shoulder or round
4 ounces/125g pork loin, trimmed of fat, or 4 ounces/125g mild Italian sausage (made without fennel)
8 ounces/250g beef skirt steak, hanging tender, or boneless chuck blade or chuck center cut (in order of preference)
1 ounce/30g thinly sliced Prosciutto di Parma
2/3 cup (5 ounces/160ml) dry red wine
1 &1/2 cups (12 ounces/375ml) chicken or beef stock (homemade if possible)
2 cups (16 ounces/500ml) milk
3 canned plum tomatoes, drained
Salt and freshly ground black pepper to taste

Working Ahead:
The ragu can be made 3 days ahead. Cover and refrigerate. It also freezes well for up to 1 month. Skim the fat from the ragu’ before using it.

Browning the Ragu Base:
Heat the olive oil in a 12 inch (30cm) skillet (frying pan) over medium-high heat. Have a large saucepan handy to use once browning is complete. Add the pancetta and minced vegetables and sauté, stirring frequently with a wooden spoon, 10 minutes, or until the onions barely begin to color. Coarsely grind all the meats together, including the prosciutto, in a food processor or meat grinder. Stir into the pan and slowly brown over medium heat. First the meats will give off a liquid and turn dull grey but, as the liquid evaporates, browning will begin. Stir often, scooping under the meats with the wooden spatula. Protect the brown glaze forming on the bottom of the pan by turning the heat down. Cook 15 minutes, or until the meats are a deep brown. Turn the contents of the skillet into a strainer and shake out the fat. Turn them into the saucepan and set over medium heat.

Reducing and Simmering: Add the wine to the skillet, lowering the heat so the sauce bubbles quietly. Stir occasionally until the wine has reduced by half, about 3 minutes. Scrape up the brown glaze as the wine bubbles. Then pour the reduced wine into the saucepan and set the skillet aside.

Stir ½ cup stock into the saucepan and let it bubble slowly, 10 minutes, or until totally evaporated. Repeat with another ½ cup stock. Stir in the last 1/2 cup stock along with the milk. Adjust heat so the liquid bubbles very slowly. Partially cover the pot, and cook 1 hour. Stir frequently to check for sticking.

Add the tomatoes, crushing them as they go into the pot. Cook uncovered, at a very slow bubble for another 45 minutes, or until the sauce resembles a thick, meaty stew. Season with salt and pepper.

Tuesday, January 13, 2009

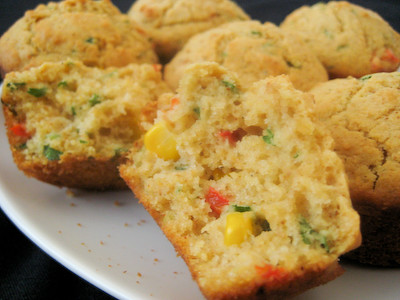
Savory Corn and Pepper Muffins (TWD)


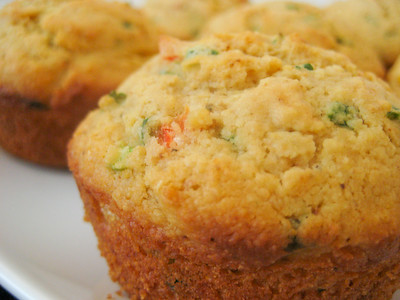
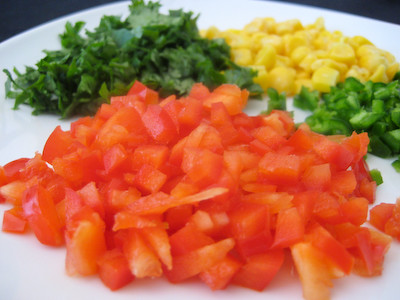
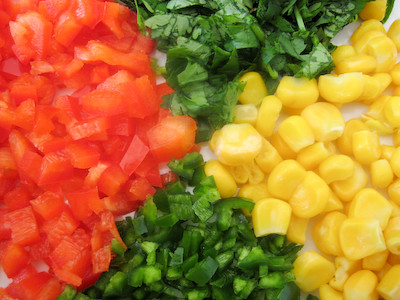
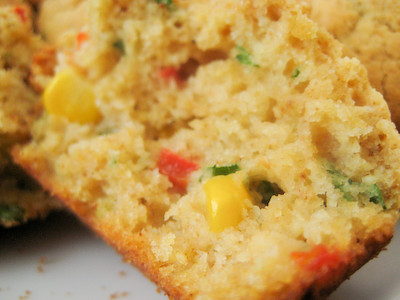
This week's Tuesdays with Dorie (TWD) recipe was chosen by Rebecca of Ezra Pound Cake: Savory Corn and Pepper Muffins. These sweet and savory muffins seem to include everything but the kitchen sink! :) They've got corn kernels, jalapeño peppers, red bell peppers, and cilantro.


I love sweet cornbread and I love jalapeño cornbread as well. I've never had a sweet jalapeño cornbread, though, and I've definitely never had a cornbread muffin that is so jam packed with goodies before!


Dorie's Savory Corn and Pepper Muffins are definitely a colorful treat. Aside from the time required to chop up the peppers and cilantro, these muffins, like all muffins, come together in no time. Simply whisk together the dry ingredients and mix together the wet ingredients. Then pour the wet ingredients into the dry, blend thoroughly and then throw in the mix-ins.


After twenty minutes in the oven (or eighteen in my case), you've got some great muffins! These muffins actually weren't as sweet as I expected them to be. The amount of heat these muffins has varies depending on your jalapeños - mine weren't spicy at all. When I asked my mom about that (she had just made a batch of super spicy muffins), she said that often times she'll get jalapeños that are extremely spicy and other times they'll aren't spicy at all. So I guess if you really want spicy muffins, you'll have to taste test your jalapeños before mixing them in! I think next time I make these, I'll add more chili powder and for an even better flavor, some bacon. (Everything is better with bacon, right?)


These muffins are great with a big bowl of chili or some chicken tortilla soup. Thanks Rebecca, for choosing these muffins. If you would like the recipe for the muffins, you can find it here. Make sure you visit the TWD Blog Roll to see how everyone else enjoyed this savory treat.


* Recipe notes:
- Start checking on these a few minutes early. Mine were completely baked after 18 minutes in my dark muffin pan.
- While these muffins rise a little bit in the oven, they don't rise a lot. So fill each well in your muffin pan almost to the top.
- These can be wrapped airtight and frozen for up to 2 months. Rewarm in a 350F oven, if you'd like, or split and toast them.
- For more tips, click here.


Thursday, January 8, 2009

Divine Rice with Prawns


I've always loved fried rice but have never made it. My mom is the master of throwing together all the leftovers in the fridge to make fried rice. This recipe can easily be adapted according to your tastes, or to whatever meat and veggies you might have on hand.


I usually keep two types of bagged frozen vegetables in my freezer at all times. One type includes red, green, and yellow bell pepper slices with onions. You can find all sorts of uses for these... from an Asian stir fry, to fried rice, to chili. You'll save a lot of money if you buy them frozen, as red and yellow bell peppers can cost a fortune. The other type of frozen veggie bag I usually keep on hand is the "stir fry" variety that contains snap peas, carrots, water chestnuts, etc. These are great for dishes like Orange Chicken.


When I saw this fried rice recipe on Cate's blog, it finally gave me the push I needed to make my own at home. I'm surprised I've never made fried rice before, especially since we eat so much rice in this household and always have leftover rice sitting in the fridge. If you haven't visited Fresh From Cate's Kitchen before, I encourage you do to so. She's got a lot of great recipes over there, and I've been dying to make the Char Siu Pork she posted.


The key to making good fried rice is a really hot wok (or skillet), and having all your ingredients ready ahead of time. Once you start making it, you don't really time in between each step to get things together. It's really nice, though, because it comes together in less than ten minutes, making it a great weeknight meal.

Divine Rice with Prawns
adapted from Fresh From Cate's Kitchen (who adapted it from Thai Cooking from the Siam Cuisine Restaurant)


12-15 prawns, pre-cooked
2 tsp canola oil
2 tbsp minced garlic
1 cup frozen stir fry vegetables, partially thawed (you can either use a bell pepper/onion stir fry or the ones that include snap peas)
2 eggs
3 cups cold cooked rice
3 tbsp fish sauce
1 tsp sugar
1 tbsp ketchup
2 tsp soy sauce
2 tsp chopped cilantro
6-8 basil leaves, chiffonade
juice of 1 fresh lime
cucumber slices (optional)


In a small bowl, mix together the fish sauce, sugar, ketchup, and soy sauce.

Heat a skillet over high heat and add the oil. When the oil is hot, add the garlic and onions. Stir-fry until light brown.

Crack the eggs into the pan and scramble, cooking for about 10 seconds.

Add the bell pepper and stir fry for about 30 seconds.

Add the rice and stir-fry, breaking up clumps of rice and egg.

Add your sauce mixture and stir fry for a few minutes.

Add the prawns and cook until they are heated through, throwing in the basil at the last minute.

Transfer to a serving dish, and sprinkle the lime juice and cilantro over the top, then serve with cucumber slices on the side if desired.

Wednesday, October 29, 2008

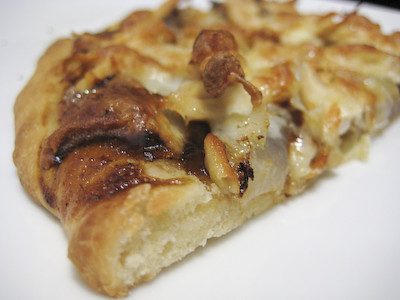
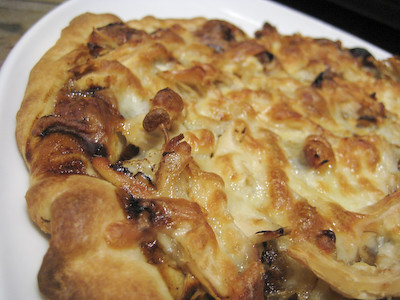
Barbeque Chicken Pizza


This month's Daring Bakers Challenge was chosen by Rosa of Rosa's Yummy Yums: Pizza! This challenge is dedicated to Sher of What Did You Eat? Sher was set to co-host this month with Rosa, but tragically passed away in July from a heart attack. It was originally Sher's idea for homemade pizza to be what the Daring Bakers made this month.


I was excited to try this recipe because while I've made pizza at home several times (with my own sauces and toppings), I've never made pizza dough from scratch.

If you decide to try this recipe, make sure you plan ahead. The flour needs to be chilled and the dough requires an overnight rest in the refrigerator before baking. (The dough can be frozen for later use to save some time.)


I don't know what happened to this month, but before I knew it, the posting date for this challenge had snuck up on me. I just got back from my vacation on the 25th, so I barely had enough time to complete this. I almost decided to sit this one out, but ended up throwing together a Barbeque Chicken Pizza.


The real challenge this month (at least for me) was to actually toss the dough instead of rolling it out. I had every intention of doing this - at least trying - but in the end it just wasn't in the cards for me. After allowing the dough to rest on the counter for two hours, it was way too soft to toss. I think my mistake was that I overlooked the part of the recipe that indicates that the flour needs to be chilled first. Consequently, my dough was too warm by the time I had finished kneading it. Regardless of my mistake, the pizza still tasted great (the dough was just really hard to work with).

Thanks Rosa, for choosing pizza for this month's challenge and honoring Sher. I hope that next time, I can follow the instructions a little better and actually get it right! The recipe for the pizza dough can be found below; if you'd like the recipe for the Barbeque Chicken Pizza you can find it here. Make sure you visit the Daring Bakers Blogroll to see how hundreds of others fared with this challenge!


Basic Pizza Dough
from The Bread Baker's Apprentice: Mastering The Art of Extraordinary Bread, by Peter Reinhart

Makes 6 pizza crusts (about 9-12 inches/23-30 cm in diameter).

Ingredients:
4 1/2 Cups (20 1/4 ounces/607.5 g) Unbleached high-gluten (%14) bread flour or all purpose flour, chilled - For Gluten Free (GF): 4 ½ cups GF Flour Blend with xanthan gum or 1 cup brown rice flour, 1 cup corn flour, 1 cup oat flour, 1 ½ cup arrowroot, potato or tapioca starch + 2 tsp xanthan or guar gum
1 3/4 Tsp Salt
1 Tsp Instant yeast - FOR GF use 2 tsp
1/4 Cup (2 ounces/60g) Olive oil or vegetable oil (both optional, but it’s better with)
1 3/4 Cups (14 ounces/420g or 420ml) Water, ice cold (40° F/4.5° C)
1 Tb sugar - FOR GF use agave syrup
Semolina/durum flour or cornmeal for dusting

DAY ONE

Method:
1. Mix together the flour, salt and instant yeast in a big bowl (or in the bowl of your stand mixer).

2. Add the oil, sugar and cold water and mix well (with the help of a large wooden spoon or with the paddle attachment, on low speed) in order to form a sticky ball of dough. On a clean surface, knead for about 5-7 minutes, until the dough is smooth and the ingredients are homogeneously distributed. If it is too wet, add a little flour (not too much, though) and if it is too dry add 1 or 2 teaspoons extra water.

NOTE: If you are using an electric mixer, switch to the dough hook and mix on medium speed for the same amount of time.The dough should clear the sides of the bowl but stick to the bottom of the bowl. If the dough is too wet, sprinkle in a little more flour, so that it clears the sides. If, on the contrary, it clears the bottom of the bowl, dribble in a teaspoon or two of cold water.
The finished dough should be springy, elastic, and sticky, not just tacky, and register 50°-55° F/10°-13° C.

Or

2. FOR GF: Add the oil, sugar or agave syrup and cold water, then mix well (with the help of a large wooden spoon or with the paddle attachment, on low speed) in order to form a sticky ball of dough.

3. Flour a work surface or counter. Line a jelly pan with baking paper/parchment. Lightly oil the paper.

4. With the help of a metal or plastic dough scraper, cut the dough into 6 equal pieces (or larger if you want to make larger pizzas).

NOTE: To avoid the dough from sticking to the scraper, dip the scraper into water between cuts.

5. Sprinkle some flour over the dough. Make sure your hands are dry and then flour them. Gently round each piece into a ball.

NOTE: If the dough sticks to your hands, then dip your hands into the flour again.

6. Transfer the dough balls to the lined jelly pan and mist them generously with spray oil. Slip the pan into plastic bag or enclose in plastic food wrap.

7. Put the pan into the refrigerator and let the dough rest overnight or for up to thee days.

NOTE: You can store the dough balls in a zippered freezer bag if you want to save some of the dough for any future baking. In that case, pour some oil (a few tablespoons only) in a medium bowl and dip each dough ball into the oil, so that it is completely covered in oil. Then put each ball into a separate bag. Store the bags in the freezer for no longer than 3 months. The day before you plan to make pizza, remember to transfer the dough balls from the freezer to the refrigerator.

DAY TWO

8. On the day you plan to eat pizza, exactly 2 hours before you make it, remove the desired number of dough balls from the refrigerator. Dust the counter with flour and spray lightly with oil. Place the dough balls on a floured surface and sprinkle them with flour. Dust your hands with flour and delicately press the dough into disks about 1/2 inch/1.3 cm thick and 5 inches/12.7 cm in diameter. Sprinkle with flour and mist with oil. Loosely cover the dough rounds with plastic wrap and then allow to rest for 2 hours.

Or

8. FOR GF: On the day you plan to eat pizza, exactly 2 hours before you make it, remove the number of desired dough balls from the refrigerator. Place on a sheet of parchment paper and sprinkle with a gluten free flour. Delicately press the dough into disks about ½ inch/1.3 cm thick and 5 inches/12.7 cm in diameter. Sprinkle the dough with flour, mist it again with spray oil. Lightly cover the dough round with a sheet of parchment paper and allow to rest for 2 hours.

9. At least 45 minutes before making the pizza, place a baking stone on the lower third of the oven. Preheat the oven as hot as possible (500° F/260° C).

NOTE: If you do not have a baking stone, then use the back of a jelly pan. Do not preheat the pan.

10. Generously sprinkle the back of a jelly pan with semolina/durum flour or cornmeal. Flour your hands (palms, backs and knuckles). Take 1 piece of dough by lifting it with a pastry scraper. Lay the dough across your fists in a very delicate way and carefully stretch it by bouncing it in a circular motion on your hands, and by giving it a little stretch with each bounce. Once the dough has expanded outward, move to a full toss.

Or

10. FOR GF: Press the dough into the shape you want (about 9-12 inches/23-30 cm in diameter - for a 6 ounces/180g piece of dough).

NOTE: Make only one pizza at a time.
During the tossing process, if the dough tends to stick to your hands, lay it down on the floured counter and reflour your hands, then continue the tossing and shaping.
In case you would be having trouble tossing the dough or if the dough never wants to expand and always springs back, let it rest for approximately 5-20 minutes in order for the gluten to relax fully,then try again.
You can also resort to using a rolling pin, although it isn’t as effective as the toss method.

11. When the dough has the shape you want (about 9-12 inches/23-30 cm in diameter - for a 6 ounces/180g piece of dough), place it on the back of the jelly pan, making sure there is enough semolina/durum flour or cornmeal to allow it to slide and not stick to the pan.

Or

11. FOR GF: Lightly top it with sweet or savory toppings of your choice.

12. Lightly top it with sweet or savory toppings of your choice.

Or

12. FOR GF: Place the garnished pizza on the parchment paper onto the stone in the oven or bake directly on the jelly pan. Close the door and bake for about 5-8 minutes.

NOTE: Remember that the best pizzas are topped not too generously. No more than 3 or 4 toppings (including sauce and cheese) are sufficient.

13. Slide the garnished pizza onto the stone in the oven or bake directly on the jelly pan. Close the door and bake for about 5-8 minutes (I baked mine for 10 minutes).

Or

13. FOR GF: Follow the notes for this step.

NOTE: After 2 minutes baking, take a peek. For an even baking, rotate 180°.

If the top gets done before the bottom, you will need to move the stone or jelly pane to a lower shelf before the next round. On the contrary, if the bottom crisps before the cheese caramelizes, then you will need to raise the stone or jelly.

14. Take the pizza out of the oven and transfer it to a cutting board or your plate. In order to allow the cheese to set a little, wait 3-5 minutes before slicing or serving.

Helpful Tossing Links:
http://www.wikihow.com/Toss-Pizza-Dough, http://www.vids.myspace.com/index.cfm?f … D=35480534, http://www.ehow.com/how_2066953_toss-pizza-dough.html, http://www.classic-hand-tossed-pizza.bl … hands.html, http://www.youtube.com/watch?v=mhcTKeslAmk, http://www.ask.yahoo.com/20050222.html

Thursday, October 2, 2008

Make Ahead Manicotti


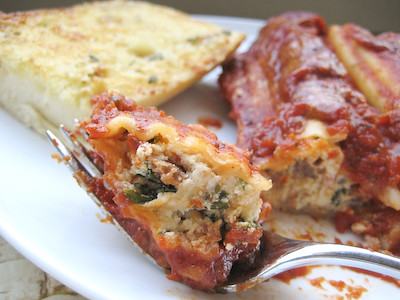
I love baked pasta dishes, but I'm not a big fan of baked ziti. It's a little too plain for me - just pasta, sauce, and cheese. I love this baked manicotti dish, though, because it has a nice blend of cheese and spinach. (I would bet that most picky kids wouldn't mind the spinach in this dish, either!) Sometimes I like to throw some hot Italian sausage and crushed red peppers into the mix to kick it up a notch too.

It can be time consuming stuffing the manicotti, but you can have it done in no time if you use a ziploc bag with the corner cut out or pastry bag. I've used a fork in the past to to fill them too. If you use freshly ground black pepper in this recipe, another tip I learned (from Alton Brown) is that twelve turns of your average pepper grinder will yield 1/8 teaspoon.

It's great because as the name states, you can make this ahead of time and then just pop it into the oven to bake when you get home from work and have dinner on the table in less than an hour. If you don't have the time to refrigerate this overnight, no worries... I have baked it immediately after assembly as well and it was still just as good. If you try this, you have to serve it with some homemade roasted garlic bread.


I'm also submitting this to the weekly Presto Pasta Nights, hosted by Ruth over at Once Upon a Feast.

Make Ahead Manicotti
from Allrecipes

1 pint ricotta cheese (I used part skim ricotta)
2 eggs
1 (10 ounce) package frozen chopped spinach, thawed and drained
1 cup shredded mozzarella cheese
1/2 cup grated Parmesan cheese
1 1/2 tablespoons white sugar (I omit this)
1/8 teaspoon salt
1/4 teaspoon ground black pepper (24 turns of the pepper grinder)
1/2 pound hot Italian sausage, crumbled and browned (optional)
1/4-1/2 tsp crushed red pepper flakes (optional - if you're using the sausage)
12 manicotti shells
1 (32 ounce) jar spaghetti sauce (I use 2 jars)

In a medium bowl, mix together ricotta cheese and eggs until blended. Stir in spinach, mozzarella cheese, 1/4 cup of the Parmesan cheese, sugar, salt and pepper (plus the sausage and crushed red pepper flakes if you are using them). Stuff mixture into uncooked pasta shells.

Spread 1/2 cup spaghetti sauce in the bottom of a medium baking dish (I use a 13 x 9-inch). Arrange stuffed pasta shells in a single layer over the sauce. Pour the remainder of the sauce over the shells (if you don't cover your pasta with enough sauce, it won't cook/soften properly in the oven), cover dish, and chill in the refrigerator for 8 hours, or overnight.

Preheat oven to 400 degrees F (200 degrees C). Bake covered for 40 minutes. Sprinkle with remaining Parmesan cheese, and bake for another 15 minutes.