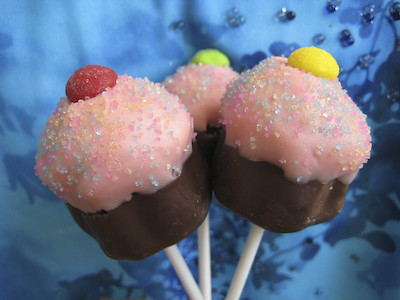
Showing posts with label cupcakes. Show all posts

Sunday, February 7, 2010

Classic Red Velvet Cake (SMS)


This week's Sweet Melissa Sundays (SMS) recipe was chosen by Rosy of Rosy Lips and Lavender: Red Velvet Cake. It's basically a cake with a mild chocolate flavor that is colored red with either beets or red food coloring. Melissa adds cinnamon and red wine vinegar to her cake, some non-traditional ingredients to spice up the cake a little bit.

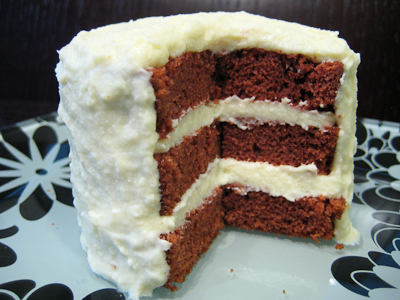
I decided that I didn't really have the time to make a pretty layer cake (my cake decorating skills leave a lot to be desired anyway!), so I went the cupcake route. I did use my molten cake pan to make some extra large cupcakes and sliced one of those cupcakes to make a mini red velvet cake. I made a full recipe which yielded 18 regular sized cupcakes and 4 huge cupcakes.

I'm not sure if it was because I didn't let my cream cheese warm up enough, or if it was because I used the fat free variety, but I could not get my cream cheese frosting to be smooth! So, my frosted cupcakes looked pathetic (which is why you won't see any photos of them here), and my mini red velvet cake looks pretty sad too... but I just couldn't put up a post without any photos so you get the one up top. Luckily the appearance of the frosting had no bearing on the taste of these cupcakes, as they were incredibly moist and delicious. The cream cheese frosting was good, but not my favorite. I prefer this cream cheese frosting, or even better - coconut cream cheese frosting.

I haven't had very many red velvet cakes before, but this recipe is definitely a keeper and I will certainly be making this cake again. This would be a great cake recipe to use for cupcake pops, too, if you wanted to do something more fun. If you would like to try the red velvet cake recipe, you can find it here. Make sure you check out the Sweet Melissa Sundays Blog Roll to see how everyone enjoyed this crimson cake!

* Recipe notes:
- If making cupcakes, bake for about 20 minutes, or until a toothpick inserted into the center comes out clean.
- I only used 1.5 tsp of red food coloring, but add the full 2 tsp (or more) if a more intense red color is desired.
- I made 2/3 of the frosting recipe and that was sufficient to frost all my cupcakes.
- For more tips, click here.

Thursday, January 29, 2009

Tuiles and Allergy Friendly Cupcakes


I have to admit that when I saw the January Daring Bakers Challenge, I was relieved. For once, it was not a multi-step, multi-day, complicated, daunting process. It was something new, but simple and fun. I'm always up for learning new things each month, but after the hustle and bustle of the holidays and a business trip this month, I gladly welcomed a simpler challenge.

This month's challenge is brought to us by Karen of Bake My Day and Zorra of 1x umruehren bitte aka Kochtopf. They have chosen Tuiles from The Chocolate Book by Angélique Schmeink and Nougatine and Chocolate Tuiles from Michel Roux.


Traditionally, tuiles are thin, crisp almond cookies that are gently molded over a rolling pin or arched form while they are still warm. Once set, their shape resembles the curved French roofing tiles for which they're named. The tuiles recipe we used this month was made with a Dutch slant - no almonds. Traditionally, this batter is used to bake flat round cookies on the 31st of December, representing the year unfold. On New Years day however, the same batter is used but on this day they are presented to well-wishers shaped as cigars and filled with whipped cream, symbolizing the New Year that's about to roll on.


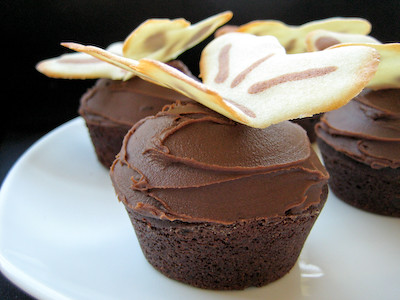
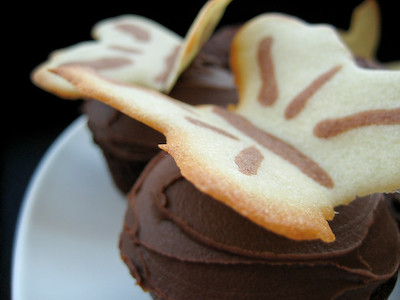
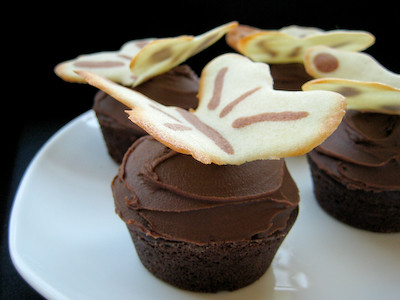
I had never made tuiles before, and was so pleased to find out how simple they are to make! Consisting of some butter, powdered sugar, egg whites, and flour, these came together in no time. I'm sure you'll find all sorts of intricate shapes and molds on other food blogs, but I was rather pressed for time so I went with the suggested butterfly shape.


I'm sure you can purchase plastic sheets at the craft store to cut into stencils, but I simply used a thick magazine cover. The gloss prevented the paper from get water logged when I wiped it clean. Then, I simply cut out the butterfly shape. It worked perfectly and I loved that I did not need to make any special purchases for this recipe.


I also took this opportunity to try out the Cherrybrook Kitchen chocolate cake mix and frosting I won from Blake Makes. Cherrybrook Kitchen makes products that are tailored for those with various food allergies. Their products are peanut free, dairy free, egg free, and nut free. That's not to say that they are taste free!


The folks at Cherrybrook Kitchen describe the chocolate cake as decadent, rich, moist, and flavorful; truly a chocolate lover’s fix. The cake is made with imported Belgium cocoa powder and studded with chocolate chips. I decided to make cupcakes with mine, and filled a few with marshmallow creme. I brought these frosted cupcakes into work and no one could tell that they were "special" cupcakes. They taste just as good as any other boxed cake mix.


If you're a person that suffers from food allergies, then you should give these cake mixes a try. I am confident that you will like them. You can use their store locator to find a grocery store near you that carries these. If you're not located near a store that carries these mixes, you can also order them online.


A big thanks to Karen and Zorra, for choosing this month's challenge. I will definitely be making these again. I can't wait to play around with the shapes in the future when I have some more time. I know the possibilities are endless! Make sure you visit the Daring Bakers Blogroll to see hundreds of other variations!


Tuiles
from The Chocolate Book by Angélique Schmeinck

Yields: 20 small butterflies/6 large (butterflies are just an example)
Preparation time batter 10 minutes, waiting time 30 minutes, baking time: 5-10 minutes per batch

65 grams / ¼ cup / 2.3 ounces softened butter (not melted but soft)
60 grams / ½ cup / 2.1 ounces sifted confectioner’s sugar
1 sachet vanilla sugar (7 grams or substitute with a dash of vanilla extract)
2 large egg whites (slightly whisked with a fork)
65 grams / 1/2 cup / 2.3 ounces sifted all purpose flour
1 table spoon cocoa powder/or food coloring of choice
Butter/spray to grease baking sheet

Oven: 180C / 350F

Using a hand whisk or a stand mixer fitted with the paddle (low speed) and cream butter, sugar and vanilla to a paste. Keep stirring while you gradually add the egg whites. Continue to add the flour in small batches and stir to achieve a homogeneous and smooth batter/paste. Be careful to not overmix.

Cover the bowl with plastic wrap and chill in the fridge for at least 30 minutes to firm up. (This batter will keep in the fridge for up to a week, take it out 30 minutes before you plan to use it).

Line a baking sheet with parchment paper or grease with either butter/spray and chill in the fridge for at least 15 minutes. This will help spread the batter more easily if using a stencil/cardboard template such as the butterfly. Press the stencil on the baking sheet and use an off sided spatula to spread batter. Leave some room in between your shapes. Mix a small part of the batter with the cocoa and a few drops of warm water until evenly colored. Use this colored batter in a paper piping bag and proceed to pipe decorations on the wings and body of the butterfly.

Bake butterflies in a preheated oven (180C/350F) for about 5-10 minutes or until the edges turn golden brown. Immediately release from baking sheet and proceed to shape/bend the cookies in the desired shape. These cookies have to be shaped when still warm, you might want to bake a small amount at a time or maybe put them in the oven to warm them up again. (Haven’t tried that). Or: place a baking sheet toward the front of the warm oven, leaving the door half open. The warmth will keep the cookies malleable.

If you don’t want to do stencil shapes, you might want to transfer the batter into a piping bag fitted with a small plain tip. Pipe the desired shapes and bake. Shape immediately after baking using for instance a rolling pin, a broom handle, cups, cones….

Alternative Baking:
Either un-glutenize the batter given substituting the flour for any nut meal or oat flour, or as an alternative use one of the following batters below:

Nougatine
from Finest Desserts by Michel Roux

5.1/4 cups / 500 grams sliced almonds
(or 4.1/3 cups/500 grams slivered almonds)
3.1/3 cups / 660 grams sugar
4 tbs / 60 grams butter (optional)
2 tbs oil (vegetable, sunflower, peanut)

Makes 2.3/4 lbs/1.2 kgs! (This is the yield of the recipe given in the book, feel free to downsize!)
Preparation time: 25 minutes
Preheat oven: 180C/350F

Spread the almonds on a baking sheet and toast in the oven until lightly browned. Cook the sugar in a heavy based saucepan over low heat, stirring gently and continuously with a spatula, until it melts to a light golden caramel. Add the almonds and stir over low heat for 1 minute, then stir in the butter until completely absorbed. (This is not essential, but will give the nougat an added sheen) Pour the nougatine onto an oiled baking sheet.

Shaping: place a bakingsheet toward the front of the warm oven, leaving the door half open. The warmth will keep the cookies malleable. Work with one piece at a time, of a size appropriate to the shape you want. Roll out each piece on a warm, lightly oiled baking sheet or lightly oiled marbled surface. It is essential to work quickly, since the nougatine rapidly becomes brittle. Heat the nougatine in a microwave oven for a few seconds only to soften it if needed.

Roll the nougatine into the appropriate thickness for your desired shape, but never thicker than 1/8 inch or 3 mm. Quickly cut out your chosen shapes using cookie cutters, or the blade or heel of a chef’s knife. To mold the nougatine, drape it very rapidly over the mold so that it follows the shape and contours. Leave until completely cold before removing from the mold.
Or, cut out and using your fingers or a knife, push into folds or pleats… use as a basket, twirl round a knitting needle..

Nougatine based shapes can be made two or three days in advance, Keep them in a very dry place and do not fill with something like a mousse more than 2 hours prior to serving.

Chocolate Tuiles
from Finest Desserts by Michel Roux

Makes 30
Preparation time: 15 minutes!

9 oz/250 grams dark or white couverture or best-quality bittersweet chocolate, chopped
2/3 cup/75 gr slivered almonds, toasted and cooled

Temper the couverture, and stir in the toasted almonds. Place the template on a sheet of rodoïde (or use a clean sheet of sturdy plastic such as a folder) and fill with about 1 tbs of the mixture. Repeat the process a little distance away from the first one. As soon as you have 5 tuiles fit, slide them onto a mold or rolling pin (side of a glass) to curve. Let cool completely, lift tuiles off the plastic only after the chocolate has set and just before serving, so that they keep their shine.

Savory tuile/cornet recipe
from The French Laundry Cookbook by Thomas Keller

1/4 cup plus 3 tablespoons (65 grams/2.1/4 ounces) all purpose flour
1 tablespoon plus 1 teaspoon sugar
1 teaspoon kosher salt (= 2/3 teaspoon table salt)**
8 tablespoons (114 grams/4 ounces) unsalted butter, softened but still cool to the touch
2 large egg whites, cold
2 tablespoons black sesame seeds

In a medium bowl, mix together the flour, sugar and salt. In a separate bowl, whisk the softened butter until it is completely smooth and mayonnaise-like in texture. Using a stiff spatula or spoon, beat the egg whites into the dry ingredients until completely incorporated and smooth. Whisk in the softened butter by thirds, scraping the sides of the bowl as necessary and whisking until the batter is creamy and without any lumps. Transfer the batter to a smaller container, as it will be easier to work with.

Preheat the oven to 400 degrees F.

Make a 4-inch hollow circular stencil. Place Silpat on the counter (it is easier to work on the Silpat before it is put on the sheet pan). Place the stencil in one corner of the sheet and, holding the stencil flat against the Silpat, scoop some of the batter onto the back of an offset spatula and spread it in an even layer over the stencil. Then run the spatula over the entire stencil to remove any excess batter. After baking the first batch of cornets, you will be able to judge the correct thickness. You may need a little more or less batter to adjust the thickness of the cornets.

There should not be any holes in the batter. Lift the stencil and repeat the process to make as many rounds as you have molds or to fill the Silpat, leaving about 1 1/2 inches between the cornets. Sprinkle each cornet with a pinch of black sesame seeds.

Place the Silpat on a heavy baking sheet and bake for 4 to 6 minutes, or until the batter is set and you see it rippling from the heat. The cornets may have browned in some areas, but they will not be evenly browned at this point.

Open the oven door and place the baking sheet on the door.*** This will help keep the cornets warm as you roll them and prevent them from becoming too stiff to roll. Flip a cornet over on the sheet pan, sesame seed side down and place 4-1/2 inch cornet mold at the bottom of the round. If you are right-handed, you will want the pointed end on your left and the open end on your right. The tip of the mold should touch the lower left edge (at about 7 o'clock on a clock face) of the cornet.

Fold the bottom of the cornet and around the mold; it should remain on the sheet pan as you roll. Leave the cornet wrapped around the mold and continue to roll the cornets around molds; as you proceed, arrange the rolled cornets, seams side down, on the sheet pan so they lean against each other, to prevent from rolling.

When all the cornets are rolled, return them to the oven shelf, close the door, and bake for an additional 3 to 4 minutes to set the seams and color the cornets a golden brown. If the color is uneven, stand the cornets on end for a minute or so more, until the color is even. Remove the cornets from the oven and allow to cool just slightly, 30 seconds or so.

Gently remove the cornets from the molds and cool for several minutes on paper towels. Remove the Silpat from the baking sheet, wipe the excess butter from it, and allow it to cool down before spreading the next batch. Store the cornets for up to 2 days (for maximum flavor) in an airtight container.

Sunday, November 16, 2008

Cupcake Pops


When I first saw these adorable little cupcake pops on Bakerella's blog, I thought they were cute, but figured they were also way too complicated to make. Turns out they're pretty easy to make, just a little time consuming. I found it best to divide the recipe up into a two day process.
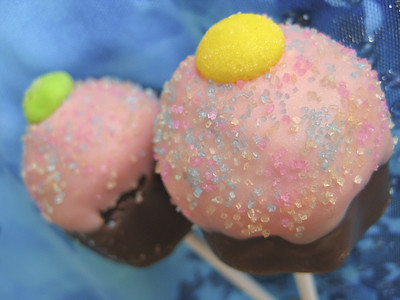

You can save time by using a boxed cake mix and store bought cream cheese frosting, but I decided to make everything from scratch because well, everything is better when you make it from scratch :)

The recipe is actually rather simple. Crumble your baked cake into bits and then mix in some cream cheese frosting. Roll the cake into balls, then refrigerate until firm.


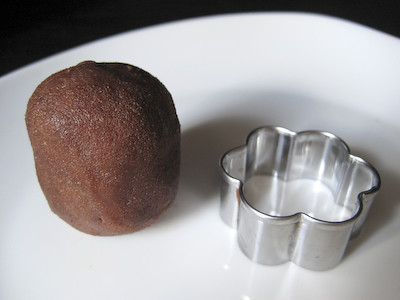
Initially, I thought a cookie cutter mold like this one would best, because it has more ridges and most resembles a true cupcake liner. I'm not sure if it was because the chocolate cake I baked was extremely moist, but I found it very difficult to mold the cake with that cookie cutter. The cake would just stick to all the ridges and would not come out in any recognizable shape. Instead, I found that this one was much easier to use:
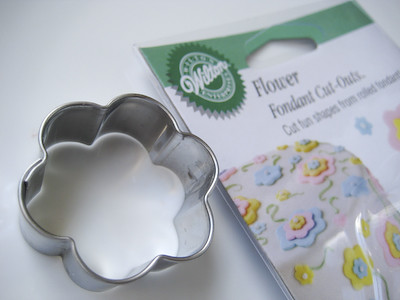

It comes in a set of three, with the medium sized one being the one I ended up using. It's 1-1/2 inches in diameter, as opposed to 1-1/4 inches (the ideal size). If you're like me and you aren't able to find the 1-1/4 inch cookie cutter, the 1-1/2 inch one works just fine. You'll just have to roll your cake balls a little larger. I like to be precise in the kitchen (read: OCD), so I actually weighed out my cake before rolling it into balls. If you have the 1-1/4" cookie cutter, you'll want to weigh out 1 ounce of cake. If you're using the 1-1/2 inch cookie cutter, you'll weigh out 1-1/8 ounces of cake.


After the balls have firmed up in the refrigerator (or freezer), you shape them into a more oblong shape. I actually found that I needed to freeze the balls before molding them - they were too soft and difficult to work with when they were only in the refrigerator, even overnight. Again, I'm not sure if this was because I was working with an extremely moist cake, or if everyone else has had a similar experience.


After reshaping the cake, you mold it in the cookie cutter and then push it out from the bottom up in order to form the bottom of the cupcake.


After a quick chill in the freezer, the cake is ready to be dipped. The bottoms are dipped in chocolate bark, and then the tops are dipped in melted pink candy melts. You're supposed to hold the little cupcakes by hand and dip them in the chocolate bark, then insert the lollipop sticks into the bottoms, but I found this very difficult to do. A trick I discovered to make this much easier was to use a wooden skewer to dip them in the chocolate. I would insert the wooden skewer into the top of the cupcake, then dip the bottom of the cupcake, shake off the excess chocolate, and then insert the lollipop stick. Once the lollipop stick was firmly in place, I removed the skewer, patched up the hole where the skewer was with a gentle nudge of my finger on the surrounding cake, and then placed the lollipops on some wax paper to set.
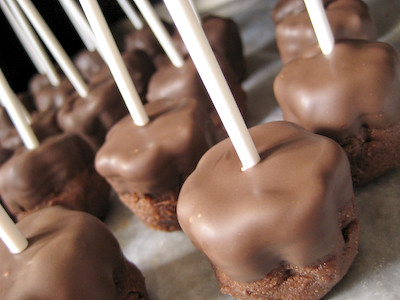

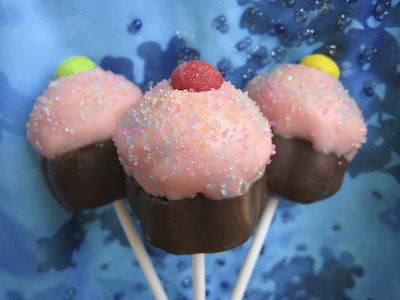
After the bottoms have been dipped in chocolate bark, you simply dip the tops of the cupcakes in pink candy melts. Then you top the cupcakes with M&M's and sprinkles. You're supposed to stick the lollipops into a styrofoam block while they set, but I didn't really want to buy one just for this purpose. I saw that others had used egg cartons, but I had no such luck with that. Instead, you can use a large bowl of sugar or rice to stand them up while they are setting, like this:
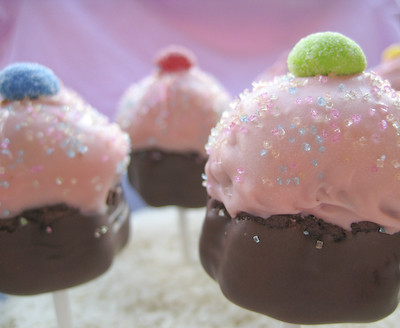

These really are the cutest baked creation I have seen in a while. Like I said at the beginning of the post, I never thought I would make these. I recently found myself needing something special to send to a good friend, though, so I took the opportunity to try my hand at them. I was pleasantly surprised to learn how easy they are to make. These are great to bring to get togethers, especially something like a birthday party or baby shower. They're even cuter when you wrap them up and tie them with a ribbon.


I found that while Bakerella's post was very detailed in some regards (lots of photos, information on cookie cutter sizes, etc.), it was lacking in other areas. Her post doesn't specify several things, like the size of the lollipop sticks you need for this, or the dimensions of the treat bags. I used lollipop sticks that were 10cm in length and treat bags that were 3" x 4" (7.6cm x 10.2cm). The ribbon I used was 1/8" (3mm) wide. If you cut it into strips that are about 9 inches long, it's the perfect length to to tie around your treat bag and make a small bow. Most of the items required to make these can be found at your local craft store. I was able to find everything at Michael's. The only thing I did not pick up from there was the chocolate bark, which I purchased from the grocery store.


These are sure to be a crowd pleaser. Not only are they adorable, but they taste good too. They're also the perfect size for those who are worried about portion control (though when it comes to sweets, why worry about portion control?). While I used a chocolate cake, you can use whichever type of cake you're craving. You could also take these to a whole new level by shaping frozen cheesecake pops like this! (Maybe I'll try that next time?!)

Cupcake Pops and Cupcake Bites
from Bakerella
(Video Instructions from the Martha Stewart Show)

1 13x9 baked cake (from a box cake mix or from scratch … any flavor) (I made a Cocoa Buttermilk Cake - recipe below)
1 container store bought cream cheese frosting (or about 2 cups equivalent from scratch) (I made some from scratch - recipe below - will use only 1-3/4 cup next time so the cake isn't so moist/sticky)
1 flower shaped cookie cutter (1.25" wide x 0.75" tall) (I use one that was 1.5" in diameter)
1 package chocolate bark (I only used 14 ounces chocolate bark from a 24 ounce package)
1 package pink candy melts or white chocolate bark (I used a 12 ounce package)
bowls for dipping
wax paper
aluminum foil
lollipop sticks (I used 55 sticks, 10cm in length)
sprinkles, m&ms or something similar for top of cupcake (I used colored sugar crystals and sour skittles - would recommend M&M's instead since they are chocolate flavored - the sour skittle was too much of a contrast in flavors)
small plastic treat bags (I used 3x4" bags) and ribbon (I used 1/8" wide ribbon) if making the Cupcake Pops
candy cups and truffle boxes to individually package the Cupcake Bites
styrofoam block

Bake a cake from a mix or from scratch and cool completely.

Crumble cake into a fine consistency into a large bowl.

TIP: If the texture is too coarse, you can run it through a food processor.

Add can of cream cheese frosting or homemade frosting and blend together using the back of a large spoon. Blend thoroughly.

Roll mixture into 1.25" - 1.5" size balls and lay on wax paper covered cookie sheet. You may want to periodically rinse and dry your hands off in between.

Cover with aluminum foil or plastic wrap and chill in refrigerator for several hours.

TIP: You can speed this up by placing in the freezer for about 15 minutes. (I found that the only way I could work with them was by placing them in the freezer. No amount of refrigeration was sufficient.)

Remove. Begin to shape into cupcakes using a small flower-shaped cookie cutter. Take the chilled ball and roll it into more of an oval and then slide into cookie cutter.


Push it into cutter until about half fills the cutter and the rest sticks out of the top in the shape of a mound.

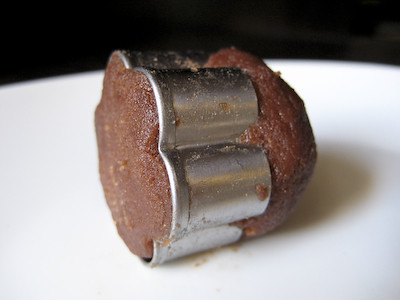

Then push the shaped cupcake carefully out of the cookie cutter from the bottom. Set right side up on a wax paper covered cookie sheet. Continue with remaining balls.

Once shaped, cover and return to freezer. (5-10 minutes)

TIP: You can leave them covered in the refrigerator overnight if you want to do the dipping on the following day.

While cupcake shapes are chilling, begin to heat up your chocolate bark.
Brown chocolate bark for the bottoms. Pink or white chocolate for the tops.

Follow the instructions on the package for melting. Most recommend heating for 30 second intervals at a time and stirring in between. You can also do the double boiler method.

When you are ready to dip, remove from freezer and set up another wax paper covered cookie sheet.

Take the cupcake shaped mixture and dip the bottoms into the melted chocolate - just to the point where the mounded shape starts. (I found this was easier if you insert a wooden skewer into the tops first.) Remove from chocolate, turn upside down and wiggle so that the excess starts to slide down slightly. Then lay on the wax paper upside down. If you want them to be lollipops, then go ahead and insert the lollipop sticks while the chocolate is still wet. (After inserting the lollipop stick, remove the skewer and then cover up the hole on the top of the cupcake by pinching the cake a bit.) Continue with rest of the cupcakes. You can also leave some without the sticks. They’re just as cute as Cupcake Bites.
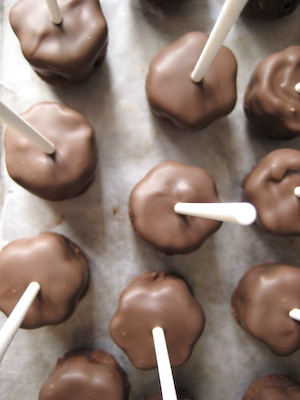

TIP: Dip end of your lollipop stick in the melted chocolate before inserting into chocolate bottoms. Not sure if this helps a lot, but it couldn't hurt. (I skipped this step and they turned out fine.)

DON'T - get water in the chocolate. Make sure your hands are completely dry. Water will cause the chocolate to separate and mess up all your hard work.

Dry completely. (15-20 minutes)

Once dry, dip the tops of the cupcakes in the pink or white chocolate. You may need to move it around a little to cover all the exposed areas.

TIP: Let the pink chocolate sit for a few minutes after heating to thicken. This will help it from dripping down the sides of the cupcake.

Remove from the pink/white chocolate and turn right side up. You may need to hold and rotate it if there is any excess so that it doesn’t drip down too far.

TIP: You can use a toothpick to help cover any areas the melted chocolate didn't cover.

For the Cupcake Bites - just turn right side up and rest on the wax paper. Then go ahead and put an M&M on the top and add sprinkles while wet.

For the lollipops, continue holding and place an M&M on the top and add sprinkles. Let them dry in a styrofoam block that you have already poked holes into.

When completely dry, cover the lollipops with small plastic treat bags and tie with a ribbon. (I used treat bags that were 3" x 4" and strips of ribbon that were 1/8" wide and 9" long.)
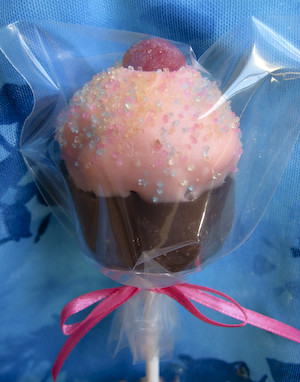

For the Cupcake Bites, place in a candy cup and package in small candy truffle boxes to present individually.

Makes about 50. (I was able to make about 55 with the 1-1/2" cookie cutter.)

You can store these in an airtight container and they will last for several days. You can also store them in the refrigerator if you would like them cold.

Cocoa-Buttermilk Cake
adapted from Baking: From My Home to Yours, by Dorie Greenspan

2 cups all purpose flour
½ cup unsweetened cocoa powder
½ teaspoon baking powder
½ teaspoon baking soda
½ teaspoon salt
2 sticks (8 ounces) unsalted butter, room temperature
1-½ cups granulated sugar
2 large eggs
2 large egg yolks
1 teaspoon pure vanilla extract
1 cup buttermilk (I use SACO buttermilk cultures from Walmart - it has a much longer shelf life than fresh buttermilk)
4 ounces bittersweet chocolate, melted and cooled (optional) (I used semisweet chocolate)

Center a rack in the oven and preheat the oven to 350 degrees F. Butter a 13-x-9 inch pan, dust the insides with flour, tap out the excess and line the bottom with parchment or wax paper. Put the pan on a baking sheet.

To Make the Cake:
Whisk together the flour, cocoa, baking powder, baking soda and salt.

Working with a stand mixer, preferably fitted with a paddle attachment, or with a hand mixer in a large bowl, beat the butter on medium speed until soft and creamy. Add the sugar and beat for about 2 minutes, until it is thoroughly blended into the butter. Add the eggs one at a time, then the yolks one by one, beating for 1 minute after each addition and scraping down the sides and bottom of the bowl as needed. Beat in the vanilla. Reduce the mixer speed to low and add the dry ingredients alternately with the buttermilk; add the dry ingredients in 3 portions and the buttermilk in 2 (begin and end with the dry ingredients); mix only until each new batch is blended into the batter. Scrape down the bowl and, if you want, add the melted chocolate, folding it in with a rubber spatula. Pour the batter into the cake pan.

Bake for 35 minutes, or until the cakes feel springy to the touch and starts to pull away from the sides of the pans (I also used the toothpick test). Transfer the cake to a rack and cool completely.

Cream Cheese Frosting
from Baking: From My Home to Yours, by Dorie Greenspan

8 ounces cream cheese, at room temperature
1 stick (8 tablespoons) unsalted butter, at room temperature
1 pound (3-¾ cups) confectioners' sugar, sifted (the frosting will be lumpy if you don't sift it)
1/2 tsp pure vanilla extract

Working with a stand mixer, preferably fitted with a paddle attachment or with a hand mixer in a large bowl, beat the cream cheese and butter together until smooth and creamy. Gradually add the sugar and continue to beat until the frosting is velvety smooth. Beat in the vanilla extract.

Yield: 2 cups

Tuesday, October 28, 2008

Chocolate-Chocolate Cupcakes (TWD)


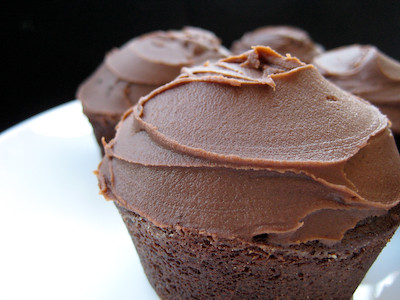
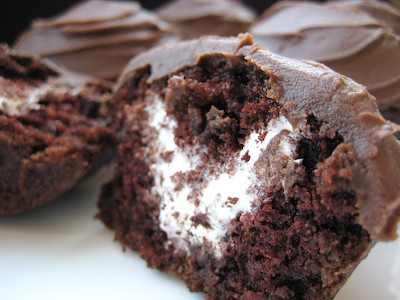
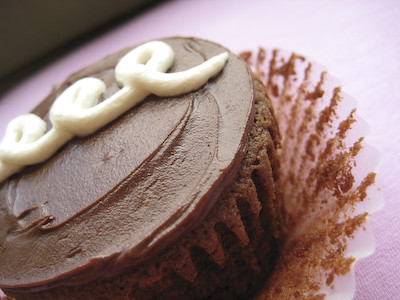
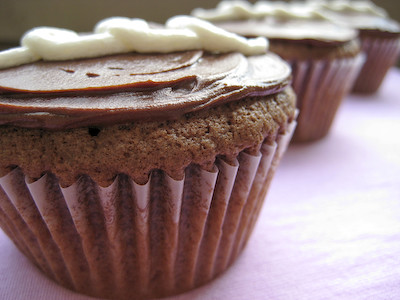
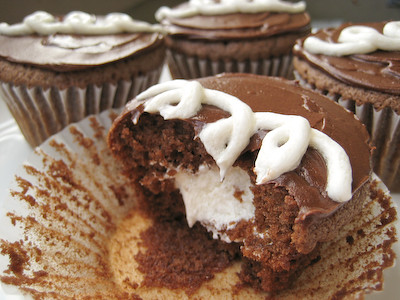
This week's Tuesdays with Dorie (TWD) recipe was chosen by Clara of I Heart Food4Thought: Chocolate-Chocolate Cupcakes. When I saw this recipe, I immediately knew I wanted to make them like the Hostess CupCakes many of us grew to love as kids - chocolate cupcakes filled with a delicious vanilla cream filling.


Dorie notes that you can use marshmallow fluff to fill these cupcakes, but I could not find any at my grocery store. All I could find was marshmallow creme. I've since discovered that "Marshmallow Fluff" is just a brand of marshmallow creme (ha!). Thinking I did not have any marshmallow fluff to use, I searched several blogs for a suitable filling recipe. There was one on Annie's Eats, but she noted that while it was good, it wasn't the same as the Hostess CupCake filling. The recipe on Baking Bites, however, was supposed to be spot on.


It has honestly been quite a while since I've had a Hostess CupCake, so it's hard for me to comment on the filling. It sure seemed close to what I remember. Authentic or not, the filling was pretty good. My only complaint about the filling was that it seemed to slightly separate, so it did not appear as smooth as the real thing.


As for the cupcakes themselves, these were wonderful. They were moist, light, and fluffy. The perfect chocolate cupcake. It seems that a lot of other TWD bakers found these to be too dry, but that was not the case with mine. I guess I was lucky in that these cupcakes turned out perfectly for me.


The next time I make these, I'll try just filling them with the marshmallow creme and see how they compare (that would certainly be simpler). I also love Dorie's suggestions to fill these with Nutella or chocolate ganache. I think these would also be great with a creamy, peanut butter filling. The possibilities are endless.


Thanks Clara, for choosing these delightful chocolate cupcakes. I've included the recipe below for the vanilla cream filling I used. If you would like the recipe for the cupcakes, you can find it here. Make sure you visit the TWD Blog Roll to see how everyone else enjoyed these chocolatey treats!

Don't forget... for those who have been on the fence about joining Tuesdays with Dorie - you have until October 31st to join. After Friday, membership in the group will be closed.


*A few recipe notes:
- The baking time is still 22-25 minutes if you halve the recipe. Mine was finished after 24 minutes.
- Many bakers found these cupcakes to be too dry. There was much debate as to whether this was due to overbaking, or too much flour. Part of this debate was due to the ambiguity as to how much 1 cup of flour weighs... Heidi over at Suburban Food found that Dorie uses the dip and sweep method of measuring and one cup of flour using this method weighs 4.8 ounces).

- Make sure you melt your chocolate first. That way it is completely cool by the time you need it (at the end).
- I used semisweet chocolate instead of bittersweet.
- I only have one muffin pan so I had to bake these in two batches. I hate not knowing how full to fill each muffin cup ("divide the batter evenly" is so vague). So I weighed it out for next time. Each muffin cup should be filled with approximately 1.75 ounces of batter (that weight is including the weight of the liner as well).
- There was just barely enough ganache to frost these cupcakes lightly. If you like to frost your cupcakes heavily, I would recommend doubling the recipe.
- Wrapped airtight (glazed or unglazed), these can be frozen for up to 2 months.
- For more recipe tips, click here.

Vanilla Cream Filling
from Baking Bites

3 tbsp all purpose flour
1/2 cup milk (low fat is fine) (I used skim)
1/2 cup butter (or trans fat-free shortening)
1/2 cup granulated sugar
1/2 scraped vanilla bean or 1 tsp vanilla extract

Whisk together the flour and milk and cook in a small saucepan over medium heat until thick (this will only take a few minutes). Stir continuously to prevent the mixture from clumping and do not bring it all the way to a boil. (Do not walk away from it! It will be slightly clumpy as it thickens but you should not get large clumps if you stir continuously.) When thickened (consistency will be that of a thin pudding or custard), strain with a mesh strainer into a small bowl, cover with plastic wrap and let cool completely to room temperature.

When the milk mixture is cool, cream the butter (or shortening) and sugar together in a medium bowl until light. Add in the milk/flour mixture and the scraped vanilla bean seeds (or vanilla extract) and beat at high speed with an electric mixer for 7 minutes, until light and fluffy.

Scrape into a pastry bag fitted with a plain tip, or a large ziplock bag with the corner cut off, and set aside until ready to fill your cupcakes.

Thursday, September 11, 2008

Peanut Buttercups with Peanut-Penuche Icing


I don't bake cupcakes very often; I'm not really sure why. Probably because I only have one muffin pan and I'm too lazy to bake them in batches. I also don't see what the big deal is about Sprinkles Cupcakes. Sure, they have a lot of flavor combinations, but they don't taste that good. Plus I've seen much better cupcakes created by all the wonderful bakers who participate in Cupcake Hero every month.


I came across this recipe when I was craving something sweet, made with peanut butter. It's a peanut butter cupcake filled with chocolate, then topped off with a peanut-penuche icing. Penuche is a fudge-like candy made by boiling brown sugar, milk, and butter. My free sample of "chocolately" TCHO chocolate (courtesty of Blake Makes) was perfect in this recipe.


My only problem was that I misread the recipe instructions and thought I was supposed to place the chocolate in the middle of the batter. Turns out you're supposed to fill the muffin pan half way, add the chocolate, then fill it three-quarters of the way to the top (placing the chocolate in the top third of the batter). This mistake caused my chocolate to be pretty close to the bottom of the cupcakes by the time they were finished baking, instead of closer to the middle.


This recipe is supposed to yield twelve "Texas-size" cupcakes. I'm not sure how big a "Texas-size" muffin pan is supposed to be, but I used my molten cake pan for these and got six super big cupcakes and then four "regular" sized ones with the remaining batter. (Next time I'll just make the regular sized ones - the others ones were huge.)


Sometimes I'll bake something, turn around, and find that it's almost all gone, consumed by my husband before even I realize what has happened! One of the perks of making baked goods with peanut butter is that my husband hates peanut butter in anything except for a peanut butter and jelly sandwich. So I learned early on in the relationship that if I wanted to keep him out of my sweets, all I had to do was bake with peanut butter :)

Well, I failed miserably this time. I gave him one bite of my cupcake and he immediately came back, claiming the rest of mine! Now if that doesn't say anything about how good these are, I don't know what does!


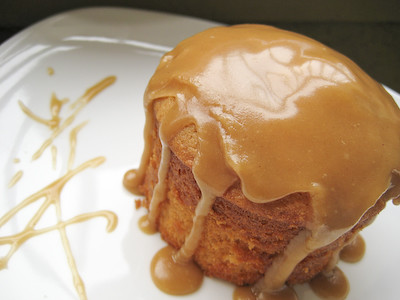
The cake itself is incredibly moist, but it's the icing that makes these special. It's a sweet, fudgey, peanut buttery icing. I iced my cupcakes while the icing was still a bit warm, so instead of sitting nicely atop the cupcakes, it oozed over the edges. Still totally edible and incredibly delicious, but a little messy - so if you want cupcakes that don't require a fork for consumption, I'd recommend letting the icing cool for a few minutes first.

If you like peanut butter, you have to try these. (Even if you don't, you might still like them - look at my husband). I even had one coworker ask me if I would make these again for her birthday. I happily agreed, then asked her when her birthday is. She replied, "March." I laughed. They must be good if I'm getting a request over six months in advance :)

This is also my submission to the September Tasty Tools event, featuring bakeware.

Peanut Buttercups with Peanut-Penuche Icing
from The Pastry Queen, by Rebecca Rather

Cupcakes
1-3/4 cups all purpose flour
1 tbsp baking powder
1/4 tsp salt
1-1/4 cups firmly packed dark brown sugar
6 tbsp unsalted butter, at room temperature
1/3 cup peanut butter, smooth or chunky (I used smooth)
1 cup milk
1 tsp vanilla extract
2 large eggs
3.5 ounce bar bittersweet chocolate, cut into 12 squares (I used TCHO "chocolatey" chocolate; you can also substitute chocolate chips if needed)

Peanut-Penuche Filling
1/4 cup (1/2 stick) unsalted butter
1/4 cup peanut butter, smooth or chunky (I used smooth)
1/4 cup milk (I used skim)
1 cup firmly packed dark brown sugar
1/8 tsp salt
1 tsp vanilla extract
1/2 cup powdered sugar

To Make the Cupcakes:
Preheat the oven to 350F. Lightly coat 6 Texas-size muffin cups with nonstick cooking spray or Baker's Joy. Using a mixer fitted with a paddle attachment, combine the flour, baking powder, salt, and sugar in a large bowl on medium speed for about 30 seconds. (Don't worry if there are a few sugar lumps.) Add the butter, peanut butter, milk, and vanilla. Mix for 1 minute on medium-low speed. Add the eggs and beat for 1-1/2 minutes on medium-high speed. Fill the prepared muffin cups with batter halfway to the top. Place 2 squares of chocolate in the middle of the batter and add more batter to fill the muffin cups three-quarters of the way to the top.

Bake for 30 to 35 minutes (mine were ready at 28 minutes), until the tops of the muffins are light brown and a toothpick stuck into the middle comes out with no crumbs clinging to it. (A bit of melted chocolate from the center may show, but that doesn't count.)

Cool the muffins for 10 minutes before removing them from the pan. Let them cool on racks at least 5 minutes longer before frosting.

To Make the Icing:
Combine the butter, peanut butter, milk, brown sugar, and salt in a medium saucepan over medium heat. Bring the mixture to a low boil and cook for 1-1/2 minutes without stirring. Take the pan off the burnder and cool about 30 minutes (do not let it sit longer than 30 minutes or the icing will not mix smoothly). Add the vanilla and powdered sugar. Using a mixer fitted with a paddle attachment, beat on medium speed until the icing is creamy and of spreading consistency, about 1 minutes. Ice the cooled cupcakes immediately. (If you let it cool for a bit first, it's less runny and easier to spread across the top.)

Tightly wrapped, the cupcakes will keep for 2 days at room temperature and up to 3 weeks frozen.

Tip: Dealing with peanut butter or other sticky ingredients such as honey or corn syrup can be a royal pain, especially when moving them from measuring cup to batter. A light coating of cooking spray on the inside of the measuring cup will allow peanut butter or any other sticky ingredient to slide out much more easily.

Yield: 12 Cupcakes