Sunday, August 31, 2008

Chocolate Éclairs


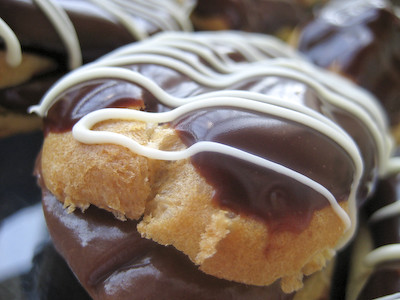
This month's Daring Bakers Challenge was chosen by Meeta of What's for lunch, Honey? and Tony of Olive Juice: Pierre Hermé's Chocolate Éclairs. For once, I wasn't intimidated by the Daring Bakers' challenge! You see, I made éclairs for the first time back in June for Tuesdays with Dorie. So this month, instead of fear, the challenge was met with excitement :) I was eager to see how this recipe would compare to Dorie's (though technically, I believe this recipe is a collaboration between Pierre Hermé and Dorie).


The éclairs consist of three elements: the cream puff dough (or pâte à choux), a pastry cream filling, and a chocolate glaze. The recipe for this cream puff dough is almost identical to Dorie's, except it contains one additional egg and less sugar. I actually thought the dough tasted a bit too eggy, so the additional egg did not seem to improve it.

The challenge with making éclairs is making sure that they do not deflate! The most common causes for them to deflate are (a) a rapid drop in temperature or (b) undercooked dough. For this reason, I did not follow the baking instructions in this recipe. The instructions indicate that you should bake for 7 minutes, then slip a wooden spoon in the oven door for 5 minutes, then open the oven door to rotate the baking sheets, and then continue baking another 8 minutes. Concerned that opening the oven door to rotate the baking sheets would cause them to deflate, I followed the baking instructions from Dorie's recipe. I baked them at 425F for 10 minutes, then lowered the oven temperature to 375F and baked them an additional 15 to 20 minutes. I also only baked one set at a time, so there was no need to rotate anything. And even though they look like they are going to burn half way through the baking, do not take them out of the oven! Let them continue to bake, or else they will deflate after you take them out of the oven.


I had no problems with the chocolate pastry cream recipe. It was almost identical to Dorie's recipe, except you're supposed to place the pastry cream in an ice water bath to stop the cooking process before incorporating the butter. Make sure that you when you are making the pastry cream, that you continue to whisk constantly as the cream comes to a boil. Like magic, it will suddenly thicken up into a nice thick cream after it starts boiling. If you're not careful to whisk evenly, including the bottom edges of the saucepan, you may end up with some clumps instead of a smooth and silky cream.
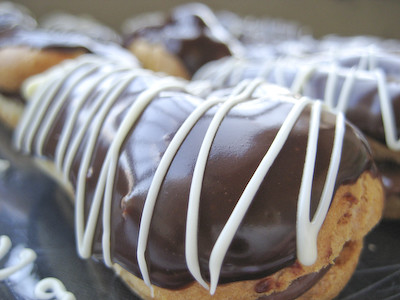

The chocolate glaze was very simple, though more involved than Dorie's recipe. At first I did not read the recipe carefully and was wondering why there was a recipe for a chocolate glaze and a chocolate sauce. Then I realized that the chocolate sauce is a component of the chocolate glaze.

The éclairs were pure chocolately goodness! I decided to make a few cream puffs in addition to the éclairs. They were a bit messier, but still every bit as good :)
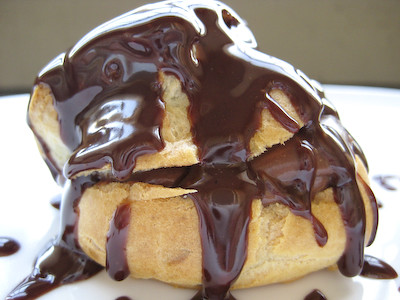

Éclairs are one of those desserts that look deceptively difficult but are actually quite simple to make. They are great for entertaining - each component can be made in advance, then assembled right before serving. If you've never made them before, I encourage you to try. I really enjoyed these, but the next time I make éclairs, I will probably be returning to Dorie's recipe.
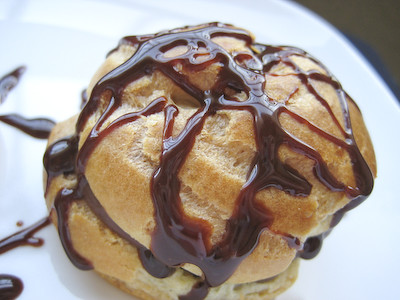

Thanks to Meeta and Tony, for choosing éclairs for this month's challenge. I really enjoyed trying another recipe for éclairs. Make sure you visit the Daring Bakers Blogroll to see how hundreds of others enjoyed these chocolately treats!


Pierre Hermé’s Chocolate Éclairs
Recipe from Chocolate Desserts by Pierre Hermé

Yield: 20-24 Éclairs

Cream Puff Dough (see below for recipe), fresh and still warm

1) Preheat your oven to 375 degrees F (190 degrees C). Divide the oven into thirds by positioning the racks in the upper and lower half of the oven. Line two baking sheets with
waxed or parchment paper. (If you use a baking stone, there is no need to line it.)

2) Fill a large pastry bag fitted with a 2/3 (2cm) plain tip nozzle with the warm cream puff dough. (I did not have this size so I piped two strips side by side. If you don't have a pastry bag, simply fill a ziploc bag and cut the corner off.) Pipe the dough onto the baking sheets in long, 4 to 41/2 inches (about 11 cm) chubby fingers. Leave about 2 inches (5 cm) space in between each dough strip to allow them room to puff. The dough should give you enough to pipe 20-24 éclairs.


3) Slide both the baking sheets into the oven and bake for 7 minutes. After the 7 minutes, slip the handle of a wooden spoon into the door to keep in ajar. When the éclairs have been in the
oven for a total of 12 minutes, rotate the sheets top to bottom and front to back. Continue
baking for a further 8 minutes or until the éclairs are puffed, golden and firm. The total baking
time should be approximately 20 minutes. (I baked mine for 10 minutes at 425F, then 15 to 20 minutes at 375F.)

Notes:
The éclairs can be kept in a cool, dry place for several hours before filling.

Assembling the éclairs:

• Chocolate glaze (see below for recipe)
• Chocolate pastry cream (see below for recipe)

1) Slice the éclairs horizontally, using a serrated knife and a gently sawing motion (kitchen scissors work great, too!). Set aside the bottoms and place the tops on a rack over a piece of parchment paper.

2) The glaze should be barely warm to the touch (between 95 – 104 degrees F or 35 – 40
degrees C, as measured on an instant read thermometer). (If you try to use the glaze while it is too warm, it will be too thin and will just run down the sides.) Spread the glaze over the tops of
the éclairs using a metal icing spatula. Allow the tops to set and in the meantime fill the
bottoms with the pastry cream.

3) Pipe or spoon the pastry cream into the bottoms of the éclairs. Make sure you fill the bottoms
with enough cream to mound above the pastry. Place the glazed tops onto the pastry cream and wriggle gently to settle them.

Notes:
1) If you have chilled your chocolate glaze, reheat by placing it in a bowl over simmering water,
stirring it gently with a wooden spoon. Do not stir too vigorously as you do not want to create bubbles.

2) The éclairs should be served as soon as they have been filled. (I assembled these the night before, wrapped them in the refrigerator, and served them the next day and they still tasted good.)

Pierre Hermé’s Cream Puff Dough
Yield: Makes 20-24 Éclairs

½ cup (125g) whole milk
½ cup (125g) water
1 stick (4 ounces; 115g) unsalted butter, cut into 8 pieces
¼ teaspoon sugar
¼ teaspoon salt
1 cup (140g) all-purpose flour
5 large eggs, at room temperature

1) In a heavy bottomed medium saucepan, bring the milk, water, butter, sugar and salt to the
boil.

2) Once the mixture is at a rolling boil, add all of the flour at once, reduce the heat to medium
and start to stir the mixture vigorously with a wooden spoon. The dough comes together very
quickly. Do not worry if a slight crust forms at the bottom of the pan, it’s supposed to. You need to carry on stirring for a further 2-3 minutes to dry the dough. After this time the dough will be very soft and smooth.

3) Transfer the dough into a bowl of a mixer fitted with the paddle attachment, or using your handmixer or if you still have the energy, continue by hand. (I beat my dough for about 2 minutes before adding the eggs in order to cool it a bit first - you don't want it too hot when adding the eggs.) Add the eggs one at a time, beating after each egg has been added to incorporate it into the dough.

You will notice that after you have added the first egg, the dough will separate, once again do not worry. As you keep working the dough, it will come back all together again by the time you have added the third egg. In the end the dough should be thick and shiny and when lifted it should fall back into the bowl in a ribbon.

4) The dough should be still warm. It is now ready to be used for the éclairs as directed above.

Notes:
1) Once the dough is made you need to shape it immediately.

2) You can pipe the dough and the freeze it. Simply pipe the dough onto parchment-lined baking sheets and slide the sheets into the freezer. Once the dough is completely frozen, transfer the piped shapes into freezer bags. They can be kept in the freezer for up to a month.

Chocolate Pastry Cream

2 cups (500g) whole milk
4 large egg yolks
6 tbsp (75g) sugar
3 tablespoons cornstarch, sifted
7 oz (200g) bittersweet chocolate, preferably Velrhona Guanaja, melted
2½ tbsp (1¼ oz: 40g) unsalted butter, at room temperature

1) In a small saucepan, bring the milk to a boil. In the meantime, combine the yolks, sugar and cornstarch together and whisk in a heavy‐bottomed saucepan.

2) Once the milk has reached a boil, temper the yolks by whisking a couple spoonfuls of the hot milk into the yolk mixture.Continue whisking and slowly pour the rest of the milk into the tempered yolk mixture.

3) Strain the mixture back into the saucepan to remove any egg that may have scrambled. Place the pan over medium heat and whisk vigorously (without stop) until the mixture returns to a boil. Keep whisking vigorously for 1 to 2 more minutes (still over medium heat).Stir in the melted chocolate and then remove the pan from the heat.

4) Scrape the pastry cream into a small bowl and set it in an ice‐water bath to stop the cooking process. Make sure to continue stirring the mixture at this point so that it remains smooth.

5) Once the cream has reached a temperature of 140 F remove from the ice‐water bath and stir in the butter in three or four installments. Return the cream to the ice‐water bath to continue cooling, stirring occasionally, until it has completely cooled. The cream is now ready to use or store in the fridge.

Notes:
1) The pastry cream can be made 2‐3 days in advance and stored in the refrigerator.

2) In order to avoid a skin forming on the pastry cream, cover with plastic wrap pressed onto the cream.

3) Tempering the eggs raises the temperature of the eggs slowly so that they do not scramble.

Chocolate Glaze
Yield: Makes 1 cup or 300g

1/3 cup (80g) heavy cream
3½ oz (100g) bittersweet chocolate, finely chopped
4 tsp (20 g) unsalted butter, cut into 4 pieces, at room temperature
7 tbsp (110 g) Chocolate Sauce (recipe below), warm or at room temperature

1)In a small saucepan, bring the heavy cream to a boil. Remove from the heat and slowly begin to add the chocolate, stirring with a wooden spoon or spatula.

2) Stirring gently, stir in the butter, piece by piece followed by the chocolate sauce.

Notes:
1) If the chocolate glaze is too cool (i.e. not liquid enough) you may heat it briefly
 in the microwave or over a double boiler. A double boiler is basically a bowl sitting over (not touching) simmering water.

2) It is best to glaze the eclairs after the glaze is made, but if you are pressed for time, you can make the glaze a couple days ahead of time, store it in the fridge and bring it up to the proper temperature (95 to 104 F) when ready to glaze.

Chocolate Sauce
(For the Chocolate Glaze Recipe, above)
Yield: Makes 1½ cups or 525 g

4½ oz (130 g) bittersweet chocolate, finely chopped
1 cup (250 g) water
½ cup (125 g) crème fraîche, or heavy cream
1/3 cup (70 g) sugar

1) Place all the ingredients into a heavy‐bottomed saucepan and bring to a boil, making sure to stir constantly. Then reduce the heat to low and continue stirring with a wooden spoon until the sauce thickens.

2) It may take 10‐15 minutes for the sauce to thicken, but you will know when it is done when it coats the back of your spoon.

Notes:
1) You can make this sauce ahead of time and store it in the refrigerator for two weeks. Reheat the sauce in a microwave oven or a double boiler before using.
2) This sauce is also great for cakes, ice-cream and tarts.

Saturday, August 30, 2008

Burnt Sugar Ice Cream and How to Freeze Eggs


After I learned how to make ice cream without an ice cream maker, I started searching for the next flavor I wanted to try. When I came across Dorie's Burnt Sugar Ice cream, I knew I had to try it. I love caramel.

The recipe is quite simple, and not too different from most ice cream recipes. The hardest part is tempering the eggs. This involves adding the hot milk/cream gradually to slowly bring the temperature of the eggs up. Dorie says it's okay to add one-third of the hot liquid initially, but I am always so worried about scrambling my eggs that I only start by adding one tablespoon at a time until the mixture is warm.


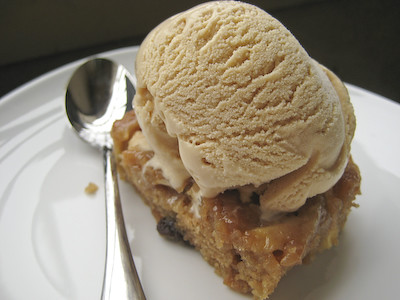
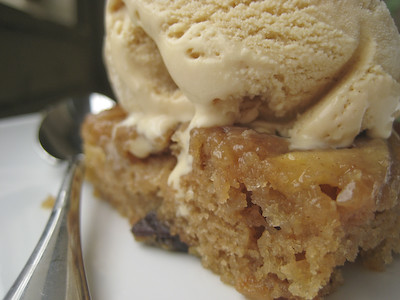
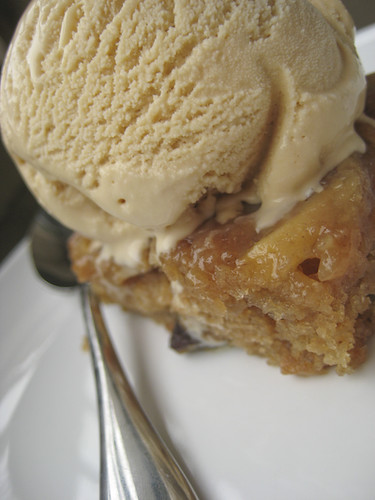
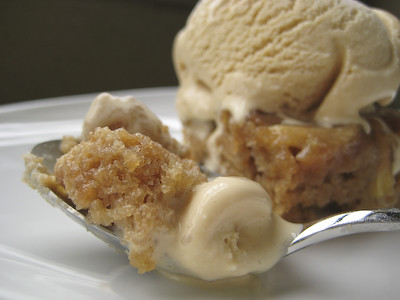
The Burnt Sugar Ice Cream was amazing!!! It had a wonderful caramel flavor that was not overly sweet. If you swirled in a bottle of store bought Dulce de Leche at the end, you would have a perfect copy cat recipe for the Haagen Daaz Dulce de Leche flavor. The next time I make this, I'll probably mix in some toffee bits, to make some Toffee Caramel Ice Cream. And of course this paired perfectly with the Applesauce Spice Bars I made.


This recipe calls for four egg yolks. I always hate wasting eggs when a recipe calls for only egg yolks or egg whites. I can never think of what to do with them before they go bad, so I've started freezing them until I come across a recipe I want to make.

I will usually freeze two egg whites in a ziploc bag and then label the bag with the number of egg whites in there and the date (they will keep for about 12 months). Alternatively, you can freeze them individually in an ice tray and then toss the cubes into a ziploc bag.

If you want to freeze egg yolks, you'll need to whisk in some sugar or salt. Without it, they will become too rubbery or gelatinous when frozen to use once they are thawed. I always use my yolks for sweets, so I typically whisk two egg yolks with 1 teaspoon of sugar and then label the bag with the number of yolks, amount of sugar I added, and the date (they will keep for about 3 months).

Always thaw your frozen eggs in the refrigerator, or under cold running water, and use them immediately. Make sure you only use them in dishes that will be thoroughly cooked (at least 160F/71C). If you would like more information on freezing and food safety, click here (also check out the link in my blog sidebar - in the "Useful Links" section).


Burnt Sugar Ice Cream
from Baking: From My Home to Yours, by Dorie Greenspan

1 cup sugar
3 tbsp water
2 cups whole milk
1 cup heavy cream
4 large egg yolks
pinch of salt
1-1/2 tsp pure vanilla extract

Stir the sugar and water together in a medium heavy-bottomed saucepan. Place the pan over medium-low heat and cook until the sugar dissolves. Increase the heat and boil, without stirring, until the syrup turns a deep amber color (watch it carefully - too dark and it will be too bitter!)--from time to time, brush down the sides of the pan with a wet pastry brush and swirl the pan. (Depending on the size of your pan and the intensity of the heat, it could take about 8 minutes for the caramel to color properly.)

Stand back--things can get a little wild--lower the heat and add the milk and cream. Don't be concerned when everything bubbles and seethes and the caramel hardens; it will calm down and smooth out as you heat and stir. Continue to heat and stir and when the mixture is smooth, remove the pan from the heat.

In a medium heatproof bowl, whisk the yolks and salt together until very well blended and just slightly thickened. Still whisking, drizzle in about one third of the hot liquid--this will temper, or warm, the eggs so they don't curdle. Whisking all the while, slowly pour in the remaining liquid. pour the custard back into the pan and cook over medium heat, stirring without stopping, until the custard slightly thickens and coats the back of a spoon; if you run your finger down the bowl of the spoon, the custard should not run into the track. the custard should reach at least 170F, but no more than 180F, on an instant read thermometer (I recommend this digital thermometer). Immediately remove the pan from the heat and pour the custard into a 2 quart glass measuring cup or clean heatproof bowl. Stir in the vanilla extract.

Refrigerate the custard until chilled before churning it into ice cream.

Scrape the chilled custard into the bowl of an ice cream maker and churn according to the manufacturer's instructions. (If you don't have an ice cream maker, learn how to make your own ice cream by hand here.) Pack the ice cream into a container and freeze it for at least 2 hours, until it is firm enough to scoop.

Yield: About 1-1/2 pints

Serving: If the ice cream is very firm, let it sit at room temperature for a few minutes or warm it in the microwave using 5 second spurts of heat.

Storage: packed tightly in a covered container, this will keep in the freezer about 2 weeks

Friday, August 29, 2008

Applesauce Spice Bars


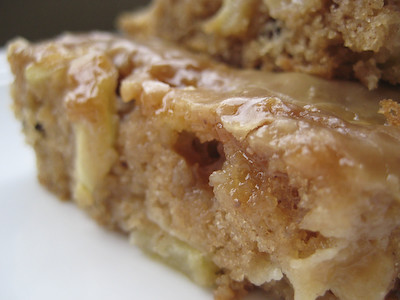
I've been trying not to make random recipes out of Dorie Greenspan's Baking: From my home to yours, waiting each week to make the selected recipe for Tuesdays with Dorie (TWD) instead. That said, I've been dying to make Dorie's Applesauce Spice Bars since it was my turn to pick the recipe, over six months ago (this was my second choice). It will probably get picked sometime this fall, when apple and pumpkin recipes will abound, but after I learned how to make ice cream without an ice cream maker, I had to try Dorie's Burnt Sugar Ice cream. And what better to go with that ice cream than the Applesauce Spice Bars?


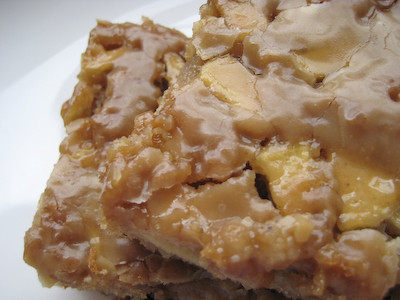
Dorie instructs you to bake these in a rectangular baking pan lined with parchment paper. After baking, you're supposed to invert the bars out onto a rack and then glaze. My cake was so moist and soft, I could tell that it would all fall apart if I attempted to invert it. So I left it in the pan and glazed, then cut it into bars after it was completely cooled.

These were so moist and delicious! I added extra chopped apples, because I love apples (and also because I was omitting the nuts). It reminded me quite a bit of the Apple Cake with Caramel Sauce I made last fall. I made the glaze exactly as directed, but somehow did not end up with enough to make my glaze layer as thick as depicted in the cookbook. Next time I make these I will probably double the glaze recipe.


These bars paired perfectly with the Burnt Sugar Ice Cream! For now I leave you with the Applesauce Spice Bar recipe. I'll be posting the ice cream recipe tomorrow, so stay tuned...


Applesauce Spice Bars
from Baking: From My Home to Yours, by Dorie Greenspan

For the Bars:
1-1/4 cups all-purpose flour
1 tsp baking powder
1/4 tsp baking soda
1 tsp ground cinnamon
1/4 tsp ground allspice*
1/4 tsp salt (I used 1/8 tsp)
1 stick (8 tbsp) unsalted butter (I used salted butter and decreased the salt)
1 cup (packed) light brown sugar
2 large eggs
1/2 cup unsweetened applesauce
1 tsp pure vanilla extract
1 tbsp applejack, brandy, or dark rum (optional) (I used Appleton Estate Jamaican Rum)
1 baking apple, such as Rome or Cortland, peeled, cored and finely diced or chopped (I used 2)
1/2 cup plump, moist raisins (dark or golden)
1/2 cup chopped pecans (I omitted these)

*If you do not have allspice: substitute 1/4 tsp cinnamon, 1/2 tsp ground cloves, and 1/4 tsp nutmeg for 1 tsp allspice (for this recipe you'll use 1/16 tsp cinnamon, 1/8 tsp ground cloves, and 1/16 tsp nutmeg)

For the Glaze:
2-1/2 tbsp heavy cream
1/3 cup (packed) light brown sugar
2-1/2 tbsp unsalted butter (I used salted butter)
1 tsp light corn syrup
1/2 tsp pure vanilla extract

Getting Ready:
Center a rack in the oven and preheat the oven to 350F. Butter a 9x13-inch baking pan, line the bottom with parchment paper, butter the paper and dust the inside of the pan with flour. Tap out the excess flour and put the pan on a baking sheet.

To Make the Bars:
Whisk together the flour, baking powder, baking soda, spices and salt.

In a medium heavy-bottomed saucepan, melt the butter over low heat. Add the brown sugar and stir with a whisk until it is melted and the mixture is smooth, about 1 minute. Remove the pan from the heat.

Still working in the saucepan, whisk in the eggs one at a time, mixing until they are well blended. Add the applesauce, vanilla and applejack, if you're using it, and whisk until the ingredients are incorporated and the mixture is once again smooth. Switch to a rubber spatula and gently stir in the dry ingredients, mixing only until they disappear, then mix in the apple, raisins and nuts. Scrape the batter into the prepared pan and smooth the top with a rubber spatula.

Bake for 23 to 25 minutes, or until the bars just start to pull away from the sides of the pan and a knife inserted into the center comes out clean. Transfer the baking pan to a rack and let the cake cool while you make the glaze.

To Make the Glaze:
In a small saucepan, whisk together the cream, sugar, butter and corn syrup. Put the man over medium heat and bring the mixture to a boil, whisking frequently. Adjust the heat so that the glaze simmers, and cook, whisking frequently, for 5 minutes. Remove the pan from the heat and stir in the vanilla.
Turn the bars out onto a rack, remove the paper and invert the bars onto another rack, so they are right side up. Slide the parchment paper under the rack to serve as a drip catcher, grab a long metal icing spatula and pour the hot glaze over the bars, using the spatula to spread it evenly over the cake. Let them cool to room temperature before you cut them.

Cut into 32 rectangles, each about 2-1/4 x 1-1/2 inches.

Yield: 32 Bars

Storing: These will keep for about 3 days at room temperature. Because of the glaze, they cannot be frozen.

Tuesday, August 26, 2008

Chocolate-Banded Ice Cream Torte (TWD)


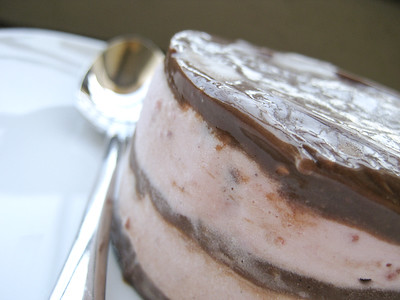
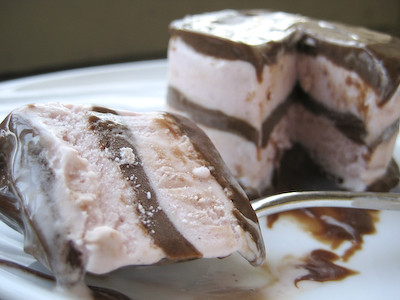
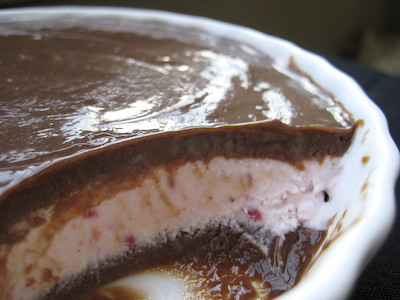
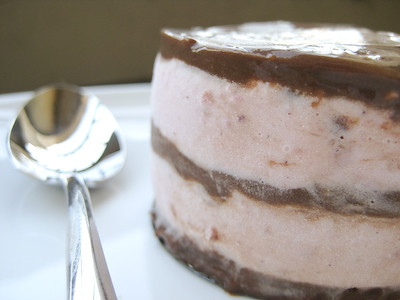
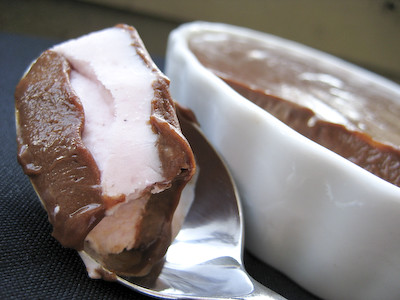
This week's Tuesdays with Dorie (TWD) recipe was chosen by Amy of Food, Family and Fun: the Chocolate-Banded Ice Cream Torte. Dorie calls it her version of a "grown up ice cream cake." It's layers of raspberry ice cream, sandwiched between rich and creamy chocolate ganache. To me, it's not so much an ice cream cake (which usually has actual cake layers in it), but more of a fancy way to serve ice cream with fudgey chocolate sauce.


I knew right away that I wanted to make mini tortes. I don't have mini springform pans, though, so I wasn't quite sure how. There were a few ideas I saw mentioned - lining a pan with plastic wrap or parchment, using paper baking molds, etc. In the end, I decided to use my molten chocolate cake specialty pan:


It was as close to a mini springform pan that I could get (and I'm always happen to find another use for it). My only other problem was that it only it makes 6 mini tortes and I knew I would need a few more because Dorie states her recipe yields eight servings. So I decided to use 8 ounce ceramic ramekins for the rest. Since my ramekins are shallow, I was only able to get 3 layers in those instead of 5. The presentation isn't as elegant in the ramekins, but it's still just as tasty :)


The recipe is rather simple. Puree some raspberries in your food processor. Then add a quart of your favorite vanilla ice cream and pulse until well combined. Layer with chocolate ganache, half of the ice cream, another layer of ganache, the rest of the ice cream, and follow with a final layer of ganache.


There's a lot of down time with this recipe while you're waiting for each layer to freeze, so you'll want to set aside several hours for it. The hardest part of this recipe for me was getting over my fear of raw eggs. The chocolate ganache has eight - yes eight - raw eggs in it! I suppose that if after 200+ TWD Bakers consumed this with no reports of death, it must be okay, right? ;) (If you're still fearful of using the raw eggs in this recipe, just get some pasteurized eggs.)


This torte is simple, yet elegant. It's perfect for entertaining because you can make it in advance (and it can be kept in the freezer for up to 1 month). Of course the possibilities are endless with this torte, as you can use any ice cream flavor you wish.

If you are going to make the mini tortes like I did, here are the measurements I used: the ganache layers were 1/8 cup each and the ice cream layers were 1/4 cup. For the ramekins, the ganache layers were 1/4 cup each and the ice cream layer was 1/2 cup. I probably won't go to the trouble of using a springform pan in the future, because I was perfectly happy with how these turned out in the ramekins.

Thanks again to Amy for choosing the Chocolate-Banded Ice Cream Torte. I'll definitely be making it again. If you would like the recipe for this torte, you can find it here on Amy's blog. Make sure you visit the TWD Blog Roll to see how everyone else enjoyed this lovely ice cream treat.

*Note: I made one change to this recipe - I used semisweet chocolate instead of bittersweet. For recipe tips, click here.


Thursday, August 21, 2008

The Best Chocolate Chip Cookies - My (New) Favorite


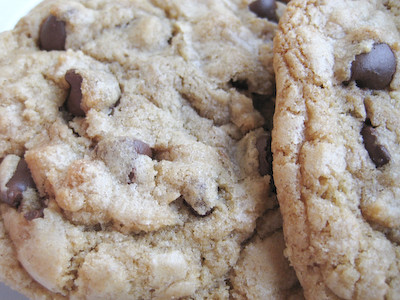
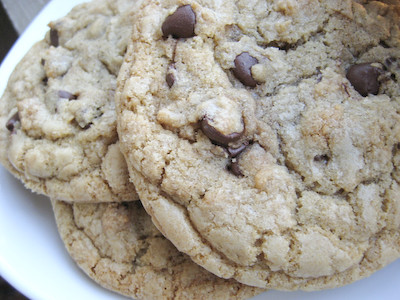
This is another one of those recipes that has been popping up everywhere on food blogs lately. It's from Baking Illustrated and I first saw it on Katie's blog, Good Things Catered. Like many, I've been on the quest to find the perfect chocolate chip cookie. Up until now, my favorite was the Soft Chocolate Chip Cookies. But now I have a new favorite - the Thick and Chewy Chocolate Chip Cookie!


It's actually quite similar to the Best Big, Fat, Chewy Chocolate Chip Cookie recipe I previously posted. Here are the only differences in the ingredient list between the Baking Illustrated recipe and the "Best Big, Fat, Chewy Chocolate Chip Cookie":

- 2 more tablespoons of flour
- 1 less teaspoon of vanilla extract
- 1/2 cup less chocolate chips


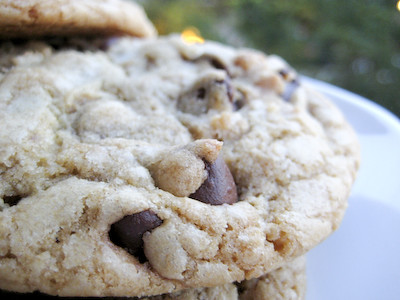
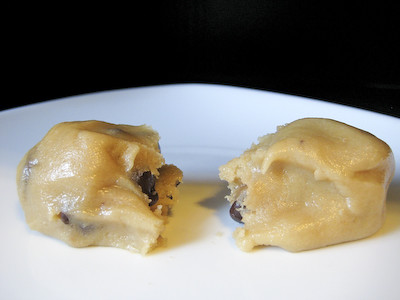
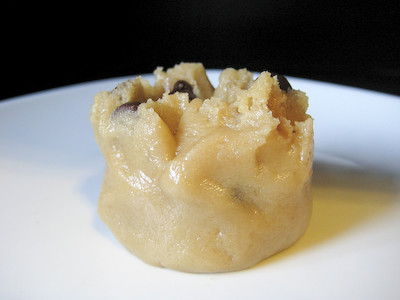
Otherwise, the only other place where these recipes differ is in the method of getting the cookie dough to the baking sheet. Chelle from Brown Eyed Baker was the first person I saw to post about this unique cookie-shaping method. Instead of simply dropping the cookie dough onto baking sheets by the spoonful (or with a cookie scoop), this recipe includes a few extra steps to make it look more like an authentic 'store bought' or bakery cookie (see below). Unlike traditional recipes, these cookies are cooled on the baking sheet, instead of on a cooling rack. This allows the cookies to continue baking after they are removed from the oven and results in the most delicious cookies.


Chelle makes an excellent point in her post in that there can be a significant difference between measuring ingredients out using cups and spoons versus weighing them with a kitchen scale. Perhaps that's where this recipe comes out on top? (If you're looking for a kitchen scale, this is the one that we have. I highly recommend it.) If you decide to try this recipe, I encourage you to try weighing the ingredients instead of measuring them - it's actually much quicker, too, I've found.


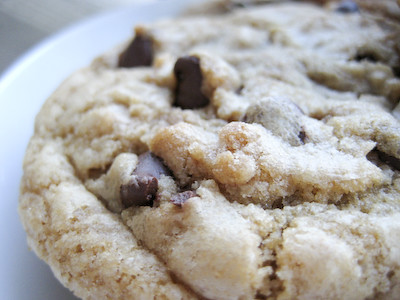
I have nothing but good things to say about this cookie. It has a nice crisp edge around it, but it's soft and chewy in the middle... just perfect. They really do taste just like the ones you would purchase from a gourmet cookie shop. More importantly, they still taste just as good the next day! (Many chocolate chip cookies are wonderful fresh out of the oven, but just aren't the same the day after.) If you haven't tried this recipe yet, you have to try it now! Trust me, you won't be disappointed.

Thick and Chewy Chocolate Chip Cookies
from Baking Illustrated, as seen on Good Things Catered and Brown Eyed Baker

These oversized cookies are chewy and thick, like many of the chocolate chip cookies sold in gourmet shops and cookie stores. They rely on melted butter and an extra egg yolk to keep their texture soft. These cookies are best served warm from the oven but will retain their texture even when cooled. To ensure the proper texture, cool the cookies on the baking sheet. Oversized baking sheets allow you to get all the dough into the oven at one time. If you’re using smaller baking sheets, put fewer cookies on each sheet and bake them in batches.

2 cups plus 2 tablespoons (10 5/8 ounces) unbleached all-purpose flour (I used bleached flour)
1/2 teaspoon baking soda
1/2 teaspoon salt
12 tablespoons (1 1/2 sticks) unsalted butter, melted and cooled until warm
1 cup packed (7 ounces) light or dark brown sugar
1/2 cup (3 1/2 ounces) granulated sugar
1 large egg plus 1 egg yolk
2 teaspoons vanilla extract
1-1 1/2 cups semisweet chocolate chips

Adjust the oven racks to the upper- and lower-middle positions and heat the oven to 325 degrees. Line 2 large baking sheets with parchment paper or spray them with nonstick cooking spray. (I used my Pampered Chef baking stone - no parchment or spray needed)

Whisk the flour, baking soda, and salt together in a medium bowl; set aside.

Either by hand or with an electric mixer, mix the butter and sugars until thoroughly blended. Beat in the egg, yolk, and vanilla until combined. Add the dry ingredients and beat at low speed just until combined. Stir in the chips to taste.

Roll a scant 1/4 cup of the dough into a ball.


Hold the dough ball with the fingertips of both hands and pull into 2 equal halves.


Rotate the halves 90 degrees and, with jagged surfaces facing up, join the halves together at their base, again forming a single ball, being careful not to smooth the dough’s uneven surface.


Place the formed dough balls on the prepared baking sheets, jagged surface up, spacing them 2 1/2 inches apart.


Bake until the cookies are light golden brown and the outer edges start to harden yet the centers are still soft and puffy, 15 to 18 minutes, rotating the baking sheets front to back and top to bottom halfway through the baking time. (It is essential that you do not let them brown too much in the oven because they will continue baking after you take them out.)

Cool the cookies on the sheets. (Make sure you follow this step - failure to do so will result in underbaked cookies.)

Remove the cooled cookies from the baking sheets with a side metal spatula.

Yield: About 18 large cookies.

Tuesday, August 19, 2008

Granola Grabbers (TWD)


This week's Tuesdays with Dorie (TWD) recipe was chosen by Michelle of Bad Girl Baking: Granola Grabbers. I originally planned on sitting this one out. First, I didn't have any wheat germ and the smallest container I could find at the store was 16 ounces, more than I could ever use. I didn't even know what wheat germ was until now! According to Wikipedia, wheat germ is the "heart," or embryo, of the cereal kernel seed. Then there was the matter of nuts. I don't like nuts (except for peanuts - and I usually prefer peanut butter over whole peanuts). This recipe calls for peanuts and almonds. I wasn't sure how it would turn out if I omitted the almonds (and I didn't want to add double the amount of peanuts to make up for the volume).


Then I saw on the TWD P&Q (Problems & Questions) that Hannah of DeL Sisters Kitchen had made them without the wheat germ, just substituting wheat flour for all purpose flour. It was then that I decided to forge ahead with the recipe and give it a try.


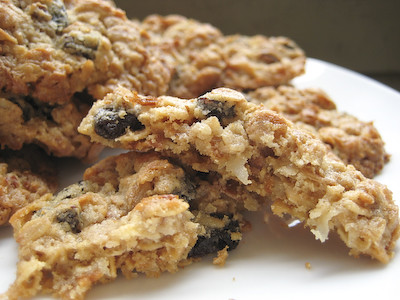
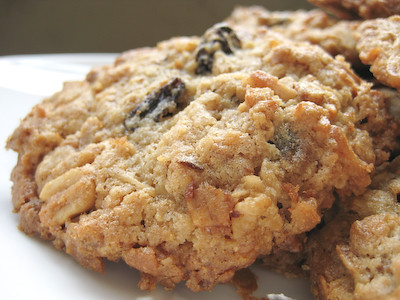
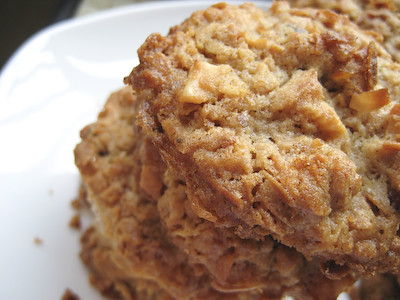
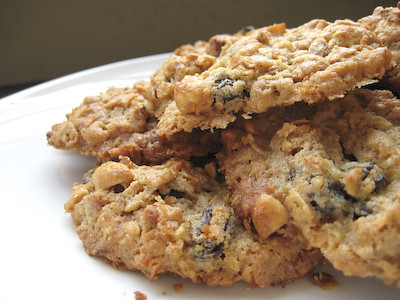
Several others commented that the cookies were too sweet, but I guess that's pretty subjective because neither my husband nor myself thought that. They were nice and crunchy around the edges, chewy in the middle, with a little bit of a sweet and a little bit of salty. We honestly couldn't stop going back for more! I wasn't a huge fan of the peanuts in these cookies, but that still didn't stop me from going back for more ;) They're like a cross between oatmeal cookies and granola bars.


Aside from omitting the wheat germ and using whole wheat flour in place of the all purpose flour, I omitted the almonds. Dorie recommends using granuloa without fruit in it, so I picked up some Orange Pecan Zest Granola made by Jake's Natural Fine Foods. I figured the small bits of pecans in the granola would make up for the almonds I was omitting.


Thanks again to Michelle for choosing the Granola Grabbers. I'm glad I didn't sit this one out. This was a really simple recipe that will certainly satisfy any craving for granola or trail mix. It's probably not something I will make often, but I'm much more likely to make these than I am homemade granola. If you would like the recipe for these cookies, you can find it here (with recipe tips here). Make sure you visit the TWD Blog Roll to see how everyone else enjoyed these wholesome cookies.

Sunday, August 17, 2008

Southwestern Wagon Wheel Pasta Salad


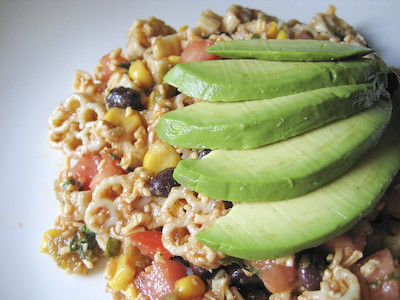
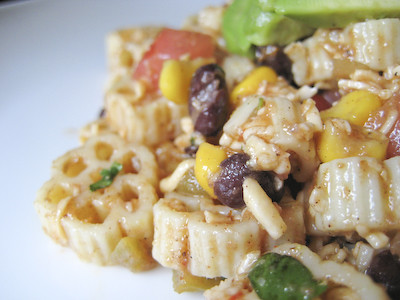
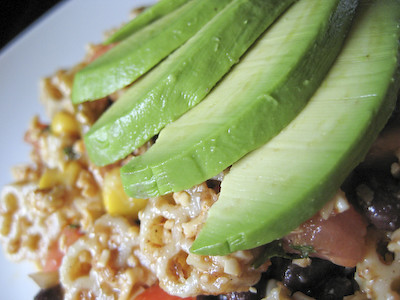
This was one of the first recipes I came across when I started frequenting the What's Cooking? Board (a forum for newlyweds sharing a common interest in food). It's a pasta salad recipe from Cara of Cara's Cravings. When I first read through the recipe, I knew I had to try it - I'll try anything with avocados in it, I love them! The big question, though, was whether my husband would eat it because he hates pasta salad.


The dish comes together quite easily. While the pasta is cooking, you can chop the tomatoes and cilantro, mix together the dressing, and throw the remaining ingredients into a large salad bowl. It's the kind of dish that is perfect for a weeknight meal, or to take with you to a potluck or luncheon.

Since the dressing is not mayonnaise-based, this dish is really light. If you're looking for something a little more filling, you could add diced, cooked chicken to this dish.


This recipe is definitely a keeper - much to my surprise, my husband loved it. It's still the only pasta salad that I can get him to eat, but something is still better than nothing!

And if you like this, you might also want to try the Tex Mex Salsa.

Southwestern Wagon Wheel Pasta Salad
from Cara's Cravings

8 ounces wagon wheel macaroni, uncooked
1 (15 ounce) can black beans
1 (9 ounce) package frozen corn, thawed
1 cup salsa
2 tomatoes, chopped
1/3 cup fresh cilantro, chopped (I used about 1/2 cup - love cilantro!)
8 ounces cheddar cheese, shredded
2 cups tortilla chips, crushed (I omitted these)
1 avocado, pitted, chopped (I sliced mine instead)

Dressing
1/2 cup olive oil or vegetable oil
2 tablespoons lime juice
3 teaspoons cumin
1/2 teaspoon chili powder
2 large garlic cloves, minced

In medium bowl, combine all dressing ingredients; mix well. Set aside.

Cook pasta as directed on package. Drain cooked pasta; rinse with cold water until cool.

In large bowl, combine beans, corn, salsa, tomatoes and cilantro.


Add cooked pasta and dressing to bean mixture; toss until well coated. Stir in half each of the cheese and tortilla chips. Place salad on large serving platter or in large serving bowl. Top with remaining cheese; garnish with remaining chips and avocado.

Tuesday, August 12, 2008

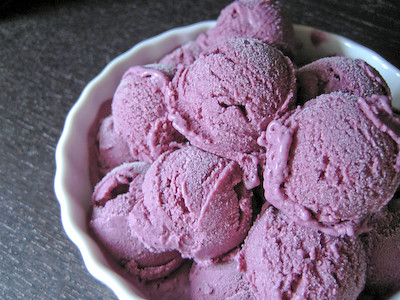
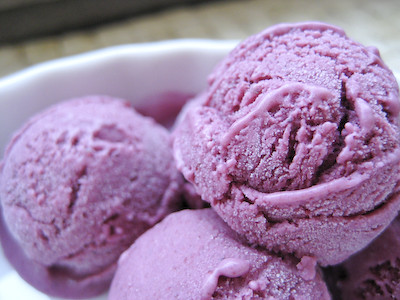
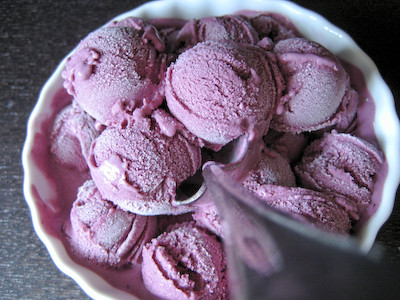
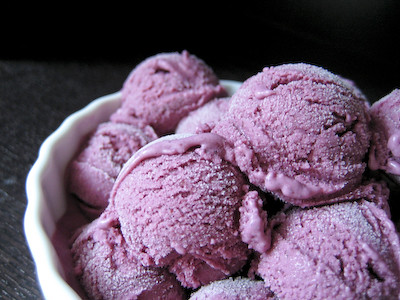
TWD: Blueberry Sour Cream Ice Cream and How to Make Ice Cream Without an Ice Cream Maker


This week's Tuesdays with Dorie (TWD) recipe was chosen by Dolores of Chronicles in Culinary Curiosity: Blueberry Sour Cream Ice Cream. I love being a part of TWD - it has challenged me to develop my baking skills in so many ways. I've had so many firsts with the group - brioche, eclairs, homemade pie crust, scones, etc. Never have I been more happy to be a part of this group than now because thanks to TWD, I have now discovered that I can make ice cream at home without an ice cream maker!!!


I have long been drooling over all the ice cream recipes on everyone else's blogs, regretting a previous decision. You see, when I purchased my KitchenAid Mixer, there was a mail in rebate for a free attachment - I could choose between the ice cream maker or the pasta maker attachment. I was trying to be 'good' and decided that if I had an ice cream maker, I would make way more ice cream than I should be eating, so I opted for the pasta maker attachment instead. Oh, how I have been regretting that decision all summer!


When I saw that ice cream was this week's pick, I thought that I would have to sit this one out. But then a link was posted to David Lebovitz' blog with an alternative method. I have now learned that it is possible to make smooth and creamy ice cream at home without an ice cream maker! I don't think you can understand how truly happy this has made me!! :) I no longer have any regrets about choosing that pasta maker attachment.


The recipe was very straightforward. Just cook the blueberries with some sugar, lemon juice, lemon zest, and a pinch of salt. Then blend it into a puree and add the heavy cream and sour cream. That's it! At this point, you would either pour the mixture into your ice cream maker, or if you're without a machine like I am, into your baking dish.


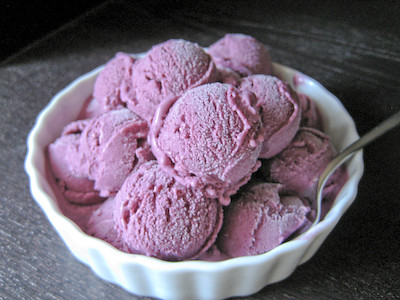
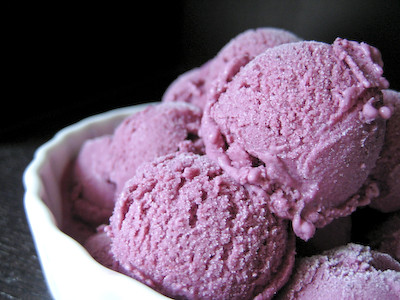
Then you just blend/mix the ice cream mixture every 30 minutes until it is fully formed. I was extremely wary of whether this method would work, but imagine my excitement and surprise when, after a few hours, I had successfully made my own ice cream! Instead of one or two large scoops, I decided to play around with the plating and used my cookie scoop to fill my bowl with lots of mini scoops.


I wasn't sure if I would like the flavor of the sour cream in this, but the tartness of the sour cream complimented the sweetness of the blueberries nicely. My husband thought the flavor was a bit too strong, like I could have used twice as much heavy cream and ended up with a better, more subtle flavor, but I thought it was just right. Perhaps next time I will try it with more cream and see if my husband is right...


Thanks again to Dolores for choosing Blueberry Sour Cream Ice Cream this week. I have discovered how to make my own ice cream at home, and you know I will be trying all sorts of ice cream recipes now! I've included the method for making ice cream without an ice cream maker below, but if you would like the actual recipe for the blueberry sour cream ice cream, you can find it here. Make sure you visit the TWD Blog Roll to see how everyone else enjoyed this frosty treat.

*Update: When I first made this, I wasn't sure if I was supposed to cover the dish before placing it in the freezer, so I covered it. The process took much longer than 2-3 hours and towards the end, I decided to see if it would help if I took the lid off. As soon as I took the lid off, my ice cream came together within about 1 hour. I concluded that the process had taken longer because I had covered my dish. I have since tried making ice cream again using this method, this time leaving my dish uncovered. It still took about 5-6 hours. Unfortunately, I introduced another factor the second time around - a deeper dish. So now I am unsure if the longer time is from covering the dish, or from using a deeper dish. The next time I make ice cream, I will use a shallow dish, uncovered, and then let you know! But rest assured that if it takes longer than 2-3 hours, don't be discouraged... just continue mixing every 30 minutes and your patience will be rewarded!

** Another update: I made some ice cream again, this time using a 13x9-inch pyrex glass pan. The larger pan gave the cream more room to spread out, thus giving it a larger surface area. I'm happy to report that came together nicely after about 3 hours!

For recipe tips, click here.

Making Ice Cream Without an Ice Cream Maker
from living the sweet life in paris by David Lebovitz

Prepare your ice cream mixture, then chill it over an ice bath.

Put a deep baking dish, or bowl made of plastic, stainless steel or something durable in the freezer, and pour your custard mixture into it. (I used a 2-1/2 qt oval CorningWare - do not cover it!)

After forty-five minutes, open the door and check it.

As it starts to freeze near the edges, remove it from the freezer and stir it vigorously with a spatula or whisk. Really beat it up and break up any frozen sections. Return to freezer.

Continue to check the mixture every 30 minutes, stirring vigorously as it's freezing. If you have one, you can use a hand-held mixer for best results, or use a stick-blender or hand-held mixer. But since we're going low-tech here, you can also use just a spatula or a sturdy whisk along with some modest physical effort.

I used my Braun Multiquick Professional Hand Blender (model MR5550MBC-HC) for this task. It's nice to find another use for this, besides my favorite tomato basil soup :)


Keep checking periodically and stirring while it freezes (by hand or with the electric mixer) until the ice cream is frozen. It will likely take 2-3 hours to be ready.

Transfer the ice cream to a covered storage container until ready to serve.