Friday, November 30, 2007

Bul-what?


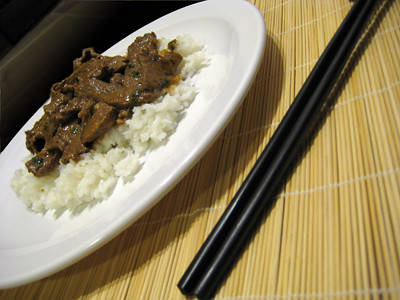
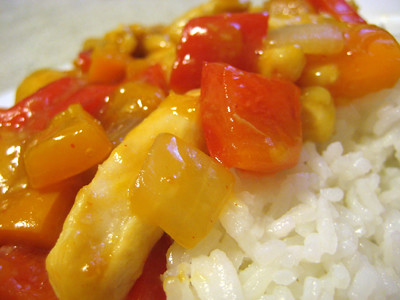
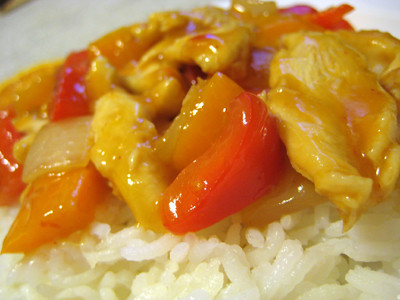
Bulgogi is one of Korea's most popular beef dishes. It involves marinating beef in a mixture of soy sauce, sugar, and other ingredients that vary by region. I first heard about this dish on the Nest Hawaii board, where nestie MrsRollergirl had shared her recipe. Her husband is Korean, and this recipe is from his mother. I kept seeing post after post from various people raving about it! With so many great reviews, I knew I had to try it. When I asked MrsRollergirl how I could credit her mother-in-law for the recipe, I gave her a few ideas... I said she could post just her first name, or something like Mrs. S, if she didn't want both her first and last name posted. She told me to credit it to "Mrs. Sassy Pants" ;)


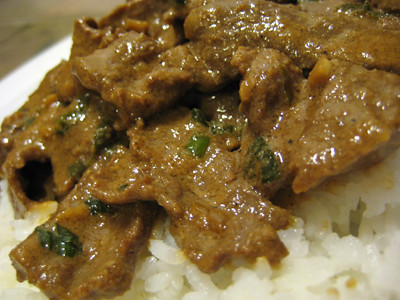
I have never had bulgogi anywhere else, so I really can't vouch for how 'authentic' this is; regardless, I love this dish :) I usually prepare it the day before and let it marinate in the fridge overnight, so it makes a great weeknight meal because all I have to do when I get home from work is throw some rice in the rice cooker and stir fry the meat. Be careful at the end when you are thickening up the sauce -- taste it as you go along (after it has heated through) because if you simmer it too long, the sauce will be way too salty!


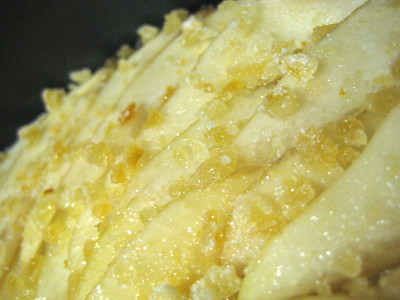
*Edit: I used a petite sirloin for this recipe because that is what I had on hand (which is good but not great in terms of tenderness). If you like your beef very tender, use short loin cuts (porterhouse, T-bone, top loin, tenderloin). The most tender cuts will be your Chateaubriand or Filet, which are the best parts of the tenderloin.

Another thing to note is that if you are buying soy sauce, make sure you don't skimp. Authentic soy sauce is made from fermented soybeans. If you look closely on the labels, the cheaper brands contain "hydrolyzed soy protein" instead. That said, I haven't noticed much of a difference in flavor with the "less sodium" soy sauces, so I tend to use those instead. Make sure you also refrigerate your soy sauce after opening, otherwise it may become slightly bitter over time.

Bulgogi
from Mrs. Sassy Pants ;)

1 1/2 lb. top sirloin or other tender steak, thinly sliced
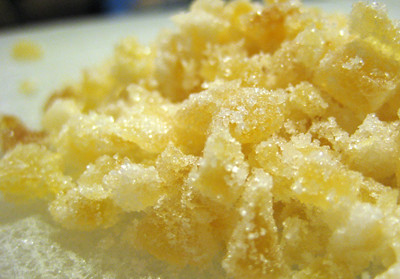
3 Tbsp sesame seeds
1/2 cup sugar
3/4 cup soy sauce (I used Kikkoman 37% less sodium soy sauce)
1/4 cup vegetable oil
4-6 green onions
2 garlic cloves
1 tsp black pepper

Brown the sesame seeds lightly in a pan with a small amount of butter (I used 1/2 tbsp), stirring constantly; cool, then pulverize in a food processor (or crush inside a ziploc).

Combine the sesame seeds with the remaining six ingredients and mix well. Add beef and marinate at least 1 hour.

Remove meat from marinade and stir fry on high heat. Once cooked, transfer meat to a plate. Pour leftover marinade back into pan and simmer for about 10 minutes until sauce thickens. Add meat back to the sauce and cook until heated through. Serve on sticky rice.

Tuesday, November 27, 2007

Caramelized Onion and Goat Cheese Pizza


This was another quick and easy weeknight meal. I'm sure this would be even better if you make your own homemade pizza dough and homemade red sauce, but if you're looking for something you can throw together after a long day at work, this is so easy and convenient.

Yellow onions actually have more sugar in them than "sweet onions," making them ideal for this recipe. When you caramelize onions, you are actually converting the sugars within the onion into caramel. As the oil heats up, the water from the onions evaporates, allowing the temperature of the sugars in the onions to rise. Once the sugars reach a temperature of 310°F, they begin to caramelize, and the onions change from light tan to golden, and then eventually deep brown.

The onions do get a little burnt around the edges while the pizza cooks in the oven, so next time I may wait until the last 3-5 minutes of cooking to add them to the pizza.


The combination of caramelized onions, goat cheese, and sun dried tomatoes is excellent. I imagine it would have been even better if I had some basil on hand. I love sun dried tomatoes, so I doubled them in this recipe. Even if you don't love them as much as I do, I'd still recommend adding a little more than what is indicated in the recipe, maybe 1/3 cup instead of 1/4 cup.

Caramelized Onion and Goat Cheese Pizza
from Cooking Light


2 teaspoons olive oil
2
cups thinly sliced onion, separated into rings (about 1 onion)
1
(1-pound) Italian cheese-flavored pizza crust (such as Boboli)
1/2
cup bottled pizza sauce (such as Contadina) (I used Prego roasted garlic and herb)
1/4
cup chopped drained oil-packed sun-dried tomato halves (I used 1/2 cup)
2/3
cup (3 ounces) crumbled goat cheese
1/4
cup chopped fresh basil (I omitted this - didn't have any on hand)
Preheat oven to 450°F.

Heat olive oil in a large nonstick skillet over medium-high heat. Add onion; cover and cook for 3 minutes. Uncover and cook for 11 minutes or until golden brown, stirring frequently. (After I uncovered the skillet, I turned the heat down to low-medium to avoid burning the onions.)

Place the pizza crust on a baking sheet. Combine the sauce and tomatoes. Spread sauce mixture over pizza crust. Top with onion and cheese. Bake at 450° for 10 minutes or until crust is golden brown. Sprinkle with basil. Cut into 6 wedges.

Sunday, November 25, 2007

Pumpkin-Cinnamon Streusel Buns


I recently found myself with some leftover canned pumpkin, so I went in search of a good recipe to use up the rest of it. That's when I came across this recipe. At a mere 219 calories per roll, I thought it was worth trying (especially when compared to the 525 calories in your traditional cinnamon roll!).


I have to say that these were good, but they definitely tasted light/low fat. The pumpkin flavor is really subtle, and no one really knew there was pumpkin in this until I told them. I was hoping that the flavor would come through more, making this the perfect fall treat.

This is one of the those cases where I feel like if you are going to go to the trouble of making homemade cinnamon rolls, you should just go for it and make these 525 calorie cinnamon rolls which are to die for. That said, if you are on a diet and start really craving cinnamon rolls, this would be a suitable alternative.

Pumpkin-Cinnamon Streusel Buns

from Cooking Light


Buns:
1 package dry yeast (about 2 1/4 teaspoons)
1/4 cup warm water (100° to 110°)
2 3/4 cups all-purpose flour, divided (you need approximately 1 extra cup if using canned pumpkin)
1/2 cup Pumpkin Puree (I used canned pumpkin)
1/2 cup 1% low-fat milk
1/4 cup butter, melted
1 tablespoon granulated sugar
1 1/4 teaspoons salt
1/4 teaspoon ground nutmeg
Cooking spray
3 tablespoons granulated sugar
3 tablespoons brown sugar
2 tablespoons all-purpose flour
1 1/2 teaspoons ground cinnamon
2 tablespoons chilled butter, cut into small pieces

Glaze:
3/4 cup sifted powdered sugar
1 tablespoon hot water
1/4 teaspoon vanilla extract

To prepare the buns, dissolve yeast in warm water in a large bowl; let stand for 5 minutes. Lightly spoon flour into dry measuring cups, and level with a knife. Add 2 cups flour, pumpkin, and next 5 ingredients (pumpkin through nutmeg); beat with a mixer at medium speed until smooth. Turn dough out onto a floured surface. (At this point, I left the dough in the mixing bowl and switched from my KitchenAid Mixer's flat beater to the dough hook.) Knead until smooth and elastic (about 10 minutes); add enough of the remaining 3/4 cup flour, 1 tablespoon at a time, to prevent dough from sticking to hands (dough will feel tacky). (I ran the mixer on speed 2 until the dough no longer stuck to the sides of the bowl and started flopping around it.)

Place the dough in a large bowl coated with cooking spray, turning to coat top. Cover and let rise in a warm place (85°), free from drafts, for 45 minutes or until doubled in size. (Press two fingers into the dough. If an indentation remains, the dough has risen enough.)

Combine 3 tablespoons granulated sugar, brown sugar, 2 tablespoons flour, and cinnamon in a small bowl. Cut in butter with a pastry blender or 2 knives until mixture resembles coarse meal.

Punch dough down; cover and let rest for 5 minutes. Roll the dough into a 12 x 10-inch rectangle on a floured surface. Sprinkle with brown sugar mixture. Roll up the rectangle tightly, starting with a long edge, pressing firmly to eliminate air pockets; pinch seam and ends to seal. Cut roll into 12 (1-inch) slices. Place slices in a 9-inch square baking pan coated with cooking spray. Cover and let rise 25 minutes or until doubled in size.

Preheat oven to 375°.

Bake the rolls at 375° for 20 minutes or until golden brown. Cool for 15 minutes in pan on a wire rack.

To prepare the glaze, combine the powdered sugar, 1 tablespoon water, and vanilla extract in a small bowl, stirring with a whisk until smooth. Drizzle glaze over buns. Serve warm.

Yield: 12 servings (serving size: 1 bun)

Thursday, November 22, 2007

Flying Cake!


Happy Thanksgiving! Well, in addition to the orange cranberry pound cake I took with me to Chattanooga this year, I also made a pear cake. I somehow still had leftover pears after making the warm pear ginger upside down cake and the jack quesadillas with pear salsa... and I didn't want them to spoil while we were away for the holiday... so I decided to use them up by baking something else for Thanksgiving.

Again, I was presented with the dilemma of creating something that would fly well. Then the idea came to me to make the apple cake from Kayte's blog, but to use pears instead. I had been wanting to try that recipe ever since I made the other apple cake recipe, and this seemed to be the perfect opportunity.


This cake was very moist, and the spices complemented the pears well. It's hard for me to say which apple cake recipe is better, as both are good, but they're different. I think I might like the other one a little better... the cinnamon flavor in the other recipe is more prominent (which I like), but it's also more fattening with a whopping 3 sticks of butter in the recipe!


The original recipe also calls for a brown sugar frosting, but I simply topped this cake with some powdered sugar and served it with some homemade whipped cream :)

Both the orange cranberry pound cake and the pear cake were a big hit at our Thanksgiving feast... everyone was impressed that I traveled with these cakes, and they were dubbed the "flying cakes."

*Humorous Update (11/25/07): my sister-in-law, Holly, and her boyfriend, James, were visiting the sculpture garden in downtown Chattanooga when they came across these "flying naked people" as James put it. It was then that he had the awesome inspiration of the flying people carrying flying cakes! So, they snapped a photo and with it he photoshopped the sculpture and cake into this funny image :)


Image courtesy of James :)

Apple (Pear) Cake
from Culinate


2 1/3 cups all purpose flour
2 tsp baking soda
1/2 tsp salt
1/2 tsp cinnamon
1/4 tsp ginger
1/8 tsp each of ground cloves and ground nutmeg
1/2 cup soft unsalted butter
1 1/2 cups sugar
2 eggs
4 cups peeled and finely chopped apples (I used pears)
3/4 cup finely chopped pecans or walnuts (I omitted these)

Preheat oven to 325F. Butter and flour a 13x9 inch baking pan (or a Bundt pan)

In a large bowl mix together flour, baking soda, salt, and ground spices. In a mixer bowl, or with an electric mixer, cream together butter and sugar until light and fluffy. Add eggs and mix for another minute, until the eggs are blended into the butter and sugar. Reduce the speed to low, and add the flour mixture - a third at a time - just until the dry ingredients are incorporated. The batter will be very thick and stuff.

Fold in the apples and nuts and stir just enough to evenly distribute the apples and nuts through the batter.

Spoon the batter into the prepared pan, and with a spatula smooth the surface, pushing the batter into the corners of the pan. Bake in preheated oven for 40-50 minutes, checking the cake at 40 minutes with a toothpick. When the top of the cake is firm and in inserted toothpick comes out clean, the cake is done. Cool on a wire rack.


*Note: If using a Bundt pan, cool the cake for 10-15 minutes and then invert onto a plate or serving platter.

Wednesday, November 21, 2007

Quesadillas with Pear Salsa


I had some leftover pears I wanted to use after making the Warm Pear Ginger Upside-Down Cake, and came across this recipe on MyRecipes.com. I normally don't care much for quesadillas, but the pear salsa intrigued me. At the same time, I wasn't sure if I would like it, especially since I wasn't sure what a pear salsa would taste like. There were a few good reviews on the website, though, so I thought I would give it a try. I am so glad I did! This meal comes together so quickly, and it is so good!

I did not have any mint on hand so I substituted cilantro, but I'm anxious to try this recipe again with the mint. Along with the Pineapple Black Bean Enchiladas, this is the second Mexican dish I have made recently that includes fruit! :)

Jack Quesadillas with Pear Salsa
from Cooking Light


Pear salsa:
4 cups chopped peeled Anjou pear (2 pounds)
1/3 cup chopped red onion (I used y
2 tablespoons chopped fresh or 2 teaspoons dried mint (I didn't have any, so I used cilantro instead)
1 tablespoon grated lime rind
2 tablespoons fresh lime juice
1 teaspoon sugar
1/2 teaspoon freshly ground black pepper
1 jalapeƱo pepper, seeded and chopped (I didn't have one, so I used some Sambal Oelek chili paste instead)

Quesadillas:
8 (8-inch) fat-free flour tortillas
2 cups (8 ounces) shredded Monterey Jack cheese (I used Cheddar Jack)
1/2 cup chopped green onions

To prepare salsa, combine first 8 ingredients in a bowl; cover and chill.

To prepare the quesadillas, place 1 tortilla in a medium nonstick skillet over medium heat, and top with 1/2 cup cheese. Sprinkle with 2 tablespoons onions; top with a tortilla. Cook 3 minutes, pressing down with a spatula until cheese melts. Turn carefully, and cook until thoroughly heated (about 1 minute). Repeat procedure with the remaining tortillas, cheese, and green onions. Cut each quesadilla into sixths; serve with pear salsa.

Yield: 6 servings (serving size: 4 quesadilla wedges and 1/2 cup salsa)

Monday, November 19, 2007

No Takeout Tonight


This is a recipe I got from my friend Laura. It's from one of the Weight Watcher's cookbooks; unfortunately I'm not sure which one so I'm not able to site the exact source. The original recipe is for Spicy Orange Beef, however I usually substitute chicken instead. It's a great, healthier alternative to ordering takeout when you have a craving for Chinese food.


I make this dish all the time. It makes a great weeknight meal, as it does not require too much prepping. It's also very easy to adapt, depending on your tastes. This time, I used red and orange bell peppers with some onions, but that's just what I had on hand.

Spicy Orange Beef (Chicken)
from Weight Watcher's


3/4 lb beef top round, trimmed of all visible fat, cut into thin strips (I used 2 chicken breasts)
2 tbsp cornstarch
2 tsp grated orange rind
1/2 cup low sodium beef broth (I used chicken broth)
1/4 cup orange juice
2 tbsp reduced sodium soy sauce
1 tbsp sugar
1 1/2 tsp chili garlic sauce or 1/4 tsp crushed red pepper
4 tsp canola oil
1 tbsp minced peeled fresh ginger
1/4 lb green beans, halved crosswise (I omitted these)
1 red bell pepper, seeded and cut into thin strips (I used 1 red and 1 orange bell pepper)
1 carrot, cut into thin match stick thin strips (I used 1/2 small onion, chopped)

Combine beef, 1 tbsp cornstarch, and orange rind in medium bowl; toss well to coat and set aside. Combine remaining 1 tbsp cornstarch, broth, orange juice, soy sauce, sugar, and chili garlic sauce in small bowl; set aside.

Heat nonstick wok or large, deep skilled over medium-high heat until a drop of water sizzles. Swirl in 2 tsp of oil, then add beef. Stir fry until cooked through, 2-3min; transfer to plate. Swirl remaining 2 tsp oil, then add ginger. Stir fry til fragrant, about 10 seconds. Add green beans, bell pepper, and carrot. Stir fry until crisp tender, 2-3 minutes. Add broth mixture and cook, stirring occasionally, until mixture boils and thickens, about 1 minute. Add beef and cook until heated through, about 1 minute.

Makes 4 servings
1 serving = 1 cup = 227 cal, 8 g fat, 2 g saturated fat, 16 g carb, 2g fiber, 22g protein


Sunday, November 18, 2007

Second Time's the Charm


I'm not a huge fan of tomato soup, especially the plain Campbell's type tomato soup. One of my favorite types of soup, however, is the creamy tomato basil soup at the French Bakery and Restaurant La Madeline. Back in September, I tried a recipe for tomato basil soup that was supposed to be a copycat of their soup. It was good, but this recipe from Cooking Light is really good. My husband said it is just as good as La Madeline's :)


I adapted the recipe a bit, using canned tomatoes to save time, a little sugar to cut back on the acidity of the tomatoes, and extra cream cheese to make the soup creamier. I think the secret to this soup is the cream cheese! I will definitely be making this again :)

Tomato Basil Soup
from Cooking Light

4 cups chopped seeded peeled tomato (about 4 large)
4 cups low-sodium tomato juice (In place of the first 2 ingredients, I used one 28 oz can of whole tomatoes, chopped, along with all the tomato juice from the can; plus one 28 oz can of crushed tomatoes)
1/3 cup fresh basil leaves
1 cup 1% low-fat milk
1/4 teaspoon salt
1/4 teaspoon cracked black pepper
1 tbsp sugar
1/2 cup (4 ounces) 1/3-less-fat cream cheese, softened (I used a full 8 oz block)
Basil leaves, thinly sliced (optional)
8 (1/2-inch-thick) slices diagonally cut French bread baguette

Bring tomato and juice to a boil in a large saucepan. Reduce heat; simmer, uncovered, 30 minutes.

Place tomato mixture and basil in a blender or food processor; process until smooth (I used an immersion blender - great time saver). Return pureed mixture to pan; stir in milk, salt, and pepper (I also added sugar). Add cream cheese, stirring well with a whisk, and cook over medium heat until thick (about 5 minutes). Ladle soup into individual bowls; garnish with sliced basil, if desired. Serve with bread.

NOTE: Refrigerate remaining soup in an airtight container for up to 1 week.

8 servings (serving size: 1 cup soup and 1 bread slice)


Saturday, November 17, 2007

Warm Pear Ginger Upside Down Cake


I knew I wanted to try this recipe when I saw it on Peabody's blog. (Yes, another recipe from my favorite blog!) I love pears and the idea of combining that flavor with ginger sounded wonderful. I've also had my eye on this caramelized pear upside-down gingerbread recipe from Williams Sonoma on Katie's blog, but I did not have any cardamom or molasses in my pantry.


You can easily save some time by chopping up the pears like Peabody did, but I decided to peel and slice mine for presentation.


The cake is super moist, and the little bits of candied ginger give it wonderful bursts of flavor as you savor the cake. I had my first slice with caramel sauce (recipe here), but all the rest without it; I honestly felt the cake was better plain. The caramel sauce just obscures the magnificent pear and ginger flavors.

Warm Pear Ginger Upside Down Cake
from Culinary Concoctions by Peabody

Topping:

½ cup salted butter
½ cup firmly packed brown sugar
2 ripe pears (I used Anjou)
2 tbsp finely chopped candied ginger


To make the topping:
Chop pears into a dice, leaving the skins on; set aside. (I peeled and cut mine into 1/8" slices.)

In a medium saucepan combine butter and sugar and bring to a boil. Take off of heat and whisk just to combine and pour into prepared pan. (This recipe calls for a 9 or 10-inch cake pan with sides that are at least 2 inches tall.) Sprinkle pears all over the pan and then followed by candied ginger. (I arranged my pear slices in a spiral, starting from the center and working my way out.) Set aside.


Cake:
½ cup unsalted butter, room temperature
1 cup granulated sugar
2 large eggs
1 1/3 cups all-purpose flour
1 ½ tsp baking powder
¼ tsp kosher salt
½ cup milk
1 ½ tsp vanilla extract
2 tbsp finely chopped candied ginger


To make the cake:
Preheat the oven to 350F.

Using an electric mixer fitted with the paddle attachment, cream the butter and sugar together on medium-high speed until light and fluffy, about 3 minutes. Add the eggs and beat for another 30 seconds.


Stir together the flour, baking powder, and salt in a separate bowl. To the butter mixture, add the flour mixture in 3 increments, the milk in two, starting and ending with the flour, beating on low speed between each addition. Stir in the vanilla and candied ginger. Pour the batter evenly over the pears. Bake for about 45 minutes if using a 10-inch pan and about 55 minutes for a 9-inch. The cake is done when a toothpick inserted in the center comes out clean. Remove from the oven and immediately invert onto a large cake plate. Let cool for about 15 minutes.

Friday, November 16, 2007

Carry-On Cake?


I've been looking for something to make to bring to Thanksgiving dinner. This year, we'll be flying to Chattanooga, TN to spend Thanksgiving with my in-laws. That makes things a little trickier because I need to find something that will be easily transported in my carry-on luggage. That means no sauces, no frosting, nothing fragile.


So I thought that some type of cake might be good. I was debating between an Apricot-Ginger Pound Cake with Rum Glaze from Williams-Sonoma, or an Orange-Cranberry Pound Cake from Peabody's blog. I consulted with my sister-in-law, Holly, who didn't even hesitate to pick the Orange-Cranberry Pound Cake :)


So this weekend I decided to make the pound cake to see if I liked it. I didn't want to bring something to Thanksgiving dinner that I had never made or tasted before. I'm not really sure why I even bothered, because I should have known that anything from Peabody's blog would be wonderful!


This pound cake is moist and dense as pound cake should be, but not too dense. The orange zest gives the cake a great undertone (if you look closely, you can even see the orange zest in the photos). And of course the cranberries make it perfect for Thanksgiving. I can't wait to share this with the family next week! :)


Orange-Cranberry Pound Cake
from Culinary Concoctions by Peabody


2 sticks of butter, softened
3 cups sugar
5 eggs
1 cup milk
1 tsp vanilla extract
zest of one medium orange
1/4 tsp cinnamon
1/4 tsp fresh nutmeg
3 cups all-purpose flour
1/2 tsp salt
1 cup dried cranberries


Preheat oven to 350F.

In a mixing bowl, cream the butter and sugar, beating until light and fluffy. Add the eggs, one at a time, beating well after each addition. Stir in the milk and the vanilla and orange zest. Sift together the spices, flour, salt; add them to the wet ingredients, stirring gently just until well combined. Fold in the dried cranberries.

Pour the batter into a greased and floured 10 inch tube pan and bake for 1 hour and 10 minutes or until a toothpick inserted in the center comes out clean. Let the cake cool in the pan then turn out onto plate.