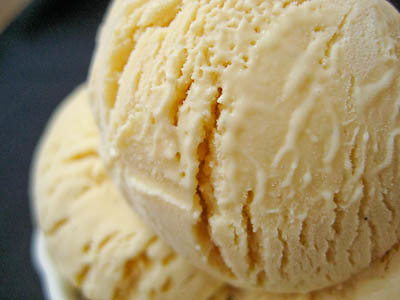
Showing posts with label ice cream. Show all posts

Tuesday, December 13, 2011

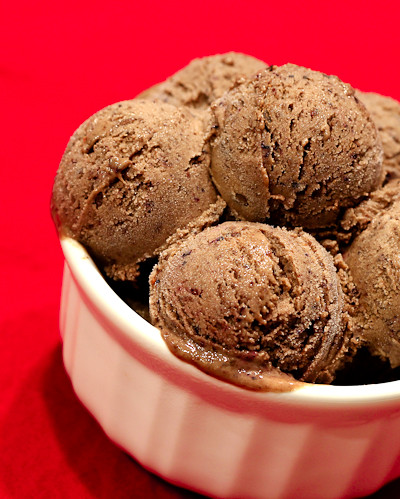
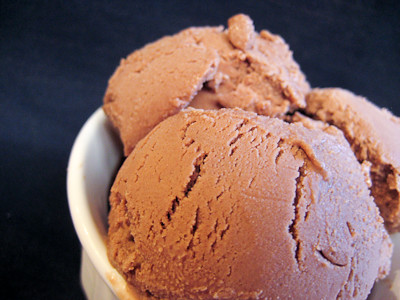
Unbelievably Good Chocolate Blueberry Pomegranate Ice Cream (TWD)


This week's Tuesdays with Dorie (TWD) recipe was chosen by Laurie (founder of TWD!) of Slush: Unbelievably Good Chocolate Blueberry Ice Cream.

I would never to think to make chocolate blueberry ice cream, but I've totally had chocolate covered strawberries, and chocolate covered dried cherries, blueberries, etc. so of course it would make sense that chocolate blueberry ice cream would be good :)

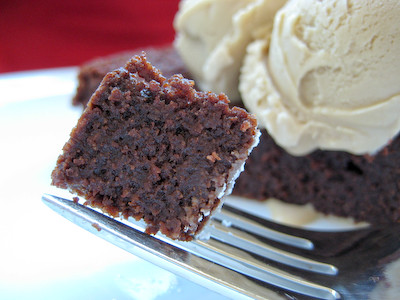
I thought I had everything I needed for this recipe because we usually keep frozen blueberries on hand for my daughter, but when I went to the make the recipe I realized that the recipe calls for blueberry preserves, not fresh/frozen blueberries! Well, I just so happened to receive some Pomegranate Jelly for my birthday in November, so I decided to puree some frozen blueberries (about 1 tbsp) and mixed it together with the Pomegranate Jelly.... resulting in the most delicious chocolate blueberry pomegranate ice cream!

If you would like the recipe, you can find here.  Make sure you also check out this page, too, so you can see what everyone else thought of this unusual chocolate ice cream!

And if you haven't already, don't forget to enter my Peeled Snacks Giveaway!

Friday, September 10, 2010

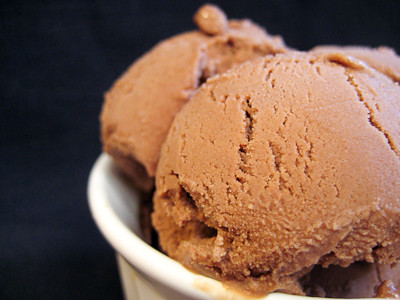
Chocolate Peanut Butter Ice Cream


It's really hard for me to believe that it's September already and we're leaving summer behind us.  Here in Dallas, we've finally seen the temperatures drop from triple digit heat to the 90's and it's amazing how it feels like it's 70 degrees outside! I think it will be a while before it truly feels like autumn, so in the meantime I am going to continue enjoying lots of homemade ice cream :)

I bring to you today another great ice cream recipe from The Perfect Scoop.  I particularly like that this one is a non-custard based ice cream, so it only takes a few minutes to prep.  I love chocolate and peanut butter together, and this ice cream is sure to satisfy any chocolate/peanut butter craving.  I'm sure it would be even better with some chopped up pieces of Reese's peanut butter cups mixed in at the end, too.  Don't have an ice cream maker? No problem. Check out this post here.

Chocolate Peanut Butter Ice Cream
from The Perfect Scoop by David Lebovitz

2 cups (500ml) half and half
1/4 cup (25g) unsweetened Dutch process cocoa powder
1/2 cup (100g) granulated sugar
pinch of salt
1/2 cup (130g) smooth peanut butter

Whisk together the half and half, cocoa powder, sugar, and salt in a large saucepan. Heat the mixture, whisking frequently, until it comes to a full, rolling boil (it will start to foam up). Remove from heat and whisk in the peanut butter, stirring until thoroughly blended.

Chill the mixture thoroughly, then freeze in your ice cream machine according to manufacturer's directions.

Makes 1 quart.

Sunday, August 29, 2010

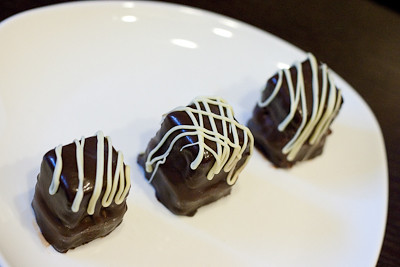
Ice Cream Petit Fours (DB)


The August 2010 Daring Bakers’ challenge was hosted by Elissa of 17 and Baking. For the first time, The Daring Bakers partnered with Sugar High Fridays for a co-event and Elissa was the gracious hostess of both. Using the theme of beurre noisette, or browned butter, Elissa chose to challenge Daring Bakers to make a pound cake to be used in either a Baked Alaska or in Ice Cream Petit Fours. The sources for Elissa’s challenge were Gourmet magazine and David Lebovitz’s “The Perfect Scoop”.

I decided to make the petit fours since I've never made them before.  I'm a few days late posting, but I had some technical difficulties with my ice cream machine! For some reason, I couldn't get the container to freeze, and I didn't realize this until the last minute. So, I had to stick the second container in the freezer and wait for it to freeze before I could make my ice cream.  Otherwise, this recipe went off without a hitch.

I made Dorie Greenspan's chocolate ganache ice cream for my petit fours, instead of David Lebovitz' vanilla ice cream.  The chocolate ice cream sandwiched between the brown butter cake pound cake, drenched in the chocolate glaze was any chocolate lover's dream come true!
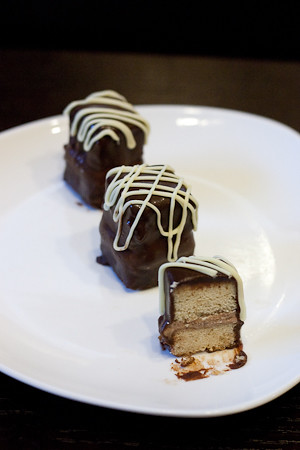

My favorite part of this recipe was actually the brown butter pound cake.  One of my favorite pastas is the one from Spaghetti Factory that is served with browned butter and mizithra cheese.  So I am very familiar with the wonderful nutty aroma of browned butter.  This pound cake was moist and delicious and much better than any traditional pound cake I've had.  I'll definitely be making it again.

Thanks Elissa, for hosting this month's challenge.  I had fun making petit fours for the very first time! Make sure you check out the Daring Bakers' Blogroll to see how everyone else enjoyed this cool and creamy summer treat.

Ice Cream Petit Fours

Preparation time:
Ice cream – 45 min active time, ice cream rests/chills for 1 hour then overnight. Without an ice cream maker, the ice cream chills 2-3 hours and must be stirred every 30 minutes.

Brown Butter Pound Cake – 2 hours (includes cooling time)

Chocolate Glaze – 15 minutes

Assembly of Ice Cream Petit Fours – Ice cream must be frozen ahead of time several hours, then the cake and ice cream freeze overnight. After dipping, the petit fours freeze for one hours.

Equipment required:
• Small and medium saucepans
• Paring knife
• 2 quart (2 litres) bowl
• Electric mixer
• Whisk
• Spatula
• Sieve
• 9”x9” (23cmx23cm) square baking pan
• 10” (25 cm) skillet
• Cake leveler/serrated knife
• Cooling racks
• Rimmed half sheets
• Teacups
• Plastic wrap
• Piping bags (optional)
• Ice cream maker (optional)
• Cooking blow torch (optional)

Directions:

Vanilla Ice Cream

1 cup (250ml) whole milk
A pinch of salt
3/4 cup (165g) sugar
1 vanilla bean, split lengthwise OR 2 teaspoons (10ml) pure vanilla extract
2 cups (500ml) heavy (approx 35% butterfat) cream
5 large egg yolks
1 teaspoon (5ml) pure vanilla extract

1. Heat the milk, salt, and sugar in a medium saucepan until the liquid steams. Scrape out the seeds of the vanilla bean with a paring knife and add to the milk, along with the bean pod. Cover, remove from heat, and let infuse for an hour. (If you do not have a vanilla bean, simply heat the milk, salt, and sugar in a medium saucepan until the liquid steams, then let cool to room temperature.)

2. Set up an ice bath by placing a 2-quart (2 litre) bowl inside a large bowl partially filled with water and ice. Put a strainer on top of the smaller bowl and pour in the cream.

3. In another bowl, lightly beat the egg yolks together. Reheat the milk in the medium saucepan until warmed, and then gradually pour ¼ cup warmed milk into the yolks, constantly whisking to keep the eggs from scrambling. Once the yolks are warmed, scrape the yolk and milk mixture back into the saucepan of warmed milk and cook over low heat. Stir constantly and scrape the bottom with a spatula until the mixture thickens into a custard which thinly coats the back of the spatula.

4. Strain the custard into the heavy cream and stir the mixture until cooled. Add the vanilla extract (1 teaspoon [5ml] if you are using a vanilla bean; 3 teaspoons [15ml] if you are not using a vanilla bean) and refrigerate until thoroughly chilled, preferably overnight.

5. Remove the vanilla bean and freeze in an ice cream maker. If you don’t have an ice cream maker, you can make it without a machine. See instructions from David Lebovitz: http://www.davidlebovitz.com/archives/2007/07/making_ice_crea_1.html

Brown Butter Pound Cake

19 tablespoons (9.5 oz) (275g) unsalted (sweet) butter
2 cups (200g) sifted cake flour (not self-rising; sift before measuring) (See “Note” section for cake flour substitution)
1 teaspoon (5g) baking powder
1/2 teaspoon (3g) salt
1/2 cup (110g) packed light brown sugar
1/3 (75g) cup granulated sugar
4 large eggs
1/2 teaspoon pure vanilla extract

1. Preheat the oven to 325°F/160°C and put a rack in the center. Butter and flour a 9”x9” (23cmx23cm) square pan.

2. Place the butter in a 10” (25cm) skillet over medium heat. Brown the butter until the milk solids are a dark chocolate brown and the butter smells nutty. (Don’t take your eyes off the butter in case it burns.) Pour into a shallow bowl and chill in the freezer until just congealed, 15-30 minutes.

3. Whisk together cake flour, baking powder, and salt.

4. Beat the brown butter, light brown sugar, and granulated sugar in an electric mixer until light and fluffy, about 2 minutes. Beat in the eggs one at a time, mixing well, and then the vanilla extract.

5. Stir in the flour mixture at low speed until just combined.

6. Scrape the batter into the greased and floured 9”x9” (23cmx23cm) square pan. Smooth the top with a rubber spatula and rap the pan on the counter. Bake until golden brown on top and when a toothpick inserted into the center comes out clean, about 25 minutes.

7. Cool in the pan 10 minutes. Run a knife along the edge and invert right-side-up onto a cooling rack to cool completely.

Chocolate Glaze (For the Ice Cream Petit Fours)

9 ounces (250g) dark chocolate, finely chopped
1 cup (250 ml) heavy (approx 35% butterfat) cream
1 1/2 tablespoons (32g) light corn syrup, Golden syrup, or agave nectar
2 teaspoons (10ml) vanilla extract

Stir the heavy cream and light corn syrup in a small saucepan over medium heat until it comes to a boil. Remove from heat and add the dark chocolate. Let sit 30 seconds, then stir to completely melt the chocolate. Stir in the vanilla and let cool until tepid before glazing the petit fours.

Assembly Instructions 
1. Line a 9”x9” (23cmx23cm) pan with plastic wrap, so that no sides of the pan are exposed and so there is some extra plastic wrap hanging off the sides. Spread 1 ¾ to 2 cups (450ml to 500ml) ice cream into the pan. Cover with more plastic wrap and freeze several hours.

2. Once the brown butter pound cake has completely cooled, level the top with a cake leveler or a serrated knife. Then split the cake in half horizontally to form two thin layers.

3. Unwrap the frozen ice cream. Flip out onto one of the layers of cake and top with the second layer of cake. Wrap well in plastic wrap and return to the freezer overnight.

4. Make the chocolate glaze (see above.)

5. While the glaze cools, trim ¾” (2cm) off each side of the ice cream cake to leave a perfectly square 7.5” (19cm) ice cream cake. Cut the cake into twenty five petit fours, each 1.5”x1.5” (4cmx4cm).

6. Glaze the petit fours one at a time: place a petit four on a fork and spoon chocolate glaze over it.

7. Place the petit fours on a parchment-lined baking sheet and return to the freezer for one hour.

Tuesday, July 27, 2010

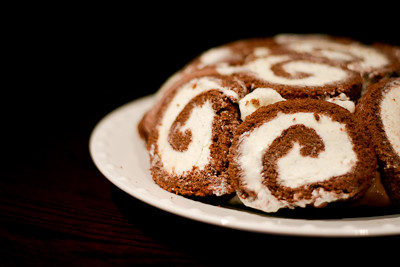
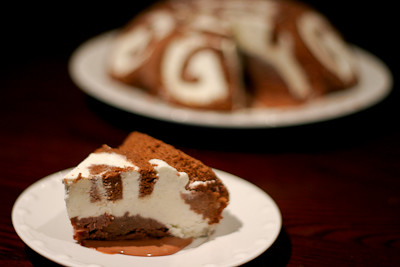
Swiss Roll Ice Cream Cake (DB)


The July 2010 Daring Bakers’ challenge was hosted by Sunita of Sunita’s world – life and food. Sunita challenged everyone to make an ice-cream filled Swiss roll that’s then used to make a bombe with hot fudge. Her recipe is based on an ice cream cake recipe from Taste of Home.

This ice cream cake was a welcome challenge during the hot summer months! I decided to halve the entire recipe and made a mini cake (that was still large enough to serve 12 people).

The first component was a swiss roll that is filled with a vanilla whipped cream.  I was familiar with the rolling method, as I've made pumpkin rolls in the past.  The only change I made here was to use a 13x9-inch pan instead.  Even though I followed the recipe exactly, I felt like there was way too much whipped cream for the amount of cake present.  Plus, I think the cake would have been better if the roll had been filled with ice cream instead of just whipped cream.  So, if I make this again, I'd probably fill it with chocolate ice cream instead.


The ice cream layers and fudge sauce came together quite nicely.  I was at my mom's place when I made this recipe, so I made the ice cream without an ice cream maker.  If you don't have an ice cream maker, you can find instructions on how to make your own ice cream here.  I think my favorite part of this cake was the chocolate ice cream.  I loved how it was rich and creamy without being a custard ice cream recipe.  I will definitely be making it again.

As a whole, this recipe was fun to make, but I'm not sure if I'd make it again.  I'll definitely make the chocolate ice cream again, but when it comes to ice cream cakes, I think I prefer a traditional ice cream cake.

Thanks Sunita, for hosting this month's challenge. Make sure you check out the Daring Bakers' Blogroll to see how everyone else enjoyed this cool and creamy summer treat.

Swiss roll ice cream cake
by Sunita (inspired by the Swiss swirl ice cream cake from the Taste of Home website)
Printable PDF Recipe

The Swiss rolls-
Preparation time- 10 minutes
Baking time- 10-12 minutes
Rolling and cooling time- at least 30 minutes
Filling-5-8 minutes
Filling and rolling- 5-10 minutes
Ingredients-
6 medium sized eggs
1 C / 225 gms caster sugar /8 oz+ extra for rolling
6 tblsp / 45gms/ 3 oz of all purpose (plain) flour + 5 tblsp/40gm /2.5 oz of natural unsweetened cocoa powder, sifted together
2 tblsp /30ml / 1 fl oz of boiling water
a little oil for brushing the pans

For the filling-
2C / 500 mls/ 16 fl oz of whipping cream
1 vanilla pod, cut into small pieces of about ½ cm (or 1 tsp vanilla extract)
5 tblsp / 70gms/2.5oz of caster sugar

Method-
    1. Pre heat the oven at 200 deg C /400 deg F approximately. Brush the baking pans ( 11 inches by 9 inches ) with a little oil and line with greaseproof baking paper. If you have just one pan, bake one cake and then let the pan cool completely before using it for the next cake.
    2. In a large mixing bowl, add the eggs and sugar and beat till very thick; when the beaters are lifted, it should leave a trail on the surface for at least 10 seconds.
    3. Add the flour mixture, in three batches and fold in gently with a spatula. Fold in the water.
    4. Divide the mixture among the two baking pans and spread it out evenly, into the corners of the pans.
    5. Place a pan in the centre of the pre heated oven and bake for about 10-12 minutes or till the centre is springy to the touch.
    6. Spread a kitchen towel on the counter and sprinkle a little caster sugar over it.
    7. Turn the cake on to the towel and peel away the baking paper. Trim any crisp edges.
    8. Starting from one of the shorter sides, start to make a roll with the towel going inside. Cool the wrapped roll on a rack, seam side down.
    9. Repeat the same for the next cake as well.
    For the filling
      1. Grind together the vanilla pieces and sugar in a food processer till nicely mixed together. If you are using vanilla extract, just grind the sugar on its own and then add the sugar and extract to the cream.
      2. In a large bowl, add the cream and vanilla-sugar mixture and beat till very thick.
      3. Divide the cream mixture between the completely cooled cakes.
      4. Open the rolls and spread the cream mixture, making sure it does not go right to the edges (a border of ½ an inch should be fine).
      5. Roll the cakes up again, this time without the towel. Wrap in plastic wrap and chill in the fridge till needed, seam side down.

        The vanilla ice cream-
        Preparation time-5 minutes+freezing
        I have made the ice cream without an ice cream maker.
        Ingredients-
        2 and ½ C / 625 ml / 20 fl oz of whipping cream
        1 vanilla bean, minced or 1 tsp/ 5 ml/ .15 fl oz vanilla extract
        ½ C / 115gms/ 4 oz of granulated sugar

        Method-
        Grind together the sugar and vanilla in a food processor. In a mixing bowl, add the cream and vanilla –sugar mixture and whisk lightly till everything is mixed together. If you are using the vanilla extract, grind the sugar on its own and then and the sugar along with the vanilla extract to the cream.

        Pour into a freezer friendly container and freeze till firm around the edges. Remove from the freezer, beat till smooth and return to the freezer. Do this 3-4 times and then set completely.

        The Hot fudge sauce- I made this just after adding the layer of vanilla ice cream to the cake.
        Preparation time-2 minutes
        Cooking time-2 minutes
        Ingredients-
        1 C / 230gms/ 8 oz of caster sugar
        3 tblsp / 24gms/1.5 oz of natural unsweetened cocoa powder
        2 tblsp /15gms/ 1 oz of cornflour/cornstarch
        1 and ½ C /355ml /12 fl oz of water
        1 tblsp /14gms/ 1 oz butter
        1 tsp/5 ml / .15 fl oz vanilla extract

        Method-
        1. In a small saucepan, whisk together the sugar, cocoa powder, cornflour and water.
        2. Place the pan over heat, and stir constantly, till it begins to thicken and is smooth (for about 2 minutes).
        3. Remove from heat and mix in the butter and vanilla. Keep aside to cool .

        The chocolate ice cream-
        Preparation time- 5 minutes + freezing
        Ingredients-
        2C/ 500 ml whipping cream
        1 C/230gms/8 oz caster sugar
        3 tblsp/ 24 gms/1.5 oz of natural unsweetened cocoa powder

        Method-
        1. Grind together the sugar and the cocoa powder in a food processor .
        2. In a saucepan, add all the ingredients and whisk lightly.
        3. Place the pan over heat and keep stirring till it begins to bubble around the edges.
        4. Remove from heat and cool completely before transferring to a freezer friendly container till firm around the edges. If you are using an ice cream maker, churn the ice cream according to the manufacturer’s instruction, after the mixture has cooled completely. 
        5. Remove from the freezer, beat till smooth and return to the freezer. Do this 3-4 times and then set completely.
        Assembly-


        1. Cut the Swiss rolls into 20 equal slices ( approximately 2 cms each ).
        2. Cover the bottom and sides of the bowl in which you are going to set the dessert with cling film/plastic wrap.
        3. Arrange two slices at the bottom of the pan, with their seam sides facing each other. Arrange the Swiss roll slices up the bowl, with the seam sides facing away from the bottom, to cover the sides of the bowl. Cover the bowl with plastic wrap and freeze till the slices are firm (at least 30 minutes).
        4. Soften the vanilla ice cream. Take the bowl out of the freezer, remove the cling film cover and add the ice cream on top of the cake slices. Spread it out to cover the bottom and sides of the bowl. Cover the bowl with plastic wrap and freeze till firm ( at least 1 hour)
        5. Add the fudge sauce over the vanilla ice cream, cover and freeze till firm . ( at least an hour)
        6. Soften the chocolate ice cream and spread it over the fudge sauce. Cover with plastic wrap and freeze for at least 4-5 hours till completely set .
        7. Remove the plastic cover, and place the serving plate on top of the bowl. Turn it upside down and remove the bowl and the plastic lining. If the bowl does not come away easily, wipe the outsides of the bowl with a kitchen towel dampened with hot water. The bowl will come away easily.
        8. Keep the cake out of the freezer for at least 10 minutes before slicing, depending on how hot your region is. Slice with a sharp knife, dipped in hot water.
        * Recipe Notes -
        • You do not need an ice cream maker for this recipe. But if you will be using one, make sure you churn the ice cream according to the manufacturer’s instructions after mixing the ingredients.
        • Whipping cream is a lighter version of double cream, with at least 35 per cent fat, and it whips beautifully without being quite so rich.
        • Vanilla extract is made from vanilla beans that have been steeped in alcohol while vanilla essence is commercial manufactured by chemicals.
        • Caster sugar is finely ground granulated sugar. It can also be found as “superfine sugar”, “fruit sugar” or “quick dissolving sugar”. If you can’t find it, you can make your own by whizzing some regular granulated sugar in the food processor or blender.
        • Keep aside enough time for cooling and chilling the rolls and also for the layers to firm up before adding the next one. Moreover, the ice creams have also got to be made before assembling. I spread out the challenge over two days. I made the cakes and ice creams on the first day, and the fudge topping and assembly on the second day.
        • While adding the final layer with the second ice-cream, make sure not to add it right to the brim. It may spill and will not look good.
        • While inverting the final dessert onto the serving plate, if the cling film refuses to budge from the bowl, just wipe the outside of the bowl with a kitchen towel dampened with hot water. The bowl will release from the dessert very easily.
        • Take the dessert out of the freezer at least 10 minutes before serving, of course depending on how hot it is in your neck of the woods.
        • Dip the knife in hot water for easy slicing.

          Tuesday, July 6, 2010

          Chocolate Ice Cream


          This week's Tuesdays with Dorie (TWD) recipe was the Tart Noire. It's a basic chocolate tart but I'm still at my parents' place and my mom doesn't have a tart pan. Plus, I'd probably have to eat it all by myself (I know, poor me, right?) because my dad's on a cholesterol busting diet and my mom doesn't like anything that is too rich.

          So I bring to you a recipe for something I made some time ago, but never got around to posting - classic chocolate ice cream. I mentioned it when I made the Baby Ruth Ice Cream Pie and now here I am, months later, finally posting the recipe for it. Better late than never, right?

          Like many of the recipes in David Lebovitz' The Perfect Scoop, this is another custard based ice cream recipe. The egg yolks really give it a rich, creamy chocolate flavor that keeps you going back for more.  I promise that if you have never made a custard based ice cream before you just have to try it once before you realize how easy it is! Don't let the egg yolks scare you!


          Whenever I make this recipe, it usually only lasts about two days in our household because I can't keep my husband out of it! If you're in search of a good chocolate ice cream recipe, look no further - this ice cream is the perfect way to beat the summer heat while satisfying those chocolate cravings :)

          Chocolate Ice Cream
          from The Perfect Scoop

          2 cups heavy cream
          3 tablespoons unsweetened Dutch-process cocoa powder
          5 ounces bittersweet or semisweet chocolate, chopped (I used semisweet chocolate chips)
          1 cup whole milk
          ¾ cup granulated sugar
          Pinch of salt
          5 large egg yolks
          ½ teaspoon vanilla extract

          Warm 1 cup of the cream with the cocoa powder in a medium saucepan, whisking to thoroughly blend the cocoa. Bring to a boil, then reduce the heat and simmer at a very low boil for 30 seconds, whisking constantly. Remove from the heat and add the chopped chocolate, stirring until smooth. Then stir in the remaining 1 cup cream. Pour the mixture into a large bowl, scraping the saucepan as thoroughly as possible, and set a mesh strainer on top of the bowl.

          Warm the milk, sugar, and salt in the same saucepan. In a separate medium bowl, whisk together the egg yolk. Slowly pour the warm milk into the egg yolks, whisking constantly, then scrape the warmed egg yolks back into the saucepan.

          Stir the mixture constantly over the medium heat with a heatproof spatula, scraping the bottom as you stir, until the mixture thickens and coats the spatula (170°F on an instant-read thermometer). Pour the custard through the strainer and stir it into the chocolate mixture until smooth, then stir in the vanilla. Stir until cool over an ice bath.

          Chill the mixture thoroughly in the refrigerator, then freeze it in your ice cream maker according to the manufacturer’s instructions. (If the cold mixture is too thick to pour into your machine, whisk it vigorously to thin it out.)

          Friday, June 11, 2010

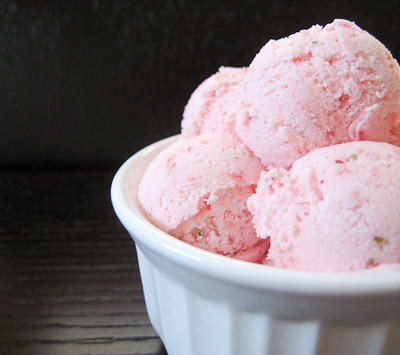
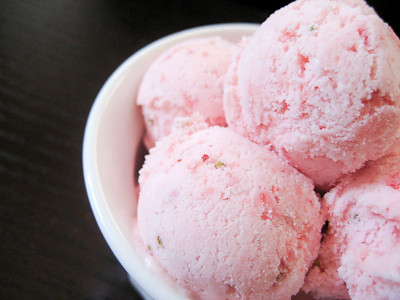
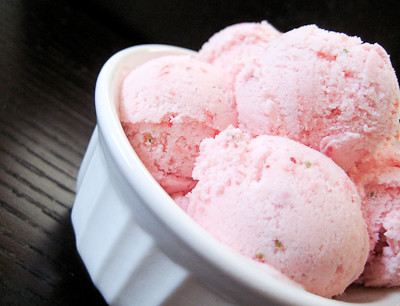
          Strawberry Sour Cream Ice Cream


          After making strawberry shortcakes last week, I had some leftover strawberries I needed to use up. With triple digit heat here in Dallas lately, ice cream sure sounded like a welcome treat! So, I went in search of a good strawberry ice cream recipe. I had tried the basic recipe that was included with the Cuisinart ice cream maker, but wanted to see if I could find something better. I've never been disappointed with David Lebovitz' The Perfect Scoop, so when I saw this recipe for Strawberry Sour Cream Ice Cream, I knew I had to try it.


          I had made Blueberry Sour Cream Ice Cream in the past, so I knew that the tang from the sour cream would be good. Most of the ice cream recipes I've made are custard based ice creams, that involve cooking the yolks, milk, and cream on the stove. While those generally yield a richer and creamier ice cream, sometimes it's nice to have a simpler ice cream recipe like this one. You simply marinate the strawberries in some sugar and kirsch (I used orange liqueur), then blend them up and add them to some heavy cream, sour cream, and lemon juice.  Just pour the mixture into your ice cream maker and you're done! That's it!


          I was pleasantly surprised when I tasted my first spoonful of this ice cream. It is actually pretty rich and creamy, considering it's not a custard ice cream. Having a bowl of this ice cream is like taking a big bowl of strawberries and just dipping them into some whipped cream. Just delicious and the perfect way to cool down on a hot summer's day...

          Strawberry Sour Cream Ice Cream
          from The Perfect Scoop by David Lebovitz

          Makes about 1 1/4 quarts
          1 pound fresh strawberries, rinsed and hulled
          3/4 cup sugar
          1 tbsp. vodka or kirsch (I used orange liqueur)
          1 cup sour cream
          1 cup heavy cream
          1/2 tsp freshly squeezed lemon juice

          Slice the strawberries and toss them in a bowl with the sugar and vodka or kirsch.  Stir until the sugar begins to dissolve.  Let stand at room temperature for 1 hour, stirring every so often.

          Pulse the strawberries and their liquid with the sour cream, heavy cream and lemon juice in a blender or food processor until almost smooth, but still slightly chunky.

          Freeze in your ice cream maker according to the manufacturer’s instructions.

          Tuesday, May 25, 2010

          Banana Coconut Ice Cream Pie (TWD)


          This week's Tuesdays with Dorie (TWD) recipe was chosen by Spike of Spike Bakes: Banana Coconut Ice Cream Pie.

          When I was a kid, I loved going to Disneyland. We only lived 30 minutes from "the happiest place on earth," so I was lucky enough to get to go there at least once a year. Sure, I loved meeting the Disney characters, seeing the castle, and going on all the rides... but what did I really look forward to the most? The food :) I'm sure that if you're regular visitor to my blog, that can't really surprise you.

          I'd love grabbing a churro and eating it while waiting in line for Splash Mountain. Or drinking one of those slushy lemonade drinks while waiting to board Star Tours. But my absolute favorite thing to get at Disneyland? Their frozen bananas! A banana dipped in chocolate, then rolled in peanuts and frozen to perfection! Yum!


          Imagine my delight, then, when Rocky Mountain Chocolate Factory came about and started offering frozen bananas in their stores! I was thrilled that I no longer had to be at an amusement park to enjoy one of my favorite frozen treats.  I've even gone and made my own frozen bananas at home a few times, but I always feel so wasteful dipping anything in chocolate because you always end up with some excess in the bowl.

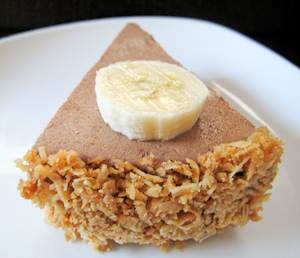
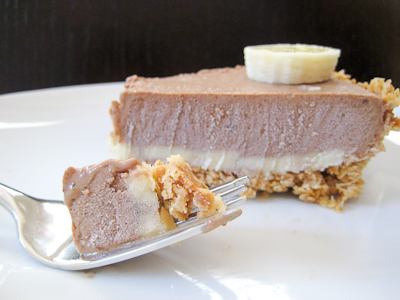
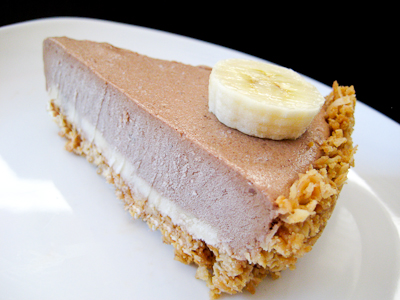
          So, when Spike chose the Banana Coconut Ice Cream Pie, I was eager to make it. Just reading the recipe immediately took me back to my childhood memories of frozen bananas! It's a layer of chocolate banana ice cream atop a coconut crust, sandwiched between two layers of sliced bananas (although I layered lots of banana slices on top of my pie, for the blog photos I only added a single banana to the slice I photographed).

          While I adore the flavors of chocolate and bananas together, I have to agree with my husband in saying that the crust is the star of this recipe! Unfortunately, I couldn't find the LU shortbread cookies that Dorie recommends so I used graham cracker crumbs instead. Still, butter + browned coconut + cookie crumbs = one amazing crust! I didn't have a deep dish pie plate, so I used a springform pan instead and didn't have any problems.


          For the ice cream, instead of using store bought chocolate ice cream I decided to make Dorie's Chocolate Ganache ice cream. After I added in the bananas and rum to the ice cream, it almost didn't make it into the pie! I may have to make a batch of Chocolate Banana ice cream in the near future (a much better use of over ripe bananas than banana bread!)

          I loved this pie and since making it this weekend I have eaten half of it all by myself! :) It totally reminds me of my childhood frozen banana favorite, only it's kicked up a notch with an amazing buttery coconut crust.

          Thanks Spike, for hosting this week. The recipe for the Chocolate Ganache Ice Cream is below; if you would like the recipe for the pie, you can find it here. Make sure you check out the TWD Blogroll, to see how everyone else enjoyed this cool, summery treat! Also, you've got one more day to enter my $100 gift card giveaway while you're here :)

          * Recipes notes:
          - If you do not have shortbread cookies, you can substitute graham cracker crumbs.
          - For tips from other TWD bakers, click here.


          Chocolate Ganache Ice Cream
          from Baking: From My Home to Yours by Dorie Greenspan
          6 ounces bittersweet chocolate, finely chopped
          1-1/2 cups heavy cream
          1 cup whole milk
          4 large egg yolks
          1/3 cup sugar

          Put the chocolate in a 2-quart liquid measuring cup or a large heatproof bowl. Bring ¾ cup of the cream to a boil. Pour the cream over the chocolate and let it sit for a minute, then, using a rubber spatula and starting in the center of the mixture, slowly stir the cream in to the chocolate in ever-widening concentric circles. When the ganache is smooth, set it aside.

          Bring the milk and the remaining ¾ cup cream to a boil in a medium heavy-bottomed saucepan.

          Meanwhile, in a medium bowl, whisk the yolks and sugar together until well blended and just slightly thickened. Still whisking, drizzle in about one third of the hot liquid- this will temper, or warm, the yolks so they won’t curdle. Whisking all the while, slowly pour in the remaining liquid. Pour the custard back into the pan and cook over medium heat, stirring without stopping, until the custard thickens slightly and coats the back of a spoon; of you run your finger down the bowl of the spoon, the custard should not run into the track. The custard should reach at least 170 degrees F, but no more than 180 degrees F, on an instant-read thermometer. Immediately remove the pan from the heat and slowly and gently stir the custard into the ganache.

          Refrigerate the custard until chilled before churning it into ice cream.

          Scrape the chilled custard into the bowl of an ice cream maker and churn according to the manufacturer’s instructions. Pack the ice cream into a container and freeze it for at least 2 hours, until it is firm enough to scoop.

          Sunday, January 10, 2010

          All-American Baby Ruth Pie (SMS)


          This week's Sweet Melissa Sundays (SMS) recipe was chosen by Donna of L’Amour de Tarte: Chocolate Pie Crust. We were given the opportunity to fill the pie crust with the filling of our choice, using a recipe outside of the cookbook. I've seen chocolate cookie crusts before, but never a chocolate pie crust, so I was curious to try this one. The recipe looked like most pie crust recipes, with the addition of some cocoa powder.


          Although it's winter, I decided to try an ice cream "pie" recipe that I have had tucked away for quite some time. It was from a Nestle calendar I got in the mail, but you can also find it on verybestbaking.com. I simply used the chocolate pie crust from the Sweet Melissa Baking Book instead of the chocolate cookie crust. I also made my own chocolate ice cream, the recipe for which I'll post later.

          How did it turn out? Sadly, the chocolate pie crust was a bit of a disappointment. I am not sure if it was just the shortening I used, but the crust had a very strong after taste of shortening that was unpleasant to say the least. The ice cream pie was great, but next time I need to make sure that I chop my Baby Ruth bars into even smaller pieces (or serve it after just one hour in the freezer) because the candy bits got a bit hard and difficult to eat.


          If you would like to try the chocolate pie crust recipe, you can find it here. The Baby Ruth Pie recipe is below (I'd recommend sticking with the cookie crust), and I'll be posting the chocolate ice cream recipe soon.

          All-American Baby Ruth Pie
          from VeryBestBaking.com

          18 (about 1 1/2 cups) crushed creme-filled chocolate cookies (Oreos)
          3 tablespoons butter or margarine, melted
          2 pints chocolate ice cream, softened
          3 (2.1 ounces each) NESTLÉ BABY RUTH Candy Bars, finely chopped; or 9 fun size bars (I used 8 fun size bars)
          1 cup miniature marshmallows
          NESTLÉ NESQUIK Chocolate Flavor Syrup

          Combine crushed cookies and butter in small bowl. Press onto bottom of 9-inch pie plate; freeze for 5 minutes.

          Combine ice cream, chopped Baby Ruth and marshmallows in large bowl; spoon into prepared crust. Freeze for about 1 hour or until firm. Drizzle with Nesquik before serving.

          Tuesday, July 28, 2009

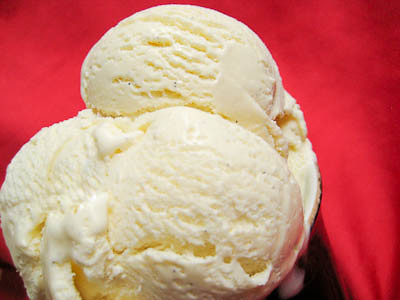
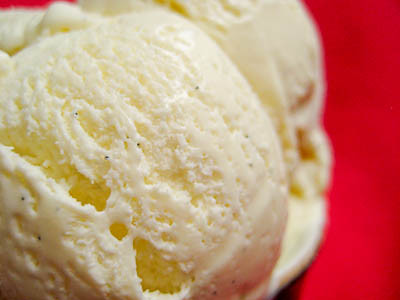
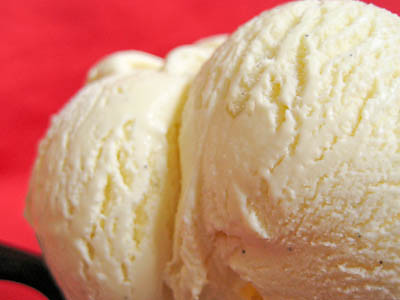
          Vanilla Ice Cream (TWD)


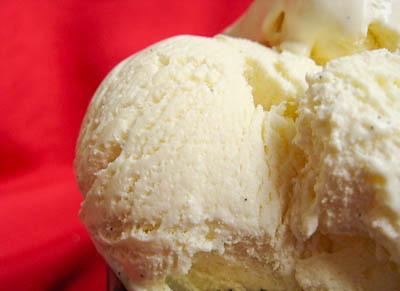
          This week's Tuesdays with Dorie (TWD) recipe was chosen by Lynne of Cafe LynnyLu: Vanilla Ice Cream. What a perfect pick for summer! It's your basic custard ice cream recipe, flavored with either a vanilla bean or some vanilla extract. For those who have never had homemade vanilla ice cream before, I promise you won't be disappointed.


          I used to not make much ice cream because it was always such a pain to buy whole milk. The small containers are just as expensive as a whole gallon of milk, and if I bought anything bigger, it would go bad before I could use it all. Since discovering how to make whole milk from regular milk and half & half/heavy cream, I've been making a lot more ice cream :) It's so convenient because we always have milk and half & half on hand.


          The smell of this custard before it was frozen was so fragrant, I could tell it was going to be good ice cream. We recently made Brown Sugar Vanilla Ice Cream for Sweet Melissa Sundays and I was anxious to see how Dorie's vanilla ice cream would compare to Melissa's.

          Dorie's ice cream was rich and creamy, perfect by itself or drenched in some hot fudge or caramel sauce. Using vanilla beans in place of vanilla extract definitely gave the ice cream a fuller flavor. I have to say that in this case, though, the Brown Sugar Vanilla Ice Cream I made a few weeks ago was better. The brown sugar flavor was very subtle, but still made it extra special. I encourage you to try both recipes for yourself and see!


          Thanks Lynne, for picking this recipe. If you would like the recipe, you can find it here. Check out the TWD Blogroll, and see how everyone else enjoyed this cool, summer treat!

          * Recipes notes:
          - For tips, click here.

          Sunday, July 5, 2009

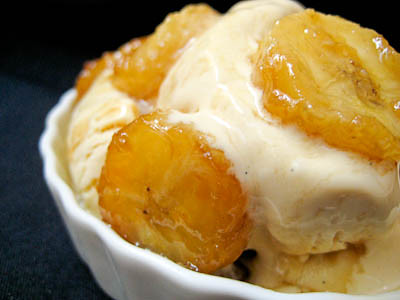
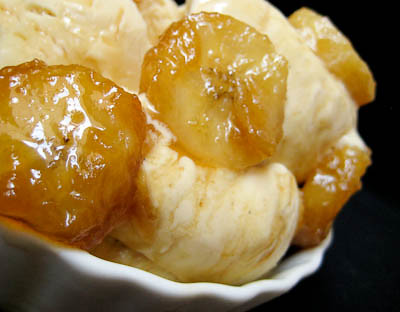
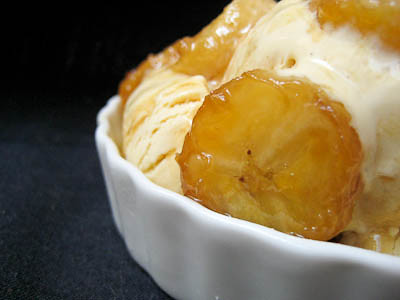
          Bananas Foster over Brown Sugar Vanilla Ice Cream (SMS)


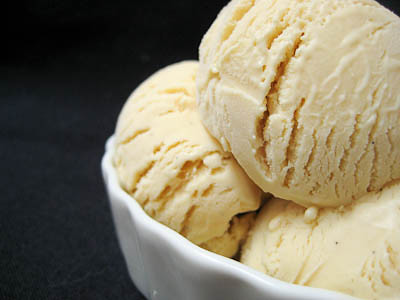
          This week's Sweet Melissa Sundays (SMS) recipe was chosen by Karen of Karen's Cookies Cakes & More: Brown Sugar Vanilla Ice Cream with Hot Fudge Sauce or Butterscotch Sauce. I've always heard about how homemade vanilla ice cream is so much better than store-bought vanilla ice cream, so I was excited to try this recipe. Throw in the brown sugar component and it makes it sound all that more interesting.

          This recipe is actually a custard ice cream, with the addition of eggs that makes it richer and creamier than regular ice cream. This was probably about the easiest custard recipe I've made so far because it doesn't require tempering the eggs by adding a hot milk/cream mixture slowly to an egg/sugar mixture. All you do is mix all the ingredients together in a bowl, set it over a double boiler, and the stir until it reaches 180F.


          I actually had trouble getting my custard to reach 180F, and noticed that in Dorie's ice cream recipes (like the burnt sugar ice cream) she only recommends heating the mixture to 170-180F. So after I mine reached 170F, I went ahead and stopped cooking it and started chilling it. This didn't seem to affect the outcome at all. Although the recipe states that you need an ice cream maker, you actually don't - I made ice cream last year without an ice cream maker using this method.


          This is a rich and creamy vanilla ice cream. The brown sugar does lend some extra depth to the flavor but is not overly noticeable. I think most people wouldn't even notice the brown sugar in it.

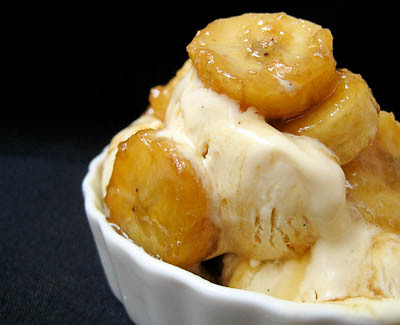
          Instead of serving this with the hot fudge sauce or butterscotch sauce recipes in the book, I decided to make my favorite ice cream accompaniment - Bananas Foster! It was the perfect way to serve this brown sugar vanilla ice cream. Bananas Foster is so easy to make and so delicious (I've included the recipe below). Usually bananas foster is made by flambéeing bananas, but I usually skip the fire show and it seems to taste just as good. I also omit butter from the recipe to save a few calories (every bit counts right? ha!).


          Thanks Karen, for choosing this recipe - I loved it! If you would like the recipe, you can find it here. Make sure you visit the SMS Blogroll to see what everyone else thought about this creamy summertime treat.

          * Recipe tips:
          - Carnation makes a non-fat skim milk powder that you can usually find at your grocery store. If you can't find any skim milk powder, just omit it from the recipe.
          - Don't have a candy thermometer? I recommend this digital thermometer which is great because it works a low temperatures for checking meat, but also reads high enough to double as a candy thermometer.
          - Save those leftover egg whites for later so you can make something yummy like the Coconut-Roasted Pineapple Dacquoise! Freeze your egg whites, as discussed here.
          - As long as your mixture gets above 170F, it should be safe for consumption.
          - For more tips, click here.


          Bananas Foster Ice Cream
          from Good Eats 'n Sweet Treats

          1/3-1/2 cup loosely packed brown sugar (depends on how much gooey brown sugar syrup you want!)
          1 tbsp dark rum
          1 ripe banana, cut into 1/4" slices


          Add the brown sugar and rum to a saute pan and cook over medium heat. Once the sugar starts to dissolve in the rum, add the banana slices. Continue cooking for about one minute, then flip the banana slices over and cook for another minute until bananas are cooked through.

          Let cool for a few minutes, then serve over your favorite vanilla ice cream.

          Yield: 1-2 Servings

          Tuesday, June 16, 2009

          Honey-Peach Ice Cream (TWD)


          This week's Tuesdays with Dorie (TWD) recipe was chosen by Tommi of Brown Interior: Honey-Peach Ice Cream. This was the perfect recipe to start off the summer!

          I love ice cream. I pretty much love all kinds of ice cream... from plain vanilla to rich and creamy chocolate to fruit-based flavors. So I was excited to see this recipe picked. It was a bit time consuming to peel and dice all the peaches, but otherwise this didn't take too long. This recipe gave me the perfect opportunity to test out the Boos cutting board I received from KaTom Restaurant Supply. It's a good, solid cutting board. The size is a bit small, but it is large enough to handle most tasks. Since I only use it for non-meat items like fruits and veggies, it does the job just fine.


          If you don't have an ice cream maker (you should really invest in one, though!), no worries. You can learn how to make ice cream without an ice cream maker here. Though time consuming, it's a very simple method that yields wonderful results.


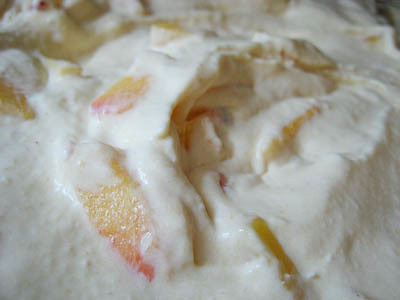
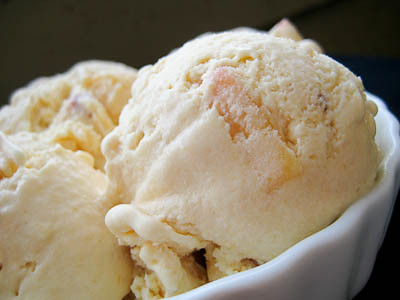
          The honey flavor in this ice cream was lovely, and complemented the peaches well. If you don't have peaches (or don't like them), you can substitute other fruits such as nectarines or plums. I actually found that the bits of peaches became too hard/frozen after the ice cream was done, so the next time I make this, I will definitely dice them into even smaller pieces. Thanks Tommi, for a great pick. If you would like the recipe, you can find it here. Make sure you visit the TWD Blogroll to see what everyone else thought about this cool, summery treat.

          * Recipes notes:
          - Dice your peaches into super teeny tiny pieces to avoid biting into large chunks of icey fruit in the ice cream.
          - No whole milk? No problem. Learn how to make your own whole milk from skim/1%/2% milk and heavy cream or half & half here.
          - For more tips, click here.

          Saturday, February 28, 2009

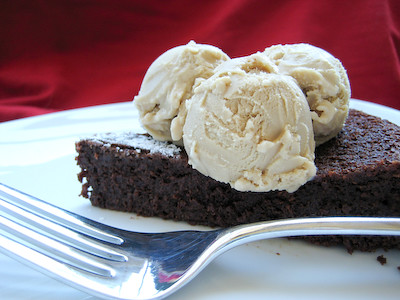
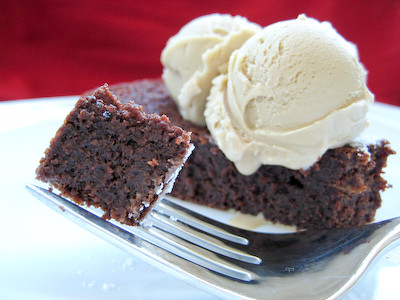
          Flourless Chocolate Cake with Coffee Ice Cream (Daring Bakers)


          The February 2009 challenge is hosted by Wendy of WMPE's blog and Dharm of Dad ~ Baker & Chef. We have chosen a Chocolate Valentino cake by Chef Wan; a Vanilla Ice Cream recipe from Dharm and a Vanilla Ice Cream recipe from Wendy as the challenge.

          February was another busy for me and I was a bit relieved to see that, like January's Daring Bakers Challenge, February's was simple too. We were to make a flourless chocolate cake and serve it with homemade ice cream. It was optional for us to use a heart shaped pan. I went with a traditional 9-inch round cake pan, but because it's called a Chocolate Valentino, I decorated the top of my cake with a powdered sugar heart :)


          I checked my cake after 25 minutes of baking, as instructed in the recipe, and was shocked to find that it was already 170F! Oops! Apparently the 140F must just be a minimum temperature, because my cake turned out just fine. It was still intensely moist, dense, fudgey, and chocolately. I suppose it reached 140F quicker because I baked it in a dark pan. Next time I will start checking the temperature after 20 minutes.


          I served this cake with some coffee ice cream, using a recipe from The Perfect Scoop. It was the perfect complement to this cake. In fact, I found the cake to be too sweet on its own, but great with the ice cream.

          A big thanks to Wendy and Dharm, for choosing this month's challenge. I made the cake for my husband's birthday today (I procrastinated this month, what can I say?!) and he loved it. Make sure you visit the Daring Bakers Blogroll to see how others enjoyed this seriously decadent chocolate treat!


          * Recipes notes:
          - Use your favorite chocolate – the finished cake will taste exactly like the chocolate you use. Be creative with your chocolate, if you like a sweeter cake use milk chocolate or a combination of the semisweet and milk chocolate. If you like bittersweet chocolate use that and add sweetness by mixing the semi sweet with bittersweet.
          - You may use any shape pan that gives you an area of 50” - 6x8 or 7x7. An 8” spring form pan works with great results as do smaller pans or ramekins. I used a 9" round cake pan and it seemed to work well.
          - This cake that will sink a little as it cools but will still hold its shape.
          -The top forms a light crust kind of like a brownie, but I inverted my cake after unmolding it for a smoother finish/presentation.

          Chocolate Valentino
          from Sweet Treats by Chef Wan

          Preparation Time: 20 minutes
          Baking Time: 25 minutes

          16 ounces (1 pound) (454 grams) of semisweet chocolate, roughly chopped
          ½ cup (1 stick) plus 2 tablespoons (146 grams total) of unsalted butter
          5 large eggs separated


          Put chocolate and butter in a heatproof bowl and set over a pan of simmering water (the bottom of the bowl should not touch the water) and melt, stirring often.

          While your chocolate butter mixture is cooling. Butter your pan and line with a parchment circle then butter the parchment.

          Separate the egg yolks from the egg whites and put into two medium/large bowls.

          Whip the egg whites in a medium/large grease free bowl until stiff peaks are formed (do not over-whip or the cake will be dry).

          With the same beater beat the egg yolks together.

          Add the egg yolks to the cooled chocolate.

          Fold in 1/3 of the egg whites into the chocolate mixture and follow with remaining 2/3rds. Fold until no white remains without deflating the batter.

          Pour batter into prepared pan, the batter should fill the pan 3/4 of the way full, and bake at 375F/190C

          Bake for 25 minutes until an instant read thermometer reads 140F/60C.
          Note – If you do not have an instant read thermometer, the top of the cake will look similar to a brownie and a cake tester will appear wet.

          Cool cake on a rack for 10 minutes then unmold.

          Coffee Ice Cream Recipe
          from The Perfect Scoop by David Lebovitz

          1 1/2 cups whole milk
          3/4 cup sugar
          1 1/2 cups whole coffee beans (decaf unless you want the caffeine in your ice cream)
          Pinch of salt
          1 1/2 cups heavy cream
          5 large egg yolks
          1/4 teaspoon vanilla extract
          1/4 teaspoon finely ground coffee (press grinds through a fine mesh sieve)


          Heat the milk, sugar, whole coffee beans, salt, and 1/2 cup of the cream in a medium saucepan until it is quite warm and steamy, but not boiling. Once the mixture is warm, cover, remove from the heat, and let steep at room temperature for 1 hour.

          Pour the remaining 1 cup of cream into a medium size metal bowl, set on ice over a larger bowl. Set a mesh strainer on top of the bowls. Set aside.

          Reheat the milk and coffee mixture, on medium heat, until again hot and steamy (not boiling!). In a separate bowl, whisk the egg yolks together. Slowly pour the heated milk and coffee mixture into the egg yolks, whisking constantly so that the egg yolks are tempered by the warm milk, but not cooked by it. Scrape the warmed egg yolks back into the saucepan.

          Stir the mixture constantly over medium heat with a heatproof, flat-bottomed spatula, scraping the bottom as you stir, until the mixture thickens and coats the spatula so that you can run your finger across the coating and have the coating not run. This can take about 10 minutes.

          Pour the custard through the strainer and stir it into the cream. Press on the coffee beans in the strainer to extract as much of the coffee flavor as possible. Then discard the beans. Mix in the vanilla and finely ground coffee, and stir until cool.

          Chill the mixture thoroughly in the refrigerator, then freeze it in your ice cream maker according to the manufacturer's instructions.

          Yield: One quart.

          Saturday, August 30, 2008

          Burnt Sugar Ice Cream and How to Freeze Eggs


          After I learned how to make ice cream without an ice cream maker, I started searching for the next flavor I wanted to try. When I came across Dorie's Burnt Sugar Ice cream, I knew I had to try it. I love caramel.

          The recipe is quite simple, and not too different from most ice cream recipes. The hardest part is tempering the eggs. This involves adding the hot milk/cream gradually to slowly bring the temperature of the eggs up. Dorie says it's okay to add one-third of the hot liquid initially, but I am always so worried about scrambling my eggs that I only start by adding one tablespoon at a time until the mixture is warm.


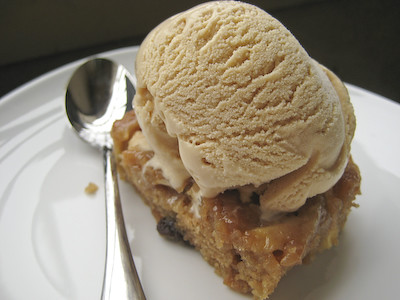
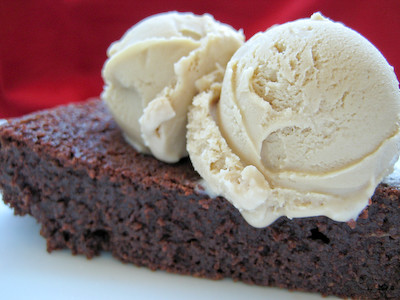
          The Burnt Sugar Ice Cream was amazing!!! It had a wonderful caramel flavor that was not overly sweet. If you swirled in a bottle of store bought Dulce de Leche at the end, you would have a perfect copy cat recipe for the Haagen Daaz Dulce de Leche flavor. The next time I make this, I'll probably mix in some toffee bits, to make some Toffee Caramel Ice Cream. And of course this paired perfectly with the Applesauce Spice Bars I made.


          This recipe calls for four egg yolks. I always hate wasting eggs when a recipe calls for only egg yolks or egg whites. I can never think of what to do with them before they go bad, so I've started freezing them until I come across a recipe I want to make.

          I will usually freeze two egg whites in a ziploc bag and then label the bag with the number of egg whites in there and the date (they will keep for about 12 months). Alternatively, you can freeze them individually in an ice tray and then toss the cubes into a ziploc bag.

          If you want to freeze egg yolks, you'll need to whisk in some sugar or salt. Without it, they will become too rubbery or gelatinous when frozen to use once they are thawed. I always use my yolks for sweets, so I typically whisk two egg yolks with 1 teaspoon of sugar and then label the bag with the number of yolks, amount of sugar I added, and the date (they will keep for about 3 months).

          Always thaw your frozen eggs in the refrigerator, or under cold running water, and use them immediately. Make sure you only use them in dishes that will be thoroughly cooked (at least 160F/71C). If you would like more information on freezing and food safety, click here (also check out the link in my blog sidebar - in the "Useful Links" section).


          Burnt Sugar Ice Cream
          from Baking: From My Home to Yours, by Dorie Greenspan
          1 cup sugar
          3 tbsp water
          2 cups whole milk
          1 cup heavy cream
          4 large egg yolks
          pinch of salt
          1-1/2 tsp pure vanilla extract

          Stir the sugar and water together in a medium heavy-bottomed saucepan. Place the pan over medium-low heat and cook until the sugar dissolves. Increase the heat and boil, without stirring, until the syrup turns a deep amber color (watch it carefully - too dark and it will be too bitter!)--from time to time, brush down the sides of the pan with a wet pastry brush and swirl the pan. (Depending on the size of your pan and the intensity of the heat, it could take about 8 minutes for the caramel to color properly.)

          Stand back--things can get a little wild--lower the heat and add the milk and cream. Don't be concerned when everything bubbles and seethes and the caramel hardens; it will calm down and smooth out as you heat and stir. Continue to heat and stir and when the mixture is smooth, remove the pan from the heat.

          In a medium heatproof bowl, whisk the yolks and salt together until very well blended and just slightly thickened. Still whisking, drizzle in about one third of the hot liquid--this will temper, or warm, the eggs so they don't curdle. Whisking all the while, slowly pour in the remaining liquid. pour the custard back into the pan and cook over medium heat, stirring without stopping, until the custard slightly thickens and coats the back of a spoon; if you run your finger down the bowl of the spoon, the custard should not run into the track. the custard should reach at least 170F, but no more than 180F, on an instant read thermometer (I recommend this digital thermometer). Immediately remove the pan from the heat and pour the custard into a 2 quart glass measuring cup or clean heatproof bowl. Stir in the vanilla extract.

          Refrigerate the custard until chilled before churning it into ice cream.

          Scrape the chilled custard into the bowl of an ice cream maker and churn according to the manufacturer's instructions. (If you don't have an ice cream maker, learn how to make your own ice cream by hand here.) Pack the ice cream into a container and freeze it for at least 2 hours, until it is firm enough to scoop.

          Yield: About 1-1/2 pints

          Serving: If the ice cream is very firm, let it sit at room temperature for a few minutes or warm it in the microwave using 5 second spurts of heat.

          Storage: packed tightly in a covered container, this will keep in the freezer about 2 weeks

          Tuesday, August 26, 2008

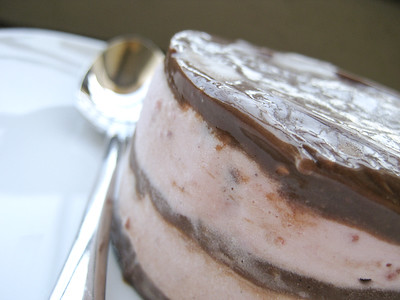
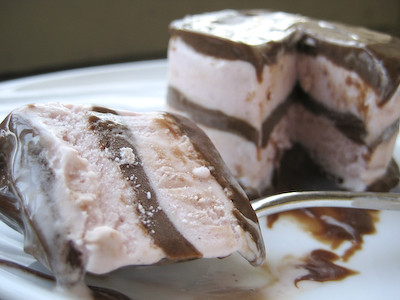
          Chocolate-Banded Ice Cream Torte (TWD)


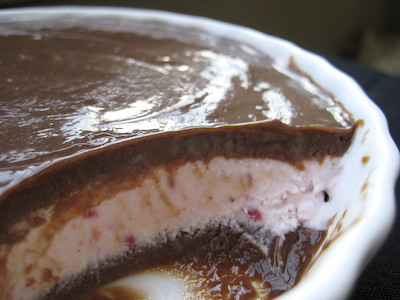
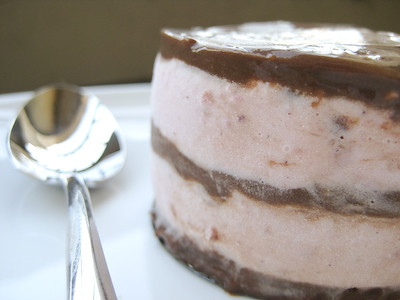
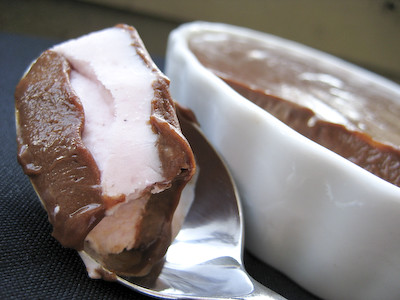
          This week's Tuesdays with Dorie (TWD) recipe was chosen by Amy of Food, Family and Fun: the Chocolate-Banded Ice Cream Torte. Dorie calls it her version of a "grown up ice cream cake." It's layers of raspberry ice cream, sandwiched between rich and creamy chocolate ganache. To me, it's not so much an ice cream cake (which usually has actual cake layers in it), but more of a fancy way to serve ice cream with fudgey chocolate sauce.


          I knew right away that I wanted to make mini tortes. I don't have mini springform pans, though, so I wasn't quite sure how. There were a few ideas I saw mentioned - lining a pan with plastic wrap or parchment, using paper baking molds, etc. In the end, I decided to use my molten chocolate cake specialty pan:


          It was as close to a mini springform pan that I could get (and I'm always happen to find another use for it). My only other problem was that it only it makes 6 mini tortes and I knew I would need a few more because Dorie states her recipe yields eight servings. So I decided to use 8 ounce ceramic ramekins for the rest. Since my ramekins are shallow, I was only able to get 3 layers in those instead of 5. The presentation isn't as elegant in the ramekins, but it's still just as tasty :)


          The recipe is rather simple. Puree some raspberries in your food processor. Then add a quart of your favorite vanilla ice cream and pulse until well combined. Layer with chocolate ganache, half of the ice cream, another layer of ganache, the rest of the ice cream, and follow with a final layer of ganache.


          There's a lot of down time with this recipe while you're waiting for each layer to freeze, so you'll want to set aside several hours for it. The hardest part of this recipe for me was getting over my fear of raw eggs. The chocolate ganache has eight - yes eight - raw eggs in it! I suppose that if after 200+ TWD Bakers consumed this with no reports of death, it must be okay, right? ;) (If you're still fearful of using the raw eggs in this recipe, just get some pasteurized eggs.)


          This torte is simple, yet elegant. It's perfect for entertaining because you can make it in advance (and it can be kept in the freezer for up to 1 month). Of course the possibilities are endless with this torte, as you can use any ice cream flavor you wish.

          If you are going to make the mini tortes like I did, here are the measurements I used: the ganache layers were 1/8 cup each and the ice cream layers were 1/4 cup. For the ramekins, the ganache layers were 1/4 cup each and the ice cream layer was 1/2 cup. I probably won't go to the trouble of using a springform pan in the future, because I was perfectly happy with how these turned out in the ramekins.

          Thanks again to Amy for choosing the Chocolate-Banded Ice Cream Torte. I'll definitely be making it again. If you would like the recipe for this torte, you can find it here on Amy's blog. Make sure you visit the TWD Blog Roll to see how everyone else enjoyed this lovely ice cream treat.

          *Note: I made one change to this recipe - I used semisweet chocolate instead of bittersweet. For recipe tips, click here.