Showing posts with label appetizers/sides. Show all posts

Sunday, November 7, 2010

My Sunday with Dorie


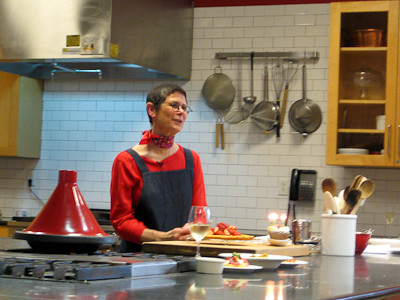
A few weeks ago (Sunday, October 24th) I had the utmost pleasure of meeting Dorie Greenspan! Dorie's been all over the US to promote her newest book, Around My French Table.  I had already booked a trip before I found out about her book tour.  As luck would have it, though, I was returning to Dallas the day before Dorie was scheduled to do her cooking class here - so I was able to make it! I checked with my husband to see if he'd be okay with me attending, and to my surprise he immediately said yes.  I think after being part of Tuesdays with Dorie for nearly three years, he actually gets how much I adore Dorie!!! :)
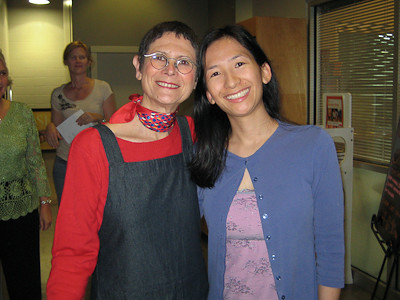

Being able to finally meet Dorie was amazing, and then some.  She is so sweet and charming. Unfortunately, I left my DSLR at home (don't know what I was thinking), so all I had was my little point-and-shoot camera (Canon Powershot SD1000).  My photos didn't come out too great due to the low lighting during the late afternoon, so to make up for it, I took some video clips of the cooking class so you could see what Dorie is really like.  I think her personality really shines through when you watch these videos :)

This first video is Dorie talking about her relationship with her mother, who (surprisingly) rarely ever cooked/baked for her! Next, you'll see Dorie telling a funny story about what she learned about cheese when she was in Paris.  Then someone in the audience asked Dorie if she was done writing cookbooks, or if there would be another one in the future and you can see what Dorie says about that here.  She's actually going to go hang out with all of her baking idols and then write a book full of recipes based on what she learns from each of them - how cool is that? Not only was I lucky enough to meet Dorie, but I was able to do so on her birthday! At the end of the cooking class, the Central Market staff presented Dorie with a birthday cupcake and we all sang "Happy Birthday" to her - see her reaction here - she is too cute!

Now on to the cooking class itself.  Dorie made a few different dishes for us from her book.  She said that she wants to make cooking simple and easy and I think she has definitely accomplished that with her book.  While at first glance, some of the recipes from this book may look a bit involved, there wasn't really anything that she made for us that day that I felt would be too difficult or time consuming for me (and I am much more of a baker than a cook!).  I feel like a lot of today's quick dinner ideas involve a lot of prepackaged or processed foods - Dorie's book allows the home cook to make simple dinners that taste like they took hours to prepare.

So without further ado, here's what Dorie showed us how to make during her cooking class:
(all recipes from Around My French Table)

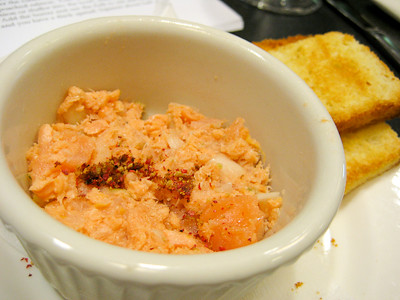
Salmon Rillettes - I've never tried smoked salmon before. I've never wanted to. I know smoked salmon is "cooked" but I've always felt like it was still raw and could not bring myself to try it. But here I was, with a recipe that Dorie had created and I thought I'd better try it because if Dorie loves it, it has to be good, right? So I was brave and tried a bite... and then another bite... and then another until my little ramekin was empty! I think because the smoked salmon was mixed up with the chunks of poached salmon, I wasn't really able to recognize the texture of the smoked salmon. The hint of lemon with the salmon in this appetizer was fabulous and I could totally see myself making this in the future for dinner guests because it's something you could easily make in advance.

Fresh Tuna, Mozzarella & Basil Pizza - This was delicious, even without the tuna.  I don't generally eat sushi, but I wanted to taste this "pizza" as Dorie intended so I tried a bite with the tuna, and then had the rest sans tuna.  I'm usually not a very adventurous eater, but again, I had to give it a try because it was Dorie's creation.
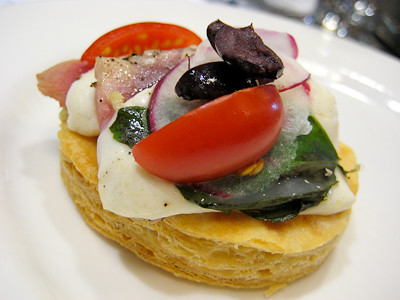

Look at all those wonderful layers of puff pastry!


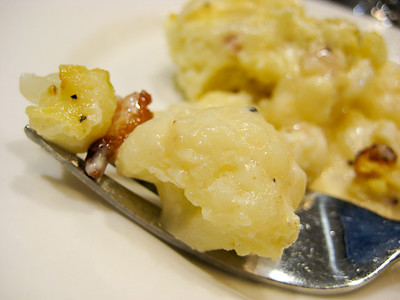
Cauliflower-Bacon Gratin - Creamy goodness! And it has to be healthy because cauliflower is the main ingredient, right? ;) This is better than any green bean casserole and will definitely be served for Thanksgiving at our house this year!

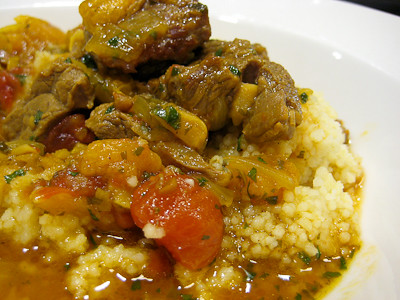
Lamb & Dried Apricot Tagine - Another first for me. Not my first time trying lamb, but my first time actually enjoying it! The lamb I've previously tasted was always gamey and had a funny taste to it. This lamb was tender and moist and I would not have known it was lamb unless you told me it was. The apricots imparted a sweet and delicious flavor to this dish that complemented the spices very well. I was glad to find out that this dish can be made in a dutch oven, as I do not have a tagine.

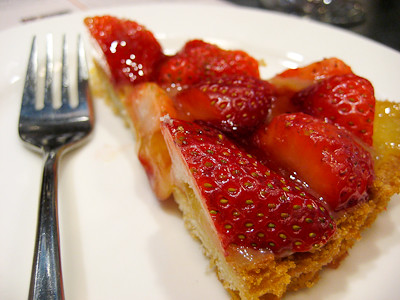
Sable Breton Galette with Berries - Simple and elegant. Strawberries atop a layer of lemon curd that has been spread across a buttery, cookie crust. Yum.

Neither the salmon rillettes nor the lamb tagine would be dishes that I would ever make on my own from the book.  Yet I thoroughly enjoyed them and plan to make them in the future.  So, while 9 times out of 10 you'll find me baking instead of cooking in the kitchen, I look forward to participating in French Fridays with Dorie because it will push me to try recipes I wouldn't otherwise try, and to develop my cooking skills in the kitchen.  My participation in that group will be intermittent at best, as I already have a lot on my plate, but I look forward to cooking along whenever possible with the group.

Along with getting to meet Dorie, I had the pleasure of meeting Jessica of My Baking Heart, Paula of Salad in a Jar, and Amy of Sing for Your Supper.  Hop on over to their blogs, as they got some great photos (better images than the ones I was able to get with my point-and-shoot camera) from that day to share, too.

Thanks, Dorie, for a wonderful and memorable day.  I know it must have been difficult for you to be away from home, family, and friends on your birthday but I am so grateful that I had the pleasure of spending those few hours with you! I look forward to the release of your next cookbook, and have already set aside a special spot for it on my shelf!
Sunday, October 24, 2010

Birthday Wishes and Saint-Germain-des-Prés Onion Biscuits


Today is a very special day.  Do you know what today is? It's Dorie Greenspan's birthday!!! That's right, the author of Baking: From My Home to Yours and Around My French Table: More Than 300 Recipes from My Home to Yours is celebrating her birthday today.  What's more, she is spending part of the day with me! Well, truth be told she is not spending it with just little ole me.  She is teaching a cooking class at Central Market here in Dallas, to help promote the release of her new book, Around My French Table: More Than 300 Recipes from My Home to Yours.  I can't wait to finally meet her!

Back in January of 2008 I came across a group of three bakers - Laurie and two other bloggers, who had decided to bake one recipe a week out of Baking: From My Home to Yours.  Laurie called it Tuesdays with Dorie (TWD) because each week everyone posted their results on Tuesday.  I had just purchased the book myself, and thought it would be the perfect way to motivate myself to actually use a cookbook.  So I joined the group and now, nearly 3 years later, there are hundreds of others baking along.  It only seemed natural, then, that with the release of her most recent book, French Fridays with Dorie (FFwD) was born.

So, in honor of Dorie's birthday and the new blogging event French Fridays with Dorie, a few of us decided to get together and throw Dorie a "Surprise Birthday Party" using recipes from Around My French Table.

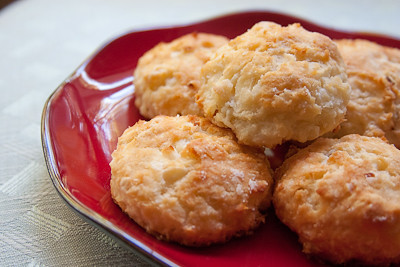
After looking through the book, I decided to bring an appetizer to the party.  There were several that caught my attention, but one in particular stood out - Saint-Germain-des-Prés Onion Biscuits.  Named for her neighborhood in Paris, Dorie considers these her "house specialty" when she is entertaining.  These biscuits, like any other biscuits, were quick and easy.  They are all-American baking powder biscuits filled with butter-sautéed onions.   I forgot that you're not supposed to twist the biscuit cutters when you're cutting you're biscuits, so mine did not rise very well :(

Still, these biscuits were delicious.  They had a great onion flavor without being too overwhelmingly onion-y (though I don't think there really is such a thing!).  I think these would be great if you added some cheddar to them as well.  Next time, I may try adding caramelized onions instead, too.

I will definitely be making these again.  I also think I'll be following Dorie's lead and make a batch to freeze and bake "on demand." Once the dough is cut, you can put the unbaked biscuits on a lined baking sheet, slide the sheet into the freezer and, once the rounds are solid, just pack them airtight. That way you can simply slide the frozen biscuits into the oven and bake them on a moment's notice.

If you'd like the recipe, you can find it below.  You'll have to get a copy of Around My French Table for most of the other recipes from this blogging event, but since this one can easily be found on Amazon I've posted it below. Make sure you visit Holly's blog, Phe.MOM.enon, to see what everyone else cooked up for Dorie's birthday.

While you're here, if you haven't already entered, check out the giveaway I'm doing here.

And of course a very big Happy Birthday to Dorie! I'm looking forward to meeting you this afternoon!!!!!!!

Saint-Germain-des-Prés Onion Biscuits
from Around My French Table: More Than 300 Recipes from My Home to Yours by Dorie Greenspan


6-1/2 tablespoons cold unsalted butter
1 small onion, peeled, trimmed, and finely diced (about 1/2 cup) (I found this to be just 1/2 of a small onion!)
2 cups all-purpose flour
1 tablespoon baking powder
2 teaspoons sugar
1/2 teaspoon salt
3/4 cup cold whole milk

Center a rack in the oven and preheat the oven to 425 degrees F. Have a biscuit or deep cookie cutter, one that’s between 1 and 2 inches in diameter, at hand.

Put 1/2 tablespoon of the butter in a small skillet or saucepan and cut the remaining 6 tablespoons butter into 12 pieces.

Set the pan over low heat, melt the butter, and add the onion. Cook, stirring, just until it softens, about 3 minutes. Pull the pan from the heat.

Put the flour, baking powder, sugar, and salt into a mixing bowl and whisk the ingredients to combine. Drop the butter pieces into the bowl and, using your fingers, rub the butter into the flour mixture until you’ve got a bowl full of flour-covered pieces, some small and flakey and some the size of peas.

Scatter the cooked onions over the mixture, then pour over the cold milk and, using a fork, toss and turn everything together until you’ve got a soft dough. If there are some dry bits at the bottom of the bowl, reach in and knead the dough gently a couple of times.

Lightly dust a work surface with flour, turn the dough out, and dust the top of the dough very lightly with flour. Pat the dough down gently with your hands (or roll it out with a pin) until it is about 1/2 inch thick. It doesn’t have to been an even square or round; it doesn't even have to be an even 1/2 inch thick. Just do the best you can and do it quickly.

Dip the biscuit cutter into the flour bin and cut out as many biscuits as you can--cutting the biscuits as close to one another as possible – and transfer the biscuits to the baking sheet, leaving a little space between each one. Gather the scraps of dough together, pat them down, and cut as many more biscuits as you can; put these on the lined baking sheet, too. (You can make the biscuits to this point, freeze them on the baking sheet and then, when they're solid, pack them airtight and freeze them for up to 2 months. Bake them without defrosting--just add a couple of minutes to the baking time.)

Alternatively (and perhaps more economically), you can pat or roll out the dough, then, using a long knife, cut square biscuits, making each biscuit about 1- to 1-1/2 inches on a side.

Bake the biscuits for 15 to 18 minutes, or until they are puffed and lightly browned.

Serving: 
Biscuits are always best right out of the oven or still warm. However, these are also good at room temperature--the deep onion flavor is enough to compensate for whatever is lost, namely some fluffiness, when the biscuit cools.

Storing:
While unbaked biscuits can be frozen for up to 2 months and baked straight from the freezer, once the biscuits are baked, they're best eaten quickly.

Monday, February 22, 2010

Cherry Tomato Cucumber Feta Salad


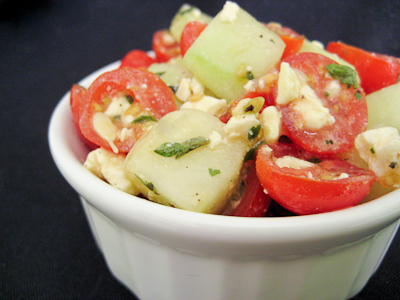
I know it's not quite spring or summer yet, but I've never been much of a winter person so I've been anxious to greet the warmer months, along with their fruits. So, I went in search of a good tomato salad recipe.

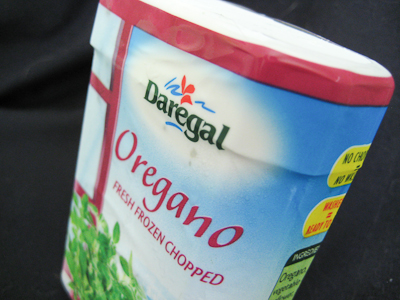
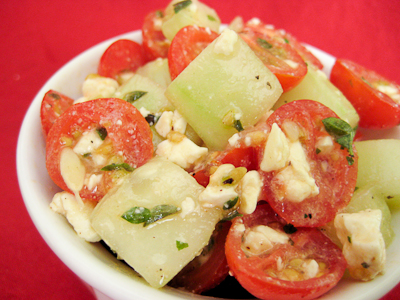
I decided to make a refreshing tomato cucumber feta salad using some fresh frozen herbs I received from Daregal Gourmet. Their herbs are frozen just after harvest to ensure fresh taste. I don't know about you, but whenever I buy fresh herbs from the supermarket, I never seem to be able to use them all before they go bad. I always feel really bad about it, too, because fresh herbs cost a pretty penny. Fresh frozen herbs seem to be a great alternative for cooks like me, because I can have the herbs on hand and use them whenever I'd like, without worry of them spoiling.
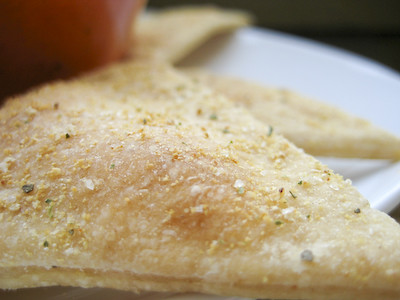


This salad takes minutes to prepare, and is so light and refreshing. It makes a great starter, but to be honest with you I loved it so much that I ate all of it myself in one sitting like it was an entree salad! The fresh frozen herbs were a great addition. I would say that they're not quite as good as fresh herbs, but much definitely better than dried herbs... so I'm glad to have them on hand in my kitchen. If you try this recipe, make sure you season this salad with lots of coarse salt and freshly ground pepper to bring out all of the flavors.

Cherry Tomato Cucumber Feta Salad
from Simply Recipes

2-3 cups of cherry and/or pear tomatoes, sliced in half
1 cup of chopped cucumber, peeled (and seeded if the seeds are bitter)
1/4 cup crumbled feta cheese
1 Tbsp chiffonaded mint leaves
1 teaspoon fresh, chopped oregano
1 Tbsp lemon juice
2 Tbsp of finely chopped shallots or green onions
2 teaspoons olive oil
Coarse salt and freshly ground black pepper to taste


Gently toss the tomatoes, cucumber, feta, onions, mint, and oregano together. Dress with lemon juice, olive oil, salt and pepper to taste.

Yield: 2-4 Servings

Thursday, April 9, 2009

Blog Makeover & Southwestern Potatoes


I've been dying to do a makeover for my blog for quite some time now. Sure, it was very simple and classic looking, but I wanted something a bit more colorful and fun.

Thanks to my amazing friend Lisa over at Surviving Oz, I was finally able to give my blog a face lift! I am beyond thrilled with how everything turned out and I cannot begin to thank her enough! I still have to work on finishing up some additional content for the blog, but for now at least it has a new look :)

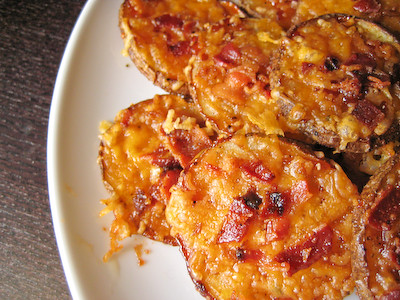
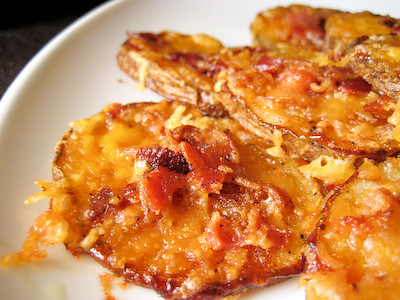
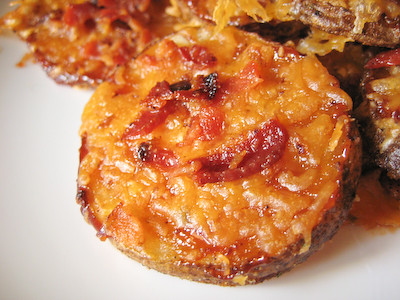
In honor of my blog makeover, I'm going to share with you one of the best recipes I have come across in a long time! I bookmarked this particular recipe several months ago. My only regret now is not making it sooner!! I promise that this is something you need to try! It's about as simple as simple gets. You simply slice some potatoes, toss them in olive oil, salt, and pepper, then bake them in the oven for about 15 minutes. Next, top them with some barbeque sauce, cheddar cheese, and bacon bits. After a few more minutes in the oven, you've got the tastiest potato side or appetizer you've ever eaten!


I made these two times in two days they were so good! My husband calls them crack :) I would bring these to a party any day over the alleged "crack dip."

Southwestern Potatoes
from cooking this and that

1 package bacon bits, or 4 slices of bacon, cooked and crumbled
2 unpeeled large potatoes, scrubbed
3 tablespoons olive oil
1 teaspoon garlic salt
1 teaspoon black pepper
1/4 cup barbecue sauce
1 cup shredded cheddar cheese
1/2 sour cream, optional (for dipping)


Line 2 large baking sheets with foil and preheat oven to 450 degrees. (I was able to fit it all on one baking sheet.)

Cut potatoes into 1/4 inch slices. Toss the potatoes, olive oil, garlic salt and pepper in a big ziploc bag to coat the potatoes.

Arrange potatoes in a single layer on the baking sheets. Bake until lightly browned, about 15-20 minutes.

Brush with barbecue sauce, then top with the shredded cheese and bacon bits. Bake until the cheese melts, about 3-5 minutes. Top with sour cream, if desired.

Yield: 4 servings (only 2 in our household!)


Friday, January 30, 2009

Super Bowl Appetizers

With the Super Bowl coming up this weekend, I know that many are on the lookout for great appetizers and finger foods that they can serve up for the big game. Last year, I was able to feature a variety of recipes leading up to the big weekend. Unfortunately, time was not on my side this year, and I was unable to try out any new recipes.

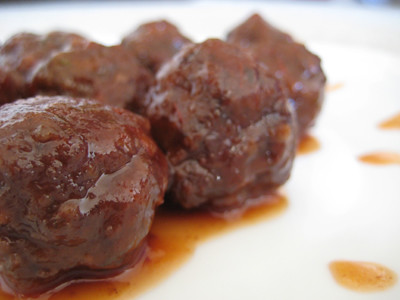
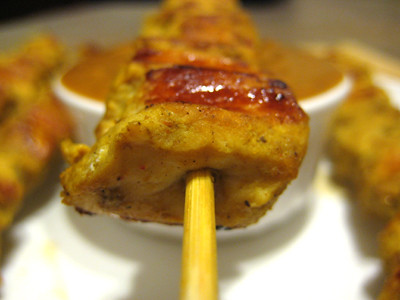
Regardless, I'd still like to feature some great appetizer recipes. I hope that you'll give some of them a try and enjoy them during the big game this weekend! Not sure which one to try? I have to say that the most popular recipe (out of all the recipes, not just appetizer recipes) on my blog to date is the Sweet and Sour Meatballs recipe; the second most popular recipe is the Chicken Satay with Peanut Dipping Sauce.

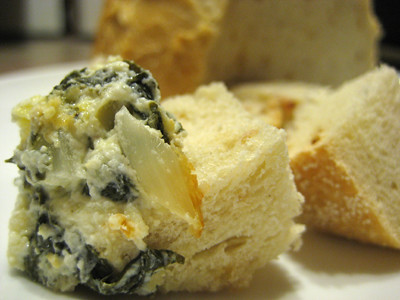
Buffalo Chicken Dip (aka Crack Dip)


Sun Dried Tomato Dip


Friday, November 21, 2008

Sweet and Savory Bites


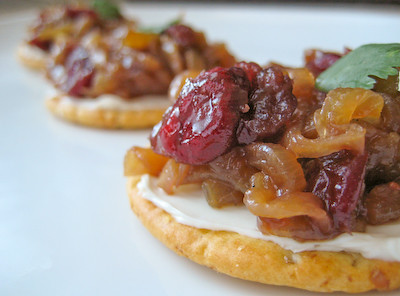
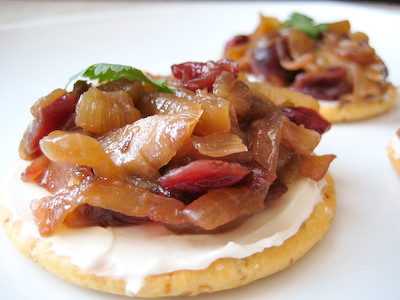
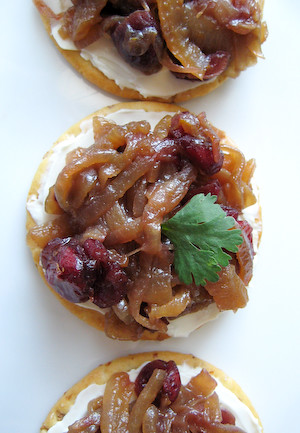
I've been really busy lately, so this post is going to be short and sweet. These Caramelized Onion-Cranberry-Cream Cheese Bites make wonderful appetizers. The great thing about these is that you can make everything ahead of time, and then just assemble right before serving.

If you really want to caramelize your onions, you'll need to cook them at lower heat for about an hour. In a pinch, the 15-18 minute sauté at medium heat will do, though.

If you enjoy caramelized onions, you'll have to try these this holiday season!


Caramelized Onion-Cranberry-Cream Cheese Bites
from Southern Living

1 tablespoon butter
2 cups thinly sliced sweet onions
1/4 cup balsamic vinegar (I used Garlic & Pepper Balsamic Vinegar)
1/2 cup fresh or frozen cranberries (thawed), coarsely chopped (I used dried cranberries)
1 tablespoon sugar
1/2 teaspoon salt
1/2 teaspoon grated orange rind
16 whole grain crackers
1/3-less-fat cream cheese (I used fat free)
Garnish: fresh cilantro or parsley leaves


Melt butter in a large skillet over medium heat; add onions, and sauté 15 to 18 minutes or until golden and tender. Stir in vinegar, cranberries, sugar, salt, and orange rind; cook, stirring occasionally, 2 to 4 minutes or until liquid is reduced to about 2 Tbsp.

Spread 16 whole grain crackers each with 1-1/2 tsp. 1/3-less-fat cream cheese; top each with 1 Tbsp. Caramelized Onion-Cranberry Compote. Garnish with fresh cilantro or parsley leaves.

Yield: 16 servings (serving size: 1 cracker)


Saturday, September 27, 2008

Lavash Crackers with Roasted Red Pepper Dip


This month's Daring Bakers Challenge was chosen by Natalie of Gluten A Go Go and Shel of Musings From the Fishbowl: Lavash Crackers. Lavash is an Armenian-style cracker similar to other middle eastern and northern African flatbreads such as mankoush, pita, and kesret. The primary difference among these flatbreads is either how thick or thin they are rolled out or the type of oven in which they are baked.

I recently made some homemade crackers to serve with my baked brie, so I already knew how simple and delicious homemade crackers can be. Unfortunately, somehow the month go away from me and I thought the posting date for this month's challenge was a little closer to the end of the month. Imagine my surprise, then, when I went to check to see what the post date was a few days ago, only to find out I had two days left! Luckily, this challenge was not too labor intensive, so I was able to complete it in one day. I started these after lunch today, and here I am, posting them now :)


This month's challenge was different from most because for the first time, we were required to make something vegan. We also had the option of making these both vegan and gluten free, but seeing as no one in this household has gluten allergies, mine are not gluten free. We also had to make a vegan dip, spread, relish, or salsa to serve with these, but otherwise we had complete freedom to make whatever we desired.


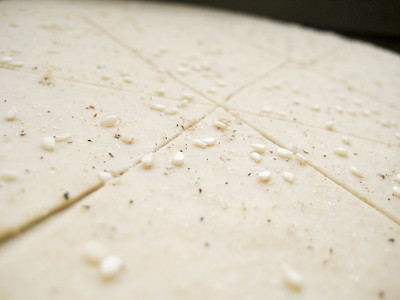
You can top these crackers with numerous different seasonings and spices, including poppy seeds, sesame seeds, paprika, cumin seeds, caraway seeds, or kosher salt. I decided to make half with salt, coarsely ground black pepper, and sesame seeds


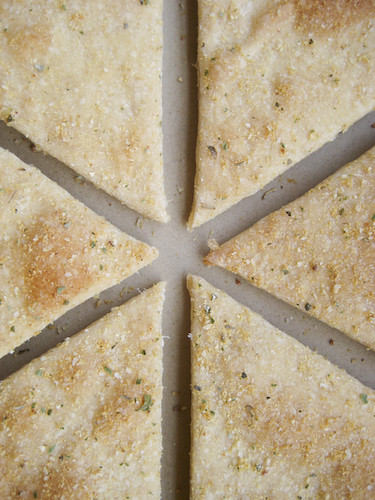
and the other half with Johnny's Great Caesar Garlic Spread and Seasoning.


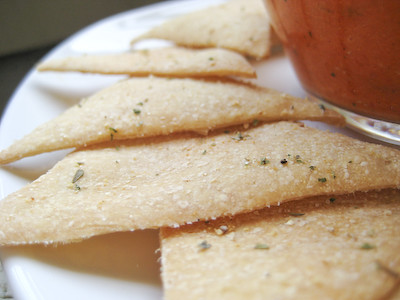
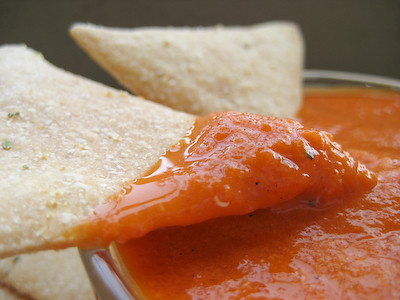
I originally wanted to serve these with some of my favorite homemade guacamole, but they didn't have any ripe avocados at the store this morning so I decided to make a roasted red pepper dip instead. Most of the roasted red pepper dips I came across online were not vegan, but I was able to find a vegan recipe on Delish.


This dip was so simple to make. The longest step was roasting the garlic, but you can use fresh minced garlic instead if you'd prefer. I simply placed the garlic cloves on some foil, drizzled them with olive oil, wrapped them up tightly in the foil and placed them in the oven with the crackers while they were baking. After the crackers were done, so was my roasted garlic! If you don't count the time it takes to roast the garlic, this dip only takes five minutes to prepare! This roasted red pepper dip was light and delicious. Next time I might add some chopped fresh basil as well for a little more flavor.


The crackers were very simple to make. I made them two different thicknesses. One batch I made paper thin and they came out super crispy and light. The second batch I made a bit thicker, and they came out more like pita chips. It really just depends on what you prefer. I really like the ones that were seasoned with the garlic seasoning; the other ones were a little bland, but maybe that was my fault for not adding enough (I seasoned very lightly since the recipe warns that a little bit goes a long way).


Thanks to Natalie and Shel for hosting this month's challenge. I really enjoyed trying another recipe for homemade crackers. Make sure you visit the Daring Bakers Blogroll to see hundreds of other variations on these!


Lavash Crackers
from The Bread Baker's Apprentice: Mastering the Art of Extraordinary Bread, by Peter Reinhart

The key to a crisp lavash is to roll out the dough paper-thin. The sheet can be cut into crackers in advance or snapped into shards after baking. The shards make a nice presentation when arranged in baskets.

Makes 1 sheet pan of crackers

1 1/2 cups (6.75 oz) unbleached bread flour or gluten free flour blend (If you use a blend without xanthan gum, add 1 tsp xanthan or guar gum to the recipe)
1/2 tsp (.13 oz) salt
1/2 tsp (.055 oz) instant yeast
1 Tb (.75 oz) agave syrup or sugar
1 Tb (.5 oz) vegetable oil
1/3 to 1/2 cup + 2 Tb (3 to 4 oz) water, at room temperature
Poppy seeds, sesame seeds, paprika, cumin seeds, caraway seeds, or kosher salt for toppings

1. In a mixing bowl, stir together the flour, salt yeast, agave, oil, and just enough water to bring everything together into a ball. You may not need the full 1/2 cup + 2 Tb of water, but be prepared to use it all if needed.

2. For Non Gluten Free Cracker Dough: Sprinkle some flour on the counter and transfer the dough to the counter. Knead for about 10 minutes, or until the ingredients are evenly distributed. The dough should pass the windowpane test (click here for a discription of this) and register 77 degrees to 81 degrees Fahrenheit (I used my dough hook on the KitchenAid Mixer and kneaded it on Speed 2 for at least 30 minutes - it never became a beautiful, thin, windowpane, but it did stretch a little more). The dough should be firmer than French bread dough, but not quite as firm as bagel dough (what I call medium-firm dough), satiny to the touch, not tacky, and supple enough to stretch when pulled. Lightly oil a bowl and transfer the dough to the bowl, rolling it around to coat it with oil. Cover the bowl with plastic wrap.

or

2. For Gluten Free Cracker Dough: The dough should be firmer than French bread dough, but not quite as firm as bagel dough (what I call medium-firm dough), and slightly tacky. Lightly oil a bowl and transfer the dough to the bowl, rolling it around to coat it with oil. Cover the bowl with plastic wrap.

3. Ferment at room temperature for 90 minutes, or until the dough doubles in size. (You can also retard the dough overnight in the refrigerator immediately after kneading or mixing).

4. For Non Gluten Free Cracker Dough: Mist the counter lightly with spray oil and transfer the dough to the counter. Press the dough into a square with your hand and dust the top of the dough lightly with flour. Roll it out with a rolling pin into a paper thin sheet about 15 inches by 12 inches. You may have to stop from time to time so that the gluten can relax. At these times, lift the dough from the counter and wave it a little, and then lay it back down. Cover it with a towel or plastic wrap while it relaxes. When it is the desired thinness, let the dough relax for 5 minutes. Line a sheet pan with baking parchment. Carefully lift the sheet of dough and lay it on the parchment. If it overlaps the edge of the pan, snip off the excess with scissors.

or

4. For Gluten Free Cracker Dough: Lay out two sheets of parchment paper. Divide the cracker dough in half and then sandwich the dough between the two sheets of parchment. Roll out the dough until it is a paper thin sheet about 15 inches by 12 inches. Slowly peel away the top layer of parchment paper. Then set the bottom layer of parchment paper with the cracker dough on it onto a baking sheet.

5. Preheat the oven to 350 degrees Fahrenheit with the oven rack on the middle shelf. Mist the top of the dough with water and sprinkle a covering of seeds or spices on the dough (such as alternating rows of poppy seeds, sesame seeds, paprika, cumin seeds, caraway seeds, kosher or pretzel salt, etc.) Be careful with spices and salt - a little goes a long way. If you want to precut the cracker, use a pizza cutter (rolling blade) and cut diamonds or rectangles in the dough. You do not need to separate the pieces, as they will snap apart after baking. If you want to make shards, bake the sheet of dough without cutting it first.

5. Bake for 15 to 20 minutes, or until the crackers begin to brown evenly across the top (the time will depend on how thinly and evenly you rolled the dough).

6. When the crackers are baked, remove the pan from the oven and let them cool in the pan for about 10 minutes. You can then snap them apart or snap off shards and serve.

Roasted Red Pepper Dip
adapted from Delish

12 ounces canned fire roasted red peppers (alternatively, you can roast your own*)
3 cloves of garlic, roasted**
1 Tbsp extra virgin olive oil
Splash of red wine vinegar
1/4 tsp coarse salt
1/8 tsp ground black pepper

Combine all ingredients in food processor/mini prep/blender until combined.

Yield: Approximately 1/2 cup

*How to Roast a Red Pepper:

If you have a gas stove, you can place the peppers over the open flame until the skin becomes blackened. Once the skins are brownish-black, remove from the oven and immediately place in a bowl and cover with plastic wrap. Let sit for 20 minutes or so (or until the peppers have time to cool and “sweat”). Once they have cooled you will be able to peel the skins right off.

Otherwise, you can use the oven method. Cut the peppers in half and clean out the seeds and innards. Place them on a baking sheet skin side up. Place the sheet in a 450-500 degree oven set on broil. The skin will start to blacken and soften in 7-10 minutes. Once the skins are brownish-black, remove from the oven and immediately place in a bowl and cover with plastic wrap. Let sit for 20 minutes or so (or until the peppers have time to cool and “sweat”). Once they have cooled you will be able to peel the skins right off.

** How to Roast Garlic:

Place the garlic cloves on a piece of aluminum foil. Drizzle olive oil over the garlic and then wrap it up in the foil. Bake at 350F for 30 minutes. You can also use finely minced garlic in this recipe to save time if you don't want to roast the garlic.