Showing posts with label muffins. Show all posts

Monday, February 27, 2012

Green Onion, Cheddar & Asiago Beer Batter Bread (DB)


The Daring Bakers' February 2012 host was – Lis! Lisa stepped in last minute and challenged us to create a quick bread we could call our own. She supplied us with a base recipe and shared some recipes she loves from various websites and encouraged us to build upon them and create new flavor profiles.

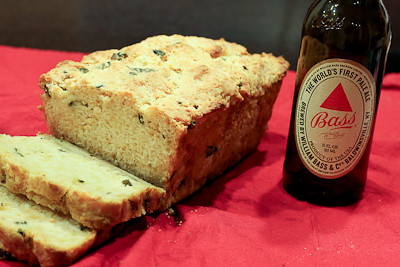
I was in the mood for something savory, not sweet (crazy, I know!) so I went with the green onion, cheddar & asiago beer batter bread!  Everything came together quickly and easily, and the smell of the bread baking in the oven was magnificent! I used a slightly smaller loaf pan (8.5" x 4.5") and that did not seem to affect the baking time much.
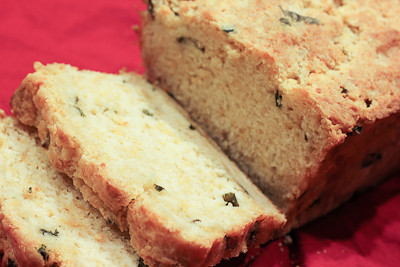
My bread was moist and fluffy and full of flavor! I love how the top of the loaf became crisp from brushing the butter on top! So good.  I think next time I'll also sprinkle some cheese on top as it's almost done baking to get a crisp, cheesy crust.  And maybe bake it in a muffin pan, to increase the ratio of buttery, cheesy crust to middle :) The best thing about this bread? It comes together so quickly! I'll definitely be making this one again.

Thanks Lis, for hosting this month's challenge.  You'll find the recipe below - be sure to read all the tips/notes below the recipe, as there is some useful information on quick breads there. Also be sure to check out the Daring Bakers' Blogroll to see how everyone else enjoyed the challenge.

Green Onion, Cheddar & Asiago Beer Batter Bread  
Makes one 9” x 5” (23 x 13 cm) loaf
Adapted from Recipe Girl’s Cheddar Chive Beer Batter Bread


Ingredients
1 tablespoon (15 ml) oil
1 cup (240 ml) (100 gm/3½ oz) sliced green (spring) onion
3 cups (720 ml) (420 gm/15 oz) all-purpose (plain) flour
3 tablespoons (45 ml) (45 gm/1½ oz) granulated sugar
2 teaspoons (10 ml) (10 gm) baking powder
1 teaspoon (5 ml) (6 gm) salt
1 cup (240 ml) (115 gm/4 oz) grated sharp cheddar cheese
½ cup (120 ml) (2 oz) grated Asiago cheese
One (12 fl oz/355 ml) (about 1½ cups) bottle beer (such as amber ale)
¼ cup (60 ml) (55 gm/2 oz) butter, melted and divided

Directions:
  1. Preheat oven to moderately hot 375°F/190°C/gas mark 5. Spray 9”×5″ (23 x 13 cm) loaf pan with cooking spray.
  2. Heat olive oil in a large nonstick skillet over medium heat. Add green onion and sauté 3-4 minutes or until tender. Cool to room temperature.
  3. Combine flour, sugar, baking powder and salt in a bowl; make a well in the center of the mixture. Add onion, cheeses, and beer. Stir just until moist.
  4. Spoon batter into prepared pan. Drizzle evenly with 2 tablespoons of butter. Bake for 35 minutes; brush with remaining 2 tablespoons butter. Bake an additional 23 minutes or until wooden pick inserted in the center comes out clean. Cool 5 minutes in pan on a wire rack; remove from pan. Cool completely on wire rack.
Quick bread primer
  • Quick breads can be sweet or savory, they are a modern innovation they became common after the introduction of baking powder and baking soda.
  • Baking powder is a combination of acid and alkaline that reacts together when moistened to form gases that raises the baked quick bread. Usage 1 to 2 teaspoons per cup of flour.
  • Baking soda (an alkaline salt, sodium bicarbonate) is used when the liquid is acidic, such as buttermilk, honey, molasses, tomato sauce etc. Usage ½ to 1 teaspoon per cup of acidic liquid.
  • Be sure your baking powder and baking soda are fresh.
  • Measure ingredients accurately, using the measuring tools and techniques suggested.
  • Preheat the oven to the correct baking temperature. Arrange racks so that the bread will bake in the center of the oven which has the best heat distribution in the oven.
  • To allow for good air circulation while baking, leave at least 1 inch of space between pans and between pans and sides of oven. Switch pan positions and rotate pans halfway through baking.
  • The two top secrets to moist, tender quick bread is 1)in the mixing always use a quick light technique so you don't over-mix the batter 2) don't over-bake since this cause dryness in the final baked product. .
  • Quick breads can be created by the following methods:
Muffin (or the two-bowl) method – The dry and wet ingredients are kept separate and then are combined quickly and gingerly by adding the wet to the dry, and folding the two together with only a few strokes. The idea is to not over-mix, basically moistening the ingredients and leaving the batter slightly lumpy, with wisps of flour showing (even small lumps are fine) so as not to overdevelop the gluten in the flour which will keep the bread tender. An over mixed batter creates tough and rubbery muffins/quick breads. Since over-mixing will cause "tunnels" – holes where the air bubbles can escape – which will make the quick bread tough.
Creaming method – The butter and sugar are beaten and creamed together until smooth and fluffy. Next, the egg and liquid flavoring are added to the butter and sugar mixture. The dry ingredients and other liquids are folded in last. This method is best when baking cakes since a lot of air pockets are added into the mixture. Folding in the ingredients creates even more air pockets to keep the cakes light and fluffy.
Cutting in method – The chilled fat is cut into the flour. The fat results in a flaky texture since the fat melts while in the oven. This method is best used when baking biscuits, scones or pie crusts.
  • Depending on the recipe and the type of quick bread, there are also three different types of batter:
Pour Batter: This type of batter has a dry:liquid ratio of 1:1. Because there is so much liquid in this type of batter, the result is very moist and dense.
Drop Batter: This batter has a dry:liquid ratio of 3:1. This batter will result in a moist but fluffy baked good.
Stiff Dough: This batter has a dry:liquid ratio of 7:1 This batter will result in a very light and fluffy baked good.
  • Lower gluten flours are best to make quick breads you can replace 4 tablespoons in each cup of all-purpose flour with cake flour in most recipes or replace 2 tablespoons in each cup of all-purpose flour with corn flour (cornstarch) if you wish to lower the gluten levels of your flour.
  • Flour should be sifted to aerate it which gives more rise therefore a lighter crumb to the final baked goods.
  • Add fruit, nuts, etc. after lightly combining the wet and dry ingredients. Then give the batter one more light-handed stir and you're done. Is the batter still thick and lumpy? That's exactly what you want
  • If you're adding dried fruit, try soaking it first. This will moisten the fruit, make it tender and juicy, and also preserve the bread's moisture. Don't sprinkle dried fruit on top of quick bread before baking, as it will burn before the loaf is done.
  • To lower the fat, for example, you can substitute some (or all) of the oil with an equal amount of almost any fruit puree (apple sauce, plum baby food, pumpkin puree, mashed bananas).
  • Glaze your baked quick breads for a nice finishing touch and burst of flavor. Make a simple mixture of confectioners' (icing) sugar and a little milk or fruit juice. Try orange and lemon juices, for their fragrant, tart zing; add curls of zest for extra color and flavor.
  • For most quick mix recipes as a general rule – less butter and sugar in a recipe makes it more bread-like, while more butter and sugar produces something closer to cake.
  • To prevent moist quick breads from spoiling, let them cool completely after baking. Then wrap them tightly in foil or plastic wrap and store at room temperature for up to 3 days. If your bread is made with cheese, cream cheese or other perishable foods, it should be refrigerated.
  • Quick breads such as banana, zucchini and cranberry slice and taste best when served a day after baking. Wrap the cooled bread in foil or plastic wrap; leave at room temperature overnight. Others like cornbread and coffee cakes are best served warm.
  • The quick bread is done if a toothpick inserted near the center comes out clean. If it is not done, test again in a few more minutes.
  • Cool in the pan for 10 minutes, unless recipe directs otherwise. Turn loaves out onto a wire rack to cool. Most quick bread should be cooled completely before slicing to prevent crumbling.
  • Using a sawing motion, cut loaves with a thin sharp knife. Use a serrated knife for quick breads that have fruits and/or nuts.
Common Problems and troubleshooting (ref http://allrecipes.com/howto/baking-quick-breads/)

Bread sticks to pan. Unless you're using high-quality non-stick metal or silicone baking pans, you should always grease the pans before you pour in the batter. The best thing to use for greasing the pan is shortening, because its melting point is higher than any other kind of fat, which helps maintain a "shield" between pan and batter while the bread is baking. A high-quality cooking spray--one that won't bake on to your pans and discolour them--is also a fast, easy fix. You can also prevent sticking by removing the bread from the pan sooner: let the bread cool for at least twenty minutes in order to set (Bundt loaves should cool twice as long) before inverting the pan.

There are big holes and "tunnels" in the bread, and/or the bread is tough. These problems are usually caused by over-mixing.

There's a big crack down the middle of the quick bread loaf. Don't worry--it's normal for quick breads. The crack on top happens when top of the loaf "sets" in the heat of the oven before the bread is finished rising. Drizzle the loaf with icing or dust with confectioners' (icing) sugar.

My blueberry muffins look green! By reacting with the alkaline baking soda, the blueberries' pigments can turn green. Toss the berries with the flour mixture before combining the ingredients; the coating should help. If you're using frozen berries, don't thaw them before using them.

The bread looks done on the outside but it's still raw in the middle. This is one of the most common quick bread problems, and it can be caused by a few different factors. The oven temperature could be too high. (Use an oven thermometer to check: they're cheap and available at most supermarkets.)

Try lowering the oven temperature and/or putting a loose tent of foil over the top of the bread so it won't burn before the middle has time to catch up.

Another cause of "raw center" syndrome could be using a different pan than the recipe calls for. One of the nice things about quick breads is that you can use the same batter to make muffins, mini loaves, jumbo loaves, or rounds. But each size requires different baking times--and some require different baking temperatures. The larger and thicker the loaf, the longer it's going to take to bake. If you're using a different size pan than your recipe calls for, adjust the baking time accordingly and check the bread often.

Tuesday, August 9, 2011

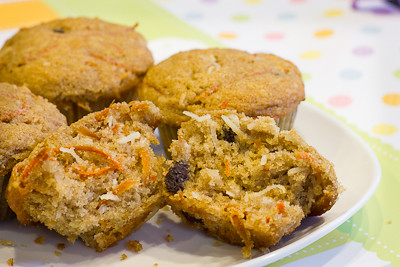
Carrot Spice Muffins (TWD)


This week's Tuesdays with Dorie (TWD) recipe was chosen by Nancy of The Dogs Eat the Crumbs: Carrot Spice Muffins.  I personally thought these muffins could use a little more sugar (or maybe some cream cheese frosting!) but then I guess they would be more like cupcakes and not really muffins :)  The addition of some crushed pineapple might be nice, too.  Regardless, these muffins were perfect for breakfast, or as a snack, and were a big hit with all of my husband's coworkers. 

Thanks Nancy, for hosting this week.  I'm sorry my post is so short this week but I've been so busy and barely had enough time to get this post up today! If you would like the recipe, you can find it here. Make sure you check out the TWD Blogroll, to see how everyone else enjoyed this delightful breakfast treat!

Tuesday, March 15, 2011

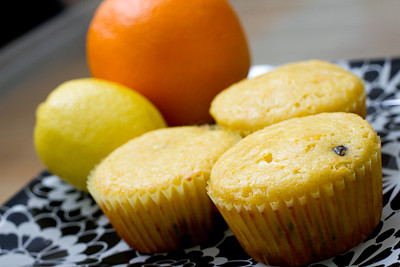
Citrus Currant Sunshine Muffins (TWD)


This week's Tuesdays with Dorie (TWD) recipe was chosen by Lauryn of Bella Baker: Citrus Currant Sunshine Muffins. Made with orange juice, lemon juice, orange zest, and dried currants, these muffins are definitely screaming "sunshine" as their name implies.

I didn't have any currants on hand, so I used dried cherries instead. I increased the amount of cherries to a full cup, and that ended up being just right. I think with just 3/4 cup, you'd end up with some bites that were without any dried fruit and that's no fun! ;)

While these muffins have plenty of citrus in them (and some lemon extract), I didn't find the citrus flavor to be very strong. It was there, but I guess I thought it would be much more prominent given the name of these muffins.


I read that many other bakers enjoyed the fact that these weren't very sweet.  Personally, I would have liked these muffins to be a little bit sweeter (but I have a big sweet tooth!). Perhaps a streusel topping is in order next time? :) Overall, though, these muffins were a delight and I would definitely make them again.

Thanks Lauryn, for hosting this week.  If you would like the recipe, you can find it here. Make sure you check out the TWD Blogroll, to see how everyone else enjoyed these citrus-y treats!  And, if you haven't already, head on over here to enter my current giveaway. 

* Recipe notes:
- I increased the amount of dried fruit from 3/4 cup to 1 cup.
- For more recipe tips, click here

Tuesday, February 1, 2011

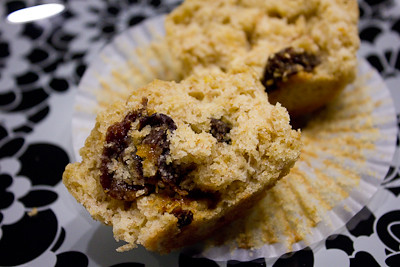
Great Grains Muffins (TWD)


This week's Tuesdays with Dorie (TWD) recipe was chosen by Christine of Happy Tummy: Great Grains Muffins.  Made with regular all-purpose flour, whole wheat flour, oats, and cornmeal, this healthy muffin is studded with dried fruit and nuts.  I omitted the nuts and included prunes at Dorie's suggestion.

I considered swapping out the regular sugar for brown sugar and then somehow got distracted with the little one running around my feet and ended up forgetting the sugar altogether! I was worried they would turn out awful, but between the maple syrup in the recipe and the bites of sweetness provided by the prunes, the sugar wasn't really missed in this recipe! I think these would also be really good with some figs.

Thanks Christine, for hosting this week.  If you would like the recipe, you can find it here. Also make sure you check out the TWD Blogroll, to see how everyone else enjoyed this healthy breakfast treat!

* Recipe notes:
- My muffins were done baking in about 13-14 minutes, so watch yours closely.
- For more recipe tips, click here

Tuesday, January 18, 2011

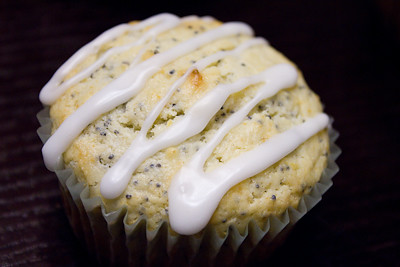
Lemon Poppyseed Muffins (TWD)

This week's Tuesdays with Dorie (TWD) recipe was chosen by Betsy of A Cup of Sweetness : Lemon Poppyseed Muffins. Let me just start with a funny story...

I had never bought poppyseeds before, so when I went to the store I thought I'd check the baking aisle first (that's logical, right?).... but I wandered around and searched and could not find them! I was in a rush (on my lunch break and had to get back to work), so I stopped a random lady and asked her if she knew where I'd find poppyseeds because I've never had to buy them before.  She said she had never bought them before, but told me to check with the spices, so I walked over to the spices... and painstakingly scanned through all of the spices, looking for them (all the bottles within each brand were alphabetical but there were multiple brands)... but of course they didn't have any! They weren't even out of stock, they just didn't have them.  Ha ha.... so I finally found them at another store, but I can't tell you how silly I felt asking a complete stranger that doesn't work in the store where poppyseeds (of all things) might be!


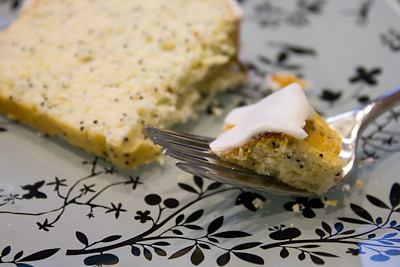
So, on to the recipe of the week.  Like any other muffin recipe, this one is straightforward and quick.  Just mix the dry ingredients and wet ingredients separately, then pour the wet ingredients into the dry ingredients and stir.  The poppyseeds get mixed in at the very end.  I decided to make 6 muffins and 1 mini loaf.  I simply drizzled the muffins with the lemon icing, but poured the icing over the entire mini loaf.  I ended up with just enough icing for everything.


These muffins are nice and moist with a fairly tight crumb.  The drizzled muffins had just a hint of sweetness and tartness that would be perfect for someone who doesn't want something too sugary for breakfast.  For someone like me, however, covering the entire top of the muffin would be much better.  My min loaf was coated with the icing completely and I loved it! It added just the right amount of sweetness with a lot of extra zing! :)  My iced lemon poppyseed loaf reminded me quite a bit of the iced lemon poundcake at Starbucks (one of my favorite "treats" on the rare occasion I happen to go to Starbucks).


Thanks Betsy, for hosting this week.  I'll definitely be making these again (probably as mini loaves instead of muffins - so much easier).  If you would like the recipe, you can find it here. Also make sure you check out the TWD Blogroll, to see how everyone else enjoyed these lemony breakfast treats!

Oh, and if you haven't already, head on over here to enter my current giveaway before it ends!

* Recipe notes:
- You can find poppyseeds along with all of the other spices in your grocery store :)
- You can make jam-filled muffins by filling your muffin tins halfway, putting a dollop of jam in the middle, and then filling the rest of the muffin tin with the batter.
- I baked my mini loaf for about 40 minutes.  I had to use a foil tent around 30 minutes to prevent the top from over browning.
- I would definitely recommend dipping your muffins in the icing instead of drizzling just a small amount over the top. 
 - For more recipe tips, click here

Tuesday, September 21, 2010

Coffee-Break Muffins (TWD)

This week's Tuesdays with Dorie (TWD) recipe was chosen by Rhiani of Chocoholic Anonymous: Coffee-Break Muffins. Instead of using milk as the liquid in these muffins, Dorie uses coffee. I'll be honest, I don't drink coffee. I love coffee ice cream, but I don't like coffee.  Most of the time it is way too bitter for my taste.  I'll have a little bit of coffee with my cream and sugar, but you'll never catch me having a cup of black coffee! So I was going to skip this week, but since muffins are quick and easy and my husband LOVES coffee, I went ahead and made these for him :)


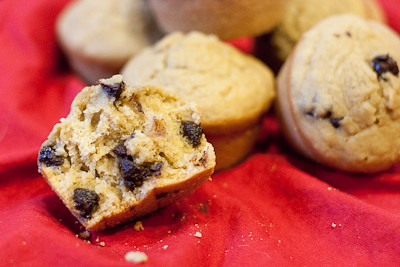
Since the man has also been known to go into the cupboard, open up my bag of chocolate chips and just grab a handful to snack on, I decided to throw some chocolate chips into these muffins as well.  I ended up with 10, not 12, muffins with this recipe.  I made 6 without chocolate chips and 4 with chocolate chips.  I sampled a bit of both and found that the muffins with the chocolate chips were much better.  The plain muffins were, well... too plain.  You could definitely taste the flavor of coffee in these muffins, and while these were just okay in my book, I am sure coffee lovers would love this breakfast treat.  (Other bakers noted a lack of coffee flavor, but perhaps that was due to the type of coffee used? I used some pretty strong Chocolate Macadamia Nut Kona Coffee.)

Thanks Rhiani, for hosting this week.  If you would like the recipe, you can find it here. Make sure you check out the TWD Blogroll, to see how everyone else enjoyed this breakfast treat!

* Recipe notes:
- I used a regular sized muffin pan and ended up with 10 muffins.
- These muffins bake up way faster than the indicated 20 minutes! Mine were done in about 14 minutes, so keep a close eye on yours to avoid dried out, over baked muffins.
- Wrapped airtight, these can be frozen for up to 2 months.  Rewarm in a 350-degree-F oven, or split and toast them.
- For more recipe tips, click here

* Update: I just found out that Dorie will be hosting a cooking class right here in Dallas on Sunday, October 24th!!! If anyone would like to attend this event, I would love to meet up with you (and Dorie!!!).  Just leave me a comment here, or shoot me an email (it's along the left side of my blog).  The class will be between 4-6:30pm and will feature Salmon Rillettes; Tuna-Mozzarella and Fresh Basil Pizzas; Lamb and Dried Apricot Tagine; Cauliflower Gratin; Sable Breton Galette.  Sign up here. To see if Dorie will be visiting your city on her book tour, click here.

Tuesday, October 13, 2009

Allspice Crumb Muffins (TWD)


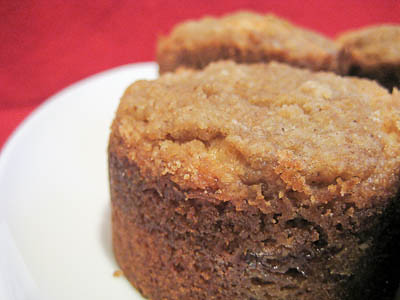
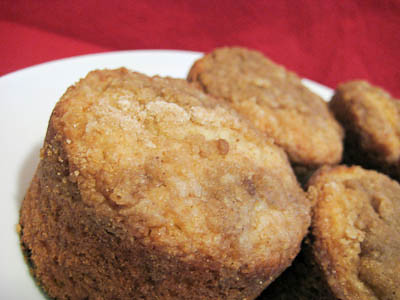
This week's Tuesdays with Dorie (TWD) recipe was chosen by Kayte of Grandma’s Kitchen Table: Allspice Crumb Muffins. I love anything with a crumb or streusel topping, so I knew right off the bat that I would like these. What I did not anticipate was exactly how much I would love these!

They seem pretty plain if you're just reading the recipe. A simple muffin with a crumb topping flavored with some allspice. I actually don't bake with allspice very often, at least not as the star ingredient, so I'm not too familiar with its flavor. Because I rarely bake with it, I didn't have any on hand, so I substituted 1/2 teaspoon cloves, 1/4 teaspoon cinnamon, and 1/4 teaspoon nutmeg based on the recommendations here.

Like most muffin recipes, this one comes together in just a few minutes and does not require a mixer. I followed Dorie's recipe to a "T," including how to make the crumb topping. I have to say that I was not a fan of this method, because it was hard to get nice big crumbs from it. Next time I will just cut the butter in using a pastry cutter to get nicer crumbs.

I baked my muffins in this pan so I didn't get nice muffin tops, but they still tasted great. I thought for a moment about just using cinnamon in place of the allspice, but I am so glad I didn't - I am sure that cinnamon muffins would be good too but I really enjoyed the allspice flavor. These kind of remind me of the coffee cake you can get at Starbucks, except much better.


Thanks Kayte for picking this recipe, I loved it. If you would like the recipe, you can find it here. Make sure you check out the TWD Blogroll, to see how everyone else enjoyed this perfect breakfast treat.

* Recipes notes:
- I would recommend cutting the butter into the crumb topping with either a pastry blender or two knives instead of doing it by hand.

- Don't have any allspice? Here is a link to the substitution, as well as many other common substitutions that will come in handy when you are baking.
- For more tips, click here.

Tuesday, January 13, 2009

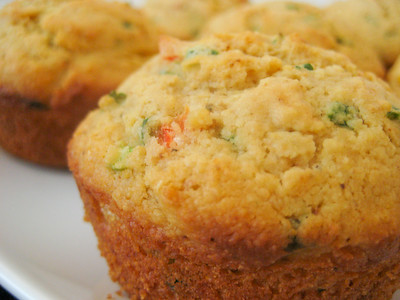
Savory Corn and Pepper Muffins (TWD)


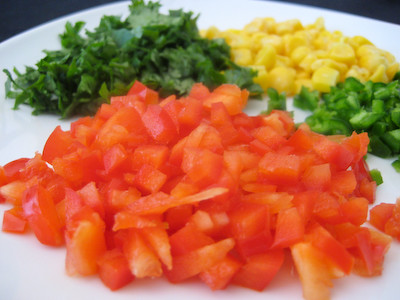
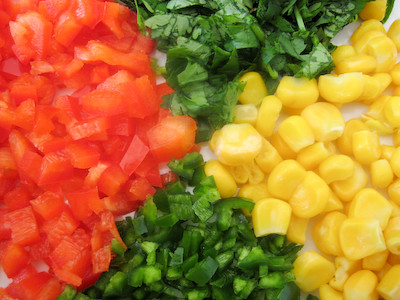
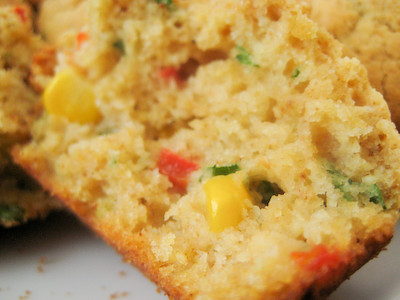
This week's Tuesdays with Dorie (TWD) recipe was chosen by Rebecca of Ezra Pound Cake: Savory Corn and Pepper Muffins. These sweet and savory muffins seem to include everything but the kitchen sink! :) They've got corn kernels, jalapeño peppers, red bell peppers, and cilantro.


I love sweet cornbread and I love jalapeño cornbread as well. I've never had a sweet jalapeño cornbread, though, and I've definitely never had a cornbread muffin that is so jam packed with goodies before!


Dorie's Savory Corn and Pepper Muffins are definitely a colorful treat. Aside from the time required to chop up the peppers and cilantro, these muffins, like all muffins, come together in no time. Simply whisk together the dry ingredients and mix together the wet ingredients. Then pour the wet ingredients into the dry, blend thoroughly and then throw in the mix-ins.


After twenty minutes in the oven (or eighteen in my case), you've got some great muffins! These muffins actually weren't as sweet as I expected them to be. The amount of heat these muffins has varies depending on your jalapeños - mine weren't spicy at all. When I asked my mom about that (she had just made a batch of super spicy muffins), she said that often times she'll get jalapeños that are extremely spicy and other times they'll aren't spicy at all. So I guess if you really want spicy muffins, you'll have to taste test your jalapeños before mixing them in! I think next time I make these, I'll add more chili powder and for an even better flavor, some bacon. (Everything is better with bacon, right?)


These muffins are great with a big bowl of chili or some chicken tortilla soup. Thanks Rebecca, for choosing these muffins. If you would like the recipe for the muffins, you can find it here. Make sure you visit the TWD Blog Roll to see how everyone else enjoyed this savory treat.


* Recipe notes:
- Start checking on these a few minutes early. Mine were completely baked after 18 minutes in my dark muffin pan.
- While these muffins rise a little bit in the oven, they don't rise a lot. So fill each well in your muffin pan almost to the top.
- These can be wrapped airtight and frozen for up to 2 months. Rewarm in a 350F oven, if you'd like, or split and toast them.
- For more tips, click here.


Tuesday, October 21, 2008

Pumpkin Muffins (TWD)


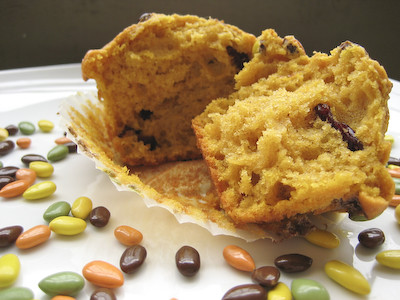
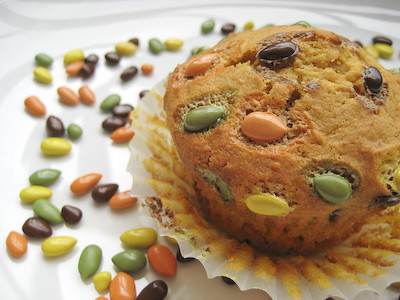
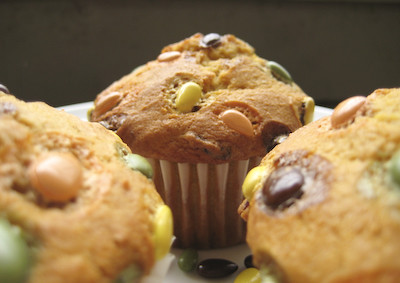
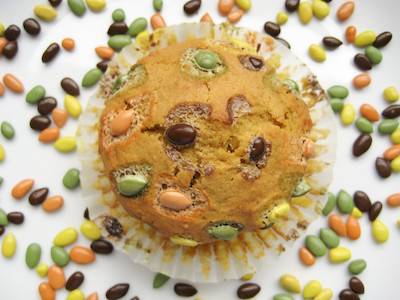
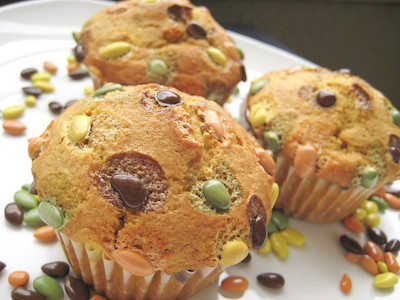
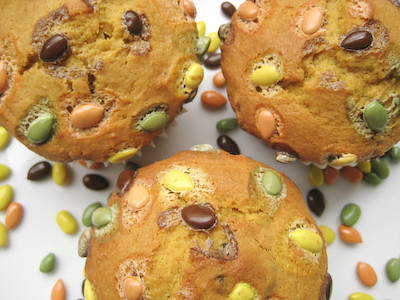
This week's Tuesdays with Dorie (TWD) recipe was chosen by Kelly of Sounding My Barbaric Gulp: Pumpkin Muffins. Dorie describes these as having a "moist and tender cakey crumb," with "a gentle spiciness," and a "sprinkling of sunflower seeds across their crowns."


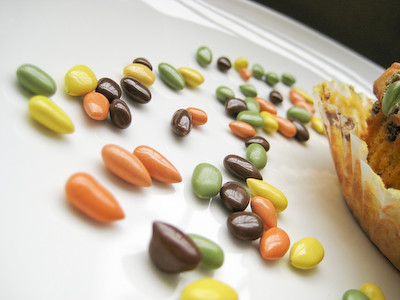
When I saw that this recipe called for sunflower seeds, I immediately knew I wanted to use the chocolate covered sunflower seeds I had on hand. Why did I have chocolate covered sunflower seeds in my pantry? Because of Peabody. Several months ago, when I saw this post on her blog for chocolate covered sunflower seed cookies, I fell in love with the cute little candies. They are from Trader Joe's, and although I live nowhere near a Trader Joe's, I make myself a list of things to get from them whenever I go back to visit my family in California. After seeing them on Peabody's blog, I made sure to pick them up on my last trip to California.


I recently made some pumpkin cookies that, while very delicious, were very blah looking and bland. So I decided to use these chocolate covered sunflower seeds to add a little color and pop to the pictures. After using them in that post, I had a few readers comment that you can also sometimes find something similar at some of your more upscale grocery or specialty stores. So, if you're one of those poor souls who doesn't live near a Trader Joe's (like me), you might not be totally out of luck.


Like most muffin recipes, this one was very simple. I substituted dried cranberries for the raisins (not because I don't like raisins, but just because that's what I had on hand). I don't like nuts, so I omitted the pecans/walnuts from this recipe, instead added more dried cranberries in their place. Some TWD bakers added chocolate chips as well. This is a highly adaptable recipe. It's also another great recipe to make when you have a little leftover canned pumpkin, as it calls for 3/4 cup (also make sure you use canned pumpkin and not pumpkin pie filling).


It seems that the opinions about these muffins among the TWD group were mixed, though I think the vast majority of bakers seemed to love them. I was in the minority - I didn't fall in love with them. They were okay, but didn't "wow" me like some of Dorie's other recipes did. I found the pumpkin flavor to be fairly subtle (a plus for those who don't particularly care for pumpkin, I guess). Like the orange berry muffins, I found the crumb to be perfectly moist and tender, but not sweet enough at all. Perhaps they might be better with some orange marmalade or apricot jam to increase the sweet factor, as Dorie suggests.


While these were adorable and fun to photograph, I probably won't be making them again. They were perfect for breakfast now that it's fall, but I just don't see myself ever having a craving for these and baking them. When I want an indulgent pumpkin treat, I'll make the pumpkin cookies instead. Don't let that stop you from trying these, though, because like I said, a lot of others in the group really enjoyed them.


Thanks Kelly, for choosing this week's pick. If you would like the recipe, you can find it here. Make sure you visit the TWD Blog Roll to see what everyone else thought of this fall treat. For those who have been on the fence about joining Tuesdays with Dorie - you have until October 31st to join. I've really enjoyed baking my way through this book with the group, and would encourage anyone who is interested to join now. After the end of this month, membership in the group will be closed.


*A few recipe notes:
- I used dried cranberries instead of raisins. I also added 3/4 cup instead of 1/2 cup.
- I used a dark metal muffin pan and my muffins were finished baking after 22 minutes instead of the full 25 minutes indicated. Some bakers found that their muffins were done as early as 17 minutes.
- I used chocolate covered sunflower seeds instead of raw sunflower seeds on top.
- Wrapped airtight, these can be frozen for up to 2 months. Rewarm in a 350F oven, or split and toast the muffins before serving.
- For more recipe tips, click here.

Tuesday, January 29, 2008

TWD: Berry Good Muffins


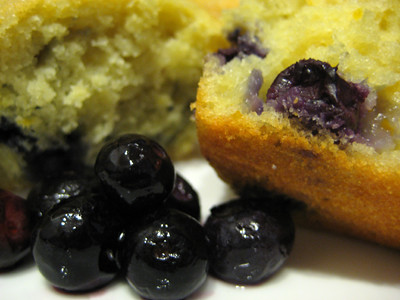
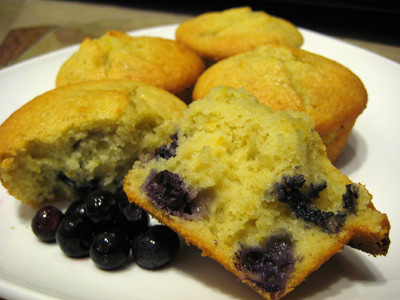
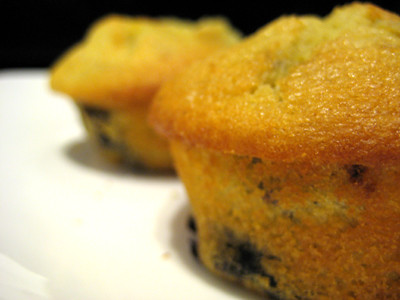
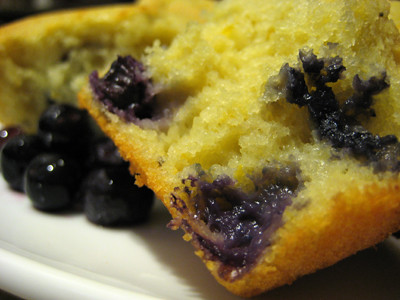
This week's recipe was chosen by Michelle of Sugar & Spice: Orange Berry Muffins. I was excited to make these, as I love anything with fruit, and these muffins looked so simple! Sure enough, these came together in no time and could easily be made on a weeknight to enjoy for breakfast during the week. These muffins are extremely moist, and not too sweet. My mom always complains that things are too sweet (for me, there is no such thing!), but I think she would really like these. Since they are not overly sweet, the blueberry flavor really comes through. The orange flavor is really just a subtle undertone to complement the blueberries.


If you don't have decorating sugar, you can sprinkle the tops of these muffins with granulated sugar before popping them in the oven for a very subtle sparkle.


This week, Nicole of Crazy Delicious and Ashley of eat me, delicious joined the Tuesdays with Dorie group! So don't forget to visit their blogs after checking out Quirky Cupcake, Sugar & Spice, and Abby Sweets to see the fruits of their labor :)

Orange Berry Muffins
from Baking: From My Home to Yours, by Dorie Greenspan

Grated zest and juice of 1 orange
About 3/4 cup buttermilk
2 large eggs
3 Tablespoons honey
1 stick (8 Tablespoons) unsalted butter, melted and cooled
1/3 cup sugar
2 cups all-purpose flour
2-1/2 teaspoons baking powder
1/4 teaspoon baking soda
1/4 teaspoon salt
1 cup blueberries - fresh, preferably, or frozen (not thawed)

Decorating sugar, for topping (optional)


Getting Ready:
Center a rack in the oven and preheat the oven to 400 degrees F. Butter or spray the 12 molds in a regular-size muffin pan or fit the molds with paper muffin cups. Alternatively, use a silicone muffin pan, which needs neither greasing nor paper cups. Place the muffin pan on a baking sheet.

Pour the orange juice into a large glass measuring cup or a bowl and pour in enough buttermilk to make 1 cup. Whisk in the eggs, honey and melted butter.

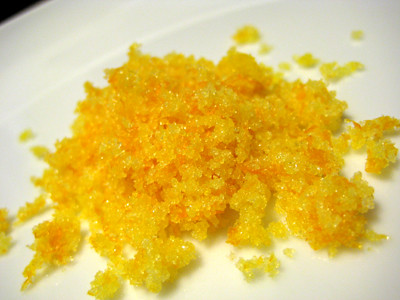
In a large bowl, rub the sugar and orange zest together with your fingertips until the sugar is moist and the fragrance of orange is strong.


Whisk in the flour, baking powder, baking soda and salt. Pour the liquid ingredients over the dry ingredients and, with the whisk or a rubber spatula, gently but quickly stir to blend. Don't worry about being thorough - the batter will be lumpy and bubbly, and that's just the way it should be. Stir in the blueberries. Divide the batter evenly among the muffin cups.

Bake for 22 to 25 minutes. If you want to top the muffins with decorating sugar, sprinkle on the sugar after the muffins have baked for 10 minutes. When fully baked, the tops of the muffins will be golden and springy to the touch and a thin knife inserted into the center of the muffins will come out clean. Transfer the pan to a rack and cool for 5 minutes before carefully removing each muffin from its mold.