Showing posts with label cheesecake. Show all posts

Tuesday, December 29, 2009

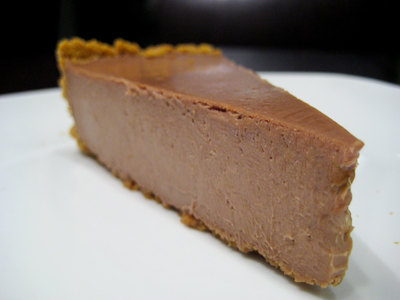
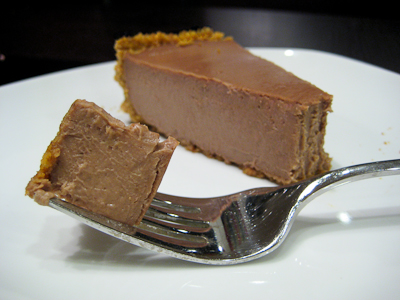
Low and Luscious Chocolate Cheesecake (TWD)


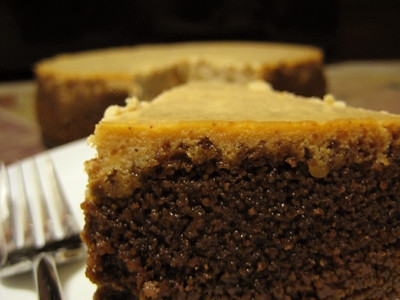
This week's Tuesdays with Dorie (TWD) recipe was chosen by The Tea Lady of Tea and Scones: Low and Luscious Chocolate Cheesecake. I almost didn't get this one done, but when I read over the recipe, I realized that I could easily put it together in a pinch.

The cheesecake filling takes about all of five minutes to make in the food processor. You simply process the cream sugar and sugar until silky smooth. Then add the eggs, vanilla, and chocolate and then you're done!


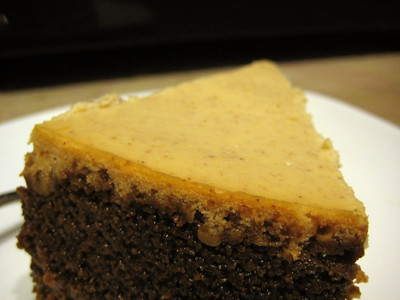
The bottom of my graham cracker crust was extremely thin, so I would recommend doubling the crust recipe if you're a crust lover. Otherwise, this cheesecake was good. It's not overwhelmingly chocolately or creamy so if you are in the mood for a super chocolately, super rich cheesecake, I'd look for another recipe. I tend to prefer the super rich and creamy cheesecakes, but this was a nice change after so many heavy desserts over the holidays.

If you would like the recipe, you can find it here. Make sure you check out the TWD Blogroll, to see how everyone else enjoyed this creamy, chocolatey treat.

* Recipes notes:
- I baked my cheesecake in a 9-inch springform pan. I wrapped it in heavy duty foil and placed it in a water bath in the oven and baked for 50 minutes. After it was done, I left the oven cracked open with a wooden spoon until it reached room temperature in order to avoid cracks in the top.
- For tips from other TWD bakers, click here.

Tuesday, September 1, 2009

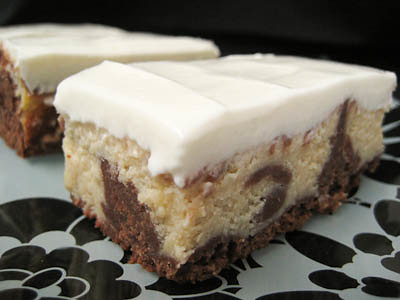
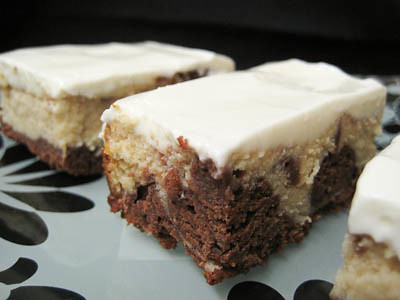
Espresso Cheesecake Brownies (TWD)


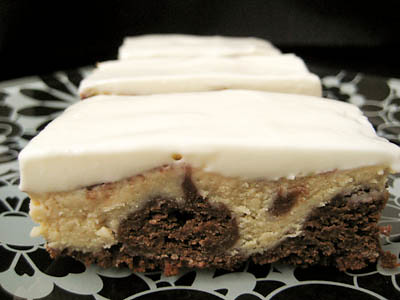
This week's Tuesdays with Dorie (TWD) recipe was chosen by Melissa of Life in a Peanut Shell: Espresso Cheesecake Brownies. There's a bottom brownie layer, topped with a cheesecake layer with swirled in brownie batter, topped with a sweetened sour cream glaze.

These were pretty simple to make, but do require several long periods of refrigeration - I wanted to eat these straight from the oven! I'll admit I was a bit unsure about this recipe, but it really surprised me. They're definitely not as chocolately as I thought they would be, but this is a great way to satiate a cheesecake craving without having to go through all the trouble of making a cheesecake. I'd probably describe these more as cheesecake bites than I would brownies, probably because the chocolate flavor is pretty subtle.


The sour cream topping was just barely tart and slightly sweet and was an excellent contrast to the cheesecake and brownie layers. I know several people omitted this, but I would really recommend giving it a try. If I make it without the sour cream topping in the future, then I'll probably cut them into bite size pieces, dip them in chocolate, and then freeze them like those Sara Lee cheesecake bites! :)


Thanks Melissa, for picking this recipe. I enjoyed trying something new. If you would like the recipe, you can find it here. Make sure you check out the TWD Blogroll, to see how everyone else enjoyed this creamy, chocolatey treat.

* Recipes notes:
- I used 1 tsp of espresso powder instead of 1.5 tsp and felt this had plenty of coffee flavor!
- I baked my brownies in a dark pan and they were done right at 35 minutes.
- Wrapped well, these will keep in the freezer for 2 months (without the glaze).
- For tips, click here.

Tuesday, December 30, 2008

Tall and Creamy Cheesecake (TWD)


This week's Tuesdays with Dorie (TWD) recipe was chosen by Anne of Anne Strawberry: Tall and Creamy Cheesecake. It's smooth, velvety, and rich... basically your classic cheesecake recipe.


You can adapt this recipe several ways to suit your taste. You can flavor it with fruits, nuts, extracts, or chocolate. The recipe calls for 1-1/3 cups heavy cream or sour cream, or a combination of the two. If you prefer a milder cheesecake, use all heavy cream. For a tangier cheesecake, use all sour cream. I used 1 cup of sour cream and 1/3 cup heavy cream, mostly just because I didn't want to purchase a huge tub of sour cream and the next size down was 8 ounces.


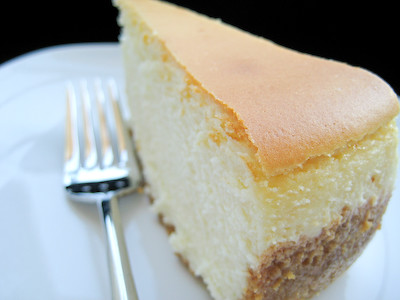
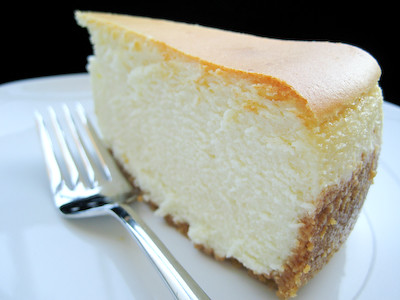
I had every intention of doing something creative and fun with this recipe, but with the holidays and our travel plans, I was happy just to get it done. This was probably the nicest looking cheesecake I've ever made. I was elated when I pulled it from the oven and there wasn't a single crack on top! Though I'm not sure why it browned so much - I know that Dorie says it's supposed to brown, but the one pictured in her book is pristine and white, without the faintest hint of browning. Regardless, it did not affect the taste and I considered it to be a success :)


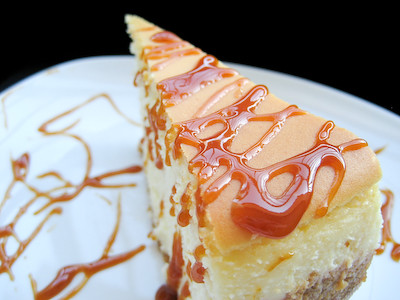
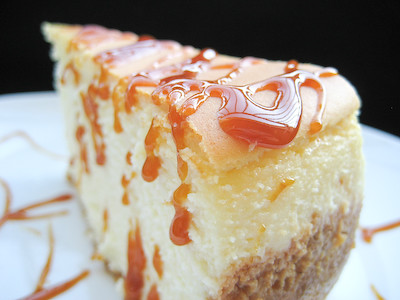
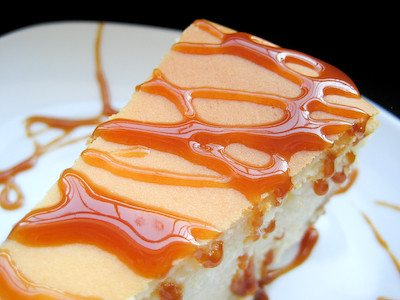
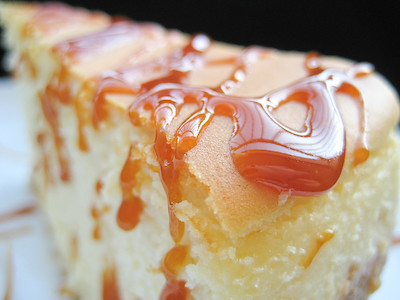
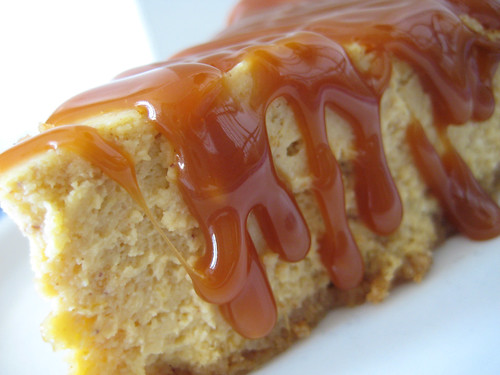
As pretty as it was, I still thought it looked a bit too naked, so I decided to whip up a batch of caramel sauce to drizzle on top.


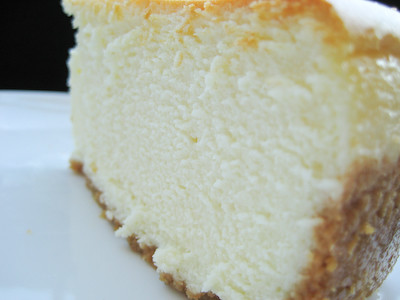
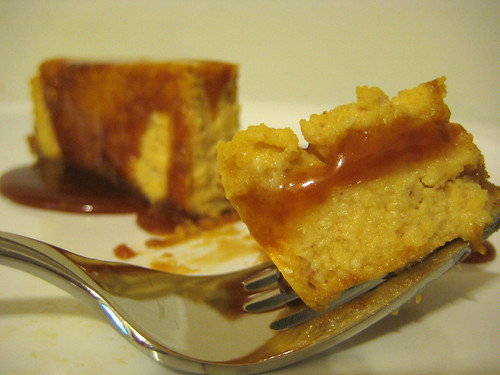
This cheesecake is everything Dorie promises it to be. It is super smooth and velvety. It's fairly dense, but not quite New York cheesecake dense. It is rich without being too heavy. Just look at how creamy it is!


What's the secret to cutting the perfect slice? I've never had much luck using a knife that's been run through hot water, though that's also what Dorie recommends. I find that I'm able to get much better looking slices if I use dental floss :)


Thanks Anne, for choosing this cheesecake. I loved it and will use it as my go-to cheesecake recipe from now on. If you would like the recipe for the cheesecake, you can find it here. If you're interested in the caramel sauce recipe, you can find it here (along with a pumpkin cheesecake recipe). Make sure you visit the TWD Blog Roll to see how everyone else enjoyed this creamy treat.

* Recipe notes:
- Be very careful when double wrapping your springform pan in aluminum foil. If you inadvertently poke any holes in it, you'll end up with a water logged crust.
- Don't worry if you can't get your water bath half way up the sides of the springform pan. Even an inch of water will help.
- This cheesecake puffs up significantly in the oven, but deflates after it is cooled.
- If you're going to use dental floss to slice your cheesecake, make sure you use the non-flavored kind ;) You'll also want to wipe off any bits that stick to the floss after each run through the cake.
- Wrapped well, the cheesecake will keep for about 1 week in the refrigerator or 2 months in the freezer. If you're freezing it, defrost it in the refrigerator overnight when you are ready to eat.
- For more recipe tips, click here.


Tuesday, May 20, 2008

TWD: Hidden Berry Cream Cheese Torte


This week's Tuesdays with Dorie (TWD) recipe was chosen by Tara of Smells Like Home: Traditional Madeleines. Unfortunately, I don't have those cute little madeleine molds, and my husband would kill me if I bought another specialty baking pan to squeeze into our tiny little kitchen, so I opted to make one of the previous TWD recipes.

I joined TWD after its third week running, so between the two weeks I wasn't able to participate in and the first three weeks' worth of recipes, I had the following recipes to choose from: Brown Sugar-Pecan Shortbread, Quintuple Chocolate Brownies, Hidden Berry Cream Cheese Torte, Marshmallows, and Fluted Polenta and Ricotta Cake. Being a cheesecake lover, I decided to try the Hidden Berry Cream Cheese Torte.

I have to admit that part of what drew me to this torte was the photo in the book. Unfortunately, mine looks nothing like the one in the book. It browned quite a bit on top and didn't look quite as elegant as Dorie's. Apparently, two out of the three bakers who made this torte (yes, the TWD group used to be that small!) had the same problem as well. Maybe next time I will cover mine with foil in order to get it as pure and white as Dorie's? Aesthetics aside, this torte still tasted great. It was smooth and creamy, and the jam on the bottom was just the right amount of tart and sweet (and based on reviews, I increased the amount of jam in the recipe). It was much lighter than cheesecake, probably owing to the cottage cheese in the filling. I would definitely make this again, especially if I was in the mood for something creamy, but not too heavy.


Thanks Tara, for picking this week's recipe. I've always wanted to make madeleines, and I really wish I could have participated, but maybe next time! Make sure you check out the Tuesdays with Dorie blogroll to see everyone else's cute madeleine cookies.

Hidden Berry Cream Cheese Torte
from Baking: From My Home to Yours, by Dorie Greenspan

For the Crust:
1 3/4 Cup all-purpose flour
1/2 Cup sugar
1/4 tsp salt
1 1/2 sticks (12 Tbsp) unsalted butter, cut into small pieces and chilled
2 large egg yolks
1 tsp pure vanilla extract

For the filling:
1/3 cup thick berry or cherry jam (I used 1/2 cup raspberry peach champagne jam)
9 oz. cream cheese, at room temperature
8 oz (1 cup) cottage cheese, at room temperature
3/4 Cup sugar
1/4 tsp salt
Pinch of ground cinnamon
Pinch of ground nutmeg
2 large eggs, preferably at room temperature

Getting Ready:
Butter a 9-inch spring form pan, dust the inside with flour and tap out the excess. Place on a baking sheet lined with parchment or a silicone mat.

To Make the Crust:
Put the flour, sugar and salt in a food processor and pulse just to blend. Toss in the pieces of butter and pulse until the mixture resembles coarse mail. Stir the egg yolks and villa together with a fork, and, still pulsing the machine, add them and continue to pulse until the dough comes together in clumps and curds-restrain yourself, and don't allow the dough to form a ball.

Turn the dough out onto a work surface. If you want to roll the dough, gather it into a ball, wrap it in plastic wrap and refrigerate ti for about 20 minutes before rolling. Or simply press the dough into the pan. The dough should come about 1 1/2 inches up the sides of the spring form. Refrigerate for at least 30 minutes.

Center a rack in the oven and preheat the oven to 375 degrees.

Fit a piece of buttered aluminum foil against the crust, covering it completely. Fill the crust lightly with rice, dried beans or pie weights and slide the sheet into the oven. Bake the crust for 20 minutes, then carefully remove the foil and weights and bake for another 5 minutes or so-you don't want the crust to get too brown. Transfer to a rack to cool while you make the filling.

Lower the oven temp for 350 degrees.

To Make the Filling:
Stir the jam, and spread it over the bottom of the crust-it's okay to do this while the crust is still warm.

Put the cream cheese and cottage cheese into the food processor and process, scraping down the sides of the bowl a few times, for 2 minutes, until you've got a smooth, satiny mix. Add the sugar, salt and spices and process for another 30 seconds. With the machine running, add the eggs and process, scraping the bowl as needed, for a final minute. Pour the filling over the jam.
Bake the cake for 60-70 minutes, or until the filling is uniformly puffed and no longer jiggly. Gently transfer the spring form pan to a cooking rack and allow the torte to cool to room temperature, during which time the filling will collapse into a thin, elegant layer.

Run a blunt knife between the crust and the sides of the pan, then open and remove the sides of the spring form pan. If the sides of the crust extend above the filling and you don't like this look, very gently saw off the excess crust using a serrated knife. Chill the torte slightly or thoroughly before serving.

Yield: 8 Servings.

Sunday, April 27, 2008

Dessert on a Stick


This month's Daring Bakers challenge was chosen by Elle of Feeding my Enthusiasms and Deborah of Taste and Tell: cheesecake pops! These totally reminded me of the frozen cheesecake slices dipped in chocolate that I used to get at the boardwalk (or at the Rocky Mountain Chocolate Factory now that we live nowhere near the beach).
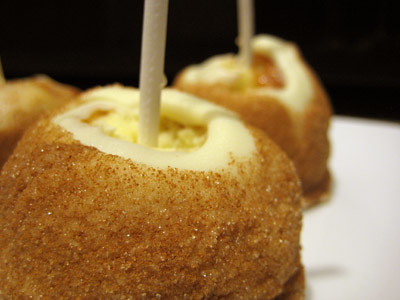


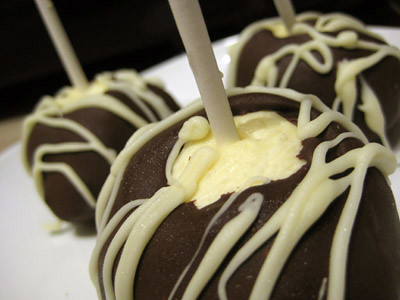
After reading comments about how several bakers were having problems with their cheesecakes not setting after the recommended 45 minute baking time, I baked mine for approximately 60 minutes until it was mostly set around the edges and just slightly jiggly in the center. I've never really had problems with my cheesecake setting before, so I was fairly confident that I had baked mine long enough. Turns out it was cooked all the way through and was sufficient for consumption, but it wasn't firm enough in the center to roll into balls for dipping (I've since read that several had to bake theirs well over 1 hour). I made do, however, and got them into the roundest shape I could using my ice cream scoop, popped them in the freezer for a few hours, and then dipped them. They turned out really well, but had to stay in the freezer until just before serving. I left a few in the refrigerator and they were still fine, but the lollipop sticks would fall out if you tried to eat one that had been in the refrigerator and not the freezer.
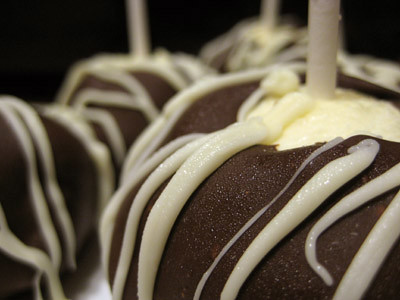

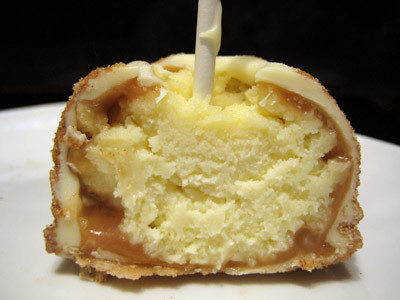
When I first found out that this was the April challenge, so many different dipping ideas went through my head... the possibilities were endless. Alas, I only had 2 weeks to complete this challenge, as I was on vacation at the beginning of the month and then left on a business trip yesterday. Then of course I had to get sick, injure my hand, etc. after my vacation so I really ended up with only 1 week to do this... and it was the week that my in-laws were visiting so my time was truly limited. So, I ended up going very simple with this recipe: I made one batch dipped in semi-sweet chocolate and then drizzled them with white chocolate; the second batch I dipped in caramel sauce, popped them back in the freezer for a bit, then dipped them in white chocolate and rolled them in a cinnamon/sugar mixture. (My favorite caramel apple at the Rocky Mountain Chocolate Factory is the "Apple Pie" Apple, so that's where I got the idea.)
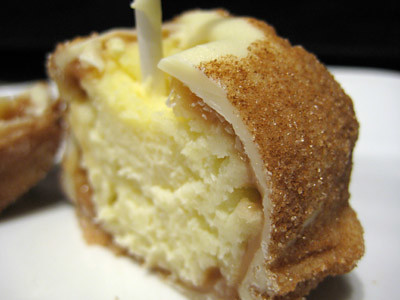

The flavor of the cheesecake itself was really good. So rich and creamy. I preferred the ones dipped in caramel/white chocolate/cinnamon/sugar over the ones that were simply dipped in chocolate, and so did my husband.
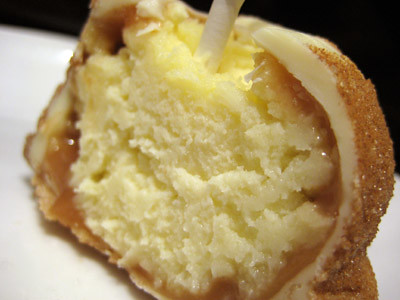

Aside from extending the baking time for the cheesecake, I would also recommend going a bit smaller than 2 ounces for each cheesecake pop. When I rolled out the cheesecake balls, I took out my kitchen scale to make sure they were 2 ounces each, as it states in the recipe. They looked quite large to me. Elle and Deborah said they shouldn't be much larger than a golf ball, but at 2 ounces, they definitely were. Even at that size, the 8-inch lollipop sticks seemed to be too long. Luckily, I had also purchased 6-inch lollipop sticks, so I ended up using those instead.

Thanks again to Elle and Deborah for hosting this month's challenge. These were a lot of fun to make and I would definitely like to make them again in the future. I wish I could have done something more impressive with the dipping and decorations, but time was not on my side. You'll have to visit the other Daring Bakers' blogs to see how creative everyone else got with their cheesecake pops--I've already seen several that are just amazing!

Aside from the blogroll, the Daring Bakers now has its own new website (still a work in progress). What's exciting about the new site is that there is a forum for discussion/questions that is available to both members and non-members, so go check it out! (The members' forum is not visible to the public.)

I'm also submitting this to Joelen's Tasty Tools event. The idea is to feature a particular kitchen tool so that we'll all have a collection of recipes to inspire us to use our kitchen tools more often. It's funny how Joelen is not a Daring Baker, and yet for two months in a row now, she has chosen a kitchen tool that I have had to use for the Daring Baker's challenge! This month's tasty tool was ice cream scoops and portion scoops. I think most everyone who made these cheesecake pops found that it was much easier to make the cheesecake balls using a scoop. Be sure to head on over to Joelen's blog on May 5th to see the round up, and get great ideas on how you can get more use of out your scoops!

Cheesecake Pops
from Sticky, Chewy, Messy, Gooey: Desserts for the Serious Sweet Tooth by Jill O'Connor

5 8-oz. packages cream cheese at room temperature (I used 1/3 less fat Neufchatel cheese)
2 cups sugar
¼ cup all-purpose flour
¼ teaspoon salt
5 large eggs
2 egg yolks
2 teaspoons pure vanilla extract
¼ cup heavy cream
Boiling water as needed
Thirty to forty 8-inch lollipop sticks (I used 6-inch sticks purchased from Michael's)

1 pound chocolate, finely chopped – you can use all one kind or half and half of dark, milk, or white (Alternately, you can use 1 pound of flavored coatings, also known as summer coating, confectionary coating or wafer chocolate – candy supply stores carry colors, as well as the three kinds of chocolate.)

2 tablespoons vegetable shortening

(Note: White chocolate is harder to use this way, but not impossible)

Assorted decorations such as chopped nuts, colored jimmies, crushed peppermints, mini chocolate chips, sanding sugars, dragees) - Optional

Position oven rack in the middle of the oven and preheat to 325 degrees F. Set some water to boil.

In a large bowl, beat together the cream cheese, sugar, flour, and salt until smooth. If using a mixer, mix on low speed. Add the whole eggs and the egg yolks, one at a time, beating well (but still at low speed) after each addition. Beat in the vanilla and cream.

Grease a 10-inch cake pan (not a springform pan), and pour the batter into the cake pan. Place the pan in a larger roasting pan. Fill the roasting pan with the boiling water until it reaches halfway up the sides of the cake pan. Bake until the cheesecake is firm and slightly golden on top, 35 to 45 minutes.

Remove the cheesecake from the water bath and cool to room temperature. Cover the cheesecake with plastic wrap and refrigerate until very cold, at least 3 hours or up to overnight.

When the cheesecake is cold and very firm, scoop the cheesecake into 2-ounce balls and place on a parchment paper-lined baking sheet. Carefully insert a lollipop stick into each cheesecake ball. Freeze the cheesecake pops, uncovered, until very hard, at least 1 – 2 hours.

When the cheesecake pops are frozen and ready for dipping, prepare the chocolate. In the top of a double boiler, set over simmering water, or in a heatproof bowl set over a pot of simmering water, heat half the chocolate and half the shortening, stirring often, until chocolate is melted and chocolate and shortening are combined. Stir until completely smooth. Do not heat the chocolate too much or your chocolate will lose it’s shine after it has dried. Save the rest of the chocolate and shortening for later dipping, or use another type of chocolate for variety.

Alternately, you can microwave the same amount of chocolate coating pieces on high at 30 second intervals, stirring until smooth.

Quickly dip a frozen cheesecake pop in the melted chocolate, swirling quickly to coat it completely. Shake off any excess into the melted chocolate. If you like, you can now roll the pops quickly in optional decorations. You can also drizzle them with a contrasting color of melted chocolate (dark chocolate drizzled over milk chocolate or white chocolate over dark chocolate, etc.) Place the pop on a clean parchment paper-lined baking sheet to set. Repeat with remaining pops, melting more chocolate and shortening (or confectionary chocolate pieces) as needed.

Refrigerate the pops for up to 24 hours, until ready to serve.

Makes 30 – 40 Pops

Tuesday, February 12, 2008

TWD: Brown-Sugar Apple Cheesecake


This week it was my turn to choose the recipe for Tuesdays with Dorie. Anyone who knows me can understand how tough this decision was for me. I will spend forever pouring over a menu before deciding what I want to order... until my husband gets mad at me and forces me to make a decision before we turn the server away for the third time ;) I love too many different things, and I'm entirely too indecisive. So with over 500 recipes to choose from, I was at a loss!


As much as I enjoyed the Black and White Chocolate Cake and the "She Ain't Heavy" Chocolate Cake," I was ready to take a small break from fancy cakes (I'm horrible at assembling cake layers). Aside from that, I had no idea what I wanted to choose. So, I poured over the book several times before narrowing it down to a select few. In the end, I chose the Brown Sugar-Apple Cheesecake. I love cheesecake, and I love apples... so it seemed perfect.


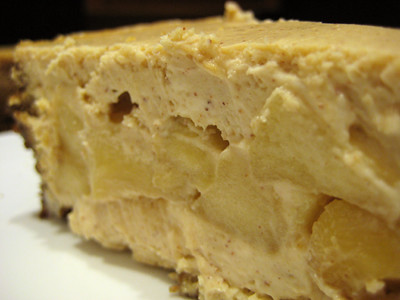
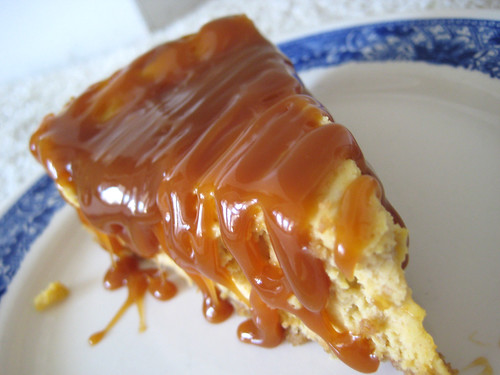
This turned out to be a soft and creamy cheesecake. Not nearly as dense as a New York Style cheesecake, but I liked that because it wasn't too heavy. Three "large" apples is a pretty subjective measure, but I usually like more fruit in anything with a fruit filling, so I used four fairly large apples, weighing a total of 2 pounds. I felt that this was the perfect cheesecake to apple ratio. Originally, I had planned on topping this with more cooked apples and caramel sauce, but in the end it was perfect as is :)


When I decided to join Tuesdays with Dorie, I had no idea what I was getting into! I don't mean that in a bad way, but what I mean is that I had no idea how quickly the group would grow! Two weeks ago, I was the third person to join Laurie in her baking endeavor. Since then, the group has grown to include thirty bakers! :) Visit our new blog to see our blog roll and who the new members are. While you're there, don't forget to check out everyone's creamy creations from this week.

Oh, and this marks my 100th post! When I started my blog back in September, it was mostly to keep track of my favorite recipes. It was also a great way for me to share recipes with my friends. Little did I know that just five months later, I'd be here, participating in blog events (like Time to Make the Doughnuts) and a part of baking groups like Tuesdays with Dorie (I also finally mustered up enough courage to join the Daring Bakers this month!). So, for those that have been along for the ride, I thank you for reading my blog. I'm thrilled to hit the 100 post milestone and look forward to many more mouth watering posts in the future :)
Brown Sugar-Apple Cheesecake
from Baking: From My Home to Yours, by Dorie Greenspan

For the Crust:
30 gingersnaps (or a scant 2 cups graham cracker crumbs)
2 tbsp light brown sugar
1/2 tsp ground cinnamon (optional)
1/2 stick (4 tbsp) unsalted butter, melted

For the Apples:
1/2 stick (4 tbsp) unsalted butter
3 large Golden Delicious or Fuji apples, peeled, cored and cut into eighths (I used 2 lbs Fuji, cut into twelfths)
2 tbsp (packed) light brown sugar

For the Filling:
1 1/2 pounds (three 8-ounce packages) cream cheese, at room temperature (I used 1/3 less fat Neufchatel)
3/4 cup (packed) light brown sugar
6 tbsp sugar
3 tbsp apple cider
2 tsp pure vanilla extract
2 tsp ground cinnamon
3 large eggs
3/4 cup sour cream (I used light sour cream)
1/3 cup heavy cream

Apple jelly, for glazing, or confectioner's sugar, for dusting (optional)


To Make the Crust:
Butter the bottom and sides of a 10-inch springform pan. (I used a 9-inch so my crust went all the way up the sides of the cheesecake.)

Put the gingersnaps in a food processor and whir until you have crumbs; you should have a scant 2 cups. (If you are using graham cracker crumbs, just put them in the food processor.) Pulse in the sugar and cinnamon, if you're using it, then pour over the melted butter and pulse until the crumbs are moistened. Turn the crumbs into the springform pan and, using your fingertips, firmly press them evenly over the bottom and up the sides of the pan as far as they'll go. Put the pan in the freezer while you preheat the oven. (The crust can be covered and frozen for up to 2 months.)

Center a rack in the oven and preheat the oven to 350 degrees F.

Remove the pan from the freezer and wrap the bottom tightly in aluminum foil, going up the sides. Place the pan on a baking sheet and bake for 10 minutes, or until the crust is set and lightly browned. Transfer to a rack to cool while you make the apples and the filling. Leave the oven at 350 degrees F.


To Make the Apples:
Melt 2 tablespoons of the butter in a large nonstick skillet over medium-high heat. When the foam subsides, toss in half of the apple slices and cook, turning once, until they are golden brown, about 3 minutes. Sprinkle the apples with 1 tablespoon of the sugar and cook them, turning, just until coated, another minute or so. Scrape the apples onto a plate, wipe out the skillet and repeat with the remaining apples. Let the apples cool while you make the filling.


Getting Ready to Bake:
Have a roasting pan large enough to hold the springform pan at hand. Put a kettle of water on to boil.

To Make the Filling:
Working with a stand mixer, preferably fitted with a paddle attachment, or with a hand mixer in a large bowl, beat the cream cheese on medium speed, scraping down the bowl often, for about 4 minutes, or until it is velvety smooth. Add the sugars and beat for another 2 minutes. Beat in the cider, vanilla, and cinnamon. Reduce the speed to low and beat in the eggs one by one, beating for 1 minute after each egg goes in. Finally, beat in the sour cream and heavy cream, beating just until the batter is smooth.

Pour about one third of the batter into the baked crust. Drain the apples by lifting them off the plate with a slotted spoon or spatula, and spoon them into the pan. Cover with the remaining batter and, if needed, jiggle the pan to even the top. Place the springform pan in the roasting pan and pour in enough boiling water to come halfway up the sides of the springform pan.

Bake the cheesecake for 1 hour and 30 to 45 minutes (I baked mine for 1 hour and 50 minutes in the 9-inch pan), covering the cake loosely with a foil tent at the 45-minute mark. The cake will rise evenly and crack around the edges (mine did not crack at all), and it should be fully set except, possibly, in the very center--if the center shimmies, that's just fine. Gently transfer the cake, still in the pan, to a cooling rack and let it cool to room temperature, then refrigerate it for at least 6 hours; overnight would be better.

Run a blunt knife around the edges of the pan to loosen the crust, open the pan's latch and release and remove the sides.

Saturday, November 3, 2007

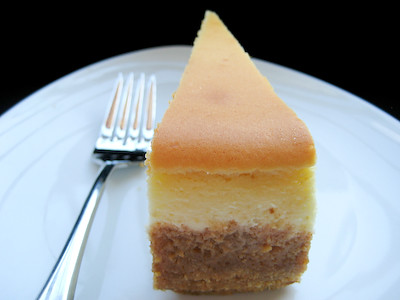
Pumpkin Cheesecake with Caramel Sauce


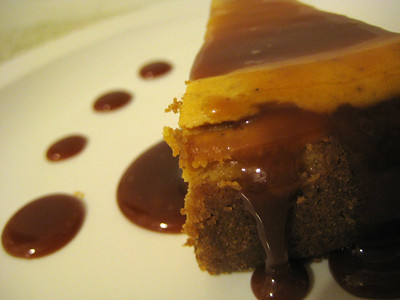
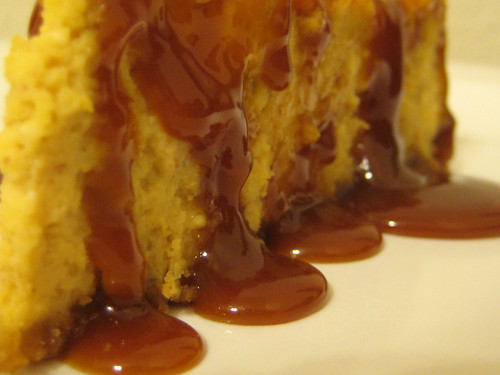
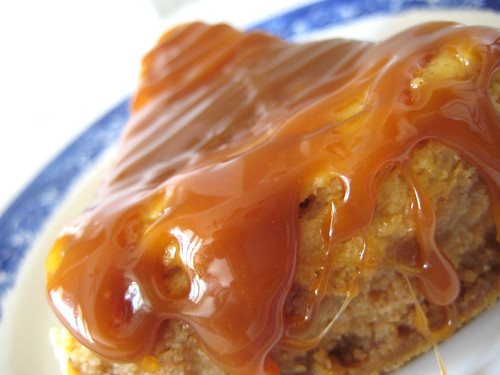
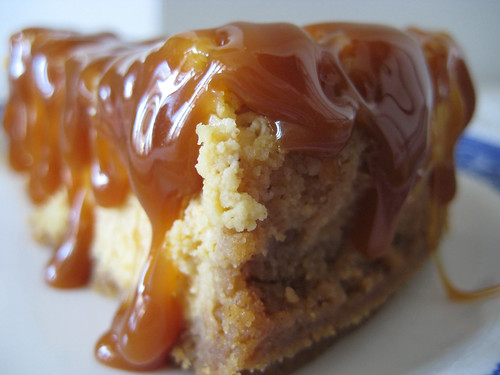
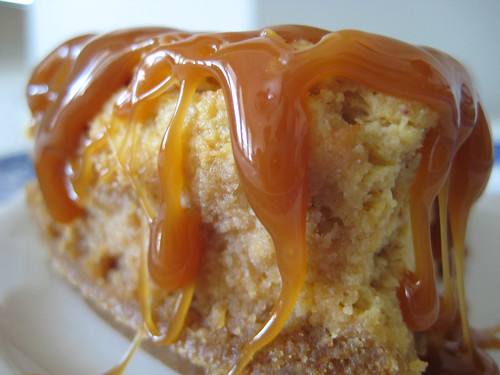
I have been wanting to make a pumpkin cheesecake for a while now. I wasn't sure which recipe I wanted to use, as I had seen this recipe on the Williams-Sonoma website and most of their recipes are pretty good. However, as I was searching for a recipe I came across this one from RecipeZaar. The only kind of pumpkin cheesecake I've ever had was from the Cheesecake Factory, so that was how I finally decided to try the recipe below. It has honestly been such a long time since I had the Cheesecake Factory version, so I can't really comment on how close of a copycat recipe this really is. Regardless, this turned out so good and everyone at work loved it... including those who don't like pumpkin! :) Everyone requested the recipe...


I had seen a few recipes in which the cheesecake was topped with a caramel sauce and thought that would be a great idea. So I went to my 'go-to' blog, Culinary Concoctions by Peabody, in search of a great caramel sauce. Wow, did I ever find a good recipe for caramel sauce! I could eat this stuff up by the spoonful alone! :) I don't think I will ever buy caramel ice cream topping again... this was so much better!


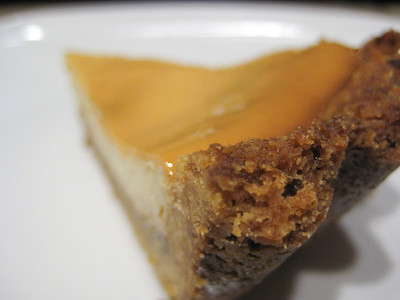
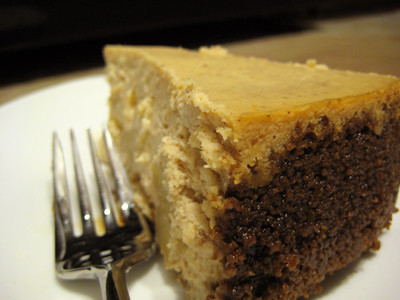
On a side note... you'll notice that the lighting in the photos in this post is not uniform. That's because by the time I finished this cheesecake, it was dark outside... so I took a set of photos with just our overhead/indoor lighting. Then I took another set the next day with natural lighting. For those who are working on their food photography skills, it's a great example of how lighting can affect the appearance of your photos.

The Cheesecake Factory Pumpkin Cheesecake
from RecipeZaar


1-1/2 cups graham cracker crumbs
5 tablespoons butter, melted
1 cup sugar, plus 1 tablespoon sugar
3 (8 ounce) packages cream cheese, softened
1 teaspoon vanilla
1 cup canned pumpkin
3 eggs
1/2 teaspoon cinnamon
1/4 teaspoon nutmeg
1/4 teaspoon allspice
caramel sauce, recipe to follow


Preheat oven to 350 degrees F.

Make the crust by combining the graham cracker crumbs with the melted butter and 1 tbsp sugar in a medium bowl. Stir well enough to coat all of the crumbs with the butter, but not so much as to turn the mixture into paste. Keep it crumbly. Put foil partway up the outside part of an 8-inch springform pan. Press the crumbs onto the bottom and about two-thirds of the way up the sides of the springform pan. You don't want the crust to form all of the way up the back of each slice of cheesecake. Bake the crust for 5 minutes, then set aside until you are ready to fill it.


In a large mixing bowl combine the cream cheese, 1 cup sugar, and vanilla. Mix with an electric mixer until smooth. Add the pumpkin, eggs, cinnamon, nutmeg and allspice and continue beating until smooth and creamy. Pour the filling into the pan. Bake for 60-70 minutes. The top will turn a bit darker at this point. Remove from the oven and allow the cheesecake to cool.


When the cheesecake has come to room temperature, put it into the refrigerator. When the cheesecake has chilled, remove the pan sides and cut the cake into 8 equal pieces. Top each slice with caramel sauce.

Caramel Sauce
from Culinary Concoctions by Peabody (original recipe from Baking: From My Home To Yours, by Dorie Greenspan, Houghton Mifflin 2006)


2 cups sugar
1/2 cup water
1-1/2 tbsp light corn syrup
2/3 cup heavy cream
2 tbsp unsalted butter, at room temperature


Put the sugar, water and corn syrup in a medium heavy bottomed saucepan, stir just to combine the ingredients and then put the pan over medium-high heat. Heat, without stirring , until the caramel turns deep amber., 5-10 minutes. Lower the heat a bit and, standing back from the saucepan add the cream and butter. When the spatters are less vehement, stir to calm down the caramel and dissolve any lumps.