Showing posts with label fruit. Show all posts

Sunday, December 23, 2012

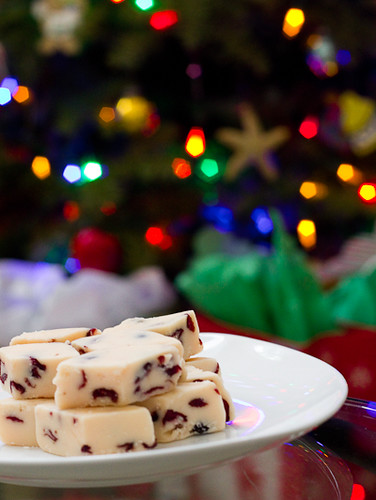
In The Pink White Chocolate Cranberry Fudge

Ok, so I wasn't able to finish posting all of my holiday posts yesterday before the kids started needing my attention.  Today I'll finish off the series with some fudge recipes.  What holiday baking list would be complete without fudge? I love fudge.  Every variety of it - chocolate, peanut butter, chocolate with peanut butter, and maple.  This year I tried two new flavors of fudge: White chocolate cranberry and maple pumpkin (the latter will be my next post).  This white chocolate fudge recipe is nice because it doesn't require the use of a candy thermometer.

I actually made this pink white chocolate cranberry fudge the first time in November for my daughter's birthday party.  I needed both pink and purple desserts and stumbled upon this fudge recipe while browsing the web.  I love white chocolate (even though my husband gets on me for it not being "real" chocolate), so I knew I'd love this fudge.  I omitted the nuts because I never put nuts in my baked goods, but the cranberries were a welcome addition.  The original recipe calls for cherries, but I did not have those on hand.  The dried cranberries work well as a substitute, as they are both tart and sweet.  Everyone who tried this at the party loved it, so if you're looking for something a little bit different this holiday season, I'd encourage you to try this fudge.

In The Pink White Chocolate Cranberry (Almond) Fudge
adapted from Imperial Sugar

2 cups Imperial Sugar® Extra Fine Granulated Sugar
2/3 cup heavy cream
1/2 cup butter
3 cups mini marshmallows
2 cups (one 12 ounce bag) white chocolate chips
1 cup dried cranberries, chopped
3-4 drops red food coloring
1/2 cup chopped slivered almonds, toasted (I omitted these)

Line an 8x8x2-inch baking pan with foil (I used a 9x9 inch pan). Butter foil and set aside.

Combine sugar, cream and butter in a heavy 2-quart saucepan. Cook and stir over low heat until blended. Increase heat to medium. Bring to a boil.  Boil for 5 minutes, stirring constantly.

Remove from heat and stir in marshmallows and white chocolate chips. Stir until chocolate is melted. Stir in cranberries, enough food coloring to turn fudge pink (3-4 drops) and nuts, mixing until well blended.

Spoon into prepared pan. Refrigerate until firm. Cut into squares.  Store tightly covered in refrigerator for up to a month.

Tuesday, September 4, 2012

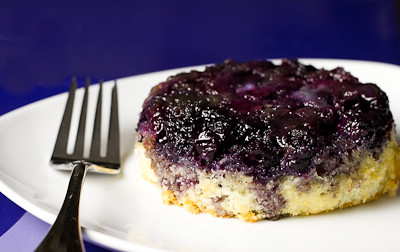
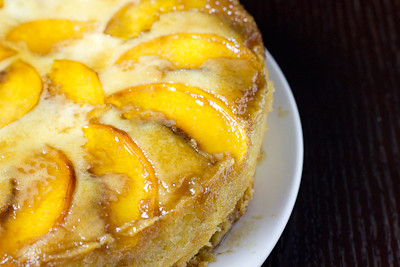
Nectarine Upside-Down Chiffon Cake (TWD)


This week's Tuesdays with Dorie: Baking with Julia recipe was hosted by Marlise of The Double Trouble Kitchen and Susan of The Little French Bakery: Nectarine Upside-Down Chiffon Cake.  It's been a long, long, time since I've posted for this group - I'm sorry :( I have just been so busy, and on top of that I'm six months pregnant and turning on the oven when it is 100+ degrees outside just hasn't been very appealing.  The good news, however, is that my baby girl (who is not so much a baby anymore) just started school this week so that means this mama is going to have a lot more time to bake each week! So, you should start to see blog posts pick up a little more at least.

I didn't have a pan large enough for this cake, so I made one large nectarine and peach upside-down chiffon cake and one mini blueberry upside-down chiffon cake.  After reading some of the comments on the weekly P&Q, I decided to skip the streusel and made sure to bake my cake for a few extra minutes.  I really think the longer baking time has to do with whether or not the cake is baked on a jelly roll pan.  I did not bake mine on one and I think it only took an extra 3-5 minutes to bake.  I did, however, cover the bottom of my pans with foil to catch the butter drippings, which was good because there was quite a bit.
The blueberry cake was delicious.  The chiffon was light and airy, as it should be.  It's a nice contrast to the denser, more traditional pineapple upside down cake.  I'm not sure how the nectarine and peach cake turned out because that one will be going with my husband to work tomorrow, but I imagine it's just as good as the blueberry cake.
Thanks to Marlise and Susan for hosting; you can find the recipe on their blogs here and here.  Make sure you check here, too, to see what everyone else thought of this sweet, end of summer treat.

* Recipe notes:
- If you bake your cake on a jelly roll pan, be sure to add at least another 10 minutes of baking time to your cake.  Definitely don't forget to wrap the bottom of your pan in foil, or you'll end up with a big mess on the bottom of your oven.
- Frozen blueberries work great with this recipe.  Do not thaw before baking.
- For more recipe notes, check here.

Tuesday, July 31, 2012

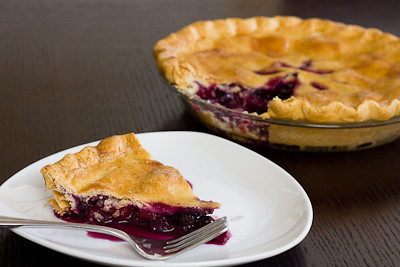
Blueberry Nectarine Pie (TWD)


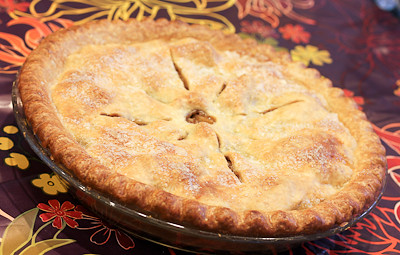
This week's Tuesdays with Dorie: Baking with Julia recipe was hosted by Hilary of Manchego's Kitchen and Liz of That Skinny Chick Can Bake: Blueberry Nectarine Pie.  This pie is about as summer as you can get.  I love taking advantage of fresh fruits that are in season. 

In this recipe, the blueberries and nectarines get cooked down in a little bit of lime zest and brown sugar and then they're tossed in some fresh lime juice with more fresh blueberries and nectarines.  The lime is what really brings out the flavors in the fruit.  This pie was delicious, and the only thing I'd probably change is to double the fruit next time, as my pie came out a bit thin.
Thanks to Hilary and Liz for hosting; you can find the recipe on their blogs here and here.  Make sure you check here, too, to see what everyone else thought of this fruit-filled summer treat.

* Recipe notes:
- You'll definitely want to use a pie crust shield or cover the edges of your pie with some foil about half way through the baking process to prevent the edges from getting burned.
- I had to bake my pie about an extra 10-15 minutes before the crust was golden and the fruit juices were bubbling.
- I did not bake my pie on a baking sheet; in my experience that only causes the bottom crust to be undercooked.  Instead, I simply laid a piece of foil at the bottom of the oven to catch any juices that might bubble over.

Tuesday, June 19, 2012

French Strawberry Cake (TWD)


This week's Tuesdays with Dorie: Baking with Julia recipe was hosted by Sophia of Sophia's Sweets and Allison of Sleep Love Think Dine: French Strawberry Cake.  It's a genoise, or Italian sponge cake, made without any chemical leavening agents.  Instead, the sponge is made by whipping air into the batter and the dry ingredients are folded in.  The batter is extremely delicate, and over mixing will cause it to deflate.  The cake is then split into three layers, and then strawberries and cream are layered into between each cake layer.


I had a few small issues with this cake.  First, I was traveling and did not have an 8-inch cake pan.  I had to use a larger pan, and the resulting cake was too thin to cut into three layers.  So, I ended up baking a second cake and splitting both cakes into two layers instead - resulting a 4-layer cake instead of a 3-layer cake.  Even though I whipped up a full 2 cups of heavy cream (instead of the indicated 1-1/4), I did not have enough cream to pipe around the cake.  Instead, I decided to just decorate my cake with more fresh strawberries.


Thanks to Sophia and Allison for hosting; you can find the recipe on their blogs here and here.  Make sure you check here, too, to see what everyone else thought of wonderful summer treat.

* Recipe notes:
- Be very very careful folding your ingredients together, especially the butter.  If you're not careful all is lost and you shouldn't even bother baking up the deflated batter.
- I'd recommend using at least 2 cups of heavy whipping cream to frost the cake.

Thursday, April 19, 2012

Orange Loaf Cake (TWD)


Ack! I'm not sure how I missed it, but I totally lost track of the days and realized on Wednesday night that I had forgotten to do this week's Tuesdays with Dorie: Baking with Julia recipe! This week's recipe hosted by Truc of Treats and Michelle of The Beauty of Life: Lemon Loaf Cake.

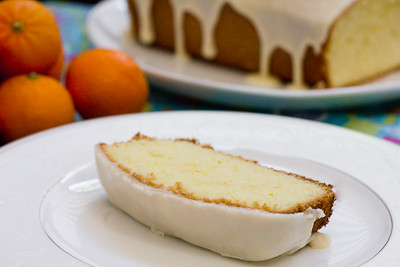
This was a quick and easy one bowl recipe that came together in just minutes (no mixer required!).  I didn't have any lemons on hand so I made an orange loaf cake instead.  I also glazed my loaf with an orange glaze.

The crumb was nice and fluffy, not too heavy at all.  However, I did find the cake a tad dry - not sure if I over baked it?  The orange flavor was quite subtle and I'm not sure you would really taste much of it without the glaze.  One of my favorite treats to get at Starbucks is their iced lemon pound cake.  I'm afraid this one pales in comparison.  It was good, but probably not something that I'll make again.

Thanks to Truc and Michelle for hosting; you can find the recipe on their blogs here and here.  Make sure you check here, too, to see what everyone else thought of citrus infused treat.

Tuesday, March 20, 2012

Irish Soda Bread (TWD) and Vitacost Deal on Coconut Oil


This week's Tuesdays with Dorie: Baking with Julia was hosted by Carla of Chocolate Moosey and Cathleen of my culinary mission.  The chosen recipe was Irish Soda Bread.  So named because instead of yeast, baking soda is used as the leavening agent in this bread.

It's pretty similar to most quick bread recipes (or biscuits), in that you mix all the dry ingredients together in one bowl, then pour the liquid ingredients in and mix it all together.  This recipe does call for a quick kneading, however, and I found the dough to be way too wet to knead.  I had to add quite a bit of extra flour before I could handle it.  Otherwise, this was a super easy recipe and it came together in just a matter of minutes!  I added dried cranberries and chopped dried apricots to mine, which gave it a slightly sweet but not overwhelmingly sweet flavor.  I saw that a few other bakers added cheese to theirs and I think that will be my next rendition of this recipe :)

Thanks to Carla and Cathleen for hosting; you can find the recipe on their blogs here and here.  Make sure you check here, too, to see all the other variations on this classic Irish bread.

Also, if you missed the last Vitacost deal I posted about, their free shipping promotion has been extended through 3/26 at 9am EST.
Right now, Vitacost.com is offering FREE shipping on orders that contain over $20 in Vitacost brand products.  (Normally their shipping fee is $4.95 for orders under $49 and free shipping for orders $49+)  Pair this free shipping offer with their $10 off $10 promo (for new customers) and you can get $20 worth of products for just $10.

You can get the 54oz Vitacost Coconut Oil for just $11.95 after the discount.  It's normally $18.89 on Amazon, so this is quite a savings.

Here's how:
1) Use this link to sign up and get a $10 promo code sent to your email.  After you register for an account with Vitacost.com (it must be through the link provided) you will receive an email with the subject line "Here's your $10 coupon for Vitacost.com" (this may take an hour)

2) Then add the Vitacost Coconut Oil to your cart for $19.95 (used to be $20.99 so it would qualify for free shipping alone).  Add the apple cider vinegar ($2) as a filler to bring your total to $20+.  Then use the $10 off code sent to your email, bringing your order total to $11.95 for both the coconut oil and the apple cider vinegar!

Of course, feel free to look around their website for other items.  You can view all Vitacost brand items that qualify for this free shipping offer here

Also, don't forget to add 2 free samples to your cart before checking out (they've got a few different teas and other samples available).  Happy shopping!

Tuesday, March 6, 2012

Rugelach (TWD)


This week's Tuesdays with Dorie: Baking with Julia was co-hosted by Jessica of My Baking Heart and Margaret of The Urban Hiker.   The chosen recipe was rugelach.  Rugelach are actually Jewish pastries made with sour cream pastry dough.  They are made in the form of a crescent by rolling a triangle of dough around a filling of fruit, nuts, or fruit preserves.  The rugelach made in this recipe is slightly different in that it is made with a cream cheese pastry dough, and the rolled dough and filling is cut into slices before baking.

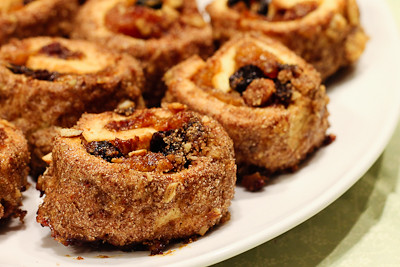
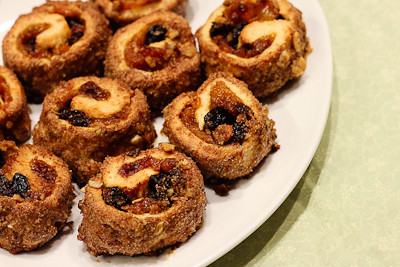
I've actually made rugelach a few times prior to this - love the stuff!  I love this Barefood Contessa recipe and we actually also made rugelach back in 2008 for TWD.  I'm not a nut person so I didn't put nuts in my filling, but I did put some nuts in the streusel that the pastries were rolled in.  I made apricot lekvar (homemade fruit butter) and filled my rugelach with dried cherries, raisins, and dried apricots.  I did not have any problems with this recipe, except that I did not look at it ahead of time and did not realize how much refrigeration time was required, so I did not finish baking them until very late today!

I have to say that I love this version of rugelach.  The sugar and cinnamon mixture that the pastries get rolled in caramelizes in the oven and gives it a wonderful, crisp texture.  Then you bite into the cream cheese pastry that is so light and flaky, and then you taste the apricot butter and dried fruit bits.  I think I just ate about ten of them in one sitting and my husband asked me to hide them from him because he can't stop eating them!

This recipe is definitely a keeper, and I can't wait to make it again.  Thanks to Jessica and Margaret for hosting; you can find the recipe on their blogs here and here.  Make sure you check here, too, to see how everyone else in our baking group enjoyed these pastries!

Also be sure to leave a comment below... I was visited recently by the Fairy Hobmother and received an unexpected gift... if you leave a comment here you might get a visit from the Fairy Hobmother too ;)

Tuesday, December 13, 2011

Unbelievably Good Chocolate Blueberry Pomegranate Ice Cream (TWD)


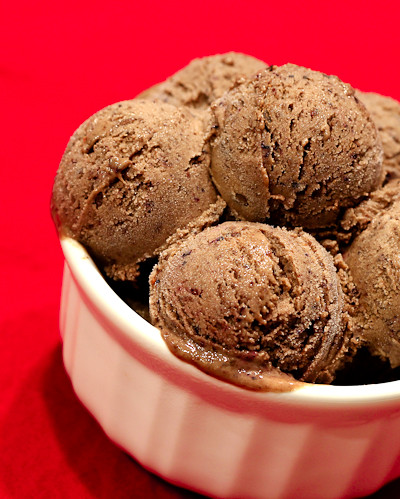
This week's Tuesdays with Dorie (TWD) recipe was chosen by Laurie (founder of TWD!) of Slush: Unbelievably Good Chocolate Blueberry Ice Cream.

I would never to think to make chocolate blueberry ice cream, but I've totally had chocolate covered strawberries, and chocolate covered dried cherries, blueberries, etc. so of course it would make sense that chocolate blueberry ice cream would be good :)

I thought I had everything I needed for this recipe because we usually keep frozen blueberries on hand for my daughter, but when I went to the make the recipe I realized that the recipe calls for blueberry preserves, not fresh/frozen blueberries! Well, I just so happened to receive some Pomegranate Jelly for my birthday in November, so I decided to puree some frozen blueberries (about 1 tbsp) and mixed it together with the Pomegranate Jelly.... resulting in the most delicious chocolate blueberry pomegranate ice cream!

If you would like the recipe, you can find here.  Make sure you also check out this page, too, so you can see what everyone else thought of this unusual chocolate ice cream!

And if you haven't already, don't forget to enter my Peeled Snacks Giveaway!

Sunday, December 4, 2011

Sour Cream Pumpkin Tart and Normandy Apple Tart (TWD)


This week for Tuesdays with Dorie (TWD) we had two recipes! (I actually had this post ready to go on Tuesday night and just realized I never posted it! oops!) The recipes were chosen by Tracey of Tracey’s Culinary Adventures and Judy of Judy’s Gross Eats. Tracey chose the Normandy Apple Tart and Judy chose the Sour Cream Pumpkin Pie/Tart.  I was ambitious this week and made both :)

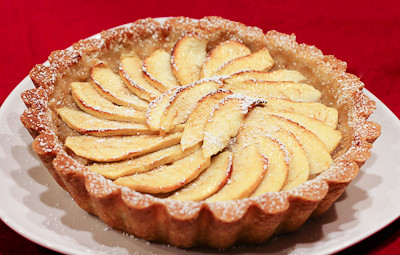
The Normandy Apple Tart is a very rustic and homey dessert.  It's basically a tart shell filled with delicious homemade (or store bought) applesauce, then layered with apples on top.  It's amazing how something so simple can be so delicious.  I think using your own homemade applesauce really makes a difference in this dessert.  I am also a huge fan of Dorie's tart shell recipe and use it all the time.... I even used it for the Sour Cream Pumpkin Pie recipe because Dorie mentions that as an alternative to your traditional pie crust.


The sour cream pumpkin pie was one of my husband's favorite desserts this Thanksgiving.  He said he liked it better than traditional pumpkin pie because it wasn't so heavy.  I thought that was interesting, given the amount of heavy cream in it ;) It has a nice blend of spices to it and I think the addition of some rum to the filling really makes it stand out.


While the pumpkin pie can be served cold or at room temperature, I thought the flavors were a bit muted when it was chilled, so I would definitely recommend serving it at room temperature.

Thanks, Tracey and Judy, for hosting this week! I really enjoyed both recipes.  I don't normally eat pumpkin pie except around Thanksgiving, but I could definitely see myself making the Normandy Apple Tart a few times each fall :) If you'd like the recipes, please click here for the Normandy Apple Tart and here for the Sour Cream Pumpkin Pie.

* Recipe notes:
- Make sure to put a pie crust shield (or some foil) around the edge of your tart about 20-30 minutes into baking to avoid burning the edges.

Friday, November 25, 2011

Ginger Jazzed Brownies and Fall Butternut Squash Pie (TWD)

I hope everyone had a wonderful Thanksgiving filled with lots of good eats and sweet treats! We had a pretty impressive spread at our house, and of course we're still enjoying leftovers today.

This week we're posting for Tuesdays with Dorie (TWD) on Friday.  This was to allow everyone the time to get ready for Thanksgiving.  There was no specific recipe chosen for this week, we were simply given the liberty to do a "rewind," meaning we could go back and bake a recipe from the past that we may have missed.  I'll be posting about the Ginger Jazzed Brownies and the Depths-of-Fall Butternut Squash Pie.

The ginger jazzed brownies were actually chosen by Hindy of Bubie’s Little Baker as the recipe of the week for October 18 and I made them a few weeks ago.  I just never got around to posting about them! I didn't have any fresh ginger on hand, so I added extra ground ginger to the brownies, as Dorie suggested.  My brownies came out with very little ginger flavor to them, which was a big disappointment because I love ginger.  I had contemplated adding in chopped candied/crystallized ginger to the brownies, and should have... because I munched on some while eating these brownies and found that the ginger and chocolate flavors together were great.  So, next time I make these, I will definitely add in chopped crystallized ginger instead of fresh ginger.  Otherwise, these brownies were super moist and dense like you would expect brownies to be.


The Fall Butternut Squash Pie was chosen by Valerie of Une Gamine dans la Cuisine. I am not a big butternut squash fan, but I still wanted to try this pie because that's what TWD is all about - trying recipes you wouldn't otherwise try. So, I made this one for Thanksgiving. Aside from the butternut squash, this pie is filled with pears, brown sugar, spices, walnuts, and raisins (or dried cranberries or diced apples).


This pie was met with mixed reviews. I really didn't care for it much. I think I would have liked it better if there had been more sugar in it because I think it was lacking in sweetness. My mom thought it was good, but attributed that to the fact that there was a lot of other filling ingredients besides squash. I think if it had a little bit less squash and lots of pears and apples, it would be very good. Just enough to have a hint of squash in it, but not overwhelmingly squashy ;)


If you're interested, head on over here for the Ginger Jazzed Brownies recipe and here for the Fall Butternut Squash Pie recipe.

Tuesday, November 15, 2011

Alsatian Apple Tart (TWD)


I am back with Tuesdays with Dorie (TWD) and will be back to posting weekly with the group from now until the end of the year.  Even though we're down to the last few recipes in the book, we've got a lot of great recipes lined up. Believe it or not, we'll be done baking through the entire book by the end of the year! Isn't that crazy?!

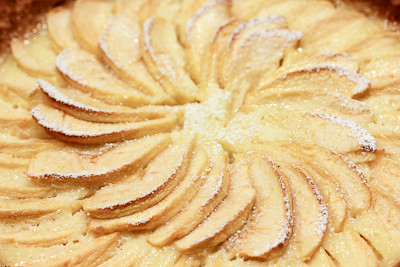
This week's TWD recipe was chosen by Jessica of Cookbook Habit: Alsatian Apple Tart.  It is a tart lined with "thick slices of sweet apples and a vanilla-flavored mix of eggs, cream and sugar that is poured over the apples and, under heat, transformed into a soft custard."

When I think of custard filled tarts, I think of fruit tarts that are topped with fruits like strawberries, blackberries, kiwi, blueberries, etc.  I have never had a custard fruit tart with apples! Interestingly enough, the rich and creamy custard that envelopes the apples is absolutely delicious.  I think the tart would be great with pears, too, which Dorie suggests in the "Playing Around" section.

I only added one egg and omitted the extra egg yolk in the custard, just because I didn't want to have another egg white in my freezer.  The custard was still rich despite this omission thanks to the heavy cream.  Only thing I would do differently next time would be to remember to put my pie crust shield on the tart sooner! I forgot and didn't realize the edges were burning until I started to smell it! (That's why you don't see a picture of the entire tart!)

Thanks, Jessica, for hosting this week! I love baked apple desserts and this one was no exception.

* Recipe notes:
- Make sure to put a pie crust shield (or some foil) around the edge of your tart about 20 minutes into baking to avoid burning the edges.

Sunday, November 6, 2011

Povitica (DB)

 
The Daring Baker’s October 2011 challenge was Povitica, hosted by Jenni of The Gingered Whisk. Povitica is a traditional Eastern European Dessert Bread that is as lovely to look at as it is to eat! It is a specialty bread that normally costs $25 a loaf! Yes, $25!

Yes, I know it's November and October is long gone, but I am so terribly behind in my blogging.  I actually finished this dessert bread before the posting deadline and have several other things I have made that I just haven't gotten around to blogging about! Please bear with me as I get back into my blogging groove.... being sick for most of September and part of October just threw me for a loop and then the last week I was very very busy making a super special birthday cake for my daughter (post to come)!

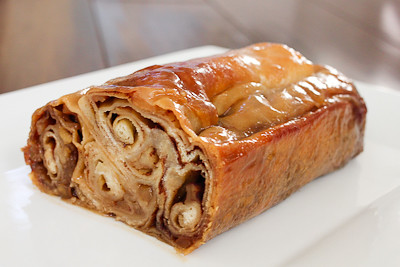
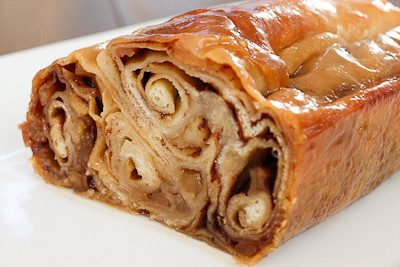
So on to the challenge... this dessert bread was different from anything I've tried before, but certainly delicious.  You basically make your regular yeast dough, then roll it out super thin (kind of like making phyllo dough) and then add in whatever filling you like.  Then you roll it up like you would a cinnamon roll and coil it up onto itself into a loaf pan.  The result is a beautiful spiral filled dessert bread.
 
We were given the liberty to either fill our bread with an English walnut filling, or the filling of our choice... and since I don't really like nuts I went with a cinnamon apple filling.  I browned some butter and brown sugar in a pan, sauteed the apples, and then layered them into the bread with cinnamon and sugar.  I didn't have enough apples at home (only 3) so my filling was a little scarce, and I would definitely add more next time. 

When I first removed my pan from the oven, there were lots of juices from the baked apples bubbling in the pan.  I found, however, that after leaving the pan out overnight that most of it had been soaked up by the bread, making it oh so gooey and delicious. It almost tasted like cinnamon apple cinnamon rolls but with thin layered dough.

Thanks Jenni, for hosting this month's challenge.  Make sure you check out the Daring Bakers' Blogroll to see how everyone else this specialty bread!

Povitica
(makes 4 loaves)

Ingredients

To activate the Yeast:
2 Teaspoons (10 ml/9 gm) Sugar
1 Teaspoon (5 ml/3 gm) All-Purpose (Plain) Flour
½ Cup (120ml) Warm Water
2 Tablespoons (30ml/14 gm/½ oz/2 sachets) Dry Yeast

Dough:
2 Cups (480ml) Whole Milk
¾ Cup (180 ml/170gm/6 oz) Sugar
3 Teaspoons (15 ml/18 gm/2/3 oz) Table Salt
4 Large Eggs
½ Cup (120ml/115 gm/one stick/4 oz) Unsalted Butter, melted
8 cups (1.92 l/1.12 kg/39½ oz/2½ lb) All-Purpose Flour, measure first then sift, divided

Walnut Filling:
7 Cups (1.68 l/1.12 kg/2.5 lbs) Ground English Walnuts
1 Cup (240ml) Whole Milk
1 Cup (240ml/225 gm/2 sticks/8 oz) Unsalted Butter
2 Whole Eggs, Beaten
1 Teaspoon (5ml) Pure Vanilla Extract
2 Cups (480ml/450 gm/16 oz) Sugar
1 Teaspoon (5 ml/4 gm) Unsweetened Cocoa Powder
1 Teaspoon (5 ml/3 gm) Cinnamon

Topping:
½ Cup (120 ml) Cold STRONG Coffee
2 Tablespoons (30 ml/28 gm/1 oz) Granulated Sugar
Melted Butter

To Activate Yeast:
1. In a small bowl, stir 2 teaspoons sugar, 1 teaspoon flour, and the yeast into ½ cup warm water and cover with plastic wrap.
2. Allow to stand for 5 minutes

To Make the Dough:
3. In a medium saucepan, heat the milk up to just below boiling (about 180°F/82°C), stirring constantly so that a film does not form on the top of the milk. You want it hot enough to scald you, but not boiling. Allow to cool slightly, until it is about 110°F/43°C.
4. In a large bowl, mix the scalded milk, ¾ cup (180 gm/170 gm/6 oz) sugar, and the salt until combined.
5. Add the beaten eggs, yeast mixture, melted butter, and 2 cups (480 ml/280 gm/10 oz) of flour.

6. Blend thoroughly and slowly add remaining flour, mixing well until the dough starts to clean the bowl.

7. Turn dough out onto floured surface and knead, gradually adding flour a little at a time, until smooth and does not stick. Note: I did not use all 8 cups of flour

8. Divide the dough into 4 equal pieces (they will each weight about 1.25 pounds/565 grams)
9. Place dough in 4 lightly oiled bowls, cover loosely with a layer of plastic wrap and then a kitchen towel and let rise an hour and a half in a warm place, until doubled in size.


To Make the Filling
10. In a large bowl mix together the ground walnuts, sugar, cinnamon and cocoa.
11. Heat the milk and butter to boiling.
12. Pour the liquid over the nut/sugar mixture.
13. Add the eggs and vanilla and mix thoroughly.
14. Allow to stand at room temperature until ready to be spread on the dough.
15. If the mixture thickens, add a small amount of warm milk.

To Roll and Assemble the Dough:
16. Spread a clean sheet or cloth over your entire table so that it is covered.
17. Sprinkle with a couple of tablespoons to a handful of flour (use flour sparingly)
18. Place the dough on the sheet and roll the dough out with a rolling pin, starting in the middle and working your way out, until it measures roughly 10-12 inches (25½ cm by 30½ cm) in diameter.

19. Spoon 1 to 1.5 teaspoons (5ml to 7 ½ ml/4 gm to 7 gm) of melted butter on top.
20. Using the tops of your hands, stretch dough out from the center until the dough is thin and uniformly opaque. You can also use your rolling pin, if you prefer.
21. As you work, continually pick up the dough from the table, not only to help in stretching it out, but also to make sure that it isn’t sticking.
22. When you think it the dough is thin enough, try to get it a little thinner. It should be so thin that you can see the color and perhaps the pattern of the sheet underneath.

23. Spoon filling (see below for recipe) evenly over dough until covered.

24. Lift the edge of the cloth and gently roll the dough like a jelly roll.

25. Once the dough is rolled up into a rope, gently lift it up and place it into a greased loaf pan in the shape of a “U”, with the ends meeting in the middle. You want to coil the dough around itself, as this will give the dough its characteristic look when sliced.
26. Repeat with remaining three loaves, coiling each rope of dough in its own loaf pan.
27. Brush the top of each loaf with a mixture of ½ cup (120 ml) of cold STRONG coffee and 2 tablespoons (30ml/28 gm/1 oz) of sugar. If you prefer, you can also use egg whites in place of this.
28. Cover pans lightly will plastic wrap and allow to rest for approximately 15 minutes.
29. Preheat oven to moderate 350°F/180°C/gas mark 4.
30. Remove plastic wrap from dough and place into the preheated oven and bake for approximately 15 minutes.
31. Turn down the oven temperature to slow 300°F/150°C/gas mark 2 and bake for an additional 45 minutes, or until done.
32. Remove bread from oven and brush with melted butter.
33. Check the bread at 30 minutes to ensure that the bread is not getting too brown. You may cover the loaves with a sheet of aluminum foil if you need to.
34. Remove from the oven and allow to cool on a wire rack for 20-30 minutes, still in the bread pan. Remember, the bread weighs about 2.5 and it needs to be able to hold its own weight, which is difficult when still warm and fresh out of the oven. Allowing it to cool in the pan helps the loaf to hold its shape.
35. It is recommended that the best way to cut Povitica loaves into slices is by turning the loaf upside down and slicing with a serrated knife.


Smaller batch measurements courtesy of Audax
Half Batch Dough Ingredients (Makes two loaves each 1.25 lbs/565 grams)
To activate the Yeast:
1 Teaspoon (5 ml/4 ½ gm) Sugar
½ Teaspoon (2½ ml/1½ gm) All-Purpose (Plain) Flour
¼ Cup (60 ml) Warm Water
1 Tablespoon (15 ml/7 gm/¼ oz/1 sachet) Dry Yeast

Dough:
1 Cup (240 ml) Whole Milk
6 Tablespoons (90 ml/85 gm/3 oz) Sugar
1½ Teaspoons (7½ ml/9 gm/1/3 oz) Table Salt
2 Large Eggs
¼ Cup (60 ml/60 gm/½ stick/2 oz) Unsalted Butter, melted
4 cups (960 ml/560 gm/19¾ oz/1¼ lb) All-Purpose Flour, measure first then sift, divided

Topping:
¼ Cup (60 ml) Cold STRONG Coffee
1 Tablespoon (15 ml/14 gm/½ oz) Granulated Sugar
Melted Butter

Half Batch Filling Ingredients (enough filling for the two loaves(
3½ Cups (840 ml/560 gm/1¼ lb/20 oz) Ground English Walnuts
½ Cup (120 ml) Whole Milk
½ Cup (120 ml/115 gm/1 stick/4 oz) Unsalted Butter
1 Whole Egg, Beaten
½ Teaspoon (2½ ml) Pure Vanilla Extract
1 Cup (240 ml/225 gm/8 oz) Sugar
½ Teaspoon (2½ ml/2 gm) Unsweetened Cocoa Powder
½ Teaspoon (2½ ml/1½ gm) Cinnamon

Quarter Batch Dough Ingredients (Makes one loaf 1.25 lbs/565 grams)
To activate the Yeast:
½ Teaspoon (2½ ml/2¼ gm) Sugar
¼ Teaspoon (1¼ ml/¾ gm) All-Purpose (Plain) Flour
2 Tablespoons (30 ml) Warm Water
1½ Teaspoons (7½ ml/3½ gm/0.125 oz/½ sachet) Dry Yeast

Dough:
½ Cup (120 ml) Whole Milk
3 Tablespoons (45 ml/43 gm/1½ oz) Sugar
¾ Teaspoon (3¾ ml/9 gm/0.17 oz) Table Salt
1 Large Egg
1 tablespoon (30 ml/30 gm/¼ stick/1 oz) Unsalted Butter, melted
2 cups (480 ml/280 gm/10 oz/0.62 lb) All-Purpose Flour, measure first then sift, divided

Topping:
2 Tablespoons (30 ml) Cold STRONG Coffee
1½ Teaspoons (7½ ml/7 gm/¼ oz) Granulated Sugar
Melted Butter

Wednesday, October 19, 2011

Apple Muffin Cake (TWD)

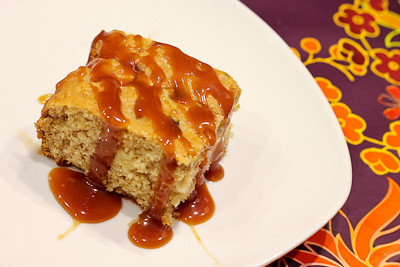
It's been weeks since my last blog post... I've been horribly sick for the last five (yes, five!) weeks and the last few were particularly terrible. I got a cold that turned into walking pneumonia and I didn't have the energy to do anything. I'm still playing catch up with my life but I finally managed to get some baking done. Too bad I'm still behind. I made Katrina's Tuesdays with Dorie (TWD) pick from October 4th finally - Apple Muffin Cake.  It was very moist but kind of plain, I thought... but it was pretty great with some caramel sauce drizzled on top :)


....and then I wanted to make the ginger jazzed brownies that were yesterday's TWD pick, but I ran out of butter! I never run out of butter! I usually try to keep the house well stocked with butter, sugar, eggs, and flour but what with being sick and all I haven't been keeping track of things so well. I hope to make those tomorrow and post them soon, so stay tuned. 

I also have a few more giveaways lined up, just have to get some time to sit down and write those posts! So if you haven't already, become a fan of my blog on Facebook so you don't miss those giveaway announcements!

* Recipe notes:
- I baked my cake in a 9 inch pan instead of an 8 inch pan and it was done at 20 minutes.

Tuesday, September 27, 2011

Flip-Over Plum Cake (TWD)


This week's Tuesdays with Dorie (TWD) recipe was chosen by Becky of Project Domestication: Flip-Over Plum Cake.  Dorie describes this cake as having "down-home, not-in-the-least-fussy good looks, an unquestionably appealing flavor and a texture that can't decide whether it wants to be a cake or your favorite nursery pudding."  I'll have to admit that when I read that description, it sounded great, up until the "nursery pudding" part! I love bread pudding (and I have no idea what nursery pudding is), but for some reason, thinking of a cake as pudding just didn't sound appetizing.  But please don't let that deter you from trying this cake - it was fantastic!

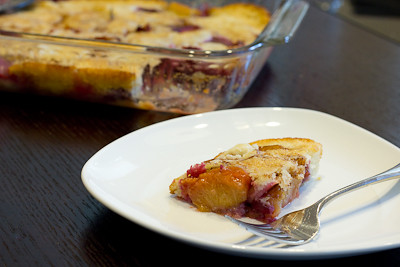
What's neat about this recipe is you pour the batter into the bottom of the pan, then top if with the fruit and pop it in the oven... and when you pull it out, the fruit has sunken to the bottom and the batter has risen to the top!

This cake has a really interesting flavor because Dorie pairs cinnamon with the plums.  Typically when you think of cinnamon being used with fruits, it's with apples, but Dorie was on to something when she paired it with plums! I'm not sure if I would describe this as a pudding, but more like a rustic cobbler of sorts.  Whatever you might want to call it, this cake was delicious.  Probably one of my favorites from this book so far if you factor in both taste and prep time (basically it has a high yield yummy factor with a low prep time factor!).  Only change I'll make when I try this again will be to decrease the sugar in the fruit by 50%, as it was just a little bit too sweet for my taste.

Thanks Becky, for hosting this week.  I loved this cake and will be making it again and again.  I think it would also be good with different types of fruits, too.  If you would like the recipe, you can find it here. Make sure you check out the TWD Blogroll, to see how everyone else enjoyed these chocolately treats!

* Recipe notes:
- I baked my cake in a 9 x 13 inch pan so my cake was a little bit thinner and was therefore done baking at about 40-45 minutes.
- I'll try reducing the sugar in the fruit by 50% next time, or perhaps cut the sugar in the batter by 50% to cut back on the sweetness just a little.

Monday, August 15, 2011

Tropical Crumble and How to Cut a Mango (TWD)


This week's Tuesdays with Dorie (TWD) recipe was chosen by Gaye of Laws of the Kitchen: Tropical Crumble.  I'm not a big nut person, so I omitted the nuts from the streusel topping.  Usually when I do this with other recipes, the topping still comes out crumbly.  However, with this recipe, it all kind of just melted away and I ended up with one big brown layer on top and what looked like baby food underneath! It was not a pretty sight.  So much so that I would be embarrassed to post a picture of it!

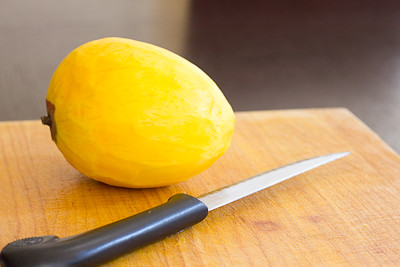
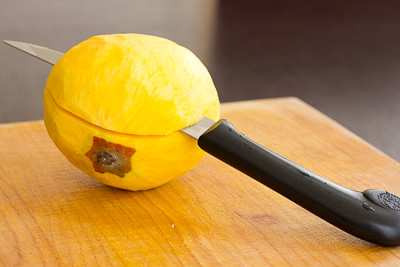
I know that a post without pictures is boring and kind of useless, so instead I'll share with you photos of how to cut a mango. For some this may be easy, for others maybe not so much.  I grew up eating mangoes, so I never really thought anything of it, but I've found over the years that not everyone knows how to properly cut a mango.

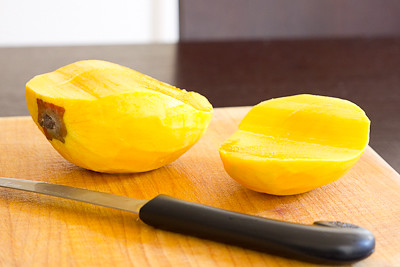
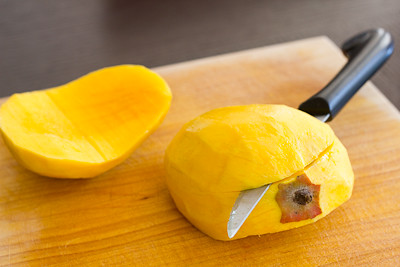
First off, when you're choosing a mango, look for one that is more rounded and less oval.  The plumper and rounder mangoes are going to be sweeter.  After you've peeled your mango, you'll want to lay it on its side (I like to use a vegetable peeler but if you're more skilled with a knife you can use a knife - I just end up wasting so much flesh when I used a knife).  Starting about half an inch above the stem, start cutting longitudinally through your mango.  It is important that you cut from the stem towards the opposite end and not the other way around, because this will prevent you from getting too many fibers from the seed in your cut mango (should you get too close to the seed and start skimming it with your knife). 


Once you've removed one half, flip the mango over and repeat with the other side.


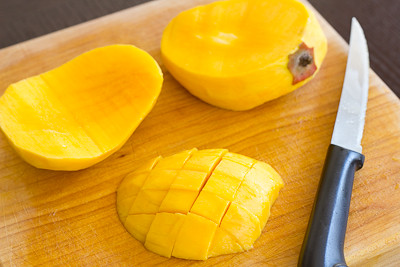
You now have two halves to work with, and can proceed to slice or dice them however you please. (If you're a true mango lover, you can now proceed to chomping on the seed and eating off what's left of the fruit around the seed!)


Now that we've talked about how to cut a mango, let's talk about the actual tropical crumble. I would have never thought to pair mangoes with bananas but the flavors are fantastic together. The mangoes are caramelized in a skillet with brown sugar and butter, then the bananas are added and just barely cooked through. The filling is then finished off with some fresh chopped ginger and grated lime zest. Looks aside, this dessert was fabulous. The mango and banana are a perfect pair, and the ginger and lime zest give it just a little kick. I found the dish was a bit too sweet (even for my sweet tooth) when it was served warm, but it was surprisingly delicious served cold.  I suspect this would be great served with some ice cream too!

Thanks Gaye, for hosting this week.  I can't wait to make this one again. If you would like the recipe, you can find it here. Make sure you check out the TWD Blogroll, to see how everyone else enjoyed this tropical treat!

Wednesday, July 27, 2011

Fresh Frasiers (DB)

Jana of Cherry Tea Cakes was our July Daring Bakers’ host and she challenges us to make Fresh Frasiers inspired by recipes written by Elisabeth M. Prueitt and Chad Robertson in the beautiful cookbook Tartine.  The Frasier is a light, moist layered chiffon cake, split and filled with sliced fresh fruit and pastry cream, then topped with a thin sheet of almond paste.

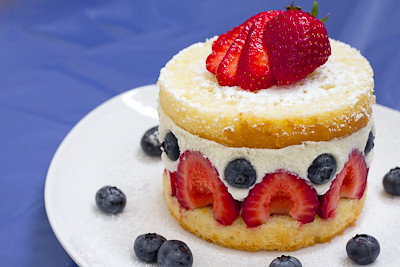
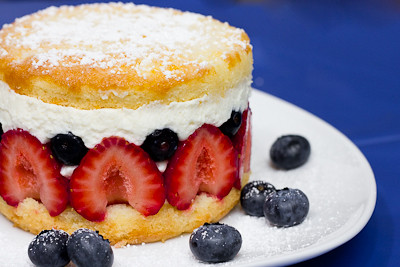
I love fresh fruit and this challenge was the perfect way to showcase some of summer's fresh fruits! I omitted the optional layer of almond paste on top, mostly just because I didn't have any on hand, but followed the rest of the recipe exactly. I made an orange chiffon cake and filled it with strawberries and blueberries. I made the simple syrup with 2 tablespoons of orange juice and 2 tablespoons of triple sec. I was concerned the flavor of the alcohol would be too strong if I added the full 4 tablespoons of alcohol, but in retrospect I think it would have been much better that way.
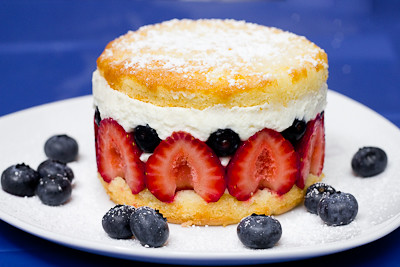
Regardless, this cake was amazing. The chiffon had an incredibly light but moist crumb.  (It is also special to me because this was the first time that my 20 month old helped me make a cake! She helped mix the cake batter (before the egg whites were added!) and it was so great to see how much fun she was having helping her mommy out.)  The pastry cream was delicious, though I think calling it a "pastry cream" makes it sound heavier than it actually is. Most pastry creams are made with multiple egg yolks (thus lending them their richness); this one is made with just one whole egg. So it's more like whipped cream with a little pastry cream added in. This keeps the dessert from being too heavy, and adds just a touch of richness to it. I basically loved everything about this dessert. Just look at all those fresh berries swimming in pastry cream! Yum!
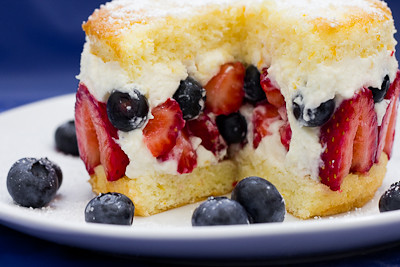
While this dessert is compromised of several components, each part on its own is very simple and you can make each individual component ahead of time and then assemble it all when needed.  Plus, if you are short on time, you can just make a trifle with the cake, fruit, and pastry cream!  It's every bit as good without any of the fuss.

Thanks Jana, for hosting this month's challenge.  I've never had or made a Fresh Frasier before, but I fell in love with them and definitely plan to make them again in the future! Make sure you check out the Daring Bakers' Blogroll to see how everyone else enjoyed this sweet, summery treat.

* Recipe notes - 
- When cutting parchment rounds for your pan(s), don't forget to check out my helpful tip here!
- I made my chiffon cakes in mini springform pans.  One chiffon cake recipe (below) will fit in four to five mini springform pans (depending on how thick you want them to be).  Depending on how thick or thin you want your cake layers to be, you can cut them into either three or four layers once they are cooled.  (I made four mini cakes and found that cutting them into two layers yielded layers that were too thick for this dessert.)
- Please note that the cake, like all chiffon cakes, will rise quite a bit, so do not overfill your pan(s)! You only want to fill them about half way, or two-thirds at most.
- Baking time was approximately 30 minutes for the mini cakes.

Fresh Frasiers
Basic Chiffon Cake:

Ingredients:
1 cup + 2 tablespoons (270 ml) (5½ oz/155 gm) all-purpose flour
1 teaspoon (5 ml) (4 gm) baking powder
3/4 cups (180 ml) (6 oz /170 gm) sugar
1/2 teaspoon (2½ ml) (1½ gm) salt, preferably kosher
1/4 cup (2 fl oz/60 ml) vegetable oil
3 large egg yolks
⅓ cup + 1 tablespoon (3.17 fl oz/95 ml) water
1 teaspoon (5 ml) pure vanilla extract
3/4 teaspoon (3¾ ml) (3 gm) lemon zest, grated
5 large egg whites
¼ teaspoon (1¼ ml) (1 gm) cream of tartar

Directions:

Preheat the oven to moderate 325°F (160°C/gas mark 3).

Line the bottom of an 8-inch (20 cm) spring form pan with parchment paper. Do not grease the sides of the pan.

In a large mixing bowl, stir together the flour and baking powder. Add in all but 3 tablespoons (45 ml.) of sugar, and all of the salt. Stir to combine.

In a small bowl combine the oil, egg yolks, water, vanilla and lemon zest. Whisk thoroughly.

Combine with the dry ingredients and mix thoroughly for about one minute, or until very smooth.

Put the egg whites into a stand mixer, and beat on medium speed using a whisk attachment on a medium speed, until frothy. Add cream of tartar and beat on a medium speed until the whites hold soft peaks. Slowly add the remaining sugar and beat on a medium-high speed until the whites hold firm and form shiny peaks.

Using a grease free rubber spatula, scoop about ⅓ of the whites into the yolk mixture and fold in gently. Gently fold in the remaining whites just until combined.

Pour the batter into the prepared pan. Bake for 45 to 55 minutes or until toothpick inserted into the center comes out clean.

Removed the cake from the oven and allow to cool in the pan on a wire rack.

To unmold, run a knife around the sides to loosen the cake from the pan and remove the spring form sides. Invert the cake and peel off the parchment paper. Refrigerate for up to four days.

Variations to the Basic Chiffon Cake:

Lemon Chiffon Cake

Ingredient Alterations:
Reduce water to 1/4 cup (60 ml)
Add 1/8 cup (30 ml) lemon juice
Increase lemon zest to 1½ teaspoon (7½ ml) (5 gm)
Remove the vanilla from the recipe

Direction Alterations:
Follow the directions, same as above, adding the lemon juice and zest to the oil, egg yolks and water in step 4.

Orange Chiffon Cake

Ingredient Alterations:
Replace the full amount of water with orange juice
Replace lemon zest with the zest of one orange
Remove the vanilla from the recipe

Direction Alterations:
Follow the directions, same as above, adding the orange juice and zest to the oil, and egg yolks in step 4.

Coconut Chiffon Cake

Ingredient Alterations:
Add ¼ teaspoon (1¼ ml) (1 gm) freshly ground nutmeg
Reduce oil to 1/8 cup (1 fl oz/30ml)
Reduce water to 1/8 cup (1 fl oz/30ml)
Add 1/3 cup (2 ⅔fl oz/80 ml) unsweetened coconut milk
Remove the vanilla from the recipe

Direction Alterations:
Follow the directions, same as above, adding the nutmeg to the flour mixture in step 3, and the coconut milk to the oil, water and egg yolks in step 4.

Chocolate Chiffon Cake

Ingredient Alterations:
Reduce all-purpose flour to ¾ cup + 1 tablespoon (195 ml) (4 oz/110 g)
Add 1/4 cup (60 ml) (3/4 oz/20 g) cocoa powder

Direction Alterations:
Follow the directions, same as above, adding the cocoa to the flour mixture in step 3.

Pastry Cream Filling:

Ingredients:
1 cup (8 fl oz/250 ml) whole milk
1/2 teaspoon (2½ ml) pure vanilla extract
1/8 teaspoon (1/2 ml) (¼ gm) salt, preferably kosher
2 tablespoons (30 ml) (10 gm)cornstarch
1/4 cup (60 ml) (2 oz/55 gm) sugar
1 large egg
2 tablespoons (30 ml) (1 oz/30 gm) unsalted butter
3/4 teaspoon (3¾ ml) (4 gm) gelatin
1/2 tablespoon (7½ ml) water
1 cup (8 fl oz/250 ml) heavy cream

Directions:

Pour the milk, vanilla, and salt into a heavy sauce pan. Place over medium-high heat and scald, bringing it to a near boiling point. Stir occasionally.

Meanwhile, in a stand mixer add the cornstarch and sugar. Whisk to combine

Add the eggs to the sugar and cornstarch and whisk until smooth.

When the milk is ready, gently and slowly while the stand mixer is whisking, pour the heated milk down the side of the bowl into the egg mixture.

Pour the mixture back into the warm pot and continue to cook over a medium heat until the custard is thick, just about to boil and coats the back of a spoon.

Remove from heat and pass through a fine mesh sieve into a large mixing bowl. Allow to cool for ten minutes stirring occasionally.

Cut the butter into four pieces and whisk into the pastry cream a piece at a time until smooth.

Cover the cream with plastic wrap, pressing the plastic wrap onto the top of the cream to prevent a skin from forming. Chill in the refrigerator for up to five days.

In a small dish, sprinkle the gelatin over the water and let stand for a few minutes to soften.

Put two inches (55 mm) of water into a small sauce pan and bring to a simmer over a medium heat.

Measure 1/4 cup (2 oz/60 ml) of the chilled pastry cream into a small stainless steel bowl that will sit across the sauce pan with the simmering water, without touching the water.

Heat the cream until it is 120 F (48.8 C). Add the gelatin and whisk until smooth. Remove from the water bath, and whisk the remaining cold pastry cream in to incorporate in two batches.

In a stand mixer, fitted with the whisk attachment, whip the cream until it holds medium-stiff peaks.

Immediately fold the whipped cream into the pastry cream with a rubber spatula.

Simple Syrup:

You may choose to flavor the syrup. One way is to use flavored sugar (for example: apple cider sugar, orange sugar, or vanilla sugar) or to stir in 1-2 teaspoons of flavored extract. You may also infuse with herbs or spices, if desired or add four tablespoons (60 ml) of fruit juice or liqueur while the syrup is cooling.
Ingredients:
1/3 cup (2⅔ fl oz/80 ml) (2⅔ oz/75 gm) of sugar, flavored or white
1/3 cup (2⅔ fl oz/80 ml) of water

Directions:

Combine the water and sugar in a medium saucepan.

Bring the mixture to a boil and let the sugar dissolve. Stirring is not necessary, but will not harm the syrup.

Remove the syrup from the heat and cool slightly.

Transfer syrup to a lidded container or jar that can be stored in the refrigerator. Simple syrup can be stored for up to one month.


Fraisier Assembly:

Components:
1 baked 8 inch (20 cm) chiffon cake
1 recipe pastry cream filling
⅓ cup (80 ml) simple syrup or flavored syrup
2 lbs (900 g) strawberries
confectioners’ sugar for dusting
½ cup (120 ml) (5 oz/140 gm) almond paste

Directions:

Line the sides of a 8-inch (20 cm) spring form pan with plastic wrap. Do not line the bottom of the pan.

Cut the cake in half horizontally to form two layers.

Fit the bottom layer into the prepared spring form pan. Moisten the layer evenly with the simple syrup.

When the cake has absorbed enough syrup to resemble a squishy sponge, you have enough.

Hull and slice in half enough strawberries to arrange around the sides of the cake pan. Place the cut side of the strawberry against the sides of the pan, point side up forming a ring.

Pipe cream in-between strawberries and a thin layer across the top of the cake.

Hull and quarter your remaining strawberries and place them in the middle of the cake. Cover the strawberries and entirely with the all but 1 tbsp. (15 ml) of the pastry cream.

Place the second cake layer on top and moisten with the simple syrup.

Lightly dust a work surface with confectioners' sugar and roll out the almond paste to a 10-inch (25 cm) round 1/16 inch (1.5 mm) thick. Spread the remaining 1 tablespoon (15 ml) of pastry cream on the top of the cake and cover with the round of almond paste.

Cover with plastic wrap and refrigerate for at least 4 hours.

To serve release the sides of the spring form pan and peel away the plastic wrap.

Serve immediately or store in the refrigerator for up to 3 days.

Tuesday, June 7, 2011

Blueberry-Brown Sugar Plain Cake (TWD)


This week's Tuesdays with Dorie (TWD) recipe was chosen by Cindy of Everyday Insanity: Blueberry-Brown Sugar Plain Cake. Dorie says this cake, with "no crumbs, streusel, nuts, icing or filling--is just plain appealing. It's got soft crumbs, a strong streak of caramel brown sugar flavor and the here-and-there surprise of sweet tart berries."

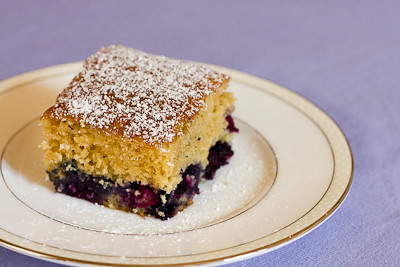
I have to say that this is probably the best "plain cake" I've had in a while! It's tempting to want to put a glaze or streusel topping on it, but give it a try as is and I promise you won't be disappointed!  The sweet, caramel undertone from the brown sugar is well complimented by the layer of blueberries.  Yes, like many other bakers noted, all of my blueberries sank to the bottom of the cake while it was in the oven (and I even rolled them in flour first!).  So, I ended up with a nice blue layer on the bottom of my cake. Thankfully this did not affect the taste at all ;)


Thanks Cindy, for hosting this week. I'll definitely be making this again! It was such a simple recipe but the flavor combination was spectacular. If you would like the recipe, you can find it here. Make sure you check out the TWD Blogroll, to see how everyone else enjoyed this sweet, blueberry treat! Also don't forget to enter my giveaway here before it ends on June 24th.

* Recipe notes - 
- I baked my cake in a 9 inch square pan and that did not seem to affect the baking time.
- I did have to cover the cake loosely with a foil tent to prevent the top from over browning.

Sunday, June 5, 2011

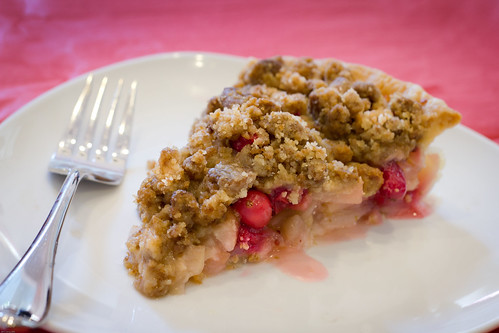
Pear Cranberry Pie with Gingersnap Crumble (SMS)


This week's Sweet Melissa Sundays (SMS) recipe was chosen by Dawn of Growing Up and Getting Healthy After 40: Pear Cranberry Pie with Gingersnap Crumble.  I love baked pears, almost as much as I love baked apples... so this recipe was right up my alley! I even still had frozen cranberries leftover from last Thanksgiving so I was able to use them in this recipe.

I used d'Anjou pears instead of Bosc pears (not sure if it matters?) and limes instead of lemons, but otherwise followed the recipe exactly.  I found that putting the pie dish on the baking sheet resulted in an underbaked pie crust, so if you make this pie I would recommend putting it directly on the oven rack and then simply putting a piece of foil on the rack below it to catch any messy drippings should your pie bubble over.

The gingersnap crumble was delicious! I often prefer a good crisp or crumble over a traditional pie, so this pie has something to offer everyone - both a crust and a crumble! It's not the most visually appealing crumble (but what it lacks in looks it makes up in taste)... in fact, while I was photographing it, my 18 month old reached for the pie and tried to grab the crumble while shouting "beef! beef!"  She thought it was ground beef! :)

The filling was good, but admittedly very tart.  I used lime juice instead of lemon juice in the recipe, but I think what accounted for the majority of the tartness in this recipe was the cranberries.  We all enjoyed the sweet and tart combo, but those who don't like a tart dessert will probably want to shy away from this one.  I also found the filling to be very runny, though it was much better the next day after the crust had some time to soak up some of the juices.  I might use Dorie's trick next time and sprinkle a bread crumb/ground nut mix on the crust before adding the filling to help soak up some of the juices.

Thanks Dawn, for hosting this week. If you'd like the recipe, you can find it here. Make sure you check out the Sweet Melissa Sundays Blog Roll to see how everyone else enjoyed this very tart treat! Also don't forget to enter my giveaway here before it ends on June 24th.

* Recipe notes:
- Don't bake your pie on a baking sheet.  Instead, simply place a large piece of foil on the rack below the pie to catch any drippings should the juices from the pie bubble over during baking.
- If the crumble starts to brown too quickly, you can cover the pie loosely with a foil tent while the rest of the pie finishes baking.
Tuesday, May 10, 2011

Brown Sugar Bundt Cake (TWD)


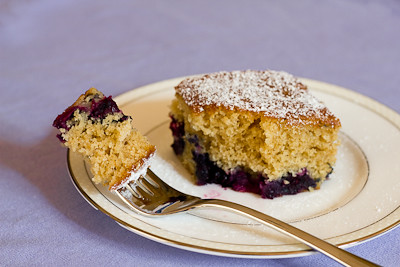
This week's Tuesdays with Dorie (TWD) recipe was chosen by Peggy of Pantry Revisited: Brown Sugar Bundt Cake.  It doesn't sound like anything special, but there is something to be said about brown sugar - I love anything flavored with brown sugar or caramel.

The addition of prunes is quite unusual, and when my husband saw me making the cake he asked me, "You're making a cake... with prunes?!" I told him that I had made muffins not too long ago with prunes that he liked, but he had no recollection of prunes in anything I had made!  I swapped out the fresh pears in the recipe for some apples, and the combination of apples and prunes was quite good.  I know some may find the idea of prunes in a cake to be odd, but Dorie was really on to something when she came up with this cake.  If you are absolutely against having prunes in your cake, you can also substitute other dried fruit such as raisins, dried apricots, or dried cranberries.

This cake is extremely moist and the caramel undertone that the brown sugar gives it is delightful.  The flavors definitely ripen if you're able to wait a day before cutting into it. 

Thanks Peggy for hosting this week. I'll definitely be making this one again! If you would like the recipe, you can find it here. Make sure you check out the TWD Blogroll, to see how everyone else enjoyed this incredibly moist treat!

Tuesday, April 19, 2011

Tourtely Apple Tart (TWD)


Things have been crazy busy here lately; I can't believe that it's been two weeks since I last posted! Where did the time go?! I hope to have some time in the coming week to get caught up with things so I can finally get around to blogging about some of the great recipes I've recently tried...

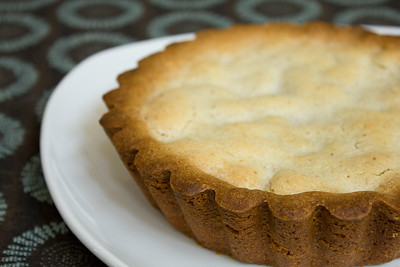
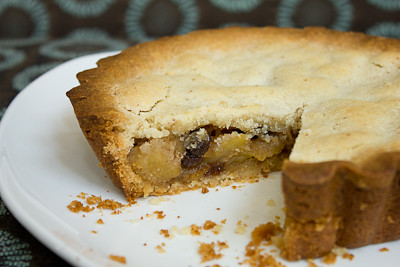
But, without further ado, here's my Tuesdays with Dorie (TWD) post.  This week's recipe was chosen by Jeannette of The Whimsical Cupcake: Tourtely Apple Tart.  This is about as homey as you can get.  It's a filling of apples cooked in brown sugar, tossed together with nutty browned butter, raisins, and ground almonds.  The aroma of the filling after is just made is simply amazing.  I love browned butter.  The filling is then sandwiched between two layers of sweet, sugary almond cookie dough.

I only had one (very large, one pound) Fuji apple left in the house, so I made a half recipe which was just enough for one mini tart.  The filling probably could have used a few more apple chunks, but that was more my fault than the recipe's fault since I didn't have any more apples on hand.  If you've never browned butter before, I'd suggest turning the heat down just a tad because it does go from brown to burnt very quickly if you don't watch it closely (and it will brown at the lower heat, it will just take longer).  I did add the "optional" cinnamon to the filling, and added more than a pinch, just because it seems wrong to make an apple dessert without cinnamon :) (I know that Grace would agree.)


The result was a very homey, comforting dessert.  It was like a cross between an apple pie and an apple tart.  I find that a lot of Dorie's desserts are quite sweet, but this one was just barely sweet.... and that was more from the tart crust than from the filling itself.  I love that you can make the tart dough and the filling ahead of time, and then just assemble and bake the tart when you're ready.  I'll definitely be making this one again.  (And next time I'll be more careful not to over bake the crust so much!)

Thanks Jeannette, for hosting this week.  If you would like the recipe, you can find it here. Make sure you check out the TWD Blogroll, to see how everyone else enjoyed this sweet, appley treat!
 
* Recipe tips:
- When baking your crust, instead of removing the foil completely after 20 minutes, gently remove it, cut a hole in the center to create a "pie crust shield," and then put it back over your tart.  This will allow the center to brown without burning the edges of your crust.  I forgot to do that this time, resulting in the very brown edges you see in my photos!
 - For more recipe tips, click here.