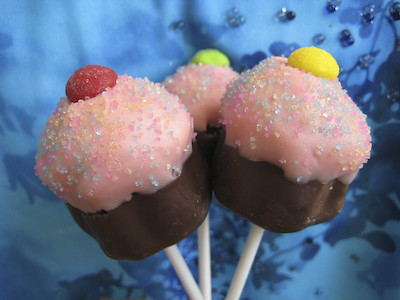
When I first saw these adorable little
cupcake pops on
Bakerella's blog, I thought they were cute, but figured they were also way too complicated to make. Turns out they're pretty easy to make, just a little time consuming. I found it best to divide the recipe up into a two day process.
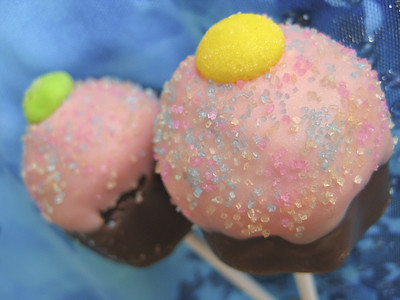
You can save time by using a boxed cake mix and store bought cream cheese frosting, but I decided to make everything from scratch because well, everything is better when you make it from scratch :)
The recipe is actually rather simple. Crumble your baked cake into bits and then mix in some cream cheese frosting. Roll the cake into balls, then refrigerate until firm.

Initially, I thought a cookie cutter mold like
this one would best, because it has more ridges and most resembles a true cupcake liner. I'm not sure if it was because the chocolate cake I baked was extremely moist, but I found it
very difficult to mold the cake with that cookie cutter. The cake would just stick to all the ridges and would not come out in any recognizable shape. Instead, I found that this one was much easier to use:
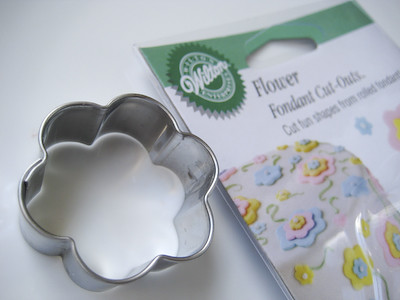
It comes in a set of three, with the medium sized one being the one I ended up using. It's 1-1/2 inches in diameter, as opposed to 1-1/4 inches (the ideal size). If you're like me and you aren't able to find the 1-1/4 inch cookie cutter, the 1-1/2 inch one works just fine. You'll just have to roll your cake balls a little larger. I like to be precise in the kitchen
(read: OCD), so I actually weighed out my cake before rolling it into balls. If you have the 1-1/4" cookie cutter, you'll want to weigh out 1 ounce of cake. If you're using the 1-1/2 inch cookie cutter, you'll weigh out 1-1/8 ounces of cake.

After the balls have firmed up in the refrigerator (or freezer), you shape them into a more oblong shape. I actually found that I needed to freeze the balls before molding them - they were too soft and difficult to work with when they were only in the refrigerator, even overnight. Again, I'm not sure if this was because I was working with an extremely moist cake, or if everyone else has had a similar experience.
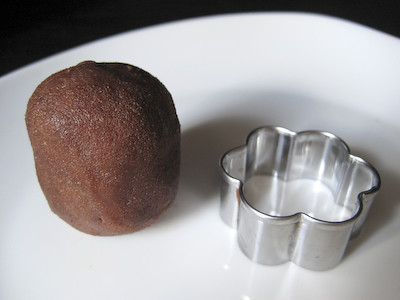
After reshaping the cake, you mold it in the cookie cutter and then push it out from the bottom up in order to form the bottom of the cupcake.

After a quick chill in the freezer, the cake is ready to be dipped. The bottoms are dipped in chocolate bark, and then the tops are dipped in melted pink candy melts. You're supposed to hold the little cupcakes by hand and dip them in the chocolate bark, then insert the lollipop sticks into the bottoms, but I found this very difficult to do. A trick I discovered to make this much easier was to use a wooden skewer to dip them in the chocolate. I would insert the wooden skewer into the top of the cupcake, then dip the bottom of the cupcake, shake off the excess chocolate, and then insert the lollipop stick. Once the lollipop stick was firmly in place, I removed the skewer, patched up the hole where the skewer was with a gentle nudge of my finger on the surrounding cake, and then placed the lollipops on some wax paper to set.
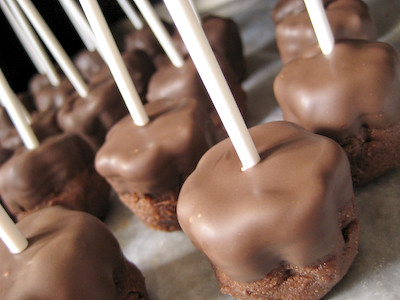
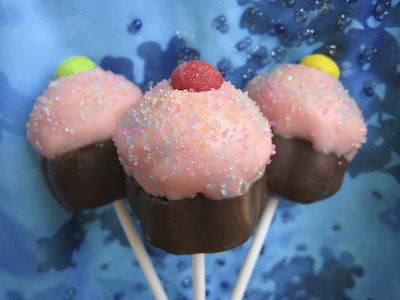
After the bottoms have been dipped in chocolate bark, you simply dip the tops of the cupcakes in pink candy melts. Then you top the cupcakes with M&M's and sprinkles. You're supposed to stick the lollipops into a styrofoam block while they set, but I didn't really want to buy one just for this purpose. I saw that others had used egg cartons, but I had no such luck with that. Instead, you can use a large bowl of sugar or rice to stand them up while they are setting, like this:
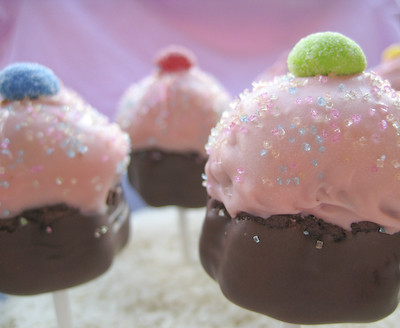
These really are the cutest baked creation I have seen in a while. Like I said at the beginning of the post, I never thought I would make these. I recently found myself needing something special to send to a good friend, though, so I took the opportunity to try my hand at them. I was pleasantly surprised to learn how easy they are to make. These are great to bring to get togethers, especially something like a birthday party or baby shower. They're even cuter when you wrap them up and tie them with a ribbon.

I found that while
Bakerella's post was very detailed in some regards (lots of photos, information on cookie cutter sizes, etc.), it was lacking in other areas. Her post doesn't specify several things, like the size of the lollipop sticks you need for this, or the dimensions of the treat bags. I used lollipop sticks that were 10cm in length and treat bags that were 3" x 4" (7.6cm x 10.2cm). The ribbon I used was 1/8" (3mm) wide. If you cut it into strips that are about 9 inches long, it's the perfect length to to tie around your treat bag and make a small bow. Most of the items required to make these can be found at your local craft store. I was able to find everything at
Michael's. The only thing I did not pick up from there was the chocolate bark, which I purchased from the grocery store.

These are sure to be a crowd pleaser. Not only are they adorable, but they taste good too. They're also the perfect size for those who are worried about portion control (though when it comes to sweets, why worry about portion control?). While I used a chocolate cake, you can use whichever type of cake you're craving. You could also take these to a whole new level by shaping frozen cheesecake pops like this! (Maybe I'll try that next time?!)
Cupcake Pops and Cupcake Bites from Bakerella
(Video Instructions from the Martha Stewart Show)
1 13x9 baked cake (from a box cake mix or from scratch … any flavor)
(I made a Cocoa Buttermilk Cake - recipe below)1 container store bought cream cheese frosting (or about 2 cups equivalent from scratch)
(I made some from scratch - recipe below - will use only 1-3/4 cup next time so the cake isn't so moist/sticky)1 flower shaped cookie cutter (1.25" wide x 0.75" tall)
(I use one that was 1.5" in diameter)1 package chocolate bark
(I only used 14 ounces chocolate bark from a 24 ounce package)1 package pink candy melts or white chocolate bark
(I used a 12 ounce package)bowls for dipping
wax paper
aluminum foil
lollipop sticks
(I used 55 sticks, 10cm in length)sprinkles, m&ms or something similar for top of cupcake
(I used colored sugar crystals and sour skittles - would recommend M&M's instead since they are chocolate flavored - the sour skittle was too much of a contrast in flavors)small plastic treat bags
(I used 3x4" bags) and ribbon
(I used 1/8" wide ribbon) if making the Cupcake Pops
candy cups and truffle boxes to individually package the Cupcake Bites
styrofoam block
Bake a cake from a mix or from scratch and cool completely.
Crumble cake into a fine consistency into a large bowl.
TIP: If the texture is too coarse, you can run it through a food processor.
Add can of cream cheese frosting or homemade frosting and blend together using the back of a large spoon. Blend thoroughly.
Roll mixture into 1.25" - 1.5" size balls and lay on wax paper covered cookie sheet. You may want to periodically rinse and dry your hands off in between.
Cover with aluminum foil or plastic wrap and chill in refrigerator for several hours.
TIP: You can speed this up by placing in the freezer for about 15 minutes.
(I found that the only way I could work with them was by placing them in the freezer. No amount of refrigeration was sufficient.)Remove. Begin to shape into cupcakes using a small flower-shaped cookie cutter. Take the chilled ball and roll it into more of an oval and then slide into cookie cutter.
Push it into cutter until about half fills the cutter and the rest sticks out of the top in the shape of a mound.

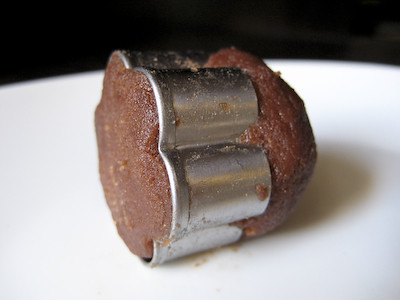
Then push the shaped cupcake carefully out of the cookie cutter from the bottom. Set right side up on a wax paper covered cookie sheet. Continue with remaining balls.
Once shaped, cover and return to freezer. (5-10 minutes)
TIP: You can leave them covered in the refrigerator overnight if you want to do the dipping on the following day.
While cupcake shapes are chilling, begin to heat up your chocolate bark.
Brown chocolate bark for the bottoms. Pink or white chocolate for the tops.
Follow the instructions on the package for melting. Most recommend heating for 30 second intervals at a time and stirring in between. You can also do the double boiler method.
When you are ready to dip, remove from freezer and set up another wax paper covered cookie sheet.
Take the cupcake shaped mixture and dip the bottoms into the melted chocolate - just to the point where the mounded shape starts.
(I found this was easier if you insert a wooden skewer into the tops first.) Remove from chocolate, turn upside down and wiggle so that the excess starts to slide down slightly. Then lay on the wax paper upside down. If you want them to be lollipops, then go ahead and insert the lollipop sticks while the chocolate is still wet.
(After inserting the lollipop stick, remove the skewer and then cover up the hole on the top of the cupcake by pinching the cake a bit.) Continue with rest of the cupcakes. You can also leave some without the sticks. They’re just as cute as Cupcake Bites.
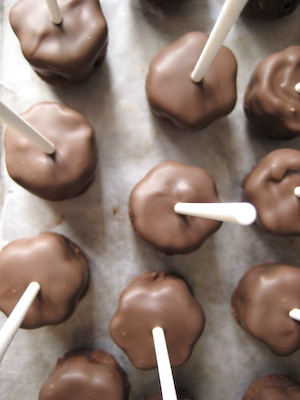
TIP: Dip end of your lollipop stick in the melted chocolate before inserting into chocolate bottoms. Not sure if this helps a lot, but it couldn't hurt.
(I skipped this step and they turned out fine.)DON'T - get water in the chocolate. Make sure your hands are completely dry. Water will cause the chocolate to separate and mess up all your hard work.
Dry completely. (15-20 minutes)
Once dry, dip the tops of the cupcakes in the pink or white chocolate. You may need to move it around a little to cover all the exposed areas.
TIP: Let the pink chocolate sit for a few minutes after heating to thicken. This will help it from dripping down the sides of the cupcake.
Remove from the pink/white chocolate and turn right side up. You may need to hold and rotate it if there is any excess so that it doesn’t drip down too far.
TIP: You can use a toothpick to help cover any areas the melted chocolate didn't cover.
For the Cupcake Bites - just turn right side up and rest on the wax paper. Then go ahead and put an M&M on the top and add sprinkles while wet.
For the lollipops, continue holding and place an M&M on the top and add sprinkles. Let them dry in a styrofoam block that you have already poked holes into.
When completely dry, cover the lollipops with small plastic treat bags and tie with a ribbon.
(I used treat bags that were 3" x 4" and strips of ribbon that were 1/8" wide and 9" long.)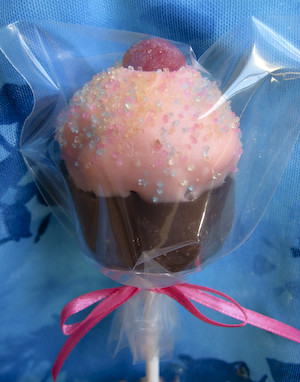
For the Cupcake Bites, place in a candy cup and package in small candy truffle boxes to present individually.
Makes about 50.
(I was able to make about 55 with the 1-1/2" cookie cutter.)
You can store these in an airtight container and they will last for several days. You can also store them in the refrigerator if you would like them cold.
Cocoa-Buttermilk Cakeadapted from Baking: From My Home to Yours, by Dorie Greenspan2 cups all purpose flour
½ cup unsweetened cocoa powder
½ teaspoon baking powder
½ teaspoon baking soda
½ teaspoon salt
2 sticks (8 ounces) unsalted butter, room temperature
1-½ cups granulated sugar
2 large eggs
2 large egg yolks
1 teaspoon pure vanilla extract
1 cup buttermilk
(I use SACO buttermilk cultures from Walmart - it has a much longer shelf life than fresh buttermilk)4 ounces bittersweet chocolate, melted and cooled (optional)
(I used semisweet chocolate)Center a rack in the oven and preheat the oven to 350 degrees F. Butter a 13-x-9 inch pan, dust the insides with flour, tap out the excess and line the bottom with parchment or wax paper. Put the pan on a baking sheet.
To Make the Cake: Whisk together the flour, cocoa, baking powder, baking soda and salt.
Working with a stand mixer, preferably fitted with a paddle attachment, or with a hand mixer in a large bowl, beat the butter on medium speed until soft and creamy. Add the sugar and beat for about 2 minutes, until it is thoroughly blended into the butter. Add the eggs one at a time, then the yolks one by one, beating for 1 minute after each addition and scraping down the sides and bottom of the bowl as needed. Beat in the vanilla. Reduce the mixer speed to low and add the dry ingredients alternately with the buttermilk; add the dry ingredients in 3 portions and the buttermilk in 2 (begin and end with the dry ingredients); mix only until each new batch is blended into the batter. Scrape down the bowl and, if you want, add the melted chocolate, folding it in with a rubber spatula. Pour the batter into the cake pan.
Bake for 35 minutes, or until the cakes feel springy to the touch and starts to pull away from the sides of the pans
(I also used the toothpick test). Transfer the cake to a rack and cool completely.
Cream Cheese Frostingfrom Baking: From My Home to Yours, by Dorie Greenspan8 ounces cream cheese, at room temperature
1 stick (8 tablespoons) unsalted butter, at room temperature
1 pound (3-¾ cups) confectioners' sugar, sifted
(the frosting will be lumpy if you don't sift it)1/2 tsp pure vanilla extract
Working with a stand mixer, preferably fitted with a paddle attachment or with a hand mixer in a large bowl, beat the cream cheese and butter together until smooth and creamy. Gradually add the sugar and continue to beat until the frosting is velvety smooth. Beat in the vanilla extract.
Yield: 2 cups


 Posts
Posts