Showing posts with label chocolate. Show all posts

Saturday, December 22, 2012

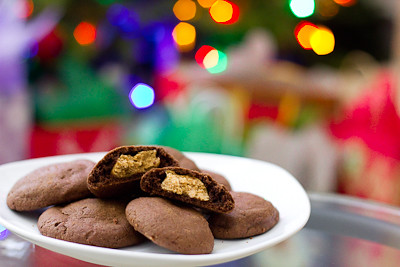
Magic Middle Peanut Butter Cookies

Wow, has it been a crazy few months. I can't believe that it's been over three months since my last blog post?! I thought that with my daughter starting school in September, I'd have all this extra time to bake and blog again.  However, as many moms out there know - your time without the kids is rare - so I found myself running a million different errands every time she was in school and I was never home to do any baking. I kept thinking to myself that I'd get around to another post "soon" and then before I knew it, I was busy getting ready for my daughter's third birthday party and then a few days later I had my baby girl! Life's been crazy with a newborn and a three year old, to say the least.  For those who have been following my blog for some time and would like to see some pictures of the new little one, you can visit our photographer's blog here. I'm so blessed to be celebrating this holiday with two beautiful little girls that are the light of my life.

And without further ado, I'm hoping to post a flurry of blog posts today to make up for my lack of blogging over the past few months (hopefully the kids will nap long enough for me to get these all up today!).  For those who are still looking for some last minute inspiration for their holiday baking, look no further :) I've got some great recipes that I've tried out this year, and of course there are the tried and true recipes from years past as well.

Let's start off this series of posts with one of my favorite combinations - peanut butter and chocolate.  You really can't go wrong with anything made with these two ingredients! These cookies are impressive yet simple to make.  With chocolate cookies it can be difficult to tell sometimes when the cookies are done baking because they do not turn golden brown like other cookies do.  You'll want to watch these cookies closely - when they just start to barely crack you should take them out of the oven.  They'll continue to bake just a little bit more while they're cooling on your cookie sheet.  If you over bake them, they'll still be good, but a bit on the dry side. 

Magic Middle Peanut Butter Cookies
from Gonna Want Seconds

Cookie:
    1 1/2 Cups - All Purpose Flour
    1/2 Cup - Unsweetened Cocoa Powder
    1/2 Teaspoon - Baking Soda
    1/2 Cup - Sugar
    1/2 Cup - Brown Sugar, Packed
    1/2 Cup - Unsalted Butter, at Room Temperature
    1/4 Cup - Peanut Butter
    1 Teaspoon - Vanilla Extract
    1 - Large Egg

Filling:
    3/4 Cup - Powdered Sugar
    3/4 Cup - Peanut Butter

Preheat oven to 375 degrees.

Make Cookies: In a small  bowl, blend flour, cocoa, and baking soda.

In a large bowl beat white sugar, brown sugar, butter and 1/4 cup peanut butter, until light and fluffy.  Add vanilla and egg, beat until blended.  Stir in flour mixture until blended.  Set aside.

Make the filling: Combine the confectioners sugar and 3/4 cup peanut butter.  Beat well with electric mixer until mixture comes together.

Roll filling into 30 1 inch balls. Form exterior part of cookie by sectioning dough into approximately 1 tablespoon pieces and then shaping the exterior part of cookie around filling balls.  Cover the filling completely.  Place 2 inches apart on an ungreased cookie sheet.  Flatten with a glass dipped in sugar.

Bake at 375 degrees for 7-9 minutes. Allow to cool on cookie sheet for 10 minutes then remove to a cooling rack and cool completely.

Tuesday, August 28, 2012

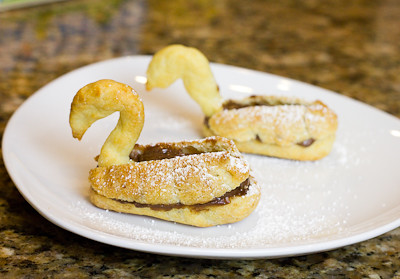
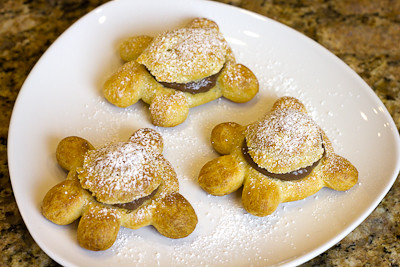
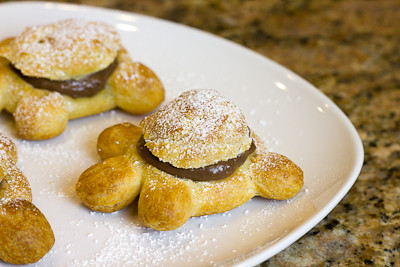
Filled Pate a Choux Swans and Turtles (DB)

Kat of The Bobwhites was our August 2012 Daring Baker hostess who inspired us to have fun in creating pate a choux shapes, filled with crème patisserie or Chantilly cream. We were encouraged to create swans or any shape we wanted and to go crazy with filling flavors allowing our creativity to go wild!

I've made pate a choux several times in the past before, but it had been quite some time.  As such, I didn't catch that a key piece of information was missing from the recipe until my dough turned out like soup! :(  The recipe states that you are to melt the butter in water, milk, and salt.  Then remove the saucepan from the heat and add the flour.  Well, it doesn't say if you're to melt the butter over low, medium, or high heat so I did it over medium heat.  Unfortunately, if your liquid isn't boiling when you add the flour, it won't cook the flour and you end up with a soupy mess instead of a beautiful pate a choux dough! So, I've added those notes to the recipe so you can avoid that fatal mistake if you make this recipe.
Otherwise, everything went off without a hitch.  I made a few swans and then loved the idea of making some turtles as another Daring Baker had posted in our private forum.  I filled my pastries with chocolate pastry cream and they were delicious. 
Thanks Kat, for hosting this month's challenge.  You'll find the recipes below.  Also be sure to check out the Daring Bakers' Blogroll to see all the other wonderful creations that were made!

Pate a choux 

(cannot be doubled)

Recipe source: Good Housekeeping Illustrated Guide to Cooking, 1980 edition


Ingredients
½ cup (120 ml) (115 gm) (4 oz) butter
1 cup (240 ml) water
¼ teaspoon (1½ gm) salt
1 cup (240 ml) (140 gm) (5 oz) all-purpose flour
4 large eggs

Directions:
  1. Line at least two baking sheets with silicone mats or parchment paper, or grease pans well.
  2. Preheat oven to moderately hot 375°F/190°C/gas mark 5 .
  3. In a small saucepot, combine butter, water, and salt. Heat over until butter melts (and liquid has come to a full rolling boil), then remove from stove.
  4. Add flour all at once and beat, beat, beat the mixture until the dough pulls away from the sides of the pot.
  5. Add one egg, and beat until well combined. Add remaining eggs individually, beating vigorously after each addition. Resulting mixture should be somewhat glossy, very smooth, and somewhat thick.
  6. Using a ¼” (6 mm) tip on a pastry bag, pipe out about 36 swan heads. You’re aiming for something between a numeral 2 and a question mark, with a little beak if you’re skilled and/or lucky.
  7. Remove the tip from the bag and pipe out 36 swan bodies. These will be about 1.5” (40 mm) long, and about 1” (25 mm) wide. One end should be a bit narrower than the other.
  8. Bake the heads and bodies until golden and puffy. The heads will be done a few minutes before the bodies, so keep a close eye on the baking process.
  9. Remove the pastries to a cooling rack, and let cool completely before filling.
Assembly
  1. Take a swan body and use a very sharp knife to cut off the top 1/3rd to ½.
  2. Cut the removed top down the center to make two wings.
  3. Dollop a bit of filling into the body, insert head, and then add wings.
  4. Your first attempt will probably not look like much, but the more you make, the more your bevy of swans will become a beautiful work of swan art.

Vanilla Crème Patissiere

(Half Batch)
Ingredients:
1 cup (225 ml.) whole milk
2 Tbsp. cornstarch
6 Tbsp. (100 g.) sugar
1 large egg
2 large egg yolks
2 Tbsp. (30 g.) unsalted butter
1 Tsp. Vanilla
Directions:
  1. Dissolve cornstarch in ¼ cup of milk. Combine the remaining milk with the sugar in a saucepan; bring to boil; remove from heat.
  2. Beat the whole egg, then the yolks into the cornstarch mixture. Pour 1/3 of boiling milk into the egg mixture, whisking constantly so that the eggs do not begin to cook.
  3. Return the remaining milk to boil. Pour in the hot egg mixture in a stream, continuing whisking.
  4. Continue whisking (this is important – you do not want the eggs to solidify/cook) until the cream thickens and comes to a boil. Remove from heat and beat in the butter and vanilla.
  5. Pour cream into a stainless steel/ceramic bowl. Press plastic wrap firmly against the surface. Chill immediately and until ready to use.

Chocolate Pastry Cream

(Half Batch Recipe):
Bring ¼ cup (about 50 cl.) milk to a boil in a small pan; remove from heat and add in 3 ounces (about 80 g.) semisweet chocolate, finely chopped, and mix until smooth. Whisk into pastry cream when you add the butter and vanilla.

Coffee Pastry Cream

(Half Batch recipe)
Dissolve 1 ½ teaspoons instant espresso powder in 1 ½ teaspoons boiling water. Whisk into pastry cream with butter and vanilla.

Chantilly Cream

1 cup (225 ml.) cold heavy cream
2 tablespoons confectioners' (powdered) sugar
Chill medium mixing bowl and whisk in freezer for 10 minutes before beginning. In chilled bowl, whisk cream until it begins to foam and thicken. Add sugar and continue to whisk just until soft peaks form. Do not over-whip.

Freezing/Storage Instructions/Tips: While the crème filling stores well when covered tightly and kept in a refrigerator, the baked choux does not store well at all, especially after being filled. Therefore, you must eat these the day they are made. This won’t be a problem, though, I assure you.

Tuesday, February 21, 2012

Chocolate Truffle Tartlets (TWD)

I'm so excited to be co-hosting this week's Tuesdays with Dorie: Baking with Julia along with Jessica of Cookbook Habit, Spike of Spike Bakes, and Steph of A Whisk and a Spoon. Just in time for Valentine's Day, we baked Chocolate Truffle Tartlets.

I made this recipe over the course of a few days.  I started the tart dough over the weekend and refrigerated it for a few days before making my tarts. This tart dough recipe is a little different from Dorie's tart dough we've been using the last few years - instead of pressing chunks of dough into the tart, this one is rolled out and then set into the tart pan, similar to what you would do with a traditional pie crust.  When I removed it from the fridge, I could not immediately shape it into a round, it was way too hard. So I let it sit out on the counter for about 30 minutes first. After that, rolling it was a breeze as long as I floured it generously. If a piece came off on my rolling pin, I simply pressed it back down. You don’t need your tart dough to be perfectly even for this recipe :)

As with most chocolate recipes, I used semisweet chocolate chips instead of chopped chocolate in the double boiler.  The "chocolate truffle" filling in these tarts is basically whipped egg yolks with chocolate, butter, and sugar.  It is rich and creamy and delicious.  Before pouring the filling into the tart pans, you add some chopped milk and white chocolate chunks (I used semisweet chocolate chips and white chocolate chips) and bits of biscotti for crunch.  I did not have any biscotti on hand so I omitted it, but I definitely think a little crunch would have been great in these tarts.  Next time I may try throwing some toffee bits in there for crunch and more flavor.  We'll have to see if the toffee bits survive the bake, or if they just melt away into the filling...

I baked these in (2) 5.5″ tart pans and there was the perfect amount of filling to fit in these 2 pans. Apparently the recipe directs you to remove the bottom of your tart pan before starting, but I must have glossed over that part because I didn't even notice that until I started reading the P&Q.  I also did not place my tart pans on a baking sheet because in past experience with TWD, that never worked well for me.  I baked these tart pans directly on the oven racks and with the tart bottoms in my pans without any issues. I did have to bake for an additional 15-20 minutes, though, due to the larger size of my tart pans.

The texture of these tarts is a bit hard to describe.  It reminded me quite a bit of a chocolate chess pie.  Not really cakey or brownie-like, and not fudgey either.  Just velvety smooth chocolate goodness? :) The extra chopped chocolate and biscotti are really what make this dessert special, in my opinion.  They add some extra texture to each bite.  Otherwise it would be a little boring (if you could really ever call chocolate boring!).  My husband loved these and exclaimed that these tarts were "one of the best things you've made in a while." (Not sure if that was a compliment on how good these were, or a comment on how bad the other stuff I've been making is??? Ha!)

This recipe is definitely a keeper, and it was certainly the perfect sweet to share on Valentine's Day.  You can find the recipe below, but be sure to check here, to see how all the other bloggers in our group enjoyed this week's chocolately treat!


Chocolate Truffle Tartlets
Recipe by David Ogonowski, from Baking with Julia by Dorie Greenspan

Makes 6 individual tartlets

1 recipe Chocolate Dough [see below], well chilled
5 tablespoons unsalted butter, cut into 10 pieces
6 ounces bittersweet chocolate, finely chopped
8 large egg yolks
1 teaspoon pure vanilla extract
1/4 cup sugar
2 ounces white chocolate, cut into small dice
2 ounces milk chocolate, cut into small dice
4 biscotti, homemade or store-bought (you can use amaretti di Saronno), chopped

Line a jelly-roll pan with parchment paper and keep at hand. Remove the bottoms from six 4 1/2-inch fluted tartlet pans (or use pans with permanent bottoms and just plan to pop the tartlets out once they're filled, baked, and cooled); spray the pans with vegetable oil spray or brush with melted butter.

Cut the dough into 6 even pieces. Working with one piece at a time, shape the dough into a rough circle, then tamp it down with a rolling pin. Flour the work surface and the top of the dough and roll it into a circle 1/8 to 1/4 inch thick. As you roll, lift the dough with the help of a dough scraper to keep it from sticking. If the dough breaks (as it sometimes does even when the pros are rolling it), press it back together and keep going - it will be fine once it's baked. Fit the dough into a tartlet ring, pressing it into the fluted edges and cutting the top level with the edges of the pan. Again, patch as you go. Use a pastry brush to dust off any excess flour and place the lined tartlet ring on the prepared baking pan.

Chilling the crusts: When all of the shells are rolled out, chill them for at least 20 minutes.

Baking the crusts: Center a rack in the oven and preheat the oven to 350 degrees F.

Prick the bottoms of the crusts all over with the tines of a fork and bake for 12 to 15 minutes, rotating the pan halfway through the baking time, until the crusts are dry, blistery, and firm. Transfer the baking pan to a rack so that the crusts can cool while you make the filling. Reduce the oven temperature to 300 degrees F.

Making the filling: Bring an inch of water to the simmer in a saucepan. Put the butter and bittersweet chocolate in a large metal bowl and place the bowl over the saucepan - don't let the bottom of the bowl touch the water. Allow the butter and chocolate to melt slowly, stirring from time to time, as you work on the rest of the filling. Remove the chocolate from the heat when it is melted and allow it to cool until it is just slightly warmer than room temperature.

Put the yolks and vanilla extract in the bowl of a mixer fitted with the whisk attachment or in a large mixing bowl. Using the whisk or a hand-held mixer, start beating the yolks at medium speed and then, when they are broken up, reduce the speed to low and gradually add the sugar. Increase the speed to medium-high and beat the yolks and sugar until the yolks thicken and form a slowly dissolving ribbon when the beater is lifted.

Spoon about one third of the yolks onto the cooled chocolate mixture and fold them in with a rubber spatula. Don't worry about being too thorough. Pour the chocolate into the beaten yolks and gently fold the two mixtures together until they are almost completely blended. Add the cubed chocolates and biscotti, folding to incorporate the chunky pieces.

Baking the tartlets: Using an ice cream scoop or 1/4-cup measure, divide the filling evenly among the cooled shells. Smooth the filling with a small offset spatula, working it into the nooks and crannies as you circle the tops of the tarts. Bake the tarts for 10 to 12 minutes, until the tops look dry and the filling is just set. Remove to a rack to cool for about 20 minutes before serving.

Storing: Best the day they're made, these are still terrific after they've been refrigerated - they lose their textural finesse, but the taste is still very much there. For longer keeping, wrap the tartlets airtight and freeze them for up to a month. Thaw, still wrapped, at room temperature.

Chocolate Dough Recipe

Makes enough for six 5-inch tartlets or one 10-inch tart

1 1/4 cups all-purpose flour
1/4 cup unsweetened cocoa powder, preferably Dutch-processed
1/4 cup sugar
1/4 teaspoon salt
1 stick (4 ounces) cold unsalted butter, cut into small pieces
1 large egg yolk
1 tablespoon ice water

To make the crust by hand, put the flour, cocoa, sugar, and salt on a smooth work surface, preferably a cool surface such as marble. Toss the ingredients together lightly with your fingertips, then scatter the butter pieces across the dry ingredients. Use your fingertips to work the butter into the flour mixture until it forms pieces the size of small peas. Then use a combination of techniques to work the butter further into the flour: Break it up with your fingertips, rub it lightly between your palms, and chop it with the flat edge of a plastic or metal dough scraper.

Gather the mixture into a mound, make a volcanolike well in the center, and pour in the yolk and ice water. Use your fingers to break up the yolk and start moistening the dry ingredients, then, just as you did with the flour and butter, toss the ingredients with your fingers and use the dough scraper to chop and blend it. The dough will be crumbly and not really cohesive. Bring it together by smearing small portions of it across the work surface with the heel of your hand.

Chilling the dough: Gather the dough together and shape it into a rough square. Pat it down to compress it slightly, and wrap it in plastic. Chill until firm, at least 30 minutes.

To make the dough in a food processor fitted with the metal blade, put the flour, cocoa, sugar, and salt in the work bowl and pulse just to blend. Add the butter and pulse 8 to 10 times, until the pieces are about the size of small peas. With the machine running, add the yolk and ice water and process, in bursts, just until crumbly - don't overwork it. Turn it out onto the work surface and, working with small portions, smear the dough across the surface with the heel of your hand.

Chilling the dough: Gather the dough together and shape it into a rough square. Pat it down to compress it slightly, and wrap it in plastic. Chill until firm, at least 30 minutes.

Storing: The dough can remain in the refrigerator for 3 days, or it can be wrapped airtight and frozen for a month. Thaw the dough, still wrapped, overnight in the refrigerator before rolling it out.

Tuesday, December 13, 2011

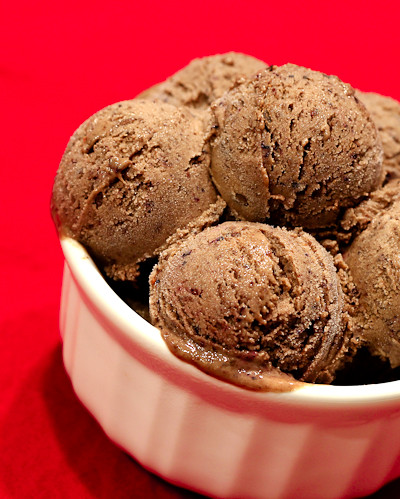
Unbelievably Good Chocolate Blueberry Pomegranate Ice Cream (TWD)


This week's Tuesdays with Dorie (TWD) recipe was chosen by Laurie (founder of TWD!) of Slush: Unbelievably Good Chocolate Blueberry Ice Cream.

I would never to think to make chocolate blueberry ice cream, but I've totally had chocolate covered strawberries, and chocolate covered dried cherries, blueberries, etc. so of course it would make sense that chocolate blueberry ice cream would be good :)

I thought I had everything I needed for this recipe because we usually keep frozen blueberries on hand for my daughter, but when I went to the make the recipe I realized that the recipe calls for blueberry preserves, not fresh/frozen blueberries! Well, I just so happened to receive some Pomegranate Jelly for my birthday in November, so I decided to puree some frozen blueberries (about 1 tbsp) and mixed it together with the Pomegranate Jelly.... resulting in the most delicious chocolate blueberry pomegranate ice cream!

If you would like the recipe, you can find here.  Make sure you also check out this page, too, so you can see what everyone else thought of this unusual chocolate ice cream!

And if you haven't already, don't forget to enter my Peeled Snacks Giveaway!

Sunday, November 27, 2011

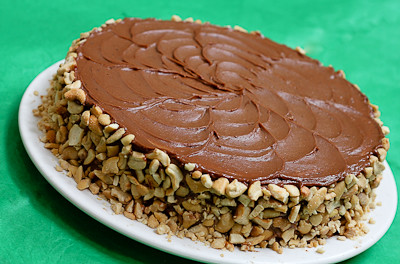
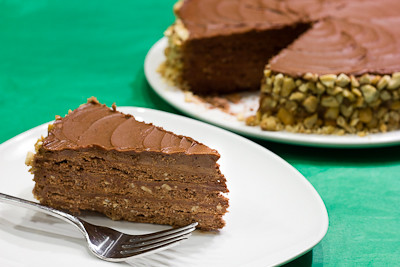
Sans Rival (DB)


Catherine of Munchie Musings was our November Daring Baker’s host and she challenged us to make a traditional Filipino dessert – the delicious Sans Rival cake! And for those of us who wanted to try an additional Filipino dessert, Catherine also gave us a bonus recipe for Bibingka which comes from her friend Jun of Jun-blog.

With all the cooking and backing involved with the Thanksgiving holiday, I only had time to make the Sans Rival cake. “Sans rival” means “without rival” and any Filipino will argue with you that this is true. Although it’s one of the most popular desserts in the Philippines, its origins are certainly French. In the 1920’s to 30’s there were many Filipinos who went abroad to study. A good number went to France and learned many French cooking techniques which they then brought home. A Sans Rival is made with layers of dacquoise, typically using crushed cashews, with very rich French buttercream frosting. The dacquoise is allowed to bake and dry to a crispy layer so that there is the crunch of pastry and nuts with the buttery, silky frosting. I went the traditional route with cashews, but the non-traditional route by making mine chocolate based.


The recipe really isn't more difficult than any other layered cake.  In fact, it's a little easier because each layer is baked as is so you don't even need to halve the layers and worry about slicing them perfectly!  It's basically meringue with crushed nuts folded in, then layered with buttercream.

It was fun to make, but I have to be honest and say that it didn't really "wow" me.  I like cashews but wasn't a big fan of a cashew flavored cake.  Perhaps almonds or peanuts would have been a better choice for me? Both my parents thought the cake was good, while my husband didn't really care for it.  So I guess it just depends on who you ask!


Thanks Catherine, for hosting this month's challenge.  Make sure you check out the Daring Bakers' Blogroll to see how everyone else enjoyed this Filipino cake!

Sans Rival
from Catherine of Munchie Musings 

Ingredients
10 large egg whites, room temp
1 cup (240 ml) (225 gm) (8 oz) white granulated sugar
1 teaspoon (5 ml) (3 gm) cream of tartar
¼ cup (60 ml) (20 gm) (2/3 oz) Dutch processed cocoa (optional and not traditional)
2 cups (480 ml) (240 gm) (8½ oz) chopped, toasted cashews

Directions:

Note: You will need four layers which will mean that you might have to bake in two batches. Be sure to use fresh parchment paper and cooled pans for each batch.

1. Preheat oven to moderate 325°F/160°C/gas mark 3.
2. Line cake pan bottoms with parchment paper and butter and flour the sides really well.
3. In a large clean, dry glass or metal mixing bowl, beat egg whites on medium until foamy (2 mins.). Sprinkle with cream of tartar. Gradually add sugar, a couple of tablespoons at a time, continuing to beat now at high speed until stiff shiny peaks form. (about 7-10 mins.)
4. Fold in nuts, reserving enough to use for decoration.
(Note the more finely ground for folding into meringue. The coarsely ground for is decoration of finished cake.)
5. Divide meringue into four equal parts. Spread in pans, evenly to edges. If doing batches, use fresh parchment paper and cooled pans for each batch.
6. Bake in preheated oven for 30 minutes, or until golden brown. Remove the meringue from the baking pans while still hot; allow to cool slightly. Peel off the parchment paper while it is still warm, it is difficult to remove sometimes when they have completely cooled.
7. When cool, trim edges so that all 4 meringue layers are uniformly shaped. Set aside.

French Buttercream:

Ingredients
5 large egg yolks, room temperature
1 cup (240 ml) (225 gm) (8 oz) white granulated sugar
1/4 cup (60 ml) water
1¼ cup (300 ml) (2½ sticks) (285 gm) (10 oz) unsalted butter, room temperature
Optional Flavorings: 2 oz (55 gm) unsweetened chocolate, melted, or 1½ teaspoon (7 ½ ml) almond extract, or 1½ teaspoon (7 ½ ml) vanilla extract, or any flavor you like

Directions:
1. Put the egg yolks in a mixing bowl. Beat at high speed until the yolks have doubled in volume and are a lemon yellow.
2. Put the sugar and water in a heavy pan and cook over medium heat, stirring the sides down only until all the sugar is dissolved and the syrup reaches 235°F/112°C (or thread stage).
3. With the mixer on high, very slowly pour the syrup down the sides of the bowl, until all has been added. Be careful as the very hot syrup could burn you if it splashes from the beaters. Continue beating on high until the mixture is ROOM TEMPERATURE (about 15 mins). Still on high, beat in the soft, room temperature butter a tablespoon at a time. Add flavoring after you beat in the butter. Refrigerate the buttercream for at least an hour, and whip it smooth just before you use it.

Assembly:

Set bottom meringue on cake board with a dab of butter cream to hold it in place. Spread a
thin layer of buttercream and then place another meringue on top. Repeat with a thin layer of
buttercream, meringue, thin layer of buttercream, meringue, and finally buttercream the top and
sides. Decorate with reserved nuts.
Refrigerate until ready to serve. It is easier to cut cold. May freeze.

Yield: 12 Servings

Notes:
• Brushing the parchment paper with some oil will help you to peel it off after the dacquoise is baked.
• Do not grind the nuts down to a fine flour/powder. This recipe is better with the nuts in a grainy/sandy grind.
• It is important to peel off the parchment within a couple of minutes of it coming out of the oven. Certainly while it is still warm.
• After you’ve removed the paper, return it into the warm oven to dry out more as the oven is cooling down. You want crunchy layers.

Friday, November 25, 2011

Ginger Jazzed Brownies and Fall Butternut Squash Pie (TWD)

I hope everyone had a wonderful Thanksgiving filled with lots of good eats and sweet treats! We had a pretty impressive spread at our house, and of course we're still enjoying leftovers today.

This week we're posting for Tuesdays with Dorie (TWD) on Friday.  This was to allow everyone the time to get ready for Thanksgiving.  There was no specific recipe chosen for this week, we were simply given the liberty to do a "rewind," meaning we could go back and bake a recipe from the past that we may have missed.  I'll be posting about the Ginger Jazzed Brownies and the Depths-of-Fall Butternut Squash Pie.

The ginger jazzed brownies were actually chosen by Hindy of Bubie’s Little Baker as the recipe of the week for October 18 and I made them a few weeks ago.  I just never got around to posting about them! I didn't have any fresh ginger on hand, so I added extra ground ginger to the brownies, as Dorie suggested.  My brownies came out with very little ginger flavor to them, which was a big disappointment because I love ginger.  I had contemplated adding in chopped candied/crystallized ginger to the brownies, and should have... because I munched on some while eating these brownies and found that the ginger and chocolate flavors together were great.  So, next time I make these, I will definitely add in chopped crystallized ginger instead of fresh ginger.  Otherwise, these brownies were super moist and dense like you would expect brownies to be.


The Fall Butternut Squash Pie was chosen by Valerie of Une Gamine dans la Cuisine. I am not a big butternut squash fan, but I still wanted to try this pie because that's what TWD is all about - trying recipes you wouldn't otherwise try. So, I made this one for Thanksgiving. Aside from the butternut squash, this pie is filled with pears, brown sugar, spices, walnuts, and raisins (or dried cranberries or diced apples).


This pie was met with mixed reviews. I really didn't care for it much. I think I would have liked it better if there had been more sugar in it because I think it was lacking in sweetness. My mom thought it was good, but attributed that to the fact that there was a lot of other filling ingredients besides squash. I think if it had a little bit less squash and lots of pears and apples, it would be very good. Just enough to have a hint of squash in it, but not overwhelmingly squashy ;)


If you're interested, head on over here for the Ginger Jazzed Brownies recipe and here for the Fall Butternut Squash Pie recipe.

Sunday, October 2, 2011

Croissants (DB)

 
The Daring Bakers’ go retro this month! Thanks to one of our very talented non-blogging members, Sarah, the Daring Bakers were challenged to make Croissants using a recipe from the Queen of French Cooking, none other than Julia Child!

I don't typically complete the DB challenge until the last minute, but still get it posted in time.  Ironically, this month I actually completed it by mid-September, but couldn't get it posted in time.  I was supposed to get this post up on September 27th, but I've been sick, working, chasing around a toddler, and getting ready for a trip.  So you'll have to forgive me if this post is short and sweet.

Making croissants really isn't as hard as it might sound (time consuming, yes, but not very difficult).  It simply involves rolling out some dough, adding a layer of butter, and then folding it over several times until you've got layers of alternating dough and butter.  As it bakes up in the oven, it puffs up into wonderful, buttery, flaky layers. 

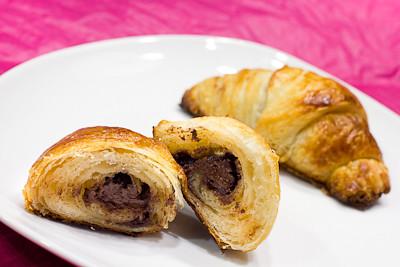
I filled my croissants with nutella and they were delicious.  I baked up a few and then put the rest in the freezer so that I can enjoy more at a later date.

Thanks Sarah, for hosting this month's challenge.  Nothing beats a fresh, homemade croissant and these were no exception! Make sure you check out the Daring Bakers' Blogroll to see how everyone else enjoyed these flaky, buttery, treats.

Croissants
Recipe Source: Mastering the Art of French Cooking, Volume Two. Julia Child and Simone Beck.
Download printable recipe here

Ingredients
¼ oz (7 gm) of fresh yeast, or 1¼ teaspoon (6¼ ml/4 gm) of dry-active yeast (about ½ sachet)
3 tablespoons (45 ml) warm water (less than 100°F/38°C)
1 teaspoon (5 ml/4½ gm) sugar
1 3/4 cups (225 gm/½ lb) of strong plain flour (I used Polish all-purpose flour, which is 13% protein)
2 teaspoons (10 ml/9 gm) sugar
1½ teaspoon (7½ ml/9 gm) salt
½ cup (120 ml/¼ pint) milk (I am not sure if the fat content matters. I used 2%)
2 tablespoons (30 ml) tasteless oil (I used generic vegetable oil)
½ cup (120 ml/1 stick/115 gm/¼ lb) chilled, unsalted butter
1 egg, for egg wash

Directions:

1. Mix the yeast, warm water, and first teaspoon of sugar in a small bowl. Leave aside for the yeast and sugar to dissolve and the yeast to foam up a little.
2. Measure out the other ingredients
3. Heat the milk until tepid (either in the microwave or a saucepan), and dissolve in the salt and remaining sugar
4. Place the flour in a large bowl.
5. Add the oil, yeast mixture, and milk mixture to the flour
6. Mix all the ingredients together using the rubber spatula, just until all the flour is incorporated
7. Turn the dough out onto a floured surface, and let it rest a minute while you wash out the bowl
8. Knead the dough eight to ten times only. The best way is as Julia Child does it in this video.  It’s a little difficult to explain, but essentially involves smacking the dough on the counter (lots of fun if you are mad at someone) and removing it from the counter using the pastry scraper.
9. Place the dough back in the bowl, and place the bowl in the plastic bag.
10. Leave the bowl at approximately 75°F/24°C for three hours, or until the dough has tripled in size.
11. After the dough has tripled in size, remove it gently from the bowl, pulling it away from the sides of the bowl with your fingertips.
12. Place the dough on a lightly floured board or countertop, and use your hands to press it out into a rectangle about 8 by 12 inches (20cm by 30cm).
13. Fold the dough rectangle in three, like a letter (fold the top third down, and then the bottom third up)
14. Place the dough letter back in the bowl, and the bowl back in the plastic bag.
15. Leave the dough to rise for another 1.5 hours, or until it has doubled in size. This second rise can be done overnight in the fridge
16. Place the double-risen dough onto a plate and cover tightly with plastic wrap. Place the plate in the fridge while you prepare the butter.
17. Once the dough has doubled, it’s time to incorporate the butter
18. Place the block of chilled butter on a chopping board.
19. Using the rolling pin, beat the butter down a little, till it is quite flat.
20. Use the heel of your hand to continue to spread the butter until it is smooth. You want the butter to stay cool, but spread easily.
21. Remove the dough from the fridge and place it on a lightly floured board or counter. Let it rest for a minute or two.
22. Spread the dough using your hands into a rectangle about 14 by 8 inches (35 cm by 20 cm).
23. Remove the butter from the board, and place it on the top half of the dough rectangle
24. Spread the butter all across the top two-thirds of the dough rectangle, but keep it ¼ inch (6 mm) across from all the edges.
25. Fold the top third of the dough down, and the bottom third of the dough up.
26. Turn the dough package 90 degrees, so that the top flap is to your right (like a book).
27. Roll out the dough package (gently, so you don’t push the butter out of the dough) until it is again about 14 by 8 inches (35 cm by 20 cm).
28. Again, fold the top third down and the bottom third up.
29. Wrap the dough package in plastic wrap, and place it in the fridge for 2 hours.
30. After two hours have passed, take the dough out of the fridge and place it again on the lightly floured board or counter.
31. Tap the dough with the rolling pin, to deflate it a little
32. Let the dough rest for 8 to 10 minutes
33. Roll the dough package out till it is 14 by 8 inches (35 cm by 20 cm).
34. Fold in three, as before
35. Turn 90 degrees, and roll out again to 14 by 8 inches (35 cm by 20 cm).
36. Fold in three for the last time, wrap in plastic, and return the dough package to the fridge for two more hours (or overnight, with something heavy on top to stop it from rising)
37. It’s now time to cut the dough and shape the croissants
38. First, lightly butter your baking sheet so that it is ready
39. Take the dough out of the fridge and let it rest for ten minutes on the lightly floured board or counter
40. Roll the dough out into a 20 by 5 inch rectangle (51 cm by 12½ cm). (Photo 24)
41. Cut the dough into two rectangles (each 10 by 5 inches (25½ cm by 12½ cm)) (Photo 24)
42. Place one of the rectangles in the fridge, to keep the butter cold
43. Roll the second rectangle out until it is 15 by 5 inches (38 cm by 12½ cm).
44. Cut the rectangle into three squares (each 5 by 5 inches (12½ cm by 12½ cm))
45. Place two of the squares in the fridge
46. The remaining square may have shrunk up a little bit in the meantime. Roll it out again till it is nearly square
47. Cut the square diagonally into two triangles.
48. Stretch the triangle out a little, so it is not a right-angle triangle, but more of an isosceles.
49. Starting at the wide end, roll the triangle up towards the point, and curve into a crescent shape.
50. Place the unbaked croissant on the baking sheet
51. Repeat the process with the remaining squares of dough, creating 12 croissants in total.
52. Leave the tray of croissants, covered lightly with plastic wrap, to rise for 1 hour
53. Preheat the oven to very hot 475°F/240°C/gas mark 9.
54. Mix the egg with a teaspoon of water
55. Spread the egg wash across the tops of the croissants
56. Put the croissants in the oven for 12 to 15 minutes, until the tops are browned nicely
57. Take the croissants out of the oven, and place them on a rack to cool for 10 minutes before serving.

Servings: 12 croissants

Tuesday, September 20, 2011

Salt and Pepper Cocoa Shortbreads (TWD)


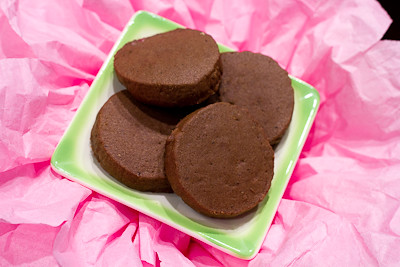
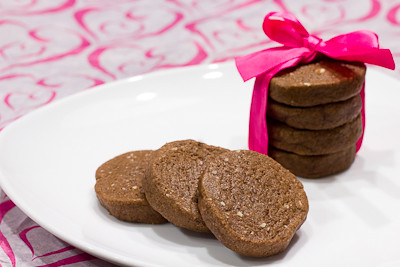
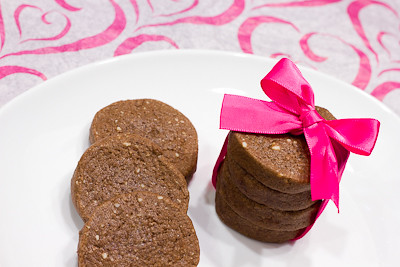
This week's Tuesdays with Dorie (TWD) recipe was chosen by Tia of Buttercream Barbie: Salt and Pepper Cocoa Shortbread. This was our second time this month baking up chocolate slice and bake cookies. This time, our cookies were spiced up with salt and pepper. Yes, salt and pepper!

I would never think to put salt and pepper in a cookie, but it worked surprisingly well. You don't really taste the salt and pepper right away when you bite into the cookies, but as you start to enjoy them, the salt and pepper flavors start to really come to the forefront. I think you definitely need to use fleur de sel or sea salt and a coarsely ground black pepper, as regular salt or finely ground black pepper won't stand out as much on your palate next to the buttery chocolate shortbread flavor.

Thanks Tia, for hosting this week.  This was definitely something different, and I'm glad I got to try these cookies! If you would like the recipe, you can find it here. Make sure you check out the TWD Blogroll, to see how everyone else enjoyed these chocolately treats!

Tuesday, September 13, 2011

Classic Brownies (TWD)


This week's Tuesdays with Dorie (TWD) recipe was chosen by Anne of Anne Strawberry: Classic Brownies.  There's really no explanation needed for these - they're just your traditional brownies, no bells or whistles.

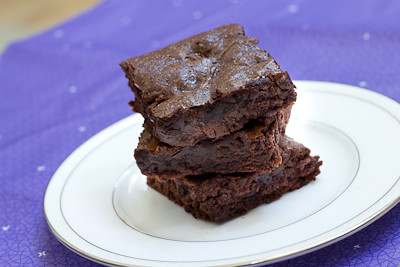
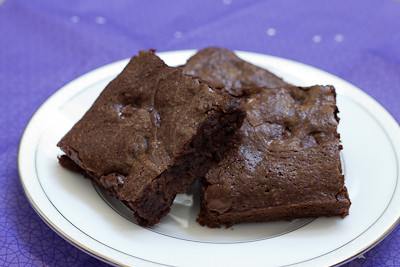
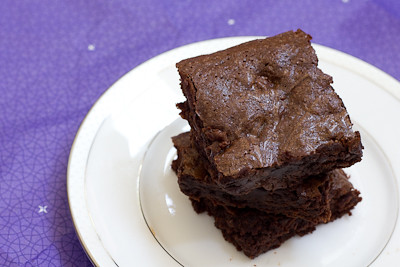
These brownies were extremely easy to make. Simply melt some butter and chocolate, add the sugar, eggs, vanilla, and then some flour. Instead of nuts, I added chocolate chips to the mix. These baked up perfectly and were slighty cakey but mostly fudgey and very chocolately.


With how simple (yet delicious) these brownies are, I really don't see any reason to use a box mix to make brownies.  The prep time was virtually the same.  I'm sure that inclusion of nuts in these brownies would be welcomed by any nut lover, but I enjoyed the extra chocolately goodness provided to these brownies by the substitution of chocolate chips :)


Thanks Anne, for hosting this week.  I'll definitely be making these again.  If you would like the recipe, you can find it here. Make sure you check out the TWD Blogroll, to see how everyone else enjoyed these chocolately treats!

* Recipe notes:
- I used semisweet chocolate chips instead of chopped bittersweet chocolate.
- I used a 9-inch pan instead of an 8-inch pan and the brownies were done baking in 20 minutes.

Tuesday, September 6, 2011

Chocolate Spice Quickies (TWD)


This week's Tuesdays with Dorie (TWD) recipe was chosen by Jessica of My Baking Heart: Chocolate Spice Quickies.  Dorie calls these "sophisticated little rounds" that are "mildly spiced, slightly chewy, almond-flecked chocolate cookies."

After reading in the P&Q that these Chocolate Spice Quickies were a little lacking in the spice department, I decided to double the spices.  I added 1/4 teaspoon of cinnamon, as well as a few pinches of cloves and nutmeg.  I also used unblanched almonds (instead of blanched almonds), simply because I was in a rush.

These cookies were easy to put together.  They were in the oven for exactly 7 minutes before they were done baking.  They were delicate, sweet, nutty, and chocolately with just a hint of spice.  I can see how others would have trouble tasting the spice if there was only 1/8 teaspoon of spice in the dough.  I don't think it really mattered that I didn't blanch the almonds, so feel free to skip that step too, if you make these cookies.


I like Dorie's suggestion of making ice cream sandwiches with these cookies, and definitely need to get my hands on some ice cream for the cookies that are remaining! As far as chocolate cookies go, these were good, but I'm not a big chocolate cookie kind of gal and my favorite chocolate cookies are still the World Peace Cookies and Chocolate Malted Whopper Drops :)

Thanks Jessica, for hosting this week.  If you would like the recipe, you can find it here. Make sure you check out the TWD Blogroll, to see how everyone else enjoyed these chocolately treats!

Saturday, August 27, 2011

Homemade Chocolate Candies and How to Temper Chocolate (DB)


The August 2011 Daring Bakers’ Challenge was hosted by Lisa of Parsley, Sage, Desserts and Line Drive and Mandy of What the Fruitcake?! These two sugar mavens challenged us to make sinfully delicious candies! This was a special challenge for the Daring Bakers because the good folks at http://www.chocoley.com offered an amazing prize for the winner of the most creative and delicious candy!

This challenge involved learning how to temper chocolate.  For those who are unfamiliar with chocolate tempering, “tempering is a method of heating and cooling chocolate in order to use it for coating or dipping. Proper tempering gives chocolate a smooth and glossy finish. Tempered chocolate will have a crisp snap and won't melt on your fingers as easily as improperly tempered chocolate.  Properly tempered chocolate is also great for molding candies because the candies will release out of the molds more easily and still retain a glossy finish.” - Ghirardelli

If you simply melt chocolate and let it cool it will set with unattractive grey streaks or spots, called blooming. If eaten, the texture will be grainy and it won’t melt smoothly in the mouth. When you temper chocolate the end result is shiny, even colored, smooth melting and with a crisp snap. Basically, tempered chocolate is what you want because it’s better in every way.  Simply put, the process involves heating the chocolate to a certain temperature, then cooling it down to a certain temperature, and then heating it back up to a working temperature that is lower than the initial temperature to which it was initially heated up.

The reason for the difference is a bit complicated, it has to do with different types of crystals forming in the cocoa butter at different times, to understand it fully you’d have to learn about the behavior of the chocolate crystals at a molecular level.  To simplify the explanation, in tempered chocolate the crystals have formed in a uniform way which gives us great looking and tasting chocolate.

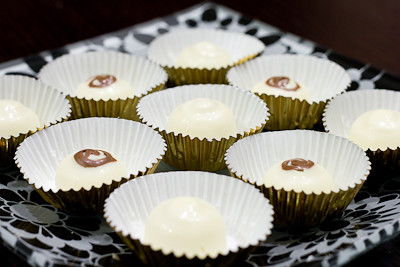
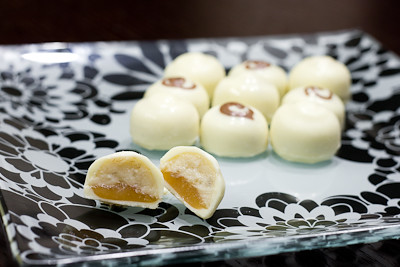
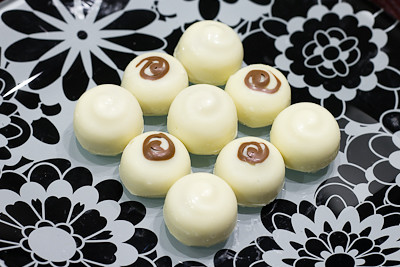
Our challenge was to make two different types of candies, with at least one being chocolate.  For the first candy, I decided to make chocolates that involved the flavors of one of my favorite desserts - Bananas Foster! I caramelized some bananas in brown sugar and rum, then pureed them and mixed them into a swiss meringue buttercream to create a bananas foster buttercream.  I then filled my white chocolate candies with this buttercream, and added in a layer of salted caramel.  These Bananas Foster Chocolates were delicious!

I used the marble slab/granite method for tempering my chocolate and although it is a fairly straightforward process, I have to admit that I had to stop, let my chocolate set, and start over multiple times because my chocolate would quickly get over the working temperature.  One second it would be way under the temperature I was shooting for and then next thing I knew, it was rising so quickly I would over heat the chocolate.  I think this may have had something to do with the fact that I was using a glass bowl for my double boiler, and the glass would retain so much heat that even after I removed the bowl from the heat, the chocolate's temperature would continue to rise dramatically.  If you work quickly, you can dump the chocolate onto the counter before it over heats, but it's hard when you're working with a very hot bowl, a thermometer, and a spatula all at the same time.  So instead of glass, I would probably recommend using a metal bowl.

I don't have a palette knife or bench scraper, but found that using a rigid spatula worked just fine.  It was a little messy, but a suitable substitute if you're not wanting to go out and buy something just for this recipe.  Funny thing was that when I first poured my chocolate onto the counter and started spreading it out and folding it to get it to cool down, I was very careful because the recipe states "keep the motions neat and tidy, if you’re not working with a lot of chocolate you don’t want to spread it too far otherwise you may end up with chocolate that begins to cool too quickly and start to set as well as drops below."

I was also glad to have my digital thermometer, because it's a multi-tasker in the kitchen! I did not realize until we did this challenge, but you cannot use a regular candy thermometer for tempering chocolate because candy thermometers do not go below 100F.  So this digital thermometer is perfect because it goes low enough for making chocolate, high enough for making candy, and of course it can be used for cooking meat as well.  It has a heat safe cord so it can be left in the oven while the meat is cooking, too.  It has been well worth the investment!

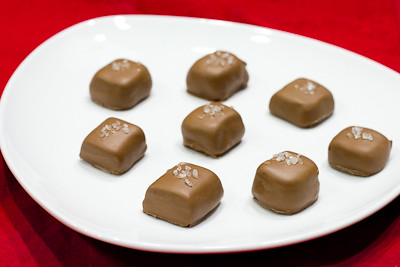
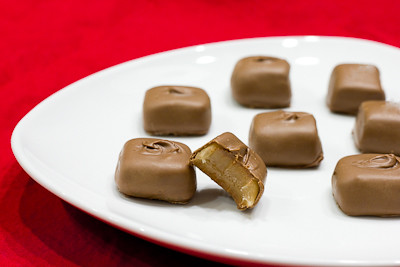
The second candy I decided to make was chocolate covered sea salt caramels. I adore anything with caramel, so it just made sense to go with that choice. I have to admit that while my white chocolate candies turned out pretty well, my chocolate covered caramels didn't turn out quite as well as I had hoped. The chocolates didn't have as much shine to them as they should have, but that was my fault because after redoing the tempering about 5 times, I just gave up and said "close enough" when it was off by 1 degree because I was too tired to redo it again.
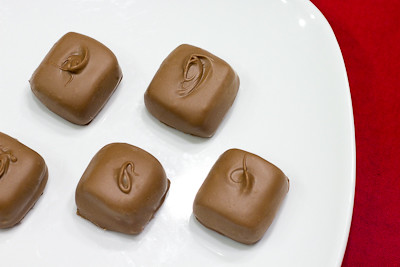

My caramel, while still soft, also came up much firmer that what was depicted in some photos by our hosts. Instead a nice gooey, drizzle-over-the-top-of-your-ice-cream-sundae caramel, I got a firm, chewy caramel.  At first I thought it was because I let the caramel get 2-3 degrees hotter than I was supposed to, but then I made a second batch, keeping close watch on the thermometer, and it still came out fairly firm. This was fine, because then instead of making filled chocolate candies, I simply made chocolate covered caramels by dipping them in the tempered chocolate.  These were delicious, with just the right amount of salt to complement the sweetness of the caramels.

Thanks Lisa and Mandy, for hosting this month's challenge.  I had a great time learning how to temper chocolate and making homemade candies! There's a lot of scrolling to do on this post to get to the recipes due to the lengthy information below on how to temper chocolate, so to jump down to the white chocolate bananas foster candies recipe just click here, and for the chocolate covered sea salt caramels click here. Make sure you check out the Daring Bakers' Blogroll to see how creative everyone else got with their chocolately confections!

* Recipe notes - 
- When tempering chocolate use a metal bowl instead of a glass bowl.  If you want to help keep it at the working temperature during the final stage, then you can transfer it to a glass bowl which will retain the heat better so you don't have to keep re-warming it so much.
- When you are getting close to your goal temperature, really do stick to heating it for 10-15 seconds at a time.  This ensures that you don't over heat the chocolate and have to start over so many times like I did!
- If you have trouble getting your chocolate down to 80.6F, you can cool down your counter/marble slab with an ice pack (or bag of frozen veggies) beforehand, just be sure to wipe it down very thoroughly before pouring your chocolate onto it, because any water droplets left on there will cause the chocolate to seize. 
- I added milk chocolate swirls on top of my white chocolate candies for contrast, but found that it is better to add the milk chocolate swirl on top after unmolding the finished chocolates (as opposed to piping the swirl into the mold and letting it set before adding in the white chocolate).

Tempering Chocolate:

Method 1: On marble or granite

Marble slab, chocolate or bench scraper, dipping forks and chocolate thermometer
Tempering Ranges:
Celcius
Dark: 45°C-50°C/ 27°C / 32°C
Milk: 45°C / 27°C/ 30°C
White: 45°C /  27°C / 29°C
Fahrenheit
Dark: 113°F-122°F / 80.6°F / 89.6°F
Milk: 113°F /  80.6°F / 86°F
White: 113°F / 80.6°F / 84.2°F

Chocolate is melted and heated until it reaches 45°C / 113°F. It is then poured onto a marble surface and moved around the surface with a scraper until it has thickened and cools to 27°C / 80.6°F. Once cooled it is then put back into the bowl and over heat to bring it back up to 32°C/30°C/29°C /// 89.6°F/86°F/84.2°F depending on the chocolate you’re tempering. It is now ready for using in molds, dipping and coating.

Tempering using a marble surface
• Finely chop chocolate if in bar/slab form.
• Place chocolate in a heatproof bowl.
• Place bowl over a saucepan of simmering water (make sure the bowl does not touch the water).
Tip: Make sure that your bowl fits snuggly into the saucepan so that there’s no chance of steam forming droplets that
may fall into your chocolate. If water gets into your chocolate it will seize!
• Using a rubber spatula, gently stir the chocolate so that it melts evenly
• Once it’s melted, keep an eye on the thermometer, as soon as it reaches 45°C / 113°F remove from heat (between 45°C-50°C / 113°F-122°F for dark chocolate)
• Pour ¾ of the melted chocolate onto a marble or granite slab or worktop
• Using a scraper or large palette knife move the chocolate around the surface to help it cool
Tip: Keep the motions neat and tidy, if you’re not working with a lot of chocolate you don’t want to spread it too far otherwise you may end up with chocolate that begins to cool too quickly and start to set as well as drops below
• the necessary temperature. Use a motion that folds the chocolate on itself
• Check temperature regularly with a thermometer
• Once it reaches 27°C / 80°F put the chocolate back into the heatproof bowl with the remaining chocolate
• Gently stir together with a rubber spatula
• Check the temperature to see if it’s risen back up to the working temperature of the chocolate (milk, dark or white) as seen in the above chart
• If the temperature has not risen to its working temperature, put the bowl back over the simmering water, stirring gently
• IMPORTANT: You really need to keep an eye on the temperature as it can rise quicker than you think, so as soon as it’s up to its working temperature, remove from heat
• It’s now tempered and ready to use
Tip: If you’re using the chocolate to dip a lot of truffles etc. which means the chocolate will be sitting off heat for a while it will naturally start to thicken as it cools. To keep it at an ideal viscosity for even coating, put the bowl over steam for 30sec-1min every 5-10mins, just do not let the temperature go over the working temperature!
Tip: Having the chocolate in a warmed glass bowl and wrapped in hot kitchen towel can also help keep the chocolate at its working temperature for longer
Tip: It is also easier to keep the heat if you work with larger amounts of chocolate rather than small amounts. Any leftover chocolate can be kept to be used later and then re-tempered
Tip: Remember, don’t let any water get into your chocolate at any stage of the tempering process!

Method 2: With tempered chocolate pieces, also called “seeding”

Tempering Ranges:
Celcius
Dark: 45°C-50°C/ 27°C / 32°C
Milk: 45°C / 27°C/ 30°C
White: 45°C /  27°C / 29°C
Fahrenheit
Dark: 113°F-122°F / 80.6°F / 89.6°F
Milk: 113°F /  80.6°F / 86°F
White: 113°F / 80.6°F / 84.2°F

Chocolate is melted and heated until it reaches 45°C / 113°F. Tempered un-melted chocolate is then stirred and melted in until it brings the temperature down to 27°C/80.6°F. It is then put back over heat and brought up to its working temperature of 32°C/30°C/29°C /// 89.6°F/86°F/84.2°F depending on the chocolate you’re using. It is now ready for using in molds, dipping and coating.

Tempering using the seeding method with couverture callets
• Finely chop chocolate if in bar/slab form (about the size of almonds).
• Place about ⅔ of the chocolate in a heatproof bowl
• Set aside ⅓ of the chocolate pieces
• Place bowl over a saucepan of simmering water (make sure the bowl does not touch the water)
Tip: Make sure that your bowl fits snuggly into the saucepan so that there’s no chance of steam forming droplets that may fall into your chocolate. If water gets into your chocolate it will seize!
• Using a rubber spatula, gently stir the chocolate so that it melts evenly
• Once it’s melted, keep an eye on the thermometer, as soon as it reaches 45°C / 113°F remove from heat (between 45°C-50°C / 113°F-122°F for dark chocolate)
• Add small amounts of the remaining ⅓ un-melted chocolate (seeds) and stir in to melt
• Continue to add small additions of chocolate until you’ve brought the chocolate down to 27°C/80.6°F (You can bring the dark chocolate down to between 80°F and 82°F)
• Put it back on the double boiler and bring the temperature back up until it reaches its working temperature of the chocolate (milk, dark or white) as seen in the above chart. (32°C/89.6°F for dark, 30°C/86°F for milk and 29°C/84.2°F for white)
• If you still have a few un-melted bits of chocolate, put the bowl back over the simmering water, stirring gently and watching the thermometer constantly.
IMPORTANT: You really need to keep an eye on the temperature so that it doesn’t go over its working temperature
It’s now tempered and ready to use
Tip: Another way of adding the "seed" is by dropping in one large chunk of tempered chocolate (the seed). That way you only need to fish out one piece of unmelted chocolate and don't need to fish out several small bits of unmelted chocolate once the chocolate has reached temper.

Other Tips

• If you’re using the chocolate to dip a lot of truffles etc. which means the chocolate will be sitting off heat for a while it will naturally start to thicken as it cools. To keep it at an ideal viscosity for even coating, put the bowl over steam for 30sec - 1min every 10 - 15mins, just do not let the temperature go over the working temperature!
• Having the chocolate in a warmed glass bowl and wrapped in hot kitchen towel can also help keep the chocolate at its working temperature for longer
• It is also easier to keep the heat if you work with larger amounts of chocolate rather than small amounts. Any leftover chocolate can be kept to be used later and then re-tempered
• Remember, don’t let any water get into your chocolate at any stage of the tempering process!
• Unless you’ve been working with chocolate for a while and have developed a feel for the tempering process and can tell the chocolate’s temperature by touching it to your lower lip like a pro, it’s imperative that you use a thermometer to determine the temperature, as going a few degrees either way can ruin the temper.
• If at any stage you do make a mistake with the tempering process you can simply start again from the beginning.
• While a marble or granite top is ideal for cooling the chocolate in the first method, you can also cool it on a countertop that’s laminated, glass or steel. It will take longer to cool, but it’s possible! (but I definitely wouldn’t recommend a wood or rough textured counter top)
• Any chocolate left over after making your molded or dipped chocolate can be stored away in a cool place and then re-tempered before using again. There’s no need to ever waste good chocolate!
• Wooden spoons can retain moisture so it’s best to use a rubber spatula while tempering

Chocolate Covered Sea Salt Caramels
caramel recipe from CandyBarLab.com

Dark or milk chocolate melted, preferably tempered, about 1 lb / 450g
1 cup (225g / 8oz) Granulated White Sugar
1/2 cup (125ml / 4 fluid oz) Light Corn Syrup
1/2 cup (125ml / 4 fluid oz) Water
4 Tbsp (60g / 2 oz) Unsalted Butter
2 Tbsp (30ml / 1 fluid oz) Heavy Cream
1/4 cup (60ml / 2 fluid oz) Passion Fruit Puree
1/2 Tbsp salt

Place the sugar, corn syrup and water in a medium saucepan.

Set over medium-high heat and stir to combine.

Bring the mixture to a boil and cook until dark amber in color 310°F-315°F / 155°C-158°C, about 5 minutes.

Use a pastry brush, dipped in water, to wash down sides of pan to prevent crystallization as the mixture boils.

Remove saucepan from the heat and gradually whisk in the passion fruit puree, heavy cream and butter.

Transfer to an 8-inch square pan that has been lined with buttered aluminum foil.

Once cooled, removed the aluminum foil from the pan and cut the chocolates with a sharp knife (coated in butter) into 1-inch squares.

Carefully lower each square of marzipan into the chocolate with a dipping fork

Tap the fork on the side of the bowl to remove excess chocolate

Place chocolate on parchment paper

Decorate as you like

Tip: You can use transfers or sprinkle sea salt on top.  You can also wait for the chocolate to be semi set then use your dipping fork to mark the top of the chocolate

Once fully set, cut off any feet with a sharp knife

White Chocolate Bananas Foster Candies
from Good Eats 'n Sweet Treats

2 pounds of high quality white chocolate (do not use white chocolate chips)
1 bananas foster swiss meringue buttercream recipe, see below
1/2 of salted caramel recipe, see below

Coat the molds with chocolate; there are a few ways to do this.  While holding mold over bowl of tempered chocolate, take a nice ladle of the chocolate and pour over the mold, making sure it cover and fills every well. Knock the mold a few times against a flat surface to get rid of air bubbles, then turn the mold upside down over the bowl of chocolate, and knock out the excess chocolate. Turn right side up and drag a bench or plastic scraper across so all the chocolate in between the wells is scraped off cleanly, leaving you with only chocolate filled wells. Put in the fridge to set, about 5 to 10 minutes. Alternatively, you could take a small brush and paint the tempered chocolate into each mold, or spoon it in if you’d like.

Remove from refrigerator and fill each well with some of the bananas foster buttercream, leaving a little room for a layer of caramel.  Squeeze a thin layer of caramel on top of the buttercream (make sure the caramel is cool, or else it will melt the buttercream).

Again take a ladle of chocolate and pour it on top of the filled chocolate wells, knocking against a flat surface to settle it in. Scrape excess chocolate off the mold with the bench scraper then refrigerate until set.

Once fully set, carefully knock the chocolates out of the mold.

Bananas Foster Swiss Meringue Buttercream
from Good Eats 'n Sweet Treats, adapted from Baking: From My Home to Yours

1/4 cup granulated sugar
1 large egg white
6 tbsp unsalted butter, at room temperature
1 bananas foster recipe, see below
1 tsp rum

Put the sugar and egg white in a mixer bowl or another large heatproof bowl, fit the bowl over a plan of simmering water and whisk constantly, keeping the mixture over the heat, until it feels hot to the touch, about 3 minutes.

The sugar should be dissolved, and the mixture will look like shiny marshmallow cream. Remove the bowl from the heat.

Working with the whisk attachment or with a hand mixer, beat the meringue on medium speed until it is cool, about 5 minutes.

Switch to the paddle attachment if you have one, and add the butter one tablespoon at a time, beating until smooth.

Once all the butter is in, beat in the buttercream on medium-high speed until it is thick and very smooth, 6-10 minutes (during this time the buttercream may curdle or separate – just keep beating and it will come together again).

On medium speed, gradually beat in the bananas foster, waiting until each addition is absorbed before adding more, and then add in the rum.

You should have a shiny smooth, velvety buttercream. Press a piece of plastic against the surface of the buttercream and set aside briefly.

Bananas Foster Recipe (for the buttercream filling)
1 tbsp tightly packed brown sugar
1/2 tbsp rum
1/2 banana, sliced

Add the brown sugar and rum to a small saucepan over medium heat until the brown sugar melts.  Add the banana slices and cook for a few minutes on each side, until the bananas are soft and cooked through.  Remove from heat and mash well with a fork, or puree in a food processor.  Allow to cool completely before adding to the buttercream recipe.

Salted Caramel
from CandyBarLab.com

1 cup (225g / 8oz) Granulated White Sugar
1/2 cup (125ml / 4 fluid oz) Light Corn Syrup
1/2 cup (125ml / 4 fluid oz) Water
4 Tbsp (60g / 2 oz) Unsalted Butter
2 Tbsp (30ml / 1 fluid oz) Heavy Cream
1/2 Tbsp salt
Place the sugar, corn syrup and water in a medium saucepan.

Set over medium-high heat and stir to combine.

Bring the mixture to a boil and cook until dark amber in color 310°F-315°F / 155°C-158°C, about 5 minutes.

Use a pastry brush, dipped in water, to wash down sides of pan to prevent crystallization as the mixture boils.

Remove saucepan from the heat and gradually whisk in the heavy cream, butter, and sea salt.

Transfer to a medium bowl and let cool.

Transfer cooled caramel to a pastry bag fitted with a medium plain tip or a squeeze bottle.

Tuesday, August 2, 2011

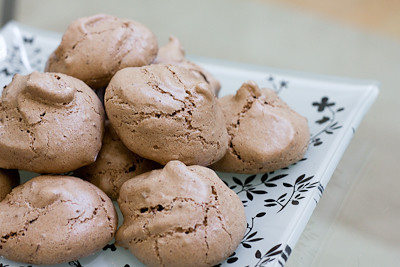
Cocoa Almond Meringues (TWD)


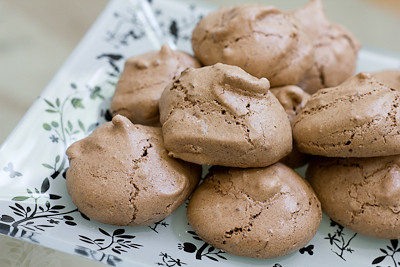
This week's Tuesdays with Dorie (TWD) was chosen by Mike of Ugly Food for an Ugly Dude: Cocoa Almond Meringues.  Dorie describes them as small cookies that "have the rough, craggy surface of stone nuggets.  Their interiors are wonderfully chewy and their flavor a bit caramelish, slightly nutty and quite chocolaty."

I loved how quick and easy these cookies were to make.  I think "slightly nutty" is a good description because despite being called Cocoa Almond Meringues, I'm not sure you'd know there were (ground) almonds in them unless you saw the recipe.  Regardless, these are especially great if you're craving something chocolate but want something light.


Thanks Mike, for hosting this week. If you would like the recipe, you can find it here. Make sure you check out the TWD Blogroll, to see how everyone else enjoyed these crunchy, chewy, chocolately treats!

Tuesday, July 26, 2011

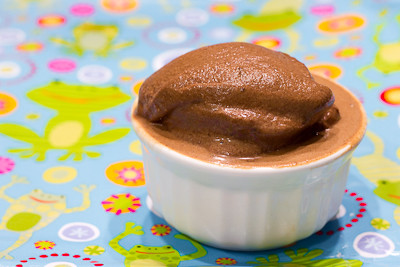
Creamy Dark Chocolate Sorbet (TWD)


Chocolate Sorbet.  Did you even know there was such a thing as chocolate sorbet?! I always thought that sorbets were fruit flavored.  Wow, where have you been all my life, chocolate sorbet?

Rich and creamy and so delicious.  I did not believe Dorie when she said this.  How could something made with skim milk and no cream or eggs turn out to be rich and creamy? I don't know how, but I now know that I should not have been skeptical.  My only complaint is that it melts really quickly - I mean, you blink and it's melted! So, it ends up a little bit more like a soft serve or a milk shake, but that won't stop me from making this one again (especially when this is so much easier and lower in fat than ice cream!)

Thanks to Steph of A Whisk and A Spoon for this week's Tuesdays with Dorie (TWD) pick.  If you would like the recipe, you can find it here. Make sure you check out the TWD Blogroll, to see how everyone else enjoyed this smooth, chocolately treat!

* Recipe notes:
- Only change I made was to use semisweet chocolate chips in place of the bittersweet chocolate in this recipe.

Tuesday, June 28, 2011

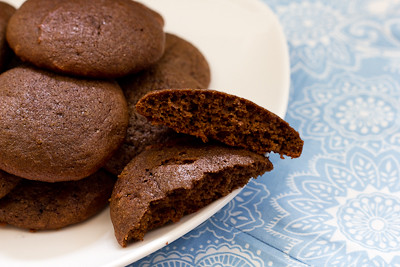
Sour Cream Chocolate Cake Cookies (TWD)


This week's Tuesdays with Dorie (TWD) recipe was chosen by Spike of Spike Bakes: Sour Cream Chocolate Cake Cookies.  I almost didn't make this one because there were some lukewarm reviews of these cookies on the P&Q.  However, the recipe looked pretty simple, so I decided to forge ahead.

I included both raisins and dried cherries in my cookies, and like Dorie, found that biting into the little bits of dried fruit was wonderful.  I thought the dried cherries were better than the raisins in this cookie, just because they were tart and stood out more than the raisins did.  I can definitely see how those who omitted the dried fruit found the cookies to be a little plain.  (However, if you do make these cookies without the dried fruit, because they have a very cake-like crumb, they do make for the base of some fantastic chocolate whoopie pies.)

Thanks Spike, for hosting this week.  If you would like the recipe, you can find it here. Make sure you check out the TWD Blogroll, to see how everyone else enjoyed this chocolately treat! Also don't forget to enter my giveaway here before it ends on June 24th.

Friday, May 27, 2011

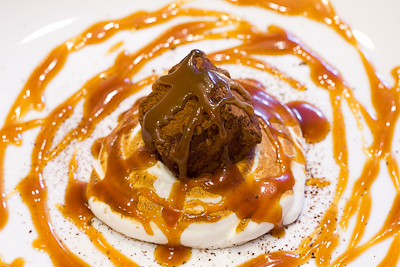
Chocolate Marquise (DB)


The May 2011 Daring Bakers’ challenge was hosted by Emma of CookCraftGrow and Jenny of Purple House Dirt. They chose to challenge everyone to make a Chocolate Marquise. The inspiration for this recipe comes from a dessert they prepared at a restaurant in Seattle.

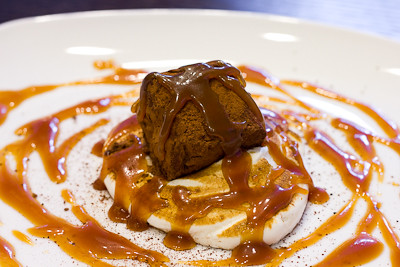
When we were presented with this month's challenge, we were told to "imagine a cube of spicy and creamy chocolate resting on a tuft of something that tastes like burnt marshmallow cream, drizzled with tequila caramel, spicy nuts, and some cacao nibs." Talk about enticing, right?

If you glance over the recipe it can definitely seem overwhelming at first.  However, if you take it one step at a time it is really not that difficult, just a bit time consuming.  The chocolate marquise tastes a bit like a cross between chocolate mousse and chocolate ice cream, and the meringue really does taste like soft, pillowy, marshmallow cream.  I used hazelnut chocolate instead of bittersweet chocolate because I don't care much for bittersweet chocolate.  The end result was a very rich and creamy frozen chocolate concoction.

My favorite part of this challenge, however, was probably the caramel.  I love caramel but I've never added liquor to it before.  I found the amount added to the recipe was just enough to give it a good flavor without being too strong.  I used rum instead of tequila and loved it.  I think the rum caramel would be delicious over some ice cream!


Thanks Emma and Jenny, for hosting this month's challenge.  While this challenge was admittedly daunting at first, in the end it was very do-able and I enjoyed trying a new dessert for the first time.  Not sure if I'll be making the marquise again, but I'll definitely be making the rum caramel again! Make sure you check out the Daring Bakers' Blogroll to see how everyone else enjoyed this chocolately, caramely treat.


Chocolate Hazelnut Marquise over Torched Meringue with Rum Caramel Sauce

Chocolate Base

Servings: n/a - this is an ingredient for the chocolate marquise, not meant to be used separately

Ingredients
3 oz (85 grams/ 6 tablespoons) bittersweet chocolate (about 70% cocoa) (I used hazelnut chocolate instead of bittersweet)
1/3 cup + 2 teaspoons (90 ml/3 fluid oz.) heavy cream
1/8 teaspoon salt
1/16 teaspoon cayenne
1 tablespoon (15 ml/ 1/2 fluid oz.) tequila (I used rum)
1 tablespoon (15 ml/ 1/2 fluid oz.) light corn syrup
1/4 teaspoon vanilla
1 tablespoon/(less than 1/4 ounce) cocoa powder (we used extra brut, like Hershey's Special Dark, but any Dutch-processed cocoa would be fine. Do not substitute natural cocoa powder.)
dash freshly ground black pepper
1/4 oz unsalted butter (1/2 tablespoon/8 grams), softened

Place the chocolate in a small mixing bowl. In a double-boiler, warm the cream until it is hot to the touch (but is not boiling). Remove from the heat and pour over the chocolate. Allow it to sit for a minute or two before stirring. Stir until the chocolate is melted completely and is smooth throughout.

Add the remaining ingredients and stir to combine. Set aside until cooled to room temperature. Do not refrigerate, as the base needs to be soft when added to the marquise mixture. If you make it the day before, you may need to warm it slightly. Whisk it until it is smooth again before using it in the marquise recipe.

Chocolate Marquise

Servings: six 2" x 2" (5 cm x 5 cm) cubes

Ingredients
3 large egg yolks at room temperature
1 large egg
2 tablespoons + 2 teaspoons (40 ml) (40 grams/ 1½ oz) sugar
1 tablespoon + 1 teaspoon (2/3 fluid oz/ 20 ml.) water
Chocolate Base, barely warm (recipe follows)
½ cup (4 fluid oz./ 120 ml.) heavy cream
½ cup Dutch process cocoa powder (for rolling) (Note: We used extra brut, like Hershey's Special Dark. Make sure it's a Dutch processed cocoa, not a natural cocoa powder.)
Torched meringue (recipe follows)
Spiced almonds (recipe follows)
Cacao nibs (optional)

In the bowl of a stand mixer, combine the egg yolks and whole eggs. Whip on high speed until very thick and pale, about 10 - 15 minutes.

When the eggs are getting close to finishing, make a sugar syrup by combining the sugar and water in a small saucepan. Bring the syrup to a boil and then cook to softball stage (235F/115C). If you have a cake tester with a metal loop for a handle, the right stage for the syrup is reached when you can blow a bubble through the loop (as seen in the following pictures).

With the mixer running on low speed, drizzle the sugar syrup into the fluffy eggs, trying to hit that magic spot between the mixing bowl and the whisk.

When all of the syrup has been added (do it fairly quickly), turn the mixer back on high and whip until the bowl is cool to the touch. This will take at least 10 minutes.

In a separate mixing bowl, whip the heavy cream to soft peaks. Set aside.

When the egg mixture has cooled, add the chocolate base to the egg mixture and whisk to combine. Try to get it as consistent as possible without losing all of the air you've whipped into the eggs. We used the stand mixer for this, and it took about 1 minute.

Fold 1/3 of the reserved whipped cream into the chocolate mixture to loosen it, and then fold in the remaining whipped cream.

Pour into the prepared pans and cover with plastic wrap (directly touching the mixture so it doesn't allow in any air). Freeze until very firm, at least 2 - 4 hours (preferably 6 – 8 hours).

When you're ready to plate, remove the marquise from the freezer at least 15 minutes before serving. While it's still hard, remove it from the pan by pulling on the parchment 'handles' or by flipping it over onto another piece of parchment.

Cut it into cubes and roll the cubes in cocoa powder. These will start to melt almost immediately, so don't do this step until all of your other plating components (meringue, caramel, spiced nuts, cocoa nibs) are ready. The cubes need to sit in the fridge to slowly thaw so plating components can be done during that time. They don’t need to be ready before the cubes are rolled in the cocoa powder.

Plate with the torched meringue and drizzled caramel sauce, and toss spiced almonds and cocoa nibs around for garnish. You want to handle the cubes as little as possible because they get messy quickly and are difficult to move. However, you want to wait to serve them until they've softened completely. The soft pillows of chocolate are what make this dessert so unusual and when combined with the other elements, you'll get creamy and crunchy textures with cool, spicy, salty, bitter, and sweet sensations on your palate.

Torched Meringue

Servings: Makes about 1 cup of meringue.

Ingredients
3 large egg whites
1/2 cup less 1 tablespoon (105 ml) (3½ oz or 100 gms) sugar
Splash of apple cider vinegar
1/8 teaspoon vanilla

Tequila Caramel

Servings: Makes about 1/4 cup of caramel

Ingredients
1/4 cup (60 ml/2 fluid oz) (2 oz/55 gm) sugar
2 tablespoons (1 fluid oz./ 30 ml.) water
1/4 cup (2 fluid oz./ 60 ml.) heavy cream
1/4 teaspoon salt
1/2 tablespoon tequila (I used rum)

Combine the egg whites, sugar and vinegar in the bowl of a stand mixer. Using your (clean, washed) hand, reach in the bowl and stir the three together, making sure the sugar is moistened evenly by the egg whites and they make a homogeneous liquid.

Over a saucepan of simmering water, warm the egg white mixture. Use one hand to stir the mixture continuously, feeling for grains of sugar in the egg whites. As the liquid heats up, the sugar will slowly dissolve and the egg whites will thicken. This step is complete when you don't feel any more sugar crystals in the liquid and it is uniformly warm, nearly hot.

Remove the mixing bowl from the saucepan and return it to the stand mixer with the whisk attachment. Whisk until you reach soft peaks. In the last 10 seconds of mixing, add the vanilla to the meringue and mix thoroughly.

When you're ready to plate the dessert, spoon the meringue onto a plate (or use a piping bag) and use a blowtorch to broil.

Spiced Almonds

Servings: Makes about 1 cup of spiced almonds

Ingredients
1/2 cup (4 oz.) sugar
1 teaspoon cinnamon
1/4 teaspoon cayenne
1/2 teaspoon salt
1 large egg white
1 cup (145 grams/ 5 oz.) blanched whole almonds

Directions:

Preheat the oven to 350F. Line a sheet pan with parchment paper or foil.
In a small bowl, combine the sugar, cinnamon, cayenne, and salt.
In a larger mixing bowl whisk the egg white until it's frothy and thick.
Add the spice mix to the egg white and whisk to combine completely.
Add the nuts to the egg white mixture and toss with a spoon.
Spoon the coated nuts onto the parchment paper-lined baking sheet.
Bake the nuts for 30 minutes, or until they turn light brown. Allow the nuts to cool completely and they will get very crunchy. Set aside until ready to serve.

Tuesday, May 3, 2011

Chocolate Orange Marbled Loaf Cake (TWD)


This week's Tuesdays with Dorie (TWD) recipe was chosen by Carol of The Bake More: Basic Marbled Loaf Cake. Dorie gives several "playing around" options, with the peppermint version being her favorite.  I would have loved to have tried it but did not have any peppermint extract on hand.  Instead, I decided to make the chocolate orange marbled loaf cake. 

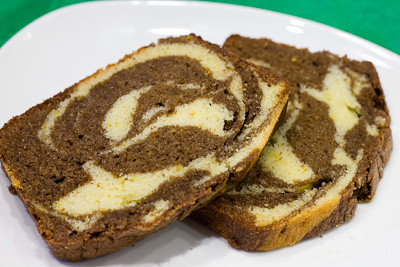
My loaf cake only had a hint of orange to it because I did not have any orange extract, either.  However, to bring out as much orange flavor as possible, I rubbed the orange zest with the sugar before mixing it in with the creamed butter.  I took the loaf out right at 1 hour and 20 minutes, and it was nice and moist, although I wonder if I may have over baked it by just a few minutes because I had envisioned the cake being more moist than it was.  Still, it was good and enjoyed by all. 

I was especially pleased with how the marbling turned out with this one, as it was only my third attempt at marbling a cake (and I failed the first and second attempts miserably!).  Overall, I enjoyed this cake but probably won't be making it again.  There's nothing wrong with it per se, I just feel like there are so many other recipes that I enjoy more than this one.

Thanks Carol, for hosting this week. If you would like the recipe, you can find it here. Make sure you check out the TWD Blogroll, to see how everyone else enjoyed this swirly treat!

Sunday, March 27, 2011

Yeasted Meringue Coffee Cake (DB)


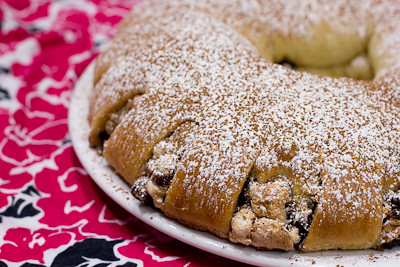
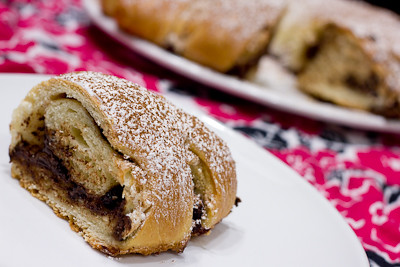
The March 2011 Daring Bakers’ challenge was hosted by Ria of Ria’s Collection and Jamie of Life’s a Feast. Ria and Jamie challenged The Daring Bakers to bake a yeasted Meringue Coffee Cake. Jamie found this recipe on a piece of yellowed paper in her dad’s collection of clipped out and hand-written recipes from the 1970’s, no source, no date, and she tried the recipe and loved it! It's a gorgeous brioche-like dough rolled jellyroll style around a layer of whipped meringue, cinnamon, sugar, and chocolate chips, then shaped into a wreath and baked.

I halved this recipe because I didn't really see the need to have two coffee cakes around the house tempting me! The recipe was easy to follow, and instead of kneading the dough by hand I let my KitchenAid dough hook do the work for me.  I did have to add a little extra flour until the dough was ready and was no longer sticking to the sides of the bowl, but otherwise the recipe was really straightforward.  I used the filling recommended by Jamie, sans nuts, and simply doubled the amount of cinnamon in the mixture.  It came out just right!

I wasn't sure what to expect from the meringue layer that is rolled into this cake, but as Ria and Jamie describe, the meringue "miraculously melts into the dough as it bakes leaving behind just a hint of sweetness and adding to the perfect moistness of the cake."  Some of it does ooze out between the slits cut into the cake, and that part of the meringue bakes up into slightly crisp, ooey gooey goodness!


Thanks Ria and Jamie, for hosting this month's challenge.  It was delicious and I'll definitely be making it again. Make sure you check out the Daring Bakers' Blogroll to see how everyone else enjoyed this wonderful breakfast treat.

And don't forget - I'm giving you two chances right now to enter to win a $100 Visa gift card.  There are just a few days left to enter the giveaway that ends on March 31st.  You have until April 11th to enter my second giveaway here.

FILLED MERINGUE COFFEE CAKE
Makes 2 round coffee cakes, each approximately 10 inches in diameter
The recipe can easily be halved to make one round coffee cake

Ingredients
For the yeast coffee cake dough:
4 cups (600 g / 1.5 lbs.) flour
¼ cup (55 g / 2 oz.) sugar
¾ teaspoon (5 g / ¼ oz.) salt
1 package (2 ¼ teaspoons / 7 g / less than an ounce) active dried yeast
¾ cup (180 ml / 6 fl. oz.) whole milk
¼ cup (60 ml / 2 fl. oz. water (doesn’t matter what temperature)
½ cup (135 g / 4.75 oz.) unsalted butter at room temperature
2 large eggs at room temperature
10 strands saffron for Ria’s version (Saffron might be hard to find and it’s expensive, so you can substitute with ½ - 1 teaspoon of ground cardamom or ground nutmeg. Or simply leave it plain like Jamie’s version)

For the meringue:
3 large egg whites at room temperature
¼ teaspoon salt
½ teaspoon vanilla
½ cup (110 g / 4 oz.) sugar

For the filling:
Jamie’s version: (this recipe is for 1 coffee cake)
1 cup (110 g / 4 oz.) chopped pecans or walnuts
2 Tablespoons (30 g / 1 oz.) granulated sugar
¼ teaspoon ground cinnamon
1 cup (170 g / 6 oz.) semisweet chocolate chips or coarsely chopped chocolate

Ria’s version:
1 cup (130 g / 5 oz.) chopped cashew nuts
2 Tablespoons (30 g / 1 oz.) granulated sugar
½ teaspoon garam masala (You can make it at home – recipe below - or buy from any Asian/Indian grocery store)
1 cup (170g / 6 oz.) semisweet chocolate chips ( I used Ghirardelli)
Egg wash: 1 beaten egg
Cocoa powder (optional) and confectioner’s sugar (powdered/icing sugar) for dusting cakes

**Garam (means “hot”) masala (means “mixture”) is a blend of ground spices and is used in most Indian savory dishes. It is used in limited quantities while cooking vegetables, meats & eggs. There is no “one” recipe for it as every household has a recipe of their own. Below, I am going to share the recipe which I follow.
4 or 5 sticks (25 g) Cinnamon Sticks (break a stick and open the scroll)
3 ½ tablespoons (25 g / less than an ounce) Cloves, whole
100 g. (3.5 oz.) Fennel seeds
4 tablespoons (25 g / less than an ounce) Cumin seeds
1 ½ tablespoons (10 g / less than half an ounce) Peppercorns
25 g (less than half an ounce) Green Cardamom pods

In a small pan on medium heat, roast each spice individually (it hardly takes a minute) until you get a nice aroma. Make sure you stir it throughout so that it doesn’t burn. As soon as each spice is roasted, transfer it to a bowl to cool slightly. Once they are all roasted, grind into a fine powder by using a coffee grinder, or pestle & mortar. Store in an airtight container and use as needed.

Directions:
Prepare the dough:
In a large mixing bowl, combine 1 ½ cups (230 g) of the flour, the sugar, salt and yeast.
In a saucepan, combine the milk, water and butter and heat over medium heat until warm and the butter is just melted. Ria’s version: add the 10 saffron threads to the warmed liquid and allow to steep off of the heat for 10 minutes. This will give the mixture a distinct aroma and flavor and a yellowish-orange hue.

With an electric mixer on low speed, gradually add the warm liquid to the flour/yeast mixture, beating until well blended. Increase mixer speed to medium and beat 2 minutes. Add the eggs and 1 cup (150 g) flour and beat for 2 more minutes.

Using a wooden spoon, stir in enough of the remaining flour to make a dough that holds together. Turn out onto a floured surface (use any of the 1 ½ cups of flour remaining) and knead the dough for 8 to 10 minutes until the dough is soft, smooth, sexy and elastic, keeping the work surface floured and adding extra flour as needed.
Place the dough in a lightly greased (I use vegetable oil) bowl, turning to coat all sides. Cover the bowl with plastic wrap and a kitchen towel and let rise until double in bulk, 45 – 60 minutes. The rising time will depend on the type of yeast you use.

Prepare your filling:In a small bowl, combine the cinnamon and sugar for the filling if using. You can add the chopped nuts to this if you like, but I find it easier to sprinkle on both the nuts and the chocolate separately.

Once the dough has doubled, make the meringue:
In a clean mixing bowl – ideally a plastic or metal bowl so the egg whites adhere to the side (they slip on glass) and you don’t end up with liquid remaining in the bottom – beat the egg whites with the salt, first on low speed for 30 seconds, then increase to high and continue beating until foamy and opaque. Add the vanilla then start adding the ½ cup sugar, a tablespoon at a time as you beat, until very stiff, glossy peaks form.

Assemble the Coffee Cakes:
Line 2 baking/cookie sheets with parchment paper.

Punch down the dough and divide in half. On a lightly floured surface, working one piece of the dough at a time (keep the other half of the dough wrapped in plastic), roll out the dough into a 20 x 10-inch (about 51 x 25 ½ cm) rectangle. Spread half of the meringue evenly over the rectangle up to about 1/2-inch (3/4 cm) from the edges. Sprinkle half of your filling of choice evenly over the meringue (ex: half of the cinnamon-sugar followed by half the chopped nuts and half of the chocolate chips/chopped chocolate).

Now, roll up the dough jellyroll style, from the long side. Pinch the seam closed to seal. Very carefully transfer the filled log to one of the lined cookie sheets, seam side down. Bring the ends of the log around and seal the ends together, forming a ring, tucking one end into the other and pinching to seal.
Using kitchen scissors or a sharp knife (although scissors are easier), make cuts along the outside edge at 1-inch (2 ½ cm) intervals. Make them as shallow or as deep as desired but don’t be afraid to cut deep into the ring.

Repeat with the remaining dough, meringue and fillings.

Cover the 2 coffee cakes with plastic wrap and allow them to rise again for 45 to 60 minutes.

Preheat the oven to 350°F (180°C).

Brush the tops of the coffee cakes with the egg wash. Bake in the preheated oven for 25 to 30 minutes until risen and golden brown. The dough should sound hollow when tapped.
 
Remove from the oven and slide the parchment paper off the cookie sheets onto the table. Very gently loosen the coffee cakes from the paper with a large spatula and carefully slide the cakes off onto cooling racks. Allow to cool.

Just before serving, dust the tops of the coffee cakes with confectioner’s sugar as well as cocoa powder if using chocolate in the filling. These are best eaten fresh, the same day or the next day.