Showing posts with label veggies. Show all posts

Tuesday, August 9, 2011

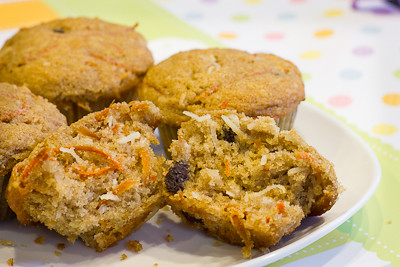
Carrot Spice Muffins (TWD)


This week's Tuesdays with Dorie (TWD) recipe was chosen by Nancy of The Dogs Eat the Crumbs: Carrot Spice Muffins.  I personally thought these muffins could use a little more sugar (or maybe some cream cheese frosting!) but then I guess they would be more like cupcakes and not really muffins :)  The addition of some crushed pineapple might be nice, too.  Regardless, these muffins were perfect for breakfast, or as a snack, and were a big hit with all of my husband's coworkers. 

Thanks Nancy, for hosting this week.  I'm sorry my post is so short this week but I've been so busy and barely had enough time to get this post up today! If you would like the recipe, you can find it here. Make sure you check out the TWD Blogroll, to see how everyone else enjoyed this delightful breakfast treat!

Monday, February 22, 2010

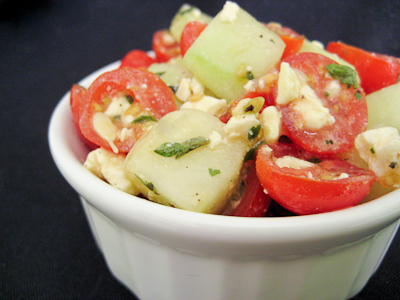
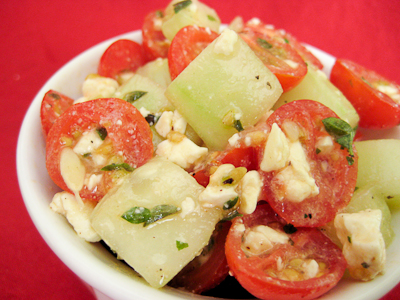
Cherry Tomato Cucumber Feta Salad


I know it's not quite spring or summer yet, but I've never been much of a winter person so I've been anxious to greet the warmer months, along with their fruits. So, I went in search of a good tomato salad recipe.

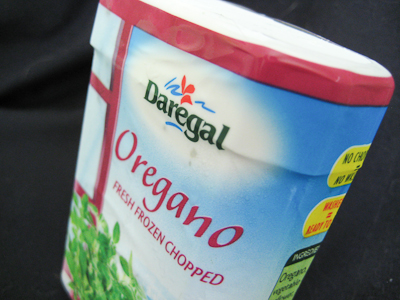
I decided to make a refreshing tomato cucumber feta salad using some fresh frozen herbs I received from Daregal Gourmet. Their herbs are frozen just after harvest to ensure fresh taste. I don't know about you, but whenever I buy fresh herbs from the supermarket, I never seem to be able to use them all before they go bad. I always feel really bad about it, too, because fresh herbs cost a pretty penny. Fresh frozen herbs seem to be a great alternative for cooks like me, because I can have the herbs on hand and use them whenever I'd like, without worry of them spoiling.


This salad takes minutes to prepare, and is so light and refreshing. It makes a great starter, but to be honest with you I loved it so much that I ate all of it myself in one sitting like it was an entree salad! The fresh frozen herbs were a great addition. I would say that they're not quite as good as fresh herbs, but much definitely better than dried herbs... so I'm glad to have them on hand in my kitchen. If you try this recipe, make sure you season this salad with lots of coarse salt and freshly ground pepper to bring out all of the flavors.

Cherry Tomato Cucumber Feta Salad
from Simply Recipes

2-3 cups of cherry and/or pear tomatoes, sliced in half
1 cup of chopped cucumber, peeled (and seeded if the seeds are bitter)
1/4 cup crumbled feta cheese
1 Tbsp chiffonaded mint leaves
1 teaspoon fresh, chopped oregano
1 Tbsp lemon juice
2 Tbsp of finely chopped shallots or green onions
2 teaspoons olive oil
Coarse salt and freshly ground black pepper to taste


Gently toss the tomatoes, cucumber, feta, onions, mint, and oregano together. Dress with lemon juice, olive oil, salt and pepper to taste.

Yield: 2-4 Servings

Thursday, January 8, 2009

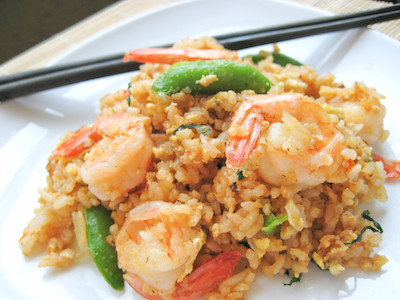
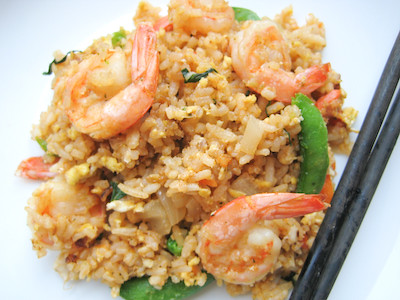
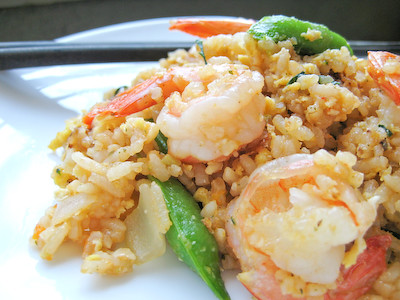
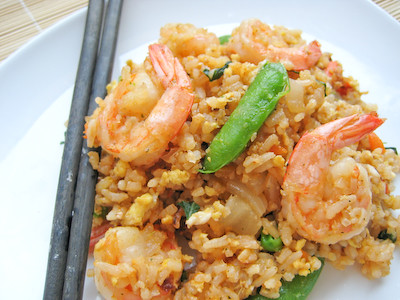
Divine Rice with Prawns


I've always loved fried rice but have never made it. My mom is the master of throwing together all the leftovers in the fridge to make fried rice. This recipe can easily be adapted according to your tastes, or to whatever meat and veggies you might have on hand.


I usually keep two types of bagged frozen vegetables in my freezer at all times. One type includes red, green, and yellow bell pepper slices with onions. You can find all sorts of uses for these... from an Asian stir fry, to fried rice, to chili. You'll save a lot of money if you buy them frozen, as red and yellow bell peppers can cost a fortune. The other type of frozen veggie bag I usually keep on hand is the "stir fry" variety that contains snap peas, carrots, water chestnuts, etc. These are great for dishes like Orange Chicken.


When I saw this fried rice recipe on Cate's blog, it finally gave me the push I needed to make my own at home. I'm surprised I've never made fried rice before, especially since we eat so much rice in this household and always have leftover rice sitting in the fridge. If you haven't visited Fresh From Cate's Kitchen before, I encourage you do to so. She's got a lot of great recipes over there, and I've been dying to make the Char Siu Pork she posted.


The key to making good fried rice is a really hot wok (or skillet), and having all your ingredients ready ahead of time. Once you start making it, you don't really time in between each step to get things together. It's really nice, though, because it comes together in less than ten minutes, making it a great weeknight meal.

Divine Rice with Prawns
adapted from Fresh From Cate's Kitchen (who adapted it from Thai Cooking from the Siam Cuisine Restaurant)


12-15 prawns, pre-cooked
2 tsp canola oil
2 tbsp minced garlic
1 cup frozen stir fry vegetables, partially thawed (you can either use a bell pepper/onion stir fry or the ones that include snap peas)
2 eggs
3 cups cold cooked rice
3 tbsp fish sauce
1 tsp sugar
1 tbsp ketchup
2 tsp soy sauce
2 tsp chopped cilantro
6-8 basil leaves, chiffonade
juice of 1 fresh lime
cucumber slices (optional)


In a small bowl, mix together the fish sauce, sugar, ketchup, and soy sauce.

Heat a skillet over high heat and add the oil. When the oil is hot, add the garlic and onions. Stir-fry until light brown.

Crack the eggs into the pan and scramble, cooking for about 10 seconds.

Add the bell pepper and stir fry for about 30 seconds.

Add the rice and stir-fry, breaking up clumps of rice and egg.

Add your sauce mixture and stir fry for a few minutes.

Add the prawns and cook until they are heated through, throwing in the basil at the last minute.

Transfer to a serving dish, and sprinkle the lime juice and cilantro over the top, then serve with cucumber slices on the side if desired.

Saturday, July 26, 2008

Pineapple Chicken Salad Pitas


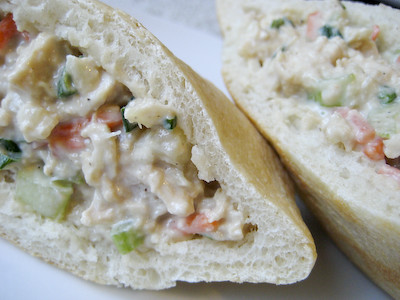
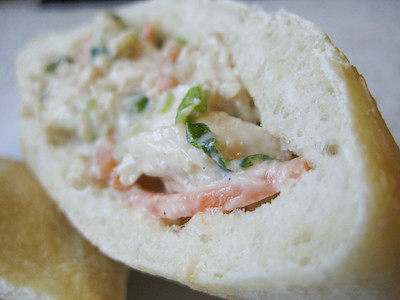
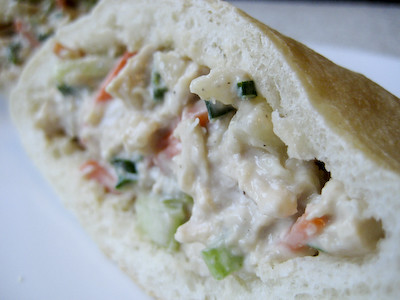
Mayonnaise is like an avocado. People have very strong feelings about it. They either love it or they hate it. My husband won't eat anything with mayo on or in it, but I think that when used properly, mayo can be good in a dish. I recently posted about my homemade pita bread and promised to share with you what I chose to stuff them with. Instead of a traditional Greek filling, I decided to fill mine with chicken salad. I have always been a fan of chicken salad containing pineapple, so when I saw this recipe from Cooking Light, I knew I wanted to try it.


The Worcestershire sauce gave this chicken salad a bit more depth. I added some celery because I like my chicken salad to have a little crunch (and I don't like nuts). The only other thing I would probably change next time is to use canned pineapple tidbits instead of crushed pineapple - I prefer a chunkier chicken salad.


If you don't have any pita bread on hand, this would be great sandwiched between some toasted bread, or simply by itself with a fresh fruit plate.

Pineapple Chicken Salad Pitas
from Cooking Light

2 1/2 cups chopped poached or cooked chicken breast* (about 1 pound) (My 1 lb of chicken yielded about 2 1/4 cups, so you might want to use more chicken; save time by using store bought, precooked Rotisserie chicken)
1/2 cup matchstick-cut carrots
1/3 cup sliced almonds, toasted (I omitted these)
1/3 cup light mayonnaise
1/4 cup finely chopped green onions
1/4 cup finely chopped celery
1/4 cup plain fat-free yogurt
1 tablespoon Worcestershire sauce
1/2 teaspoon garlic powder
1/4 teaspoon salt
1/4 teaspoon black pepper
1 (8-ounce) can crushed pineapple in juice, drained
4 (6-inch) whole wheat pitas, each cut in half (I used my homemade pitas)
8 Romaine lettuce leaves (I forgot these)

* To poach your chicken, put the chicken breast halves in a large saucepan and add lightly salted water to cover. Bring to a boil over high heat, reduce the heat to low and simmer for 30 minutes. You can do this with frozen chicken breasts, too.


Combine first 11 ingredients in a large bowl, stirring well. Line each pita half with 1 lettuce leaf; fill each half with 1/3 cup chicken mixture.

Yield: 4 servings (serving size: 2 stuffed pita halves)

Tuesday, July 22, 2008

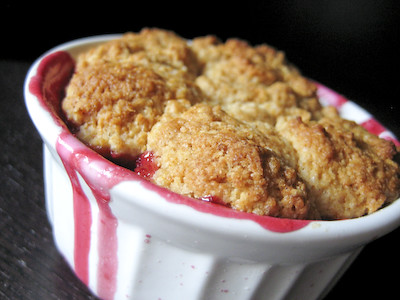
TWD: Cherry Rhubarb Cobbler


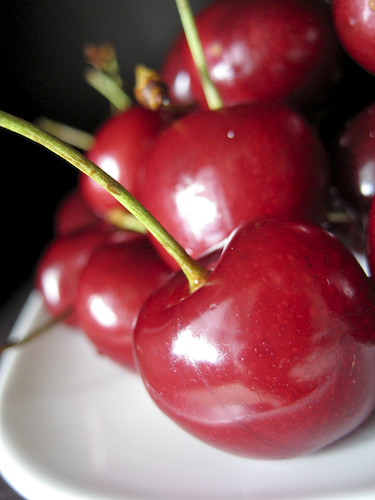
This week's Tuesdays with Dorie (TWD) recipe was chosen by Amanda of Like Sprinkles on a Cupcake: Cherry Rhubarb Cobbler. While I've certainly had my fair share of fresh cherries, I've actually never baked with them before.


I've actually never tasted or baked with rhubarb either. Most of the time, I've seen strawberries paired with rhubarb, so I was interested to see how Dorie's cherry and rhubarb pairing would turn out.


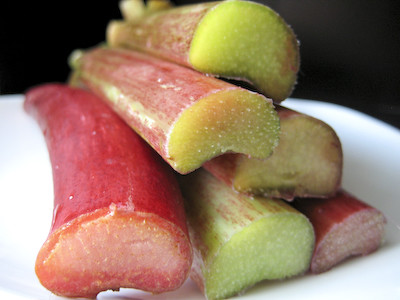
I'm not sure how much rhubarb normally costs, but I found it at Central Market (a grocery store similar to Whole Foods) and the 12 ounces required for this recipe was just under $3 (seemed a bit pricey). I've always known rhubarb to be the red-looking celery-like stalks, but never knew that their leaves are actually poisonous! While rhubarb is technically a vegetable, most of its uses make it seem more like a fruit. Some of the stalks I bought were reddish pink through and through, while others were red on the outside but green in the middle (not sure if that affects their taste?).


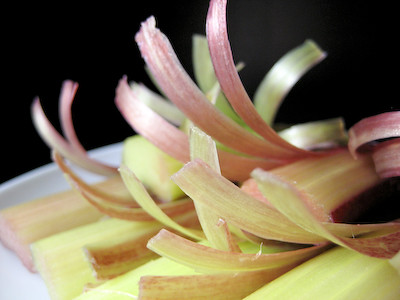
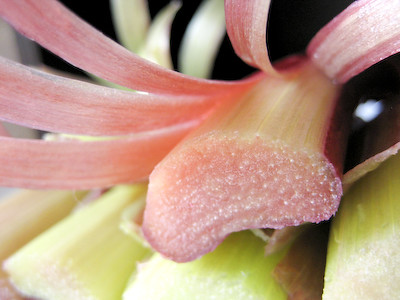
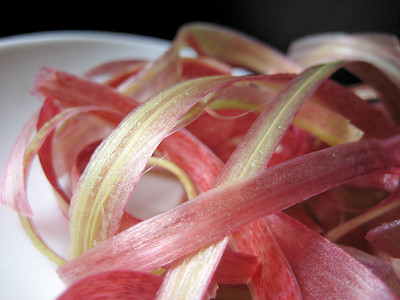
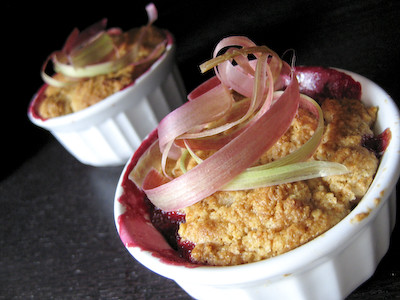
Just like celery, you trim the ends of rhubarb when preparing it for baking. Unlike celery, you have to peel away the stringy outside layer before chopping it up (at least that's what I gathered from various online sources). I used a vegetable peeler for this task, and could not help but notice how pretty this process looked as I was peeling the rhubarb.


When I finished all the peeling, it looked like I had a pretty plate full of ribbons. My husband saw it and commented on how I was beginning to go a little overboard with my food blogging, as he thought I had cut a bunch of ribbons for the cobbler 'photo shoot.' While I reassured him that it was simply the rhubarb peels, I really do wish that I could improve upon the plating of everything in my blog, but our tiny apartment just doesn't have the storage space for me to buy a bunch of cute dishes, back drops, and props! Some day... :)


Dorie's recipe is very simple. Trim, peel, and cut the rhubarb into 1-inch pieces.


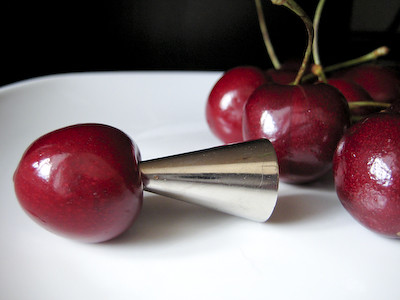
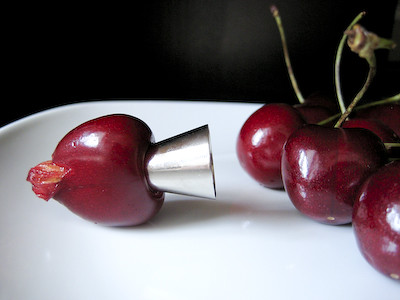
Pit and halve a pound of cherries, then mix the rhubarb and cherries together with some sugar, cornstarch, and ground ginger. Not sure how to pit cherries? No problem. You can use a decorating tip, or any long, rigid object (i.e. chopstick). Simply remove the stem from the cherry and hold it firmly in one hand while advancing the decorating tip through the insertion site of the stem.


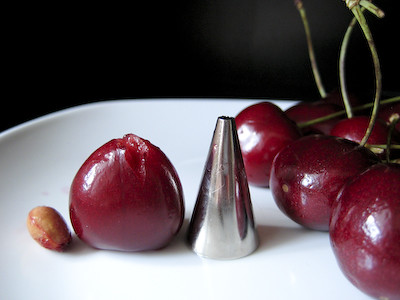
Continue pushing through until the cherry seed pops out completely.


Voila! It's as simple as that.


After you mix the filling together, the topping comes together in just minutes. Aside from pairing cherries with rhubarb in this recipe, Dorie also changes it up a bit with the cobbler's biscuit topping. She uses brown sugar and whole wheat flour with just a hint of ginger. You just pulse the dry ingredients together, then pulse in the butter, followed by the whole milk. I have to say that I enjoyed this cobbler topping much more than one from the Mixed Berry Cobbler. I could absolutely see myself using the cobbler topping recipe alone to make biscuits and enjoying them with a small pat of butter :)


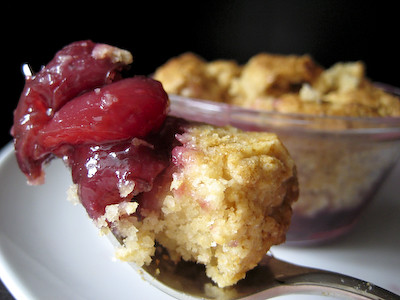
Since I was bringing this in to share with my co-workers, instead of one large cobbler, I decided to make eight individual mini cobblers. I only have three small oven safe bowls, so I used tea cups for the rest!


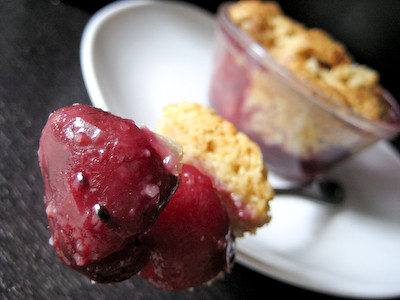
I really enjoyed this cobbler, although I think my favorite is still peach and blackberry cobbler. The rhubarb didn't have much texture to it, though it had quite a prominent flavor. It was extremely tart and was a nice contrast to the sweet cherries. I can see why Dorie would say that a plain cherry cobbler can be a bit bland otherwise. While I haven't quite fallen in love with rhubarb yet, I also don't see why so many people seem to hate it. I never realized how many people disliked rhubarb until this recipe was chosen!

I baked the mini cobblers for about 30 minutes, 5 minutes less than indicated for the full size version. I checked them at 25 minutes, and the topping was nice and golden brown at that point, but the fruit juices weren't bubbling away quite yet.


Thanks again to Amanda for choosing this cobbler. It was my first time baking with and trying rhubarb. Will I make this again? Probably not exactly as written. But I may have found my new favorite cobbler topping and I am eager to try it with my favorite peach and blackberry cobbler filling. If you would like the Cherry Rhubarb Cobbler recipe, you can find it here (with recipe tips here). Make sure you visit the TWD Blog Roll to see how everyone else enjoyed this sweet and oh so tart treat.

Tuesday, April 22, 2008

TWD: Bill's Big Carrot Cake


Well, I've still got some mild sniffles and it took a few days for me to be able to use my hand again without too much pain, but I'm happy to report that I'm better now. You don't realize how much you grasp things in day to day life until you lose the ability to do so (I wasn't even able to turn a door knob or start my car engine!). So needless to say, I'm happy to be back in the kitchen and baking again :) Thank you to all who left me comments with get well wishes.

This week's Tuesdays with Dorie (TWD) recipe was chosen by Amanda of Slow like honey: Bill's Big Carrot Cake. Who's Bill you ask? Apparently he was one of Dorie's friends. Not a baker, but a jeweler... with a recipe so good that Dorie calls it "perfect."

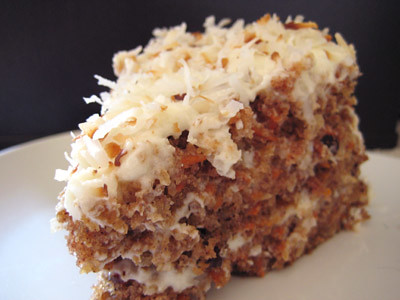
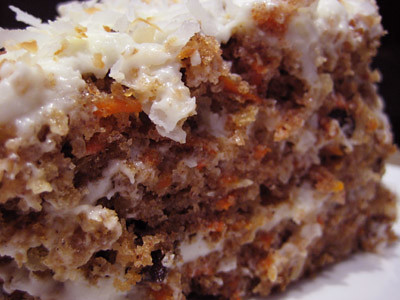
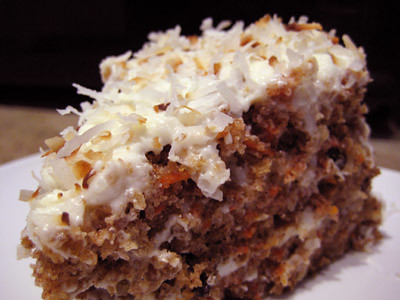
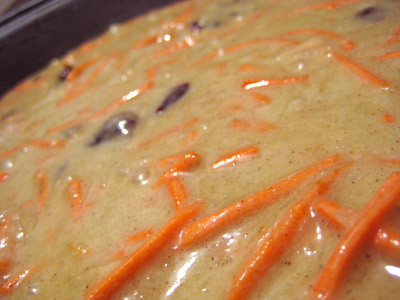
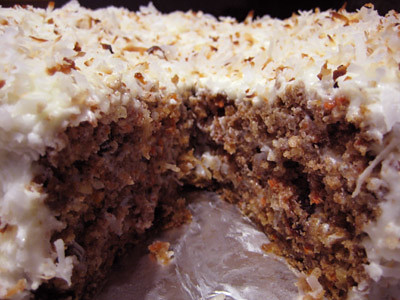
I was eager to try this recipe, because after deeming the Pastry Queen's carrot cake the best carrot cake ever, I wasn't sure how Dorie's (err, Bill's) recipe would compare. I have to say that the jury's still out--my husband and I can't come to an agreement. Don't get me wrong; this was a very good carrot cake. It did not last very long in our household. It was completely consumed by five people within a twenty-four hour period! (It was great for breakfast!) It had a nice, chunky texture, as all carrot cakes should, with the dried cranberries and nice big pieces of shredded carrots and coconut (I omitted the nuts). The cinnamon spice was probably one of the more prominent flavors in this cake. It was moist, but very dense. My husband said that this carrot cake was better, but I still feel that the Pastry Queen's carrot cake is the best. Her carrot cake has pineapple in it, which I really love. It's also more moist and light. I really feel that the coconut cream that is in both the cake and the frosting are what make that carrot cake special. I really enjoyed the dried cranberries in Dorie's version, however, so the next time I make a carrot cake I think will use the Pastry Queen's recipe and just add the dried cranberries to it.


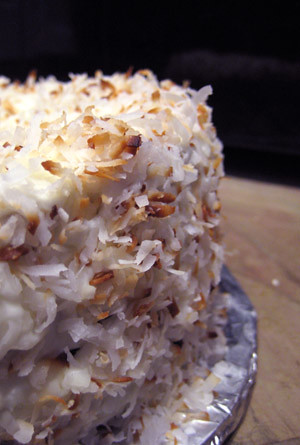
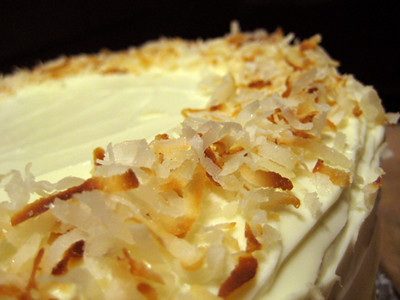
I did run across a small problem with this cake. My layers sunk quite a bit in the middle. I'm not sure exactly why. Initially they were only slightly sunken, but after I opened the oven midway through baking to rotate the cake pans, they seemed to sink even more. So I had to even out my cakes with a serrated knife before assembling the whole cake. As a result, the layers wouldn't have looked as pretty if I had only frosted between the layers (as depicted in the cookbook) so I frosted the entire cake and the decorated it with toasted coconut.


Thanks Amanda, for picking this week's recipe. I've been curious to try this recipe. While it was indeed a very good carrot cake, I think I will stick to the Pastry Queen's recipe. Make sure you check out the Tuesdays with Dorie blogroll to see everyone else's beautiful cakes.


Bill's Big Carrot Cake
from Baking: From My Home to Yours, by Dorie Greenspan

Ingredients:
For the cake:
2 cups all purpose flour
2 teaspoons baking powder
2 teaspoons baking soda
2 teaspoons ground cinnamon
¾ teaspoon salt
3 cups grated carrots (about 9 carrots, you can grate them in food processor fitted w/ a shredding a blade or use a box grater) (I bought a 10 oz bag of pre-shredded carrots and it was enough)
1 cup coarsely chopped walnuts or pecans (I omitted these)
1 cup shredded coconut (sweetened or unsweetened)
½ cup moist, plump raisins (dark or golden) or dried cranberries (I used cranberries)
2 cups sugar
1 cup canola oil
4 large eggs

For the frosting:
8 ounces cream cheese, room temperature
1 stick (8 tablespoons) unsalted butter, at room temperature
1 pound or 3 and ¾ cups confectioners' sugar, sifted
1 tablespoon fresh lemon juice or ½ teaspoon pure lemon extract
½ cup shredded coconut (optional)
Finely chopped toasted nuts and/or toasted shredded coconut (optional)

Getting ready: Position the racks to divide the oven into thirds and preheat the oven to 325 degrees Fahrenheit. Butter three 9-x-2-inch round cake pans, flour the insides, and tap out the excess. Put the two pans on one baking sheet and one on another.

To make the cake: Whisk the flour, baking powder, baking soda, cinnamon and salt. In another bowl, stir together the carrots, chopped nuts, coconut, and raisins.

Working with a stand mixer, preferably fitted with a paddle attachment, or with a hand mixer in a large bowl, beat the sugar and oil together on a medium speed until smooth.


Add the eggs one by one and continue to beat until the batter is even smoother.


Reduce the speed to low and add the flour mixture, mixing only until the dry ingredients disappear.


Gently mix the chunky ingredients. Divide the batter among the baking pans.


Bake for 40-50 minutes, rotating the pans from top to bottom and front to back at the midway point, until a thin knife inserted into the centers comes out clean. The cakes will have just started to come away from the sides of the pans. Transfer the cakes to cooling racks and cool for about 5 minutes, then run a knife around the sides of the cakes and unmold them. Invert and cool to room temperature right side up.

The cakes can be wrapped airtight and kept at room temperature overnight or frozen for up to 2 months.

To make the frosting: Working with a stand mixer, preferably fitted with a paddle attachment or with a hand mixer in a large bowl, beat the cream cheese and butter together until smooth and creamy. Gradually add the sugar and continue to beat until the frosting is velvety smooth. Beat in the lemon juice or extract.

If you'd like coconut in the filling, scoop about half of the frosting and stir the coconut into this position.

To assemble the cake:
(I used a long serrated knife and a gentle sawing motion to even out my cake layers before assembling the cake.)
Put one layer top side up on a cardboard cake round or a cake plate protected by strips of wax or parchment paper. If you added the coconut to the frosting, use half of the coconut frosting to generously cover the first layer (or generously cover with plain frosting). Use an offset spatula or a spoon to smooth the frosting all the way to the edges of the layer. Top with the second layer, this time placing the cake stop side down, and frost with the remainder of the coconut frosting or plain frosting. Top with the last layer, right side up, and frost the top- and the sides- of the cake. Finish the top with swirls of frosting. If you want to top the cake with toasted nuts or coconut, sprinkle them on now while the frosting is soft.

Refrigerate the cake for 30 minutes, just to set the frosting before serving.

Serving: This cake can be served as soon as the frosting is set. It can also wait, at room temperature and covered with a cake keeper overnight. The cake is best served in thick slices at room temperature and while it's good plain, it's even better with vanilla ice cream or some lemon curd.

Storing: The cake will keep at room temperature for 2 to 3 days. It can also be frozen. Freeze it uncovered, then when it's firm, wrap airtight and freeze for up to 2 months. Defrost, still wrapped, overnight in the refrigerator.

Yield: 10 servings

Wednesday, March 12, 2008

THE Best Carrot Cake (and a helpful tidbit!)


Best Carrot Cake EVER.

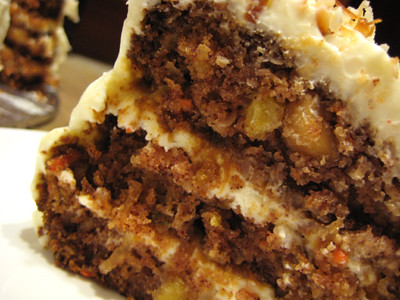
Seriously. This is probably the best carrot cake I have ever had. When we were home for the holidays over Thanksgiving, my mother-in-law had made a wonderful carrot cake for us. It was the first time I had eaten a carrot cake with pineapple in it, and I thought the flavor was wonderful. I had been meaning to get the recipe from her, when I came across this version from The Pastry Queen. It sounded very similar, but with the addition of macadamia nuts, so I thought I would give it a try. Wow! I was not disappointed to say the least. My friends and family will tell you that I just could not stop talking about this cake!

The only problem I had with this cake was that I did not have enough frosting to frost the whole cake. I had enough to frost each layer, including the top, but not enough for the sides (and I don't tend to frost my cakes too heavily). I'm guessing that Rebecca frosts these very very lightly; otherwise, I have no idea how she could make that amount of frosting go such a long way. So, as I see it, you have 3 options with this cake:

- Keep the frosting recipe as is and make your frosting layers extremely thin, and frost the entire cake.
- Keep the frosting recipe as is, frost your layers more moderately, and leave the sides of the cake bare.
- Increase the frosting recipe by one-third, frost the layers more moderately, and frost the entire cake.

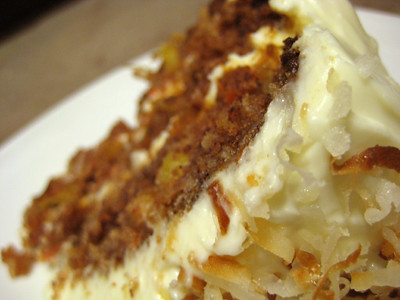
This cake is super moist and loaded with carrots, pineapple, coconut, and macadamia nuts. The frosting is creamy and the addition of the coconut cream really gives it a nice flavor and some depth. Do not substitute coconut milk for the coconut cream. Coconut cream is much thicker than coconut milk and contains less water. It can usually be found in the international foods aisle at larger grocery stores (or at Asian Supermarkets). You can, however, get coconut cream from coconut milk, but it will take a lot of coconut milk. Simply refrigerate your coconut milk. You'll notice that it separates - you want the thick, non-liquid part at the top - that's coconut cream. (For this recipe, you'll need 3 cans of coconut milk to yield the amount of coconut cream needed.)

Rebecca says that if you're feeling "energetic," you can decorate the top of the cake with leftover frosting. Not having any leftover frosting with which to decorate the cake, I decided to add some toasted coconut around the edges to jazz up the otherwise plain white cake.
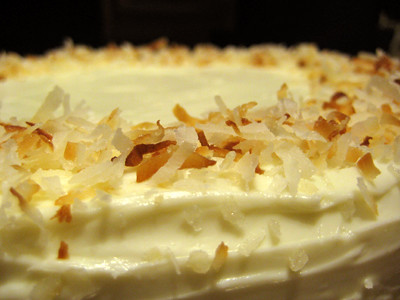

The only change I would make to this next time would be to chop the macadamia nuts before adding them. It was a little awkward biting into such a soft cake and hitting these big pieces of nuts. And if you don't like macadamia nuts, then just leave them out. The cake would still be great without them.
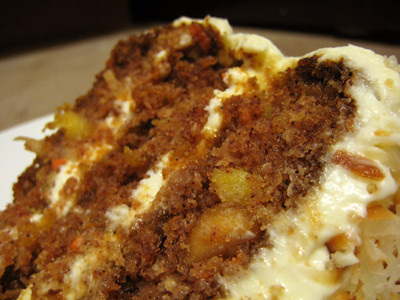

You must try this cake. I promise you will not be disappointed!

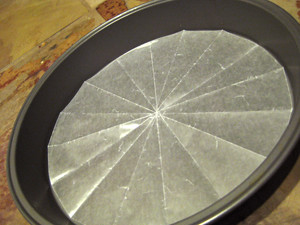
Oh, and here's the "tidbit" I promised. Here are some step by step instructions on how you can easily make rounds to line your cake pans. This recipe instructs you to line three 9-inch cake pans with parchment paper rounds, and instead of tracing a circle around the bottom of the pan and then cutting it out, I'm going to show you this neat trick from Alton Brown which is much easier!

First, tear out a piece of parchment paper that is a little bit larger than the diameter of your cake pan.
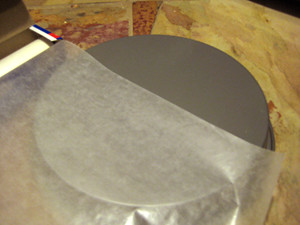
Then take the top right corner and fold it down towards the left edge, making a triangle. There will be a little bit of excess along the bottom, don't worry about it.
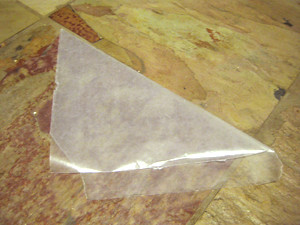

Next take the top left corner of the triangle and fold it down towards the bottom right corner, creating another triangle.
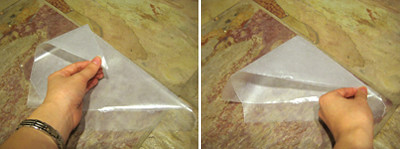
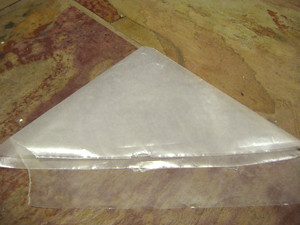
Now fold your triangle in half width-wise.
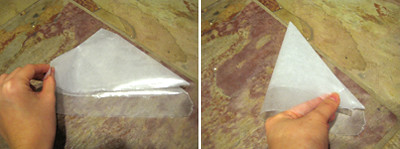
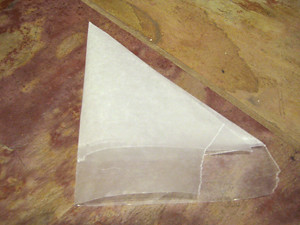
Fold the triangle in half again.
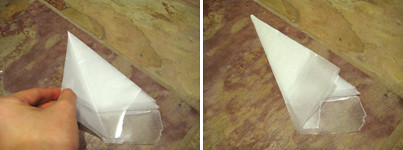
Lastly, flip your cake pan over and place the tip of the triangle at the center of the pan. Cut the parchment paper where it hits the edge of the cake pan.
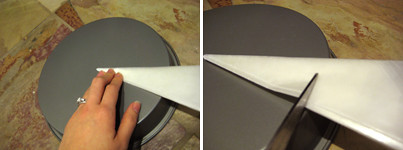
Unfold the parchment paper and voila! You have a circle that fits perfectly within your cake pan!
Tropical Carrot Cake with Coconut-Cream Cheese Frosting
from The Pastry Queen, by Rebecca Rather

Carrot Cake
1 cup macadamia nuts (I recommend chopping these up or crushing them)
3 cups all purpose flour
3 cups sugar
1 tbsp baking soda
1 tsp salt
1 tbsp ground cinnamon
1/2 tsp ground nutmeg
1-1/2 cups sweetened flaked coconut
4 large eggs
2 tbsp vanilla
1-1/2 cups vegetable oil, such as canola or safflower
1-1/2 cups shredded peeled carrots
1-1/2 cups diced fresh pineapple or drained crush canned pineapple (this is one 20 oz. can)
1/2 cup sweetened cream of coconut, such as Coco Lopez

Coconut-Cream Cheese Frosting
3 (8 oz) packages cream cheese, at room temperate (I used 4 packages of 1/3 less fat Neufchatel cheese)
1-1/2 cups powdered sugar (I used 2 cups)
1/4 cup heaving whipping cream (I used 1/4 cup + 4 tsp)
1/4 cup sweetened cream of coconut, such as Coco Lopez (I used 1/4 cup + 4 tsp)
1/2 tsp salt (I used 1/2 tsp + 1/8 tsp)

To Make the Cake:
Preheat the oven to 350F. Arrange the nuts on a baking sheet in a single layer and toast them for 7 to 9 minutes, until golden and aromatic. Set aside to cool.

Place one oven rack one-third from the bottom of the oven and the second two-thirds from the bottom. Preheat the oven to 350F. Line three 9-inch cake pans with parchment paper rounds, grease with butter, and dust with flour (or spray with Baker's Joy).

Stir together the flour, sugar, baking soda, salt, cinnamon, nutmeg, coconut, and nuts in a large bowl. In another large bowl, whisk together the eggs, vanilla, oil, carrots, pineapple, and cream of coconut. Pour the egg mixture into the flour mixture and stir until combined.

Pour the batter into the prepared cake pans. Stagger the cake layers on the oven racks so that no layer is directly over another. Set 2 layers on one rack and the third on the other. Bake for 30 to 35 minutes. The cakes are done when they are golden brown on top and a toothpick inserted into the center comes out clean. Cool the cakes in their pans on racks for 5 minutes, then invert them onto the racks and cool completely, about 15 to 20 minutes.

To Make the Frosting:
Using a mixer fitted with a paddle attachment, beat the cream cheese and powdered sugar in a large bowl on medium-high speed about 1 minute. Add the whipping cream, cream of coconut, and salt; beat until combined.

Place 1 cake layer on a serving plate and spread a thick blanket of frosting on top. Add the second layer, spread thickly with frosting, and top with the third layer. Cover the top and sides of the cake with an even layer of frosting. If you're feeling energetic and there is frosting left over, use a pastry bag fitted with a decorative tip to pipe a decoration around the top rim of the cake.

The cake can be covered with plastic wrap and refrigerated up to 4 days. Let it cool in the refrigerator about 1 hour before covering, to ensure the frosting has hardened and will not stick to the plastic wrap.

Yield: 12-14 Servings.