Wednesday, May 27, 2009

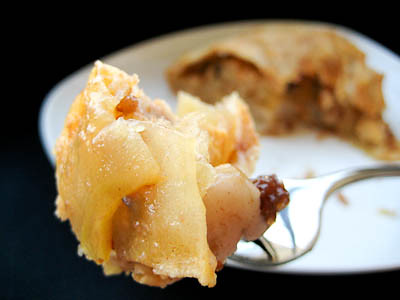
Apple Strudel (DB)


The May Daring Bakers’ challenge was hosted by Linda of make life sweeter! and Courtney of Coco Cooks. They chose Apple Strudel from the recipe book Kaffeehaus: Exquisite Desserts from the Classic Cafés of Vienna, Budapest and Prague by Rick Rodgers. Strudel is typically made from flour, egg, water and butter with no sugar added. This recipe uses vegetable oil instead of butter. After kneading the dough, it is allowed to rest and then rolled out and stretched by hand until it is as thin as tissue paper.


I've never made strudel before, so I had no idea what was involved in the process until now. It was actually fairly simple, though I was a bit intimidated after reading the instructions on how to stretch out the dough. Surely I wouldn't be able to stretch a small ball of dough into a thin piece that was 2 feet by 3 feet?! Once I started working with the dough, though, I was pleasantly surprised to find how easily stretched without tearing. I didn't end up measuring it, but was able to stretch my dough out to span the entire surface of my stove.
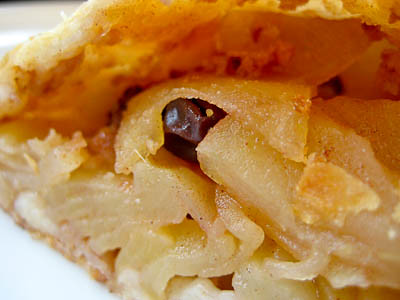

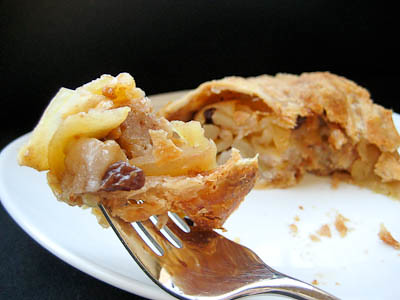
We were given the freedom to vary the type of filling, but I decided to stick with the classic cinnamon apple filling. Speaking of cinnamon, I added four times as much cinnamon as the recipe called for, and thought it turned out just right. The filling was actually not as sweet as I typically like my apple fillings, but my husband thought it was just right. I guess it depends on how sweet you like things ;)


Thanks to Linda of make life sweeter! and Courtney of Coco Cooks for hosting this month's challenge. The pastry was delicious and I enjoyed this challenge. Making strudel pastry is one more technique I have under my belt now. That said, I probably won't be making this again unless it's to experiment with different types of fillings. When it comes to apples I think my favorite baked good is always going to be apple crumb pie.

Apple Strudel
from Kaffeehaus: Exquisite Desserts from the Classic Cafés of Vienna, Budapest and Prague by Rick Rodgers

Preparation time
Total: 2 hours 15 minutes – 3 hours 30 minutes

15-20 min to make dough
30-90 min to let dough rest/to prepare the filling
20-30 min to roll out and stretch dough
10 min to fill and roll dough
30 min to bake
30 min to cool

2 tablespoons (30 ml) golden rum
3 tablespoons (45 ml) raisins
1/4 teaspoon ground cinnamon (I used 1 tsp)
1/3 cup plus 1 tablespoon (80 g) sugar
1/2 cup (1 stick / 115 g) unsalted butter, melted, divided
1 1/2 cups (350 ml) fresh bread crumbs
strudel dough (recipe below)
1/2 cup (120 ml, about 60 g) coarsely chopped walnuts (I omitted these)
2 pounds (900 g) tart cooking apples, peeled, cored and cut into ¼ inch-thick slices (use apples that hold their shape during baking) (I used Golden Delicious apples - and sliced them into 1/8 inch slices)

1. Mix the rum and raisins in a bowl. Mix the cinnamon and sugar in another bowl.

2. Heat 3 tablespoons of the butter in a large skillet over medium-high. Add the breadcrumbs and cook whilst stirring until golden and toasted. This will take about 3 minutes. Let it cool completely.

3. Put the rack in the upper third of the oven and preheat the oven to 400°F (200°C). Line a large baking sheet with baking paper (parchment paper). Make the strudel dough as described below. Spread about 3 tablespoons of the remaining melted butter over the dough using your hands (a bristle brush could tear the dough, you could use a special feather pastry brush instead of your hands). Sprinkle the buttered dough with the bread crumbs. Spread the walnuts about 3 inches (8 cm) from the short edge of the dough in a 6-inch-(15cm)-wide strip. Mix the apples with the raisins (including the rum), and the cinnamon sugar. Spread the mixture over the walnuts.

4. Fold the short end of the dough onto the filling. Lift the tablecloth at the short end of the dough so that the strudel rolls onto itself. Transfer the strudel to the prepared baking sheet by lifting it. Curve it into a horseshoe to fit. Tuck the ends under the strudel. Brush the top with the remaining melted butter.

5. Bake the strudel for about 30 minutes or until it is deep golden brown. Cool for at least 30 minutes before slicing. Use a serrated knife and serve either warm or at room temperature. It is best on the day it is baked.

Strudel dough
1 1/3 cups (200 g) unbleached flour (I used bleached flour)
1/8 teaspoon salt
7 tablespoons (105 ml) water, plus more if needed
2 tablespoons (30 ml) vegetable oil, plus additional for coating the dough
1/2 teaspoon cider vinegar

1. Combine the flour and salt in a stand-mixer fitted with the paddle attachment. Mix the water, oil and vinegar in a measuring cup. Add the water/oil mixture to the flour with the mixer on low speed. You will get a soft dough. Make sure it is not too dry, add a little more water if necessary.
Take the dough out of the mixer. Change to the dough hook. Put the dough ball back in the mixer. Let the dough knead on medium until you get a soft dough ball with a somewhat rough surface.

2. Take the dough out of the mixer and continue kneading by hand on an unfloured work surface. Knead for about 2 minutes. Pick up the dough and throw it down hard onto your working surface occasionally. Shape the dough into a ball and transfer it to a plate. Oil the top of the dough ball lightly. Cover the ball tightly with plastic wrap. Allow to stand for 30-90 minutes (longer is better).

3. It would be best if you have a work area that you can walk around on all sides like a 36 inch (90 cm) round table or a work surface of 23 x 38 inches (60 x 100 cm). Cover your working area with a table cloth (I used a cheesecloth), dust it with flour and rub it into the fabric. Put your dough ball in the middle and roll it out as much as you can.

Pick the dough up by holding it by an edge. This way the weight of the dough and gravity can help stretching it as it hangs. Using the back of your hands to gently stretch and pull the dough. You can use your forearms to support it.

4. The dough will become too large to hold. Put it on your work surface. Leave the thicker edge of the dough to hang over the edge of the table. Place your hands underneath the dough and stretch and pull the dough thinner using the backs of your hands. Stretch and pull the dough until it's about 2 feet (60 cm) wide and 3 feet (90 cm) long, it will be tissue-thin by this time. Cut away the thick dough around the edges with scissors. The dough is now ready to be filled.
(I did not hang my dough over the edge of anything. I found it easiest to just grab the edges of the dough and gently pull/stretch it outward. I slowly worked my way around the dough until it was completely stretched to cover the entire surface of my stove.)

Tuesday, May 26, 2009

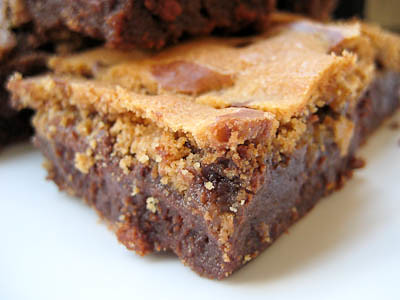
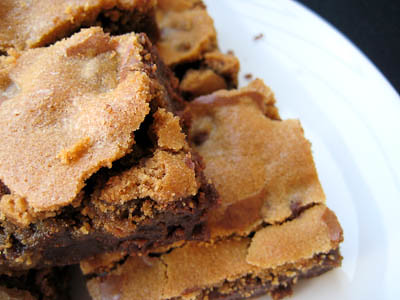
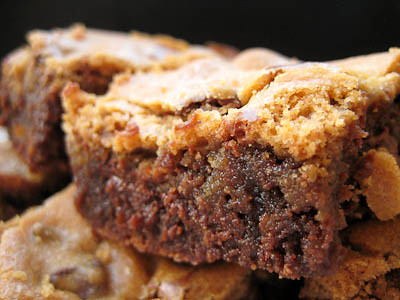
Chipster-Topped Brownies (TWD)


This week's Tuesdays with Dorie (TWD) recipe was chosen by Beth of Supplicious: Chipster-Topped Brownies. They are Dorie's brilliant idea to put a layer of chocolate chip cookie dough on top of a layer of brownies. Why haven't I seen this concept before?!


There was a lot of chatter about the recipe this week. Some had issues w/the raw cookie dough sinking into the brownie layer - I seemed to avoid this by dropping very small amounts at a time. There was also mention of the cookie layer browning and finishing cooking before the bottom brownie layer. Some pre-baked the brownie layer for a few minutes before adding the cookie dough and baking the two layers together. I considered doing that, but then decided to just make the recipe as written because if the brownie layer needed to be pre-baked, wouldn't Dorie have discovered that in her test kitchen?


So I decided to bake the brownies for the full 55 minutes to make sure the brownie layer wasn't undercooked. To avoid burning the cookie layer, I covered it with foil after 40 minutes in the oven. I probably should have done so at the 30 minute mark, but lost track of time. Still, this seemed to do the trick because my brownie layer was moist and chocolatey and my cookie layer was golden brown and crunchy.


To say that these brownies were good is an understatement. We loved them and my husband said they were one of the best things I have ever baked. I am not sure how they taste with the bittersweet chocolate, but I thought they were great with the semisweet chocolate I substituted. I loved these and will definitely be making them again.


Thanks Beth, for choosing this recipe - I am not sure how I missed this recipe in all the times I have flipped through the book, but I am so glad you pointed me towards it! If you would like the recipe, you can find it here. Make sure you visit the TWD Blogroll to see what everyone else thought about this awesome cookie/brownie combination.

* Recipes notes:
- I used 9 oz of semisweet chocolate chips in place of the 6 oz bittersweet and 3 oz of unsweetened chocolate.
- I omitted the walnuts from my brownie layer.
- I had to place a foil tent over my brownies about 40 minutes into baking to prevent the cookie layer from over browning, but I would recommend adding it at 30 minutes.
- I had to bake my brownies for the full 55 minutes before they were done.
- For more tips, click here.

Tuesday, May 19, 2009

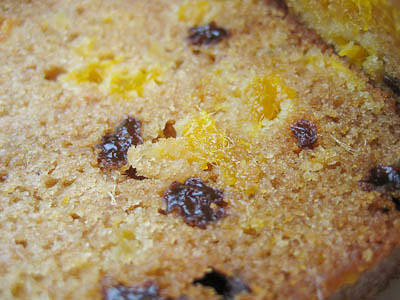
Fresh Mango Bread (TWD)


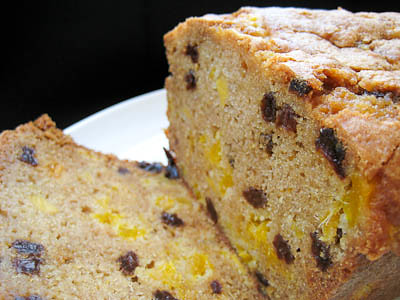
This week's Tuesdays with Dorie (TWD) recipe was chosen by Kelly of Baking with the Boys: Fresh Mango Bread. I love mangoes and was very curious to see this recipe. I wasn't really sure what to expect because I've never had cooked/baked mangoes before - I always enjoy them fresh.


This recipe is about as simple as any banana bread recipe, except dicing the mangoes may take some practice for those who are not familiar with eating them. If you've never cut a mango before, you can find instructions (with pictures) here.

The aroma coming from the oven as this bread was baking was wonderful. I wasn't really sure what to expect, but this bread tasted very similar to banana bread. The mangoes did impart a very subtle flavor to the bread, but it wasn't very prominent. I think I'll stick to enjoying fresh mangoes, but if I ever end up with an abundance of ripe mangoes, I would definitely make this bread again.


Thanks Kelly, for choosing this recipe - it was interesting and different. If you would like the recipe, you can find it here. Make sure you visit the TWD Blogroll to see what everyone else thought about this unique recipe.

* Recipes notes:
- My mango was just over 0.75 pounds and yielded 1.75 cups of diced mango. I would recommend either purchasing a large mango that is at least 1 pound, or at least 2 half pound mangoes.
- I had to place a foil tent over my bread about 40 minutes into baking to prevent it from over browning.
- I had to bake my bread for an extra 15 minutes before it was done in the middle.
- For more tips, click here.

Tuesday, May 12, 2009

Mexican Pizza and Homemade Taco Seasoning

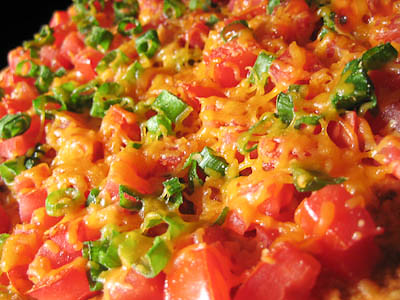
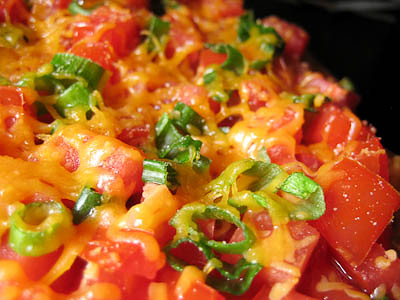
My apologies to Babette of Babette Feasts who chose this week's Tuesdays with Dorie (TWD) recipe (Tartest Lemon Tart). I would have loved to have tried it, but I just got back from my trip and I was so jet lagged. So instead of a tart this week, I bring you a super simple dinner idea - the Mexican Pizza.


I grew up in southern California and I'll admit, I used to go to Taco Bell. I almost always ordered the same thing whenever I went there - "Mexican Pizza with extra tomatoes, hold the olives please."

I haven't been to Taco Bell in years, and prefer to avoid fast food establishments in general now. So when I got a craving for a mexican pizza, I decided I could just as easily make them at home. Unlike most restaurants, there aren't many things on the Taco Bell menu that you couldn't make at home.


It was relatively easy to create the copycat Mexican Pizza recipe. Each component is simple to make, and this is actually a great weeknight meal because it comes together in no time. I don't like deep frying things, so I baked my tortillas instead. In our house, we buy the 10-inch tortillas in bulk, so that's what I used for this recipe. I then cut them into "slices" for serving. You can easily use smaller tortillas if you want to make individually sized servings instead. You can either use store bought taco seasoning, or you can just as easily make your own to cut back on the sodium (I've included a recipe below).


These are delicious, and a nice change from plain old tacos. I love that I can make my own mexican pizzas at home now, because I can customize them to suit my tastes - with extra tomatoes and no olives :) Give these a try - I think you'll enjoy them!

Mexican Pizza
from Good Eats 'n Sweet Treats

1 lb ground beef
1 tbsp taco seasoning, recipe below
1/4 cup water
4 flour tortillas (10 inch)
cooking spray
2 tbsp chopped green onions (scallions)
1/2 can (8 ounces) refried beans
1 cup diced tomatoes
1/2 cup taco sauce
1 cup shredded cheese (I used a Mexican Blend)
sliced black olives, optional


Preheat oven to 350F.

Cook the ground beef over medium heat until brown, then drain. Return the meat to the pan and add the taco seasoning and water. Continue to cook over medium heat for a few minutes, stirring often.

Spray both sides of each tortilla with cooking spray and then place them on the middle rack of your oven. Bake for approximately 6 minutes, turning them half way through. The tortillas should be golden brown and crispy, but watch them closely because they will go from golden to burnt in a matter of seconds. (They may puff up slightly in the oven - you can prevent this by poking them a few times with a knife every few minutes in the oven.) After you remove the tortillas from the oven, increase the oven temperature to 400 degrees F.

Place the refried beans in a small bowl and heat them for 30-60 seconds in the microwave.

Assembling the pizzas:
Spread 1/2 cup beans, then 1 cup of seasoned ground beef on the first tortilla. Top with the second tortilla.

Top the second tortilla with 1/4 cup taco sauce. Layer with 1/2 cup diced tomatoes, then 1/2 cup cheese and 1 tablespoon scallions.

Bake for 5 minutes. Cut each pizza into four "slices" using a knife or kitchen scissors.

Yield: 3-4 Servings

Taco Seasoning
from Amber's Delectable Delights

1 Tbsp chili powder
1/4 tsp garlic powder
1/4 tsp onion powder
1/4 tsp crushed red pepper flakes
1/4 tsp dried oregano
1/2 tsp paprika
1 1/2 tsp ground cumin
1 tsp sea salt
1 tsp black pepper

Mix together all ingredients and store in airtight container.
Use within 6 months for best flavor.

Yield: 2 2/3 tablespoons (2 tbsp + 2 tsp)

Tuesday, May 5, 2009

No Tiramisu Cake on the Garden Isle

Waipo'o Falls, Waimea Canyon, Kauai

This week's Tuesdays with Dorie (TWD) recipe was chosen by Megan of My Baking Adventures: Tiramisu Cake. I love Tiramisu and this recipe looks amazing, but I was unable to make it this week because I am currently on the Garden Isle of Kauai! My brother is getting married in a few days on the island of Oahu, so we decided to make a vacation out of it :) I promise to make this cake when I return, so stay tuned...

Sunday, May 3, 2009

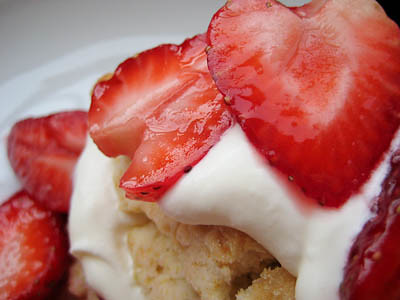
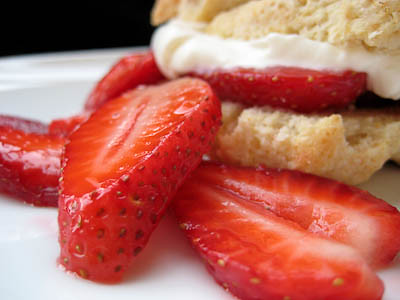
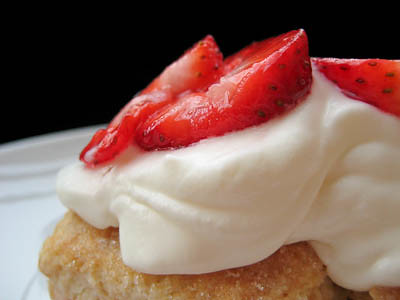
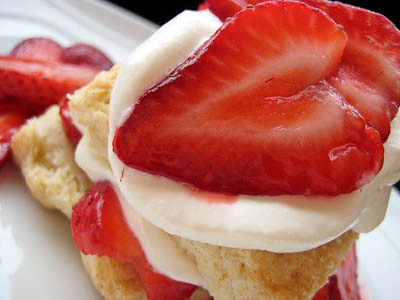
Strawberry Shortcakes (SMS)


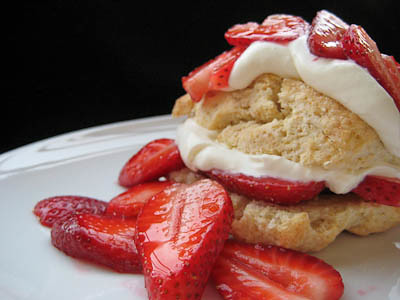
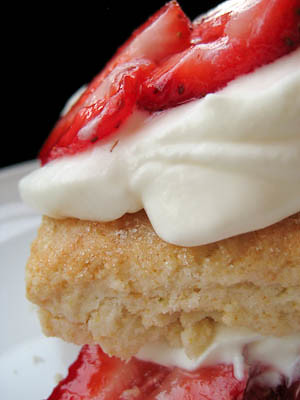
This week's Sweet Melissa Sundays (SMS) recipe was chosen by Wendy of Pink Stripes: Strawberry Shortcakes. There is nothing that I love more when it comes to strawberries than strawberry shortcakes. To say that I was looking forward to trying this recipe is an understatement.


The recipe is simple and straightforward with the typical 3 strawberry shortcake components: the strawberries, the shortcakes, and the whipped cream. The strawberries are sliced and then sweetened with sugar. The whipped cream is just that - whipped cream; nothing fancy. The shortcakes are basically sweet biscuit dough, with a little lemon zest to add more flavor. The key to making good shortcakes is handling the dough as little as possible. Overworking the dough will yield very flat, not very flaky shortcakes. If you don't have a pastry cutter, use two butter knives to cut the butter in to the dough.


I had no issues with my dough rising, though the shortcakes did not spread quite as much as I thought they would. Melissa said to place them on the baking sheet at least two inches apart, so I was expecting them to spread quite a bit! Instead, they just rose to become nice, flaky shortcakes!


These strawberry shortcakes were delicious! The perfect spring and summertime treat! The biscuit dough is sweet, but not too sweet. Paired with strawberries and whipped cream, it is perfect. I love that the shortcakes require only a few minutes of prep time, and then a few more minutes in the oven. It's the perfect last minute dessert if you have some unexpected guests coming over.


Thanks Wendy, for choosing this recipe - I loved it! If you would like the recipe, you can find it here. Make sure you visit the SMS Blogroll to see what everyone else thought about this scrumptious dessert.

* Recipe tips:
- Be careful with your shortcake dough - handle it as little as possible. Also make sure your butter is very cold before cutting it in. This will ensure your biscuits rise well and are perfectly flaky.
- Start your strawberries as the shortcakes go into the oven. By the time they're done baking and cooling, you'll be ready to go.
- The shortcakes are best eaten the day they are made, but they can be tightly wrapped in plastic wrap and then aluminum foil and frozen for up to 3 weeks. Do not unwrap before defrosting.

- For more tips, click here.


Tuesday, April 28, 2009

Chocolate Coconut Cream Tart (TWD)


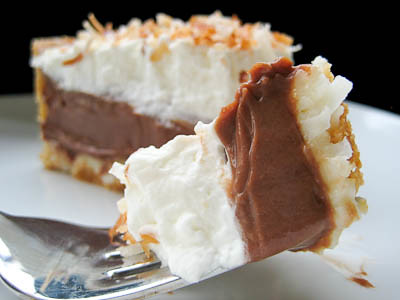
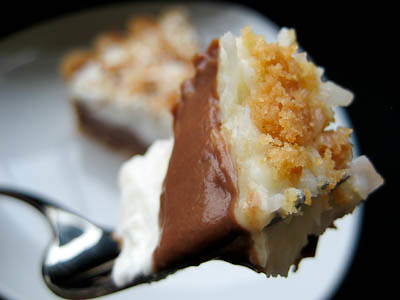
This week's Tuesdays with Dorie (TWD) recipe was chosen by Kim of Scrumptious Photography: Chocolate Cream Tart. The recipe includes a chocolate pastry cream in a dark chocolate shortbread crust, topped with sweetened whipped cream.


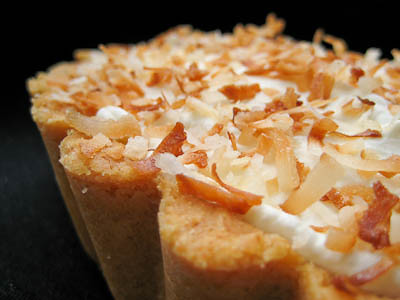
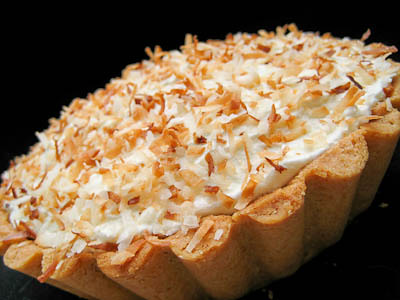
I lost track of time and almost didn't participate this week, but I am so glad that I did! I decided to go with Dorie's "playing around" idea to make a Chocolate Coconut Cream Pie instead. I've never had one before, but the idea of one sounded so good. I love Dorie's sweet tart dough, so I decided to keep with the tart idea instead of making a regular pie crust.


The coconut cream was very simple to make, though I almost ran out of patience waiting for the cream to come to a boil. I believe this step took at least 20 to 30 minutes, though I honestly lost track of time!

I've made Dorie's pastry cream many times before, so I had no issues with that component. I used semisweet chocolate because I'm not a fan of bittersweet chocolate.

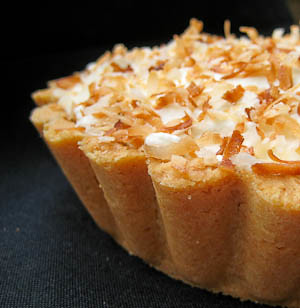
I didn't have a 9-inch tart pan, so I used 4.5 or 5-inch tart pans instead. I made one recipe of sweet tart dough, but probably should have made 1.5x the recipe because my tarts were a bit on the thin side.


The Chocolate Coconut Cream Tarts were to die for! The chocolate pastry cream - oh, the pastry cream... it was amazing. Rich and creamy... chocolatey... but not too rich. The coconut cream gave the tart a nice flavor and texture. I'm glad that I went with the sweet tart dough instead of the chocolate shortbread crust because I think it would have been (gasp) too chocolately otherwise. Next time, I will drizzle some caramel sauce over the top and it will taste like a Samoa Girl Scout cookie! :)


Thanks Kim, for choosing this recipe - I loved it. If you would like the recipe for the chocolate cream tart, you can find it here. (I've included the recipe for the Chocolate Coconut Cream Tart below since I used a completely different tart dough recipe and the weekly host usually doesn't post the "playing around" options.) Make sure you visit the TWD Blogroll to see what everyone else thought about this chocolately treat!


Chocolate Coconut Cream Tart
from Baking: From My Home to Yours, by Dorie Greenspan

For the Coconut Cream
1-1/3 cups heavy cream
1 cup sweetened shredded coconut

For the Filling
2 cups whole milk
4 large egg yolks
6 tbsp sugar
3 tbsp cornstarch, sifted
1/4 tsp salt
7 ounces bittersweet chocolate, melted (I used semisweet)
2-1/2 tbsp unsalted butter, cut into pieces, at room temperature

For the Topping
1 cup heavy cream
3 tbsp confectioner's sugar
1 tbsp dark rum (optional)
1 tsp pure vanilla extract

1 9-inch Sweet Tart Dough, fully baked and cooled


To make the Coconut Cream:
Put the heavy cream and shredded coconut in a small saucepan and bring to a boil over medium-low heat, stirring almost constantly. Continue to cok and stir until cream is reduced by half and the mixture is slightly thickened. Scrape the coconut cream into a bowl and cool to room temperature.

To make the Filling:
Bring the milk to a boil in a small saucepan.

Meanwhile, in a medium heavy-bottomed saucepan, whisk the egg yolks together with the sugar and cornstarch until thick and well blended. Still whisking, drizzle in about 1/4 cup of the hot milk-- this will temper, or warm, the yolks so they won't curdle. Whisking all the while, slowly pour in the remainder of the milk. Put the pan over medium heat and, whisking vigorously, constantly and thoroughly (making sure to get the edges of the pot), bring the mixture to a boil. Keep at a boil, still whisking, for 1 to 2 minutes, then remove the pan from the heat.

Whisk in the melted chocolate. Let sit for 5 minutes, then whisk in the bits of butter, stirring until they are full incorporated and the pastry cream is smooth and silky. Scrape the cream into a bowl. You can press a piece of plastic wrap against the surface of the cream to create an airtight seal and refrigerate the pastry cream until cold or, if you want to cool it quickly--as I always do--put the bowl into a larger bowl filled with ice cubes and cold water, and stir the pastry cream occasionally until it is thoroughly chilled, about 20 minutes.

To make the topping:
Whip the heavy cream with the confectioner's sugar, dark rum, and pure vanilla extract.

To assemble the tart:
When you are ready to assemble the tart, whisk the chocolate pastry cream vigorously to loosen it and to bring back its velvety texture. Spread the coconut cream over the bottom of the tart crust, cover it with the chocolate cream, and then top it with the whipped cream. Cover the whipped cream with toasted coconut or with chocolate shavings, or a combination of the two.


* Recipes notes:
- If you've never made pastry cream before, it won't really come to a boil. It will just start to thicken. After it starts to thicken, just continue to cook for another 1-2 minutes.
- I used semisweet chocolate instead of bittersweet.
- If you don't have whole milk, learn how to make your own with skim/1%/2% and cream or half & half here.
- For more tips, click here.