Tuesday, March 11, 2008

TWD: Russian Grandmothers' Apple Pie-Cake


This week's Tuesdays with Dorie (TWD) recipe was chosen by Natalie of Burned Bits: the Russian Grandmothers' Apple Pie-Cake. It is technically an apple pie, not a cake, but Dorie calls it an apple pie-cake because the crust is "soft, thick and sweet." I was really excited when I saw that this was the recipe of the week, as I love anything with fruit in it, and I especially love apple pie!

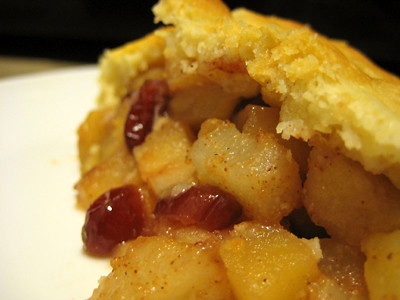
I had originally planned on making turnovers with this recipe. I've made plenty of pies in the past, but never turnovers. So this seemed like the perfect opportunity to do so - plus it would be easier to send to school with my husband - each person could have their own cute little turnover! Leigh and I got to talking and came up with the brilliant idea to play around with the recipe and make it with apples, pears, and cranberries! I would definitely recommend this combination - it's a nice change from the usual apples and raisins.

The recipe says that "when properly combined, the dough should almost clean the sides of the bowl." I felt like I was reading a recipe for a yeast bread. I wasn't sure what Dorie meant by this - does she mean that you should continue to add flour, like when you make bread dough, until it flops around on the dough hook and doesn't stick to the sides of the mixing bowl? Based on some comments I had read from other TWD bakers, I knew that this dough was going to be sticky. But I wasn't sure how much flour to add to avoid this problem. Dorie says that typically, you'll have to add another 1/4 cup of flour to the dough (for a total of 3-1/2 cups) to get it to the proper consistency. Well, I added an extra 1/4 cup beyond that and still ended up with some pretty sticky dough! I was weary of adding too much flour as well, so I proceeded to refrigerate my dough and hope for the best.


I was able to put together one cute little turnover before giving up and switching to Plan B (the regular pie). The dough was just too sticky to work with, even after ample refrigeration. Even then, after rolling out the dough into a rectangle, I found it hard to transfer it to the baking pan in one piece and had to patch it together to cover the entire pan. I think part of the problem lies within the fact that Dorie simply calls for "the juice of one lemon" instead of specifying an exact measurement. Lemons come in many sizes, and depending on how thoroughly you squeeze them, the amount of juice you can get from "one lemon" can vary greatly. I'm sure that this affects the amount of flour required to make the dough just right. I wish Dorie would have been more specific here, as it would have made the recipe a little more fool proof. So, here you have it: my little turnover, in all its glory :)


I also found that my crust started to brown very quickly and a bit unevenly. Normally, I use a pie crust shield to keep the edges of my apple pies from burning, but seeing as this was baked in a rectangular baking pan, I had to go the low tech route and make my own shield with foil. As the edges started to brown, I covered the entire pie with foil. Towards the end of the baking time, I cut a hole in the middle of my foil so that I could keep the edges covered and let the center of the crust brown. This seemed to work well.


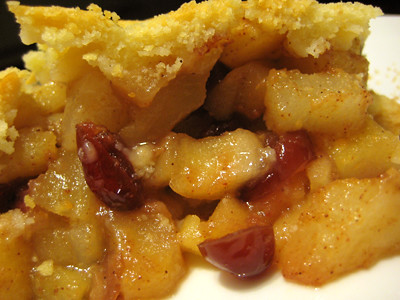
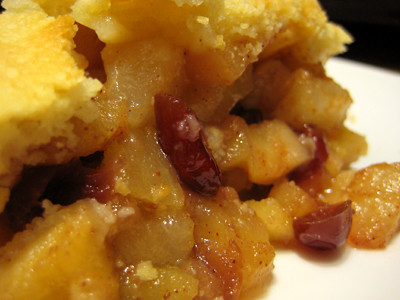
My fruit filling ended up being a little overcooked. I like mine to still have a little bit of a crunch to it after it has been baked. I think this was due to the fact that I chopped my fruit up into itty bitty chunks with the intent of making turnovers... I'm guessing that if I had sliced them like Dorie recommended for the pie, they would have turned out better.

The dough/crust for this pie is certainly different and very delicious. When it was fresh out of the oven and still barely warm, the crust tastes almost like a cross between your traditional pie crust and a shortbread cookie! The next day it softens up quite a bit and tastes more cakey like Dorie says it's supposed to. I think I prefer the slight crunch it has when it is fresh out of the oven.

Overall, I thought this recipe was good. I'm not sure if I will be making it again, though, because I just haven't been able to find anything better than my mother-in-law's apple crumb pie (I hope to be able to blog about that one soon). I always prefer a sugary streusel topping over a traditional pie crust. If you're the kind of person who can't get enough pie crust, though, you need to give this recipe a try! :)

Thanks Natalie, for picking this week's recipe. I love apple pie and this was my first time ever making my own pie crust! (And my first time making a turnover!) Make sure you check out the blog roll on the Tuesdays with Dorie blog to see what everyone else thought of this "pie-cake."

Russian Grandmothers' Apple Pie-Cake
from Baking: From My Home to Yours, by Dorie Greenspan

For The Dough

2 sticks (8 ounces) unsalted butter, at room temperature
1 cup sugar
2 large eggs
1 tablespoon baking powder
1/2 teaspoon salt
Juice of 1 lemon
3 1/4 - 3 1/2 cups all-purpose flour (I used 3-3/4 cups)

For The Apples
10 medium apples, all one kind or a mix (Dorie likes to use Fuji , Golden Delicious and Ida Reds; her grandmother probably used dry baking apples like Cordland and Rome) (I used 5 Golden Delicious Apples and 5 Anjou Pears)
Squirt of fresh lemon juice
1 cup moist, plump raisins (dark or golden) (I used dried cranberries)
1/4 cup sugar
1 1/4 teaspoons ground cinnamon

Sugar, preferably decorating (coarse) sugar, for dusting

To Make The Dough:
Working with a stand mixer, preferably fitted with a paddle attachment, or with a hand mixer in a large bowl, beat the butter and sugar together on medium speed until smooth, about 2 minutes. Add the eggs and continue to beat until the mixture is light and fluffy, about 3 minutes more. Reduce the mixer speed to low, add the baking powder and salt and mix just to combine. Add the lemon juice - the dough will probably curdle, but don't worry about it. Still working on low speed, slowly but steadily add 3 1/4 cups of the flour, mixing to incorporate it and scraping down the bowl as needed. The dough is meant to be soft, but if you think it looks more like a batter than a dough at this point, add the extra 1/4 cup flour. (The dough usually needs the extra flour.) When properly combined, the dough should almost clean the sides of the bowl.

Turn the dough out onto a work surface, gather it into a ball and divide it in half. Shape each half into a rectangle. Wrap the dough in plastic wrap and refrigerate for at least 2 hours, or for up to 3 days. (The dough can be wrapped airtight and frozen for up to 2 months; defrost overnight in the refrigerator.)

To Make The Apples:
Peel and core the apples and cut into slices about 1/4 inch thick; cut the slices in half crosswise if you want. Toss the slices in a bowl with a little lemon juice - even with the juice, the apples may turn brown, but that's fine - and add the raisins. Mix the sugar and cinnamon together, sprinkle over the apples and stir to coat evenly. Taste an apple and add more sugar, cinnamon, and/or lemon juice if you like.

Getting Ready to Bake:
Center a rack in the oven and preheat the oven to 375 degrees F. Generously butter a 9x12-inch baking pan (Pyrex is good) and place it on a baking sheet lined with parchment or a silicone mat (I used a 9x13-inch pan).

Remove the dough from the fridge. If it is too hard to roll and it cracks, either let it sit at room temperature for about 15 minutes or give it a few bashes with your rolling pin to get it moving. Once it's a little more malleable, you've got a few choices. You can roll it on a well-floured work surface or roll it between sheets of plastic wrap or wax paper. You can even press or roll out pieces of the dough and patch them together in the pan - because of the baking powder in the dough, it will puff and self-heal under the oven's heat. Roll the dough out until it is just a little larger all around than your pan and about 1/4 inch thick - you don't want the dough to be too thin, because you really want to taste it. Transfer the dough to the pan. If the dough comes up the sides of the pan, that's fine; if it doesn't that's fine too.

Give the apples another toss in the bowl, then turn them into the pan and, using your hands, spread them evenly across the bottom.

Roll out the second piece of dough and position it over the apples. Cut the dough so you've got a 1/4 to 1/2 inch overhang and tuck the excess into the sides of the pan, as though you were making a bed. (If you don't have that much overhang, just press what you've got against the sides of the pan.)

Brush the top of the dough lightly with water and sprinkle sugar over the dough. Using a small sharp knife, cut 6 to 8 evenly spaced slits in the dough.


Bake for 65 to 80 minutes, or until the dough is a nice golden brown and the juices from the apples are bubbling up through the slits. Transfer the baking pan to a cooling rack and cool to just warm or to room temperature. You'll be tempted to taste it sooner, but I think the dough needs a little time to rest.

Apple Turnovers
Roll out the dough until it is a little thinner than 1/4 inch and cut it into circles 4-1/2 to 5 inches in diameter. Fill each one with 1 to 2 tablespoons of the apple filling (I chop the apples when I'm using them in a small turnover) or substitute another fruit filling, apple butter and apple chunks or some great preserves. Brush the edges of each dough circle with a little water, fold over the dough to make a half circle pocket and use the tines of a fork to seal the edges. Transfer to a baking sheet lined with parchment or a silicone mat and cut a steam slit in the top of each turnover. Bake in a 375-degree-F oven for about 20 minutes, or until the dough is golden brown and you can smell the sweet filling. Cool to room temperature before serving.

Sunday, March 9, 2008

An Excellent Award Made My Day!


Thank you so much to Nikki and bakingblonde for awarding my blog with an Excellence Award! I'm so honored. When I started this blog back in September, it was a fun way for me to keep track of my recipes and share them with my friends and family. I had no idea how big the food blogging community was, or how many great friends I would meet along the way. It's been a great journey, and I'm thankful for this opportunity to recognize some of my new friends.

So now it's my turn to pass this award on to five other bloggers. It was so hard for me to pick just five, as there are so many excellent blogs that I read; just because I did not award this to you, doesn't mean I didn't want to! I would like to give this award to the following blogs (listed in alphabetical order):

1. Kevin of Closet Cooking: I'm not sure if there is anyone else in my Google reader that updates their blog as much as Kevin does! Most of his blog is dedicated to cooking, though he does do a little baking as well. What I love about his blog is the great variety of different foods he tries... Chinese, Greek, Italian, Japanese, Korean, Mexican, Thai, etc. he seems to try it all! (He even made his own kim chi!) I also have to say that I was utterly impressed when Kevin first visited my blog. Not only did he take the time to read my last couple of updates, but he went through all of my posts from beginning to end, and commented on all of them! Thanks Kevin! :)

2. Peabody of Culinary Concoctions by Peabody: I came across Peabody's blog when I started to frequent the Nest's What's Cooking? Board. It was the first food blog that I would visit regularly (first one I added to my Google reader!), and through reading it, I learned just how large the food blogging community is! It was through Peabody that I discovered the Daring Bakers, and thanks to her that I got Dorie's cookbook and am now part of Tuesdays with Dorie. Her pictures are amazing, and I love how she features a wide variety of baked goods - from simple, beginner recipes to complex, expert recipes! That, and her taste tester cocker spaniel is super cute! :)

3. Joy of Joy The Baker: I only recently discovered Joy's blog after joining the Tuesdays with Dorie group. Everything that she creates, makes my mouth water! She has also started featuring podcasts on her blog - check them out! She looks like she could be food celebrity with her own show on the Food Network :)

4. Jenny of Picky Palate: I found Jenny's blog when I was going through my Google Analytics reports to see where all my site traffic was coming from. I was aware of most of the links to my blog, but when I saw her link I was perplexed because I had never visited her blog before and didn't really know her. I figured she had just mentioned my blog in one of her posts, but when I went to her site I was flattered to see that she had listed Good Eats 'n Sweet Treats on her blog side bar as a "great blog to visit." Thanks Jenny! :) I love all of her recipes. Being a full time mom with picky kids, I know that I can always count on Jenny to provide me with that great weeknight meal that still tastes gourmet.

5. Gretchen Noelle of Canela & Comino: I only recently came across this blog - I believe it was through the Daring Bakers. What I love about Gretchen's blog is that she brings a fresh perspective from Peru. It's always interesting to read about other cultures and how they enjoy their food. She takes some pretty awesome photos as well!

I've also received the "You Make My Day" Award. Thanks to Michelle, Erin, Carrie, bakingblonde, and Julia for making making my day with this award :)


In turn, I need to pass this along to 10 other bloggers who make my day. In addition to those who gave me this award, I would like to let Beth, Dori, Elly, Emiline, Jenny, Leigh, Nikki, Patricia, Peabody, and Ruth know that you all make my day!

I realize that these awards have been making their way around the food blogosphere, so if you've already received these awards, don't feel like you need to post again and pick another batch of bloggers to pass them on to... but I do hope that it still gives you that warm and fuzzy feeling inside ;)

Thursday, March 6, 2008

Bright College Years


It's funny how most of my memories are centered around food :) When we travel, I definitely take in the sights, but sometimes I remember the meals and different things I tasted during our trip even more! Like our honeymoon, for instance. I will never forget that it was on our honeymoon that I had my very first molten chocolate lava cake. How I never came across one until then is beyond me!

When I think of my college years, I reminisce about how my roommate and I concocted these delicious banana milkshakes in an attempt to replicate a milkshake that she had tasted while in Jamaica. And how one night, the chef in our dining hall made the most amazing "Death by Chocolate" cake. Then there was the tres leches cake that my friend Maureen introduced me to - I promptly got the recipe from her and then made one on my own! If only I had a kitchen back then - imagine the possibilities! Alas, I was in a dorm room for all four years. Still, I remember quite a few good eats from those bright college years.

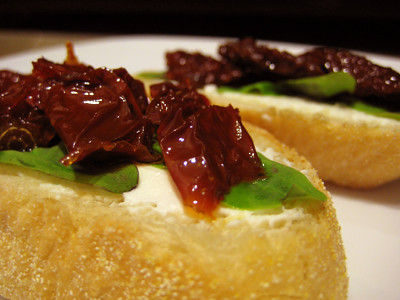
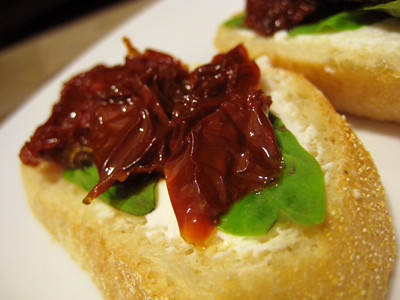
These crostini have to be one of my very favorite appetizers. It's a close call between these and the Sweet and Sour Meatballs. I was introduced to these when I was in college by my friend Nikki. She had brought them to a get together we both attended. One bite and I could not stop going back for more! Tomato and basil naturally go well together, but then the cream cheese makes these little bites heavenly! Every time I have these now, I always think of my friend Nikki.

I'm afraid I don't have good measurements for you here so it's not a real "recipe" yet; I will have to get those the next time I make this (I'll update this post after I get them)... I threw this together in a hurry and did not have time to figure out the exact amounts of everything, but I did include estimates below for anyone who might need them.

These are great for when you are hosting a dinner, or if you need to bring something for a get together. They take very little time, and are sure to be a crowd pleaser!


Sun-Dried Tomato Basil Crostini
from my college friend Nikki

1 loaf french bread
3 oz. cream cheese, at room temperature (I normally use 1/3 less fat Neufchatel cheese)
24 fresh basil leaves, washed and dried
1-1/2 to 2 cups sun-dried tomatoes in olive oil, drained and sliced

Preheat oven to 350°F.

Slice bread into 1/4-inch slices at a slight angle, then brush the slices evenly with olive oil (or spray with cooking spray). Arrange the bread in a single layer on a baking sheet. Bake for 10 minutes or until lightly toasted.

Allow the bread to cool completely, then spread a thin layer of cream cheese onto each slice. Top with one or two fresh basil leaves and then a few sun-dried tomato slices on top of the basil.

Tuesday, March 4, 2008

TWD: Snickery Squares


This week's Tuesdays with Dorie (TWD) recipe was chosen by Erin of Dinner & Dessert: Snickery Squares. Dorie describes them as "a made-at-home, slimmer, sleaker version of the beloved candy bar" with a "buttery shortbread base, a layer of smooth caramel dulce de leche mixed with crunch candied salted peanuts and a top coat of dark chocolate sprinkled with crushed candied peanuts."


The recipe was actually quite simple. The most difficult part, from what I could tell, was making the candied peanuts. I must confess, however, that I skipped this step. I made my grocery run without reading through the recipe and purchased honey roasted peanuts instead of plain salted peanuts. I love honey roasted peanuts, and thought they would be great in this recipe. Then I got home and saw what Dorie had intended for them, and wasn't sure what the caramelized sugar would do to the honey roasted coating, so I decided to just skip it all together. Thankfully, I don't think much taste was sacrificed, as the honey roasted nuts are sweet all on their own. I'm sure these would have been even better if I had covered the peanuts in caramelized sugar.


To make up for skipping out on the candied peanuts, I did make my own dulce de leche instead of using the store bought kind. There's been much talk lately among the food blogging community about dulce de leche, thanks to Blake! If you weren't among the lucky few who received free samples of his dulce de leche, you can follow the instructions in my previous post about dulce de leche macaroons to make your own :) The first time I made it, I only cooked the sweetened condensed milk for 2 hours (which was fine for the macaroons); this time I cooked it for 3 hours and it was much thicker and more caramelized. It doesn't seem to cook evenly, so you do get some clumps at the bottom of your can, but you can easily whisk those out at the end, creating a very smooth dulce de leche. My dulce de leche was thick enough for these treats, but it still oozed a little with each bite. Based on these observations, here is my conclusion for the homemade dulce de leche: cook for 2-3 hours if you want something more like a caramel sauce; try 4 hours if you want something thicker that is more spreadable. So for Dorie's Snickery Squares, I suggest a cooking time of 4 hours to get the thicker dulce de leche.


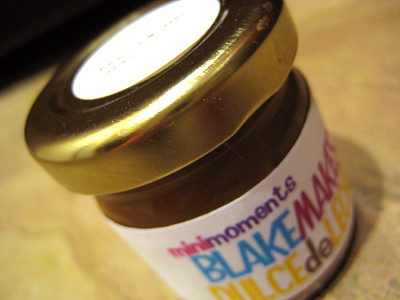
Speaking of Blake, I thought this would be the perfect opportunity to use his Peanut Butter Dulce de Leche (PBDDL). Unfortunately, I didn't get as much love as some of the other foodies I know, because I only received one jar of the PBDDL while several others received two (not sure if that was my fault because I didn't tell him in my comment that I would be baking with it?). That made it quite difficult for me to figure out what to do with it (aside from eating it straight from the jar with my fingers!) because it's only about one ounce.


Dorie's recipe seemed the perfect way for me to use it because I could make little tarts instead of squares... that way, I could use the jar of PBDDL for one of the tarts, and the rest of my homemade dulce de leche in the others. This was my first time making any kind of tart; my mother-in-law gave me tart pans for Christmas and I've been trying to figure out what to make with them ever since. I know that tarts aren't the biggest baker's challenge, but I was so proud of how well my tarts turned out :) Of course I ended up with some extra dulce de leche since I did not reduce the recipe and added in the jar of PBDDL, but now I have more to drizzle over ice cream or something :)


Overall, this was a really fun recipe to make. I measured the amount of peanuts to be used in the recipe but then eyeballed it when adding them to the tarts. I ended up only using about half of what Dorie called for. I think using the entire 1-1/2 cups might have been too much (then again, I'm not a big nut fan). The other change I made to this recipe was with the chocolate topping. After my bitter experience with the Almost Fudge Gâteau, I decided to use semisweet instead of bittersweet chocolate for the topping. I think it was perfect with the semisweet, but if you're a dark chocolate lover you might want to try the bittersweet.

What about the PBDDL? It was great in this dessert, but I think I actually prefer eating it straight out of the jar ;) Oh, and if you decide to make the tarts like I did, be careful not to overfill them with the dulce de leche or else you'll end up with a gooey treat like this when you go to add the chocolate topping:

I'm submitting this photo to the Click event. For details about this month's contest, click here.

Thanks Erin, for picking this week's recipe. I love Snickers bars and this certainly satisfied my sweet tooth. As the group continues to grow weekly (we've got over 60 now and even our first male member!), make sure you check out the blog roll on the Tuesdays with Dorie blog to see what everyone else thought of this sweet candy treat.

Snickery Squares
from Baking: From My Home to Yours, by Dorie Greenspan

For the Crust: 1 cup all-purpose flour
¼ cup sugar
2 TBSP powdered sugar
¼ tsp salt
1 stick unsalted butter, cut into small pieces and chilled
1 large egg yolk, lightly beaten

For the Filling: ½ cup sugar
3 TBSP water
1 ½ cups salted peanuts
About 1 ½ cups store-bought dulce de leche (click here to learn how to make your own)

For the Topping: 7 ounces bittersweet, coarsely chopped
½ stick unsalted butter, cut into 8 pieces, at room temperature


Getting Ready:
Preheat oven to 350F. Butter a 8 inch square pan and put it on a baking sheet. (I used four 4-inch tart pans.)

To Make the Crust:
Toss the flour, sugar, powdered sugar and salt into a food processor and pulse a few times to combine. Toss in the pieces of cold butter and pulse about 12 times, until the mixture looks like coarse meal. Pour the yolk over the ingredients and pulse until the dough forms clumps and curds-stop before the dough comes together in a ball.

Turn the dough into the buttered pan and gently press it evenly across the bottom of the pan. Prick the dough with a fork and slide the sheet into the oven.

Bake the crust for 15-20 minutes, or until it takes on just a little color around the edges. Transfer the pan to a rack and cool to room temperature before filling.

To Make the Filling:
Have a parchment or silicone mat-lined baking sheet at the ready, as well as a long-handled wooden spoon and a medium heavy bottomed saucepan.

Put the sugar and water in the saucepan and cook over medium-high heat, stirring, until the sugar dissolves. Keeping the heat fairly high, continue to cook the sugar, without stirring, until it just starts to color. Toss the peanuts and immediately start stirring. Keep stirring, to coat the peanuts with sugar. Within a few minutes, they will be covered with sugar and turn white—keep stirring until the sugar turns back into caramel. When the peanuts are coated with a nice deep amber caramel, remove the pan from the heat and turn the nuts out onto the baking sheet., using the wooden spoon to spread them out as best you can. Cool the nuts to room temperature.

When they are cool enough to handle, separate the nuts or break them into small pieces. Divide the nuts in half. Keep half of the nuts whole or in biggish pieces for the filling, and finely chop the other half for the topping.

Spread the dulce de leche over the shortbread base and sprinkle over the whole candied nuts.

To Make the Topping:
Melt the chocolate in a heatproof bowl set over a saucepan of barely simmering water. Remove chocolate from the heat and gently stir in the butter, stirring until it is fully blended into the chocolate.

Pour the chocolate over the dulce de leche, smoothing it with a long metal icing spatula, then sprinkle over the rest of the peanuts. Slide the pan into the fridge to set the topping, about 20 minutes; if you’d like to serve the squares cold, keep them refrigerated for at least 3 hours before cutting.

Cut into 16 bars, each roughly 2-1/2 inches on a side.

Saturday, March 1, 2008

Marinated Grilled Shrimp


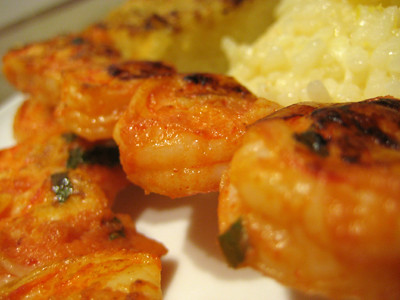
I am always looking for good seafood recipes, as we seem to eat a lot of chicken and beef. I love the simplicity of this dish. There is a little bit of a wait for the shrimp to marinate, but otherwise the recipe comes together really quickly and makes a great weeknight meal.

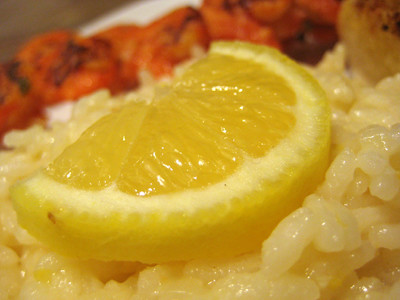
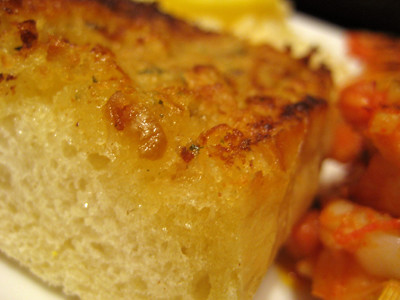
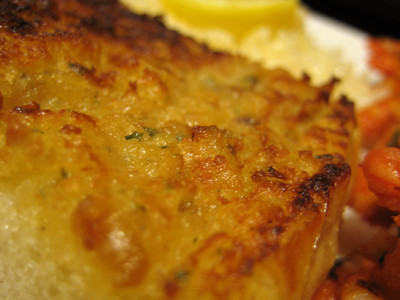
The flavors are perfect, too. Tomato and basil are always great together - I love fresh basil so much that I pretty much love anything with basil in it :) The cayenne complements the other flavors without making it spicy at all. As the author of the recipe warns, don't leave it out! I might even add more cayenne next time to give it some kick. I halved the recipe (but included the full recipe below) and it was the perfect amount for the two of us. I served it with lemon risotto and roasted garlic bread... mmmm!


Marinated Grilled Shrimp
from Allrecipes.com

3 cloves garlic, minced (I halved the recipe and still used 2 cloves)
1/3 cup olive oil
1/4 cup tomato sauce
2 tablespoons red wine vinegar
2 tablespoons chopped fresh basil
1/2 teaspoon salt
1/4 teaspoon cayenne pepper
2 pounds fresh shrimp, peeled and deveined
skewers

In a large bowl, stir together the garlic, olive oil, tomato sauce, and red wine vinegar. Season with basil, salt, and cayenne pepper. Add shrimp to the bowl, and stir until evenly coated. Cover, and refrigerate for 30 minutes to 1 hour, stirring once or twice.

Preheat grill for medium heat. Thread shrimp onto skewers, piercing once near the tail and once near the head. Discard marinade.

Lightly oil grill grate (I use my George Foreman grill; no oiling needed). Cook shrimp on preheated grill for 2 to 3 minutes per side, or until opaque.

Yield: 6 Servings.

When Life Hands You Lemons...


... make lemon risotto! (Or, if you prefer something sweeter, Slammin' Citrus Squares.) I love risotto and am always eager to try new recipes. When I saw this recipe for lemon risotto on Williams-Sonoma, I immediately bookmarked it. So when I found a bag of frozen shrimp in the freezer and decided to make the marinated grilled shrimp, this seemed like the perfect accompaniment. I was not disappointed. The creamy, lemony flavor of this dish complimented the shrimp really well.

Next time, I will probably half this recipe, because it's just the two of us and this recipe yielded quite a bit. If you've never made risotto before, I highly recommend you try it. If you decide to go for it, make sure you check out my tips for making risotto here.

Lemon Risotto
from Williams-Sonoma

3 cups chicken stock or reduced-sodium chicken broth (use vegetable broth to make this vegetarian)
5 Tbs. unsalted butter
3 Tbs. extra-virgin olive oil
3 Tbs. minced shallots
2 1/4 cups Arborio rice
1/2 cup fresh lemon juice
1/4 cup coarsely grated lemon zest
3/4 cup freshly grated Parmigiano-Reggiano cheese, plus shaved cheese for garnish
Salt, to taste
1/4 cup minced fresh chervil (optional)

In a saucepan over high heat, combine the chicken stock and 3 1/2 cups water and bring to a boil. Reduce the heat to low and maintain a simmer.

In another saucepan over medium heat, melt 2 Tbs. of the butter with the olive oil. Add the shallots and sauté until translucent, 2 to 3 minutes. Add the rice and stir until it is opaque, about 3 minutes. Add about 3/4 cup of the simmering stock, adjust the heat to maintain a simmer and cook, stirring, until most of the stock is absorbed, about 3 minutes. Continue adding the stock, about 3/4 cup at a time and stirring constantly, until all but about 1/2 cup of the stock has been used, the rice is nearly tender and still slightly firm in the center, and the mixture is creamy, 20 to 25 minutes.

Add the lemon juice to the remaining 1/2 cup stock and add the mixture, little by little, to the rice along with the remaining 3 Tbs. butter, the lemon zest and the grated cheese, always stirring constantly. Taste and adjust the seasonings with salt.

Stir in the chervil. Transfer to a serving bowl, garnish with shavings of cheese and serve immediately.

Yield: 6 Servings.

Adapted from Williams-Sonoma, Christmas Entertaining,by Georgeanne Brennan (Simon & Schuster, 2005 ).

Roasted Garlic Bread


There is nothing like the smell of garlic roasting in your oven! Just try it and you'll see what I'm talking about. I love garlic. If you look, I usually increase the amount of garlic called for in any recipe I blog about, because what doesn't taste better with more garlic? :)

Sure, you can make garlic bread with garlic powder and other seasonings, but nothing beats true homemade garlic bread with roasted garlic! Roasting garlic, as you'll see from this recipe, is very very simple. The only way I imagine this recipe being better is if you made the loaf of bread yourself. For those Daring Bakers who plan on making Julia Child's French Bread again, this would be a great use for it :)

Oh, and the recipe doesn't state it - but I assume the butter needs to be at room temperature so that you can easily mix in the other ingredients and spread it onto the loaf. If you don't have time to let the butter come to room temperature, just pop it in the microwave for 10 seconds and that should make it soft enough to work with.

Roasted Garlic Bread
from Allrecipes.com

3 bulbs garlic (that's 3 whole bulbs, not cloves!)
2 tablespoons olive oil
1 (1 pound) loaf Italian bread (I used French Bread)
1/2 cup butter (at room temperature)
1 tablespoon chopped fresh parsley (optional) (I used 1 tsp dried parsley)
2 tablespoons grated Parmesan cheese (optional)


Preheat the oven to 350 degrees F (175 degrees C). Slice the tops off of the garlic bulbs so that the tip of each clove is exposed. Place the bulbs on a baking sheet, and drizzle with olive oil. Bake for 30 minutes, or until garlic is soft (I baked mine, wrapped in a foil packet, for 60 minutes).

Set the oven to broil. Slice the loaf of bread in half horizontally, and place cut side up on a baking sheet.

Squeeze the cloves of garlic from their skins into a medium bowl. Stir in the butter, parsley, and Parmesan cheese until well blended. Spread onto the cut sides of the bread.

Broil for about 5 minutes, until toasted. (Watch it closely, as it will go from perfectly golden brown to burnt very quickly!)