Friday, December 31, 2010

Stollen (DB)


"You stole what?" Yes, that is the response I got when I told my husband that I was making stollen!

The 2010 December Daring Bakers’ challenge was hosted by Penny of Sweet Sadie’s Baking. She chose to challenge Daring Bakers’ to make Stollen. She adapted a friend’s family recipe and combined it with information from friends, techniques from Peter Reinhart’s book.........and Martha Stewart’s demonstration.

I had actually never heard of or tried stollen before, so I had no idea what to expect.  Stollen is a very traditional German Christmas bread.  It is made with yeast, water and flour, and usually with zest added to the dough. Candied orange peel and candied citrus is often also added.  What you end up with is a bread-like fruitcake.
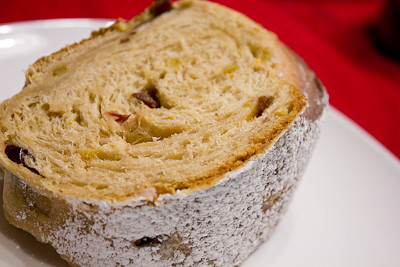

I was pleasantly surprised by this recipe.  When you bake something until it is a "dark mahogany color,"and sounds "hollow when thumped on the bottom" you kind of expect something dry and hard.  This was quite the opposite, actually.  It was moist and had a nice, tender crumb.  The citrus zest and candied orange peels really gave the bread an interesting flavor that reminded me of the Italian sweet bread panettone.  I have to admit that the sugared butter coating was my favorite part of this bread (the finished bread is coated with three layers of melted butter and sprinkled with powdered sugar).  Without it, the bread wouldn't have been nearly as good. 

Thanks Penny, for hosting this month's challenge.  I actually made this weeks ago but my post is a few days late because we just got back from a trip to (rainy) California and I completely forgot about this until now! Make sure you check out the Daring Bakers' Blogroll to see how everyone else enjoyed this sweet German holiday treat.

Wishing everyone a safe and Happy New Year's!


Stollen Wreath

Makes one large wreath or two traditional shaped Stollen loaves. Serves 10-12 people

Ingredients

¼ cup (60ml) lukewarm water (110º F / 43º C)
2 packages (4 1/2 teaspoons) (22 ml) (14 grams) (1/2 oz) active dry yeast
1 cup (240 ml) milk
10 tablespoons (150 ml) (140 grams) unsalted butter (can use salted butter)
5½ cups (1320 ml) (27 ozs) (770 grams) all-purpose (plain) flour (Measure flour first - then sift- plus extra for dusting)
½ cup (120 ml) (115 gms) sugar
¾ teaspoon (3 ¾ ml) (4 ½ grams) salt (if using salted butter there is no need to alter this salt measurement)
1 teaspoon (5 ml) (6 grams) cinnamon
3 large eggs, lightly beaten
Grated zest of 1 lemon and 1 orange
2 teaspoons (10 ml) (very good) vanilla extract
1 teaspoon (5 ml) lemon extract or orange extract
¾ cup (180 ml) (4 ¾ ozs) (135 grams) mixed peel
1 cup (240 ml) (6 ozs) (170 gms) firmly packed raisins
3 tablespoons (45ml) rum
12 red glacé cherries (roughly chopped) for the color and the taste. (optional)
1 cup (240 ml) (3 ½ ozs) (100 grams) flaked almonds
Melted unsalted butter for coating the wreath
Confectioners’ (icing) (powdered) sugar for dusting wreath

Note: If you don’t want to use alcohol, double the lemon or orange extract or you could use the juice from the zested orange.

Directions:

Soak the raisins
In a small bowl, soak the raisins in the rum (or in the orange juice from the zested orange) and set aside.


To make the dough

Pour ¼ cup (60 ml) warm water into a small bowl, sprinkle with yeast and let stand 5 minutes. Stir to dissolve yeast completely.

In a small saucepan, combine 1 cup (240 ml) milk and 10 tablespoons (150 ml) butter over medium - low heat until butter is melted. Let stand until lukewarm, about 5 minutes.

Lightly beat eggs in a small bowl and add lemon and vanilla extracts.

In a large mixing bowl (4 qt) (4 liters) (or in the bowl of an electric mixer with paddle attachment), stir together the flour, sugar, salt, cinnamon, orange and lemon zests.

Then stir in (or mix on low speed with the paddle attachment) the yeast/water mixture, eggs and the lukewarm milk/butter mixture. This should take about 2 minutes. It should be a soft, but not sticky ball. When the dough comes together, cover the bowl with either plastic or a tea cloth and let rest for 10 minutes.

Add in the mixed peel, soaked fruit and almonds and mix with your hands or on low speed to incorporate. Here is where you can add the cherries if you would like. Be delicate with the cherries or all your dough will turn red!

Sprinkle flour on the counter, transfer the dough to the counter, and begin kneading (or mixing with the dough hook) to distribute the fruit evenly, adding additional flour if needed. The dough should be soft and satiny, tacky but not sticky. Knead for approximately 8 minutes (6 minutes by machine). The full six minutes of kneading is needed to distribute the dried fruit and other ingredients and to make the dough have a reasonable bread-dough consistency. You can tell when the dough is kneaded enough – a few raisins will start to fall off the dough onto the counter because at the beginning of the kneading process the dough is very sticky and the raisins will be held into the dough but when the dough is done it is tacky which isn't enough to bind the outside raisins onto the dough ball.

Lightly oil a large bowl and transfer the dough to the bowl, rolling around to coat it with the oil. Cover the bowl with plastic wrap.
Put it in the fridge overnight. The dough becomes very firm in the fridge (since the butter goes firm) but it does rise slowly… the raw dough can be kept in the refrigerator up to a week and then baked on the day you want.


Shaping the Dough and Baking the Wreath

1. Let the dough rest for 2 hours after taking out of the fridge in order to warm slightly.
2. Line a sheet pan with parchment paper.
3. Preheat oven to moderate 350°F/180°C/gas mark 4 with the oven rack on the middle shelf.
4. Punch dough down, roll into a rectangle about 16 x 24 inches (40 x 61 cms) and ¼ inch (6 mm) thick.


Starting with a long side, roll up tightly, forming a long, thin cylinder.

Transfer the cylinder roll to the sheet pan. Join the ends together, trying to overlap the layers to make the seam stronger and pinch with your fingers to make it stick, forming a large circle. You can form it around a bowl to keep the shape.

Using kitchen scissors, make cuts along outside of circle, in 2-inch (5 cm) intervals, cutting 2/3 of the way through the dough.

Twist each segment outward, forming a wreath shape. Mist the dough with spray oil and cover loosely with plastic wrap.

Proof for approximately 2 hours at room temperature, or until about 1½ times its original size.Bake the stollen for 20 minutes, then rotate the pan 180 degrees for even baking and continue to bake for 20 to 30 minutes. The bread will bake to a dark mahogany color, should register 190°F/88°C in the center of the loaf, and should sound hollow when thumped on the bottom.

Transfer to a cooling rack and brush the top with melted butter while still hot.
Immediately tap a layer of powdered sugar over the top through a sieve or sifter.
Wait for 1 minute, then tap another layer over the first.
The bread should be coated generously with the powdered sugar.
Let cool at least an hour before serving. Coat the stollen in butter and icing sugar three times, since this many coatings helps keeps the stollen fresh - especially if you intend on sending it in the mail as Christmas presents!

When completely cool, store in a plastic bag. Or leave it out uncovered overnight to dry out slightly, German style. The stollen tastes even better in a couple of days and it toasts superbly…. so delicious with butter and a cup of tea

Storage
The more rum and the more coatings of butter and sugar you use the longer it will store.
The following is for the recipe as written and uses the 45 mls of rum and two coatings of butter and icing sugar
1. Stollen freezes beautifully about 4 months
2. The baked stollen stores well for 2 weeks covered in foil and plastic wrap on the counter at room temperature and
3. One month in the refrigerator well covered with foil and plastic wrap.

Monday, December 20, 2010

iPad Giveaway

This is a compensated review by BlogHer.

Have you gotten all of your Christmas shopping done yet? If you're anything like me, you're still working on getting some last minute gifts together! I was recently asked to check out BlogHer.com and see what features I liked. One of the first things I stumbled across was their holiday gift guide.  There's several categories, including "Gifts for the Photographer," "Gifts for the App Addict," "Gifts for Animal Lovers," "Gifts for the Cook," and many many more.  Take a peek and see if you get inspired!

They have featured content for entertainment, family, home & garden, life, style, etc. but of course what caught my attention was the food section!  There I found some great posts from around the web from other bloggers on the BlogHer ad network.  One that particularly caught my attention was the Rolo-Stuffed Chocolate Chip Cookies - can you say yum?!

Take a look around Blogher.com and visit this week's Sweepstakes post. This week’s giveaway is for an iPad. I'm sure that most of us could use a free iPad, right? The contest is open to US and Canadian Residents (except Quebec) who are 18 or older and is running today through Sunday, December 26th. Good luck, and Happy Holidays!

Tuesday, December 14, 2010

Apple-Coconut Family Cake (TWD)

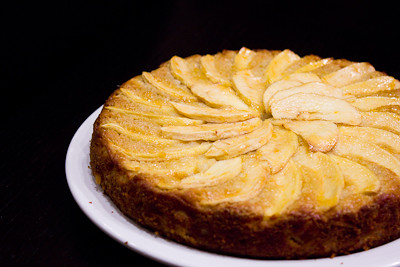
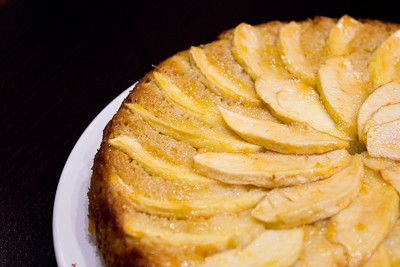
 This week's Tuesdays with Dorie (TWD) recipe was chosen by Amber of Cobbler du Monde: Apple-Coconut Family Cake. I had seen this recipe in the book before, and thought it looked interesting. I honestly thought it was more of a fancy cake, so I passed it up, waiting to make it another day. Had I spent a little more time to read the recipe instructions (and not just the recipe list), I would have quickly realized that this is not a fussy cake, and it doesn't take long to make at all. The most time consuming aspect of it is slicing and dicing the apples. Otherwise, it's pretty much like any other muffin or quick bread recipe that doesn't even require an electric mixer. 


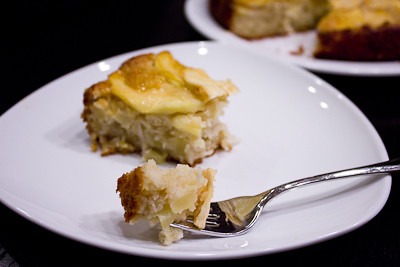
I found that my cake took considerably longer to bake through completely - a full 20-25 minutes extra! I was worried that the edges would burn because they started to brown much sooner than the center, but in the end it was okay.  The edges of my cake were a little drier than the center, but they weren't burnt at least.  Otherwise, this recipe came together quickly and easily for me. The slightly chewy texture that the coconut gives this cake did not bother me, but I did read that a few did not like that. I love apples and I love coconut, but I never would have thought to put the two together like this.  It was a nice combination of flavors.


Thanks Amber, for hosting this week.  I will definitely be making this again. If you would like the recipe, you can find it here.  Make sure you check out the TWD Blogroll, to see how everyone else enjoyed this cake.

* Recipe notes:
- Make sure you test your cake before removing it from the oven - mine took a full 20-25 minutes longer to bake!
- For more recipe tips, click here

Tuesday, December 7, 2010

Translucent Maple Tuiles (TWD)

This week's Tuesdays with Dorie (TWD) recipe was chosen by Hindy of Bubie’s Little Baker: Translucent Maple Tuiles. I was honestly a bit intimidated about these because they look so beautiful and delicate and in the book. When I read the recipe and realized how quick and easy they are, I decided to give them a try.

The dough is simply butter, brown sugar, and maple syrup with just a little bit of flour. It can be made in a matter of minutes but requires a bit of refrigeration so you'll need to plan ahead when making these. Luckily, the dough will also keep in the refrigerator for up to a week, so you can make it ahead of time.


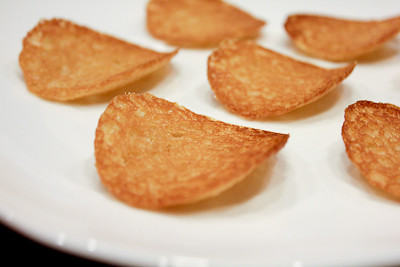
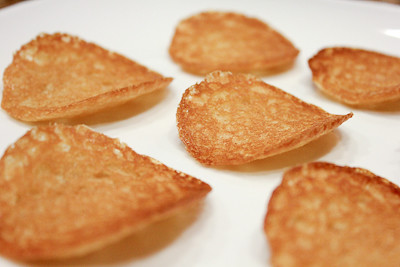
My tuiles did not turn out at all! They look more like pringles than translucent tuiles! I think my idea of a small cherry is a little different from Dorie's so my dough balls were a bit too big. So I ended up with cookies that did not spread as much as they should have but luckily only the appearance was affected because the taste was amazing! These tuiles are like part cookie, part candy.

Thanks Hindy, for hosting this week.  I will definitely be making this again - next time I will be sure to roll out smaller balls of dough so they'll actually get their characteristic honeycomb appearance. If you would like the recipe, you can find it here.

Make sure you check out the TWD Blogroll, to see how these are really supposed to look :)

* Recipe notes:
- Keep a close eye on these to make sure you don't burn them! Mine were done after a short 4-5 minutes in the oven!
- Make sure you make your balls of dough really small, as they spread quite a bit in the oven and a little bit goes a long way.
- For more recipe tips, click here

Sunday, November 28, 2010

Crostata di Frutta Fresca (DB)


The 2010 November Daring Bakers’ challenge was hosted by Simona of briciole. She chose to challenge Daring Bakers’ to make pasta frolla for a crostata. She used her own experience as a source, as well as information from Pellegrino Artusi’s Science in the Kitchen and the Art of Eating Well.

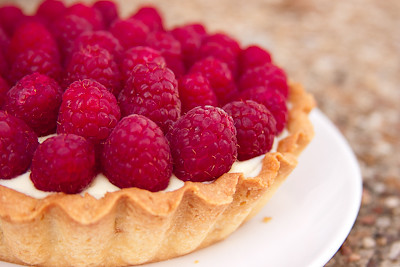
I decided to make the Crostata di Frutta Fresca (crostata with fresh fruit).  I filled my tart with Dorie's vanilla pastry cream and then topped it with fresh raspberries.  The dough came together quickly and easily, but I thought it was just okay.  It was a little too hard and not buttery enough in my opinion.  My favorite tart dough is still Dorie's sweet tart dough - it's so buttery and flaky and almost melts in your mouth.

Thanks Simona, for hosting this month's challenge.  My post is a day late and kind of short because I've been busy! Between Thanksgiving on Thursday and my daughter's 1st birthday party yesterday (photos to come), I've been running around the kitchen like crazy.  I finally got around to making the tart today and now I'm exhausted!

Make sure you check out the Daring Bakers' Blogroll to see how everyone else enjoyed these sweet Italian treats.

Crostata (Italian tart)
all photos below are from Simona

Version 1 of pasta frolla

Ingredients:
  • 1/2 c. minus 1 tablespoon [105 ml, 100 g, 3 ½ oz] superfine sugar (see Note 1) or a scant 3/4 cup [180ml, 90g, 3 oz] of powdered sugar
  • 1 and 3/4 cup [420 ml, 235 g, 8 1/4 oz.] unbleached all-purpose flour
  • a pinch of salt
  • 1 stick [8 tablespoons / 4 oz. / 115 g] cold unsalted butter, cut into small pieces
  • grated zest of half a lemon (you could also use vanilla sugar as an option, see Note 2)
  • 1 large egg and 1 large egg yolk, lightly beaten in a small bowl
Note 1: Superfine sugar is often also referred to as ultrafine, baker’s sugar or caster sugar. It’s available in most supermarkets. If you cannot find “superfine” sugar, you can make your own by putting some regular granulated sugar in a food processor or blender and letting it run until the sugar is finely ground.
Note 2: There are different ways of making vanilla sugar. I keep vanilla beans in a jar half-filled with sugar until I need to use them, for example, to make vanilla ice cream. After I remove the split bean from the custard that will go into the ice cream maker, I rinse it, dry it and put it back in the jar with sugar.
Making pasta frolla by hand:
  1. Whisk together sugar, flour and salt in a bowl.
  2. Rub or cut the butter into the flour until the mixture has the consistency of coarse crumbs. You can do this in the bowl or on your work surface, using your fingertips or an implement of choice.
  3. Make a well in the center of the mounded flour and butter mixture and pour the beaten eggs into it (reserve about a teaspoon of the egg mixture for glazing purposes later on – place in the refrigerator, covered, until ready to use).
  4. Add the lemon zest to your flour/butter/egg mixture.
  5. Use a fork to incorporate the liquid into the solid ingredients, and then use your fingertips.
  6. Knead lightly just until the dough comes together into a ball.
  7. Shape the dough into a flat disk and wrap in plastic wrap. Place the dough in the refrigerator and chill for at least two hours. You can refrigerate the dough overnight.
   
Making pasta frolla with a food processor:

  1. Put sugar, flour, salt, and lemon zest in the food processor and pulse a few times to mix.
  2. Add butter and pulse a few times, until the mixture has the consistency of coarse meal.
  3. Empty food processor's bowl onto your work surface
  4. See step 3 above and continue as explained in the following steps (minus the lemon zest, which you have already added).
Variation for Version 1 of pasta frolla:
If you want, you can make the pasta frolla using a combination of all-purpose flour and whole-wheat pastry flour.
If you choose to try this variation, use 1 cup [240 ml, 135 g, 4 3/4 oz.] unbleached all-purpose flour and 3/4 cup [180 ml, 100 g, 3.5 oz.] whole-wheat pastry flour.

Version 2 of pasta frolla

In this version of pasta frolla, I have played with different kinds of flours, using almond, whole-grain barley and, most recently, coconut flour instead of some of the all-purpose flour. If you want to try a different version of pasta frolla that uses some flours that you wouldn’t normally use, this is a good recipe to try. All the flours listed below (whole-wheat pastry, almond flour, coconut flour and barley flour) are available at health food stores. You may even find them at well-stocked supermarkets.
The preparation for this version of pasta frolla is very similar to the preparation for Version 1.
Ingredients
  • 1/3 cup [80 ml, 75 g, 2 2/3 oz.] superfine sugar or 1/2 cup [120ml, 60 g, 2 oz]powdered sugar (see Note 1.)
  • 1/2 cup [120 ml, 65 g, 2 3/8 oz.] unbleached all-purpose flour
  • 1/2 cup [120ml, 65 g. 2 1/4 oz.] whole-wheat pastry flour
  • 1/4 cup [60ml, 28 g, 1 oz] almond flour, or almond meal, or coconut flour
  • 1/4 cup [60ml, 28 g, 1 oz.] whole-grain barley flour or unbleached all-purpose flour
  • a pinch of salt
  • 6 tablespoons[90ml, 85 g, 3 oz] cold unsalted butter, cut into small pieces
  • 1 large egg, lightly beaten
  • 1/4 teaspoon vanilla extract (you can also use vanilla sugar; see Note 2.)
Note 1: Superfine sugar is often also referred to as ultrafine, baker’s sugar or caster sugar. It’s available in most supermarkets. If you cannot find “superfine” sugar, you can make your own by putting some regular granulated sugar in a food processor or blender and letting it run until the sugar is finely ground.
Note 2: There are different ways of making vanilla sugar. I keep vanilla beans in a jar half-filled with sugar until I need to use them, for example, to make vanilla ice cream. After I remove the split bean from the custard that will go into the ice cream maker, I rinse it, dry it and put it back in the jar with sugar.
Directions:
By hand:
  1. Whisk together sugar, flours and salt in a bowl.
  2. Rub or cut the butter into the sugar and flour mixture until it has the consistency of coarse crumbs. You can do this in the bowl or on your work surface, using your fingertips or an implement of choice.
  3. Make a well in the center of the flour and butter mixture and pour the beaten egg and vanilla extract into it.
  4. Use a fork to incorporate the liquid into mixture and then use your fingertips.
  5. Knead lightly just until the dough comes together into a ball.
  6. Shape the dough into a flat disk and wrap in plastic wrap. Place the dough in the refrigerator and chill for at least two hours. You can refrigerate the dough overnight.
With a food processor:
  1. Put sugar, flour, and salt in the bowl of the food processor and pulse a few times to mix.
  2. Add butter and pulse a few times until the mixture has the consistency of coarse meal.
  3. Empty food processor's bowl onto your work surface.
  4. Make a well in the center of the mounded flour and butter mixture and pour the beaten egg and vanilla extract into it.
  5. Use a fork to incorporate the liquid into the solid ingredients then use your fingertips.
  6. Knead lightly just until the dough comes together into a ball.
  7. Shape the dough into a flat disk and wrap in plastic wrap. Place the dough in the refrigerator and chill for at least two hours. You can refrigerate the dough overnight.

Ideas for Filling for Your Crostata

Whether you choose to make Version 1 or 2 of the pasta frolla, there are numerous fillings that you can choose from for your crostata. I am suggesting some filling for you here (and including assemblage and baking instructions). But be brave and creative and see what you can come up with!
Crostata di Marmellata (crostata with a jam filling using Version 1 pasta frolla)
If you choose to make a crostata with a jam filling, you will need:
  • 1 and 3/4 cups [415ml, 600 gm, 21 oz] of jam or fruit preserves, whatever flavor you like (Note: I use my homemade fruit preserves, which have a low sugar content. I recommend you choose a good quality product, made with mostly fruit.)
Assembling and baking the crostata di marmellata:
  1. Heat the oven to 375ºF [190ºC/gas mark 5].
  2. Take the pasta frolla out of the fridge, unwrap it and cut away ¼ of the dough. Reserve this dough to make the lattice top of the crostata. Refrigerate this dough while you work on the tart base.
  3. To help roll the crostata dough, keep the dough on top of the plastic wrap that you had it wrapped in. This can help rolling the dough and can also help when transferring the dough to your pan. You can also use parchment paper for this. However, you can also roll the dough directly on a work surface if you prefer.
  4. Lightly dust the top of the dough and your work surface (if you’re rolling directly on a work surface) with flour. Keep some flour handy to dust the dough as you go along.
  5. If the dough is very firm, start by pressing the dough with the rolling pin from the middle to each end, moving the rolling pin by a pin's width each time; turn the dough 180 degrees and repeat; when it softens, start rolling.
  6. Roll the dough into a circle about 1/8th inch (3 mm) thick.
  7. If you used the plastic wrap or parchment paper as rolling surface, flip dough over the pan, centering it, and delicately press it all around so the corners are well covered. Peel away the plastic wrap.
  8. Trim the excess dough hanging over the edges of the pan. Press the remaining dough around the border into the sides of the pan making sure the border is an even thickness all the way around.
  9. Prick the bottom of the dough with a fork in several places.
  10. Take out of the fridge the reserved pasta frolla you had cut away earlier. Roll it with your pin and cut into strips or use cookie cutters to make small shapes (this is not traditional, but it looks cute); or roll with your hands into ropes.
  11. Spread the jam or fruit preserves evenly over the bottom of the crostata.
  12. Use the prepared strips or rolls of dough to make a lattice over the surface, or decorate with the cut shapes. (Note: You can use dough scraps to make cookies: see the Additional Information section for some pointers)
  13. Brush the border and strips of dough with the reserved beaten eggs. You can add a drop or two of water to the beaten eggs if you don’t have enough liquid.
  14. Put the tart in the oven and bake for 25 minutes.
  15. After 25 minutes, check the tart and continue baking until the tart is of a nice golden hue. (Note: Every oven is different. In my oven it took 34 minutes to bake the tart until golden.)
  16. When done, remove the tart from the oven and let cool. If you have used a tart pan with a removable bottom, then release the tart base from the fluted tart ring. Make sure the tart is completely cool before slicing and serving.
  17.      

Crostata con la Crema (crostata with pastry cream filling using Version 1 pasta frolla)


If you choose to make a crostata with pastry cream filling, you will need:
  • One batch of pastry cream (Note: For the recipe that I used, see #5 of the Additional Information section. Prepare the pastry cream in advance of assembling the crostata.
Assembling and baking the crostata con la crema:
  1. Heat the oven to 350ºF [180ºC/gas mark 4].
  2. Take the pasta frolla out of the fridge, unwrap it and cut away ¼ of the dough. Reserve this dough to make the lattice top of the crostata. Refrigerate this dough while you work on the tart base.
  3. To help roll the crostata dough, keep the dough on top of the plastic wrap that you had it wrapped in. This can help rolling the dough and can also help when transferring the dough to your pan. You can also use parchment paper for this. However, you can also roll the dough directly on a work surface if you prefer.
  4. Lightly dust the top of the dough and your work surface (if you’re rolling directly on a work surface) with flour. Keep some flour handy to dust the dough as you go along.
  5. If the dough is very firm, start by pressing the dough with the rolling pin from the middle to each end, moving the rolling pin by a pin's width each time; turn the dough 180 degrees and repeat; when it softens, start rolling.
  6. Roll the dough into a circle about 1/8th inch (3 mm) thick.
  7. If you used the plastic wrap or parchment paper as rolling surface, flip dough over the pan, centering it, and delicately press it all around so the corners are well covered. Peel away the plastic wrap.
  8. Trim the excess dough hanging over the edges of the pan. Press the remaining dough around the border into the sides of the pan making sure the border is an even thickness all the way around.
  9. Prick the bottom of the dough with a fork in several places.
  10. Take out of the fridge the reserved pasta frolla you had cut away earlier. Roll it with your pin and cut into strips or use cookie cutters to make small shapes (this is not traditional, but it looks cute); or roll with your hands into ropes.
  11. Instead of jam or fruit preserves, cover the bottom of the crostata crust evenly with the pastry cream.
  12. Use the prepared strips or rolls of dough to make a lattice over the surface, or decorate with the cut shapes. (Note: You can use dough scraps to make cookies: see the Additional Information section for some pointers)
  13. Brush the border and strips of dough with the reserved beaten eggs. You can add a drop or two of water to the beaten eggs if you don’t have enough liquid.
  14. Put the tart in the oven and bake for 30 minutes.
  15. After 35 minutes, check the tart, and continue baking until the tart is of a nice golden hue. (Note: Every oven is different. In my oven it took 45 minutes to bake the tart until golden.)
  16. When done, remove the tart from the oven and let cool. If you have used a tart pan with a removable bottom, then release the tart base from the fluted tart ring. Make sure the tart is completely cool before slicing and serving.

Crostata di Frutta Fresca (crostata with fresh fruit using Version 1 or 2 of pasta frolla)

Note: This filling variation involves a process called “blind-baking”. (If you’re not familiar with blind-baking, see #4 in the Additional Information section for an explanation and a video on blind-baking.)
In its simplest form, a crostata with fresh fruit has 3 components:
  • the pasta frolla base, blind-baked
  • a layer of pastry cream
  • a layer of fruit
For this recipe you will need:
  • a blind-baked shell made using pasta frolla
  • a batch of pastry cream, prepared in advance and cooled (Note: For the recipe that I used, see #5 of the Additional Information section. For this crostata I make half that recipe.)
  • enough fresh fruit to cover the top of your crostata (Note: You can choose anything you like, including berries, stone fruit, , kiwis, bananas, etc. See the Additional Information section for more information on using fresh fruit.)
Directions to assemble and bake a crostata di frutta fresca:
  1. Preheat the oven to 350ºF [180ºC/gas mark 4].
  2. Roll out a batch of the pasta frolla and cover the base of the tart pan. (You can use Version 1 or 2: if you use Version 1, you will have more leftover pasta frolla to turn into cookies.)
  3. Cut a piece of parchment paper or aluminum foil large enough to cover the bottom of the crust and extend out a bit over the edges of the pan.
  4. You can use pie weights or dry beans to blind bake. Place whatever weight you’re using directly on the parchment paper or aluminum foil in an even layer.
  5. Place the crostata shell in the oven and bake for 20 minutes.
  6. Remove the weights and parchment paper and continue baking the crostata shell until the border is light golden, about 5 minutes (watch carefully to avoid over-baking, which results in a hard shell). In the absence of weight, the crust may rise in the middle: if that occurs, gently push it back down with the back of a spoon.
  7. Remove from the oven and let the crostata shell cool completely before proceeding.
  8. If you use a tart pan with removable bottom, release the base from the fluted tart ring, then slide the cooled crostata shell on a serving plate for filling. (Note: If you’ve used a cake pan or pie plate, use a bit of care in taking the shell out of the baking vessel.)
  9. Spread the prepared pastry cream over the cooled shell.
  10. Decorate the surface with fresh fruit. The crostata must be cool, but not cold, so if you refrigerate it, take it out of the fridge half an hour before serving. This crostata is best eaten the same day it is prepared.
Additional Information:
You may be interested to know that in Science in the Kitchen and the Art of Eating Well, Artusi actually describes three recipes for pasta frolla. For crostata, Artusi recommends using his recipe C, made with butter and strutto, which is rendered pork fat used for cooking. Version 1 of the pasta frolla that I have given you here is a variation of Artusi’s Recipe B.
Here’s another version of crostata with fruit preserves inspired by Artusi's recipe
This is a video from an Italian web site that shows you how to make pasta frolla. It’s dubbed in English. Note that the recipe and the procedure used are a bit different from the ones I employ here; however, it’s a useful link:
A video from the same Italian food web site that shows how to make crostata con le fragole (crostata with fresh strawberries) and in the process shows how to blind-bake the tart shell
Blind-baking is a process often used in baking. To blind-bake a tart shell, you line the unbaked tart (once you’ve placed it in the tart pan) with parchment paper or aluminum foil. You then fill the tart with pie weights. If you don’t have pie weights, you can use dried beans. You pour these on top of the parchment paper or aluminum foil to weigh the paper down. You then bake the tart for a period of time to ensure that it is at least partially cooked. The weights help to ensure that the tart base does not bubble up during baking and that it bakes evenly. The blind-baked tart is then cooled and filled according to the recipe instructions. (Note that in the video, the dough is rolled to 1 cm [3/8th inch] thickness, thicker than than what I do.)
 Notes on using a different baking pan. If you don't have a fluted round tart pan with removable bottom, as described in the Equipment section at the beginning, you are not required to purchase one. As a reference, the one I have, purchased in a store in Northern California, was not expensive. However, if you don't have such a pan, a cake pan of the same size can be used, or a pie plate. I used my 9-inch cake pan, which is 9 inches [23 cm] wide and 1.5 [a bit less than 4 cm] inches high to make a crostata di marmellata. Making the border required a bit more dexterity since you want it to be lower than the rim of the pan. The crostata was ready a few minutes earlier than when I use the tart pan. I also used a 9.5 inches [24 cm] Pyrex pie plate to make a crostata di marmellata.. The baking time in this case was the same as the one noted in the recipe above. The plate is 1.75 inches [4.5 cm] so the same note about the border applied. I have never seen a crostata not baked in a pan. If you want to explore this option, use the descriptions and photos given above to guide your hands in shaping the crostata.
Note on white flour. I use all-purpose flour, the most commonly available flour in the US. Do not use bread flour or flour with a high protein content. If you use pastry flour, the volume measurement will be different, so use the weight.

Tuesday, November 16, 2010

Cranberry Lime Galette (TWD)

This week's Tuesdays with Dorie (TWD) recipe was chosen by Whitney, April, and Elizabeth of Celestial Confections: Cranberry Lime Galette.  What I love about a galette is how easy it is to make.  You don't need a pie pan, and since it's supposed to look rustic, no need to worry about making it look perfect!

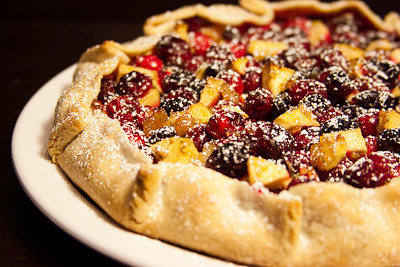
This galette was filled with both fresh and dried cranberries, apples, lime zest, and fresh ginger, tossed together with some raspberry jam (I used orange marmalade), lime juice and brown sugar.  The layer of ground nuts and bread crumbs lining the bottom of the galette was subtle but perfect.  The combination of cranberries and lime is wonderful - I love a good cosmopolitan, but I've never seen the cranberry and lime combination in sweets before.


The cranberries were definitely more tart than I expected them to be in this galette, but it was still delicious.  Part of my crust opened up and my filling spread more on one side than the other and it seems to me that the thinner side ended up sweeter.  I'm guessing that may be due to the fact that the layer of cranberries was thinner and and therefore cooked down more while in the oven.

I love sour candy, so I didn't mind how tart this was but I know it was too tart for some of the other bakers this week! So, if you're wanting a sweeter galette, I'd make a slightly larger crust so you get a thinner layer of filling; alternatively, you could halve the filling in the recipe or make two crusts and the same amount of filling.  I think this would really help with the tartness factor. I considered adding in bits of crystallized/candied ginger, but in the end decided not to.  I definitely want to try it with some next time, though. I think it would add an extra bit of sweetness to the galette, too, to counter the tartness of the cranberries.  Of course you could just add more brown sugar to the recipe, but I think the crystallized ginger would be more fun :)


Thanks Whitney, April, and Elizabeth, for hosting this week.  I will definitely be making this again - loved the cranberry and lime combination! (I loved it so much I ate 3/4 of the galette between the time it came out of the oven last night and when I went to bed!) If you would like the recipe, you can find it here.

Make sure you check out the TWD Blogroll, to see how everyone else enjoyed this sweet and oh so tart treat!

* Recipe notes:
- If you prefer a dessert that isn't tart, you'll have to add more sugar to this recipe.  Or, consider adding chopped crystallized ginger.  Halving the filling might also create a sweeter result as well.
- I had to add a rim of foil around my galette for the last 10 minutes of baking to prevent it from over-browning.
- For more recipe tips, click here

Tuesday, November 9, 2010

Not-Just-For Thanksgiving Cranberry Shortbread Cake (TWD)

This week's Tuesdays with Dorie (TWD) recipe was chosen by Jessica of Singleton in the Kitchen: Not-Just-For Thanksgiving Cranberry Shortbread Cake.  Dorie calls this "part cake, part torte and even part bar cookie."  It's a delicious layer of homemade cranberry orange jam sandwiched between two layers of shortbread.

The jam is so simple to make (takes about 10 minutes), but if you are short on time (or don't have the ingredients on hand) you can substitute 2 cups of your favorite chunky fruit preserve or citrus marmalade.  If you've never segmented an orange before, you'll find this video to be helpful.

There were several bakers that had problems with their cakes ending up too tart.  Dorie does recommend that you taste the jam at the end and add more sugar if it's too tart.  I was worried about ending up with a cake that was too tart for consumption, so I added quite a bit of sugar to my jam.  Even then, my cake ended up with a nice zing to it.  Definitely not too tart, but more tart than I anticipated it being.  My only guess is that the jam tastes more sweet when warm than when cooled to room temperature.  So, my advice would be to add the sugar until the jam has reached your desired level of tartness, then add a little bit more sugar for good measure.


This cake was delicious.  The crumb was so soft and tender, and the cranberry orange jam keeps this dessert light.  It would be the perfect addition to any Thanksgiving table, especially since you can make the jam up to two weeks ahead.  Dorie says you can make the dough ahead of time and refrigerate it overnight, but I had mine in the refrigerator for 2-3 nights without any problems.  So you could easily make each component in advance and then put it all together come Thanksgiving Day.

Thanks Jessica, for hosting this week.  I will definitely be making this again - maybe next time using Dorie's suggestion of layering caramelized apples in between!  If you would like the recipe, you can find it here.

Make sure you check out the TWD Blogroll, to see how everyone else enjoyed this wonderful cake!  If you love cranberries, these sugared cranberries were a hit when I made them last year!

* Recipe notes:
- It seems that the cranberry orange jam tastes more sweet while it is warm than after it cools. So, keep adding sugar until it's no longer too tart for your preference, then continue to add a bit more! 
- I did not do the knife test on my cake to see if it was done - I simply went by the color of the crust on top and that seemed to work well. 
- I did not place my springform pan on a baking sheet as directed; I simply placed my pan directly into the oven.  It was done baking after about 38 minutes.
- For more recipe tips, click here