


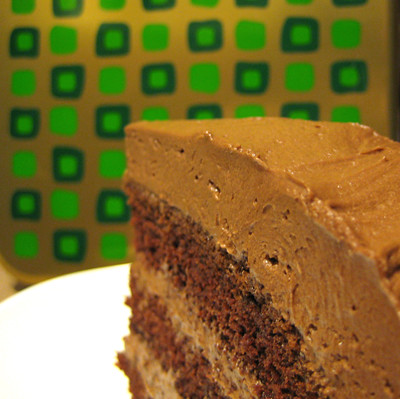
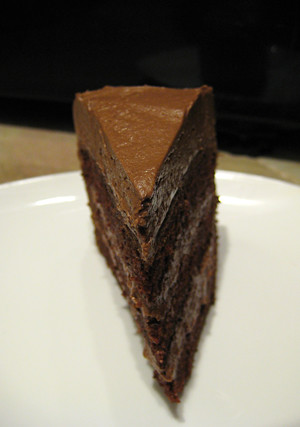
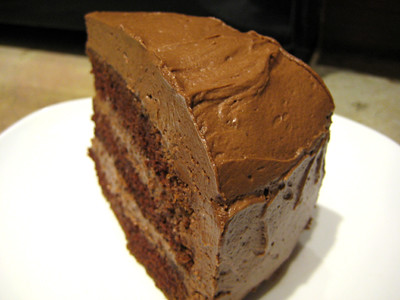
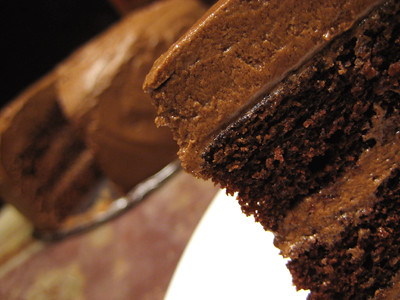
With a name like that, you know it's going to be good. If you're watching your waistline, please don't look too closely as the ingredient list (this cake is anything but light). It's worth every last calorie, however, as Marcel Desaulniers calls this "the most perfect piece of chocolate cake you could possibly imagine passing your lips." This recipe is from Marcel's mother, "Mrs. D," and I guarantee one bite of this cake and you'll think you died and went to heaven! Given this fact, I am entering this cake into the Death by Chocolate contest being held by Culinate. (It only seemed appropriate that I would submit a recipe by the author of the book Death by Chocolate.)
This contest will send one reader and one food blogger (could be you!), on a trip for two to Napa Valley to attend the Copia Center’s annual Death by Chocolate Festival on Feburary 23, 2008, featuring a day of chocolate and wine tasting, demonstrations by pastry chefs, and other sessions with chocolate aficionados and experts.
If you haven't already, consider entering the contest. Here's how it works. You have two chances to win:
(1) If you don't have a blog (or even if you do), you can go to their site and be one of the lucky reader's chosen at random to win the trip. All you have to do is register to win.
(2) If you are a food blogger, submit your best chocolately post - you can even submit a previous post! Readers will vote for their favorite blog posts, and the winning food blogger will be selected by a panel of judges from the top 10 reader favorites.
Here's why you should vote for me :) My husband and I could really use a weekend getaway to Napa. He's in his third year of medical school right now, so I hardly ever get to spend time with him anymore. He works a lot of nights and weekends in the hospital -- in late November/early December, he worked 19 days straight without a single day off and every third night he had to work the overnight shift so I barely got to see him. January was a little better in that he only had to work 3 overnight shifts, but he still only had about 5 days off. So... while he doesn't get very many weekends off, as luck (or fate) might have it, he has the weekend of February 23rd off, so it would be the perfect opportunity for us to get away and spend some alone time together! So please take a moment to vote for me (every vote counts!)... you'll need to register first (it only takes a minute and it will automatically enter you to be part of the random drawing to win a trip to Napa for yourself!), then click here to vote for me; I'll be eternally grateful! :) Oh, and I think you can vote for more than one blog, so if you've already voted for someone, don't let that stop you from voting for me :)

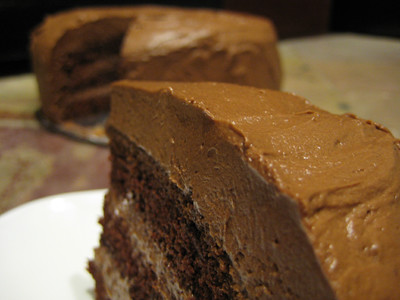
Mrs. D's "She Ain't Heavy" Chocolate Cake
from Celebrate with Chocolate by Marcel Desaulniers
"She Ain't Heavy" Chocolate Cake:
1 tbsp unsalted butter, melted
3/4 lb (3 sticks) unsalted butter, cut into 1/2 ounce pieces
2 cups cake flour
3/4 cup unsweetened cocoa powder
1-1/4 tsp baking soda
1/2 tsp baking powder
1/2 tsp salt
1-3/4 cups granulated sugar
3 large eggs
1-1/4 cups whole milk
1 tsp pure vanilla extract
"Hasn't Failed Me Yet" Cocoa Icing:
1-1/4 lbs confectioner's sugar
1-1/4 cups unsweetened cocoa powder
1-1/4 lbs (5 sticks) unsalted butter, cut into 1/2 ounce pieces
1/2 cup whole milk
1 tsp pure vanilla extract
Make Mrs. D's "She Ain't Heavy" Chocolate Cake:
Preheat the oven to 350F.
Lightly coat the insides of three 9 x 1-1/2-inch cake pans with some of the melted butter. Line the bottoms of the pans with parchment paper (or wax paper), then lightly coat the paper with more melted butter. Set aside.
In a sifter combine the cake flour, cocoa powder, baking soda, baking powder, and salt. Sift onto a large piece of parchment paper (or wax paper) and set aside.
Place the sugar and the 3/4 pound butter in the bowl of an electric mixer fitted with a paddle. Mix on low speed for 1 minute, then beat on medium until soft, about 2 minutes. Scrape down the sides of the bowl and the paddle. Continue beating on medium for an additional 2 minutes until very soft. Scrape down the sides of the bowl and the paddle. Add the eggs one at a time, beating on medium for 30 seconds after each addition, and scraping down the sides of the bowl once the eggs have been incorporated. Operate the mixer on low while gradually adding about half of the dry ingredients, followed by about half of the milk. Once these ingredients have been incorporated, about 1-1/2 minutes, gradually add the remaining dry ingredients, followed by the milk; mix until incorporated, about 1-1/2 minutes. Scrape down the sides of the bowl and hte paddle. Don't be concerned if the batter looks a bit odd texturally at this point (because of the interaction between the milk and the butter); it will come together nicely with the next step.
Add the vanilla extract and mix on low for 5 seconds; beat on medium for 1 minute until thoroughly combined. Remove the bowl from the mixer and use a rubber spatula to finish mixing the ingredients until thoroughly combined. Now the batter looks very thick, a bit like soft-serve ice cream, but please don't taste, because the ingestion of raw yolks may not be salubrious. Immediately divide the cake batter among the prepared pans (about 2-1/4 cups in each pan), spreading evenly (an off-set spatula would work best).
Bake on the top and center racks in the oven until a toothpick inserted in the center of each cake layer comes out clean, about 35 minutes. (Rotate the pans from top to center halfway through the baking time). Remove the cake layers from the oven and cool in the pans for 15 to 20 minutes at room temperature. Invert the cake layers onto cake circles (or cake plates) wrapped with plastic wrap or lined with parchment paper or wax paper. Carefully peel the paper away from the bottoms of the layers. Refrigerate the cake layers while preparing the icing.
Make Mrs. D's "Hasn't Failed Me Yet" Cocoa Icing:
In a sifter combine the confectioner's sugar and cocoa powder. Sift onto an extra large (about 12 x 20 inches) piece of parchment paper (or wax paper) and set aside.
Place the butter in the bowl of an electric mixer fitted with a paddle. Mix on low speed for 1 minute; increase the speed to medium and beat for 2 minutes until soft. Use a rubber spatula to scrape down the sides of the bowl and the paddle. Beat on medium for 2 more minutes until very soft. Scrape down the sides of the bowl and the paddle. Operate the mixer on the lowest speed (stir) while gradually adding about half the amount of dry ingredients, followed by half the amount of milk. Once these ingredients have incorporated, about 2 minutes, add the remaining dry ingredients, followed by the remaining milk; mix until incorporated, about 2 minutes. Scrape down the sides of the bowl and the paddle. Beat on medium for 1 more minute until very soft and fluffy. Add the vanilla extract and mix on low for 5 seconds; increase the speed to medium and beat for 1 minute until very soft and fluffy. Remove the bowl from the mixer and use a rubber spatula to finish mixing the icing until thoroughly combined.
Assemble Mrs. D's "She Ain't Heavy" Chocolate Cake:
Remove the cake layers from the refrigerator. Turn one of the layers onto a clean cake circle (or cake plate), then peel off the paper. Use a cake spatula to spread 1-1/2 cups of icing evenly and smoothly over the top and to the edges of the cake layer. Turn a second cake layer onto the iced layer, then peel off the paper. Use a cake spatula to spread 1-1/2 cups of icing evenly and smoothly over the top and to the edges of the cake layer. Turn the remaining cake layer onto the second iced layer and gently press the layers into place. Spread the remaining icing over the top and sides of the entire cake. Refrigerate the cake for 1 hour before serving.
To Serve:
Heat the blade of a serrated slicer under hot running water and wipe the blade dry before making each slide. Keep the slices at room temperature for 15 to 20 minutes before serving.
Note: This cake may be prepared over 2 days.
Day 1: Bake the cake layers. Once they're cooled, cover each layer with plastic wrap and refrigerate.
Day 2: Make the cocoa icing. Assemble the cake as directed in the recipe. Refrigerate for 1 hour before serving.
After assembly, keep the cake in the refrigerator for 3 to 4 days before serving to avoid permeating the cake with refrigerator odors, place it in a large, tightly sealed container.
Yield: 12 servings


she may not be heavy yet, but she will be if she eats a lot of this one...
ReplyDeleteit looks fabulous, and you've got my vote! :)
This looks absolutely amazing! What a GORGEOUS layer cake. wow.
ReplyDeleteThis looks absolutely amazing! What a GORGEOUS layer cake. wow.
ReplyDeleteLooks absolutely heavenly! Good luck with the contest :)
ReplyDeleteGood Luck to you!
ReplyDeleteI am entered too, but I'd love to make this recipe!
wow, this looks so good. my thighs got bigger reading the ingredients but it definitely looks worth it!
ReplyDeleteOh my goodness, this cake looks insane! It has been starred :) Good luck in the contest!
ReplyDeleteThis comment has been removed by a blog administrator.
ReplyDeleteWhat a gorgeous cake! That would definitely put a chocolate craving in its place. Truly a piece of died and gone to heaven!
ReplyDeleteholy cow this looks amazing!
ReplyDeleteHey, both this and the black and white chocolate cake look incredible! You've been busy.
ReplyDeleteLooks delicious, I can feel the calories piling on just looking at them! lol
ruth
This cake looks sooo good! I cannot wait to try this recipe out...my mom is a chocolate freak so I may save it for her birthday.
ReplyDeleteThis is my kind of cake!! Yum!
ReplyDeleteTwo great looking chocolate cakes in one day! This one looks decadently chocolaty and good!
ReplyDeleteThat looks amazing! Yum!!
ReplyDeleteSure to cure a chocolate fix.
A moment on the lips and a lifetime on the hips = that is all I can say.
ReplyDeleteBeautiful pics
Nina
hey! just voted for you- love your blog! good luck girl!!
ReplyDeleteby the way the kittens are doing really well. hope your little guys are well too.
-javi
looks delicious!!
ReplyDeleteThat looks beyond amazing!
ReplyDeleteOkay, the photo of the cake has me psyched that I have all of the ingredients in the house lol. Thanks for posting it!
ReplyDeleteThis is a very sexy cake. HOT chocolate!!
ReplyDeleteThis cake is so sexy! It's definitely going in my 'to bake' pile. Thanks for sharing! Good luck to you in the contest!
ReplyDeleteWow,
ReplyDeleteThis cake looks fabulous! Best of luck on the contest, I bet you've got a great shot at it with the looks of this cake!
What a decadent cake!
ReplyDeleteMy brother's birthday is next month and I think he would love this cake.
Oh my goodness! I love all of that frosting!
ReplyDeleteoh, and...you have been tagged!
http://abbysweets.blogspot.com/2008/02/tag-i-am-it.html
Wow, this cake looks soooooooooo good!
ReplyDeleteWow Mrs.Presley, this looks gorgeous and absolutely divine. I'm glad you mentioned its 'not heavy' would love to try this! Thanks for stopping by my blog, will add you to my reader so I won't miss another delicious post!!
ReplyDelete(We could maybe help each other with the DB challenge too :) )
This cake looks fabulous. I am going to try it the next time I make a cake.
ReplyDeleteThis looks delicious, and will fit the bill for my Valentine's Day dessert. (I'd been looking for one!) Thanks! And I hope you win.
ReplyDeleteWow - that is one serious chocolate cake. It looks perfect though; just how a chocolate cake should look! I must admit that I am amazed that you made it through 4 years in New Haven without ever having Wooster St. pizza. I was a New Haven pizza virgin until last weekend, and can truthfully attest that there is nothing like it. Hopefully you'll be back at some point to have a taste!
ReplyDeleteWow....talk about death by chocolate!! That looks fabulous! Thanks for the comment, too!
ReplyDeleteThis cake look soooooo good and your photos are beautiful
ReplyDeleteVery nice blog Mrs Presley
Sakya
Wow - that is some serious cake! And there's another one right below this post!
ReplyDeletewhat a divine looking cake! With all those layers... WOW! Lots of patience u hv!
ReplyDeleteIt was nice to have you drop by and visit my blog. This is my first look at your baking.
ReplyDeleteMy, you have some lovely goodies. Your husband needs to spend more time at home!
Your cake looks grand especially as you said on the black and white cake post you don't make many layer cakes. I am impressed. Well done and good luck. I will put forward a vote in your behalf. I don't think I have a chance in winning as it is open only to USA residents...but I am allowed to vote.
I will see you for our debut bake at the end of Feb.
She sure looks heavy! And delicious! And chocolate-y! Yum!
ReplyDeleteI'm not usually a big fan of chocolate/chocolate cake - strange, I know.
ReplyDeleteBut in all honesty, yours looks SO amazing that I want to eat it so badly right now; I just want to bite into that top icing layer! It's wonderful =)
I am glad and excited to be a Daring Baker with you!
Hi! thanks for your visit in my blog. I have in both blogs a translator, so you can understand everything that I wrote. My Cooker blog is
ReplyDeletehttp://gatinhadadivosa.blogspot.com/ Come to visit me... bjs dani
Ohhhh, your cake looks and sounds heavenly... and your photos are incredible!
ReplyDeleteThank you so much for your lovely comment on my blog - it's so exciting to meet a fellow Daring Bakers Feb. newbie! :-)
You definitely have my vote... and I sympathize - my guy is in medical school too... :-)
What a sinfully delicious looking cake! Thank you for visiting my blog and introducing yourself as another new DB. Good luck with the trip to Napa--sounds like the two of you could use some R&R.
ReplyDeleteJulie
That's one beautiful cake! Welcome to the DBers :)
ReplyDeleteOh good grief! My afternoon apple and a mug of peppermint tea is an embarassment in the face of that gorgeous looking cake! Enjoy Daring Bakers!
ReplyDeleteWoooah~ That's heavy
ReplyDeletebut looks yummilicious =D
Eight sticks of buttah, huh? This sounds amazing. And the last chocolate cake I made was good, but not as good as this looks and sounds. Goodness!
ReplyDeleteThanks for checking out my blog!
ReplyDeleteThat cake looks amazing. I went into sugar shock just looking at pictures of it though.
Wow! Just the icing looks glorious, and then the cake is moist and decadent looking, too. Sigh. Where is my fork? Glad you are joining the Daring Bakers...you will obviously be a wonderful addition to the group!
ReplyDeleteOK, I'm taking your word for it, here. I know you wouldn't joke about something as serious as chocolate cake. If it's that "to die for," then I'm ready and willing to die for it.
ReplyDeletePS-As I was looking at my comments, I was wondering who Mrs. Presley was, and it's you! I don't remember you using that name earlier, unless I'm just having an Alzheimer's moment.
We wish you the best on the trail of the Daring Baker Challenge! Hope to see more of your creations soon!
ReplyDeleteWoah check out that insanely thick layer of chocolate icing on the outside! Now that is exactly the kind of chocolate cake I'd want to eat!
ReplyDelete