Tuesday, October 27, 2009

Macarons (DB)


The 2009 October Daring Bakers’ challenge was brought to us by Ami S. She chose macarons from Claudia Fleming’s The Last Course: The Desserts of Gramercy Tavern as the challenge recipe.

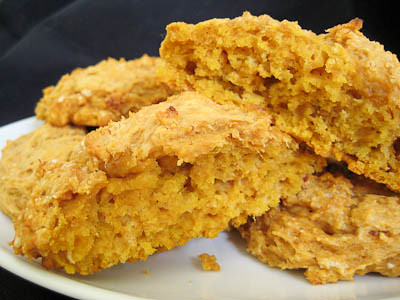
I have long been intimidated by the French macaron, so I was excited to see this was the October challenge because I finally had that extra push I needed to overcome my fears. I am sad to report that after baking along with the Daring Bakers for over a year and half now, I failed my first challenge. Despite my efforts, I could not get those characteristic "feet" at the bottom of my macarons.


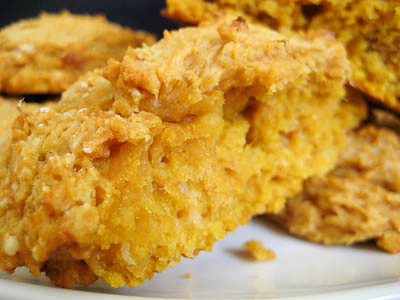
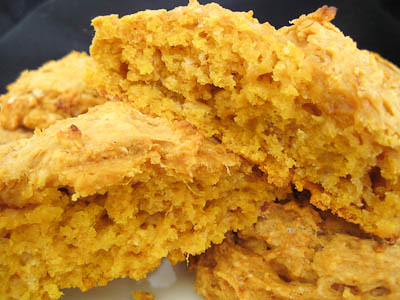
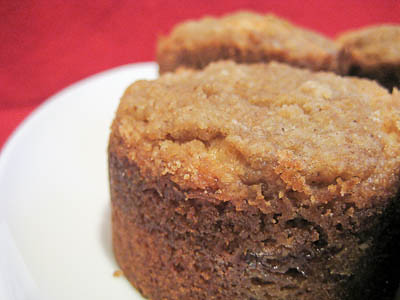
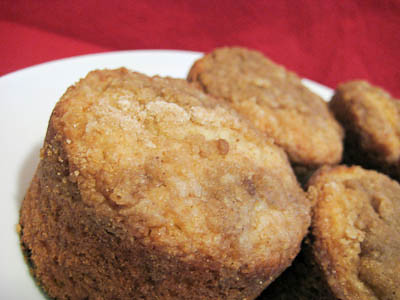
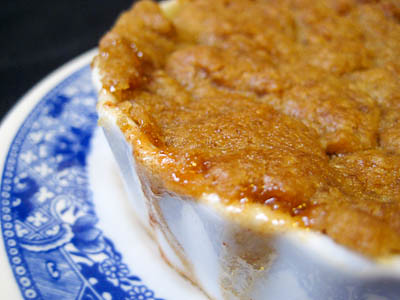
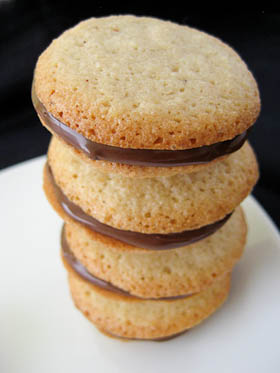
I made a full batch but baked the first half using the oven drying method described in the recipe. This is supposed to dry the egg whites out to help them grow the "feet." I was sorely disappointed when I pulled my macarons out of the oven and they did not have any feet. So with the second half batch I let the macarons air dry on the counter for one hour and then did the additional oven drying method. Alas, this still did not produce the desired effect :( According to David Lebovitz, a "perfect macaron needs to be folded just-so. One extra fold, and it's all over. Not enough, and you won't get that little foot." Some bakers note that you'll know when the batter is just right because it will flow like "magma." Honestly, I am still not sure what I did wrong... and I would have persisted until I was successful but I am 38 weeks pregnant now and did not have the time nor the energy to make another batch.


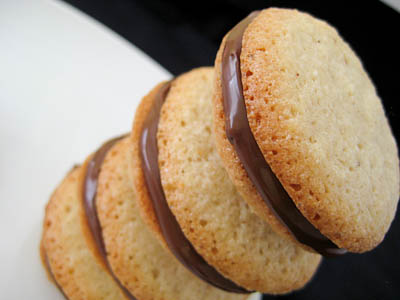
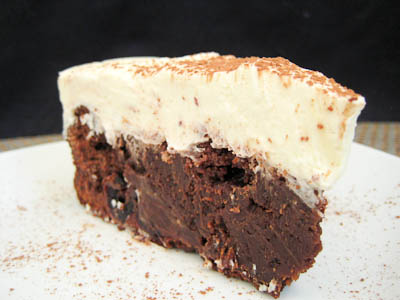
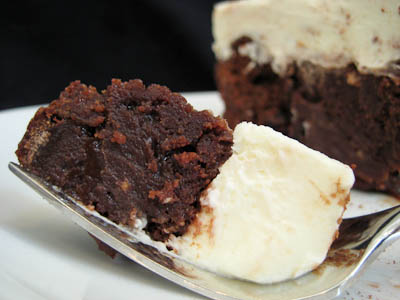
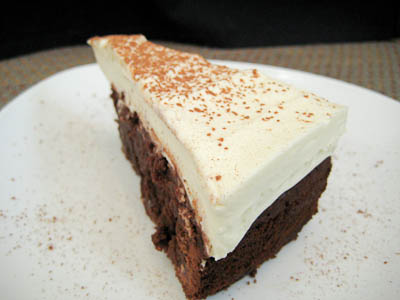
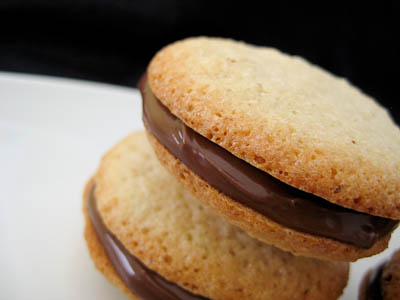
The good news was that despite their lack of feet, these macarons were delicious! I made gingerbread macarons inspired by Tartelette and filled my macarons with chocolate ganache. The gingerbread flavor was very subtle (but just right in my opinion) because I used 1/4 teaspoons ground ginger, 1/8 teaspoon ground cinnamon, 1/8 teaspoon ground nutmeg, and 1/8 teaspoon ground cloves in the below recipe whereas Tartelette's recipe uses the same amount for just 3 egg whites.


Thanks Ami, for hosting this month's challenge. You finally gave me the push I needed to try my hand at macarons... I am only sad to report that I was unsuccessful. But I am proud to say that at least I tried and that's what being a Daring Baker is all about, right? I promise to try again in the future. Make sure you check out the Daring Bakers' Blogroll to see how everyone else enjoyed these classic French sweets.

Macarons
from Claudia Fleming’s The Last Course: The Desserts of Gramercy Tavern

Ingredients
Confectioners’ (Icing) sugar: 2 ¼ cups (225 g, 8 oz.)
Almond flour: 2 cups (190 g, 6.7 oz.)
Granulated sugar: 2 tablespoons (25 g , .88 oz.)
Egg whites: 5 (Have at room temperature)

Directions:

1. Preheat the oven to 200°F (93°C). Combine the confectioners’ sugar and almond flour in a medium bowl. If grinding your own nuts, combine nuts and a cup of confectioners’ sugar in the bowl of a food processor and grind until nuts are very fine and powdery.
2. Beat the egg whites in the clean dry bowl of a stand mixer until they hold soft peaks. Slowly add the granulated sugar and beat until the mixture holds stiff peaks.
3. Sift a third of the almond flour mixture into the meringue and fold gently to combine. If you are planning on adding zest or other flavorings to the batter, now is the time. Sift in the remaining almond flour in two batches. Be gentle! Don’t overfold, but fully incorporate your ingredients.
4. Spoon the mixture into a pastry bag fitted with a plain half-inch tip (Ateco #806). You can also use a Ziploc bag with a corner cut off. It’s easiest to fill your bag if you stand it up in a tall glass and fold the top down before spooning in the batter.
5. Pipe one-inch-sized (2.5 cm) mounds of batter onto baking sheets lined with nonstick liners (or parchment paper).
6. Bake the macaroon for 5 minutes. Remove the pan from the oven and raise the temperature to 375°F (190°C). Once the oven is up to temperature, put the pans back in the oven and bake for an additional 7 to 8 minutes, or lightly colored.
7. Cool on a rack before filling.

Yield: 10 dozen. Ami's note: My yield was much smaller than this. I produced about two dozen filled macaroons.

Cherry Fudge Brownie Torte (TWD)


This week's Tuesdays with Dorie (TWD) recipe was chosen by April of short + rose: Cherry Fudge Brownie Torte. It's a fudgey brownie layer full of chocolate and cherries, topped with a creamy mascarpone mousse.

The brownie layer is very rich and dense. It's nicely contrasted with the light and creamy mascarpone mousse. An interesting ingredient in the brownie layer is ground black pepper. It adds a very subtle flavor to this torte but isn't overpowering. I only added one teaspoon of black pepper - I think two teaspoons would probably be too much. The cherries are a wonderful surprise to bite into and keep this dessert from being too basic.


The torte is simple enough to make but yields a very decadent dessert perfect for serving guests. Thanks April, for picking this recipe, I would definitely make it again. If you would like the recipe, you can find it here. Make sure you check out the TWD Blogroll, to see how everyone else enjoyed this fudgey treat.


* Recipes notes:
- I used semisweet chocolate chips instead of chopped chocolate.
- I omitted the kirsch due to my little bun in the oven :) I simply boiled the cherries and water until almost all of the water was evaporated, then added the preserves with a splash of water until it seemed a good consistency.
- For more tips, click here.
com

Tuesday, October 20, 2009

Sweet Potato Biscuits (TWD)


This week's Tuesdays with Dorie (TWD) recipe was chosen by Erin of Prudence Pennywise: Sweet Potato Biscuits. I love biscuits but have never seen anything like this, so I was eager to try this recipe.

I've never had any problems with making biscuits. The key is to use really cold butter and to not overwork your dough. When cutting the biscuits you also need to make sure you press straight down, as twisting the cutters can inhibit some of the rise in the biscuits.


This recipe presented a lot of problems for me though. Even though I used 29 ounces of canned sweet potatoes (instead of 30 ounces), my dough was super sticky and moist. Not sure where the extra moisture came from? It was so hard to work with; I had a lot of trouble cutting my dough into biscuits. Then after they went in the oven, they hardly rose at all. I know my baking powder isn't too old, so that wasn't the issue. I am not sure what went wrong, but my biscuits look pretty pathetic.

Thankfully, aesthetics aside, these tasted great :) I enjoyed them with some butter and brown sugar. These would be great to make the morning after Thanksgiving, when you want something besides leftovers but don't want to spend too much time in the kitchen.


Thanks Erin for picking this recipe, I loved it. If you would like the recipe, you can find it here. Make sure you check out the TWD Blogroll, to see how everyone else enjoyed this perfect-for-fall breakfast treat.

* Recipes notes:
- Consider putting your butter in the freezer to get it extra cold before using it.
- For more tips, click here.

Tuesday, October 13, 2009

Allspice Crumb Muffins (TWD)


This week's Tuesdays with Dorie (TWD) recipe was chosen by Kayte of Grandma’s Kitchen Table: Allspice Crumb Muffins. I love anything with a crumb or streusel topping, so I knew right off the bat that I would like these. What I did not anticipate was exactly how much I would love these!

They seem pretty plain if you're just reading the recipe. A simple muffin with a crumb topping flavored with some allspice. I actually don't bake with allspice very often, at least not as the star ingredient, so I'm not too familiar with its flavor. Because I rarely bake with it, I didn't have any on hand, so I substituted 1/2 teaspoon cloves, 1/4 teaspoon cinnamon, and 1/4 teaspoon nutmeg based on the recommendations here.

Like most muffin recipes, this one comes together in just a few minutes and does not require a mixer. I followed Dorie's recipe to a "T," including how to make the crumb topping. I have to say that I was not a fan of this method, because it was hard to get nice big crumbs from it. Next time I will just cut the butter in using a pastry cutter to get nicer crumbs.

I baked my muffins in this pan so I didn't get nice muffin tops, but they still tasted great. I thought for a moment about just using cinnamon in place of the allspice, but I am so glad I didn't - I am sure that cinnamon muffins would be good too but I really enjoyed the allspice flavor. These kind of remind me of the coffee cake you can get at Starbucks, except much better.


Thanks Kayte for picking this recipe, I loved it. If you would like the recipe, you can find it here. Make sure you check out the TWD Blogroll, to see how everyone else enjoyed this perfect breakfast treat.

* Recipes notes:
- I would recommend cutting the butter into the crumb topping with either a pastry blender or two knives instead of doing it by hand.

- Don't have any allspice? Here is a link to the substitution, as well as many other common substitutions that will come in handy when you are baking.
- For more tips, click here.

Sunday, October 11, 2009

Sticky Buns (SMS)

This week's Sweet Melissa Sundays (SMS) recipe was chosen by Jen of Not Microwave Safe: Sticky Buns with Toasted Almonds. I love cinnamon rolls and sticky buns and almost chose this recipe when it was my turn to pick, but in the end I chose the Bee Stings instead. So I was delighted to see that someone finally picked this recipe!

Working with yeast really isn't that bad. I remember when I used to be so intimidated by it. This recipe is a bit time consuming, but is not difficult at all. It is split into two days with an overnight refrigeration so you don't feel like you are baking all day. One thing I always do when baking with yeast is I use my oven as a proofing box. I'll preheat the oven for about a minute, just long enough for it to warm up but not to where it starts to get hot. Then I turn the oven off and stick my dough in and let it rise. This ensures that it is always warm enough for my dough to rise regardless of what time of year it is.


I omitted the orange zest from this recipe, just because I didn't have any on hand and didn't want to make a grocery store run just for orange zest... I am sure that the zest would probably add a great subtle flavor to the dough but it also tasted just fine without it.


I also omitted the toasted almonds because I don't like nuts, but you can also cover these with cream cheese frosting if you don't want to top them with sticky sauce. These smelled so good while they were baking in the oven... in fact, that was how I knew to check on them early. The smell of sugar and cinnamon was so strong that I though I'd better check on them - and it was a good thing I did because they were done in HALF the time indicated on the recipe! If I had waited for my timer to go off, these would have been burnt to a crisp!


I would love to try these with cream cheese frosting some time. The dough was really soft and sweet and it's probably just as good as my favorite Cinnabon recipe - though I'll have to try these with the cream cheese frosting before I declare them better than the other recipe :)

Thanks Jen, for choosing this recipe. I will definitely be making this one again. If you would like the recipe, you can find it here. Make sure you visit the SMS Blogroll to see how everyone else enjoyed this sweet, sticky treat!

* Recipe Notes:
- I added room temperature milk instead of cold milk to make sure that my dough would rise.
- I had to add a little over 1/2 cup of extra flour to get my dough to be not so sticky. So I used the full 2-3/4 cup, and then continued adding 1 tbsp of flour at a time until the dough no longer stuck to the edges of the mixing bowl.
- I did not have pure maple syrup so I used pancake syrup instead (Aunt Jemima's).
- I used salted butter in my sticky sauce and could taste a little bit of the salt in it - this was great because salty and sweet flavors go together very well.
- Use your oven as a proofing box. Preheat the oven for about a minute, just long enough for it to warm up but not to where it starts to get hot. Then turn the oven off and stick your dough in and let it rise. This ensures that it is always warm enough for your dough to rise regardless of what time of year it is.- Start checking on your buns around 20 minutes. They will probably be golden brown and done around 25 to 30 minutes, depending on your oven.
- You can easily freeze these. Prepare the recipe as directed up until the overnight refrigeration step. Then, instead of refrigerating it, wrap it tight and freeze it. When you are ready to bake, remove it from the freezer for the second rise until the dough has doubled in size and then bake.
- For more recipe tips, click here.

Tuesday, October 6, 2009

Split Level Pudding (TWD)


This week's Tuesdays with Dorie (TWD) recipe was chosen by Garrett of Flavor of Vanilla: Split Level Pudding. It's homemade vanilla pudding atop a layer of chocolate ganache.

We've made chocolate pudding before for TWD, so I was curious to see how this recipe compared. The method was pretty much the same, using a food processor to help create a perfectly smooth and creamy pudding. The only difference with this recipe is that the chocolate is in a layer beneath the pudding, instead of incorporated into the pudding.


I think if you're in the mood for chocolate, that regular chocolate pudding would be better, but if you want just a hint of chocolate, then this recipe is perfect. Not too chocolately, but enough chocolate to satisfy a chocolate craving.

While homemade pudding is far superior to store bought, I just don't love pudding enough to make it from scratch all the time. So while I enjoyed trying this recipe, I probably won't be making it again. If you're a pudding lover, though, you definitely need to try this.


Thanks Garrett, for picking this. If you would like the recipe, you can find it here. Make sure you check out the TWD Blogroll, to see how everyone else enjoyed this rich, creamy treat.


* Recipes notes:
- If you really like chocolate, I'd double the chocolate ganache recipe so you have a thicker chocolate layer on the bottom. Otherwise, this recipe was great as is.
- For more tips, click here.

Sunday, October 4, 2009

Apple Orchard Crumble (SMS)


This week's Sweet Melissa Sundays (SMS) recipe was chosen by Cristine of Cooking with Cristine: Apple Orchard Pecan Crumble. I love anything with baked apples, so I was excited to try this recipe.

I don't usually like nuts, so my Apple Orchard Pecan Crumble was just an Apple Orchard Crumble :) I thought about adding in oats in place of the pecans for the texture, but in the end decided just to omit the nuts. I was worried my crisp topping wouldn't quite turn out but in the end it was just fine.


Most crumb toppings require you to cut the butter in, but in this recipe you add melted butter. This made it really easy, but I was really doubtful that this would work. Lo and behold, though, my crumble came out of the oven with a nice, crisp, sugary topping.

This crumble was delicious, even without the pecans in the topping. The topping was crisp and had a nice caramelized sugar taste thanks to the brown sugar that is in it. I have to say that the apple filling was a little sweet for my taste (and I rarely if ever say that!), so I would recommend halving or even omitting the sugar next time.


Thanks Cristine, for choosing this recipe. I will definitely be making this one again. If you would like the recipe, you can find it here. Make sure you visit the SMS Blogroll to see how everyone else enjoyed this wonderful fall treat!


* Recipe Notes:
- I halved the apple filling recipe and used 3 shallow creme brulee ramekins. I made the full topping, recipe, however, and it seemed just right - so if you make the full apple filling, I would double the topping recipe.
- Either omit the sugar or only one 1/2 cup sugar in the apple filling, otherwise it's a bit too sweet. Also double the cinnamon, it's better that way!
- If you make smaller portions, bake for about 45 minutes instead of 1 hour 20 minutes (closer to 1 hour if your ramekins are deeper).
- This dessert freezes well. The best way to do this is to put it all together, wrap tightly, and freeze it unbaked. When you are ready to bake, pull it from the freezer, loosely tent it with foil, and pop it in the oven. Remove the foil about halfway through baking and bake until the juices are bubbling and thick.
- For more recipe tips, click here.