Tuesday, January 27, 2009

Fresh Ginger and Chocolate Gingerbread (TWD)


This week's Tuesdays with Dorie (TWD) recipe was chosen by Heather of Sherry Trifle: Fresh Ginger and Chocolate Gingerbread. I was really excited to see this pick because I have been wanting to make this for about a year now. I actually got the ingredients together to make this, and then found out that this recipe had been picked. So it was perfect timing :)

It's a cake that is "packed with fresh, candied and ground ginger, spices, molasses and a little chocolate," then topped with chocolate icing. I love ginger and spiced cakes and cookies, so I was really looking forward to trying some homemade gingerbread.

Aside from fresh ginger or stem ginger in syrup, I think most bakers will already have the ingredients required for this recipe on hand. I was unable to find any stem ginger in syrup, so I only used fresh ginger. In the ingredients list, the fresh ginger is listed as required, whereas the stem ginger is listed as optional. However, within the recipe instructions, Dorie says to add the fresh ginger to the batter "if you're using it" and then it is implied that the ginger in syrup is not optional.

I found that with just the fresh chopped ginger and ground ginger, this cake had a nice spicy flavor without being too overpowering. Adding the stem ginger in syrup might have been too much for those who don't enjoy ginger so much.


The smell while this cake was baking was wonderful. Dorie always recommends baking cakes on a baking sheet. However, I've found that this always causes them to be under baked, at least in my oven. I usually just place my cake pans directly on the oven rack to avoid this. I'm not sure why, but I thought maybe I would try it just one more time with this recipe so I placed my cake pan on the baking sheet before placing it in the oven. The cake is supposed to bake for about 40 minutes. Well, after 40 minutes, I could tell that the center of my cake was not even close to being set so I removed the baking sheet and allowed the cake pan to rest directly on the oven rack and baked it for an additional 10 minutes. This seemed to do the trick.

However, after allowing the cake to cool for 10 minutes, I was unable to unmold from the cake pan. I had buttered the cake pan as directed, run a knife around the edges of the cake, but was still unable to unmold it. After much struggle, I was finally able to get it out of the pan... but not in one piece :( I was able to get a large chunk in the middle out, almost intact, but the rest was just broken into pieces.

Determined not to waste my cake (and efforts), I frosted what I could and cut those pieces into squares... then I made individual chocolate trifles with the rest :)


I thought this gingerbread was good, but not great. My husband loved it, as did my coworkers. I think the combination of chocolate and ginger just didn't appeal to me as much as I thought it would. Still, it's definitely something I would consider making again towards the end of the year for a holiday party.

Thanks Heather, for choosing this gingerbread. If you would like the recipe, you can find it here. Make sure you visit the TWD Blog Roll to see how everyone else enjoyed this holiday inspired treat.

* Recipe notes:
- The best way to peel your ginger is with a vegetable peeler, but you'll need a paring knife to get into the nooks at each branching.
- Ginger will keep for a while in your refrigerator. You can also chop or zest any leftover ginger and put it in a ziploc bag and freeze it for later use.
- I had to remove my cake from the baking sheet after 40 minutes, then bake it an additional 10 minutes before it was done.
- My cake stuck to the pan like crazy, so I would recommend lining your pan with parchment paper, and then buttering it. Or maybe flouring the pan after you butter it.
- I used semisweet chocolate instead of bittersweet chocolate.
- Consider using an electric mixer for your icing. Despite sifting my confectioner's sugar into the icing recipe, I still ended up with lumpy icing :(
- You can wrap this and keep it at room temperature for about 3 days or freeze it, icing and all, for up to 2 months.
- For more tips, click here.
- Lastly, a quick note from Dorie about the recipe:

I just saw that TWD will be making the chocolate gingerbread cake next. I just wanted to say that you’ve got to use a TRUE 9-x-9 pan or else you’ll have too much batter. Sadly, these days it seems as though the pans that are marked 9-x-9 are really only 8-x-8, sometimes even smaller. Short of buying a new pan, the best thing to do is to fill your pan just 2/3 or 3/4 full (if your pan is smaller than 9-x-9) and to make mini-cakes out of the leftover batter.

Tuesday, January 20, 2009

Berry Surprise Cake (TWD)


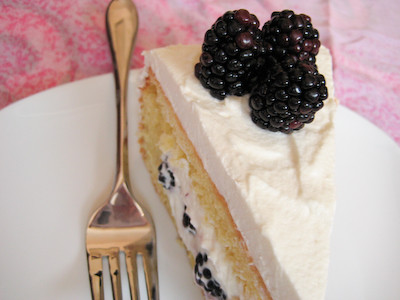
This week's Tuesdays with Dorie (TWD) recipe was chosen by Mary Ann of Meet Me in the Kitchen: Berry Surprise Cake. It's a génoise (whole egg sponge cake) that is hollowed out, then filled with berries enveloped in a cream cheese and heavy cream mixture, and then the entire cake is finished off with some whipped cream. Sounds delightful, doesn't it?

That's what I thought when I saw this week's pick. Unfortunately I can't say that I am a huge fan of this cake. The recipe, unlike most others in the book, was not very straightforward. Usually Dorie gives very detailed descriptions and instructions in her recipes, making everything easy to follow. I had several problems along the way with this particular recipe.


After checking out the Problems & Questions post for this recipe, I knew that it was going to be fickle. There were many complaints about the cake not rising, the middle of the cake sinking, and the filling not being sweet enough.

I had read that some of the issues with the cake not rising was from over mixing the batter in the final steps when folding in the flour - so I was extra careful folding the flour in. I also saw that the cake sinking could be avoided by being more careful with the eggs. Dorie calls them "divas" because apparently they are very hard to work with. Dorie simply states to heat them until "just warm to the touch," but I read a tip from Lauren that you could more objectively do this by measuring their temperature. So I watched mine closely on the stove and made sure to pull them off when they reached 110F. Not entirely sure where that number comes from, but that's what Lauren suggested and that's what I did ;)


The next part I had a problem with was in beating the warmed egg and sugar mixture until it "triples in volume and forms a ribbon that holds its shape for about 10 seconds when the beater is lifted." Well, I'm not a very experienced baker and I had no idea what this meant. A ribbon? I've never beaten eggs until they looked like a ribbon before so I had no idea what I was looking for. A quick search on google and I found this excerpt from Carole Bloom's The Essential Baker:

Holding a ribbon: this is the stage that refers to the consistency of batter or mixture - usually eggs and sugar - beaten or whipped until it is very thick and pale colored. Whip the mixture with an electric stand mixer using the wire whip attachment or a hand-held mixer on medium to medium-high speed for about 5 minutes. To tell if the mixture is thick enough, dip a rubber spatula into it and lift it up. Let the mixture drip from the spatula into the bowl. The mixture should very slowly fall back on itself in a ribbon-like manner and hold its shape for a few seconds before dissolving back in the bowl.

It would have helped to know that I needed to beat the eggs until they were very pale, almost white. Dorie usually includes information like this in her recipes - not sure why this was left out? I also found that after beating them for 5 minutes on medium speed, my eggs were getting nowhere. So I increased the speed to medium high and that seemed to do the trick. I found that it took eight minutes (not five) on my KitchenAid Mixer (at speed 8) to get to the ribbon stage.


The next problem I ran across was really my fault. I only have a 9-inch springform pan and the recipe calls for an 8-inch. Most of the time, I can get away with using my 9-inch without any modifications to the recipe. I should have known when I heard that others had trouble getting their cakes to rise that I wouldn't be able to do that with this recipe. So the first time I made this cake, I made the recipe as is. I ended up with a thick pancake basically. Surprisingly, I did not have any issues with my cake sinking in the middle with this one (another common complaint I heard from everyone else) - mine domed a little actually.


Realizing that there was no way I would be able to use this cake as a "nest" for the berries and cream, I set out to try again, this time doubling the recipe to ensure that I had an adequate "nest." (Yes, I could have just crumbled up the cake at this point and made a trifle, but I wanted to try to make the cake like Dorie intended.) Well, I definitely had enough cake the second go around. This time, about 15 minutes into baking, I started to smell that awful burning smell and instantly thought "Oh no!" ...I ran to the oven to discover that - yes - it had risen all the way to the top of my pan and had started overflowing onto the bottom of my oven. Grrrrr . (No one likes to clean this up.) While this cake rose quite a bit more than the first one, it also sank in the middle. Not sure why, though Dorie says that it's normal for it to sink a little bit.


Between these two attempts, I ended up with enough cake to assemble my Berry Surprise Cake. I hollowed out the larger cake and then sliced the smaller cake, evening out the top, and used it as the "lid" on my cake.

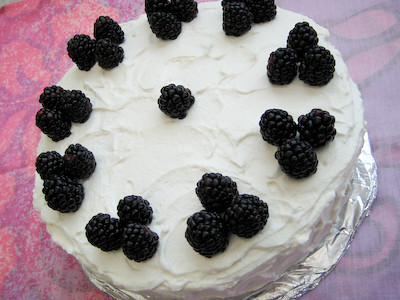
Assembling the cake wasn't very difficult. I'm a bit challenged in the cake decorating department, though. So instead of attempting a perfectly smooth, frosted cake, I decided to go for the more "rustic" look with swirls.


Due to complaints that the filling was not sweet enough, I doubled the amount of sugar in it. While this may have made the filling sweeter, it did not change the overpowering flavor of cream cheese in the mixture. I love cream cheese and I love cheesecake, but this filling tasted more or less like straight cream cheese in the middle of the cake. Not something that I enjoyed very much.

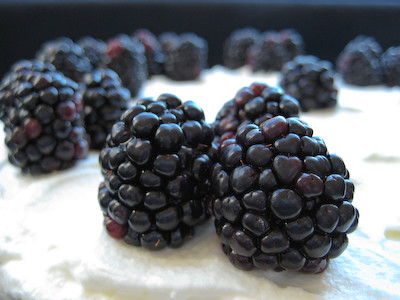
I think a lot of people tried various fillings, having difficulty finding fresh berries that were in season. That is the only part of this recipe where I did not have any problems. I found 12 ounce packages of fresh blackberries at Sam's Club for $3.28. Though I think I probably would have enjoyed the berries more just dipping them into a bowl of whipped cream :)


So, while I probably won't be making this cake again, I'm still happy I attempted it because I still learned some things. That's why I joined Tuesdays with Dorie right? If nothing else, I learned a new technique - how to beat a mixture until it holds a ribbon. *Update: I took the cake to work today and everyone there loved it, though one person wasn't a big fan of the génoise. I guess some people just like this cake and others don't.

Thanks Mary Ann, for choosing this cake. While I struggled with it and it wasn't my favorite cake, I'm glad I learned something new. If you would like the recipe, you can find it here. Make sure you visit the TWD Blog Roll to see how everyone else enjoyed this cake.

* Recipe notes:
- I've documented most of my tips above. Aside from what was already
mentioned, I would recommend making 1.25-1.5x the amount of topping if you use a 9-inch springform pan. Otherwise, you might not have enough to frost your cake.
- For more tips, click here.

Saturday, January 17, 2009

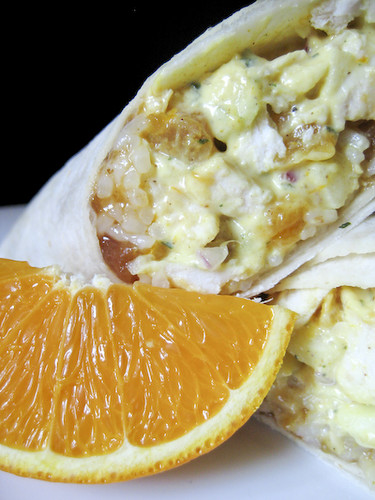
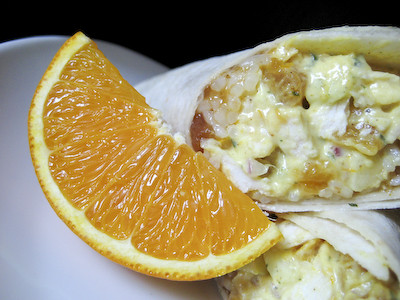
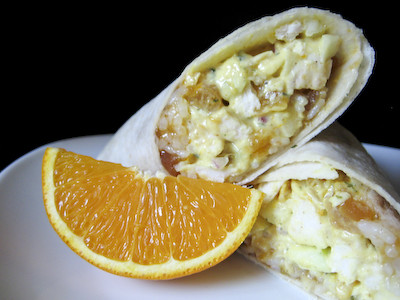
Curried Chicken Salad Wraps


When I was in college, my roommate and I quickly learned that the food at the graduate school cafeterias was much better than our dorm food. So we'd go to the medical school sometimes, but most of the time we chose to eat at the School of Management because of its proximity to us.


Every day for lunch, they'd offer a different kind of wrap, made to order. One of my favorites was an Indian inspired wrap - it had curried chicken in it, rice, and some type of chutney.

When I saw this recipe from Cooking Light, I was reminded of the wraps that I had grown to love in college, and thought I could adapt this recipe to replicate them. I really can't remember if there were grapes or apples in them, but I just used apples because that's what I had on hand. I have to say that I was pleasantly surprised with how well these turned out. They weren't exactly like what I remember, but they're pretty close.


So, if you're looking for a quick dinner idea, or something different to pack for lunch during the week, give these wraps a try.

Curried Chicken Salad Wraps
adapted from Cooking Light

click here for printable recipe

6 tablespoons reduced-fat mayonnaise
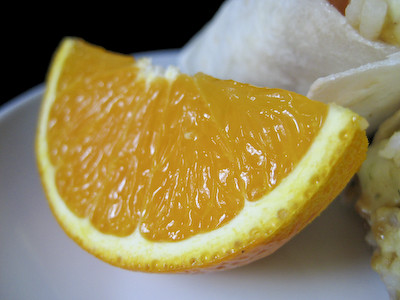
1/2 teaspoon grated orange rind
1 1/2 teaspoons orange juice
1 teaspoon curry powder
1/2 teaspoon grated peeled fresh ginger
2 1/2 cups diced roasted skinless, boneless chicken breasts (about 3/4 pound) (I used 1 pound and it yield 2 cups)
3/4 cup seedless green grapes, halved (I used diced apples)
1/4 cup diced dried apricots (I used 5 pieces)
1/4 cup thinly sliced green onions (I used finely diced red onions)
2 tablespoons chopped unsalted cashews (I don't like nuts so I omitted these)
1 tablespoon chopped fresh parsley (I used 1 tsp dried parsley)
4 (6-inch) naan breads (I used flour tortillas but if you want a good naan recipe, click here)
3 cups trimmed watercress (I omitted this but would like to use it next time)
4 tbsp chutney (I used Hot Peach & Apple Chutney)
1 cup cooked rice (basmati would be best but you can use white rice too)

Combine first 5 ingredients in a large bowl; stir with a whisk. Add chicken and next 5 ingredients (through parsley) to mayonnaise mixture, tossing to coat.

Heat naan according to the package directions, if desired.

Spread 1 tablespoon of chutney across one side of your naan/tortilla. Layer on about 1/4 cup cooked rice. Spoon about 3/4 cup chicken mixture onto each naan (or tortilla). Top with 3/4 cup watercress; fold over (or roll up wrap tightly if using tortillas. Cut diagonally in half.)

Yield: 4 servings (serving size: 1 sandwich/wrap)

Tuesday, January 13, 2009

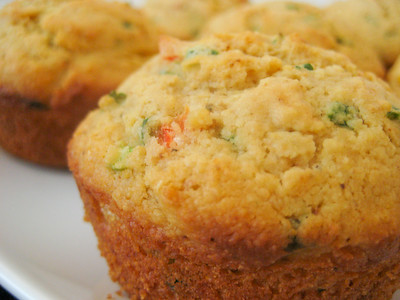
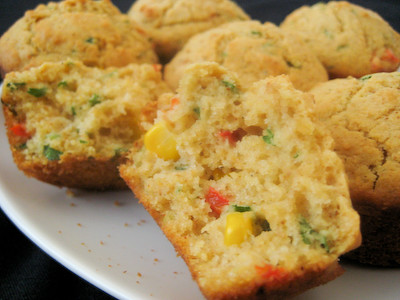
Savory Corn and Pepper Muffins (TWD)


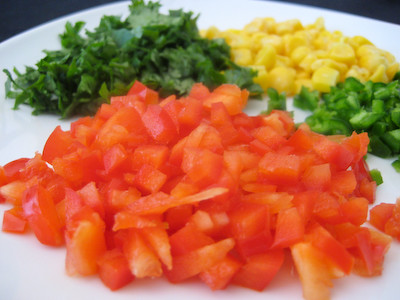
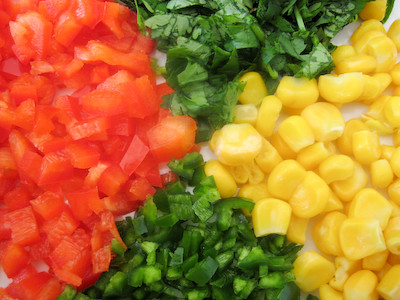
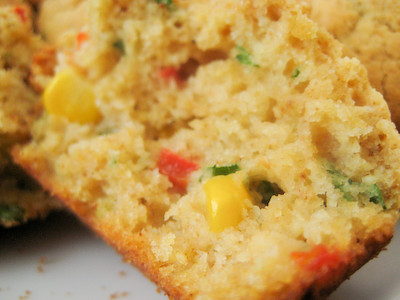
This week's Tuesdays with Dorie (TWD) recipe was chosen by Rebecca of Ezra Pound Cake: Savory Corn and Pepper Muffins. These sweet and savory muffins seem to include everything but the kitchen sink! :) They've got corn kernels, jalapeño peppers, red bell peppers, and cilantro.


I love sweet cornbread and I love jalapeño cornbread as well. I've never had a sweet jalapeño cornbread, though, and I've definitely never had a cornbread muffin that is so jam packed with goodies before!


Dorie's Savory Corn and Pepper Muffins are definitely a colorful treat. Aside from the time required to chop up the peppers and cilantro, these muffins, like all muffins, come together in no time. Simply whisk together the dry ingredients and mix together the wet ingredients. Then pour the wet ingredients into the dry, blend thoroughly and then throw in the mix-ins.


After twenty minutes in the oven (or eighteen in my case), you've got some great muffins! These muffins actually weren't as sweet as I expected them to be. The amount of heat these muffins has varies depending on your jalapeños - mine weren't spicy at all. When I asked my mom about that (she had just made a batch of super spicy muffins), she said that often times she'll get jalapeños that are extremely spicy and other times they'll aren't spicy at all. So I guess if you really want spicy muffins, you'll have to taste test your jalapeños before mixing them in! I think next time I make these, I'll add more chili powder and for an even better flavor, some bacon. (Everything is better with bacon, right?)


These muffins are great with a big bowl of chili or some chicken tortilla soup. Thanks Rebecca, for choosing these muffins. If you would like the recipe for the muffins, you can find it here. Make sure you visit the TWD Blog Roll to see how everyone else enjoyed this savory treat.


* Recipe notes:
- Start checking on these a few minutes early. Mine were completely baked after 18 minutes in my dark muffin pan.
- While these muffins rise a little bit in the oven, they don't rise a lot. So fill each well in your muffin pan almost to the top.
- These can be wrapped airtight and frozen for up to 2 months. Rewarm in a 350F oven, if you'd like, or split and toast them.
- For more tips, click here.


Thursday, January 8, 2009

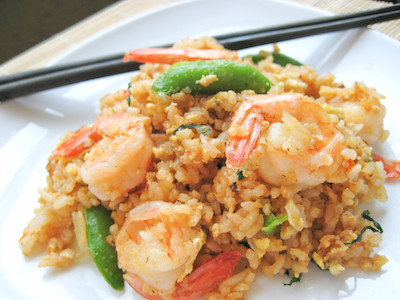
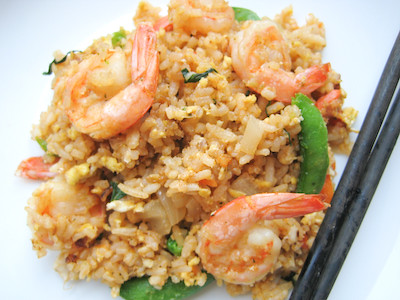
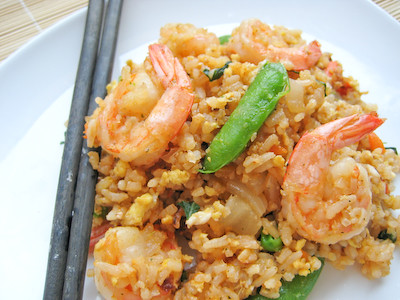
Divine Rice with Prawns


I've always loved fried rice but have never made it. My mom is the master of throwing together all the leftovers in the fridge to make fried rice. This recipe can easily be adapted according to your tastes, or to whatever meat and veggies you might have on hand.


I usually keep two types of bagged frozen vegetables in my freezer at all times. One type includes red, green, and yellow bell pepper slices with onions. You can find all sorts of uses for these... from an Asian stir fry, to fried rice, to chili. You'll save a lot of money if you buy them frozen, as red and yellow bell peppers can cost a fortune. The other type of frozen veggie bag I usually keep on hand is the "stir fry" variety that contains snap peas, carrots, water chestnuts, etc. These are great for dishes like Orange Chicken.


When I saw this fried rice recipe on Cate's blog, it finally gave me the push I needed to make my own at home. I'm surprised I've never made fried rice before, especially since we eat so much rice in this household and always have leftover rice sitting in the fridge. If you haven't visited Fresh From Cate's Kitchen before, I encourage you do to so. She's got a lot of great recipes over there, and I've been dying to make the Char Siu Pork she posted.


The key to making good fried rice is a really hot wok (or skillet), and having all your ingredients ready ahead of time. Once you start making it, you don't really time in between each step to get things together. It's really nice, though, because it comes together in less than ten minutes, making it a great weeknight meal.
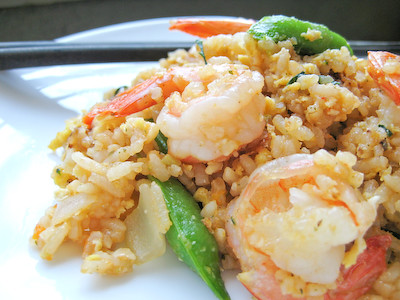
Divine Rice with Prawns
adapted from Fresh From Cate's Kitchen (who adapted it from Thai Cooking from the Siam Cuisine Restaurant)


12-15 prawns, pre-cooked
2 tsp canola oil
2 tbsp minced garlic
1 cup frozen stir fry vegetables, partially thawed (you can either use a bell pepper/onion stir fry or the ones that include snap peas)
2 eggs
3 cups cold cooked rice
3 tbsp fish sauce
1 tsp sugar
1 tbsp ketchup
2 tsp soy sauce
2 tsp chopped cilantro
6-8 basil leaves, chiffonade
juice of 1 fresh lime
cucumber slices (optional)


In a small bowl, mix together the fish sauce, sugar, ketchup, and soy sauce.

Heat a skillet over high heat and add the oil. When the oil is hot, add the garlic and onions. Stir-fry until light brown.

Crack the eggs into the pan and scramble, cooking for about 10 seconds.

Add the bell pepper and stir fry for about 30 seconds.

Add the rice and stir-fry, breaking up clumps of rice and egg.

Add your sauce mixture and stir fry for a few minutes.

Add the prawns and cook until they are heated through, throwing in the basil at the last minute.

Transfer to a serving dish, and sprinkle the lime juice and cilantro over the top, then serve with cucumber slices on the side if desired.

Tuesday, January 6, 2009

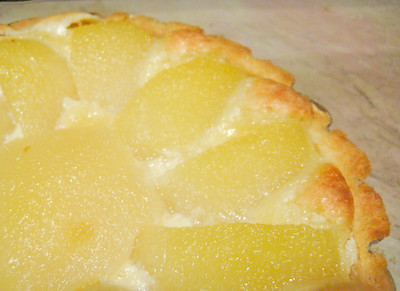
French Pear Tart (TWD)


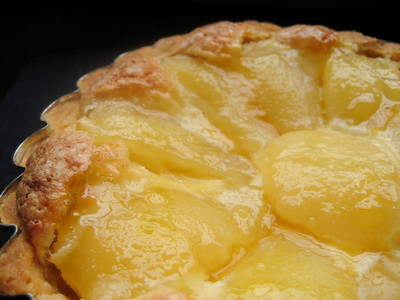
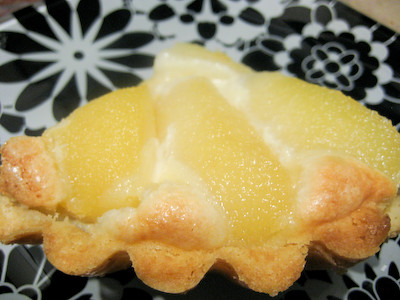
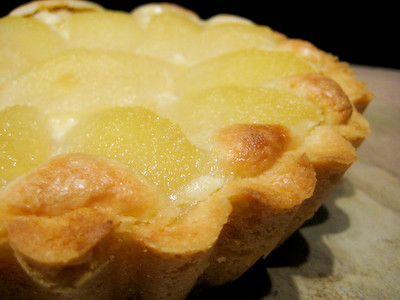
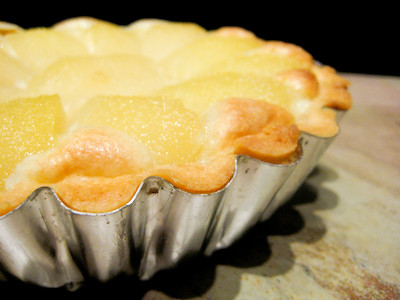
This week's Tuesdays with Dorie (TWD) recipe was chosen by none other than Dorie herself! This week marks the one year anniversary of our group, as we bake our way through Baking: From my home to yours. I can't believe that last year when I joined, the group was just three other bakers. One year later, we are now over three hundred members strong.


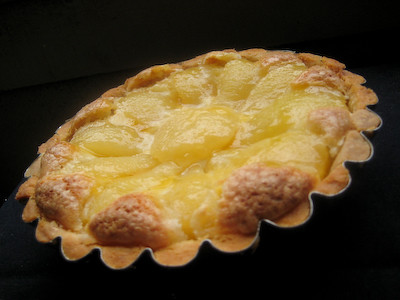
In honor of this milestone, Laurie (our founder) asked Dorie to choose the recipe of the week, and she picked the French Pear Tart. I love fruit tarts, so I was thrilled to see this one chosen. Unlike most fruit tarts, filled with pastry cream, Dorie's French Pear Tart is filled with an almond cream.


The tart has three basic components: the actual tart (Dorie's sweet tart dough recipe), the almond cream, and the pears. We've made Dorie's sweet tart dough before, so I knew I wouldn't have any problems with it. The almond cream was easier to make than I thought it would be. I made my own almond meal since I was taking the easy way out with the pears and using canned pears instead of poaching my own.


The only major problem I had with this recipe was in understanding what Dorie meant by "thinly slice each pear half crosswise." I was in a rush and did not take the time to google it, or check our "Problems & Questions" post on the TWD website so I just winged it. In my haste, I read the instructions to say "slice each pear in half crosswise," so I thought that meant to slice them in half lengthwise. Turns out that crosswise means that they should be sliced width-wise. This was more of an aesthetic issue, not a taste issue, though, so I wasn't too upset about this.


I did not have a 9-inch tart shell, so I used two 5.5-inch tart pans instead. I was somehow able to get two 5.5-inch tarts from 1 9-inch tart recipe, but I had to double the almond cream to fill them both. If you don't have any tart pans, don't fret. You can make do with whatever you have in your kitchen. A springform pan works well, it just won't have the fluted edges of a tart pan. You could even use any small, ovenproof bowl - you just won't be able to unmold the tart before consumption.


This tart was absolutely delicious! The almond cream complemented the pears wonderfully. I love that you can make this tart using canned pears. Even if you poach your own pears, this is a great recipe to use for entertaining. It is simple and classic. You can partially bake the tart shell ahead of time, as well as the almond cream. Then on the day of your party, simply spread the almond cream in your shell, arrange the pears on top, and pop the tart in the oven for an hour and voila! An easy yet impressive dessert your guests are sure to enjoy.


Thank you Dorie, for choosing the French Pear Tart. Thank you especially for providing us with all these wonderful recipes and being so supportive of our baking group. I have really enjoyed being a part of this group. I've learned so much about baking, discovered recipes I would have never tried on my own, and met a wonderful community of friends.


If you would like the recipe for the tart, you can find it here. Make sure you visit the TWD Blog Roll to see how everyone else enjoyed this tart.

* Recipe notes:
- You can easily make your own almond meal at home using whole almonds and a food processor. Simply toss them in some boiling water for about 30-60 seconds until most have floated to the top. Drain and rinse with cold water, then remove the skins. The rest of my tips for making your own almond meal can be found here.
- If you're making your own almond meal, 3/4 cup of whole almonds will yield about 1 1/2 cups of almond meal so you'll need to halve that if you're only making one 9-inch tart.
- I did not place my tart pan on a baking sheet. Things tend to be underbaked when I do that.
- Using 5.5-inch tart pans, you'll need 1 tart dough recipe if you make your tart thin (1.5x or 2x recipe if you like a thicker tart), a double recipe of almond cream, and two 29 ounce cans of pear halves.
- For more tips, click here.

Thursday, January 1, 2009

Best of 2008


Happy New Year!!!

I realize that this post is a bit late, but I was stuck at work for most of the day and I've been sick for over two weeks now (only way I was able to get my cheesecake post up was because I had completed it before I got sick).

As we move forward into 2009, I thought I'd do a quick review of 2008, similar to the Best of 2007 post I wrote last year. It was a lot a easier last time, though, because I had only been blogging for a few months. 2008 was a very busy blogging year - I joined The Daring Bakers, Tuesdays with Dorie, and posted about 120+ recipes. Thanks again to all of those who continue to show support and visit my blog, especially to those who take the time to leave feedback.

Below, I've highlighted some of my favorite recipes from 2008. Enjoy!

Favorite Breakfast Item
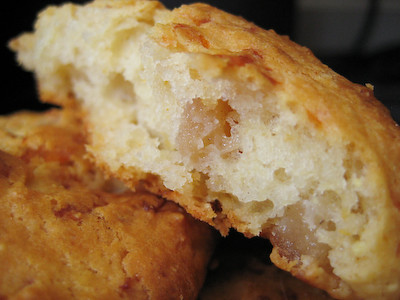
Apple Cheddar Scones


Favorite Appetizer


Favorite Side
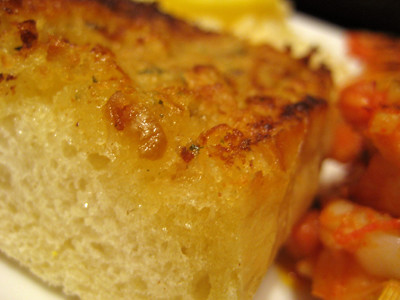
Roasted Garlic Bread

Favorite Chicken Dish
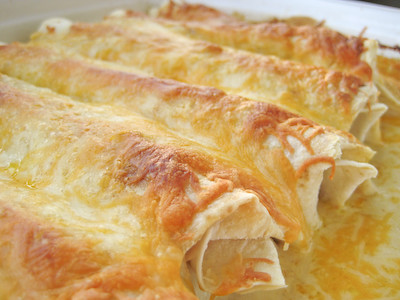
Honey Lime Chicken Enchiladas


Favorite Seafood Dish
Tomato Basil Salmon

Favorite Vegetarian Dish
Cold Sesame Noodles

Favorite Pasta Dish
Peasant Pasta


Favorite Pastry
Cinnamon Apple Danish Braids

Favorite Cookie
The Best Chocolate Chip Cookies


Favorite Chocolate Sweet
Cupcake Pops

Favorite Cake
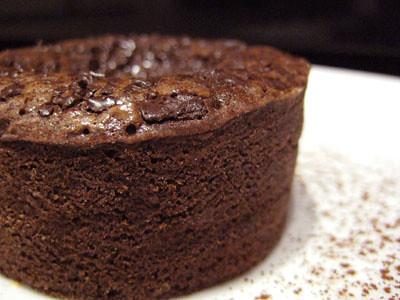
Gooey Chocolate Cake (aka Molten Chocolate Lava Cake)


Wishing you a happy and prosperous 2009. Here's to a year filled with bountiful blessings, and a tummy full of countless good eats 'n sweet treats :)