Sunday, April 26, 2009

Granola Breakfast Cookies (SMS)


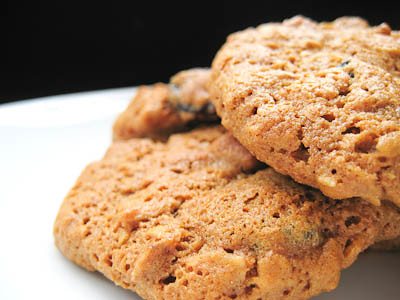
This week's Sweet Melissa Sundays (SMS) recipe was chosen by Jessica of A Singleton in the Kitchen: Granola Breakfast Cookies. These cookies are made with whole wheat flour and sweetened with honey and molasses. Cherry Almond Granola gives them a nice, chewy texture.


I love that this recipe uses melted butter, so you don't have to set butter out ahead of time. It's also a great cookie to make when you are running low on ingredients. This recipe requires no sugar, and only one egg.


I have to say that I cheated and used store bought granola instead of making the Cherry Almond Granola recipe in the book. I just didn't have any time, and actually still had Orange Pecan Zest Granola leftover from when we made the Granola Grabbers for TWD. I also tossed in some dried cherries at the end since there wasn't any dried fruit in my granola.


The smell coming from the oven as these cookies was baking was amazing! I just love the smell of honey and molasses. These cookies were great. Totally chewy, not crunchy at all. Sweet, but not too sweet. Some found the molasses flavor to be too strong, but I love molasses cookies so I enjoyed the molasses flavor quite a bit. I loved biting into the dried cherries - so glad I decided to add them at the last minute. These cookies actually taste pretty healthy, so you don't feel so guilty eating so many ;)


Thanks Jessica, for choosing this recipe - they were quick and easy and so full of flavor! If you would like the recipe, you can find it here. Make sure you visit the SMS Blogroll to see what everyone else thought about these wholesome treats!


* Recipe tips:
- Spray your measuring cups with PAM for easy pouring of the honey and molasses (and easy clean up!)
- If you don't use whole wheat flour often, store the leftover flour in the freezer for a longer shelf life.
- These cookies will keep layered between wax paper in an airtight container at room temperature for 4 days, or frozen up to 3 weeks.

- For more tips, click here.

Tuesday, April 21, 2009

Four Star Chocolate Bread Pudding (TWD)


This week's Tuesdays with Dorie (TWD) recipe was chosen by Lauren of Upper East Side Chronicle: Four Star Chocolate Bread Pudding. It's a classic bread pudding, but with a chocolate based custard instead of vanilla. And just to add a little more interest, there are some raisins (or cherries) sprinkled throughout.


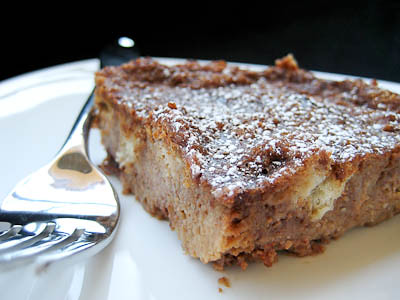
The recipe was easy enough, as most bread pudding recipes are. I have nothing against raisins, but I used dried cherries instead of raisins because the idea of a flavor similar to 'chocolate covered cherries' sounded great.


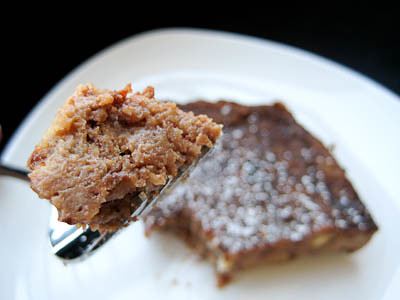
I had read that some folks felt that there was way too much liquid in this recipe, so I cut the amount of milk from 3 cups back to 2-1/2 cups. When I first poured the custard over the bread, it still looked like too much, but after the 30 minute waiting period, the bread had soaked up all the moisture nicely! Thankfully, this reduction in milk did not result in a custard that tasted too eggy.


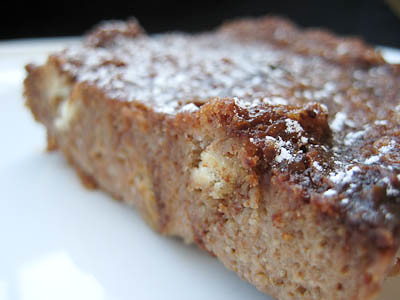
I'm not quite sure how Dorie's bread stayed so white, as mine became mostly all brown from the chocolate custard. This made for a not so photogenic piece of bread pudding, but it was delicious nonetheless. I initially served it with a simple dusting of confectioner's sugar on top, but tomorrow I think I'll have it with some whipped cream. If you like bread pudding and you like chocolate, I'd recommend you try this.


Thanks Lauren, for choosing this recipe - I love bread pudding and this was different from anything I've ever had before. If you would like the recipe, you can find it here. Make sure you visit the TWD Blogroll to see what everyone else thought about this chocolately treat!

* Recipes notes:
- I used 2 cups of whole milk and 1/2 cup of skim milk, reducing the total amount of milk by 1/2 cup.
- I used semisweet chocolate instead of bittersweet.
- For more tips, click here.

Sunday, April 19, 2009

Caramel Apple Turnovers with Sweet Ricotta Filling (SMS)


As busy as I've been, the last thing I needed to do was join another baking group. But that's what I've done. When I discovered Sweet Melissa Sundays, I really had no intention of joining. Where would I find the time? I barely have enough time as it is keeping up with Tuesdays with Dorie and The Daring Bakers.


That all changed when I saw that Lorelei, founder of Sweet Melissa Sundays, was giving away a free copy of the book to anyone who wanted to join the group. I had wanted to get The Sweet Melissa Baking Book for quite some time, so I entered the giveaway, thinking I probably wouldn't win anyway. Well, lo and behold, it was my lucky day because I ended up winning the book! So, that's how I ended up as part of this group.

While I'm excited to be a part of this group, I'm afraid that I most likely won't be able to participate weekly in it like I do with Tuesdays with Dorie. My schedule is already super busy, then add to that the fact that we're supposed to post on Sundays. I do the majority of my baking on Sunday and Monday, so that makes it harder for me to post on schedule each week for this group. And because I joined Tuesdays with Dorie first, when things get busy, I'll always bake for Tuesdays with Dorie before I do for Sweet Melissa Sundays. I do hope to bake along with the group at least once or twice a month, though. Now on to the featured recipe...

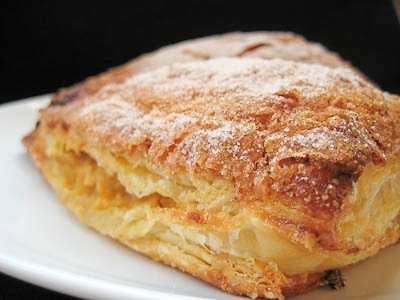
This week's Sweet Melissa Sundays (SMS) recipe was chosen by Tracey of Tracey's Culinary Adventures: Caramel Apple Turnovers with Sweet Ricotta Filling. If you know me, you know that I love anything with fruit in it, especially apples. I could eat an apple crumb pie every day if I had to. So I was really looking forward to trying this recipe.


At first glance, the recipe looks really simple - and it is, but it definitely took longer than I had initially anticipated. There are three components to this recipe - the apple filling, ricotta filling, and the puff pastry.

For the apple filling, you caramelize some sugar and then toss in the apples and cook until they are tender and soft. I have caramelized sugar plenty of times before, but I swear this seemed to take forever. I'm guessing this was because the heat was set to low. I started to get impatient and actually turned my heat up to medium-low, and I think it took at least 15-25 minutes before it became amber. Otherwise, this step was really easy. I also sprinkled some cinnamon over my apples because it just didn't feel right to be cooking apples without cinnamon!

The ricotta filling is easy enough, too, though it does require some planning ahead. You need to strain the moisture out of the ricotta overnight in a cheesecloth, but once that is done the filling takes just a few minutes to prepare. I have to admit that I did not notice this step when I first looked at the recipe, and when I went to make it earlier this afternoon, I was mad at myself that I had not started this last night. I simply took the ricotta and squeezed it to the death in the cheesecloth and that seemed to work okay. I was able to get out quite a bit of moisture that way.

Thankfully this recipe uses store bought puff pastry, but make sure you set it out to thaw ahead of time, as it takes about 40 minutes to do so.
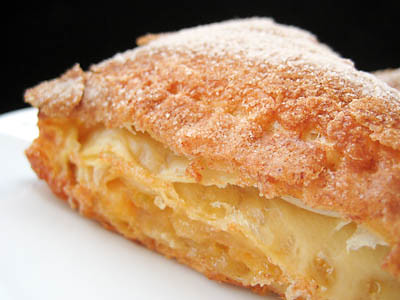

Assembly of the turnovers is simple, though I have a tendency to want to over stuff mine, so filling starts to ooze everywhere. I had a lot of filling leftover, probably enough to make an additional 3-4 turnovers.

These were delicious! I was pleasantly surprised at how prominent the orange flavor was from the orange zest in the ricotta filling. It complemented the caramel apple filling well. My husband thought that these were too sweet, but I didn't think so at all. I love that you can make the apple and ricotta fillings ahead of time, and just assemble these the day of. Even better, you can make them from start to finish and just freeze them before baking so they're ready to bake whenever you have a craving :)


Thanks Tracey, for choosing this recipe - I love turnovers and will definitely be making this again! If you would like the recipe, you can find it here. Make sure you visit the SMS Blogroll to see what everyone else thought about this appley treat!

* Recipe tips:
- Save time by starting your water/sugar on the heat first before peeling/chopping your apples. I still had to wait for my sugar to caramelize even after I had finished with the apples.
- Make sure you DO NOT STIR your water/sugar mixture while you are waiting for it to caramelize - you will end up with big sugar crystals if you do.
- I dusted my turnovers with tons of cinnamon sugar, but still had some leftover. You can reduce the amount by 25% and waste less.
- Seal your turnovers shut with the tines of a fork - you'll get a better seal that way.
- I totally forgot to vent my turnovers (oops!) but apparently they still turned out okay.
- Keep a close eye on your turnovers - I checked mine at 39 minutes (6 minutes early) and they had already started to burn!
- For more tips, click here.

Tuesday, April 14, 2009

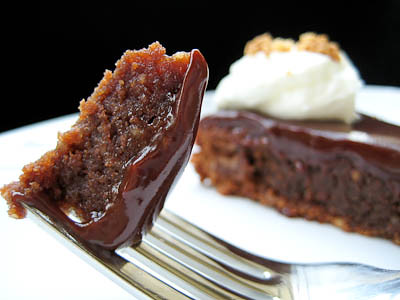
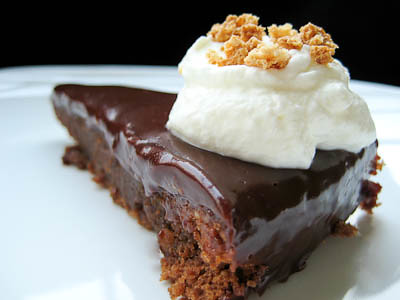
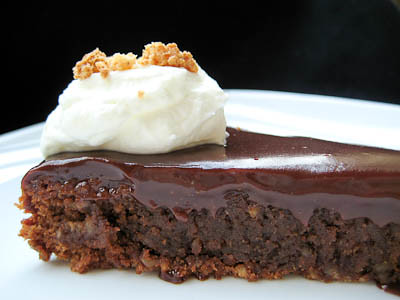
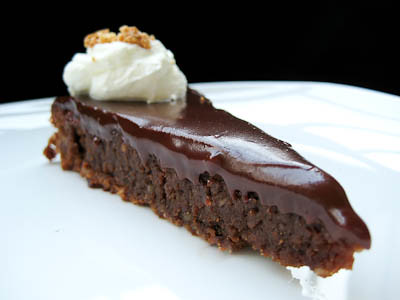
Chocolate Amaretti Torte (TWD)


This week's Tuesdays with Dorie (TWD) recipe was chosen by Holly of Phe.MOM.enon: 15 Minute Magic: Chocolate Amaretti Torte. As the recipe promises, prep time really is just fifteen minutes. Since the entire recipe is made in the food processor, Dorie states that if you can push a button, you can make this torte :)


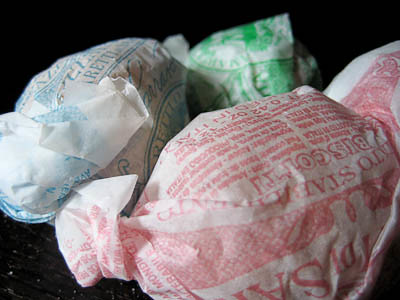
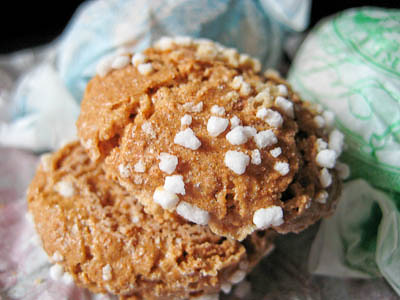
Aside from ground almonds, one of the main ingredients in this torte are amaretti cookies. I had never heard of amaretti cookies before. They're "Italian macaroons," and most recipes seem to indicate that they are made of almond flour/paste, sugar, and egg whites. A quick search on google will yield several recipes that you can try if you'd like to make them at home yourself.


The amaretti cookies that Dorie favors are made by the Lazzaroni family and are made with slightly different ingredients. According to legend, almost three centuries ago, the Cardinal of Milan unexpectedly visited the town of Saronno in Italy. To honor him, two young lovers, Giuseppe and Osolina, quickly baked up a mixture of sugar, apricot kernels, and egg whites, creating crisp, airy cookies with an unusual bittersweet flavor which they wrapped in pairs to symbolize their love. The Cardinal was delighted and blessed the young couple, who married and lived happily ever after.


The amaretti cookies can be found in various locations, such as specialty shops and Italian markets. I found mine for about $6 at Central Market which is only located in Texas. It was a small package, so that works out to about $41 per pound, actually. I heard others found some for about $3 at World Market, though they were made by another company.


There were some complaints about how expensive the cookies were; I suppose if I was getting a whole pound, I would mind paying that much for cookies, but considering I didn't need that much for this torte, I didn't think it was too much to spend. A single slice of something like this can cost you about $6 if you're dining out, so it's all relative. I'm sure the other cookies taste great too, but I imagine there's a difference in taste when you're comparing cookies made from apricot kernels versus ones made with almonds.


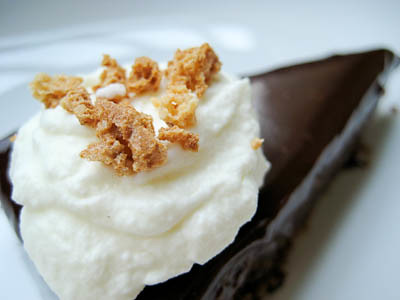
I wasn't sure what to expect when I took my first bite of this torte, but I loved it. It had a nice, nutty flavor to it with a very subtle fruity undertone and the texture was somewhat similar to a slightly chewy brownie. The almond whipped cream paired really well with it, though I could also see enjoying it with a nice scoop of vanilla ice cream and hot fudge sauce too! I love that this torte comes together in just fifteen minutes, yet looks like it could have taken much longer, making it great for entertaining ;)


Thanks Holly, for choosing this torte - I enjoyed trying something a little different. If you would like the recipe, you can find it here or here. Make sure you visit the TWD Blogroll to see what everyone else thought about this chocolately treat!

* Recipes notes:
- The box of amaretti cookies I found was only 2.3 oz whereas the recipe calls for 2.75 oz if you are going to use some to top/decorate the torte. If you're only using it for the actual torte, 2.3 oz is just fine. I simply used all but one cookie half in the torte, saving it for the topping. To make up for this in the filling, I added just a little bit more ground almonds.
- I made mine in a 9-inch round pan and it was done in just 20 minutes (it was also a dark pan).
- Wrapped well, this will keep 2 months in the freezer.
- For more tips, click here.


Thursday, April 9, 2009

Blog Makeover & Southwestern Potatoes


I've been dying to do a makeover for my blog for quite some time now. Sure, it was very simple and classic looking, but I wanted something a bit more colorful and fun.

Thanks to my amazing friend Lisa over at Surviving Oz, I was finally able to give my blog a face lift! I am beyond thrilled with how everything turned out and I cannot begin to thank her enough! I still have to work on finishing up some additional content for the blog, but for now at least it has a new look :)

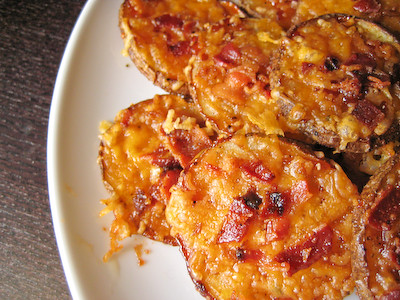
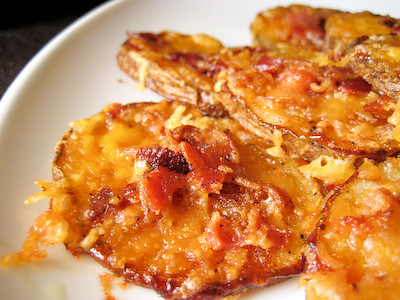
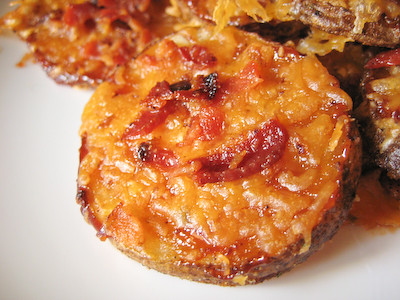
In honor of my blog makeover, I'm going to share with you one of the best recipes I have come across in a long time! I bookmarked this particular recipe several months ago. My only regret now is not making it sooner!! I promise that this is something you need to try! It's about as simple as simple gets. You simply slice some potatoes, toss them in olive oil, salt, and pepper, then bake them in the oven for about 15 minutes. Next, top them with some barbeque sauce, cheddar cheese, and bacon bits. After a few more minutes in the oven, you've got the tastiest potato side or appetizer you've ever eaten!


I made these two times in two days they were so good! My husband calls them crack :) I would bring these to a party any day over the alleged "crack dip."

Southwestern Potatoes
from cooking this and that

1 package bacon bits, or 4 slices of bacon, cooked and crumbled
2 unpeeled large potatoes, scrubbed
3 tablespoons olive oil
1 teaspoon garlic salt
1 teaspoon black pepper
1/4 cup barbecue sauce
1 cup shredded cheddar cheese
1/2 sour cream, optional (for dipping)


Line 2 large baking sheets with foil and preheat oven to 450 degrees. (I was able to fit it all on one baking sheet.)

Cut potatoes into 1/4 inch slices. Toss the potatoes, olive oil, garlic salt and pepper in a big ziploc bag to coat the potatoes.

Arrange potatoes in a single layer on the baking sheets. Bake until lightly browned, about 15-20 minutes.

Brush with barbecue sauce, then top with the shredded cheese and bacon bits. Bake until the cheese melts, about 3-5 minutes. Top with sour cream, if desired.

Yield: 4 servings (only 2 in our household!)


Tuesday, April 7, 2009

Banana Cream Pie (TWD)


This week's Tuesdays with Dorie (TWD) recipe was chosen by Amy of Sing For Your Supper: Banana Cream Pie. I can honestly say that I had never had a banana cream pie before. Growing up, my mom hated any kind of cream pie - banana cream pie, coconut cream pie, etc. so I never had the opportunity to try one.

Honestly, I wasn't sure if I would really like it, either. But being a part of TWD means trying new things, whether that entails learning a new baking skill, or trying a new ingredient or recipe. So I forged ahead with this week's pick.


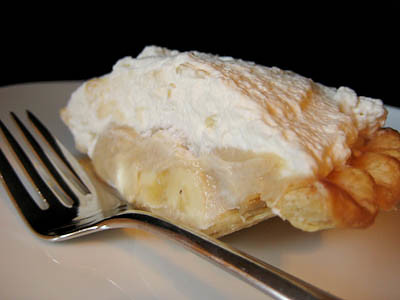
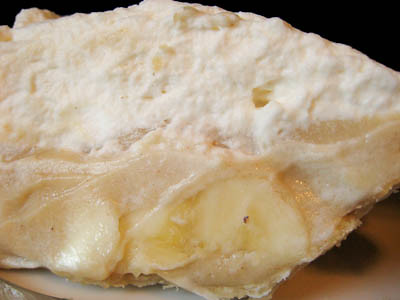
The recipe was actually quite simple. It's a basic pastry cream, made with brown sugar instead of white sugar, with just a hint of cinnamon and nutmeg in it. All you do is prepare the pie crust, then layer it with pastry cream and bananas, and then top with whipped cream. Dorie adds a touch of sour cream to the whipped cream to give it a little something extra, but I honestly couldn't really tell it was there. Unfortunately, I accidentally over whipped my cream and ruined it, but thankfully it didn't affect the taste - I just have some sad looking pie pictures this week :(

The pie was just so so for me. I was glad I made it and tried it, but I probably won't be making it again. I guess I'm just not a banana cream pie person. I brought the pie to work and everyone loved it so I guess it's great as far as banana cream pies go :)


Thanks Amy, for choosing this pie - I enjoyed trying something new. If you would like the recipe, you can find it here. Make sure you visit the TWD Blogroll to see what everyone else thought about this creamy pie!

* Recipes notes:
- I didn't pass my brown sugar through a sieve - I just made sure there was no big clumps in it and the pastry cream turned out just fine.
- The pastry cream doesn't really come to a noticeable boil - just keep stirring constantly until it begins to thicken, then continue heating/stirring for another minute.
- I thought the pie would taste better with more bananas - so I would recommend using 4 bananas instead of just 3.
- For more tips, click here.

Tuesday, March 31, 2009

Coconut Butter Thins (TWD)


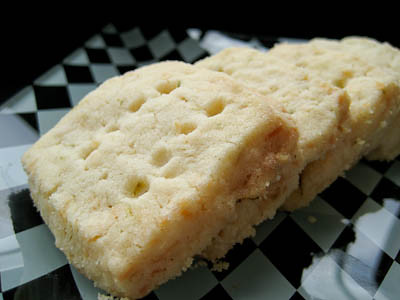
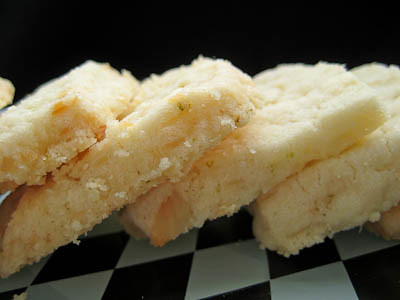
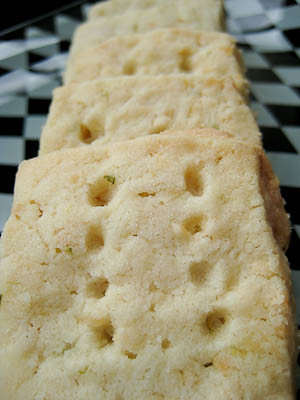
This week's Tuesdays with Dorie (TWD) recipe was chosen by Jayne of The Barefoot Kitchen Witch: Coconut Butter Thins. They're basically shortbread cookies with chopped macadamia nuts, shredded coconut, and a hint of lime.

The recipe is as simple as any other shortbread cookie recipe. Dorie warns that you should place these two inches apart on the baking sheet, but I surprisingly found that mine only spread a little bit. It seems that others had their cookies spread quite a bit, so I'm not sure what the difference was.


These cookies were very delicate. The coconut made them slightly chewy, but otherwise the coconut flavor wasn't too pronounced. There were many reports this week that coconut haters could not even taste the coconut in this recipe. The macadamia nuts gave them a nice crunch, too. Dorie's idea to rub the sugar with some lime zest was marvelous - coconut and lime are flavors that pair very well. These cookies were simple and delicious. I will definitely make them again.


Thanks Jayne, for choosing these cookies. If you would like the recipe, you can find it here. Make sure you visit the TWD Blogroll to see what everyone else thought about this buttery treat!

* Recipes notes:
- I didn't have a gallon size ziploc bag so I simply rolled my dough out between two pieces of plastic wrap until it was a 1/4-inch thickness.
- I baked my cookies for the full 20 minutes.
- Let the cookies rest of the baking sheet for about 1 minute before transferring them to a rack to cool - they are very delicate and may not make it in one piece if you transfer them too early.
- Wrapped well, these cookies will keep for a few days at room temperature. They will keep in the freezer for 2 months.
- For more tips, click here.