Friday, January 30, 2009

Super Bowl Appetizers

With the Super Bowl coming up this weekend, I know that many are on the lookout for great appetizers and finger foods that they can serve up for the big game. Last year, I was able to feature a variety of recipes leading up to the big weekend. Unfortunately, time was not on my side this year, and I was unable to try out any new recipes.

Regardless, I'd still like to feature some great appetizer recipes. I hope that you'll give some of them a try and enjoy them during the big game this weekend! Not sure which one to try? I have to say that the most popular recipe (out of all the recipes, not just appetizer recipes) on my blog to date is the Sweet and Sour Meatballs recipe; the second most popular recipe is the Chicken Satay with Peanut Dipping Sauce.

Buffalo Chicken Dip (aka Crack Dip)


Sun Dried Tomato Dip


Thursday, January 29, 2009

Tuiles and Allergy Friendly Cupcakes


I have to admit that when I saw the January Daring Bakers Challenge, I was relieved. For once, it was not a multi-step, multi-day, complicated, daunting process. It was something new, but simple and fun. I'm always up for learning new things each month, but after the hustle and bustle of the holidays and a business trip this month, I gladly welcomed a simpler challenge.

This month's challenge is brought to us by Karen of Bake My Day and Zorra of 1x umruehren bitte aka Kochtopf. They have chosen Tuiles from The Chocolate Book by Angélique Schmeink and Nougatine and Chocolate Tuiles from Michel Roux.


Traditionally, tuiles are thin, crisp almond cookies that are gently molded over a rolling pin or arched form while they are still warm. Once set, their shape resembles the curved French roofing tiles for which they're named. The tuiles recipe we used this month was made with a Dutch slant - no almonds. Traditionally, this batter is used to bake flat round cookies on the 31st of December, representing the year unfold. On New Years day however, the same batter is used but on this day they are presented to well-wishers shaped as cigars and filled with whipped cream, symbolizing the New Year that's about to roll on.


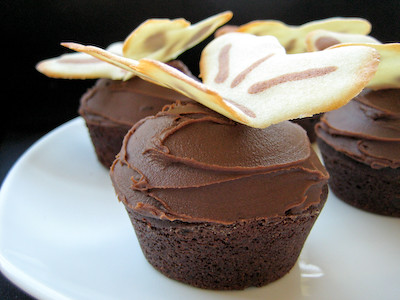
I had never made tuiles before, and was so pleased to find out how simple they are to make! Consisting of some butter, powdered sugar, egg whites, and flour, these came together in no time. I'm sure you'll find all sorts of intricate shapes and molds on other food blogs, but I was rather pressed for time so I went with the suggested butterfly shape.


I'm sure you can purchase plastic sheets at the craft store to cut into stencils, but I simply used a thick magazine cover. The gloss prevented the paper from get water logged when I wiped it clean. Then, I simply cut out the butterfly shape. It worked perfectly and I loved that I did not need to make any special purchases for this recipe.


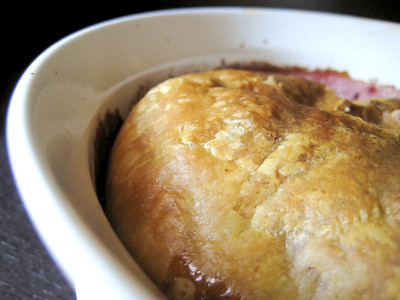
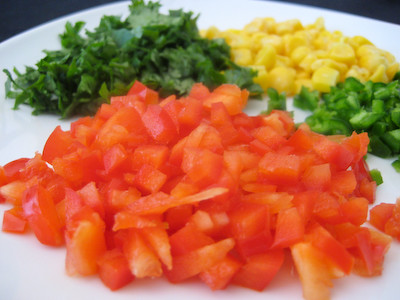
I also took this opportunity to try out the Cherrybrook Kitchen chocolate cake mix and frosting I won from Blake Makes. Cherrybrook Kitchen makes products that are tailored for those with various food allergies. Their products are peanut free, dairy free, egg free, and nut free. That's not to say that they are taste free!


The folks at 
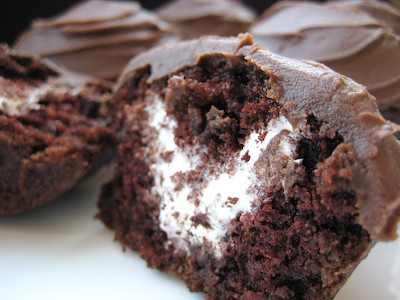
Cherrybrook Kitchen describe the chocolate cake as decadent, rich, moist, and flavorful; truly a chocolate lover’s fix. The cake is made with imported Belgium cocoa powder and studded with chocolate chips. I decided to make cupcakes with mine, and filled a few with marshmallow creme. I brought these frosted cupcakes into work and no one could tell that they were "special" cupcakes. They taste just as good as any other boxed cake mix.


If you're a person that suffers from food allergies, then you should give these cake mixes a try. I am confident that you will like them. You can use their store locator to find a grocery store near you that carries these. If you're not located near a store that carries these mixes, you can also order them online.


A big thanks to Karen and Zorra, for choosing this month's challenge. I will definitely be making these again. I can't wait to play around with the shapes in the future when I have some more time. I know the possibilities are endless! Make sure you visit the Daring Bakers Blogroll to see hundreds of other variations!


Tuiles
from The Chocolate Book by Angélique Schmeinck

Yields: 20 small butterflies/6 large (butterflies are just an example)
Preparation time batter 10 minutes, waiting time 30 minutes, baking time: 5-10 minutes per batch

65 grams / ¼ cup / 2.3 ounces softened butter (not melted but soft)
60 grams / ½ cup / 2.1 ounces sifted confectioner’s sugar
1 sachet vanilla sugar (7 grams or substitute with a dash of vanilla extract)
2 large egg whites (slightly whisked with a fork)
65 grams / 1/2 cup / 2.3 ounces sifted all purpose flour
1 table spoon cocoa powder/or food coloring of choice
Butter/spray to grease baking sheet

Oven: 180C / 350F

Using a hand whisk or a stand mixer fitted with the paddle (low speed) and cream butter, sugar and vanilla to a paste. Keep stirring while you gradually add the egg whites. Continue to add the flour in small batches and stir to achieve a homogeneous and smooth batter/paste. Be careful to not overmix.

Cover the bowl with plastic wrap and chill in the fridge for at least 30 minutes to firm up. (This batter will keep in the fridge for up to a week, take it out 30 minutes before you plan to use it).

Line a baking sheet with parchment paper or grease with either butter/spray and chill in the fridge for at least 15 minutes. This will help spread the batter more easily if using a stencil/cardboard template such as the butterfly. Press the stencil on the baking sheet and use an off sided spatula to spread batter. Leave some room in between your shapes. Mix a small part of the batter with the cocoa and a few drops of warm water until evenly colored. Use this colored batter in a paper piping bag and proceed to pipe decorations on the wings and body of the butterfly.

Bake butterflies in a preheated oven (180C/350F) for about 5-10 minutes or until the edges turn golden brown. Immediately release from baking sheet and proceed to shape/bend the cookies in the desired shape. These cookies have to be shaped when still warm, you might want to bake a small amount at a time or maybe put them in the oven to warm them up again. (Haven’t tried that). Or: place a baking sheet toward the front of the warm oven, leaving the door half open. The warmth will keep the cookies malleable.

If you don’t want to do stencil shapes, you might want to transfer the batter into a piping bag fitted with a small plain tip. Pipe the desired shapes and bake. Shape immediately after baking using for instance a rolling pin, a broom handle, cups, cones….

Alternative Baking:
Either un-glutenize the batter given substituting the flour for any nut meal or oat flour, or as an alternative use one of the following batters below:

Nougatine
from Finest Desserts by Michel Roux

5.1/4 cups / 500 grams sliced almonds
(or 4.1/3 cups/500 grams slivered almonds)
3.1/3 cups / 660 grams sugar
4 tbs / 60 grams butter (optional)
2 tbs oil (vegetable, sunflower, peanut)

Makes 2.3/4 lbs/1.2 kgs! (This is the yield of the recipe given in the book, feel free to downsize!)
Preparation time: 25 minutes
Preheat oven: 180C/350F

Spread the almonds on a baking sheet and toast in the oven until lightly browned. Cook the sugar in a heavy based saucepan over low heat, stirring gently and continuously with a spatula, until it melts to a light golden caramel. Add the almonds and stir over low heat for 1 minute, then stir in the butter until completely absorbed. (This is not essential, but will give the nougat an added sheen) Pour the nougatine onto an oiled baking sheet.

Shaping: place a bakingsheet toward the front of the warm oven, leaving the door half open. The warmth will keep the cookies malleable. Work with one piece at a time, of a size appropriate to the shape you want. Roll out each piece on a warm, lightly oiled baking sheet or lightly oiled marbled surface. It is essential to work quickly, since the nougatine rapidly becomes brittle. Heat the nougatine in a microwave oven for a few seconds only to soften it if needed.

Roll the nougatine into the appropriate thickness for your desired shape, but never thicker than 1/8 inch or 3 mm. Quickly cut out your chosen shapes using cookie cutters, or the blade or heel of a chef’s knife. To mold the nougatine, drape it very rapidly over the mold so that it follows the shape and contours. Leave until completely cold before removing from the mold.
Or, cut out and using your fingers or a knife, push into folds or pleats… use as a basket, twirl round a knitting needle..

Nougatine based shapes can be made two or three days in advance, Keep them in a very dry place and do not fill with something like a mousse more than 2 hours prior to serving.

Chocolate Tuiles
from Finest Desserts by Michel Roux

Makes 30
Preparation time: 15 minutes!

9 oz/250 grams dark or white couverture or best-quality bittersweet chocolate, chopped
2/3 cup/75 gr slivered almonds, toasted and cooled

Temper the couverture, and stir in the toasted almonds. Place the template on a sheet of rodoïde (or use a clean sheet of sturdy plastic such as a folder) and fill with about 1 tbs of the mixture. Repeat the process a little distance away from the first one. As soon as you have 5 tuiles fit, slide them onto a mold or rolling pin (side of a glass) to curve. Let cool completely, lift tuiles off the plastic only after the chocolate has set and just before serving, so that they keep their shine.

Savory tuile/cornet recipe
from The French Laundry Cookbook by Thomas Keller

1/4 cup plus 3 tablespoons (65 grams/2.1/4 ounces) all purpose flour
1 tablespoon plus 1 teaspoon sugar
1 teaspoon kosher salt (= 2/3 teaspoon table salt)**
8 tablespoons (114 grams/4 ounces) unsalted butter, softened but still cool to the touch
2 large egg whites, cold
2 tablespoons black sesame seeds

In a medium bowl, mix together the flour, sugar and salt. In a separate bowl, whisk the softened butter until it is completely smooth and mayonnaise-like in texture. Using a stiff spatula or spoon, beat the egg whites into the dry ingredients until completely incorporated and smooth. Whisk in the softened butter by thirds, scraping the sides of the bowl as necessary and whisking until the batter is creamy and without any lumps. Transfer the batter to a smaller container, as it will be easier to work with.

Preheat the oven to 400 degrees F.

Make a 4-inch hollow circular stencil. Place Silpat on the counter (it is easier to work on the Silpat before it is put on the sheet pan). Place the stencil in one corner of the sheet and, holding the stencil flat against the Silpat, scoop some of the batter onto the back of an offset spatula and spread it in an even layer over the stencil. Then run the spatula over the entire stencil to remove any excess batter. After baking the first batch of cornets, you will be able to judge the correct thickness. You may need a little more or less batter to adjust the thickness of the cornets.

There should not be any holes in the batter. Lift the stencil and repeat the process to make as many rounds as you have molds or to fill the Silpat, leaving about 1 1/2 inches between the cornets. Sprinkle each cornet with a pinch of black sesame seeds.

Place the Silpat on a heavy baking sheet and bake for 4 to 6 minutes, or until the batter is set and you see it rippling from the heat. The cornets may have browned in some areas, but they will not be evenly browned at this point.

Open the oven door and place the baking sheet on the door.*** This will help keep the cornets warm as you roll them and prevent them from becoming too stiff to roll. Flip a cornet over on the sheet pan, sesame seed side down and place 4-1/2 inch cornet mold at the bottom of the round. If you are right-handed, you will want the pointed end on your left and the open end on your right. The tip of the mold should touch the lower left edge (at about 7 o'clock on a clock face) of the cornet.

Fold the bottom of the cornet and around the mold; it should remain on the sheet pan as you roll. Leave the cornet wrapped around the mold and continue to roll the cornets around molds; as you proceed, arrange the rolled cornets, seams side down, on the sheet pan so they lean against each other, to prevent from rolling.

When all the cornets are rolled, return them to the oven shelf, close the door, and bake for an additional 3 to 4 minutes to set the seams and color the cornets a golden brown. If the color is uneven, stand the cornets on end for a minute or so more, until the color is even. Remove the cornets from the oven and allow to cool just slightly, 30 seconds or so.

Gently remove the cornets from the molds and cool for several minutes on paper towels. Remove the Silpat from the baking sheet, wipe the excess butter from it, and allow it to cool down before spreading the next batch. Store the cornets for up to 2 days (for maximum flavor) in an airtight container.

Tuesday, January 27, 2009

Fresh Ginger and Chocolate Gingerbread (TWD)


This week's Tuesdays with Dorie (TWD) recipe was chosen by Heather of Sherry Trifle: Fresh Ginger and Chocolate Gingerbread. I was really excited to see this pick because I have been wanting to make this for about a year now. I actually got the ingredients together to make this, and then found out that this recipe had been picked. So it was perfect timing :)

It's a cake that is "packed with fresh, candied and ground ginger, spices, molasses and a little chocolate," then topped with chocolate icing. I love ginger and spiced cakes and cookies, so I was really looking forward to trying some homemade gingerbread.

Aside from fresh ginger or stem ginger in syrup, I think most bakers will already have the ingredients required for this recipe on hand. I was unable to find any stem ginger in syrup, so I only used fresh ginger. In the ingredients list, the fresh ginger is listed as required, whereas the stem ginger is listed as optional. However, within the recipe instructions, Dorie says to add the fresh ginger to the batter "if you're using it" and then it is implied that the ginger in syrup is not optional.

I found that with just the fresh chopped ginger and ground ginger, this cake had a nice spicy flavor without being too overpowering. Adding the stem ginger in syrup might have been too much for those who don't enjoy ginger so much.


The smell while this cake was baking was wonderful. Dorie always recommends baking cakes on a baking sheet. However, I've found that this always causes them to be under baked, at least in my oven. I usually just place my cake pans directly on the oven rack to avoid this. I'm not sure why, but I thought maybe I would try it just one more time with this recipe so I placed my cake pan on the baking sheet before placing it in the oven. The cake is supposed to bake for about 40 minutes. Well, after 40 minutes, I could tell that the center of my cake was not even close to being set so I removed the baking sheet and allowed the cake pan to rest directly on the oven rack and baked it for an additional 10 minutes. This seemed to do the trick.

However, after allowing the cake to cool for 10 minutes, I was unable to unmold from the cake pan. I had buttered the cake pan as directed, run a knife around the edges of the cake, but was still unable to unmold it. After much struggle, I was finally able to get it out of the pan... but not in one piece :( I was able to get a large chunk in the middle out, almost intact, but the rest was just broken into pieces.

Determined not to waste my cake (and efforts), I frosted what I could and cut those pieces into squares... then I made individual chocolate trifles with the rest :)


I thought this gingerbread was good, but not great. My husband loved it, as did my coworkers. I think the combination of chocolate and ginger just didn't appeal to me as much as I thought it would. Still, it's definitely something I would consider making again towards the end of the year for a holiday party.

Thanks Heather, for choosing this gingerbread. If you would like the recipe, you can find it here. Make sure you visit the TWD Blog Roll to see how everyone else enjoyed this holiday inspired treat.

* Recipe notes:
- The best way to peel your ginger is with a vegetable peeler, but you'll need a paring knife to get into the nooks at each branching.
- Ginger will keep for a while in your refrigerator. You can also chop or zest any leftover ginger and put it in a ziploc bag and freeze it for later use.
- I had to remove my cake from the baking sheet after 40 minutes, then bake it an additional 10 minutes before it was done.
- My cake stuck to the pan like crazy, so I would recommend lining your pan with parchment paper, and then buttering it. Or maybe flouring the pan after you butter it.
- I used semisweet chocolate instead of bittersweet chocolate.
- Consider using an electric mixer for your icing. Despite sifting my confectioner's sugar into the icing recipe, I still ended up with lumpy icing :(
- You can wrap this and keep it at room temperature for about 3 days or freeze it, icing and all, for up to 2 months.
- For more tips, click here.
- Lastly, a quick note from Dorie about the recipe:

I just saw that TWD will be making the chocolate gingerbread cake next. I just wanted to say that you’ve got to use a TRUE 9-x-9 pan or else you’ll have too much batter. Sadly, these days it seems as though the pans that are marked 9-x-9 are really only 8-x-8, sometimes even smaller. Short of buying a new pan, the best thing to do is to fill your pan just 2/3 or 3/4 full (if your pan is smaller than 9-x-9) and to make mini-cakes out of the leftover batter.

Tuesday, January 20, 2009

Berry Surprise Cake (TWD)


This week's Tuesdays with Dorie (TWD) recipe was chosen by Mary Ann of Meet Me in the Kitchen: Berry Surprise Cake. It's a génoise (whole egg sponge cake) that is hollowed out, then filled with berries enveloped in a cream cheese and heavy cream mixture, and then the entire cake is finished off with some whipped cream. Sounds delightful, doesn't it?

That's what I thought when I saw this week's pick. Unfortunately I can't say that I am a huge fan of this cake. The recipe, unlike most others in the book, was not very straightforward. Usually Dorie gives very detailed descriptions and instructions in her recipes, making everything easy to follow. I had several problems along the way with this particular recipe.


After checking out the Problems & Questions post for this recipe, I knew that it was going to be fickle. There were many complaints about the cake not rising, the middle of the cake sinking, and the filling not being sweet enough.

I had read that some of the issues with the cake not rising was from over mixing the batter in the final steps when folding in the flour - so I was extra careful folding the flour in. I also saw that the cake sinking could be avoided by being more careful with the eggs. Dorie calls them "divas" because apparently they are very hard to work with. Dorie simply states to heat them until "just warm to the touch," but I read a tip from Lauren that you could more objectively do this by measuring their temperature. So I watched mine closely on the stove and made sure to pull them off when they reached 110F. Not entirely sure where that number comes from, but that's what Lauren suggested and that's what I did ;)


The next part I had a problem with was in beating the warmed egg and sugar mixture until it "triples in volume and forms a ribbon that holds its shape for about 10 seconds when the beater is lifted." Well, I'm not a very experienced baker and I had no idea what this meant. A ribbon? I've never beaten eggs until they looked like a ribbon before so I had no idea what I was looking for. A quick search on google and I found this excerpt from Carole Bloom's The Essential Baker:

Holding a ribbon: this is the stage that refers to the consistency of batter or mixture - usually eggs and sugar - beaten or whipped until it is very thick and pale colored. Whip the mixture with an electric stand mixer using the wire whip attachment or a hand-held mixer on medium to medium-high speed for about 5 minutes. To tell if the mixture is thick enough, dip a rubber spatula into it and lift it up. Let the mixture drip from the spatula into the bowl. The mixture should very slowly fall back on itself in a ribbon-like manner and hold its shape for a few seconds before dissolving back in the bowl.

It would have helped to know that I needed to beat the eggs until they were very pale, almost white. Dorie usually includes information like this in her recipes - not sure why this was left out? I also found that after beating them for 5 minutes on medium speed, my eggs were getting nowhere. So I increased the speed to medium high and that seemed to do the trick. I found that it took eight minutes (not five) on my KitchenAid Mixer (at speed 8) to get to the ribbon stage.


The next problem I ran across was really my fault. I only have a 9-inch springform pan and the recipe calls for an 8-inch. Most of the time, I can get away with using my 9-inch without any modifications to the recipe. I should have known when I heard that others had trouble getting their cakes to rise that I wouldn't be able to do that with this recipe. So the first time I made this cake, I made the recipe as is. I ended up with a thick pancake basically. Surprisingly, I did not have any issues with my cake sinking in the middle with this one (another common complaint I heard from everyone else) - mine domed a little actually.


Realizing that there was no way I would be able to use this cake as a "nest" for the berries and cream, I set out to try again, this time doubling the recipe to ensure that I had an adequate "nest." (Yes, I could have just crumbled up the cake at this point and made a trifle, but I wanted to try to make the cake like Dorie intended.) Well, I definitely had enough cake the second go around. This time, about 15 minutes into baking, I started to smell that awful burning smell and instantly thought "Oh no!" ...I ran to the oven to discover that - yes - it had risen all the way to the top of my pan and had started overflowing onto the bottom of my oven. Grrrrr . (No one likes to clean this up.) While this cake rose quite a bit more than the first one, it also sank in the middle. Not sure why, though Dorie says that it's normal for it to sink a little bit.


Between these two attempts, I ended up with enough cake to assemble my Berry Surprise Cake. I hollowed out the larger cake and then sliced the smaller cake, evening out the top, and used it as the "lid" on my cake.

Assembling the cake wasn't very difficult. I'm a bit challenged in the cake decorating department, though. So instead of attempting a perfectly smooth, frosted cake, I decided to go for the more "rustic" look with swirls.


Due to complaints that the filling was not sweet enough, I doubled the amount of sugar in it. While this may have made the filling sweeter, it did not change the overpowering flavor of cream cheese in the mixture. I love cream cheese and I love cheesecake, but this filling tasted more or less like straight cream cheese in the middle of the cake. Not something that I enjoyed very much.

I think a lot of people tried various fillings, having difficulty finding fresh berries that were in season. That is the only part of this recipe where I did not have any problems. I found 12 ounce packages of fresh blackberries at Sam's Club for $3.28. Though I think I probably would have enjoyed the berries more just dipping them into a bowl of whipped cream :)


So, while I probably won't be making this cake again, I'm still happy I attempted it because I still learned some things. That's why I joined Tuesdays with Dorie right? If nothing else, I learned a new technique - how to beat a mixture until it holds a ribbon. *Update: I took the cake to work today and everyone there loved it, though one person wasn't a big fan of the génoise. I guess some people just like this cake and others don't.

Thanks Mary Ann, for choosing this cake. While I struggled with it and it wasn't my favorite cake, I'm glad I learned something new. If you would like the recipe, you can find it here. Make sure you visit the TWD Blog Roll to see how everyone else enjoyed this cake.

* Recipe notes:
- I've documented most of my tips above. Aside from what was already
mentioned, I would recommend making 1.25-1.5x the amount of topping if you use a 9-inch springform pan. Otherwise, you might not have enough to frost your cake.
- For more tips, click here.

Saturday, January 17, 2009

Curried Chicken Salad Wraps


When I was in college, my roommate and I quickly learned that the food at the graduate school cafeterias was much better than our dorm food. So we'd go to the medical school sometimes, but most of the time we chose to eat at the School of Management because of its proximity to us.


Every day for lunch, they'd offer a different kind of wrap, made to order. One of my favorites was an Indian inspired wrap - it had curried chicken in it, rice, and some type of chutney.


When I saw this recipe from Cooking Light, I was reminded of the wraps that I had grown to love in college, and thought I could adapt this recipe to replicate them. I really can't remember if there were grapes or apples in them, but I just used apples because that's what I had on hand. I have to say that I was pleasantly surprised with how well these turned out. They weren't exactly like what I remember, but they're pretty close.


So, if you're looking for a quick dinner idea, or something different to pack for lunch during the week, give these wraps a try.

Curried Chicken Salad Wraps
adapted from Cooking Light

click here for printable recipe

6 tablespoons reduced-fat mayonnaise
1/2 teaspoon grated orange rind
1 1/2 teaspoons orange juice
1 teaspoon curry powder
1/2 teaspoon grated peeled fresh ginger
2 1/2 cups diced roasted skinless, boneless chicken breasts (about 3/4 pound) (I used 1 pound and it yield 2 cups)
3/4 cup seedless green grapes, halved (I used diced apples)
1/4 cup diced dried apricots (I used 5 pieces)
1/4 cup thinly sliced green onions (I used finely diced red onions)
2 tablespoons chopped unsalted cashews (I don't like nuts so I omitted these)
1 tablespoon chopped fresh parsley (I used 1 tsp dried parsley)
4 (6-inch) naan breads (I used flour tortillas but if you want a good naan recipe, click here)
3 cups trimmed watercress (I omitted this but would like to use it next time)
4 tbsp chutney (I used Hot Peach & Apple Chutney)
1 cup cooked rice (basmati would be best but you can use white rice too)

Combine first 5 ingredients in a large bowl; stir with a whisk. Add chicken and next 5 ingredients (through parsley) to mayonnaise mixture, tossing to coat.

Heat naan according to the package directions, if desired.

Spread 1 tablespoon of chutney across one side of your naan/tortilla. Layer on about 1/4 cup cooked rice. Spoon about 3/4 cup chicken mixture onto each naan (or tortilla). Top with 3/4 cup watercress; fold over (or roll up wrap tightly if using tortillas. Cut diagonally in half.)

Yield: 4 servings (serving size: 1 sandwich/wrap)

Tuesday, January 13, 2009

Savory Corn and Pepper Muffins (TWD)


This week's Tuesdays with Dorie (TWD) recipe was chosen by Rebecca of Ezra Pound Cake: Savory Corn and Pepper Muffins. These sweet and savory muffins seem to include everything but the kitchen sink! :) They've got corn kernels, jalapeño peppers, red bell peppers, and cilantro.


I love sweet cornbread and I love jalapeño cornbread as well. I've never had a sweet jalapeño cornbread, though, and I've definitely never had a cornbread muffin that is so jam packed with goodies before!


Dorie's Savory Corn and Pepper Muffins are definitely a colorful treat. Aside from the time required to chop up the peppers and cilantro, these muffins, like all muffins, come together in no time. Simply whisk together the dry ingredients and mix together the wet ingredients. Then pour the wet ingredients into the dry, blend thoroughly and then throw in the mix-ins.


After twenty minutes in the oven (or eighteen in my case), you've got some great muffins! These muffins actually weren't as sweet as I expected them to be. The amount of heat these muffins has varies depending on your jalapeños - mine weren't spicy at all. When I asked my mom about that (she had just made a batch of super spicy muffins), she said that often times she'll get jalapeños that are extremely spicy and other times they'll aren't spicy at all. So I guess if you really want spicy muffins, you'll have to taste test your jalapeños before mixing them in! I think next time I make these, I'll add more chili powder and for an even better flavor, some bacon. (Everything is better with bacon, right?)


These muffins are great with a big bowl of chili or some chicken tortilla soup. Thanks Rebecca, for choosing these muffins. If you would like the recipe for the muffins, you can find it here. Make sure you visit the TWD Blog Roll to see how everyone else enjoyed this savory treat.


* Recipe notes:
- Start checking on these a few minutes early. Mine were completely baked after 18 minutes in my dark muffin pan.
- While these muffins rise a little bit in the oven, they don't rise a lot. So fill each well in your muffin pan almost to the top.
- These can be wrapped airtight and frozen for up to 2 months. Rewarm in a 350F oven, if you'd like, or split and toast them.
- For more tips, click here.


Thursday, January 8, 2009

Divine Rice with Prawns


I've always loved fried rice but have never made it. My mom is the master of throwing together all the leftovers in the fridge to make fried rice. This recipe can easily be adapted according to your tastes, or to whatever meat and veggies you might have on hand.


I usually keep two types of bagged frozen vegetables in my freezer at all times. One type includes red, green, and yellow bell pepper slices with onions. You can find all sorts of uses for these... from an Asian stir fry, to fried rice, to chili. You'll save a lot of money if you buy them frozen, as red and yellow bell peppers can cost a fortune. The other type of frozen veggie bag I usually keep on hand is the "stir fry" variety that contains snap peas, carrots, water chestnuts, etc. These are great for dishes like Orange Chicken.


When I saw this fried rice recipe on Cate's blog, it finally gave me the push I needed to make my own at home. I'm surprised I've never made fried rice before, especially since we eat so much rice in this household and always have leftover rice sitting in the fridge. If you haven't visited Fresh From Cate's Kitchen before, I encourage you do to so. She's got a lot of great recipes over there, and I've been dying to make the Char Siu Pork she posted.


The key to making good fried rice is a really hot wok (or skillet), and having all your ingredients ready ahead of time. Once you start making it, you don't really time in between each step to get things together. It's really nice, though, because it comes together in less than ten minutes, making it a great weeknight meal.

Divine Rice with Prawns
adapted from Fresh From Cate's Kitchen (who adapted it from Thai Cooking from the Siam Cuisine Restaurant)


12-15 prawns, pre-cooked
2 tsp canola oil
2 tbsp minced garlic
1 cup frozen stir fry vegetables, partially thawed (you can either use a bell pepper/onion stir fry or the ones that include snap peas)
2 eggs
3 cups cold cooked rice
3 tbsp fish sauce
1 tsp sugar
1 tbsp ketchup
2 tsp soy sauce
2 tsp chopped cilantro
6-8 basil leaves, chiffonade
juice of 1 fresh lime
cucumber slices (optional)


In a small bowl, mix together the fish sauce, sugar, ketchup, and soy sauce.

Heat a skillet over high heat and add the oil. When the oil is hot, add the garlic and onions. Stir-fry until light brown.

Crack the eggs into the pan and scramble, cooking for about 10 seconds.

Add the bell pepper and stir fry for about 30 seconds.

Add the rice and stir-fry, breaking up clumps of rice and egg.

Add your sauce mixture and stir fry for a few minutes.

Add the prawns and cook until they are heated through, throwing in the basil at the last minute.

Transfer to a serving dish, and sprinkle the lime juice and cilantro over the top, then serve with cucumber slices on the side if desired.