Thursday, December 18, 2008

Sugar-Topped Molasses Spice Cookies


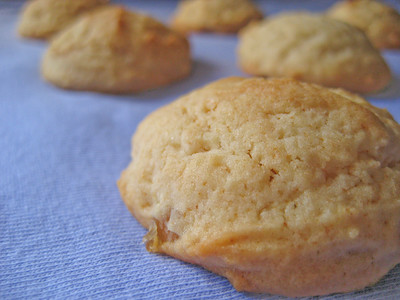
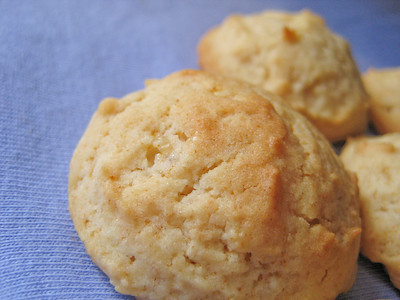
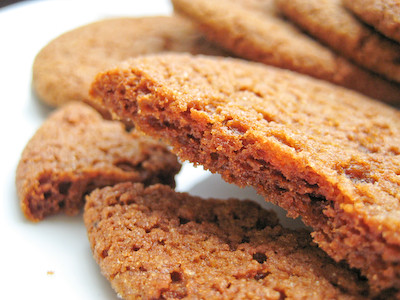
I like gingerbread cookies, but I love molasses spice cookies even more. Partly because of the spices, and partly because I love the chewy texture of the spice cookies. Last year, I made some molasses spice cookies from Good Things Catered. This year, I wanted to see how Dorie Greenspan's recipe would compare. The main difference between the two recipes appears to be the types of sugars used. Dorie's recipe uses all brown sugar, whereas the other one uses a combination of white, granulated sugar and brown sugar. My mom always says that brown sugar gives everything a better flavor, so I was pretty sure that I would like these.
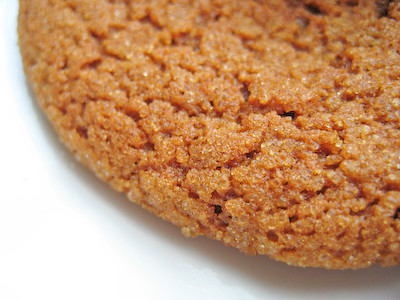

These cookies, like most cookies, are very easy to make. They do require an hour of refrigeration (or 30 minutes in the freezer), so plan accordingly.

I learned from the cookies I made last year that ground black pepper can give these cookies a nice little kick... so I made sure to include more than just a pinch in these :)
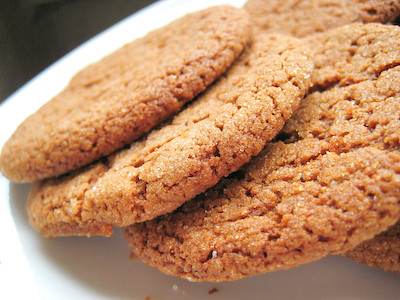

I think Dorie's cookies are slightly better, though both recipes are really great. Be careful when you are baking these, though, not to over bake them. They look a bit soft in the middle when they are done, but firm up once they are cooled. I did not know this when I created my first batch, and let it bake longer, resulting in a crunchy cookie instead of a soft and chewy one.

Also make sure you don't place these cookies too close together on your baking sheet. I did not realize they would spread so much, so my first batch ended up looking like a big cobblestone sidewalk! (They still tasted great, though!)

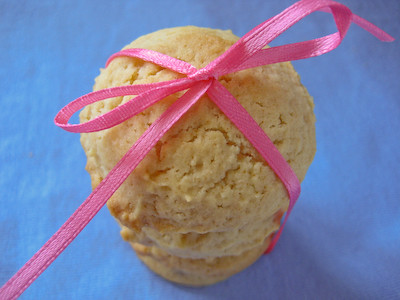
These were perfect in my holiday gift packages, and would be a nice addition to your holiday platter this year!

You'll also find these cookies as part of "Eat Christmas Cookies, Season 2," hosted by Susan of Food Blogga. Click on the logo below to find out more about this event and click here to see the round-up of all the other wonderful cookies being submitted!

Sugar-Topped Molasses Spice Cookies
from Baking: From My Home to Yours, by Dorie Greenspan

2 1/3 cups all-purpose flour
2 teaspoons baking soda
1/2 teaspoon salt
2 teaspoons ground ginger
1/2 teaspoon ground cinnamon
1/4 teaspoon ground allspice
pinch (small or not so small) of cracked or coarsely ground black pepper (I used 1/4 tsp)
1 1/2 sticks (12 tablespoons) unsalted butter, at room temperature
1 cup (packed) light brown sugar
1/2 cup molasses (not blackstrap)
1 large egg
about 1/2 cup sugar, for rolling

Whisk together the flour, baking soda, salt, ginger, cinnamon, allspice and pepper.

Working with a stand mixer, preferably fitted with a paddle attachment, or with a hand mixer in a large bowl, beat the butter on medium speed until smooth and creamy. Add the brown sugar and molasses and beat for 2 minutes or so to blend, scraping down the sides of the bowl as needed. Add the egg and beat for 1 minute more. Reduce the mixer speed to low and add the dry ingredients, mixing until the flour and spices disappear. If some flour remains in the bottom of the bowl, to avoid overbeating the dough, mix in the last of the dry ingredients by hand with a rubber spatula. You'll have a smooth, very soft dough.

Divide the dough in half and wrap each piece in plastic wrap. Freeze for 30 minutes, or refrigerate for at least 1 hour. (The dough can be kept refrigerated for up to 4 days.)

Getting Ready to Bake:
Center a rack in the oven and preheat the oven to 350 degrees F. Line two baking sheets with parchment or silicone mats.

Put the sugar in a small bowl. Working with one packet of dough at a time, divide it into 12 pieces, and roll each piece into a smooth ball between your palms. One by one, roll the balls around in the bowl of sugar , then place them on one of the baking sheets. Dip the bottom of a glass into the sugar and use it to press down on the cookies until they are between 1/4 and 1/2 inch thick.

Bake the cookies one sheet at a time for 12 to 14 minutes, or until the tops feel set to the touch. Remove the baking sheet from the oven and, if the cookies have spread and are touching, use the edge of a metal spatula to separate them while they are still hot. Transfer the cookies to a rack to cool to room temperature. Repeat with the second batch of dough.

Storage:
The cookies will keep for at least 1 week in the cookie jar. Wrapped airtight, they can be frozen for up to 2 months.

Wednesday, December 17, 2008

Stained Glass Cookies


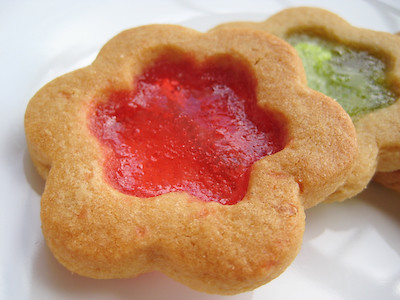
Among the many goodies I made this holiday season to give away was these stained glass cookies. I came across these cookies on Elise's blog at the end of the holiday season last year, and only now just got around to making them :)


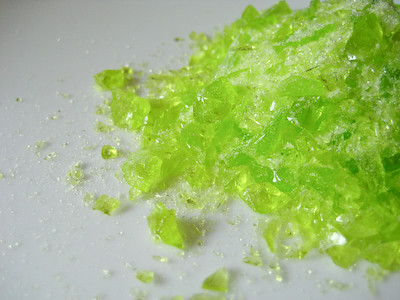
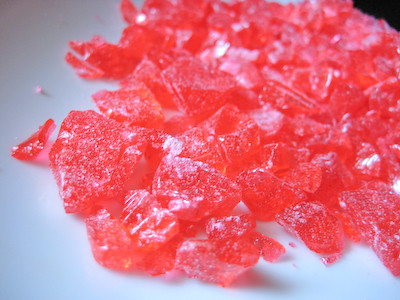
These cookies are just as easy to make as your standard sugar cookie. They have a small amount of molasses in them for a little extra color (and flavor). Just use your favorite cookie cutters and then fill the middle of these cookies with crushed candies to achieve the beautiful stained glass appearance.


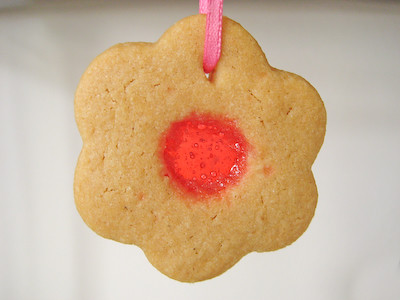
You can simply serve them as is, and they will brighten up any platter... or, you can make a small hole at the top of each one and string a ribbon through the cookie to make the most delicious Christmas ornaments. (They're almost too cute to eat!)


If you've got kids, this is a great way to get them involved with the holiday baking. But rest assured, these will be gobbled up by kids and grown ups alike.


These cookies are being submitted to "Eat Christmas Cookies, Season 2," hosted by Susan of Food Blogga. Click on the logo below to find out more about this event and click here to see the round-up of all the other wonderful cookies being submitted!


Stained Glass Cookies
from Simply Recipes

1/2 cup (1 stick) butter
1/2 cup sugar
1/4 cup brown sugar
1 tablespoon molasses
1/2 teaspoon vanilla extract
1 egg
2 cups flour
1/4 teaspoon salt
3/4 teaspoon baking powder
30-40 hard candies (such as Life Savers), preferably in several flavors/colors (I used about 20 Jolly Ranchers)


In a large bowl, using an electric mixer, cream together butter and sugars until fluffy, about 2 minutes. Add molasses and vanilla extract, mixing until incorporated. Add egg and mix until light and smooth, about 1 minute on medium speed.

Sift together flour, salt, and baking powder. Fold dry ingredients into wet mixture. Use electric mixer to blend just until flour is incorporated. Divide dough in half and flatten into two disks. Wrap disks in plastic wrap and refrigerate at least an hour and up to 2 days. (You can also freeze the dough up to 2 months before baking.)

Pre-heat oven to 375°F. Line two baking sheets with parchment paper or Silpat.

Remove any wrappers on candies and separate them by color into plastic bags. Using a mallet to crush candies.


Place one disk between two large sheets of waxed paper and roll to 1/4-inch thickness. Use cookie cutters to cut dough into desired shapes. Transfer cookies to prepared baking sheets, about 1 inch apart. Using a smaller cookie cutter or a knife, cut shapes into centers of cookies, reserving these center bits to add into extra dough.

Use a spoon to sprinkle the crushed candy into the hollowed-out centers of the cookies, filling to the edges. Try to keep the candy within the centers. Any candy specks that fall on the cookie will color the cookie. (I found it easier to use a piece of paper, rolled up, to pour the crushed candy into the centers. I also found that you need to add the candy until it is slightly domed, otherwise there won't be enough candy in the middle after it melts.)

If cookies will be hung as ornaments or decorations, poke a small hole in the top of each cookie before baking. (I used a toothpick to do this. If your cookies are larger, you can use a straw. Remember that as the cookie bakes, it will expand slightly, making your hole a bit smaller - so you'll need to take this into account when creating your holes.)

Bake 9 to 10 minutes. The candy should be melted and bubbling and the cookies just barely beginning to brown. Remove baking sheets from oven and place on wire racks to cool. Allow cookies to cool on pans at least 10 minutes; otherwise, the candy centers may separate from the dough. When cookies are completely cooled, remove and store in an airtight container. String with ribbon if you want to hang as an ornament.


Yield: 2 to 4 dozen cookies, depending on how large you make them.

Tuesday, December 16, 2008

Buttery Jam Cookies (TWD)


This week's Tuesdays with Dorie (TWD) recipe was chosen by Heather of Randomosity and the Girl: Buttery Jam Cookies. Like the name implies, these are buttery cookies made with jam. Dorie also adds some ground ginger to enhance the flavor of the jam.


You can use your choice of jam, marmalade, or preserves in this recipe to flavor your cookies. I decided to use the Dundee ginger preserves I still had from the blackberry nectarine galette to really give these a strong ginger flavor. While these cookies definitely had a ginger flavor, it was actually more subtle than I had anticipated. Next time I might consider adding a bit more ground ginger, some crystallized ginger pieces, or maybe even some more preserves.


This recipe is super simple and comes together in just minutes. The dough doesn't really spread much, so they pretty much come out of the oven looking like what they did going in... just a bit more golden :) I was able to get a fairly uniform shape to my cookies by using my cookie scoop.


These cookies received some rather mixed reviews among the TWD bakers. I found them to be delightful, though my husband said "these aren't the best cookies you've made." He found them too bland.

Thanks Heather, for choosing the Buttery Jam Cookies. I really enjoyed them and they made a wonderful addition to my holiday gift baskets! If you would like the recipe for the cookies, you can find it here. Make sure you visit the TWD Blog Roll to see how everyone else decorated their cookies!


* Recipes notes:
- These cookies puff up slightly in the oven but do not spread very much, so you can place them close together on the baking sheet.
- The baked cookies can be frozen for up to 2 months as well.
- For more recipe tips, click here.

This is another submission to "Eat Christmas Cookies, Season 2," hosted by Susan of Food Blogga. Click on the logo below to find out more about this event and click here to see the round-up of all the other wonderful cookies being submitted!


Friday, December 12, 2008

World Peace Cookies


Each holiday season, I like to bake up several goodies and then package them as holiday gifts for my coworkers. This year, I'm making some tried and true recipes from last year, as well as some new recipes I've had my eye on... so this post will be the first installment of many, over the next two weeks, featuring sweet treats that are perfect for holiday gift giving.

I've seen mention of Dorie Greenspan's World Peace Cookies here and there on various blogs but never noticed that they were chocolate cookies. I always wondered why they were called World Peace Cookies... it was not until I read the recipe that I saw that Dorie's neighbor actually gave them this name. He believes that a daily dose of these cookies is all it takes to bring peace and happiness to the world.


That's a big name to live up to, and I have to say that after trying these, I'm not sure if I would call them that. You see, these are just about the best chocolate cookies I've ever tasted (with the chocolate malted whopper drops coming in a close second), and I don't really like chocolate cookies. I think those who have had them will agree with me in saying that folks are likely to fight over these cookies. So I don't see how they could bring about world peace ;)


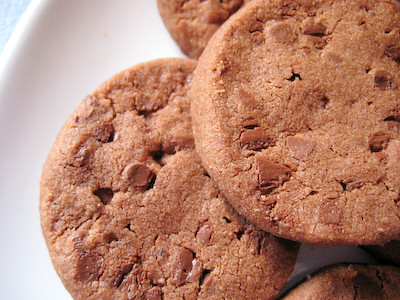
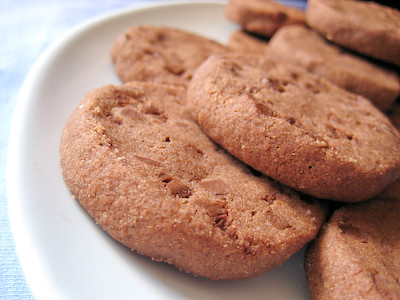
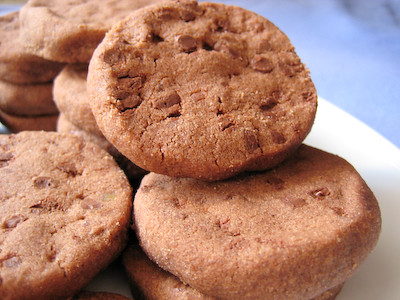
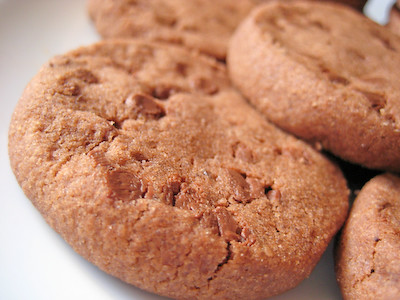
These cookies are actually the brainchild of pastry chef Pierre Hermé, but Dorie is kind enough to share the recipe with us in her book. They are rich, buttery, sandy, melt-in-your-mouth chocolate cookies studded with chocolate chunks (or in my case, mini chocolate chips).

The recipe is simple and straightforward. Like all slice-and-bake cookies, you'll need to plan ahead when making these, as they require 3 hours of refrigeration before baking. My only complaint with these is that there weren't enough to go around! I'm likely to whip up another batch of these cookies real soon, and stick it in the freezer so that the next time I have a craving for a chocolate, these heavenly cookies will only be a few minutes away...


I'm submitting these cookies to "Eat Christmas Cookies, Season 2," hosted by Susan of Food Blogga. Click on the logo below to find out more about this event and click here to see the round-up of all the other wonderful cookies being submitted!


World Peace Cookies
from Baking: From My Home to Yours, by Dorie Greenspan

1 1/4 cups all-purpose flour
1/3 cup unsweetened cocoa powder
1/2 teaspoon baking soda
1 stick plus 3 tablespoons (11 tablespoons) unsalted butter, at room temperature
2/3 cup (packed) light brown sugar
1/4 cup sugar
1/2 teaspoon fleur de sel or 1/4 teaspoon fine sea salt
1 teaspoon vanilla extract
5 ounces bittersweet chocolate, chopped into chips, or a generous 3/4 cup store-bought mini chocolate chips (I used the semi-sweet mini chocolate chips)

Sift the flour, cocoa and baking soda together.

Working with a stand mixer, preferably fitted with a paddle attachment, or with a hand mixer in a large bowl, beat the butter on medium speed until soft and creamy. Add both sugars, the salt and vanilla extract and beat for 2 minutes more.

Turn off the mixer. Pour in the flour, drape a kitchen towel over the stand mixer to protect yourself and your kitchen from flying flour and pulse the mixer at low speed about 5 times, a second or two each time. (I simply used my KitchenAid pouring shield - it really wasn't very messy.) Take a peek — if there is still a lot of flour on the surface of the dough, pulse a couple of times more; if not, remove the towel. Continuing at low speed, mix for about 30 seconds more, just until the flour disappears into the dough — for the best texture, work the dough as little as possible once the flour is added, and don’t be concerned if the dough looks a little crumbly. Toss in the chocolate pieces and mix only to incorporate.

Turn the dough out onto a work surface, gather it together and divide it in half. Working with one half at a time, shape the dough into logs that are 1 1/2 inches in diameter. Wrap the logs in plastic wrap and refrigerate them for at least 3 hours. (The dough can be refrigerated for up to 3 days or frozen for up to 2 months. If you’ve frozen the dough, you needn’t defrost it before baking — just slice the logs into cookies and bake the cookies 1 minute longer.)

GETTING READY TO BAKE:
Center a rack in the oven and preheat the oven to 325 degrees F. Line two baking sheets with parchment or silicone mats.

Working with a sharp thin knife, slice the logs into rounds that are 1/2 inch thick. (The rounds are likely to crack as you’re cutting them — don’t be concerned, just squeeze the bits back onto each cookie.) Arrange the rounds on the baking sheets, leaving about 1 inch between them.

Bake the cookies one sheet at a time for 12 minutes — they won’t look done, nor will they be firm, but that’s just the way they should be. Transfer the baking sheet to a cooling rack and let the cookies rest until they are only just warm, at which point you can serve them or let them reach room temperature.

SERVING:
The cookies can be eaten when they are warm or at room temperature — I prefer them at room temperature, when the textural difference between the crumbly cookie and the chocolate bits is greatest — and are best suited to cold milk or hot coffee.

STORING:
Packed airtight, cookies will keep at room temperature for up to 3 days; they can be frozen for up to 2 months.

Yield: About 36 cookies

* For recipe tips, click here.

Tuesday, December 9, 2008

Grandma's All-Occasion Sugar Cookies (TWD)


This week's Tuesdays with Dorie (TWD) recipe was chosen by Ulrike of Küchenlatein: Grandma's All Occasion Sugar Cookies. I'm not a big sugar cookie fan and I've only made sugar cookies a few times before... so I was curious to see how Dorie's sugar cookies would compare.

The dough came together easily and I had no problems at all rolling it out. There were a few complaints from other bakers that the dough would warm up too quickly, making it difficult to make cut outs, but I refrigerated my dough overnight and had no problems whatsoever. If you run into this problem (after refrigerating it for 2 hours), simply pop the dough in the freezer for a few minutes and you should be good to go.


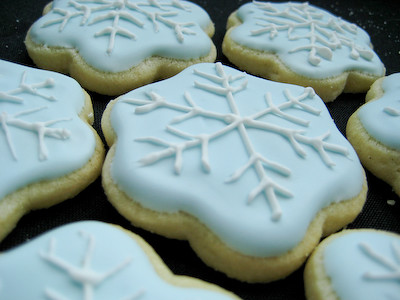
While I've made sugar cookies in the past, I've never decorated with royal icing before. I've always been so impressed whenever I see sugar cookies decorated in this manner and I have to admit that after I finished decorating these, I was a little impressed with myself too ;) It was very time consuming, but well worth the effort. I scaled down a recipe I found from Williams-Sonoma and it was definitely enough icing to ice the 38 cookies I made with Dorie's recipe. Speaking of recipe yields, I'm not sure how Dorie gets so many cookies out of her dough. According to Dorie, this recipe is supposed to yield 50 two inch cookies. She must have a magical rolling pin, because I even measured my dough after rolling it out to make sure it was the recommended 1/4-inch thickness and still only got 38 cookies from this recipe...


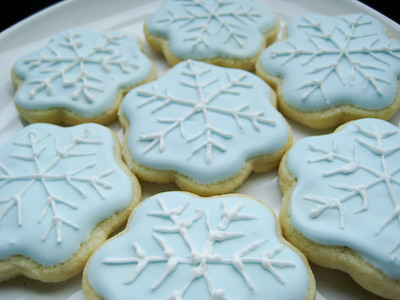
I have to admit that when I bought cookie cutters to make the cupcake pops, I didn't think I would really get much use out of them otherwise. However, I've found them quite useful as of late. They were perfect for the linzer sablés we made last week, and when it came time to make these sugar cookies, I was inspired by Williams-Sonoma to use the flower cut out again. While my cookies did not turn out quite as perfect as the ones sold there (it was my first time working with royal icing!), they still turned out pretty cute, if you ask me :) And way cheaper than the asking price at Williams-Sonoma of $2.75 per cookie.


So how did these taste? I thought that they were good - for sugar cookies (remember, I'm not a big sugar cookie person). My husband loved them and thought they were great. They were sturdier and slightly chewy, compared to the other sugar cookies I previously made that were fragile and almost melt in your mouth.


The one thing that I love about sugar cookies is how versatile they are. The possibilities are endless when it comes to decorating them. If you're looking for something a little different to do with your sugar cookies, check out these posts from my holiday baking last year:


Thanks Ulrike, for choosing the Grandma's All-Occasion Sugar Cookies. It was perfect timing for the holidays! You'll find the royal icing recipe below. If you would like the recipe for the sugar cookies, you can find it here. Make sure you visit the TWD Blog Roll to see how everyone else decorated their cookies!

* Recipes notes:
- These are great as slice 'n bake cookies - simply roll them into a log about 2 inches in diameter, refrigerate (or freeze), and then when you are ready to bake, simply slice and you're ready to go.
- These cookies puff up slightly in the oven but do not spread very much, so you can place them close together on the baking sheet.
- I used my baking stone for the cookies and did not need any parchment paper.
- This recipe yielded 38 (2-inch) cookies for me, not the 50 that is promised in the cookbook.
- If you are new to icing cookies (like me), check out these helpful videos here and here.
- The cookie dough can be frozen for up to 2 months. The baked cookies can be frozen for up to 2 months as well.
- For more recipe tips, click here.

I'm submitting these cookies to "Eat Christmas Cookies, Season 2," hosted by Susan of Food Blogga. Click on the logo below to find out more about this event and click here to see the round-up of all the other wonderful cookies being submitted!


Royal Icing
from Williams-Sonoma

2 egg whites, at room temperature
3 cups confectioners' sugar
1/3 tsp. cream of tartar (this is 1/4 tsp + a little bit over half of 1/8 tsp)
Pinch of salt
A few drops of vanilla extract

In the bowl of an electric mixer fitted with the whisk attachment, beat the egg whites, confectioners' sugar, cream of tartar and salt on medium-low speed until blended. Add the vanilla or lemon juice, increase the speed to medium-high, and continue beating until stiff peaks form and the mixture is nearly triple in volume, 7 to 8 minutes.
Remove the bowl from the mixer, cover tightly with plastic wrap and store at room temperature until ready to use, up to 6 hours. Makes 3 to 4 cups.
To create the snowflake sugar cookies depicted above, you'll need two sets of royal icing. First, make the recipe as indicated above and set aside a small amount of white icing for the snowflakes. Then add a few drops of blue food coloring to the remainder of the icing. Next, you'll need to add a small amount of water to thin it out until you are able to spread it across the cookie without leaving "tracks." You can use a decorating bag and tip, pipe around the edges of the cookie and then fill it in (called "flooding")... but I simply used a butter knife to spread the icing. To create the white snowflakes, pipe the icing out onto the cookies using a small round decorating tip or by simply placing the icing in a ziploc bag and snipping the corner off.

Tuesday, December 2, 2008

Linzer Sablés (TWD)


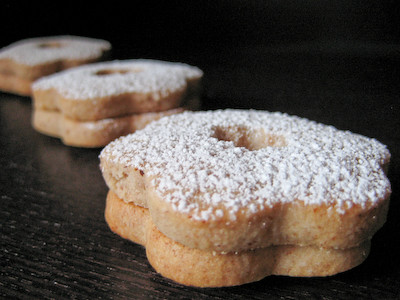
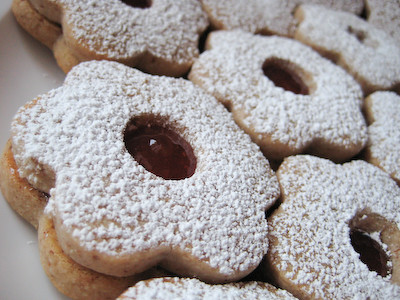
This week's Tuesdays with Dorie (TWD) recipe was chosen by noskos of Living the Life: Linzer Sablés. They are buttery, lightly spiced sandwich cookies filled with jam.


They're made with the ground nuts of your choice - I decided to use ground almonds (also called almond meal). You can purchase almond meal from the store, or you can make your own if you have a food processor. If you decide to go the DIY route, make sure you add a teaspoon or two of the flour used in the recipe into the food processor. This will allow you to get a much finer meal, and prevent it from turning into a paste. I also used a fine meshed sieve to sift my almond meal, and then threw the larger bits back into the food processor for another whirl. You can do without the sifting, but you might end up with a grittier texture to your cookies.


I had no problems with this recipe; it was really simple. The dough was extremely easy to work with and rolled out nicely between two sheets of plastic wrap. I think some bakers had problems with the dough warming up too quickly after it was taken out of the refrigerator, making it difficult to create the cut outs. I was in a rush, so I put my dough in the freezer and had no problems at all. It was ready after 45 minutes in the freezer, just as Dorie promised. I made half the cookies with a flower cut out in the middle, and the other half with a round cut out (using the end of a piping tip as Dorie suggests). I'm not sure which one I like better.


The dough is supposed to be rolled out to a 1/4-inch thickness. If you're making single cookies, the 1/4-inch thickness is just fine. If you're going to make the sandwiches, however, I would recommend rolling the dough out just a tad thinner so you don't end up with such a thick sandwich (maybe 1/8-inch?). I'm also not sure how Dorie got 25 sandwiches out of this recipe. I even used a smaller cookie cutter (1.5 inches instead of 2 inches) - and I was only able to get 16.


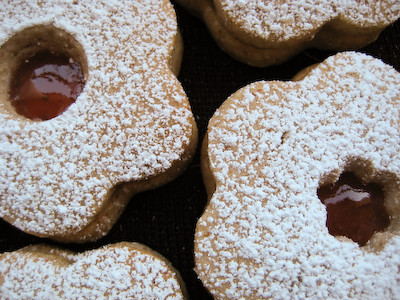
These were delightful cookies that were surprisingly easy to make. They were slightly nutty, with just a hint of cinnamon and cloves. The burst of flavor from the jam in the middle was wonderful. I filled my cookies with some strawberry guava jam that I recently received from a friend in Hawaii - yum!


Thanks noskos, for choosing the Linzer Sablés. If you would like the recipe, you can find it here. Make sure you visit the TWD Blog Roll to see how everyone else enjoyed these lovely cookies!

* Recipes notes:
- If you don't have cookie cutters, don't let that stop you from making these. You can either use the rim of a glass, or simply cut them into squares or rectangles.
- If you want to make your own almond meal, 7/8 cup (3/4 + 1/8) whole almonds = 1.5 cups ground.
- If you roll the dough out thinner (as recommended above), make sure you also decrease the baking time.
- These cookies puff up slightly in the oven but not very much, so you can place them close together on the baking sheet.
- I used my baking stone for the cookies and did not need any parchment paper.
- I only needed 1/4 cup jam for the 16 sandwiches I was able to get from the recipe. You can just put a small dollop of jam on the cookie and then place the other cookie on top. There is no need to spread the jam first.
- If you're going to dust them with confectioner's sugar, make sure you do so before sandwiching the cookies together; otherwise, you'll end up with confectioner's sugar covering up your pretty jam in the middle.
- These cookies can be frozen for up to 2 months (skip the confectioner's sugar dusting if you're going to freeze them).
- For more recipe tips, click here.


Saturday, November 29, 2008

Caramel Cake


This month's Daring Bakers Challenge was hosted by Dolores of Culinary Curiosity, Alex of Blondie and Brownie, and Jenny of Foray into Food: Caramel Cake. We also had an optional challenge this month in addition to the cake: Golden Vanilla Bean Caramels. I really wanted to make the caramels, but every time I went to World Market, they were out of Lyle's Golden Syrup. I still plan to make them, but won't be able to post about them today.


Caramel cake was actually the very first thing I blogged about over a year ago. That cake had a different kind of frosting, though. It was a thick, sugary, caramel frosting. This caramel cake has a browned butter frosting that is similar in consistency/texture to a cream cheese frosting. Having made browned butter before, I had no problems with this aspect of the recipe. I can imagine that those who had never made it before, probably had some difficulty, as the recipe gave the very vague instructions of "cook butter until brown." I've included more detailed instructions on how to do this below, for anyone interested in making this cake.


The tricky thing with caramel is that the darker you get it, the better the flavor. However, the longer you heat it, the higher the risk of burning it. I actually think I didn't cook my caramel long enough, because after I added the water to it, it changed from a deep amber to a lighter, caramel color. The consistency of my syrup was right - it was supposed to be similar to thick, maple syrup - but the flavor wasn't as prominent because I didn't let it caramelize enough.


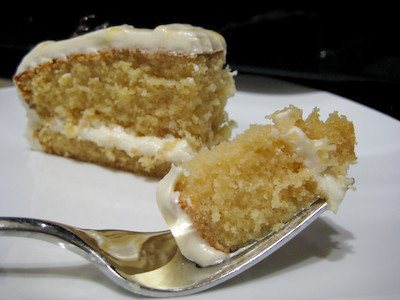
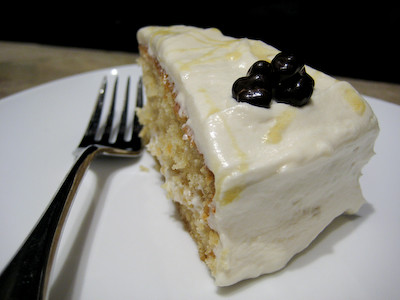
You'll have to excuse the fact that I cut my cake layers completely uneven - it sure looked even when I cut it, but somehow I ended up with one really thin layer and one really thick layer ;) I topped my cake with a drizzle of caramel syrup and some chocolate covered cacao nibs from TCHO chocolate. A lot of bakers complained about the cake being too sweet, and I partially agree. Without the sea salt, it would definitely be too sweet (and I always like things sweet). But the sea salt was a great contrast in flavor, not to mention texture.


The cake was very moist and had just a hint of caramel to it (the flavor would have been better if I had cooked the caramel syrup longer). I received many compliments on it. While I enjoyed this cake, I'm not sure if it is meant for everyone. It is very sweet, and I think many will probably consider it too sweet, even with the added sea salt.

If you decide to make this, be sure you read these tips here first.

Thanks Dolores, Alex, and Jenny for choosing one of my favorite flavors this month! I can't wait to try making the caramels. Make sure you visit the Daring Bakers Blogroll to see how hundreds of others fared with this sugary challenge!


*Recipe notes:
- Save time by starting the caramel syrup while you are letting the ingredients for the cake come to room temperature.
- You only need to make a half recipe of caramel syrup and that will be plenty for both the cake and the frosting.
- Leftover caramel syrup? Drizzle some over ice cream. Add some to your hot apple cider for some delicious caramel apple cider.
Or just lick it right from the spoon :)
- If you have leftover browned butter, it is delicious tossed with some spaghetti or angel hair pasta and some mizithra cheese (if you can't find mizithra, you can substitute freshly grated parmesan cheese).


Caramel Cake with Caramelized Butter Frosting
from Shuna Fish Lydon as seen on Bay Area Bites

10 tablespoons unsalted butter at room temperature
1 1/4 cups granulated sugar
1/2 teaspoon kosher salt
1/3 cup Caramel Syrup (see recipe below)
2 each eggs, at room temperature
splash vanilla extract
2 cups all-purpose flour
1/2 teaspoon baking powder
1 cup milk, at room temperature (I used skim)

Preheat oven to 350F

Butter one tall (2 – 2.5 inch deep) 9-inch cake pan. (I used a regular 9-inch pan. I would also recommend lining it with parchment - my cake stuck to the buttered pan quite a bit!)

In the bowl of a stand mixer fitted with a paddle attachment, cream butter until smooth. Add sugar and salt & cream until light and fluffy.

Slowly pour room temperature caramel syrup into bowl (add a little bit at a time, and wait until it is incorporated before adding more). Scrape down bowl and increase speed. Add eggs/vanilla extract a little at a time, mixing well after each addition. Scrape down bowl again, beat mixture until light and uniform.

Sift flour and baking powder.

Turn mixer to lowest speed, and add one third of the dry ingredients. When incorporated, add half of the milk, a little at a time. Add another third of the dry ingredients, then the other half of the milk (slowly - only a bit at a time) and finish with the dry ingredients. {This is called the dry, wet, dry, wet, dry method in cake making. It is often employed when there is a high proportion of liquid in the batter.}

Take off mixer and by hand, use a spatula to do a few last folds, making sure batter is uniform. Turn batter into prepared cake pan.

Place cake pan on cookie sheet or 1/2 sheet pan. Set first timer for 30 minutes, rotate pan and set timer for another 15-20 minutes. Your own oven will set the pace. Bake until sides pull away from the pan and skewer inserted in middle comes out clean. Cool cake completely before icing it.

Cake will keep for three days outside of the refrigerator.

CARAMEL SYRUP
(I halved this recipe)

2 cups sugar
1/2 cup water
1 cup water (for "stopping" the caramelization process)

In a small stainless steel saucepan, with tall sides, mix water and sugar until mixture feels like wet sand. Brush down any stray sugar crystals with wet pastry brush. Turn on heat to highest flame. Cook until smoking slightly: dark amber.

When color is achieved, very carefully pour in one cup of water. Caramel will jump and sputter about! It is very dangerous, so have long sleeves on and be prepared to step back. (I used a measuring cup and poured very slowly and from a very high distance. This worked well for me. You can also cover your saucepan with some aluminum foil and cut a small hole in the top and then pour the water through that. The foil will serve as a nice splatter guard.)

Whisk over medium heat until it has reduced slightly and feels sticky between two fingers. {Obviously wait for it to cool on a spoon before touching it.} (This took about 2-3 minutes.)


Note: For safety reasons, have ready a bowl of ice water to plunge your hands into if any caramel should land on your skin.

CARAMELIZED BUTTER FROSTING

12 tablespoons unsalted butter
1 pound confectioner’s sugar, sifted (I used 3 cups)
4-6 tablespoons heavy cream (I used 4 tbsp)
2 teaspoons vanilla extract
2-4 tablespoons caramel syrup (I used 4 tbsp)
Kosher or sea salt to taste (I used 1/2 tsp but would probably recommend 1 tsp)

Cook butter until brown. (For those who have never browned butter before, here's how...Place butter in a saucepan over medium heat. Bring butter to a slow boil (about 5 minutes). Once the butter begins to boil, stir constantly to prevent residue from sticking to the bottom of the pan. As the butter cooks, it will start to foam and rise. Continue stirring, otherwise the butter foam could overflow and catch fire. Once the butter stops foaming and rising (about 5 minutes), cook until amber in color (about 1 to 2 minutes). It will have a pleasant caramel aroma.)


Pour through a fine meshed sieve into a heatproof bowl (let it cool for a few minutes before pouring it through the sieve if you are using a plastic sieve - otherwise it will melt!), set aside to cool.

Pour cooled brown butter into mixer bowl.

In a stand mixer fitted with a paddle or whisk attachment, add confectioner's sugar a little at a time. When mixture looks too chunky to take any more, add a bit of cream and or caramel syrup. Repeat until mixture looks smooth and all confectioner's sugar has been incorporated. Add salt to taste.

Note: Caramelized butter frosting will keep in fridge for up to a month.
To smooth out from cold, microwave a bit, then mix with paddle attachment until smooth and light.