The August 2011
Daring Bakers’ Challenge was hosted by Lisa of
Parsley, Sage, Desserts and Line Drive and Mandy of
What the Fruitcake?! These two sugar mavens challenged us to make sinfully delicious candies! This was a special challenge for the Daring Bakers because the good folks at
http://www.chocoley.com offered an amazing prize for the winner of the most creative and delicious candy!
This challenge involved learning how to temper chocolate. For those who are unfamiliar with chocolate tempering, “tempering is a method of heating and cooling chocolate in order to use it for coating or dipping. Proper tempering gives chocolate a smooth and glossy finish. Tempered chocolate will have a crisp snap and won't melt on your fingers as easily as improperly tempered chocolate. Properly tempered chocolate is also great for molding candies because the candies will release out of the molds more easily and still retain a glossy finish.” - Ghirardelli
If you simply melt chocolate and let it cool it will set with unattractive grey streaks or spots, called blooming. If eaten, the texture will be grainy and it won’t melt smoothly in the mouth. When you temper chocolate the end result is shiny, even colored, smooth melting and with a crisp snap. Basically, tempered chocolate is what you want because it’s better in every way. Simply put, the process involves heating the chocolate to a certain temperature, then cooling it down to a certain temperature, and then heating it back up to a working temperature that is lower than the initial temperature to which it was initially heated up.
The reason for the difference is a bit complicated, it has to do with different types of crystals forming in the cocoa butter at different times, to understand it fully you’d have to learn about the behavior of the chocolate crystals at a molecular level. To simplify the explanation, in tempered chocolate the crystals have formed in a uniform way which gives us great looking and tasting chocolate.
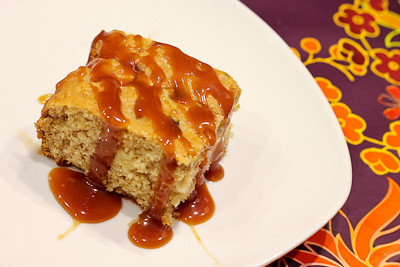
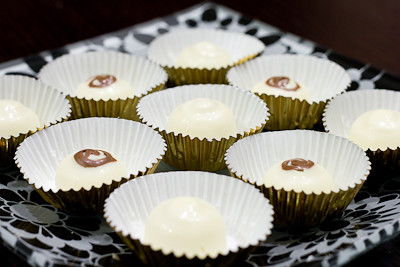
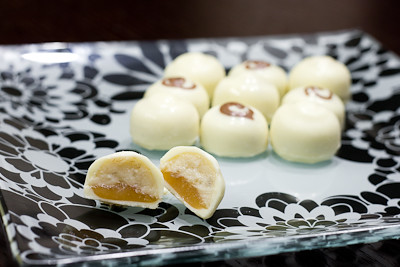
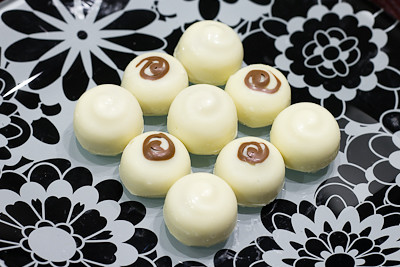
Our challenge was to make two different types of candies, with at least one being chocolate. For the first candy, I decided to make chocolates that involved the flavors of one of my favorite desserts - Bananas Foster! I caramelized some bananas in brown sugar and rum, then pureed them and mixed them into a swiss meringue buttercream to create a bananas foster buttercream. I then filled my white chocolate candies with this buttercream, and added in a layer of salted caramel. These
Bananas Foster Chocolates were delicious!
I used the marble slab/granite method for tempering my chocolate and although it is a fairly straightforward process, I have to admit that I had to stop, let my chocolate set, and start over
multiple times because my chocolate would quickly get over the working temperature. One second it would be way under the temperature I was shooting for and then next thing I knew, it was rising so quickly I would over heat the chocolate. I think this may have had something to do with the fact that I was using a glass bowl for my double boiler, and the glass would retain so much heat that even after I removed the bowl from the heat, the chocolate's temperature would continue to rise dramatically. If you work quickly, you can dump the chocolate onto the counter before it over heats, but it's hard when you're working with a very hot bowl, a thermometer, and a spatula all at the same time. So instead of glass, I would probably recommend using a metal bowl.
I don't have a palette knife or bench scraper, but found that using a rigid spatula worked just fine. It was a little messy, but a suitable substitute if you're not wanting to go out and buy something just for this recipe. Funny thing was that when I first poured my chocolate onto the counter and started spreading it out and folding it to get it to cool down, I was very careful because the recipe states "keep the motions neat and tidy, if you’re not working with a lot of chocolate you don’t want to spread it too far otherwise you may end up with chocolate that begins to cool too quickly and start to set as well as drops below."
I was also glad to have
my digital thermometer
, because it's a multi-tasker in the kitchen! I did not realize until we did this challenge, but you cannot use a regular candy thermometer for tempering chocolate because candy thermometers do not go below 100F. So
this digital thermometer is perfect because it goes low enough for making chocolate, high enough for making candy, and of course it can be used for cooking meat as well. It has a heat safe cord so it can be left in the oven while the meat is cooking, too. It has been well worth the investment!
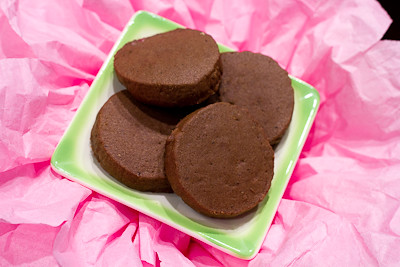
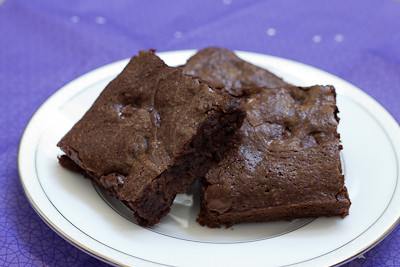
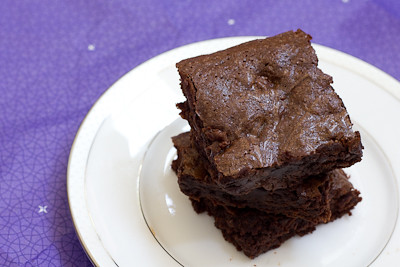
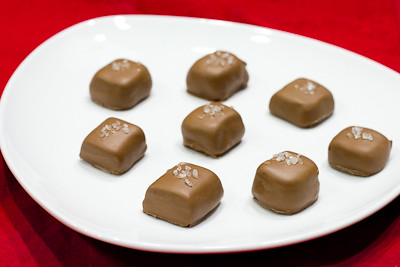
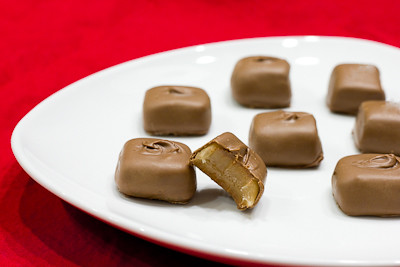
The second candy I decided to make was
chocolate covered sea salt caramels. I adore anything with caramel, so it just made sense to go with that choice. I have to admit that while my white chocolate candies turned out pretty well, my chocolate covered caramels didn't turn out quite as well as I had hoped. The chocolates didn't have as much shine to them as they should have, but that was my fault because after redoing the tempering about 5 times, I just gave up and said "close enough" when it was off by 1 degree because I was too tired to redo it again.
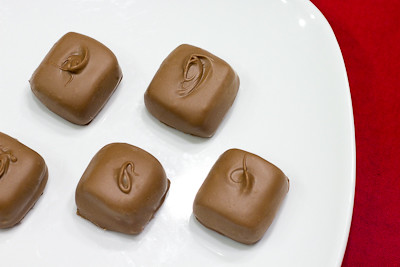
My caramel, while still soft, also came up much firmer that what was depicted in some photos by our hosts. Instead a nice gooey, drizzle-over-the-top-of-your-ice-cream-sundae caramel, I got a firm, chewy caramel. At first I thought it was because I let the caramel get 2-3 degrees hotter than I was supposed to, but then I made a second batch, keeping close watch on the thermometer, and it still came out fairly firm. This was fine, because then instead of making filled chocolate candies, I simply made chocolate covered caramels by dipping them in the tempered chocolate. These were delicious, with just the right amount of salt to complement the sweetness of the caramels.
Thanks Lisa and Mandy, for hosting this month's challenge. I had a great time learning how to temper chocolate and making homemade candies! There's a lot of scrolling to do on this post to get to the recipes due to the lengthy information below on how to temper chocolate, so to jump down to the white chocolate bananas foster candies recipe just click
here, and for the chocolate covered sea salt caramels click
here. Make sure you check out the
Daring Bakers' Blogroll to see how creative everyone else got with their chocolately confections!
* Recipe notes -
- When tempering chocolate use a metal bowl instead of a glass bowl. If you want to help keep it at the working temperature during the final stage, then you can transfer it to a glass bowl which will retain the heat better so you don't have to keep re-warming it so much.
- When you are getting close to your goal temperature, really do stick to heating it for 10-15 seconds at a time. This ensures that you don't over heat the chocolate and have to start over so many times like I did!
- If you have trouble getting your chocolate down to 80.6F, you can cool down your counter/marble slab with an ice pack (or bag of frozen veggies) beforehand, just be sure to wipe it down very thoroughly before pouring your chocolate onto it, because any water droplets left on there will cause the chocolate to seize.
- I added milk chocolate swirls on top of my white chocolate candies for contrast, but found that it is better to add the milk chocolate swirl on top after unmolding the finished chocolates (as opposed to piping the swirl into the mold and letting it set before adding in the white chocolate).
Tempering Chocolate:
Method 1: On marble or granite
Marble slab, chocolate or bench scraper, dipping forks and chocolate thermometer
Tempering Ranges:
Celcius
Dark: 45°C-50°C/ 27°C / 32°C
Milk: 45°C / 27°C/ 30°C
White: 45°C / 27°C / 29°C
Fahrenheit
Dark: 113°F-122°F / 80.6°F / 89.6°F
Milk: 113°F / 80.6°F / 86°F
White: 113°F / 80.6°F / 84.2°F
Chocolate is melted and heated until it reaches 45°C / 113°F. It is then poured onto a marble surface and moved around the surface with a scraper until it has thickened and cools to 27°C / 80.6°F. Once cooled it is then put back into the bowl and over heat to bring it back up to 32°C/30°C/29°C /// 89.6°F/86°F/84.2°F depending on the chocolate you’re tempering. It is now ready for using in molds, dipping and coating.
Tempering using a marble surface
• Finely chop chocolate if in bar/slab form.
• Place chocolate in a heatproof bowl.
• Place bowl over a saucepan of simmering water (make sure the bowl does not touch the water).
Tip: Make sure that your bowl fits snuggly into the saucepan so that there’s no chance of steam forming droplets that
may fall into your chocolate. If water gets into your chocolate it will seize!
• Using a rubber spatula, gently stir the chocolate so that it melts evenly
• Once it’s melted, keep an eye on the thermometer, as soon as it reaches 45°C / 113°F remove from heat (between 45°C-50°C / 113°F-122°F for dark chocolate)
• Pour ¾ of the melted chocolate onto a marble or granite slab or worktop
• Using a scraper or large palette knife move the chocolate around the surface to help it cool
Tip: Keep the motions neat and tidy, if you’re not working with a lot of chocolate you don’t want to spread it too far otherwise you may end up with chocolate that begins to cool too quickly and start to set as well as drops below
• the necessary temperature. Use a motion that folds the chocolate on itself
• Check temperature regularly with a thermometer
• Once it reaches 27°C / 80°F put the chocolate back into the heatproof bowl with the remaining chocolate
• Gently stir together with a rubber spatula
• Check the temperature to see if it’s risen back up to the working temperature of the chocolate (milk, dark or white) as seen in the above chart
• If the temperature has not risen to its working temperature, put the bowl back over the simmering water, stirring gently
• IMPORTANT: You really need to keep an eye on the temperature as it can rise quicker than you think, so as soon as it’s up to its working temperature, remove from heat
• It’s now tempered and ready to use
Tip: If you’re using the chocolate to dip a lot of truffles etc. which means the chocolate will be sitting off heat for a while it will naturally start to thicken as it cools. To keep it at an ideal viscosity for even coating, put the bowl over steam for 30sec-1min every 5-10mins, just do not let the temperature go over the working temperature!
Tip: Having the chocolate in a warmed glass bowl and wrapped in hot kitchen towel can also help keep the chocolate at its working temperature for longer
Tip: It is also easier to keep the heat if you work with larger amounts of chocolate rather than small amounts. Any leftover chocolate can be kept to be used later and then re-tempered
Tip: Remember, don’t let any water get into your chocolate at any stage of the tempering process!
Method 2: With tempered chocolate pieces, also called “seeding”
Tempering Ranges:
Celcius
Dark: 45°C-50°C/ 27°C / 32°C
Milk: 45°C / 27°C/ 30°C
White: 45°C / 27°C / 29°C
Fahrenheit
Dark: 113°F-122°F / 80.6°F / 89.6°F
Milk: 113°F / 80.6°F / 86°F
White: 113°F / 80.6°F / 84.2°F
Chocolate is melted and heated until it reaches 45°C / 113°F. Tempered un-melted chocolate is then stirred and melted in until it brings the temperature down to 27°C/80.6°F. It is then put back over heat and brought up to its working temperature of 32°C/30°C/29°C /// 89.6°F/86°F/84.2°F depending on the chocolate you’re using. It is now ready for using in molds, dipping and coating.
Tempering using the seeding method with couverture callets
• Finely chop chocolate if in bar/slab form (about the size of almonds).
• Place about ⅔ of the chocolate in a heatproof bowl
• Set aside ⅓ of the chocolate pieces
• Place bowl over a saucepan of simmering water (make sure the bowl does not touch the water)
Tip: Make sure that your bowl fits snuggly into the saucepan so that there’s no chance of steam forming droplets that may fall into your chocolate. If water gets into your chocolate it will seize!
• Using a rubber spatula, gently stir the chocolate so that it melts evenly
• Once it’s melted, keep an eye on the thermometer, as soon as it reaches 45°C / 113°F remove from heat (between 45°C-50°C / 113°F-122°F for dark chocolate)
• Add small amounts of the remaining ⅓ un-melted chocolate (seeds) and stir in to melt
• Continue to add small additions of chocolate until you’ve brought the chocolate down to 27°C/80.6°F (You can bring the dark chocolate down to between 80°F and 82°F)
• Put it back on the double boiler and bring the temperature back up until it reaches its working temperature of the chocolate (milk, dark or white) as seen in the above chart. (32°C/89.6°F for dark, 30°C/86°F for milk and 29°C/84.2°F for white)
• If you still have a few un-melted bits of chocolate, put the bowl back over the simmering water, stirring gently and watching the thermometer constantly.
•
IMPORTANT: You really need to keep an eye on the temperature so that it doesn’t go over its working temperature
It’s now tempered and ready to use
Tip: Another way of adding the "seed" is by dropping in one large chunk of tempered chocolate (the seed). That way you only need to fish out one piece of unmelted chocolate and don't need to fish out several small bits of unmelted chocolate once the chocolate has reached temper.
Other Tips
• If you’re using the chocolate to dip a lot of truffles etc. which means the chocolate will be sitting off heat for a while it will naturally start to thicken as it cools. To keep it at an ideal viscosity for even coating, put the bowl over steam for 30sec - 1min every 10 - 15mins, just do not let the temperature go over the working temperature!
• Having the chocolate in a warmed glass bowl and wrapped in hot kitchen towel can also help keep the chocolate at its working temperature for longer
• It is also easier to keep the heat if you work with larger amounts of chocolate rather than small amounts. Any leftover chocolate can be kept to be used later and then re-tempered
• Remember, don’t let any water get into your chocolate at any stage of the tempering process!
• Unless you’ve been working with chocolate for a while and have developed a feel for the tempering process and can tell the chocolate’s temperature by touching it to your lower lip like a pro, it’s imperative that you use a thermometer to determine the temperature, as going a few degrees either way can ruin the temper.
• If at any stage you do make a mistake with the tempering process you can simply start again from the beginning.
• While a marble or granite top is ideal for cooling the chocolate in the first method, you can also cool it on a countertop that’s laminated, glass or steel. It will take longer to cool, but it’s possible! (but I definitely wouldn’t recommend a wood or rough textured counter top)
• Any chocolate left over after making your molded or dipped chocolate can be stored away in a cool place and then re-tempered before using again. There’s no need to ever waste good chocolate!
• Wooden spoons can retain moisture so it’s best to use a rubber spatula while tempering
Chocolate Covered Sea Salt Caramels
caramel recipe from CandyBarLab.com
Dark or milk chocolate melted, preferably tempered, about 1 lb / 450g
1 cup (225g / 8oz) Granulated White Sugar
1/2 cup (125ml / 4 fluid oz) Light Corn Syrup
1/2 cup (125ml / 4 fluid oz) Water
4 Tbsp (60g / 2 oz) Unsalted Butter
2 Tbsp (30ml / 1 fluid oz) Heavy Cream
1/4 cup (60ml / 2 fluid oz) Passion Fruit Puree
1/2 Tbsp salt
Place the sugar, corn syrup and water in a medium saucepan.
Set over medium-high heat and stir to combine.
Bring the mixture to a boil and cook until dark amber in color 310°F-315°F / 155°C-158°C, about 5 minutes.
Use a pastry brush, dipped in water, to wash down sides of pan to prevent crystallization as the mixture boils.
Remove saucepan from the heat and gradually whisk in the passion fruit puree, heavy cream and butter.
Transfer to an 8-inch square pan that has been lined with buttered aluminum foil.
Once cooled, removed the aluminum foil from the pan and cut the chocolates with a sharp knife (coated in butter) into 1-inch squares.
Carefully lower each square of marzipan into the chocolate with a dipping fork
Tap the fork on the side of the bowl to remove excess chocolate
Place chocolate on parchment paper
Decorate as you like
Tip: You can use transfers or sprinkle sea salt on top. You can also wait for the chocolate to be semi set then use your dipping fork to mark the top of the chocolate
Once fully set, cut off any feet with a sharp knife
White Chocolate Bananas Foster Candies
from Good Eats 'n Sweet Treats
2 pounds of high quality white chocolate (do not use white chocolate chips)
1 bananas foster swiss meringue buttercream recipe, see below
1/2 of salted caramel recipe, see below
Coat the molds with chocolate; there are a few ways to do this. While holding mold over bowl of tempered chocolate, take a nice ladle of the chocolate and pour over the mold, making sure it cover and fills every well. Knock the mold a few times against a flat surface to get rid of air bubbles, then turn the mold upside down over the bowl of chocolate, and knock out the excess chocolate. Turn right side up and drag a bench or plastic scraper across so all the chocolate in between the wells is scraped off cleanly, leaving you with only chocolate filled wells. Put in the fridge to set, about 5 to 10 minutes. Alternatively, you could take a small brush and paint the tempered chocolate into each mold, or spoon it in if you’d like.
Remove from refrigerator and fill each well with some of the bananas foster buttercream, leaving a little room for a layer of caramel. Squeeze a thin layer of caramel on top of the buttercream (make sure the caramel is cool, or else it will melt the buttercream).
Again take a ladle of chocolate and pour it on top of the filled chocolate wells, knocking against a flat surface to settle it in. Scrape excess chocolate off the mold with the bench scraper then refrigerate until set.
Once fully set, carefully knock the chocolates out of the mold.
Bananas Foster Swiss Meringue Buttercream
from Good Eats 'n Sweet Treats, adapted from Baking: From My Home to Yours
1/4 cup granulated sugar
1 large egg white
6 tbsp unsalted butter, at room temperature
1 bananas foster recipe, see below
1 tsp rum
Put the sugar and egg white in a mixer bowl or another large heatproof bowl, fit the bowl over a plan of simmering water and whisk constantly, keeping the mixture over the heat, until it feels hot to the touch, about 3 minutes.
The sugar should be dissolved, and the mixture will look like shiny marshmallow cream. Remove the bowl from the heat.
Working with the whisk attachment or with a hand mixer, beat the meringue on medium speed until it is cool, about 5 minutes.
Switch to the paddle attachment if you have one, and add the butter one tablespoon at a time, beating until smooth.
Once all the butter is in, beat in the buttercream on medium-high speed until it is thick and very smooth, 6-10 minutes (during this time the buttercream may curdle or separate – just keep beating and it will come together again).
On medium speed, gradually beat in the bananas foster, waiting until each addition is absorbed before adding more, and then add in the rum.
You should have a shiny smooth, velvety buttercream. Press a piece of plastic against the surface of the buttercream and set aside briefly.
Bananas Foster Recipe (for the buttercream filling)
1 tbsp tightly packed brown sugar
1/2 tbsp rum
1/2 banana, sliced
Add the brown sugar and rum to a small saucepan over medium heat until the brown sugar melts. Add the banana slices and cook for a few minutes on each side, until the bananas are soft and cooked through. Remove from heat and mash well with a fork, or puree in a food processor. Allow to cool completely before adding to the buttercream recipe.
Salted Caramel
from CandyBarLab.com
1 cup (225g / 8oz) Granulated White Sugar
1/2 cup (125ml / 4 fluid oz) Light Corn Syrup
1/2 cup (125ml / 4 fluid oz) Water
4 Tbsp (60g / 2 oz) Unsalted Butter
2 Tbsp (30ml / 1 fluid oz) Heavy Cream
1/2 Tbsp salt
Place the sugar, corn syrup and water in a medium saucepan.
Set over medium-high heat and stir to combine.
Bring the mixture to a boil and cook until dark amber in color 310°F-315°F / 155°C-158°C, about 5 minutes.
Use a pastry brush, dipped in water, to wash down sides of pan to prevent crystallization as the mixture boils.
Remove saucepan from the heat and gradually whisk in the heavy cream, butter, and sea salt.
Transfer to a medium bowl and let cool.
Transfer cooled caramel to a pastry bag fitted with a medium plain tip or a squeeze bottle.